Categories
Recipes

Root Vegetable Recipes

Consider the radish, rutabaga, beet and parsnip!

A tender baked potato is one simple way to add warmth of a root vegetable to your meal, but potatoes aren’t all you’re growing in your garden.

Get ready to warm up your kitchen this winter; we have seven tasty root crop recipes by Kate Savage and Karen Keb Acevedo, Hobby Farms publications editor in chief, for you to try.

If you’re intrigued by root crops, you’ll want to pick up a copy of Hobby Farms Jan/Feb 2008 issue and read Jessica Walliser’s article, “Root Crops.”

Radish Salsa
From Cooking with Heirlooms, by Karen Keb Acevedo
Radishes grow quickly, especially in cool weather, so they are planted in spring and in fall. French breakfast is a short-season radish that grows in just 23 days. Dating back to 1879 Europe, it’s widely grown today by heirloom enthusiasts.

Ingredients

  • 1/2 lg. shallot or red onion
  • 1 tsp. salt
  • 1/4 cup rice wine or white vinegar
  • 1 lemon (for juice and zest)
  • 1 1/2 cups finely diced heirloom radish, such as French Breakfast
  • 1 jalapeno, minced with or without seeds (depending on desired heat)
  • 1 clove garlic, minced
  • 1 T. olive oil
  • 2 tsp. dried cilantro
  • Salt and freshly ground black pepper, to taste

Preparation
Finely chop the shallot and place in a medium bowl. Add the 1 teaspoon salt, and cover with the vinegar and lemon juice. Allow to stand for 20 minutes at room temperature. Strain the shallot, reserving the liquid. Add the radish, jalapeno and garlic to the shallot. Stir in the olive oil. Add the lemon zest and cilantro, and then season with salt and pepper. Add as much of the reserved vinegar as desired. Let the mixture stand for at least 30 minutes before serving with sesame crackers.

Top

Root Vegetable Recipes
© Kate Savage

About Kate
Kate Savage is a freelance writer and professional chef/caterer. She has been in the catering business for more than 26 years. She is the owner of Bleu Ribbon Catering in Lexington, Ky.
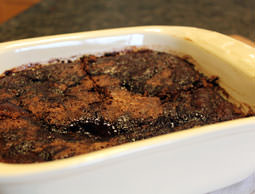
Celeriac Gratin
From Kate Savage, freelance writer and professional chef/caterer
Creamy and rich.  A winter winner!  Aromatic flavours that work wonders with any roast, especially pork, goose and game birds, or even as a course on its own.  A spin on the traditional potato gratin only using the “ugly duckling” of the root vegetable world.

Ingredients

            • 3 T. olive oil or any oil infusion
            • 2½ lb. celeriac peeled and roughly sliced
            • 4 garlic cloves, peeled and chopped
            • 2 fresh red chilies, finely chopped
            • 6 anchovy fillets, finely chopped
            • 1 sprig fresh rosemary, finely chopped
            • Sea salt and freshly ground black pepper
            • 2 cups half and half

Preparation
Heat the oven to 375 degrees F. Lightly oil a gratin or casserole dish. Peel the celeriac and slice thinly. Combine the finely chopped garlic, chili, anchovy and rosemary. Place a layer of celeriac in the prepared dish and sprinkle with the combined seasonings. Repeat this layering.  Pour the half and half on top, just so that it’s visible around the edges of the dish but doesn’t completely cover the celeriac.  Drizzle with the oil and bake for 40-50 minutes, until the celeriac is tender and the top browned and crisp.  Finish under the broiler for that extra crispy look.  Sprinkled chopped parsley is a great embellishment. Serves Six

Top

Parsnip Puree
From Cooking with Heirlooms, by Karen Keb Acevedo
You can serve this with pot roast or even with a hearty fish such as salmon–it creates an interesting flavor combination with the sweet apple and aromatic parsnip.

Ingredients

  • 5 medium-size heirloom parsnips, such as The Student
  • 1 medium-size sweet apple
  • 1 medium-size heirloom potato, such as Bintje
  • 3 tablespoons butter
  • 1/4 cup heavy cream
  • Salt and pepper, to taste

Preparation
Peel and dice the parsnips and apple into medium-size pieces. Dice the poato in to small pieces. Place the parsnips, apple and potato in cold water in a deep saucepan. Bring the water to a boil, reduce the heat and cook on medium heat until the potato is tender. Drain well. Place the mixture in a food processor and blend for about 2 minutes. Add the butter, cream, salt and pepper, then pulse for another minute or until the cream and butter are mixed through. Keep warm until ready to serve.

Top

English Roast Root Vegetables
From Cooking with Heirlooms, by Karen Keb Acevedo
The lard or shortening give the vegetables in this recipe a wonderful cripsness you just can’t achieve with oil.

Ingredients

  • 4 medium heirloom russet potatoes, such as Russet Burbank
  • 3 medium heirloom parsnips, such as The Student
  • 1 cup lard or shortening
  • Salt and ground black pepper, to taste

Preparation
Preheat oven to 425 degrees F. Peel and quarter the potatoes. Peel and cut the parsnips into equal-sized pieces. Parboil the potatoes and parsnips in salted water for about two minutes, then drain well. Melt the lard or shortening in a large roasting pan in the oven. Add the pototoes and parships, being careful not to splash the oil. Roast for 40 to 50 minutes, turning every 10 minutes until browned and crisp on all sides. Drain on paper towels, and season to taste. Let stand 1 or 2 minutes before serving.

Top

Roasted Beet Salad
With Hot-Smoked Salmon, Soured Cream and Dill Dressing

From Kate Savage, freelance writer and professional chef/caterer
A delicious and pretty salad for any time of the year.  Add boiled waxy potatoes to make this dish more substantial if you want to serve as an entree.

Root Vegetable Recipes

© Kate Savage

Ingredients

  • 1 lb. small raw beets
  • Olive oil
  • ½ lb. hot-smoked salmon
  • 4 handfuls of baby spinach leaves/salad greens
  • 1 T. extra virgin olive oil
  • Squeeze of fresh lemon juice

Dressing

  • 4 oz. sour cream
  • 2 T. milk
  • 1 T. white wine vinegar
  • 1 tsp. Dijon mustard
  • ½ tsp. sugar
  • 2 T. finely chopped fresh dill

Preparation
Prepare dressing by combining all the ingredients.  Adust the flavours to suit your preference (sweeter/hotter) and then chill until ready to serve. Preheat the oven to 375 degrees F.  Trim the beets leaving some of the stalk attached. Drizzle a little olive oil over them, wrap in foil, put in a small pan and roast for 1-11/2 hours or until tender.  Whilst still warm, rub or peel off the skins.  Beware as beets will stain your hands so wear gloves or work with a fork and a sharp knife.   Cut beets into quarters or halves depending on their size. Break up the salmon into large flakes. Toss the spinach or salad greens with the extra virgin olive oil and lemon adjust with salt and pepper.  Divide between the four plates and add the salmon and beets.  Drizzle over the dressing.  Serve warm, room temp or chilled.  Delicious at any degree. Serves four.

Top

Rutabaga, Carrot and Potato Pulao
From Kate Savage, freelance writer and professional chef/caterer
A Persian variation of the Middle Eastern Pilaf or the Mediterranean Paella. This dish is made with saffron scented basmati rice from the foothills of the Himalaya.  Remember that rice is always measured by volume, not by weight.

Root Vegetable Recipes

© Kate Savage

Ingredients

  • A pinch of saffron strands or ½ tsp. of turmeric
  • ½ cup sunflower oil
  • 2 cloves, crushed
  • 1 tsp. cumin seeds
  • 1 onion, finely sliced
  • 1 T. cardamom pods, crushed
  • 1 cinnamon stick, broken
  • 2 bay leaves
  • ½ cauliflower head, broken into florets
  • 1 rutabaga, peeled, and cut into ½-inch cubes
  • 2 potatoes cut into ½-inch cubes
  • 1 cup of shelled green peas, fresh or frozen
  • 1 carrot, cut into small cubes
  • 2 cups basmati rice, wash and drained
  • 1 inch fresh ginger, peeled and grated
  • Pinch of sugar
  • 4 zucchinis, cut into 1-inch chunks

Garnishings:
Chopped cashews, pistachios and cilantro leaves.

Preparation
Put saffron strands into a small bowl and cover with boiling water to infuse for as long as it takes to boil the rice.
Heat ½ cup of the sunflower oil in a large heavy-bottom saucepan.  Add the cloves and cumin seeds and sauté for about 10 seconds.  Add the sliced onions and stir-fry until soft and translucent.  Add the cardamom, cinnamon, bay leaves, cauliflower, rutabaga, potatoes, peas and carrot.  Stir-fry until covered with oil, the cover with a lid, lower the heat and simmer for 5 minutes. 

Stir in the rice, add 4 cups of water, the ginger and sugar.  Bring to a boil, cover with a lid, reduce the heat and simmer until all the water has been absorbed the rice is fluffy – about 10-12 minutes. 

Do not lift the lid or you will spoil the rice. Meanwhile, heat the remaining oil in a small skillet, add the zucchinis, and stir-fry for 1-2 minutes at a high heat until lightly browned but still firm.  Set aside. Turn the rice out onto a serving dish, add the zucchinis, then sprinkle the cashews, pistachios, and cilantro.  Carefully drizzle the saffron liquid to make yellow trails in the rice.  Serves six.

Top

Rutabaga and Tomato Stew
From Kate Savage, freelance writer and professional chef/caterer
A hearty combination of vegetables.  Satisfying as an entrée served. With a green salad and fresh crusty bread.  Hard to beat on a cold winter night.  The red onion relish and corn slices are a great finish! 

Ingredients

  • ¼ cup olive oil
  • 1 T. minced garlic
  • 1 lb. onions, finely chopped
  • 1 lb. tomatoes, peeled, seeded and chopped
  • 1 T. coarse salt
  • ¾ tsp. dried oregano
  • ¼ tsp. freshly ground white pepper
  • ½ cup water/stock
  • 4 lbs. rutabaga, peeled and cut into 1-inch cubes
  • 2 cups of corn kernels
  • 1 cups of shelled fresh or frozen peas
  • 1 ear of corn cut into ½ inch thick slices
  • Red onion relish*

Preparation
Heat oil in heavy large skillet over medium-high heat. Add garlic and stir for one minute.  Add onions.  Reduce heat to low and cook until onions begin to turn colour, stirring occasionally.  Mix in tomatoes, salt, oregano and pepper.  Cook until tomatoes are tender.  Add water and bring to boil.  Mix in Rutabaga and simmer until tender, stirring occasionally for about 25 minutes.  Mix corn kernels, cover and simmer 5 minutes.  Mix in peas and cook until tender, about 5 minutes.  Adjust seasonings. Meanwhile, cook corn slices in boiling water until just tender, about three minutes.  Drain.  Garnish stew with slices and onion relish. Serves six

Red Onion Relish

Ingredients

  • 3 lbs. red onions, halved and cut into fine julienne
  • 2 tsp. coarse salt
  • ¼ cup olive oil
  • ¼ cup red wine vinegar
  • ¼ cup pitted sliced Kalamata olives
  • 1 jalapeno chili, seeded and cut into fine julienne
  • Fresh ground white pepper

Preparation
Combine onions and salt in large bowl.  Let stand 1 hour.  Place onions in strainer.  Rinse thoroughly; drain well.  Return to bowl.  Mix in oil, then vinegar, olives, chili and pepper.  Adjust season.  (Can be prepared a week ahead and refrigerated.) Makes 8 cups.

Top

Categories
Crops & Gardening Recipes

Sausage and Mushroom Pizza with White Sauce and Pesto

Save time by substituting commercially prepared Alfredo sauce and pesto for the homemade versions below.

Ingredients
12- to 14-inch pizza crust, unbaked
1 lb. hot Italian sausage
½ lb. combined Crimini and Portabello mushrooms
2 T. olive oil
2/3 cup coarsely grated Parmesan or Romano cheese

For the pesto
1 cup loosely packed fresh basil, washed and dried
3 T. pine nuts
2 T. coarsely chopped fresh garlic
2 T. olive oil, divided
½ cup finely grated Parmesan cheese

For the white sauce
2 T. butter
2 T. flour
1 cup milk (any kind)
¼ tsp. salt
¼ tsp. white pepper
1/3 cup finely grated Parmesan cheese

Preparation
Brown the sausage just until no longer pink; do not overcook. Drain and set aside.

Wash the mushrooms, remove stems and slice. In a heavy-bottomed skillet, heat the olive oil over medium-high heat. Add the mushrooms and sauté just until they begin to soften. Let cool, and drain any excess liquid.

Preheat the oven to 450 degrees F.

To prepare the pesto, heat 1 tablespoon of the olive oil over medium heat in heavy-bottomed skillet. Add the pine nuts and garlic and sauté until pine nuts are lightly browned. Remove from heat. In a food processor, combine the pine nuts and garlic, basil, Parmesan cheese, and remaining 1 tablespoon of olive oil. Using the pulse button, process until thoroughly combined and finely textured.

To prepare the white sauce, melt the butter over medium heat. Gradually whisk in the flour, and continue stirring and cooking over medium heat until mixture is a light brown, about 2 minutes. Gradually whisk in the milk, and continue cooking and stirring until mixture is bubbly. Remove from heat and stir in salt, pepper, and cheese; stir until cheese is melted.

If you’re using a thick crust, bake the crust about 5 to 7 minutes before topping.

Add the pesto to the white sauce and spread the mixture over the pizza crust. Top with sausage, mushrooms, and Parmesan or Romano cheese. Bake at 450 degrees F until sauce is bubbly and cheese is lightly browned, about 15 to 20 minutes.

Categories
Recipes

Pawpaw Pie

Ingredients

  • 1 pie crust, baked

    FILLING
  • ¾ cup sugar
  • 2 T. flour
  • 2 egg yolks
  • 2 cups milk
  • 1 cup pawpaw pulp

Combine sugar and flour. Add egg yolks and milk, beat well. Add pawpaw pulp and cook over medium heat until thickened; pour into baked pie crust.

MERINGUE

  • 2 egg whites
  • ¼ tsp. cream of tartar
  • 4 T. sugar
  • ½ tsp. vanilla

Beat egg whites until frothy. Add cream of tartar and beat until stiff, but not dry; they should stand in soft peaks when beater is removed. Add sugar ½-teaspoon at a time. Beat in vanilla.

Spread meringue over pie and bake in 350 degree F oven until lightly browned. Serves 6.

About Pawpaws
The pawpaw is a somewhat unfamiliar fruit....The pawpaw is a somewhat unfamiliar fruit. It’s native to Ohio and the Midwest, but is not commercially grown on a large scale; it doesn’t get trucked to supermarkets all over the country.

The fruit, which is similar to a mango in shape and size, grows on tropical-looking trees and has a tropical taste—sweet like a banana and tangy like a mango. It’s a soft fruit, with flesh that has been described as having the consistency of a creamy custard.

It’s the largest edible fruit native to North America and was eaten by Native Americans long before the Europeans arrived on our shores. If you’re lucky enough to live in a region where pawpaws are grown, you might find the fruits at farmers’ markets. If you’re not, it’s also available by mail order from a small number of growers.

Integration Acres, in Albany, Ohio, offers a variety of pawpaw products—including fresh pawpaw (in season), Pawpaw Spiceberry Jam and Pawpaw Green Tomato Relish—to those interested in rediscovering this American heirloom; (740) 698-6060; www.integrationacres.com

Categories
Recipes

Hearty English Muffin Bread

Grab a mixing bowl and your bread-making apron—time to whip up two loaves of this lovely English muffin bread.

Ingredients

  • 2 cups milk
  • 1/2 cup water
  • 3 cups whole-wheat flour
  • 3 to 4 cups unbleached, all-purpose flour (or bread flour)
  • 4 tsp. yeast
  • 1 T. sugar
  • 2 tsp. salt
  • 1/4 tsp baking soda
  • Cornmeal

Preparation
Heat the milk and water over low heat in a small saucepan until warm, stirring frequently.

Meanwhile, place 3 cups of whole-wheat flour, 3 cups of unbleached, all-purpose flour, sugar, salt and baking soda in a large bowl. Stir to mix.

Pour the milk/water mixture into another large bowl, and sprinkle with yeast. Stir gently and set aside to proof for five to 10 minutes.

Whisk the yeast mixture. Stir in the flour mixture about 1/2 to 1 cup at a time until a dough forms and it becomes too difficult to stir.

Place dough on lightly floured cutting board and knead in the rest of the flour (including remainder of all-purpose flour, if needed). The dough may be slightly sticky. Knead for about 10 minutes until smooth and elastic.

Divide dough in two, shape into logs, and place in two rectangular pans (9 by 5 by 3 inches) that have been oiled and sprinkled with cornmeal.

Cover the loaves with plastic wrap, and let rise for about one hour or until doubled in size.

Preheat oven to 400 degrees F. Bake loaves for 25 minutes or until they sound hollow when tapped on the bottom. Remove from pans right away, and cool on wire racks.

Get more step-by-step instructions for homemade-bread making.

Categories
Recipes

Broccoli and Smoked Turkey Salad on Romaine

Broccoli and Smoked Turkey SaladIngredients

  • 4 cups romaine, rinsed, dried and torn into bite-sized pieces
  • 2 cups bite-sized broccoli florets
  • 1 large, tart apple (such as Granny Smith), cored and chopped
  • 12 cup diced red bell pepper
  • 13 cup thinly sliced red onion
  • 2 cups cooked, cubed or shredded smoked turkey
  • Parsley sprigs for garnish

Dressing

  • 12 cup sour cream
  • 13 cup mayonnaise
  • 1 T. Dijon mustard
  • 2 T. balsamic vinegar
  • 2 tsp. sugar

Preparation

In a large bowl, whisk together dressing ingredients until thoroughly blended. Add broccoli, apple, red pepper, onion and turkey, and stir to coat. Arrange romaine lettuce pieces on four plates, top with broccoli-turkey salad, garnish with parsley sprigs and serve. Serves 4.

Back to Salads & Appetizers

Categories
Crops & Gardening Homesteading Recipes

How to Make Cider

Make your own Apple Cider from Hobby Farms at home
Courtesy iStockphoto/Thinkstock

For most of us the thought of cider conjures cozy memories of brisk autumn days and evenings by the fireside, Christmas caroling and mugs of spicy, steaming apple juice cupped in mittened hands. To the rest of the world, “cider” means an alcoholic treat. Whichever sort of cider you prefer, chances are you can make it at home.

What exactly is cider? The freshly-pressed product we call cider is elsewhere called apple juice. What Americans refer to as “hard cider” is simply “cider” in Canada and abroad, where non-alcoholic cider is called “sweet cider.” Traditionally, both beverages are pure pressed apples and nothing more; no added yeasts, sugars, preservatives or flavorings, just unadulturated apples. However, today’s commercial ciders, sweet and hard, are sometimes doctored to hasten fermentation and yield a safer and more consistent product. (We’ll cover that later.)

American hard cider is generally 4 to 8 percent alcohol; British commercial ciders run 8.5 percent. Farmhouse ciders made for home consumption may go 10 to 11 percent (although sweetener-added ciders between 8 and 14 percent are technically apple wine).
Spaniards call hard apple cider “sidra,” Germans, “apfelweinn.” In Brittany and Normandy it’s “cidre.” To Australians, hard cider is cider; sweet cider is spelled “cyder.” In Britain, low-grade hard cider is “scrumpy,” the name derived from the slang verb “to scrump,” meaning to swipe fruit from an orchard; old-timers sometimes called it “squeal pig cider” because of the sound tipplers made when sampling it unaware. Cider cut with lager becomes “snakebite,” with rum, “stonewall.” Distilled cider and whiskey blend are “cider royal.” Other distilled ciders are “apple brandy,” “applejack” and “gumption.”
A lot of names for fancy apple juice, you say? Yes, indeed. But cider has been around a very long time and it’s a historically significant drink.

Cider Through the Ages
No one is certain when cider was first created, but when Julius Caesar’s legionnaires stormed through England in 55 A.D., they found rustics sipping fermented apple brew. By the 9th century A.D. cider making was well established throughout Europe. After the Norman Conquest (1066 A.D.) it became the drink du jour in Great Britain. Vast cider apple orchards were established throughout the realm. The Middle Ages found monks pressing and peddling large quantities of apple spirits. English cider making probably peaked around the mid-1600s; when country folk migrated to the cities as part of the Industrial Revolution, cider’s popularity began to wane. Yet in 1896, in evidence presented to the Royal Commission on Agriculture, Mr. Sampson of the National Association of English Cidermakers estimated Britain’s annual cider consumption at 55.75 million gallons. That’s a lot of fermented apple juice!

Picture this… You’re homesteading one of the new American colonies. Your well is a shallow, hand dug affair or you tote water from a nearby creek or river. It’s often not fit to drink. The cow (if you’re lucky enough to own one) doesn’t give milk year-round and her milk may be iffy at best. But apples, those you have. You or your parents or someone along the line packed seeds when they sailed the sea to this new land, so you have a fine cider orchard out back of the cabin. Cider tastes grand, it doesn’t go bad, and unlike that nasty water, fermented apple cider doesn’t make anyone ill—or dead.

By 1686, one Virginia Colony orchard boasted 2,500 trees. In 1767, Massachusetts Colony’s hard cider consumption was estimated at 1.14 barrels per capita annually. Everyone drank hard cider with meals: toddlers, Grandma, the parson and the barmaid. And “barrel” was a unit of measure, not a generality. A barrel held 36 Imperial gallons; that’s 49.25 gallons of hooch for every man, woman and child in the Virginia Colony for a year.

Cider became the All-American drink. George Washington and John Adams were extremely fond of cider; the latter quaffed a tankard of hard cider every morning before breakfast—to soothe his stomach and quell flatulence, he said.

Between 1845 and 1918, the Temperance Movement dealt cider making a dastardly blow. Fired by speeches from the pulpit, many farmers abandoned or destroyed their evil cider orchards; usually only sweet cider apple trees were spared.

Still, in 1900 an estimated 55 million gallons of hard cider were consumed by thirsty Americans; by 1919, only 13 million gallons. That year’s Volstead Act, the 18th Amendment to the Constitution of the United States that solidified prohibition enforcement, effectively illegalized the sale and consumption of alcoholic beverages—including hard cider. By December 5, 1933, when it was repealed, most Americans had forgotten their old friend, cider.

Maginc Ingredient: Cider Apples
As microbrewery beer is to Coors and Budweiser, today’s artisan ciders are to mass-produced ciders. Like Budweiser, commercial hard ciders have a following and rightfully so, but artisan hard ciders (also called craft ciders) are in a class of their own. They are hand-pressed using organic or near-organic heirloom cider apples—real cider apples—in small batches at 50 or so cideries, mostly in New England and Oregon.

Unlike large production hard ciders brewed of apple juice concentrates or blends of concentrates and real apples, sometimes with commercial yeasts, preservatives and sugars added, artisan ciders are apples and nothing but. And they’re apples of the very best kinds. For hard cider that means somewhat puny, rock-hard specialty apples whose high concentrations of malic acid and thick skins packed with tannins (the puckery, bitter substance in acorns) makes them downright repulsive to munch. Yet tannin adds body to hard cider, while malic acids add flavor and tartness. Concentrations of natural sugars, fermented, spur alcohol production.

Cider apples aren’t the sort you’ll find in stores. Most are antique apples. Their names are highly evocative: Blood Butcher, Cider Lady’s Finger, Fillbarrel, and Slack-Me-Girdle (now extinct). Thanks to Temperance crusaders’ eager axes, few elderly cider apple trees grace American orchards, but specialty nurseries are selling them again.

Cider apples fall into one of four groups, depending on their acidity (malic acid content) and tannins. These are: sharps, bittersharps, bittersweets and sweets.

A blend of three or more varieties is generally pressed together when crafting fine hard cider, but a few choice apples make a toothsome stand-alone vintage brew. A traditional mixture is one-third each of sweet, bittersweet and sharp apples. However, most artisan cider makers develop their own favorite blends.

Most sweet apples are general-purpose varieties, rather than cider-specific types. American sweet cider is mainly pressed using apples from this group. It’s said more American cider has been pressed from sweet Golden Russets (also a fine eating, drying and cooking apple) than any other fruit.

Anyone living in USDA zones 5 to 9 can grow cider apples. Orchardists two zones farther north or one south can press new or antique all-purpose sweets and sharps. Crabapples, many of which flourish in zones 3 and 10, make acceptable bittersharp apples.

Sweet Cider in a Nutshell
If you have apples, you can have sweet cider, it’s that simple. If you live in apple country, check around; folks who press cider often do custom pressings. Make certain their equipment and process is safe and sanitary before hiring them.

Safe? Years ago when most cider was hard, safety was less of an issue; long fermentation effectively zapped troublesome bacteria. Today’s sweet cider? Not so. E. coli, Salmonella, Cryptosporidiosis, and a toxin called Patulin thrive in infected unpasteurized, unfermented cider and all cause serious food-borne illnesses.

How to prevent these nasties?

  • Never press windfalls (drops), wormy, moldy or overripe fruit. E. coli is introduced by fruit contaminated with bird or animal feces; rotten, moldy apples are troublesome too. Besides being potentially unsafe, they effect cider taste, color and keeping qualities, too. Undersized, misshapen, or slightly blemished fully ripened apples work fine; compost the others.
  • Vinegar Resources

    Making vinegar can be simple or quite complex. To get a handle on the process, digest these fine resources.

    “Making Cider Vinegar at Home” (Ohio State University)
    https://ohioline.osu.edu/hyg-fact/5000/5346.html

    Vinegar: The User Friendly Standard Text, Reference and Guide to Appreciating, Making, and Enjoying Vinegar
    by Lawrence Diggs (Quiet Storm Trading; 1996)

    Wash apples very thoroughly. Dump them in a warm, weak bleach solution (one ounce of commercial 5 percent household bleach to each gallon of water) and briskly scrub each one with a sanitary brush. Rinse before pressing.

  • Sanitize equipment immediately before use with the same sort of chlorine solution. Rinse thoroughly; twice.
  • Consider pasteurizing fresh-pressed sweet cider, especially if children, older folks, or anyone having a compromised immune system might drink it. Using a cooking thermometer, heat cider to 160 to 170 degrees F, skim any foam that forms, and pour cider into sanitized, heated glass jars or plastic freezer containers. Immediately refrigerate and drink fresh cider within a week or so, or freeze it for up to one year.
  • Sweet cider making processes vary considerably, depending on the equipment you have at hand. No cider press? The University of Georgia’s “Making Apple Cider” at www.fcs.uga.edu/pubs/PDF/FDNS-E-91.pdf leaflet describes making it with standard kitchen utensils. If you own a home cider press or want to cob one together to try your hand at pressing apples, “Apple Cider Recipe” at www.allsands.com/Food/Recipes/appleciderreci_tsm_gn.htm is an even better bet (instructions are included).

How to Make Cider
The cider making process is fairly simple; here’s what to do:

  1. Wash your hands then grade and scrub your apples. Sanitize all equipment, including utensils and containers, then thoroughly wash your hands again.
  2. Grind the apples to a fine pulp (called pomace). This initiates cellular breakdown and releases the juices inside. The finer the pulp, the more juice will be extracted and (usually) the darker and cloudier the cider.
  3. Load the pulp into a porous fabric bag (thus forming a “cheese”) and press it. The juice/cider expressed is properly called “must.” Depending on the varieties and equipment used, expect to extract three to six gallons of cider per bushel of apples.
  4. Pasteurize and store your cider or filter it to remove large solids and chill it in the refrigerator for up to 24 hours to allow sedimentation to occur, then bottle or freeze it.Hard cider making progresses from this point and it’s a varied, yet exacting, art. Neophyte hard cider makers are wise to peruse as many resources as they can.

Basically, fresh-pressed must is poured into fermentation casks or vats (wooden barrels are traditional and best, but stainless steel or plastic works too; cider cannot be stored in aluminum, iron or copper) and stored at 60 to 70 degrees F for two to three months.

During this time natural wild yeasts convert apple sugar into alcohol. When a desired level of dryness is reached, the cider is decanted, casks or vats are cleaned, and the cider poured back into them and stored at 40 to 60 degrees F for six months to a year or more to further age.

Homemade Cider Vinegar
Another value-added product in sizzling demand is organic apple cider vinegar. Even if you don’t make it to sell, if you have extra apple cider why not craft homemade vinegar too?

In fact, you can have your vinegar without growing apples; high quality, unpasteurized, store-bought cider makes fine homemade vinegar. The key words are “high quality.” Sweet cider past its prime becomes vinegar, as does hard cider gone awry during the cider making process. But quality it’s not. Let’s consider the better kind.

Like cider, vinegar is an ancient comestible. The Babylonians used herb-laced wine vinegar as a condiment. Cleopatra dissolved precious pearls in vinegar to prove she could consume a fortune in a single meal. Roman legionnaires chugged refreshing vinegar beverages. Hannibal doused troublesome mountain pass boulders with heated vinegar to cleave and crumble them. And ancients everywhere treasured it for its medicinal applications.

Vinegar can be fermented using barley malt and other grains, sugars such as honey or sorghum, and a myriad of fruit, especially apples.

The common crock method is the essence of simplicity. Using fresh, unpasteurized sweet cider, fill a sanitized crock or dark-colored glass jug three-quarters full (if you don’t allow for foaming during fermentation, you’ll be sorry).

Secure a triple layer of cheesecloth or a clean cotton tea towel over the top and stow it in a cool, dark place for two to six months. Begin tasting it when your nose detects a vinegary scent in the crock’s general locale.

When the vinegar suits your palate, it’s done. Filter it through cheesecloth into sterilized jars and store it in the refrigerator, or pasteurize by heating to 160 to 180 degrees F. Use it in salad dressings (plain or flavored), for medicinal purposes, or diluted in household cleaning applications. Note: Don’t can with homemade vinegar. Its acidity isn’t equal to store-bought varieties.

“Cider, and doughnuts,” Mark Twain once said, “make old people’s tales and old jokes sound fresh and crisp and enchanting.” Cider itself is fresh, crisp and enchanting. And never better than when it’s cider from your own home press.

This article first appeared in the July/August 2004 issue of Hobby Farms magazine. Pick up a copy at your local newsstand or tack and feed store.

Categories
Recipes

Chocolate Cobbler

Chocolate Cobbler
Photo by Stephanie Staton

Easily and quickly made from everyday pantry staples, this warm, comfort-food dessert gives the gourmet impression that you spent all day preparing it.

Ingredients

  • 1 cup self-rising flour *
  • 1/2 cup sugar
  • 2 T. plus 1/4 cup cocoa powder, divided
  • 1/2 cup milk
  • 3 T. vegetable oil
  • 1 cup brown sugar, firmly packed
  • 1¾ cups hot water

*As a substitute for self-rising flour, place 1/2 tsp. baking powder and 1/2 tsp. salt in a measuring cup. Add all-purpose flour to measure 1 cup.

Preparation
In a bowl, combine the flour, sugar and 2 T. cocoa. Stir in milk and oil until smooth. Pour into a greased, 8-inch square baking pan.

Combine the brown sugar and remaining cocoa; sprinkle over batter. Pour hot water over top (do not stir).

Bake at 350 degrees F for 40 to 45 minutes or until top of cake springs back when lightly touched. Serve warm.

Serves 4.

More Hobby Farms Dessert Recipes

Categories
Recipes

Cranberry Walnut Mold

Ingredients

  • 1 can whole berry cranberry sauce
  • 1 package raspberry gelatin
  • 8 oz. cream cheese
  • about a dozen or so walnut halves

Preparation
Prepare gelatin following package directions for mixing with fruit. Chill until soft set.

While gelatin is chilling, make walnut-filled cream cheese balls. For each ball, use 1/2 to 1 tablespoon cream cheese, and press walnut half in the middle; roll between palms to form a ball. With a fork, crush cranberry sauce in a bowl; add gelatin and mix well. Place cream cheese balls in the bottom of a decorative tube pan. Fill pan with cranberry mixture, and chill until firm. To unmold, place mold pan briefly in larger pan or bowl of hot water. Invert onto serving plate.

Categories
Recipes

Herbed Zucchini Cheese Bread

Bake up this savory bread and spread slices with softened goat cheese for an appetizer or serve as an accompaniment to a main-dish soup or salad.

Ingredients
— 2 cups all-purpose flour
— 2 tsp. baking powder
— ½ tsp. baking soda
— ¾ tsp. salt
— ¼ tsp. freshly ground black pepper
— 1/8 tsp. cayenne pepper
— 2 T. your favorite fresh herbs, chopped, such as dill and parsley, or rosemary, basil, and oregano
— 2 T. green onions or shallots, finely chopped
— 1 cup sharp cheddar cheese, grated
— 2 eggs
— ¼ cup olive oil
— ½ cup milk
— 1 cup zucchini, shredded

Preparation
Combine dry ingredients, herbs, green onions or shallots and cheese; stir to mix well. In a separate bowl, beat eggs lightly; add oil and milk, and mix well. Stir in zucchini. Add liquid ingredients with zucchini to flour mixture and stir just until all ingredients are moistened; do not overmix. Pour into a greased and floured 8- by 4-inch loaf pan, and smooth top of batter. Bake at 350 degrees F for 40 to 45 minutes or until a toothpick inserted in the center comes out clean. Let loaf stand for 15 minutes, then turn out onto a wire rack and cool completely.

More bread recipes

Categories
Recipes

Chicken and Egg Recipes

Savor the bounty of your chickens! Taste the scrumptious choices chickens provide with their meat and eggs. From country classics to lighter fare, try one of our recipes today!

Country Classics:

Easy French Toast

Easy French Toast

Barbecued Beer-Can Chicken

Crunchy Fried Chicken

Crunchy Fried Chicken

Chicken and Herbed Dumplings

Lighter Fare:

Chicken Kebabs

Chicken Kebabs

Chicken Salad in Tomato Cups

Chicken Salad in Tomato Cups

BBQ Chicken Pizza


Barbecued Chicken Pizza

Chicken with Fresh Fruit Salsa

Chicken with Fresh Fruit Salsa

Potato Frittata with Fresh Herbs

Angel Food Cake with Raspberry Sauce

Angel Food Cake with Raspberry Sauce


More chicken recipes — Kentucky style!