Categories
Crops & Gardening Urban Farming

10 Ingredients to Make Your Own Potting Soil

Although many container-vegetable gardeners eventually find a reliable, favorite brand of potting soil, buying farm-sized amounts is not cheap and shipping is a nightmare if you can’t find a local source.

Mixing your own custom blends of potting soil with readily available ingredients allows you to develop a soil mixture suited specifically to your farm’s needs. It also allows you to pick and choose your nutrient sources—especially important to farmers looking to cut out the chemicals. All good-quality potting soil is easy to handle, is well-draining and contains ample organic matter. It should provide physical support to your plants as well as nutrients and sufficient water and air. Making your own potting soil mix is easy, and it gives you complete control of one of the most critical steps in the growing process.

Like all good recipes, quality ingredients are key to making healthy potting soil. Here are the ingredients you should look for.

1. Garden soil

For homemade potting soil mixtures, garden soil adds density and is a cheap source of bulk. Don’t use soil that contains pesticides, chemical fertilizer residues or other environmental pollutants. Using your farm’s topsoil or soil from a certified organic grower is best. Solarize the soil first by covering the pile with clear, plastic sheeting for at least four to six weeks to kill weed seeds, pests and pathogens. Sterilization is also possible in an oven or microwave, but this method leaves the house smelling, well, earthy.

2. Compost

Containing billions of beneficial microbes and with great water-holding capacity and nutrient content, compost is a must for quality, homemade soil mixtures. And if you make compost yourself, it’s free. It should be fully decomposed and screened into a small, consistent particle size. An added benefit: Recent studies note a decrease in foliar diseases on plants grown in soil mixes containing 20 to 30 percent compost.

3. Sand

Coarse builder’s sand improves drainage and adds weight to the mix, providing ample physical support for growing plants.

4. Sphagnum peat moss

A very stable ingredient, peat takes a long time to break down and is widely available and inexpensive. It bulks up mixes without adding a lot of weight and, once wet, holds water fairly well. The environmental impact of current peat harvests is a factor for some farmers, many of whom prefer to turn to coir fiber products instead. Organic farmers cannot use peat moss treated with a wetting agent, and most are treated. Limestone must be added to mixes containing sphagnum peat moss to help balance the finished product’s pH.

5. Coir fiber

A byproduct of the coconut industry, coir looks and acts a lot like sphagnum peat. It has more nutrients than peat moss and lasts even longer, but it’s more expensive to purchase. Coir is sold in compressed bricks.

6. Composted pine bark

Composted pine bark lightens up soil mixes by increasing pore sizes and allowing air and water to travel freely in the potting soil mixture. It is slow to break down, but might rob nitrogen from the soil as it does. The addition of a nitrogen fertilizer is necessary when using composted pine bark as an ingredient. It is most commonly found in mixes designed for potted perennials and shrubs.

7. Perlite

A volcanic rock, perlite is heated and expanded to become a lightweight, sterile addition to potting soil mixes. It holds three to four times its weight in water, increases pore space and improves drainage. With a neutral pH, perlite can be used in place of sand when a lighter mix is required.

8. Vermiculite

Vermiculite is a mined mineral that is conditioned by heating until it expands into light particles used to increase the porosity of soil mixtures. It also adds calcium and magnesium to the soil and increases the water-holding capacity. Select medium grade for seed-starting mixes and coarse grade for older, potted plants. Use caution when handling vermiculite, as it naturally contains asbestos. The EPA recommends growers use substitute products, such as peat, sawdust or perlite, whenever possible to avoid excessive exposure.

9. Limestone

Calcium carbonate or dolomitic limestone are used to adjust the pH of soil mixes containing acidic ingredients, such as sphagnum peat or composted pine bark.

10. Fertilizers

Additional nutrient sources are especially important when using soil mixtures that don’t contain compost. Choose natural fertilizers derived from mined minerals, animal byproducts, plant materials or manures. A combination of these natural fertilizers provides a long-term, stable and eco-friendly source of nutrients. Such a blend can include combinations of any of the following: alfalfa meal, blood meal, bone meal, cottonseed meal, crab meal, feather meal, fish meal, greensand, kelp meal, dehydrated manures and rock phosphate.

Use newly mixed potting soil as quickly as possible. Try to estimate exactly how much you’ll need on a given day to avoid storing it.

Categories
Equipment

7 Classic American Barn Styles

It was a beautiful summer day, drier than most July in the East. I was driving through eastern Pennsylvania on a business trip, enjoying the open highway before me. As I passed through towns along the roadway, I noticed the scenery was becoming more rural. It wasn’t long before great, green expanses lay on either side of the highway. Every few minutes, a magnificent barn would come into view, rising above the landscape and punctuating the sky with its gabled roof and proud silo. The glory of these old barns was breathtaking, leaving me to realize the power of this very American piece of architecture.

Throughout American history, farmers have built barns to shelter their livestock and store their harvest. A great number of barn styles can be seen throughout the United States, each suited to the environment where it resides.

“The design of a barn, especially if it is very old, is bound with the weather requirements of the area and the particular cultural traditions of the farmers in the region,” says Nancy W. Ambrosiano, co-author of Complete Plans for Building Horse Barns Big & Small (Breakthrough Publishing, 2006). “A steeply peaked roof, for example, is relevant to regions with considerable snowfall since the weight of snow can bring a barn down. Such peaks only capture heat in the hotter, humid South, so while they’ll still have a slope to shed rain and snow, more southerly barns add variations for ventilation such as the airy ‘monitor’ barns that ensure a breeze from floor to ceiling through the monitor’s vents.”

American farmers built their barns with not only practicality in mind, but also aesthetics. These barns were functional and their distinct looks provided a sense of identity to the regional farmlands on which they stood. Certain barn styles have become synonymous with particular parts of the country; in many cases they are considered historic reminders of the area’s agricultural past.

1. Bank Barns
The Midwest is home to the bank barn, a rectangular building with two levels. Traditionally, the lower level of the barn housed livestock and draft animals, while the upper level provided storage and a threshing floor. Both areas can be entered from the ground.

So named because the buildings were situated against the side of a hill, bank barns, most of which were built in the 1800s, permitted farmers direct access to the storage area with wagons loaded with wheat or hay. When built in an area where a hill was not present, a “bank” was created by building an earthen ramp.

The earliest bank barns featured gabled roofs, while later bank barns were built with gambrel roofs. Bank barns were primarily constructed with their axis parallel to the hill on the south side; this allowed livestock to have a sunny spot to gather in the winter. To take advantage of this protection, the second story is extended over the first; the overhang sheltered animals from harsh weather.

In certain areas of Wisconsin, where glaciers once moved during the Ice Age, bank barns were constructed with fieldstones. In non-glaciated areas of the state, primarily southwestern Wisconsin, the barn walls were made of quarried rock. In other areas of the country, bank barns were built from wood.

2. Round and Polygonal Barns
Round or polygonal barns, first built by the Shakers in the 1800s, are the rarest of barn types in terms of numbers and are scattered from New England to the Midwest. Although constructed in the early 19th century, these barns became popular during the 1880s when experiment stations and agricultural colleges taught progressive farming methods based on their great efficiency.

Round barns were encouraged for many reasons: circles have greater volume-to-surface ratios than other barn forms (square or rectangular), therefore they use less materials and save on cost. Also, they offer greater structural stability because they are built with self-supporting roofs, which also opens vast storage space. The circular layout was viewed as more efficient—a claim that was overstated, demonstrated in the lack of round barns today.

In the final stage of round-barn development, a center silo was added, allowing gravity to move feed from the barn’s top level to the floor. Made from wood or occasionally brick, round and polygonal barns typically housed cattle on the ground floor and hay in the loft above.

3. Tobacco Barns
Seen throughout the South and East, tobacco barns served a unique function when first erected nearly four centuries ago. Their role was to provide a place for tobacco farmers to hang and dry their crop after harvest.

These barns are heavily ventilated because air flow was needed to cure the hanging tobacco leaves. Multiple vents are typical of tobacco barns, which can be seen in different styles depending on the type of tobacco, the time period when tobacco became a crop in the area and local building styles, such as conventional tobacco barns that have long, vertical doors that open along the sides. They are made from oak, poplar or other regional timber.

4. English Barns
One of the first barn styles built in the states, English barns were a simple and popular design in New England during Colonial times, particularly in Vermont.

Reminiscent of barns in England, the English barn is usually small and rectangular in shape with an A-frame roof. These barns were traditionally made from wood, are not usually more than 30×40 feet in size and feature hinged wagon doors. The barn was usually located on level ground with no basement and unpainted, vertical boards on the walls.

The interior of the English barn has a center aisle and threshing floor. Livestock were kept on one side of the barn while feed was stored on the other.

5. Dutch Barns
Dutch barns are among the oldest and rarest American barns and are known for their broad, gabled roofs, corner stock doors, clapboarding and center wagon doors.

Popular in New York and New Jersey in the 1700s, these barns have a distinctive, H-shaped structure, which provided a rigid core to support the broad, gabled roof and walls. They feature a spacious center aisle with a plank floor for unloading wagons and for grain threshing.

The Dutch-style half doors were situated to allow prevailing winds to disperse chaff when threshing on the barn floor. A pent roof (or pentice) over the center doors gave protection from the elements. Flanking animal doors at the corners and holes near the roof to admit swallows and martins are typical Dutch barn elements.The side aisles were used to house cattle and draft animals, as well as to store feed and hay.

Unlike most other barns, the internal structure of the Dutch barn is relatively protected from the elements and can often survive exterior decay.

6. Crib Barns
Common in the South, crib barns are most often seen in the mountainous areas of North Carolina, Virginia, Kentucky, Tennessee and Arkansas. The name of this barn comes from the one to six cribs built inside the structure for storage or for housing livestock. Smaller crib barns were used exclusively for feed storage.

Crib barns were built primarily in the 1800s and were most often made from unchinked logs occasionally covered with wood siding and wood-shingled, gabled roofs. Crib barns with roofs that were later replaced can be seen with tin or asphalt coverings. “Double-crib” barns feature a second-story loft; they were the simplest barn to build for their size and stability.

Similar to dog-trot houses, the double-crib barn, commonly found in Appalachia, consists of two cribs separated by a breezeway and covered by a single roof. The doors could either face front or toward the breezeway. The first story was used for stabling with the breezeway, usually used for grain threshing. The second story loft was used for hay and grain storage.

7. Prairie Barns
One of the most common barns in the American landscape, prairie barns (also called Western barns, one of which is pictured above), were the barn of choice for farmers in the West and Southwest because large livestock herds required great storage space for hay and grain.

These large, wooden barns provided plenty of storage space for feed and could house livestock if necessary. Long roofs that often reach nearly to the ground created ample space; these barns were built throughout the 1800s as agriculture spread westward. The prairie barn is similar to the Dutch barn with regards to the long, low rooflines and the internal arrangements of animal enclosures on either side of a central, open space.

Categories
Beginning Farmers

Aiding the American Farmer

A native son of the Midwest, John Mellencamp was a young man in his early 30s in the summer of 1985, and his album, Scarecrow, was burning up the charts. Its title song, “Rain on the Scarecrow,” was a searing commentary on what he saw happening to farms around his home in Bloomington, Indiana.

This land fed a nation, this land made me proud
And son I’m just sorry, there’s no legacy for you now
Rain on the scarecrow, blood on the plow

As John says, “It isn’t like you had to go looking for a cow, or looking for a cornstalk, they were everywhere. They were right outside the door.” Growing up and as a young man, he knew the people who owned those cows and those cornstalks. They were small, family farmers—people who had grown up on the land, and loved it.

Scarecrow on a wooden cross, blackbird in the barn
Four hundred empty acres, that used to be my farm
I grew up like my daddy did, my grandpa cleared this land
When I was five I walked the fence, while Grandpa held my hand

Farmers prospered in the late 1960s and early 1970s, with a federal farm policy that bolstered foreign exports of agricultural goods, and tax laws that encouraged outside investment in American agriculture. Because markets and income were so good, farmers were encouraged to borrow more and more money. They took on heavy debts, buying additional farmland, even though the land prices were seriously inflated.

Farmers owed nearly $50 billion to banks in 1970, but by 1985 their debt had exploded to $215 billion, with an overwhelming $20 billion a year in interest, yet the value of land and other farm assets declined nearly 50 percent from their peak in the late ‘70s. Farmers couldn’t pay back the loans, and a tsunami of farm foreclosures swept the country.

The crops we grew last summer, weren’t enough to pay the loan
Couldn’t buy the seed to plant this spring, the Farmers Bank foreclosed
Called my old friend Schepman, to auction off the land
He said John it’s just my job, and I hope you understand

But there were some people who wouldn’t accept the changes that were ravaging rural America. They would intercede on behalf of the farmers.

MUSIC FOR CHANGE
On July 13, 1985, rock musicians and bands, from both sides of the Atlantic, got together for the Live Aid charity concert, to raise money for African famine relief. During the show, Bob Dylan said something about it being too bad that some of the money being raised couldn’t be used to support American farmers.

Willie Nelson heard Dylan’s comment, and was spurred to action. “He was going to try to put this concert together; I think I was like the first guy he called,” John  Mellencamp says.

Just six weeks later, on September 22, 1985, before a crowd of over 80,000 people in Champaign, Ill., the first Farm Aid concert happened. Willie, John, and their friend, Neil Young, had recruited a veritable who’s who of musicians. Over 60 acts performed, raising over $7 million for America’s family farmers. As John explains, “Every rock band, and every country band, and every folk band in America was there. The first guy on the act was Jon Bon Jovi; he started the show and it just went on and on and on from there.”

The who’s who element has continued. In 16 concerts, Willie, John and Neil have drawn 329 artists into the fold. From Alabama and the Allman Brothers Band to Joe Walsh and Dwight Yoakam, some of music’s biggest names have come to perform, and have donated not only their time, but also all their expenses associated with playing at Farm Aid, making the concert a true benefit. Some artists have played Farm Aid only once or twice; others, like Dave Matthews, or Hootie and the Blowfish, play whenever their schedules allow.

Jim “Soni” Sonefeld, drummer for Hootie and the Blowfish, remembers well the band’s first performance at Farm Aid 1995. “I can guarantee you we were very nervous getting up in front of all those people at the first Farm Aid concert we did, and realizing that Willie Nelson invited us to do this gig with him. We were still very impressionable and we wanted the chance to be on with our idols. I think we got the call to do Farm Aid, and realized ‘wow,’ John Mellencamp’s gonna be there, Neil Young’s gonna be there, Willie’s gonna be there.”

But the chance to be on with these idols isn’t what’s kept Hootie coming back time and again. Soni grew up much like John Mellencamp did, in a small Midwestern town where corn and cows predominated, but he saw farm friends from school leave as the family farms were sold for subdivisions, and he saw independent businesses give way to big box stores. “I have always believed in, and tried to actively support, the small guy and the local guy in any business, from farming to a lot of different businesses. Why have the mom-and-pop record stores and the mom-and-pop convenience stores gone out of business? Why have family farmers gone out of business? …”

MAKING A DIFFERENCE
Farm Aid is about the music to most concertgoers, but to the artists themselves, it is very much about the cause. At its genesis, the cause was the depression—both economical and spiritual—that was troubling rural America; today it is still about family farmers, but it is also about providing the American people with a safe, fresh and locally grown food supply from family farmers, who are often good stewards of the land—for air and water quality, and for wildlife.

The result of these artists’ generosity has been that, since its inception, Farm Aid has granted over $17 million to more than 100 farm organizations, churches and service agencies in 44 states. Many Farm Aid grants are used for direct services, like food and emergency aid, legal assistance and hotlines—services that have helped thousands of struggling farm families across the country stay on the land. Farm Aid also grants funds to nonprofit organizations around the country that promote outreach, education and the development of long-term solutions for the problems facing rural America. In recent years, some of this support has gone to local efforts that confront the threat of increasing corporate control of agriculture.

When Farm Aid started, the farm crisis was “on the front page of the paper almost daily. There were foreclosures, and farmers going to help each other at penny auctions [farmers support each other by bidding very low to force the auctions’ cancellation]. People were very conscious about it,” says Carolyn Mugar, Farm Aid’s executive director.

Carolyn was recruited by Willie Nelson to help, about 10 days before the first concert. She says that although the farm crisis is not on the front pages of the paper anymore, there is still a real need. The farm crisis has become a chronic problem, but Carolyn sees something to be hopeful about. “People are becoming more conscious about where their food comes from and they are concerned about whether they are going to have access to fresh, locally grown, family farm raised food as opposed to food from factories, or food from other countries. We know that people are more and more interested in making a commitment to connect with family farms.” 

LOOKING BACK, LOOKING AHEAD
I ask John if, in the summer of ‘85, he thought he was going to be part of something that would go on for years and be such an influence on the dialog about rural America and our food system, or did he think they would do one concert, raise some money to give away, and that would be that? “Oh, definitely, I think the latter of the two was about all the vision I had. I can’t speak for Willie or Neil, but that’s about all the discussion we had at first. You have to imagine, at that time it was really quite an undertaking, just doing that first concert.”

But as everyone associated with Farm Aid points out, the problems have not gone away so neither has Farm Aid. It continues to grow and change, responding to changing, but continuing needs. Carolyn points to an example: “When we started, we knew that industrial agriculture was on the horizon, but it really started coming into people’s consciousness much clearer as factory farms arose in rural communities, ruining air quality, polluting rivers and driving family farmers out of business. People are realizing what this horror is, and they are more willing to start taking note of the difference between industrial food and family farm raised food.”

John follows up on the point. “When we started out we took a lot of paths and avenues that we hoped would help family farmers. But we realized as we were traveling them that they didn’t seem to be going particularly the way that we’d hoped. We could see that just being there for the farmer wasn’t going to work; we decided to take a more educational position and tried to be more proactive with the general public.”

What John sees as important in terms of the organization’s ability to ensure ongoing support of the cause is the backing of younger musicians. “I’ll tell you, I am always surprised about the people who want to play at Farm Aid. I had three young acts wanting to participate last year, andthese people were 22 years old—they had grown up watching it, and they were just so eager to play Farm Aid,” he says.

Thanks to his commitment to Farm Aid, Willie, John and Neil extended an invitation to Dave Matthews (who owns a farm of his own in Virginia) to join the board of directors of Farm Aid in 2001. John says, “Dave’s enthusiasm and commitment to Farm Aid have been just incredible. I think it must have been 1995, in Louisville, Ky., that he first played with us—that was before he was so well known, he was just starting out, but his commitment to Farm Aid was very big. He was so excited to be a part of everything and worked so hard.

“Dave is not one of those guys that ‘half-asses’ anything,” he adds with a laugh.

One thing is for sure, with new artists coming on board, and the commitment of John, Willie, Neil and Dave, Farm Aid will continue to provide great music for an important cause, and it will continue to advocate a food system that keeps the family farmer as the caretaker of the land.

About the Author: Carol Ekarius is a contributing editor to HF and author of several books on small farming, including her latest, How to Build Animal Housing (Storey Publishing, Spring 2004).

HFLyrics to “Rain on the Scarecrow” used with permission of John Mellencamp.

This article first appeared in the July/August 2004 issue of Hobby Farms magazine.

Categories
Homesteading

Farm Auctions

By Carol Ekarius

In this article …

Related Article
Overcome Auction Phobia

That auction was one of the first farm auctions we ever attended.

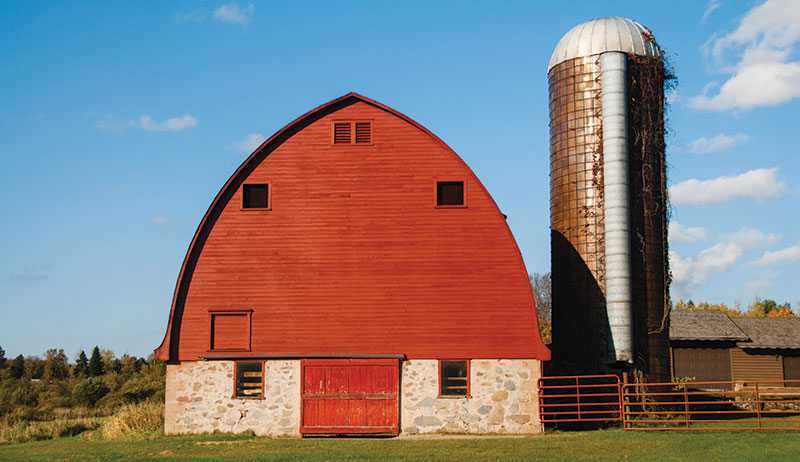
It was a Saturday afternoon in late February, and cars and pickups, many pulling stock trailers, were streaming up a gravel road near Deer Creek, Minn.

We were in the line, with our trailer hitched behind, and our hopes set high that we’d find just the right group of heifers, at just the right price, to start our own herd of dairy cows. In spite of cold temperatures and wind, the farm auction was drawing a good crowd. 

We bought five Holstein heifers that day; black and white bottle-babies that would form the foundation of our dairy herd almost two years down the line.

But since that February afternoon we’ve attended hundreds of farm auctions (and held one of our own).

We learned what many rural folks have always known: Farm Auctions are a great way to spend a day—offering a chance to socialize with rural neighbors, and the opportunity to buy anything from antiques and collectibles to land and livestock, or tractors and trucks. (Maybe even the kitchen sink!) You just never know what you’ll find at a farm auction.

The History of Auctions
Auctions have a long, and sometimes notorious, history. The first auctions that historians have confidently documented occurred in Babylon, about 500 B.C. At these earliest auctions beautiful women were sold into marriage. 

The Romans used auctions to dispose of all kinds of property, from grain and livestock, to the spoils of war. In fact, in 193 A.D., the Praetorian Guard sold the whole Empire at auction, after killing the ruling Emperor, Pertinax.  Unfortunately for the successful bidder, Didius Julianus, his acquisition was short lived—two months after he claimed the Empire, Rome fell in battle to Septimus Severus.

During the 1500s, the British began using “public outcry” to sell items, with the term “auction” making its debut in British dictionaries around 1600. The British style of auctioneering made its way to the New World with early settlers, but it was often used for selling out the property of debtors—or for selling slaves, giving early auctions in this country a bad name.

After the Civil War, Army Colonels traveled around the country selling seized and surplus Army goods. Civilian auctioneers followed the Colonels around, and dressed similarly, so that soon the public began to address all auctioneers as Colonel—a title still used by auctioneers today.

Top

The Market Sets the Price
Today, over 35,000 auctioneers practice the trade. Most are generalists, selling antiques one day, livestock the next day and used restaurant equipment another. The auctioneer works for a seller, and his or her goal is to maximize profit for the seller.

According to Bob Shively, CEO of the National Auctioneers Association (NAA), auctions are unlike other marketing methods because they truly allow the market place, on any given day, in any given place, to set the price between a buyer and a seller.

“At auction, the market sets the price; the real estate market gives a good example,” he says. “Typically, if you wanted to sell your house you’d call three or four realtors. They’d come over and tell you your house is worth $100,000 and you’d put your house on the market for that price. But in the majority of cases you’d end up selling it for less than your asking price. So the traditional real estate market works from the price coming down, but the auction method of marketing is based on the price going up. More times than not we find that the price realized at auction is comparable to, or exceeds, that received through other marketing strategies.

“There is age-old thinking that only ‘distressed property’ is sold at auction, but it just isn’t so,” says Shively. “For years, industrial real estate and farms and ranches—especially bare farmland—were often sold at auction, but nationwide we are seeing a real spike in auctions where residential real estate sells at auction also. The National Association of Realtors predicts that within five years, almost one third of all real estate transactions will likely be auction based.”

Top

At Auctions Buyer Beware Rule Applies
Although auctions can be a lot of fun, and a good way to buy, sell or trade almost anything, they can be a dangerous way for the uninitiated to shop. They are a “buyer-beware” world, where items are sold “as is” and all sales are final.  

An auction I recently attended provides a good example. I got there early in the morning to inspect items I was interested in. There were all kinds of neat household items—some antiques, and some modern—on a hay wagon, and I spent time looking things over.

When the auction got going a couple of nicely dressed women who looked to be straight out of the city started bidding against each other on a bowl that looked like an antique, but was actually a modern reproduction you could probably pick up in a department store for $10 or $20. One of the women was pleased as punch when she got the bowl for $108, but her jaw dropped when the auctioneer handed her the bowl and she realized her mistake. By then, it was too late—she had bought the bowl.

The moral: To get good buys at an auction, you need to be an educated buyer. Although any auctioneer worth his salt won’t tell you it’s an antique if it’s not, he also won’t say during the bidding, “Hey lady, you’re bidding too much for a department-store bowl.” 

Larry Theurer, an auctioneer from Wellington, Kan., who has been in the business since 1976, andis current president of NAA, agrees: “There are a number of things we recommend. Know what you need before you get to the auction, and know what it’s worth. Visit with a reputable auctioneer or someone in the farming business to help assess your needs before you go to your first auction.” 

Don’t buy a big tractor and big equipment if it’s not needed; bigger isn’t always better, says Theurer. “There are differences in quality that auctioneers and experienced farmers know about, but that newcomers don’t always know; one model may have a history of problems, or be harder to find parts for. Some brands always bring more money, but that’s because they are more reliable. In my experience, most hobby farmers, because they have outside jobs, need to buy good quality equipment so they don’t have to spend all their time working on it.”

The same applies to livestock. “Quality varies from farmer to farmer,” says Theurer. “Try to deal with reputable people. Horses are a perfect example. Despite all the good people, there are some real crooks in the horse business. So, there are good horses, but there are also horses with inherited problems. For novice buyers, they won’t even have a clue what those problems are.”

The way around the problems that Theurer points out: Come early and thoroughly inspect any goods you might want to bid on. If you’re thinking of bidding on expensive items, like breeding stock, machinery or vehicles, you can usually arrange an advance visit to the auction  site to get a closer look. Bring along your own personal expert—a mechanic or veterinarian—if you are serious about investing in equipment or livestock. 

Talk to the auctioneer; talk to the owner. “If someone asks me before an auction starts, I’ll give them an honest range that the item they’re looking at should sell for,” says Theurer. “I want buyers to be satisfied with what they buy.”

Top

The Future of Farm Auctions
The times they are a changing, and auctions are changing with them. “Farm auctions, it’s no secret, are decreasing in number, because we have sold so many farmers off in the last decade or two,” says Theurer. “For example, we do about 10 farm auctions per year now; a decade ago we were doing double that. But one change we have observed is an increase in the volume of equipment and consignors at our consignment auctions. The consignment auction is a great opportunity for smaller farmers to sell, and for beginning farmers to buy all types and sizes of equipment. We may have 100 to 125 consignors—it’s a huge, full day. We’ll have tractors that are 30 or 40 years old, some of collectible types, to modern four-wheel-drive tractors.”

Also, you may be able to take advantage of another change. According to NAA’s Shivley, “By and large, auctioneers are moving into the electronic age. Many are already utilizing online broadcasting of auctions via the Internet. They accept online bids as the live auction is taking place, essentially bringing the world into the auction. It gives auctioneers the ability to maximize value for the seller, which is who they are working for.” 

It also gives buyers the chance to participate in auctions they normally couldn’t attend—or to stay warm and dry while bidding from the comfort of home on a cold winter day.

The Fastest Talker in the World
Auctioneers are known for the chant they use to sell products, and for Bill Sheridan, of Sheridan Realty and Auction in Mason, Mich., his chant—and his knowledge of the auction business—has earned him the title of World Champion Auctioneer.

Bill started out in the auction business in 1975, working first at a livestock sale barn, and later branching out to his own business.

Bill explains his winning technique, “The chant is the announcement of a bid, and calling for a higher bid. Some auctioneers add lots of ‘noise,’ but I feel like the public wants to buy and they aren’t really interested in fancy words. I have worked hard to develop a melodic chant that’s full of rhythm and pleasing to the ear. I try to keep it clean and straight, with no excess garble.”

The world championship is an actual auction with over 500 bidders.

Eighty-eight competitors from every state as well as Canada and Mexico competed last year, and all competitors had to first win at a state championship.

During the competition each competitor sells three items while seven judges assess their technique, their ability to catch bids, how they maintain order in the auction and get value for the items they are selling.

Bill sold a camera, a pearl necklace and a watch during the first round of judging. After all the competitors have sold three items each, the top 15 competitors come up for a question-and-answer session that assesses their knowledge of the business.

If you are looking for a farm auction in the upper midwest, there’s a good chance you might find Bill.

Although he no longer works regularly at a sale barn, he’s still very involved in the agricultural sector, and still sells lots of livestock at private farms and special sales, like the Upper Peninsula Beef Expo Sale, and the Michigan State University Arabian Horse Farm Sale.

Top


About the Author
: Carol Ekarius is a small farmer, freelance writer and a contributing editor to HF.

Top

This article first appeared in the August/September 2003 issue of Hobby Farms magazine. Pick up a copy at your local newsstand or tack and feed store. Click here to subscribe to HF.


Categories
Homesteading

Nature’s Bounty

By Maureen Blaney Flietner

Perhaps it’s just in our nature. Those who appreciate the country, being surrounded by the beautiful bounty of the outdoors, want to capture some of it and bring it inside. And why not? It’s difficult to find anything artificial that can compete with the delicate colors, intricate textures, and alluring shapes and scents of nature.

Many of us, as hobby farmers, have also grown accustomed to being thrifty. Using what’s available in our surroundings for alternative uses–such as natural décor–plays right into the practical economics we live by.

Scouting the Land
Surprisingly, the materials that can make up some wonderful natural décor are often “free” items available from unusual sources. Weeds we want to eradicate–such as wild grapevines, bittersweet or teasel–become the stuff of swags and centerpieces. Cones at the base of pine or spruce trees are destined to be the stars of ornaments or  wreaths. Milkweed, that life-giving plant for Monarch butterflies, offers pods excellent for arrangements. Redosier dogwood, rampant through lowlands, makes a striking accent in holiday arrangements with evergreen branches.

It doesn’t end there. A handful of dried wheat. A cache of colorful fall leaves. Piles of acorns or hickory nuts. Twigs. Bouquets of dried flowers. Cornhusks. This is the stuff that natural décor is made of.

If you happen to live on an old farmstead, every year the earth seems to yield a new “crop” from the past. Bits of pottery, parts of old machinery, old square nails and other remnants of earlier lives appear on the ground and can become part of décor unique to your farm. The curlicues of an old piece of metal. A section of an old cedar fence post. A bit of barbed wire. They all have a chance to be a part of a new life on the farm. 

Free Your Imagination
Hobby-farm country décor requires free rein of the imagination. Get in the proper frame of mind. Put an imaginary sign above your work space. On it, picture these words to guide you: “Everything I need is here, waiting to be discovered and appreciated.”

Between what’s growing and what’s “found,” there’s abundance. Each area of the country, each farmstead, offers something special. Wear some gloves, get some clippers and a box, and start gathering.

Here are some simple projects to give your creativity a jumpstart. Then start looking at what local bounty you can transform into something special.

Project: Cone wreath
With their varied textures and earthy colors, cones have long been a popular and free material for decorations. Gather them when they’re available and store them for later use. Air dry the cones or put them on a cookie sheet in a 200-degree F oven for about an hour.

For a cone wreath, you’ll need:

  • a metal wreath form
  • flexible craft wire. Brown or green works fine. For a different effect, try a gold or copper color.
  • needlenose pliers, to occasionally help pull wire through the wreath form
  • curved-nose wire clippers, to clip some cones
  • different cone sizes and types

Until you get familiar with how much craft wire you will use to secure your cones, start with about a foot of wire. Make sure you will have a few inches of wire left at either end and then encircle the bottom layer of scales. Tuck the wire toward the base of the scales. If the cone is a smaller one, you can twist one of the wire ends tightly around the other end wire. Then anchor the cone to the metal wreath form with the now combined, single wire. For larger cones, take each end of wire and separately secure it to the metal wreath form for extra stability.

Position cones on their sides, angled, base in or base out. Make sure each wire is wrapped around a cone and then wound securely around part of the wreath form. Continue this process as you fill the form.

As the wreath shapes up, add extra touches. Take a pine cone and, with the curved wire cutters, snip off the scales until you reveal the “flower” inside. Wire the base of the clipped cone and keep the “flower” looking outward. For another look, wire the top end of a cone and put the base end out. Small, thin cones can be wired to back into any “holes” in the form. For an extra finish, hot glue some dried flowers to the wreath. Clean gently with canned compressed air.

Project: Grapevine wreath or swag

If you ignore the fact that they’re considered nuisance weeds, wild grapevines are interesting plants that are wildlife-friendly. As you gather these vines, take a moment to appreciate how tendrils allow these plants to aggressively move into the territory of other plants.

Wild grapevines basically “crawl” right over plants with a grip on bark and branches that is surprisingly strong and tight. It’s that flexibility and those tendrils that work well when you turn them into something beautiful like swags and wreaths.

Gather wild grapevines when they are young and easy to shape. You may have to unwrap the grip of some roots to keep the curly tendril look. Snip the leaves to save yourself from having to clean up dried leaves as they disintegrate. You can gather the brown, woodier plants but they will not be as easy to shape. Try to cut vines at the base; you will want each vine to be 4 to 10 feet long. 

Either work with the vines right away or store them for a short time in water, formed in the circular or swag shape you want them to have. For a wreath, start with one vine and create a circle just a bit smaller than the size you want. Wind the vine around about three times and overlap the end. Use a matching or accent craft wire to hold it together.

With the next vine and each subsequent vine, start at a different place around the wreath. Weave each new vine in and out around the main wreath, being careful to allow the curly tendrils to show.

When you have built your wreath to the thickness you want and have securely anchored all of the vine ends, it’s ready for finishing touches. Among the choices could be to hot glue or wire some dried nuts or flowers, colorful leaves or eggshells.

Next Page: More Projects!

About the Author: Maureen Blaney Flietner is a freelance writer, photographer and hobby farmer in Wisconsin.

This article first appeared in the Fall/Winter 2006 issue of Hobby Farm Home magazine.

Categories
Crops & Gardening

USDA Certified-Organic Pesticides

Some of Pharm Solutions award-winning product line
The award-winning Pharm Solutions product line includes Flower, Veggie and Indoor Pharm.

Susan E. Lewis, founder and president of Pharm Solutions, says, “We think every pesticide sold should be USDA/National Organic Program Certified Organic. Consumers should not have to settle for less.”

Pharm Solutions, a family-owned, Washington-state based company, put its money where its mouth is by developing the world’s only pesticides to be certified as USDA-compliant with organic regulations.

The family started out with strict guidelines for their own gardens—any pesticide they placed on their plants had to be natural and environmentally friendly.

Pharm Solutions’ patent-pending product line includes:

  1. Garlic Pharm
  2. Veggie Pharm
  3. Flower Pharm
  4. Rose Pharm
  5. Indoor Pharm
  6. Fungus Pharm
  7. Oil Pharm
  8. Deer Pharm
  9. Soap Pharm

When most of the products they tried failed, the family decided to make their own.

They did extensive research and created an organic “system” that would treat various plant and crop ailments.

They have products that repel pests; and if that doesn’t work–and a plant becomes infected or infested–they can use their insecticidal soaps, which contain pure essential oils (also containing miticides and fungicides).

The minimal treatment system, gives plants a chance to be healthy on their own–with no or very little human-applied treatment.

Other benefits:

  • The insecticidal soaps target pests with one application, reducing labor costs.
  • In every setting – indoor, outdoor or nursery – the health risks associated with standard pesticides are eliminated.
  • The products can be used all the way through harvest without any risks to the plant.

The family’s passion and dedication and their products’ effectiveness were recognized in 2006 by the Lawn and Garden Marketing and Distrubution Association; Pharm Solutions ready-to-use product line was voted “Best New Product,” “Best of Show” and “Best New Packaging.”

For more information, including where to find retailers that sell the products, visit https://pharmsolutionsinc.com/, email info@pharmsolutionsinc.com or call (805) 927-7400.

Visit the company’s website and you may find yourself thinking of anything but chemicals and pesticides. Some of the ingredients in their formulas:

  • Peppermint oil, which scrambles the senses of insects.
  • Garlic extract, which repels insects and small animals, like rabbits.
  • Organic almond, cinnamon, cottonseed and soybean oils, which smother pests and help control mildew and fungus.
  • Fermented salmon byproduct, “not intended for indoor use or bear country,” reads the site.
  • Vitamin E and rosemary oil, tossed in as perservatives.


Categories
News

Scientists Study Virus With Possible Connection to Bee Loss, Colony Collapse

About the Author
Tom Meade is a writer, beekeeper and vegetable gardener in Rhode Island.

The discovery that an Israeli virus is present in collapsed honey bee colonies is a step in determining what is killing bees throughout the United States. Meanwhile, Ross Conrad, a Vermont beekeeper, is advocating organic approaches for keeping bees healthy in his new book, Natural Beekeeping.

Honey Bee on Garlic Blossoms
© Tom Meade

Scientists Discover Virus Connection
A team led by scientists from the Columbia University Mailman School of Public Health, Pennsylvania State University, the USDA Agricultural Research Service, University of Arizona, and 454 Life Sciences has found a significant connection between the Israeli Acute Paralysis Virus (IAPV) and colony collapse disorder (CCD) in honey bees. Colony collapse disorder has killed thousands of honeybee colonies in America.

“I hope no one goes away with the idea that we’ve actually solved the problem,” said Jeffery Pettis, research leader of the U.S. Department of Agriculture’s Bee Research Laboratory. “We still have a great deal of research to do to resolve colony collapse disorder and why bees are dying.”

Could Honey Improve Memory?
Could honey join dark chocolate as one of the sweet treats that we’re allowed to indulge in guilt-free because of its health benefits?

A recent study showed that rats on diets including honey had better spatial memory and were less anxious. Click here for more…

“This discovery may be helpful in identifying hives at risk for disease,” said Dr. Ian Lipkin, a physician and professor of epidemiology, neurology, and pathology at Columbia University. He and his team used revolutionary genetic technologies to survey microflora of colony collapse disorder hives, normal hives, and imported royal jelly.

“The next step is to ascertain whether IAPV, alone or in concert with other factors, can induce CCD in healthy bees.”

This is the first report of IAPV in the United States. Transmitted by the Varroa mite, a pest in bee hives, IAPV was first described in 2004 in Israel where infected bees had shivering wings which progressed to paralysis, and then they died just outside the hive.

Bee Diets and Pest Control Methods Could Be Key
In the U.S., “IAPV was found in non-CCD hives in some cases, which could reflect strain variation, co-infection, or the presence of other stressors, such as pesticides or poor nutrition,” according to a statement from Columbia University.

Many American beekeepers, especially commercial pollinators and honey producers, feed their bees syrup made from refined sugar or high-fructose corn syrup after taking away some of the bees’ natural honey stores in late summer or early autumn.

“Such unnatural food sources add to the stress on the bee’s digestive systems and ultimately can compromise and weaken the immune systems of each individual within the hive,” writes Ross Conrad in his new book, Natural Beekeeping, Organic Approaches To Modern Apiculture. Chelsea Green, a Vermont publisher, released the book this summer.

To eliminate mites and other insects thought to be pests, many American beekeepers also treat their hives with lethal chemicals in doses that do not kill the bees.

“The effect of exposing honey bees to sub-lethal doses of these compounds is rarely discussed,” Conrad writes.

“Just as with people, the long-term health and vitality of the hive is likely to be compromised by such exposure, even if such detrimental effects are not readily and immediately evident.”

Beekeepers should treat the hive as a teacher, Conrad believes.

He writes:

“The honey bee inspires me to work into my daily life this lesson: that we should take what we need to live in the world in such a way that we give something back and improve upon things, thus making the world a better place. Many of the world’s problems could potentially be solved in short order if every person took this single lesson from the honey bee to heart and worked to manifest it in his or her life.”

Categories
News

Honey Health Benefits

Could honey have the potential to offer more health benefits such as antiseptic and antibaterial benefits–or even aid more serious conditions–for humans?

According to the Committee for the Promotion of Honey and Human Health it could.

A group of scientists meeting at international symposium in Sacramento, Calif., plan to discuss some of the possible benefits, including:

  • its potential to improve chemotherapy-induced neutropenia
  • wound healing
  • restorative sleep
  • cough suppression
  • cognitive function

The Committee, a non-profit group that organized the symposium, hopes the discussion also will help stimulate further research that could advance the role for honey in other health issues like weight management or even risk reduction for neurodegenerative conditions, including Alzheimer ‘s disease and Parkinsonism. Read more

Categories
Homesteading

Fall Lawn Care: Must or Lust?

By Emily Goodman

About the Author
Emily Goodman is a freelance writer based in New York
.

Winter’s just around the corner, and you’re no doubt looking forward to putting away your lawn mower and relaxing at the close of the growing season. But don’t get too comfortable yet! Fall is a surprisingly busy time of year when extra effort can really pay off in a thicker, healthier lawn next spring.

First off, you have to deal with all those crinkly red and brown objects flying through the air, falling all over your lawn and flowerbeds, and filling your rain gutters.

We’re talking about leaves, of course. They’re a natural product of trees and you’ve heard they’re good for the soil. So they must be good for your lawn and you can just leave them where they fall, right?

Forests vs. Prairies
Why you should get leaves off the lawn

While most people think it’s perfectly natural to plant trees in a grass lawn, these plants actually come from two different ecosystems. Trees come from forests, where their fallen leaves decay slowly over years to form deep, humus-rich soils underfoot. There is no grass in forests, only wildflowers and groundcover plants specially adapted to surviving in leaf litter.

Grasses, on the other hand, are sun-loving plants from the prairies. They like being the tallest plants around, with nothing overhead to shade them.

So mixing grasses and trees, no matter how “natural” it may look, is actually highly unnatural–and that causes problems. Most grasses don’t like growing under trees, where it’s shaded. And in autumn, the shade gets even closer. As falling leaves pile up on your lawn, they cover and may even smother the grass plants underneath.

Many species of grass are still growing in early fall and are eager to take advantage of the extra sunlight available now that the trees are bare.

The solution? Simple. Remove the fallen leaves from the lawn.

Wrong! Leaves and lawn don’t mix. Read on to learn what you really have to do to get your lawn ready for winter and the best tools with which to do it.

Leaf Removal
Since it’s important for lawn health to remove fallen leaves, what’s the best way to do this basic fall task? Fortunately, there are all kinds of tools and machines available to help you: Vacuums, blowers, sweepers and simple rakes all help pick leaves up or gather them into one place; shredders rip them to pieces; composters accelerate turning shredded leaves into compost; and long-handled tongs help get them out of your gutters.

Must: Rake
Wondrous as all the machines are, they haven’t completely replaced the lowly rake. Rakes are cheap, they’re quiet, they don’t pollute or contribute to global warming, and some people actually enjoy the outdoor exercise. Besides, even if you buy the fanciest leaf blower or vacuum on the market, you’ll still need a rake to pick up the odds and ends mechanical equipment leaves behind, and to help with dethatching (see below).
The classic fan-shaped lawn rake is a basic piece of garden equipment. Today there are rakes made of metal, rakes made of bamboo, rakes with springy tines, self-declogging rakes and ergonomic models with bent handles that help you rake without bending over. There are also narrow ones for raking in garden beds and wide models to cover lots of lawn with each sweep.

Lust: Lawn Sweeper
To gather leaves with minimal effort, try a lawn sweeper. These workhorses hook up behind your tractor mower and as you drive around, its rotating, replaceable brushes sweep across the surface of your lawn like a hairbrush, pushing leaves, grass clippings and small debris into a hopper bag. You can even dump the bag into your compost pile via a rope cord without leaving your seat on the mower. The bag holds 12 cubic feet, or 10 bushels, of yard debris.

Once you’ve raked or swept your leaves into heaps, what’s next? Shredding them into smaller pieces can reduce the size of those piles dramatically. This makes them much easier to handle, whether you plan to lug them to the garbage dump or, a much better idea, turn them into mulch or compost. You can run your mulching lawnmower over the leaves again and again to shred them or you can use a leaf shredder.

Must: Leaf Shredder
There are many models of mini-leaf shredders on the market. Many attach to trash cans. Perhaps a better idea, when you replace your lawn mower, is to get a so-called mulching mower (85 percent of new mowers are mulchers), which can shred grass clippings so fine they fall between the remaining blades of grass onto the soil surface, instead of resting on top of the lawn. Look for a model with at least 5- or 6-HP and a four-stroke engine.

Lust: Leaf Vacuum
If your property is simply too large for an over-the-trash-can model, a good alternative is one that can be pulled behind your mower. Agri-Fab’s Chip-N-Vac is the Cadillac of shredder-mowers and is a combination wood chipper/vacuum. It can dramatically cut down on your lawn maintenance time by vacuuming up grass clippings, leaves and other debris while you mow. It sucks up even pesky debris like pine needles through a 6-inch hose, leaving your lawn perfectly manicured, then shreds the debris, reducing leaves to one-quarter their original volume.
 

Mulch vs. Compost
Mulch and compost are not the same, though people often confuse these two terms.

Mulch:
Something you put over bare soil to cover it up. Bare soil is dangerous: it lets water evaporate quickly, meaning you have to water more often; it exposes plant roots to temperature changes, possibly damaging the plant; and it will soon sprout weeds, equaling more work for you.

Mulch can be almost anything: newspaper, black plastic, gravel, shredded leaves or wood chips, just to name a few options. Bonus: An organic mulch, like wood chips, will add nutrients to the soil as it decays, gradually turning into compost and feeding your plants.

Compost:
Plant matter decayed until it’s turned into rich, dark stuff that looks like soil, with its nutrients immediately available to nourish plants. It’s great to spread around your plants because it improves soil texture.

A bonus feature is the wood chipper, which can demolish branches up to two inches thick. This workhorse can hold a whopping 32 cubic feet, or 26 bushels, of debris.

Composters
Shredded leaves are already well on their way to becoming compost, so you might as well continue the process and return this resource to your garden.

Must: Compost Pile
There are many composters on the market. But the simplest method of all is to leave plant debris in a pile for a year (the “cold” method); it will gradually decompose. Adding the right  mix of “greens” (grass clippings, kitchen vegetable scraps) and “browns” (dead leaves), and the right amount of water and air (from turning the pile over), will help the compost “cook” chemically (the “hot” method).

Lust: Composter
Trials suggest that compost tumblers don’t actually make compost faster than the pile method. But they do make it e asier to mix the compost, which means you might turn it more frequently and thus help your compost cook more thoroughly. They also are neater to look at, pest-resistant (though not insect-proof) and odorless. The PBM Group’s ComposTumbler and the Mantis ComposT-Twin are deluxe hand-cranked models. The crank rotates a drum to mix the decomposing matter inside. The drum is high enough off the ground that to gather finished compost, you simply push a wheelbarrow under the drum, position the door over it, open and pour out the compost–much easier than having to shovel it out of piles, bins or lower drums. The ComposT-Twin has two smaller barrels side by side so you can start one and let it “cook” while adding new compost ingredients to the other one.

Lawn Dethatchers
You’ve heard of thatched-roof cottages. Thatch is simply dead grass; the reason it makes a good roof is because it’s waterproof. Thatch in your lawn will prevent water from penetrating the soil.

Do You Have Thatch?
How can you tell if you have a thatch problem?

Every lawn has some thatch. A thin layer (less than a half-inch thick) is actually desirable because it prevents water from evaporating too quickly from the soil. But do you have too much?

Part the grass stems and try to look at your soil. If that’s impossible, because there’s a whitish, straw-like layer of dead stuff between the green and the soil, then congratulations–you have thatch. Another method is to remove a core of soil from the lawn with a trowel or probe. This makes it easy to see how thick the layer of thatch is. Half an inch to an inch of thatch is considered a small problem. If it’s more than an inch thick, you have a serious thatch problem.

If grass is like hair growing on a scalp (the soil), then thatch is like dandruff. It’s a layer of dead matter–grass stems, roots and grass clippings–that settles on the soil surface, below the green part of your lawn. When thatch builds up, usually on lawns that have been heavily watered or fertilized, it prevents sunlight, water, oxygen and nutrients from reaching the grass roots–literally starving the plants. If the thatch layer is a half-inch thick or more, you need to dethatch.
 
Dethatching is best done in early spring or late fall when your grass isn’t growing actively.

Must: Scrake
There are special thatch rakes, called scrakes, created just for dethatching. Scrakes have sharp, metal blades (instead of tines) attached to a horizontal bar. The knife blades cut through the thatch and help pull it to the surface.

In lieu of a scrake, rake your lawn–hard. The tines of the rake will pull thatch out. For small jobs (a half- to one-inch of thatch), a rake is actually better than a power tool because it’s less damaging to the grass. Even if you use a power dethatcher, you’ll still have to rake up the thatch you pull out afterwards.

Lust: Dethatcher Attachment
A dethatching attachment for your lawn tractor works like a power mower except its spring-loaded tines move vertically down to the soil surface instead of across. The combing action removes the thatch. Springs mean the tines have some “give” so they don’t tear the soil. Unlike many dethatchers on the market, the Agri-Fab 48” tine dethatcher is a lightweight piece of equipment that is easy to pick up and move. Its steel tray can be weighted down to the appropriate height for your lawn.

Lawn Aerators
In the quest for a thick, healthy lawn, raking leaves and dethatching go a long way. The final step for people with compacted or drought-hardened soil is aeration.

Is Your Soil Compacted?
Your daughter’s 30-member marching band practices every day in your yard. Your son always parks his loaded truck in the same spot on the lawn. Abuse like this, repeated many times, will compact soil: squeezing out the air spaces between soil particles so it loses its naturally porous texture.

When there are no more spaces for air, water and nutrients can’t seep into the ground to feed grass roots, either.

How can you tell if your soil is compacted? Try the shovel test: if you can’t push a shovel in half an inch, it’s compacted. Another clue is if water stands on the surface of the lawn after it rains because it can’t seep into the hard ground.

Aerating your lawn means, basically, punching holes into the hard soil to allow water, oxygen and nutrients to penetrate deeper. This is done by pushing into the ground either solid spikes or hollow cylinders. Hollow cylinders have the added benefit of popping out “plugs” of soil through the center of the cylinder and leaving them on the lawn surface. Even though these soil remnants may look temporarily unsightly, the plug method is considered more effective because of this exchange of materials: Soil below the surface is brought up to the top, where it’s left to decay on its own and its nutrients gradually seep back into the ground, while water and fertilizer from above ground are brought down into the soil, where they’ll benefit grass roots.

Leaving the plugs on the lawn surface looks raggedy for a few days, but the benefits of aeration will pay off in much healthier grass that will spread more thickly and compete better against weeds.

Aerating is usually done immediately after dethatching in the spring or fall, when the grass is not actively growing. For best results, it should be done about once every three years.

Must: Garden Fork
Simple aeration jobs can be done by hand or by foot. The hand method uses a garden fork. You poke its tines into the ground, usually about one to two inches deep, and wiggle the fork to loosen the soil. The foot method requires wearing shoes with spikes on the bottom. This job can be fun, for about two minutes. Imagine the joy of plunging your garden fork into or treading with spiked shoes on every square inch of your yard! Manual aerating is recommended only for perfectionists with very small lawns.

Lust: Plug Aerator Attachment
This is one job where the machine definitely makes more sense. Agri-Fab’s 48” plug aerator removes soil plugs up to three inches deep with 32 galvanized steel points that are rotated on spools into the soil. A single lever makes it convenient to raise all the wheels at once; especially handy for things like driving across concrete (other models require you to manipulate different levers for each wheel). It’s ideal for both heavily compacted and drought-damaged areas.

This article first appeared in the Fall/Winter 2006 issue of Hobby Farm Home magazine. Pick up a copy at your local bookstore or tack and feed store or buy one online.