Categories
Equipment

Making Your Own Hay

Here are some reasons for making your own hay. According to the University of Missouri, most forages lose 20 percent of their total digestible nutrients and 40 percent protein just 10 days after their optimal harvest stages. One reason stock keepers make they own hay is because later cuttings spell higher yields, many commercial haymakers choose volume over quality. Others get involve in making their own hay because the land is waiting—instead of mowing or bush hogging fallow land to push back encroaching woodland, they fertilize and seed it to hay. And some folks make their own hay just savor the satisfaction of working the land with equipment. Anyone can put up enough hay by hand for a hutch of bunnies or a pet lamb.

A mechanically minded hobby farmer can easily bale plenty for a beef steer or a pair of horses using inexpensive, vintage haying machinery. Even investing in secondhand modern equipment makes sense if you want control of how and when your own hay is made.

Think you might like to try? Keeping in mind that anything beyond a bare-bones introduction to machinery selection and haymaking is beyond the scope of a magazine article, here are some things to consider.

Equipment

Unless you put up your own hay strictly by hand, you’ll need a fairly hefty tractor, a mower, rake and baler. In some parts of the country, folks using old-style mowers add a tedder or crimper to the mix. Your best source of advice is a friendly neighbor who knows farm equipment and can help you get started the right way. Most farmers are happy to show new folks the ropes.

Unless you already have one of today’s breed of brawny small farm tractors in your stable, you’ll want to consider buying one. Yesterday’s compact tractors weren’t designed for heavy-duty applications, so if new isn’t an option, your older tractor will need to be a big powerhouse for baling. But “old” is relative.

We’ve put up hay with a 1947 John Deere B and a 1970 Case IH diesel—both doing a fine job. Since restoring vintage tractors is a popular country hobby and mechanical assistance is readily available, age isn’t necessarily a liability when you buy.

While Webster’s defines “antique” as something made at least 100 years ago, many farmers generally define antique tractors as those manufactured before 1975. These older models are readily available, relatively inexpensive, and ideal for small haying operations. Drawbacks: Some can be quirky and require a modicum of mechanical savvy to keep running well. And unless you or a previous owner adds them, they aren’t equipped with today’s important safety features.

Next you’ll need a mower. The simplest and the best suited to extremely antique horsepower is your basic sickle mower. Its drop-down cutting bar shears hay off and drops it as is, unlike a more modern haybine, which cuts but also crimps and windrows in a single pass, a better bet if your tractor is big enough to power one. You’ll also need a rake to turn the hay so its underside dries and finally, a baler.

Assess your needs. Do you want to put up small square bales or big round ones? Small square bales require more handling than big but hog less space under cover. Picky eaters like sheep and goats, that sometimes trample hay and then ignore it, are best fed square bales because you can dole it out a few flakes at a time. Big bales must be lugged from the hay meadow to storage and later hauled to your livestock to be fed, and only the brawniest older tractors with the best hydraulics can handle a hay-moving spike. However, even mammoth bales can be dragged singly behind a tractor–but you’ll lose hay and quality if you do it. Smaller round bales can sometimes be manhandled into a pickup bed by a pair of strapping humans, but it’s definitely a job. Small square bales are generally a hobby farmer’s better choice.

Less savvy buyers should purchase used haying equipment from a machinery dealer, or a friend or family member who knows the piece’s history and will likely stand behind it. If you’re the adventurous type, you can also answer ads and shop at farm auctions.

Tractor Rating System

In 1919 the University of Nebraska developed a comprehensive rating system they used to evaluate practically every make and model of tractor built between 1920 and 1984. The Nebraska Tractor Tests established a tractor’s horsepower by measuring the usable power at its drawbar and power take off (PTO). Today’s compact tractor horsepower is determined by measuring crankshaft power, so vintage and modern horsepower ratings aren’t the same. An antique tractor in the 25-horsepower range can power a small, PTO-driven square baler but a bigger oldie is a better investment in muscle and versatility.

Choose a make popular in your locale. You’ll find a better selection of tractors to choose from and more secondhand parts at machinery salvage lots. If you’re mechanical, you can pick up a manual and tools and make most repairs yourself; vintage tractors are far less complex than newer models and well within the ken of most automotive mechanics. If you aren’t mechanical, speak to a mechanic before you buy.

Parts are rarely a problem. New parts can be ordered from manufacturers through automotive parts dealers or from farm suppliers. Used parts? Tractor graveyards usually dot the rural landscape. Unless you choose a truly orphan make, you’ll be readily supplied.

Gas or diesel? Diesel tractors are generally more fuel efficient but they reek of fuel and are notoriously picky about firing when temperatures plunge below freezing.

Evaluating Used Tractors

Picture this. You’re tooling along a country road when you spot a likely prospect parked by the road with a “for sale” sign propped against its front tire. Before even considering plunking down money for the rig, you should have a mechanic take a look, but you can pre-evaluate it nicely by yourself.

Ask for particulars. Is the owner’s manual available? If it is, check to see where the tractor’s serial number is located, find it and jot it down. To the uninitiated eye, various tractor models look much alike; you’ll want to reference the serial number later to be certain you’re buying what’s represented.

No manual? Search for numbers punched or pressed on a smooth, readily accessible surface, sometimes on a mounted plate but never molded into cast-iron parts.

Why is the tractor for sale? Will the seller detail its history and possible foibles? If it sells with a front-end loader, a plus for manure-scooping livestock keepers, know that these devices are notoriously hard on a transmission, clutch, front axle and tires. Examine them extra carefully. If it lacks fenders, consider shopping elsewhere. Fenders keep the operator from being thrown on a wheel if tossed out of the seat. They aren’t optional equipment.

About that seat … A comfy back feels mighty nice after half a dozen hours in the saddle. And if you hit a rock or woodchuck hole, it’s easier to be flung from a hard, metal pan than a padded one with a back and arm rests.

Brandnew paint? Was it carefully applied to make the tractor look nicer or splashed on to cover something?

Have new safety warning decals been applied? If not and novice operators will be piloting the unit, factor in the cost of replacing them–they’re essential.

Carefully check tires, front and rear. Weather checking is acceptable, cracks aren’t. Rear tires should show at least an inch of usable tread. Keep in mind that replacement tires are costly, running $400 each and up.

Is it equipped with a three-point hitch? Since most implements require one, older tractors may need to be retrofitted with a fairly pricey three-point hitch adapter.

There are several types of three-point hitches, so if you already own implements, be certain they’re compatible. If the tractor sells with a complement of implements to fit it (and many vintage tractors do), compatibility is less of an issue. The tractor’s dangerous, clothes-grabbing, limb-ripping PTO shafts must be completely encased in guards–always. If they aren’t, plan to install them immediately if you buy.

Search the engine block, manifold, transmission casing and other cast-iron parts for cracks, repaired or otherwise, as well as smooth spots indicating epoxy fixes. Repair welds should be neat and strong, not hastily splashed on.

Pools or splotches of oil under the tractor bespeak leaky seals or gaskets; don’t buy until your mechanic takes a look. Excess grease or oil anywhere on the tractor should be suspect.

Check the oil. If it’s milky it has water in it. If sludgy, suspect combustion problems.

Start the tractor. Some antique tractors have magneto ignitions, meaning you can fire up without a battery if you’re willing to pull or crank to start it. This sounds good in theory but it’s difficult in practice. You’ll wisely opt for a tractor that starts easily. Unless you’re mechanically savvy and don’t mind rebuilding an engine from scratch, don’t buy a tractor that the owner can’t start. You’ll likely spot a hefty puff of blue smoke as it fires, especially if the tractor hasn’t been started for a while, but if blue smoking continues, the engine is burning oil. White smoke can indicate water in the cylinders, a bad head gasket or a cracked block. Beware! Black smoke marks bad timing or a poorly adjusted carburetor. No smoke is best of all.

Run the engine until it’s warm. It should run smoothly while idling and at full throttle. Check the oil pressure and hydraulics to make certain they stay up, then go for a ride. Listen for engine pings and knocks. Gears should shift smoothly. Second gear is generally used for plowing so it’s the gear most likely to be troublesome if things are wrong; consider transmission whine (in second gear) a red alert.

A vintage tractors’ steering will likely be loose but more than one-sixth turn requires fixing.

If everything looks good, arrange for your mechanic to take a look. Ask if the seller guarantees the tractor’s engine, transmission and hydraulics and if you buy, expect to get it in writing.

Shopping at a machinery dealership is much the same, but in addition, ask for the previous owner’s name and phone number so you can discuss the unit with him. Farm auctions are trickier. Unless you run your tests on a pre-sale preview day, you won’t be able to drive the tractor. If a preview isn’t an option, arrive early on auction day and be there when the machinery is demonstrated.

Evaluating Used Implements

Check used implements’ chains and sprockets, belts and bearings for excessive wear. Make sure that there are no missing belts or chains.

Is the implement’s frame square and its tires in fair condition? Sickle mower blades and guards and haybine crimper rollers are sometimes bent, worn or missing. Factor in the cost of replacements.

Hay rake and square baler pickup springs should be present and in decent condition. The bars that run a hay rake’s spring fingers shouldn’t be terribly worn. Frayed or broken adjustment cables need replacement.

Check the auger that feeds hay into a square baler to determine it isn’t bent or broken and the baler’s packing plunger slides freely. Check for missing, bent or worn cutter and twine knives.

Round baler roller belts and bearings take a lot of abuse. So do hydraulic hoses and cylinders on these larger machines. Basically, if an implement’s parts are unduly worn or missing, suspect hard use and abuse and buy elsewhere.

Types of Hay to Make

You’ve got your equipment and you’re champing at the bit to make hay. What now? Because each type of hay is mown when a certain percentage of its flowers have opened–called its “stage of bloom”–you’ll need to know exactly when to cut.

Alfalfa is best mown in bud (just before its blossoms open) to one-tenth bloom. Alfalfa yields two or three crops in the northern states and as many as six cuttings farther south, making it a favorite hay crop wherever it grows.

Clover is another popular legume hay, but it’s harder to dry in the field, making it harder for a novice to put up well. If you grow it, cut clover when one-fifth to one-half of its flowers are in bloom. Alfalfa and clover are often planted with grasses to alter the finished hay’s nutrient balance but also because legume hays play out with the passage of time. Stands of straight alfalfa or clover generally demand reseeding every four to six years. In a legume-grass mixture, as the legumes are depleted, grasses take over and continue producing bumper hay crops for many more years. Mow alfalfa-grass mixtures when the alfalfa component is ready for the sickle, but mow clover grasses when the primary grasses are ready to cut.

Primary grass hays include tall fescue, brome, timothy and orchard grass. Straight grass hays dry easier, so they rarely mold and are better bets for novice haymakers. Tall fescue and timothy are best mown in “boot” stage, when their undeveloped seed heads are fit to burst from the top of their stems. Cut brome and orchard grasses when their heads are emerging.

Even native grasses make “filler” hay to feed with more nutritious feedstuffs, for adding fiber to certain livestock diets.

Weather enters the equation too. You’ll need several consecutive days of fine, fair weather to put up hay dry. Coordinating weather and bloom time is art and science that takes practice to perfect.

Haymaking Alternatives Make Sense Too

Not every small farmer wants to make hay, yet we all want control over the quality and price of the forage our livestock consume. “Even if a hobby farmer had the time and could find inexpensive equipment, he might be lucky to just break even,” says Highland Cattle breeders Nick and Anneke Self of Bent Creek Farm in Greeneville, Tenn.”You have to consider the cost of the equipment, maintaining it, your time and the weather,” says Anneke. “Nick works full-time off the farm and isn’t always able to take off work during peak haying season, so we’ve found it’s more economical to buy the hay and use our pastures for grazing. Another possibility is to form a hay co-op; a small group of hobby farmers in our county are discussing forming one. This would increase our buying power because of the volume of hay we could buy together, and as a group we may have more control over the quality of hay being produced by our supplier.”

For an hourly or per-bale fee, or for a percentage of the harvest, hobby farmers can usually find a custom baler to handle all or part of the process. “This works well for us but only since finding a responsible baler,” says Ann Helmuth of Rochester, Minn. “The first man we hired did his own hay first. Ours went well past prime and our fussy goats wasted a lot of it. The next year he cut all of his clients’ hay at once and before he got to baling ours it was rained on—twice! It works, but be careful who you hire.”

Small-Scale Haymaking: Our Forefathers’ Way (With a Few Modern Twists)

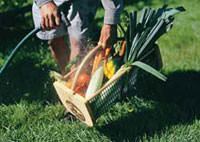
If your winter hay needs aren’t great and you have an unused corner of an outbuilding for storage, consider putting up premium hay for rabbits, a goat or a miniature horse the old-fashioned way: by hand.

The trick is to make good hay so every mouthful packs a punch. Touch base with your county extension agent or do your homework to determine which forage works best for your critters, then prepare, fertilize and plant a small hay plot (¼ to one acre) accordingly. Just like the big hay makers, be set to harvest at optimal bloom during a window of warm, sunny days.

For this, you’ll need a mower. You could choose an old-time scythe or sickle if you can find someone to teach you how to use it, but the 21st century counterparts—heavy-duty string trimmers and brush cutters (see “Tools of the Trade,” Summer 2002)—will save your back and do the work in a fraction of the time.

Your hay should be turned at least twice. Our forefathers used wooden peg-toothed haying rakes; if you’re handy with tools you could make one, but a wide-toothed garden rake will do. Check frequently and when mown and turned hay is fully dry, but still green and sweet smelling, hook a cart to your lawn tractor, grab your pitchfork and bring in the harvest.

Store your hay in a well-ventilated area, out of direct sunlight. Don’t fork it directly on the floor, place it atop wooden pallets to prevent ground contact spoilage. Pack it down and pile it high. It’s best to leave new hay uncovered for a few weeks until it finishes curing, but then top it with tarps to preserve cleanliness and quality.

Still want to make your own hay? Buy vintage machinery to do it with? Print and online resources can get you started, but for the genuine, first-hand skinny, always touch base with a friendly veteran farmer and court his advice. A close second best is your county agricultural extension agent.

This article first appeared in the June/July 2003 issue of Hobby Farms magazine. 

Categories
Homesteading

Ways to Enjoy the Transition to Fall and Winter

Give thanks for the bounty of your garden ... and other ways to prepare for fall and winter.
© Maggie Oster

Here’s a peek at some of the ways Lisa Kivirist, a Hobby Farms and Hobby Farm Home contributor, and her family enjoy the transition from summer to fall and winter on their farm in southeastern Wisconsin.
 
Extra: Farm Video Recommendations!

Fall ushers in abundance with a pile of pumpkins and a rush of outdoor farm chores as we spread a blanket of compost on the garden beds, store the picnic table in the shed and clean the chicken coop one last time before spring.

Fall and winter provide ample opportunity to personally bloom while the land grows dormant.

Explore these To Do’s for Fall and Winter:

  • Give thanks for the bounty of your garden.
  • Begin to catch up on house projects and other loose ends.
  • Consider ways to diversify farm income outside of crops or livestock.
  • If animal responsibilities permit or can be bartered with a neighbor, consider attending a farming conference or doing some traveling.
  • Adopt a fruit tree. Chances are, there’s a fruit tree near you that sits ripe for picking–all you need to do is ask.
  • Layer up. “Nothing keeps my whole body warmer than a thin pair of cotton socks layered with the bulk wool kinds,” says Kivirist.
  • Warm up with luminaries. Add a dash of warmth outside as the snow piles up with homemade luminaries. We save white paper bags from our local bakery all year and then fill them with snow, sticking a pillar candle inside that we light at dusk. Don’t forget to blow them out before crawling under the covers for the night.
  • Plant garlic. In the flurry of harvest, remember spring with fall garlic plantings. Break apart the best heads from the garlic harvest and plant them around Columbus Day (a little later in the Deep South) so the bulbs can grow a little root before winter and can survive the frost. Garlic planted in spring doesn’t do nearly as well as fall plantings.

    Winter Farm Video Recommendations
    Use a home movie night to foster inspiration for farm living:

    • The Real Dirt on Farmer John
      A fascinating portrayal of John Peterson, a farmer who refused to yield to economic pressures and revitalized his conventional Midwest family farm into one of the largest organic CSA (community supported agriculture) in the country. 
    • Cold Mountain
      A Civil War-era drama telling the tale of a soldier’s treacherous journey home while his lady love back home discovers redeeming joy and fulfillment rejuvenating her father’s farm, cultivating crops and community along the way. 
    • Future of Food
      An eye-opening documentary that sheds light on the, at times, shadowy relationship between agriculture, big business and government.
    • Little House on the Prairie TV Series
      Could my Laura Ingalls fascination as a kid have fueled my jump from suburbia upbringing to tending hens on a farmstead? Fortunately, the series is now available on DVD for further research.

    ~ LK

Categories
Crops & Gardening

Grow a Colorful Cutting Garden

Fresh-cut, homegrown flowers transform a house into a home. Cutting armfuls of flowers you grew, and then making arrangements, drying them or giving them away is a true country pleasure. For years, I resisted harvesting flowers from my gardens, afraid I would ruin the wonderful display. The perfect solution was to start a cutting garden.

This new garden was fun to plan. I had no reason to worry about the design; I simply planted the flowers in rows for easy plant care and harvest. I didn’t need to worry about color schemes; I could welcome flowers of all colors. Now, spring, summer and fall, I can cut to my heart’s content! If you love flowers in your home, try adding a cutting garden.

Where you plan your cutting garden will determine the plants you will be able to use. Check the location to see how much sunlight it receives during the day. If it is sunny in the morning but shady by noon, all but the deepest shade plants will thrive. Hot afternoon sun locations are best for the sun-loving plants. Note if the area holds water or if it drains quickly.

Perennials form the backbone of any cutting garden. The plants live and bloom for years but their blooming season is often counted in weeks instead of months. When you begin to plan your garden, don’t forget to check when the plants bloom. Be sure to add spring, summer and fall bloomers to your cutting garden. By staggering the bloom time, you will have plenty of flowers to grace your home.

Spring Color for Cutting

When the snow recedes and the warm winds begin to blow, the spring bloomers brighten the grey landscape. Be sure to plant enough spring flowers to add some cheer to the cool spring days. Early bird bloomers have the shortest bloom times.

Lenten Rose (Hellebores)
Often blooming while snow still covers the ground, this tough and tenacious perennial (pictured above) has wonderful flowers.  Flowers can be single or double, and come in a large variety of colors including green. Plant these shade lovers in well drained locations for years of blooms. Harvest the flowers when they are just opening.
zones 4 to 9

Columbine (Aquilegia)
From April to June, columbines add their special beauty to the garden. The petals have spurs that project behind the flower which gives them an unusual look. For areas of the garden where you need some height, the McKanna’s Giants reach 36 inches and come in a wide array of colors.  I love the long strong stem of these for cutting.  For a more compact plant, look for the dwarf Dragonfly Hybrids; they only grow 16 inches.  In cooler climates the plants can tolerate sun, but require shade in warmer climates, and enjoy rich well drained soils. Cut when the blooms just begin to open.
zones 3 to 9

Dianthus
From lowly groundcovers to the taller varieties, dianthus performs well in almost any garden. One whiff of the spicy fragrance and you can understand why the flower is popular in cut arrangements. Dianthus do best in full sun and come in colors ranging from pure white to purple. The lovely grey green foliage makes a nice contrast to the flowers. When the flowers first open is the best time to harvest.
zones 3 to 8

Bleeding Hearts (Dicentra)
Bleeding hearts flowers are always a welcome sight. The stems with dainty hearts delicately dangling in a row make great cut flowers and add a special touch to any arrangement. The common bleeding heart had dark pink flowers and grows to 36 inches. These plants enjoy shady locations with rich moist soil. If you have a sunnier spot, try Dicentra eximia commonly called Fringed Bleeding heart. More compact, growing only 10 to 18 inches , this plant blooms for longer periods of time than common bleeding heart and tolerates some sun.  Both types of bleeding hearts are available in white cultivars. Cut bleeding hearts for arrangements when the flowers are open.
zones 4 to 8

Peonies
What would spring be like without fragrant peony flowers? Though their blooming season is short, the big beautiful flowers are a must for any cutting garden. Hardy and easy to grow, peonies enjoy full sun sites, but can tolerate some shade. The colors range from white to red with a few yellow varieties. The double flowers tend to be the most fragrant, but single flowers have a lovely form. Cut theses flowers when they are just opening.
zones 2 to 8

Oriental poppy (Papaver)
Late spring brings the incredibly showy flowers of the oriental poppy. Brilliant colors of the large crepe paper like flowers make these plants a must for a cutting garden.  They love full sun and well- drained soil but only bloom a few short weeks. Cut the flowers in the cool morning before the flowers fully open.
zones 3 to 7

Lupine
Lupine’s long spikes of pea-like flowers are held above the plant’s attractive foliage. The flowers come in many colors, including some bi-colors. Lupine grows best in acid soil and likes a shady spot in the garden. Harvest when most of the buds are open.
zones 4 to 8

Summer Color

As the warmer weather of summer approaches, the spring bloomers slip away, replaced by the incredible array of summer bloomers.

Just a few of the many to chose from, these are plants that are hardy in most gardens and have a longer bloom time than many summer perennials.

Shasta daisy (Leucanthemum)
White daisies compliment any flower arrangement and the perennial Shasta daisies are great bloomers. While most shastas have a short bloom period, ‘Becky’ blooms till frost. This tough plant fills out quickly and produces masses of flowers, making it my all time favorite daisy. As a cut flower it is excellent due to its sturdy stem that holds up well in arrangements. Plant is full sun, and be prepared to share this plant with friends since the clumps will grow quickly. Cut the flowers when they are fully open.
zones 4 to 9

Delphinium
The tall stately beauties of the cutting garden, these plants produce masses of flowers. Strong stems make them great cut flowers in arrangements. “Pacific Giants” come in a variety of colors, are mildew resistant and grow around 4 feet tall. Look for ‘Magic Fountains’ if you need a shorter plant. Known best for brilliant blue flowers, they also come in pink, red and white. Plant in full sun and well-drained soil for the best results. Harvest when half of the florets are open.
zones 4 to 8

Coneflowers (Echinacea)
Native to the North American plains, coneflowers have lovely flowers with drooping petals. These hardy, adaptable plants produce excellent cut flowers and deserve a place in any cutting garden. The standard coneflower has bright pink flowers, but ‘White Swan’ is an excellent cultivar with white flowers. Exciting  new coneflowers varieties now come in shades of mango, orange and gold. Look for ‘Sunrise’, ‘Sunset’, and Sundown’ if you want these colors in your garden. Coneflowers tolerate many different conditions but do enjoy a fair amount of sun, and can be cut at any time. At the end of the season, don’t remove the spent flowers, the birds love the seeds.
zones 2 to 8

Phlox
If fragrance is a must in your garden, be sure to plant phlox! Ranging from white to purple, you are sure to find a phlox that fits your garden needs.  Look for varieties resistant to powdery mildew, a common problem of this plant. “David’, has wonderful white flowers and is very disease resistant. ‘Robert Poore’ has rosy purple flowers with strong stems for cutting. Lovely lilac blooms and sweet scent make ‘Franz Schubert’ one of my favorite phlox.  When half of the flowers are open is the best time to cut to take in for arrangements.
zones 4 to 8

Russian Sage (Perovskia)
This plant packs a punch!  The silvery green foliage contrasts nicely with the lovely spikes of lavender blue flowers and an added bonus is the herb like fragrance of the plant. Russian sage blooms till frost and produces plenty of flowers. Plant size reaches four to five feet tall by three to four feet wide, with an open airy look.  Tolerant of poor soil, drought and a range of pH, Russian Sage can grow in a variety of conditions. This plant deserves a sunny place in any cutting garden. Cut when most of the flowers are open.
zones 3 to 9

Coreopsis
For your garden border, try coreopsis. Growing from 8 inches to 2 feet, these sun loving plants produce flowers for a long period of time. Thread leaf coreopsis, has fern like foliage and blooms profusely. The yellow, pink or red flowers are small but the foliage adds a nice texture to an arrangement. Taller growing ‘Early Sunrise’ has large, bright yellow semi-double flowers and is one of my favorite coreopsis.  Harvest when the flowers are open.
zones 4 to 9

Blanket flower (Gaillardia)
Easy to grow Blanket flower is a lovely addition to the cutting garden. The daisy like flowers have yellow tips and rust centers and a long bloom time. For dwarf plants look for   ‘Goblin’ and ‘Baby Cole’. ‘Burgundy’ is taller and has solid red flowers while Dazzler’ had the bicolor red and yellow flowers. ‘Red Plume’ has a dark red, double flower .Plant them in full sun and well drained soil then sit back and enjoy.  Cut the flowers when they are fully open.
zones 2 to 10

Fall Bloomers

When cool weather arrives, the summer perennials decide they are done, and the fall bloomers begin their show.

Sneezeweed (Helenium)
Once used in place of snuff to induce sneezing, this wildflower is finding a home in the fall garden. The  yellow, orange or red daisylike flowers open  in late summer and the plant  grows  3 to 5 feet.. This plant is excellent if you have clay soil and enjoys a sunny spot. Cut when the flowers just open.
zones 3 to 9

Goldenrod (Solidago)
Because ragweed and goldenrod bloom at the same time, goldenrod has long been wrongly blamed for causing hay fever. This incredible plant is finally getting the respect it deserves in the fall garden. Unlike native goldenrods, the new varieties are more compact and less invasive.  ‘Fireworks’  grows three feet and blooms vigoursly till frost .’Golden Fleece’  is a more compact varitiey that grows about 18 inches tall. Give goldenrod plenty of sun and once they are established, they are tolerant of drought. Cut these flowers when some of the florets are just opening
zones 2 to 9

Asters
In shades of pink, red, purple, blue and white, these delicate daisy-like blossoms add punch to the autumn garden. There is an abundance of varieties available, with dwarf plants and ones that grow 3-5 feet. I particularly love the dark purple of the ‘Purple Dome’ and the brilliant red of ‘Winston Churchill’. The airy foliage is a nice contrast to the flowers and helps fill in fall bouquets. Give them a sunny site and enjoy the show. Cut the flowers when most of the flowers are open.
zones 4 to 9

Turtle head (Chelone)
Don’t let the name of this perennial put you off! Nick-named for blossoms shaped like turtles heads, this plant adds a lot of interest to the fall garden. Coming in shades of white, pink or red, turtle head has attractive foliage and generally, the plant is 3 feet tall and 2 feet wide. Partial shade to full sun and a consistently moist to wet, organic soil are ideal conditions for growth. Cut the flowers when they are just opening.
zones 2 to 9

Toad Lily (Tricyrtis)
Here is another lovely plant with a less than desirable name. The speckled pink flowers look like orchids and rise above lovely foliage.  New varieties include those with variegated foliage and a few even have yellow flowers. ‘Miyazaki’ and ‘Amethystina’ are nice varieties. Plant toad lilies in moist but well-drained soil in part to full shade. To bring the flowers in for arrangements, pick when buds show color and are just beginning to open.
zones 4 to 9

Japanese Anemone
Tall and stately, the anemones add pink or white flowers to the fall garden. An excellent selection is ‘Honorine Joubert’. This vigorous plant grows up to five feet and produces masses of single white flowers.  ‘Max Vogel’ is another tall plant with single pink flowers. Where you need a shorter plant, look for ‘Prince Henry’. It only reaches two feet and had semi-double flowers that are rosy pink. Japanese anemones need well draining soil and shade. Cut the flowers as the buds open.
zones 5 to 8

Sedum (Stonecrop) – Sedum makes a great cutting garden plant. It requires minimal attention and is drought tolerant.   ‘Autumn Joy’ is the traditional variety but newer varieties such as ‘Bertram Anderson, ‘Brilliant’ and ‘Matrona’ are excellent choices. Give sedum full sun and well drained soil and sit back and enjoy the show.  Cut when most of the florets are open.
zones 3 to 9

Categories
Crops & Gardening

Popular Farmers’ Market Heirloom Vegetables

By Andy Tomolonis

Try some interesting heirloom vegetables

Funky Heirlooms


If you’re interested in moving beyond common vegetables (tomatoes, peppers and lettuce), try heirloom varieties of these more unusual choices:

* Artichoke  * Leeks       
* Chinese cabbage * Endive 
* Peanuts * Parsnips 
* Chicory* Tomatillo 
* Amaranth* Salsify 
* Okra * Rhubarb
* Celeriac* Crowder peas
* Rutabaga*Sweet potatoes

Here’s the Seeds!
Click here for a wealth of heirloom seed resources.

Did You Know …
Hobby Farms Editor in Chief Karen Keb Acevedo was a keynote speaker at the Bakersville 8th Annual Spring Planting Festival

Heirloom vegetables are grabbing an increasing share of the space at farmers’ markets due to superior flavor and the novelty of their often colorful hues.

A customer favorite is the Brandywine tomato. Its pinkish-red skin doesn’t hold up well to being poked and squeezed by human hands, but buyers everywhere are aware of Brandywine’s reputation as possibly the world’s best-tasting tomato.

Growers are just as knowledgeable about Brandywine’s lack of productivity and that the fruits sometimes split or appear misshapen. But the large, vigorous, potato-leaf vines are more disease resistant than other many heirlooms.

A more eye-catching tomato with a taste that rivals Brandywine, is Cherokee Purple, a plump and meaty, purplish-brown tomato with shoulders that stay green even when fruit is ripe.

“They’re good looking and the flavor is outstanding,” says Ryan Voiland, owner of Red Fire Organic Farm in Granby, Mass.

Voiland grows more than 300 varieties of vegetables, with at least 75 different tomatoes.

A few of his favorites:

  • Striped German, a big, late-season tomato with yellow fruit that’s marbled with streaks of crimson. Flavor is extremely sweet.
  • Eva Purple Ball, a purplish-pink tomato from Germany. Salad-sized fruit are about two inches in diameter, and perfectly round and blemish free.
  • Federle, a large, deep-red paste tomato shaped like a cow’s horn pepper. Fruit reaches seven inches long and flavor is much better than other paste tomatoes.
What is an Heirloom?
Like the seeds, the term has been passed down for many years.

While it’s not an official designation, most seed experts agree that to be classified as an heirloom, a variety must be open-pollinated and not be the quick result of deliberately crossing one variety with another. And when planted, the seeds that are harvested will be stable, showing all the basic characteristics of its parents.

Some plants called heirlooms today have been selectively pollinated and then stabilized, which means that seeds from the offspring are collected and planted, for several generations until the new plants retain the full characteristics of their parents.

These crosses eventually become open-pollinated varieties and can be called heirlooms if they’ve been successfully grown for more than 50 years.

–AT

Voiland also likes heirloom Antohi Romanian pepper, a sweet, elongated frying pepper, and red- or green-leaf Deer’s Tongue lettuce, which looks like a butterhead lettuce at its base, but the tops form a rosette of leaves shaped like deer’s tongues.

“The flavor is excellent and the ribs have a tender crunch.”

Another New England organic farmer, Bryan Connolly of Mansfield, Conn., takes pride in bringing heirlooms to market.

“They provide lots of color and eye-candy that you don’t get in other varieties,” he says.

One colorful combination he sells is a rainbow radish assortment.

He mixes red-and-round Champion radishes with violet-magenta Purple Plum radishes and torpedo-shaped red-and-white French Breakfast radishes in a single bunch.

It’s a winning combination at the University of Connecticut farmers’ market, he says.

About the Author: Andy Tomolonis is a gardener and freelance writer living in suburban Boston.

Top

This article contains excerpts from “A Taste of Yesterday” by Andy Tomolonis. It first appeared in Heirloom Farm, a recent issue of the Popular Farming Series. For an indepth, detailed and full-color exploration of heirlooms, get a copy of Heirloom Farm online or in a farm supply store near you.


Categories
Crops & Gardening

Crop Profile: Strawberries

The agricultural juggernaut in California has produced increasingly more millions of strawberries every year for the past 40 years, creating consumer demand for this delectable fruit. American consumers are now accustomed to consuming more fresh strawberries than ever, and lucky you, you can grow them right outside your doorstep!

Types of Strawberries

There are three main types of strawberries (June bearing, day neutral and ever bearing) and hundreds of varieties of each of the types. June-bearing strawberries (also called short-day strawberries) are the most commonly used varieties for commercial growers. These plants are generally planted in the fall and then produce their best crop of fruit the following year. Day-neutral types are usually planted in the spring and produce fruit the first year. Ever-bearing varieties are planted at various times and produces two smaller crops, one in late-June and the second in late-August.

Many new strawberry varieties are introduced every season. Strawberries hybridize easily, and farmers have been busy for the last century breeding tolerance to various natural elements—earliness or lateness, color, flavor retention and storage capacity.

Camarosa, a June-bearing strawberry has been the overwhelmingly favorite California commercial variety and is replanted every year as an annual crop. U-Pick operations across the United States, Canada and Europe tend to grow June-bearing strawberries, too, but they keep the garden beds going and get two or three years of production from each planting.

Because seed catalogs, with all their luscious illustrations of tempting red fruits, usually come from some other states, their advice concerning strawberry types and varieties can be confusing. Your best bet is to talk to your neighbors and your local cooperative-extension agent, nod politely, experiment a little, and then make up your own mind. What works for the fellow on the other side of the hill might not work as well on your farm.

How to Grow Strawberries

The cultural key to growing strawberries begins with good soil drainage. Traditionally, strawberries are grown on a raised mound to ensure this drainage. Even the precise placement of the new strawberry plants requires attention to depth because a plant buried too deeply will suffocate and rot, whereas placing it too shallow will leave the crown of the plant exposed. Garden books are fond of showing three Goldilocks-style planting diagrams: one with the new plant planted too deeply, one that’s too shallow and one that’s just right. Some are now adding a fourth illustration, showing the roots going sideways, which is another mistake.

When they are setting fruit, strawberries thrive on cool nights and cool, sunny days. Plants grown in coastal and northern locations produce their crops in the summer, whereas in warmer areas, like Florida, they can be grown throughout the year. The strawberry plants themselves can live and produce fruit for many years. At the intense California agribusiness farms, strawberries are grown as annuals that are planted in the fall for harvest the following spring, but almost everywhere else the plants are grown for several years. According to the Ohio State University Extension, avoid allowing plants to set fruit in the first year, as your plants will be able to produce more fruits if allowed to grow to a larger size before fruiting.

A strawberry farmer usually looks at all the strawberry beds after the harvest season and decides which beds to replant and which beds to leave for another year. Situations change from year to year, and so do the decisions about replanting. Particularly healthy and productive beds will likely be left for another year, whereas beds that experienced problems during the season are likely to be replanted. Strawberry beds can grow for 10 years in the most favorable conditions, but the fruit crop yield always seems to decline from year to year. Additionally, some pests and diseases become more problematic in older beds.

During the cold months, strawberry beds that are left intact benefit from being mulched despite whether they receive snow. The mulch provides insulation from the cold, but should not be applied until after a hard frost. Straw is a common and inexpensive mulch material, but any clean, dry organic material can be used. In the spring, leave one-third of the winter-cover mulch in place, and allow the plants grow up through it. The remaining mulch will provide many benefits, including nutrition, hygiene, weed control and most importantly, preventing fruit’s contact with the soil.

Strawberry Pests and Diseases

Fungi

Strawberry plants and fruits are susceptible to several different fungal diseases, and this is the leading danger to your plants. Once a fungus infection has started, you probably won’t be able to stop it. Plants and fruit become infected through soil contact, so it’s wise to spend time arranging plants so neither the leaves nor the fruit come in contact with the ground. Repeated mass doses of fungicides might slow the progress of the disease but won’t wipe it away completely. Growers who choose to use fungicides use them almost exclusively as preventative treatments before the fungus has a chance to start growing.

Insects

Whiteflies and spider mites top the list of insect pests that can infect your strawberry patch. When conditions are right, these pests can multiply from a few individuals to a dangerous infestation within a few weeks. While preventative soap and essential-oil sprays can discourage unwanted visitors, attracting beneficial bugs, such as predatory mites for combating whiteflies and spider mites, will promote better ecological harmony within your garden.

Weeds

Strawberry rows are often covered with a plastic film to keep weeds from growing, and this technique also prevents the ripening fruit from contacting the soil. The raised mounds are slightly easier to work on and harvest from, as well.

Wildlife

If you have a problem with birds and deer wanting to nibble on your strawberries, then consider adding fencing, netting and a scarecrow to the patch.

Strawberries

Amusingly, the list of strawberry-plant pests must include itself. Plants in a new bed will produce a number of runners in the spring, and while these are wonderful for filling in the bed and multiplying the investment in plantlets, you must take care to thin these runners or they can create an overcrowded bed. Keep two to three inches between plants after the runners are out. Having too many plants can starve the bed and can restrict pollination and fruit size.

This article first appeared in the Summer 2002 issue of Hobby Farms magazine.

Categories
Equipment

Harvesting Tools

Having the right set of tools sometimes makes the difference between an enjoyable interlude in the garden or orchard and sweaty hours of backbreaking labor. The proper tools make bringing in the harvest easier, faster and simply more fun. Here are some items to consider to help you get the job done.

Garden Scissors

If you, like me, harvest your own herbs, garden scissors could be your new best friend. Also known as flower shears, most garden scissors feature narrow, sharply pointed anvil blades that make snipping between tight stems a breeze. Things to look for include comfortable handles (soft plastics are especially easy on the hands) and durable, stay-sharp stainless-steel blades.

Joyce Chen Unlimited Garden Scissors are typical of this breed. They feature soft-grip handles; tapered points for precision cutting; and finely honed blades of chrome molybdenum stainless steel. Their design makes them ideal for either right- or left-handed use and many retail outlets stock them.

Fiskars markets a slightly different, but-just-as-efficient, design. Fiskars Garden Shears have extra-sharp, serrated, hardened stainless steel blades that grip and hold plant material for clean cuts; comfortable, ergo-dynamic handles; and come with a lifetime warranty!

Digging Tools

You’ll never appreciate a precision digging tool more than you do at harvest time—especially the classic Spear and Jackson County Trowel for hand-digging bulbs and roots. Skillfully crafted, perfectly balanced and ruggedly dependable, this heirloom-quality trowel has a carbon-steel head and a weatherproofed, hardwood handle for greater durability.

I once dug a large garden plot of potatoes with a pitchfork—never again! The right tool for the right job, I say after that ordeal—and that tool is a proper digging fork. Spear and Jackson make especially fine ones; their Neverbend Professional Potato Fork has extra-wide, forged carbon-steel tines specifically designed for lifting potatoes. Its entire head is epoxy-coated for improved resistance to rust and scratches; a traditional hardwood shaft completes this pretty picture.

Garden Carry-all

Pike's Original Maine Garden Hod

You can carry goodies in from the garden and orchard in less picturesque containers, but why? Patterned after traditional New England clam baskets, Pike’s Original Maine Garden Hods, manufactured by Maine Garden Products, are a cut way above a bucket or sack. Pike’s carry-alls are crafted of pine and steam-bent oak, with birch side rods and a food-grade, PVC-coated wire mesh body that makes it easy to rinse your crops right in the hod. They come in two handy sizes, the 16-quart Original Hod and the 8-quart L’il Hod in logo-branded, plain and painted models.

Scythe

If you’d like to hand-harvest hay for your goats, horses or rabbits, here is your tool. According to  Scythe Supply—one of America’s leading authorities on European-style scythes—you can easily scythe enough grass over the summer to put up hay for eight to 10 goats. The trick is buying a quality scythe and learning to maintain and use it. They say the scythe isn’t that difficult to master and their informative website (www.scythesupply.com) is loaded with resources to teach you how to do it.

Nut and Dropped-fruit Harvester

Nut Wizard

If you’ve ever wanted to harvest dropped fruit or nuts that litter your yard each fall, but dread hours of bending over to pick them up, the Nut Wizard is the tool for you. The Nut Wizard, originally invented for harvesting pecans and walnuts, is a revolving, spring-wire cage on a handle. Capable of picking up most any object between 3/8-inch and 4 inches in diameter, the 41⁄2-foot-long, 3- to 5-pound tool (depending on the size) requires very little pressure to operate and comes in three sizes, the  better to handle the precise sorts of dropped nuts and fruits in your own yard.

Fruit Pickers

Ames Fruit Picker

If you need to pick fruit from trees instead of off the ground, there are multiple tools designed to help do the trick.

An innovative design is the Twister Picker, a lightweight (8 ounces), aluminum-and-plastic picker tool designed to be mounted on a pole, such as a standard broom handle. To use it, the operator clamps the aluminum fruit holders on a single piece of fruit and twists it off by rotating the pole in her hands. Fruit is picked undamaged with this device and it almost makes fruit picking fun!

Ames’ lightweight, basket-style Fruit Picker’s bent-wire fingers are designed to coax apples, oranges, plums, peaches, avocadoes and more from trees. Its picker head comes fitted with a two-piece, wooden handle; Ames applies an enamel finish to protect the picker’s wire basket from rust and corrosion, and adds a foam pad inside the basket to minimize bruising of valuable fruit.

The German company, Wolf-Garten, is known for its quality tools, among them the Wolf-Garten RG-M Fruit Picker. Its adjustable picker head’s strong, nylon fingers grip each fruit without bruising it; then a concealed cutting blade near the front of the basket cuts it off the tree; finally it tumbles into the unit’s soft, four-apple capacity canvas bag. The picker head is used with the buyer’s choice of Wolf-Garten interchangeable Interlocken System expandable handles, sold separately; Wolf-Garten has over 50 different attachments that work with the Interlocken System.

Orchard Ladders

Tallman Ladder

If you have so much fruit that you need a ladder to pick it, don’t settle for the rickety, old ladder in your garage! Household ladders aren’t designed for orchard use; play it safe—buy a tool designed for the job.

Orchard ladders come in several designs, including four-legged, double-step ladders, straight ladders designed to lean against a tree and the créme de la créme of orchard ladders: the three-legged, traditional tripod orchard ladder.

Which-ever you choose, opt for a sturdy, lightweight, tempered aluminum ladder with each step braced for maximum security and one tall enough to do the job you have in mind (you must never stand above the third rung from the top of an orchard ladder, so plan accordingly). Keep in mind that tripod ladders are designed for use on soil or grassy surfaces only, so don’t choose this style to use for any type of indoor application.

Ladder King manufactures a full line of  aluminum orchard ladders, including the Ladder King 1400 Series Double Step Ladders designed for two-person use in 3- to 10-foot heights. Three-inch-wide steps with raised ribbing to prevent slippage; heavy-duty bracing to minimize twisting; strong spreader hinges to hold the  ladder steady during use; and sure-grip rubber feet are all features of the line.

Tallman, a manufacturer of orchard ladders, features a  tripod orchard ladder safety video at www.tallmanladders.com Tallman’s elegant tripod ladders come in 4- to 16-foot lengths with slip-resistant steps and rigid steel hinges for strength and durability.

Garden Carts

Vermont Garden Cart Model 26

I’ve saved my most indispensable harvest tool for last: a sturdy, easy-to-push- (or pull) and-maneuver garden cart. I simply couldn’t farm without one. There are scores of styles ideal for every need.

When choosing a garden cart, remember these points:

  • Some carts push and maneuver infinitely easier than others; it’s always best to try before you buy.
  • The more you plan to use your cart, the  sturdier it must be.
  • If you’ll need to maneuver the cart through a doorway or gate, measure to make certain it will fit.
  • Combination wood and metal carts require indoor storage; metal or plastics usually weather well
  • Carts with pneumatic tires generally push easiest, but flat-free, solid tires are better for jobs like harvesting walnuts in the woods.

Rubbermaid Poly Farm Cart

Carts Vermont manufactures the classic, plywood “Garden Way” cart in a variety of sizes ranging from a compact, 4-cubic-foot, 200-pound-capacity Model 16 to a brawny, 13.6-cubic-foot, 400-pound-capacity Model 26 workhorse; it also builds Model 20A L, a lightweight cart of the same traditional design, but fashioned out of aluminum. Most incorporate an easy-slide panel for dumping heavy loads.

Agri-Fab offers an especially nice line of lawn and garden carts, including the 11-cubic-foot, 600-pound-capacity, low-center-of-gravity “Carry-All” Push Cart with a one-piece, rustproof poly bed; poly wheels; and flat-proof tires; it weighs just 65 pounds.

Rubbermaid makes a fleet of yard and garden carts as diverse as their 3.5-cubic-foot, 200-pound-capacity, 33-inch-wide Rubbermaid Poly Farm Cart with a one-piece body and 20-inch semi-pneumatic tires, and the 600-pound-capacity Garden Dump Cart with its patented dump  feature and trademark pull handle that  converts to a trailer hitch in seconds.

Categories
Homesteading

Take A Trip to Amish Country

By Kimberly Button

In this article …

  • The Landscape of Lancaster
  • Understanding the Amish Lifestyle
  • Retail Adventures: Central Market and The Old Country Store
  • Down-Home Cooking and Country Cuisine
  • Discover What Life was Like at Landis Valley Museum
  • There seems to be increasingly fewer places in this world where it’s perfectly acceptable to just slow down and enjoy the simple pleasures of life, such as the goodness of home-cooked food, quiet afternoons spent leisurely tending the gardens or fellowship with family and friends.

    Even if you’ve managed to carve out your own tranquil spot at home, the hustle and bustle of life is sure to intrude on your calm once you leave. Though much of the world seems to be moving at a quick speed nowadays, there’s still an entire region where the pace is much slower and where old-fashioned ways are predominant.

    Buggy crossing sign from Amish Country
    © Kimberly Button

    If you’re searching for a destination where you can not only recharge your spirit, but also find inspiration for time-honored crafts, mouth-watering comfort food and traditional farming techniques, look no further than Lancaster County, Penn.

    The Landscape of Lancaster
    Lancaster County is known for its rolling hills and vast farmlands, as well as for its homegrown foods and laid-back lifestyle.

    Yet there is one facet of Lancaster County you won’t find anywhere else in the world: the oldest Amish community in the United States. With approximately 25,000 Amish living in Lancaster County, also known as Pennsylvania Dutch Country, this picturesque area has truly been able to hold on to the simpler ways of life.

    The Amish are a religious sect who have shunned modern day conveniences in an effort to preserve family traditions and a sense of community.

    The Amish are just one of the three Anabaptist-related groups that live in Lancaster County; the others are the Mennonites and the Brethren. All three deeply religious groups strongly believe in the authority of the Bible, as well as in the importance of brotherhood, family and community.

    The differences among the religious groups can be found in the way that they worship and dress, as well as in how much modern technology they’re willing to allow into their lives.

    Amish Clothesline
    © Kimberly Button

    The Old Order Amish and Mennonites have the strictest rules; when most people think of the Amish, they’re envisioning this sect, which wears modest clothing of solid colors, avoids electricity and most other modern conveniences, and works primarily in the fields and on farms.

    With so many Amish and other Anabaptist-related groups in Lancaster County, Pennsylvania Dutch Country has become known as an area that has successfully been able to hold onto old-fashioned ways in spite of the onslaught of technological advances.

    That’s not to say that there aren’t any bustling cities or congested roadways in the county, but 65 percent of the land is dedicated to farming and other agricultural pursuits.

    In the small towns with intriguing names such as Paradise, Bird-in-Hand and Intercourse, roadside markets are standard, quilting is one of the most popular activities, meals are based on what is currently growing in the fields and the evenings are peacefully pitch-dark and quiet.

    Top

    Amish Quilt
    © Kimberly Button

    Understanding Amish Lifestyle
    While you might come to Lancaster County to find inspiration from the Amish’s crafts, cooking and farming techniques, you’ll probably soon find yourself with more questions than answers.

    For many who are not familiar with the religious values of the Amish, their lifestyle might seem a bit puzzling. You might find yourself wondering things like, “Why do the Amish shun cars, yet they’re allowed to use bicycles and scooters?” or “If the Amish refuse to use electricity, then why do I see lights on throughout their homes?”

    Because the Amish are so often misunderstood, one of the best ways to understand their lifestyle is to visit the Amish Country Homestead and the Amish Experience Theater located in Bird-in-Hand. The Amish Experience Theater, an “experiential theater” that features special effects, is a great way to unobtrusively learn about the Amish way of life and their religious beliefs.

    After gaining a better appreciation of the Amish lifestyle, you can take a tour through the Amish Country Homestead, a nine-room home that recreates how true Amish families live. Here, you will see what it’s like to live a truly simplistic lifestyle without the luxuries of the modern world. After touring the sparsely decorated home, visitors can walk through the yard to see laundry hanging on an outdoor clothesline, a traditional Amish site, as well as a small garden tended by the Amish.

    With an aversion to using automobiles, the Amish’s main mode of transportation is a horse and buggy. The image of an Amish family slowly making their way down the side of the road as modern-day cars speed by is a common one throughout Pennsylvania Dutch Country. To have an appreciation for the struggles the Amish must face using this old-fashioned mode of transportation, be sure to take a horse and buggy ride with one of the many operators found in Lancaster County. 

    As you sit on a narrow bench inside the wooden carriage and listen to the horse’s hooves clip-clopping along the asphalt, you’ll probably become very thankful for the modern-day convenience of the automobile. The Amish must utilize their old-fashioned carriages in the freezing temperatures of winter and the stifling heat of summer, during heavy rains and in the darkness of night, all the while battling with the high speeds of cars, tractor trailers and motor coaches that share the road just a few feet away.

    Top

    Retail Adventures: Central Market and The Old Country Store
    While the Amish’s mode of transportation might make you appreciate modern marvels, a visit to the area’s farmers’ markets will probably make you nostalgic for old-fashioned crafts and homemade goods.

    It’s at these farmers’ markets that you can really get an appreciation for Pennsylvania Dutch Country’s agricultural pursuits. Lancaster County is the most productive non-irrigated farming county in the United States, with 421,000 acres of farmland. Of the 5,910 farms in the county, over 99 percent are family owned.

    There are several farmers’ markets throughout Lancaster County, yet the most popular is the Lancaster Central Market in downtown Lancaster. 

    Central Market is the nation’s oldest publicly owned farmers’ market, continuously operating since the 1730s. Housed in an 1889 Victorian market building, Central Market’s stands are brimming with the usual fare of fresh fruits, vegetables and herbs.

    Unlike many farmers’ markets, though, you’ll also find Amish- and Mennonite-run stands stacked high with homemade quilts, pot holders and pillows. Here, you’ll have a chance to talk with the women who create the crafts and you’ll learn more about the meaning behind the Amish’s use of only dark, solid-colored fabrics and simplistic designs.

    If you’re inspired to begin quilting after admiring the Amish’s hand-crafted creations, then a trip to The Old Country Store is definitely in order. Located in Intercourse, on the site where the town’s first store was opened in 1833, the historic country store retains an old-fashioned charm while showcasing crafts from more than 300 local Amish and Mennonites.

    It would be nearly impossible not to find crafting inspiration while walking around the quaint store located in the heart of Amish country. The walls are loaded down with hundreds of bolts of fabrics ideal for quilt making and if you are new to quilting, don’t worry. It seems that nearly every quilting book in existance is stocked in The Old Country Store. For even more inspiration, head upstairs to The People’s Place Quilt Museum, which has rotating exhibits featuring the finest quilts.

    Quilting isn’t the only attraction in The Old Country Store, though. Cookbooks are also plentiful and you’ll find plenty of collections of local recipes as well as many of the popular “Fix-It and Forget-It” series of cookbooks that are published in this tiny town.

    Top

    Down-Home Cooking and Country Cuisine
    If you enjoy down-home country cooking, Lancaster County is known for its culinary heritage. Known as the “Garden Spot of America,” there are plenty of comfort foods to enjoy at the small, family-owned restaurants that can be found throughout the towns. Nearly every restaurant offers their own version of traditional Pennsylvania Dutch Country treats such as shoofly pie, whoopie pies and chow chow.

    Lancaster County is also home to culinary history as the spot where America’s first pretzel bakery was started. Pretzels continue to be a popular aspect of Lancaster County food scene and visitors can try their hand at twisting pretzel dough at one of the area’s pretzel factories.

    One of the most well-known food industries in Pennsylvania Dutch Country is Kitchen Kettle Village. For anyone who has ever labored over canning a few jars of preserves or pickled vegetables, you will be amazed at Kitchen Kettle Village’s Jam & Relish Kitchen. What started out as a small home business run out of a garage in 1954 has grown into one of the area’s largest and most well-known attractions.

    The canning kitchen at Kitchen Kettle Village makes over 70 different kinds of jams, jellies and relishes, all made in old-fashioned ways and even bottled by hand.

    All day long, visitors to the canning kitchen can watch as large, steaming vats of fruit jellies and spicy relishes are created and left simmering on the industrial-sized stoves before being carefully ladled into glass jars.  The local women who work in the canning kitchen can produce around 5,000 jars of jellies or relishes each day and secure every steaming jar lid by hand, averaging one jar every two seconds. 

    Just walking through the retail store of the Jam & Relish kitchen is sure to inspire new taste creations you can enjoy at home. A majority of the products can be taste tested, so you can discover for yourself if carrot jam or elderberry jelly is a taste you actually enjoy. Whether you decide to try new recipes in your own canning pursuits or purchase jars of pre-made jams and jellies, your tastebuds will never be the same after experiencing the varied tastes of Kitchen Kettle Village.

    Top

    Discover What Life was Like at Landis Valley Museum
    Though traditional ways are still prevalent in Lancaster County, there was a time when day-to-day chores were even more old-fashioned. Discover what life was like in the area hundreds of years ago at the Landis Valley Museum, a living-history village of Pennsylvania Dutch life.

    Located in Lancaster, the Landis Valley Museum recreates what life was like for the early German immigrants who settled to the area in the 1700s.

    Wanting to preserve the German immigrant’s early culture and traditions from this time period, brothers George and Henry Landis started collecting Pennsylvania German objects from the 1700s and 1800s.  By the 1920s, their collection included over 75,000 objects. In 1953, the state of Pennsylvania acquired the small museum the brothers had started on their homestead. 

    Today the Landis Valley Museum owns over 100,000 objects from early rural America and features a collection of 27 buildings that bring the story of the early Pennsylvania Dutch to life. Many of the buildings are historic structures that were relocated to the sprawling museum. Visitors to the Landis Valley Museum can enjoy living-history demonstrations, such as weaving decorative roping or spinning wool.
     
    Also located on the museum’s grounds is the Heirloom Seed Project, which strives to preserve seeds from heirloom varieties of herbs and ornamentals that have historical significance for Pennsylvania Germans from 1750 to 1940.

    For a first-hand experience of what life is like living on a Pennsylvania Dutch farm, book a stay at one of the area’s many working farms, such as the Verdant View Farm Bed and Breakfast located in the town of Paradise.

    Don and Ginny Ranck own this fourth-generation dairy farm that supplies milk to the Land O’ Lakes Cooperative. The Rancks milk their 40 cows every morning and evening, and invite their guests to watch or even try their hand at bottle feeding a baby calf. Guests at Verdant View can hike along the railroad line that cuts through the couple’s 118-acre farm or just sit and watch Amish horse and buggies pass along the quiet road.

    The Rancks make sure that each and every one of their guests feels like a part of their family by inviting them to breakfast each morning.
     
    “I like to have the fellowship over a meal,” Ginny Ranck says. At the family breakfast, guests can enjoy milk and yogurt from the Ranck’s dairy cows, eggs from their neighbors and meats that were produced on the farm. As everyone joins hands and sings the Johnny Appleseed song before digging in to their farm breakfast, it seems that a new family has been formed in a region that values fellowship and community so much.

    Pennsylvania Dutch Country is more than just a destination where people can go to observe the Amish way of life. At its heart, Lancaster County is a testament to what was best about our ancestor’s way of life and a beacon toward the way that life should be … a world where family and community are honored and the simple pleasures of life can be peacefully enjoyed.

    Top

    For more articles like this one, consider reading Hobby Farms Home.

    About the Author
    Kimberly Button is a freelance journalist. To learn more about Button’s works, visit www.kimbutton.com

    Categories
    Homesteading

    Rust Dyeing Fabric

    Article and photos by Maggie Howe

    Rust-dyeing fabric
    Once you begin rust dyeing, you’ll be scouting garage sales, antiques shops and auctions for uniquely-shaped or –patterned rusty items.

    My mom and I own a small herb farm in central Iowa. We purchased it years ago. As with many older farms, it came with outbuildings full of old junk, and an ancient, abandoned garbage burning pile.

    We’ve spent years gradually cleaning up the farm, and over the years unearthed many rusty objects such as frying pans, weathervanes, and what seems like endless buckets of nails, wire, tools and bolts.

    I used to view these rusty items as a nuisance, but now that I’ve discovered the fun art and craft of rust dyeing, I enjoy finding these rusty “treasures.”

    What Is Rust Dyeing?
    Rust dyeing is an easy, fascinating way to dye fabric. You can dye wonderful imprints on cotton, silk, wool or even synthetic fibers using rusty “stuff.”

    I’ve dyed:

    • Cotton quilting fabric
    • Silk scarves and shawls
    • Flannel fabric for sewing
    You can achieve batik-like effects and wonderful color shifts by over dyeing colored fabrics.
    You can achieve batik-like effects and wonderful color shifts by over dyeing colored fabrics.

    I’ve even dyed silk ties and shirts to give as gifts – all using rusty nails, bolts, sprockets, hinges, wire and other rusty objects found our two-acre farm.

    What Is Rust … and What Will Rust?
    Rust is the common word for several naturally occurring iron oxides. These iron oxides are formed by the corrosion of iron or steel; this corrosion happens when iron is exposed to oxygen and water.

    Rust will permanently dye a variety of fabrics, and can even dye other materials such as leather and paper. The resulting fabric is completely colorfast, washable and totally unique.

    How Does It Work?
    The rust-dyeing process is extremely simple.  When a rusty object is in contact with fabric, fiber or paper, it leaves an imprint. We place our rusty items on our fabric, wet it with water and vinegar to hasten the oxidization (rusting) process, and leave the fabric and rusty item together until we are satisfied with the color or pattern. Then we remove the item, wash the fabric and use it however we choose! The whole process takes only a few days and requires little effort.

    What do I need?
    Only a few simple items are needed for rust dyeing. To begin dyeing, you should assemble:

    • Fabric
    • Plastic kitchen gloves
    • Spray bottle filled with a mixture of 50 percent water and 50 percent vinegar
    • Plastic bags or wrap (optional)
    • Plastic bin, box or tray
    • Rusty items or steel wool pads (new ones are fine)
    Place your rusty items on the fabric in any pattern you like.

    Place your rusty items on the fabric in any pattern you like.


    Lightly spray your fabric with the vinegar/water mixture. You can add extra vinegar at any time, to help speed the dyeing process

    Now, wrap loosely …

    The scarf is folded or wrapped around the rusty item(s), and placed inside a plastic bag. The plastic bag is simply to help keep the project moist, thus hastening the dyeing process
    .

    I have found that cotton and silk are the best fabrics for dyeing, but you can experiment with cotton blends. Even some synthetic fibers will dye well; you can experiment to find out which ones. Wool fabric will take dye, but the rust tends to color it a bit harshly; a wool/cotton blend can be a better choice, if that works for your project.

    Find, buy or assemble a collection of rusty items. Wire, nails, bolts, tools, sprockets, pans, cooking items, irons, tractor or car parts, chain, hinges… the list is endless! And once you begin rust dyeing, you’ll be scouting garage sales, thrift stores, antiques shops and auctions for uniquely-shaped or –patterned rusty items. You can also use brand-new or used (but clean) steel wool pads. You can use these items over, and over, and over again.
     
    You can even rust non-rusty iron items. I found a bike sprocket that was in pristine condition, but I wanted it to rust! I put it outside in a shallow pan with a bit of salt, water, and vinegar, and in a few weeks, it was fabulously rusty and ready for dyeing.

    Think Outside the Box
    You can use white cloth for the purest rust colors and clearest designs, but don’t be afraid to experiment with colored or even patterned fabrics. Scraps of sewing or quilting fabrics in assorted colors are wonderful for rust dyeing; you can achieve batik-like effects and wonderful color shifts by over dyeing colored fabrics.
     
    Look for neutral-colored natural fiber shirts, t-shirts, skirts, tablecloths, or fabric scraps at garage sales or thrift stores. These can be turned into one-of-a-kind designer works of art with the application of a little rust.

    Let’s Dye!
    Follow these steps:

    • Assemble your items on a workspace.
    • You may want to cover your table or bench with plastic bags or wrap.
    • Rust will also dye your clothes, so wear old clothes that you don’t mind staining.
    • Always wear gloves (kitchen gloves are perfect) when handling rusty items. It’s safer, cleaner, and protects your hands from both discoloration and scrapes or scratches.

    If you want specific imprints from your rusty items:

    • Lay your fabric flat in a plastic box or tray.
    • Lightly spray your fabric with the vinegar/water mixture.
    • Place your rusty items on the fabric in any pattern you like.
    • Place another piece of fabric on top.

    Keep your fabric slightly moist for the next few days; this will help the rust designs to develop. (Tip: Weight down the fabric with small items such as rocks or bottles if you want to make your imprint clearer.)

    You can lay a plastic bag or sheet lightly over the fabric, but you also want to make sure air can reach the fabric as well. Oxygen is necessary for the rust to develop.

    My favorite way to rust-dye is to leave the items outside, uncovered, for a few rainy or humid days!

    Here are some more dyeing options:

    • Roll or wrap your fabric around rusty items; if you have a rusty pot or kettle, you can wad the fabric up and stuff it inside the pot or kettle.
    • If you’re using steel wool, unroll it and wrap or fold it into your fabric, or cut it into strips, pieces or bits, and place or sprinkle them onto your fabric.
    • I have even bundled rusty chain, wire, nails and other small items willy-nilly into fabric, and put it all in a plastic bucket or bag with fantastic results.

    The important thing is to make sure that the rusty items are in contact with the fabric—that’s how the dyeing occurs. This process can be as planned or as random as you like. And you cannot fail – if you don’t like your results, you can simply dye your fabric again with more rusty items.

    Length of the Dyeing Process
    Check your fabric once a day or so; make sure it’s damp, and see how the color is developing.

    For light colors, you may only want to leave your dyeing project for one day.

    For very dark intense color, you might leave it for 4 or 5 days.

    If left too long, the rust can eventually damage the fabric, especially if it is thin or delicate (I’ve left silk too long and it developed holes). However, if you check your fabric every day or so, you should not have any problems.

    I find that the rust-dye develops more quickly in warmer environments; I especially love rust-dyeing outdoors in the summer, as it goes very quickly.

    Rust dyeing does damage the integrity of fabrics slightly; however, I have found my rust-dyed fabrics perfectly suitable for crafting, wearing, quilting and sewing. Items with very strong or dark rust-dye will be more difficult to sew, simply because your needle will dull quickly.

    Finishing Your Dyeing Process
    When you are satisfied with the color and patterning of your fabric, remove the rusty items and keep them for use in your next project.

    Next, immerse the fabric in a light saline solution; this completely stops the rusting process and neutralizes the fabric. For the solution, I use about one tablespoon of salt in a gallon of water.

    Then wash the fabric as normal – if it’s silk or wool, hand wash with dishwashing liquid and rinse thoroughly. If it’s a cotton or synthetic, you may machine wash and dry as normal.

    The only time I enjoy ironing is after I have just rust-dyed some fabric or a garment. After it’s washed, ironing it is so
    rewarding! When it’s ironed, you can really see the fantastic patterns and fully enjoy the beauty of your dye project.

    About the Author: Maggie Howe grows herbs and flowers—and makes beautiful fabrics and more-at Prairieland Herbs, the farm she co-owns in central Iowa.

    Categories
    Animals

    Acidosis Aware

    Question:
    Young CalfWe observed one of our weaned, 6-month-old calves staggering in the pasture.

    When we approached to investigate, the calf did not try to run away and acted as though it was blind. The next day we found it dead. None of the other calves seem to be affected.

    We are experiencing a drought and pasture is scarce. We just started feeding the calves cracked corn to make up for the lack of pasture. Could this have had something to do with it? Should we be concerned that this is something contagious?

    Answer:
    What you are describing sounds like a condition called acidosis, or grain overload. Ruminant animals have a specialized digestive tract that is designed to digest complex (fibrous) plant material such as grasses from pasture or hay (including straw), also referred to as roughage. They have a specialized rumen that contains a variety of bacteria to help with the digestion of these roughages.

    Get More Articles Like This One
    This item first appeared in the September/October 2007 Hobby Farms “Livestock Q&A,” which is researched and written by Dianne Hellwig, PHD, DVM, an associate professor at Berea College in Berea, KY with Dr. Lyle G. McNeal, a livestock specialist in the Department of Animal, Dairy and Veterinary Sciences at Utah State University.

    Pick up a copy of Hobby Farms at your local bookstore or tack and feed store. Click Here to subscribe to HF.

    It is not uncommon to supplement cattle with grain to enhance their nutrition when increase energy in the diet is needed. Problems can occur, however, when large amounts of grain are ingested, without enough good-quality roughage. When some of the bacteria in the rumen begin to break down large amounts of carbohydrates, they produce lactic acid. The resulting accumulation of lactic acid in the rumen results in acidosis.

    Rumen acidosis usually occurs in animals that have been fed primarily forage-based diets and are suddenly provided access to large quantities of grains or energy-type feedstuffs.

    The symptoms you are describing resulted from increasing amounts of lactic acid that eventually got into the bloodstream. This affected the animal’s central nervous system and resulted in the signs you observed. Rumen function becomes compromised due to the acidic environment and digestion may be abnormal for the remainder of the animal’s life. In many cases, such as yours, the animal will die.

    Prevention
    One way to prevent this is to make sure cattle have access to moderate to good quality hay or pasture. You can consult with your county extension agent to determine the quality of the roughage you are feeding, as well as the amount of grain necessary for growing cattle.

    When feeding grain, there needs to be enough room for each of the animals to eat.

    • Larger, more-aggressive animals may push others out of the way and ingest the majority of the feed. This sets them up for problems with acidosis.
    • Another good feeding practice is to feed the mature animals separate from the younger animals.

    There are other things you can do to prevent acidosis.

    • Rumensin™ is a feed additive used to treat or prevent a parasitic problem known as coccidiosis. The presence of this product in the feed slows down the animal’s consumption of grain and decreases the occurrence of acidosis.
    • Sodium bicarbonate gels also can be given to the animal by mouth when you notice the animal beginning to show symptoms. One product for this use is Acidosis Gel™, made by the Kaeco Group, Inc, of Savannah, Mo.

    You can find these and other products in livestock supply catalogs.

    Smaller Ruminant Animals Also Affected
    Other ruminant animals such as sheep and goats can develop acidosis, as well. The same precautions and treatments will apply to them. Sodium bicarbonate is the most commonly used buffer and can be offered free choice or included in the diet as about 1 percent of dry-matter intake. Prevention of rumen acidosis should be to introduce high-energy feeds or rations slowly over 10 days to two weeks. Dietary change from a lower to a higher fermentable energy ration allows the rumen microbes to adapt.

    One final word: Rabies?
    The neurological symptoms you described could also be associated with rabies. Curious cattle can get bitten by rabid skunks. Since this disease is fatal and transmissible to humans, one should proceed with caution when examining these animals. Avoid putting your hand in the mouth of any animal that may be showing the signs you described. Wait until your veterinarian has examined the animal and assisted you with a diagnosis.