Categories
Poultry

Helping Chickens Recover From the Heat: 8 Vital Tips

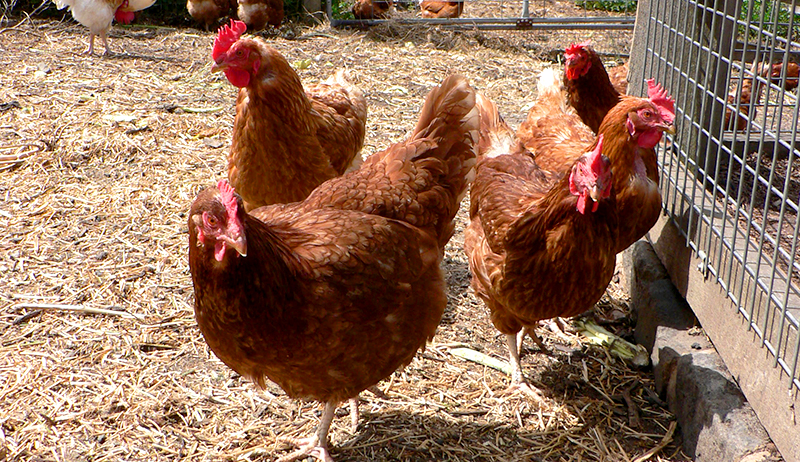
Helping chickens recover from the heat is vital for their health and overall wellness. Late summer and early autumn is usually when the most heat-related chicken deaths occur, but by following these eight tips, you can give your flock the nutrients they need to survive the final dog days of summer.

#1 Boost Recovery with Life-Saving Electrolytes

Adding electrolytes to their drinking water can go a long way to helping chickens recover from the heat. Serving chickens electrolytes works to replace those lost in their bodies during the course of the summer.

Unlike humans, chickens don’t sweat and lose their electrolytes through panting. When a chicken pants, the pH levels in their body are disrupted. This disruption causes a loss of electrolytes, resulting in possible heat-related illnesses.

While chickens may benefit from electrolytes at other times of the year, helping chickens recover from the heat is the number one reason backyard chicken keepers rely on them for their flock’s health.

Electrolytes can be purchased at a farm supply store, or you can make your own using the recipe below.

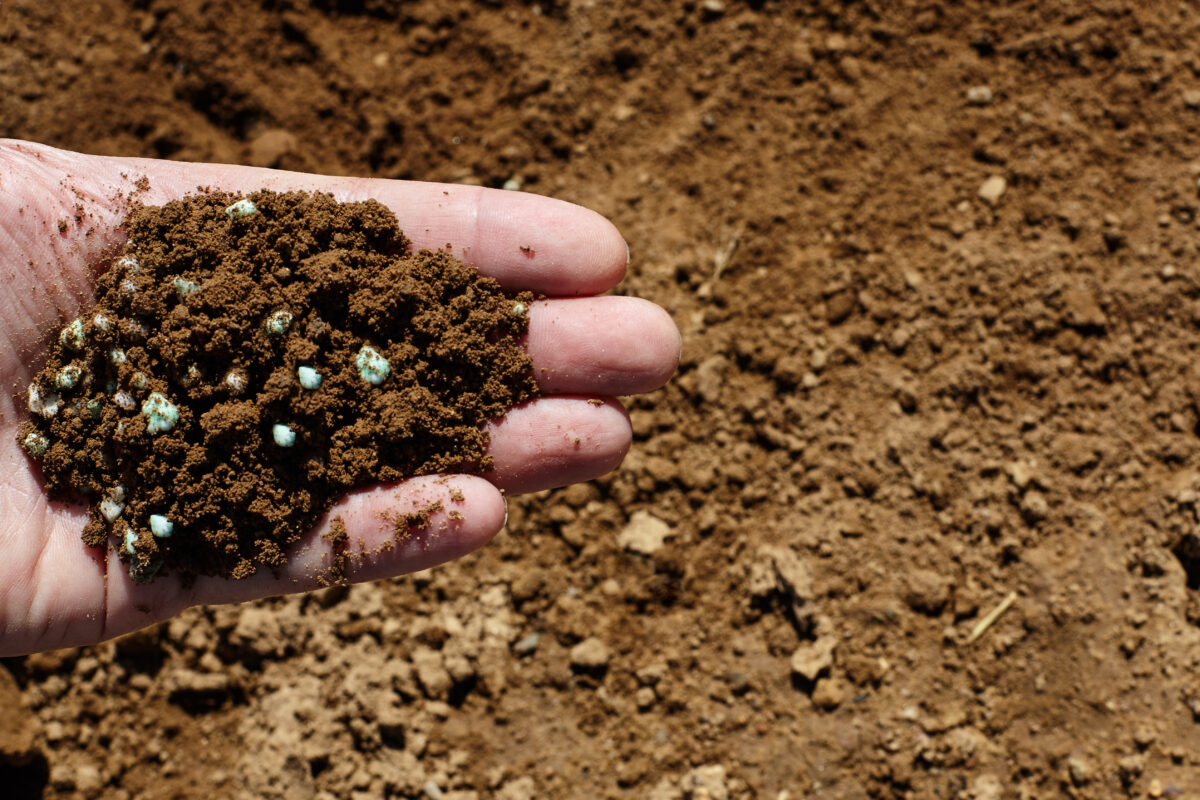
Homemade Electrolytes

Ingredients

  • gallon water
  • 1 teaspoon sugar
  • ⅛ teaspoon baking soda
  • ⅛ teaspoon salt

Bring one cup of water to a boil. Stir in sugar, baking soda, and salt until dissolved. Remove from heat. Cool to room temperature. Mix homemade electrolytes into the remaining gallon of water.

Be sure to serve plain water alongside the electrolyte mixture, as some chickens do not enjoy the taste and may refuse to drink. Refresh with clean water after twelve hours.

#2 Strengthen Gut Health with Probiotics

Helping chickens recover from the heat means more than replacing what their bodies have lost; it’s also about keeping their bodies in tiptop condition.

During the hot summer months when temperatures and humidity levels soar, bacteria, fungi, and mold levels are also on the rise. While most times, a chicken’s body can fight off these infections themselves, adding some probiotics to your flock’s diet will help boost their immune system and fight off seasonal health problems.

Heat stress and other heat-related illnesses can also take a toll on a chicken’s gut health, so it’s important to do what we can to help keep our flocks’ guts healthy. Adding probiotics to your flock’s diet will improve overall gut health and also help to combat other common diseases, including coccidiosis.

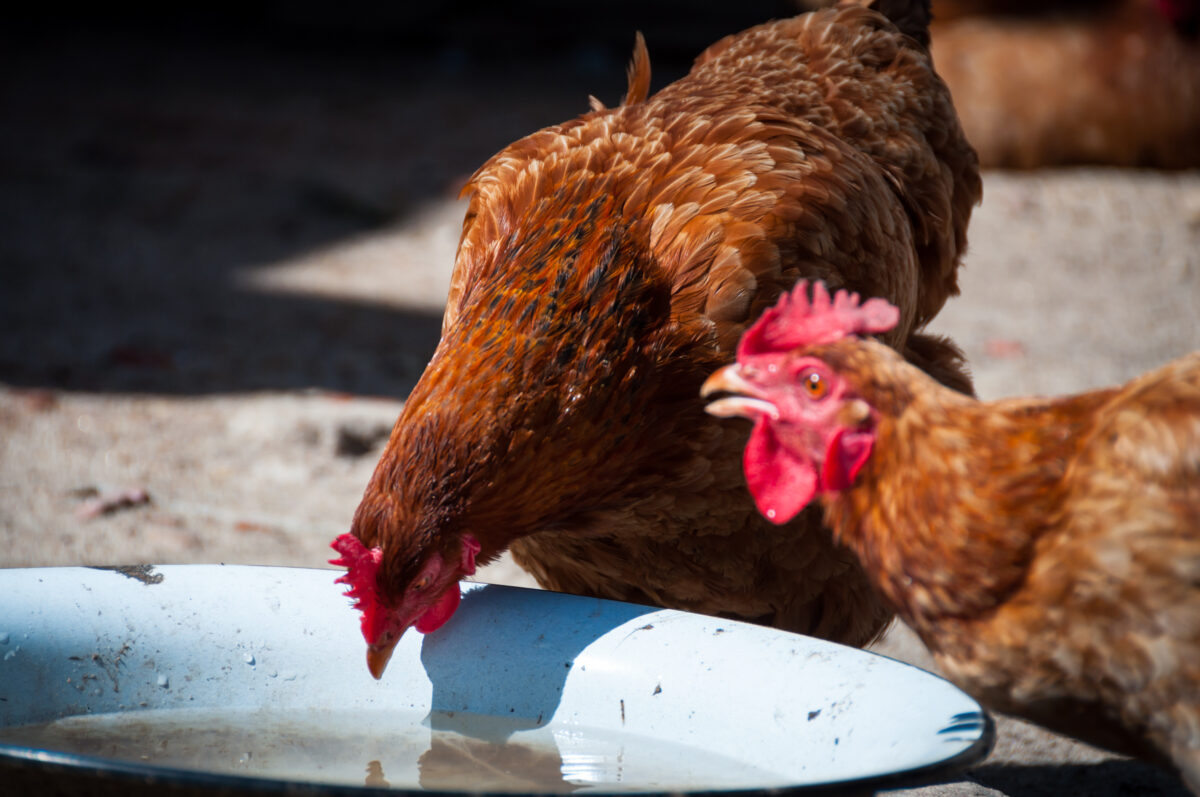
#3 Keep Chickens Cool with Fresh Water

Providing your chickens with fresh, cool water is the best way to help your chickens recover from the heat. Like all living things, chickens need water to stay hydrated, survive, and lay eggs. Going without access to water for even a few hours can severely impact egg production, so be sure to provide layers with plenty of water to maintain good production.

Chickens do not like the taste of warm water, so be sure to place water founts out of direct sunlight. Adding additional water founts to the coop and run throughout the summer and into the autumn months is another good idea to ensure all flock members are staying hydrated.

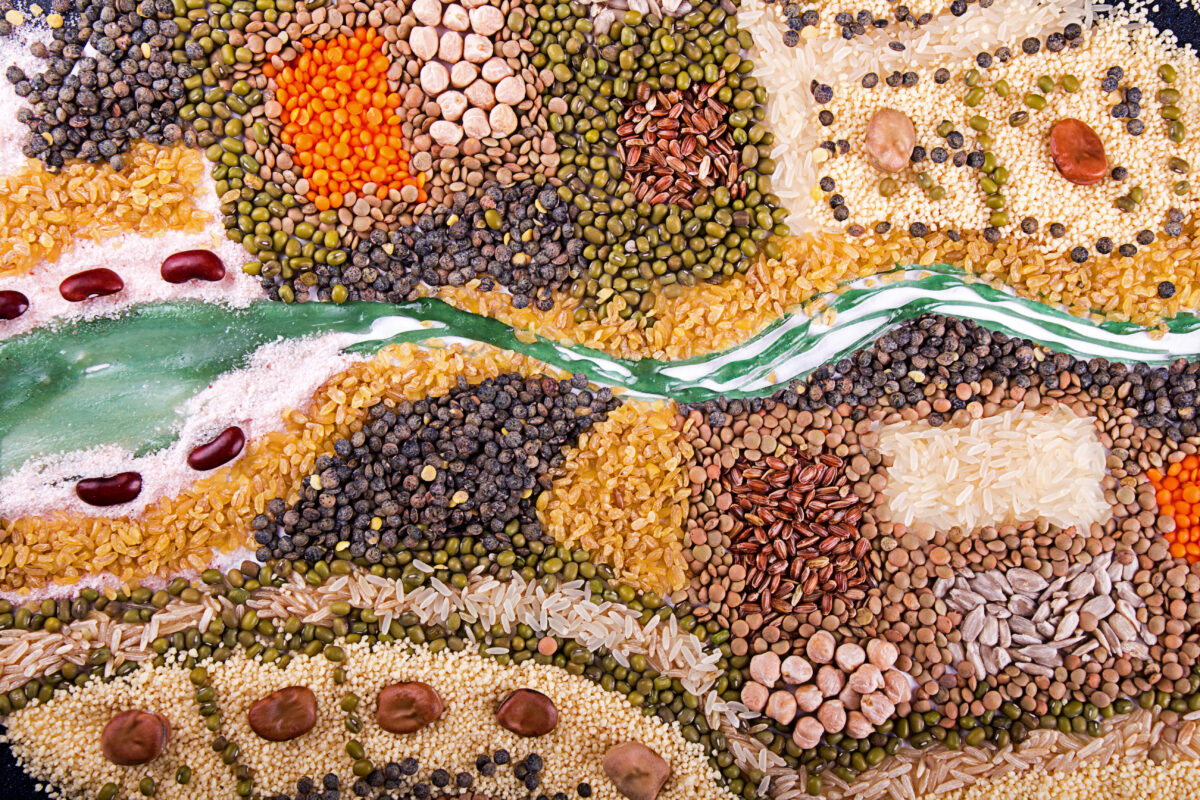
#4 Support Flock Health with Quality Feed

Feeding your flock a good, nutrient-rich feed is essential to keeping them healthy year-round, and especially when helping chickens recover from the heat. As temperatures soar, it isn’t uncommon for chickens to consume less feed, so providing a high-quality feed will help replenish their bodies from the stress of heat and egg production.

Choose a feed specific to your flocks’ needs, i.e., layer, broiler, etc. Select a feed that contains prebiotics, probiotics, beneficial yeast, North American grains, and is vegetarian-based (excluding probiotics).

Always purchase chicken feed from a feedstore versus a farm supply store to ensure the freshest, most nutrient-packed feed.

#5 Use Fennel for Heat Relief and Egg Benefits

Fennel is my go-to herb for helping chickens recover from the heat. The neat thing about fennel is that not only does it benefit chickens, but studies suggest that chickens that consume fennel may lay eggs with less cholesterol. Making them healthier for you, too.

Fennel helps combat heat stroke and is also considered anticoccidiosis (a common occurrence in backyard coops during hot, humid summers). The entire plant is edible, including the bulb; however, the seeds are reported to have the most health benefits for chickens.

Another plus to fennel is that chickens seem to enjoy the taste of this fragrant herb and will eat the plant and seeds free choice.

#6 Offer Hydrating Summer Treats

Helping your chickens recover from the heat isn’t just about providing them with feed and water. In fact, feeding your chickens a hydrated treat is another way to help your flock beat the heat by providing some extra nutrients when feed consumption is down.

Watermelon, zucchini, cucumbers, peas, grapes, and berries all contain high water content and are excellent treat choices during the final dog days of summer. While healthy in moderation, keep treat intake to no more than ten percent of your flock’s daily diet.

#7 Cool Chickens Naturally with Peppermint

Adding some fresh peppermint leaves or brewed peppermint tea to your flock’s water can help prevent heat stress and other heat-related illnesses.

Peppermint is excellent at helping chickens recover from the heat, and is safe for chickens of all ages. This sweet-smelling herb has cooling properties to lower your flock’s body temperatures, and also works to strengthen weak eggshells.

#8 Parsley: A Vitamin-Rich Herb for Helping Chickens Recover from the Heat

High in vitamins and minerals, it’s no wonder parsley is one of the best herbs for helping chickens recover from the heat.

Parsley is a poultry super herb, and contains vitamins A, B6, C, E, and K, and minerals calcium, copper, iron, manganese, magnesium, phosphorus, potassium, selenium, and zinc.

This watery herb is a favorite among chickens, and some hens will even eat it straight out of your hand.

Helping Chickens Recover From the Heat: Final Thoughts

Helping chickens recover from the heat is critical for your flock’s health and longevity. Providing your flock with good nutrition and plenty of hydration can help lessen the chances of heat stress and other heat-related illnesses during the final days of summer.

This article about helping chickens recover from the heat was written for Hobby Farms and Chickens magazines. Click here to subscribe.

Categories
Farm & Garden

Potassium in Soil: Why Plants Need It and How to Add More

Potassium in soil is one of the three essential nutrients plants need to grow strong and healthy. Along with nitrogen and phosphorus, it plays a vital role in photosynthesis, moisture control, and overall plant resilience. There are three basic “macronutrients” that plants obtain from the soil—nitrogen, phosphorus, and potassium. Each one is a basic element (recall the periodic table), and each is represented by a letter—N for nitrogen, P for phosphorus, and K for potassium (because of its Latin name, kalium). As a gardener or small-scale farmer, it’s easy to hear these words, acknowledge them, and then move on without really understanding them. But maybe you’re wondering what soil potassium is, and do I need to think about it?

Potassium in Soil: Why Plants Need It

When it comes to your plants, potassium is critical and performs many functions. It’s involved with photosynthesis. It helps activate various plant enzymes and hormones. And it plays a significant role in managing the opening and closing of the stomata in leaves, which dictates plant moisture control. Stalks and stems need potassium to stay strong and rigid.

Potassium Deficiency in Plants: Symptoms to Watch For

So what does potassium deficiency look like in your garden or your crops? You’ll probably see your plants responding worse to stress—perhaps they struggle more in dry conditions, or become more susceptible to pests and disease. You might see slow growth, stalks or stems bending over instead of standing up. But a really good indicator is chlorosis—yellowing between the veins of the plant’s leaves. If it’s serious enough, the leaves might even curl or turn brown.

How to Test and Improve Soil Potassium Levels

Even with all those indicators, it can be tricky to know for sure if low potassium levels are to blame for your plants’ troubles, or some other issue. Luckily, the answer can easily be found with a simple DIY soil test. Fancier tests with a lab can get you more concrete numbers—especially helpful for bigger ag situations—but for a home garden, the basic home test will at least let you know if potassium levels are sub-par. From there, you have several soil amendment options:

Commercial Fertilizers: These will exhibit a series of three numbers, like 10-10-10, that indicate the percentages of nitrogen (N), phosphorus (P), or potassium (K) that they provide. If your potassium levels were particularly low, you could look for a fertilizer with a higher K percentage, like 10-10-20 or some other configuration. They’re easy to use.

Wood Ash: This is known to get potassium into the soil pronto, but you have to be careful because it works kind of like lime at adjusting soil pH at the same time. But if you have a good source for wood ash, this can be a fast solution.

Banana Peel Compost: The fruit is famous for being a good source of potassium, and you aren’t going to do anything with the peels but toss them anyway. Chop your peels up, and put them into your compost where they can properly break down and release their potassium for plant use. The rest of your regular compost should also help increase soil potassium.

Potassium in Soil: Final Thoughts

Soil potassium (K) is quite important. While you don’t need to know the deep science at a hobby level, it’s enough to know that if the nutrient is lacking in the soil, plants may suffer, and your yields could drop. But a quick soil test and some plans for soil amendment can help put things right.

This article was written for Hobby Farms magazine. Click here to subscribe.

Categories
Farm & Garden

Lasagna Gardening: A No-Dig Method for Thriving Gardens

Lasagna gardening, also known as “sheet composting,” is a simple, no-dig method for turning grassy or weedy spaces into productive garden beds. By layering cardboard or newspaper with organic materials such as leaves, compost, and grass clippings, this method suppresses weeds while building nutrient-rich soil. Over time, the layers decompose, creating fertile ground ready for planting without the need for tilling or strenuous digging.

As a child, I remember watching my mom start a new garden. She was adding a vegetable garden space on top of the hill at my grandparents’ house. She began by laying down cardboard. She placed flattened pieces of cardboard and newspaper on top of the lawn in the shape she wanted her new garden to be. She explained that this would snuff out the grass and eventually the paper would break down. She laid wooden logs around the edges of the cardboard. Then she added some old mulch and old leaves and shoveled dirt over that in a thick layer. That’s it, it was that simple! Mom didn’t have a name for the method back then but it’s what I now know as the “lasagna gardening” method.

No-Dig Methods for the Win

Lasagna gardening, also sometimes referred to as “sheet composting,” is a cost-effective, no-dig way to turn a weedy or grassy space into a garden. Because you aren’t tilling soil and removing the grass and weeds by hand, it’s much easier on the body.

The idea is that you snuff out the growth below the paper layer, then add organic materials that will eventually break down, top with soil (if you want), and you’re ready to go. The paper will eventually decompose, as well as the organic matter, offering nutrients to the soil below.

Ideally, you’d prep your garden in the fall using fall garden clean-up, such as fallen leaves and twigs, in your layering. By spring, the garden will be ready for planting. If you want to speed up the process, garden soil can be added in a thick final layer and planted directly into.

Materials Needed for Lasagna Gardening

To create a productive no-dig garden, gather the following supplies:

  • Cardboard or Newspaper – Forms the base layer and suppresses weeds. Avoid glossy or coated paper.

  • Brown Organic Materials – Shredded leaves, straw, twigs, sawdust, or mulch provide carbon and structure.

  • Green Organic Materials – Grass clippings, compost, coffee grounds, or kitchen scraps supply nitrogen.

  • Optional Garden Soil or Compost – Helps plants establish quickly if you want to plant immediately.

  • Watering Can or Hose – To moisten layers and aid decomposition.

Step-by-Step Guide to Lasagna Gardening

  1. Choose the Location
    Select a flat or gently sloped area with good sunlight. Mow any tall grass if necessary.

  2. Outline Your Garden
    Plan the size and shape of your garden. If desired, line the edges with logs, rocks, or garden bed frames to contain layers.

  3. Lay the Base Layer
    Cover the ground with cardboard or multiple layers of newspaper. Overlap the edges to prevent weeds from sneaking through. Remove any tape or glossy sections.

  4. Add Brown Organic Materials
    Layer shredded leaves, straw, sawdust, twigs, or mulch on top of the paper. These materials provide carbon and structure to the bed.

  5. Add Green Organic Materials
    Spread grass clippings, compost, food scraps, or coffee grounds. These materials supply nitrogen, essential for plant growth.

  6. Repeat Layers as Needed
    Alternate brown and green layers until the bed reaches the desired height, typically 12–18 inches. Only one base layer of cardboard or paper is needed.

  7. Water the Layers
    Lightly water each layer as you build the bed to help materials settle and start the decomposition process.

  8. Optional Final Layer of Soil
    Add garden soil or compost on top if you want to plant immediately. Otherwise, allow the layers to break down naturally over the fall and winter.

  9. Planting
    Once the bed has settled, you can plant directly into the top layer. Root crops, vegetables, and annual flowers all thrive in lasagna gardens.

Tips for a Successful Lasagna Garden

  • Layer Wisely – Alternate brown and green materials for a balanced decomposition process.

  • Moisture Matters – Keep layers slightly damp, but avoid waterlogging.

  • Start in the Fall – Build beds in the fall to allow materials to break down before spring planting.

  • Select the Right Plants – Most vegetables, herbs, and annual flowers thrive in lasagna gardens. Root crops like carrots do especially well in thick, well-decomposed beds.

  • Avoid Shiny Paper – Glossy sections or tape can slow decomposition and inhibit plant growth.

  • Be Patient – Layers need time to decompose. Allowing the bed to settle before planting produces the best results.

Final Thoughts

Lasagna gardening is a simple, sustainable, and highly effective way to create a productive garden without the physical strain of digging or tilling. By layering organic materials, this method improves soil fertility, suppresses weeds, and encourages healthy plant growth. Whether you’re a beginner or an experienced gardener, lasagna gardening offers a low-maintenance, environmentally friendly approach that can transform any grassy or weedy space into a thriving garden. With patience, proper layering, and a little planning, you can enjoy bountiful harvests and vibrant plants year after year.

This article about lasagna gardening was written for Hobby Farms magazine. Click here to subscribe.

Categories
Farm & Garden

Crop Art: How to Create Stunning Seed Designs

Crop art, also known as “seed art,” is a cherished craft across the United States. At many state fairs and local exhibits, artists create intricate designs using seeds, stems, and other natural plant materials. Commonly used seeds include flax, sorghum, pumpkin, beans, corn, rice, lentils, sunflower, mustard, and peas. Some seeds are crushed to achieve different designs, textures and colors, while the use of paint or dye is generally not allowed. The vibrant artwork is entirely made from natural materials, showcasing the creativity and skill of artists nationwide.

What is Crop Art?

Crop art has a long history in the United States, with many families and artists passing down techniques through generations. Traditionally, designs are created by cutting patterns into wood or other surfaces and carefully adhering seeds to form detailed images. This craft has been celebrated in fairs, exhibitions, and competitions nationwide, allowing artists to showcase their skill and creativity using only natural materials.

On a personal note, my grandma used to make crop art in the late 1960s and sell her pieces. She’d cut out designs from plywood and mimic the designs that her grandma made. Seeds came from the bulk aisle of her local grocery, and she used Elmer’s glue to adhere the seeds to the wood. It was an enjoyable way to spend her time, she told me. No phones or computers back then. She didn’t even have a television.

Materials Needed for Crop Art

Curious about creating your own crop art? Here’s what you’ll need to get started.

Wood or Base Surface – Plywood is traditional, but sturdy cardboard or pre-cut wooden shapes work too.

Glue – My grandma’s used basic Elmer’s craft glue and it’s proven to stand the test of time. But feel free to use a stronger type if you feel so inclined.

Tweezers – Helpful for the smaller details.

Seeds – Visit the bulk aisle at your local grocer or grow them yourself. Select seeds in various colors, shapes and sizes. If you can’t grow enough and you happen to garden or know a gardener, you can collect seeds from them at the end of the season to save money as well. Pet food stores are another great option for buying a variety of seeds in bulk. If you’re looking for something hyper-specific or unique, consider seed stores such as Territorial Seed or Eden Brothers.

NOTE: If using collected seeds from the garden, remember to allow them to thoroughly dry out before crafting with them so that they do not mold. Larger seeds are better for younger children to handle.

Seed Organizer – Egg cartons make great seed organizers.

Finishing Spray – This is an optional step; however, a matte or gloss spray can protect your art and make cleaning easier.

Step-by-Step Crop Art Guide

  1. Choose Your Design
    Start by hand-sketching an image or tracing a design onto plywood. Beginners may want to pick simple shapes, while experienced crafters can try intricate patterns. Pre-cut wooden designs are also available at craft stores for convenience.

  2. Prepare Your Workspace
    Cover your table with a newspaper or a craft mat. Organize your seeds in small containers, egg cartons, or trays so you can easily reach each type and color as you work. Gather tweezers, glue, and any additional tools you might need.

  3. Apply the Glue
    Use a small brush or glue applicator to carefully cover the area where seeds will be placed. Work in sections to prevent the glue from drying before you add seeds.

  4. Place the Seeds
    Using tweezers for smaller seeds, carefully place each seed onto the glued area. Start with larger seeds for background or outline sections, then fill in details with smaller seeds. Crush or break seeds if you want to create shading or texture.

  5. Layer for Depth
    For added texture or dimension, layer seeds lightly on top of each other. Experiment with patterns and colors to create gradients or highlights. Be patient—precision is key for a polished look.

  6. Let It Dry
    Once your design is complete, allow the glue to dry thoroughly. Drying times vary depending on glue type and the amount used, but a few hours to overnight is usually sufficient.

  7. Finishing Touches
    Check for any loose seeds and secure them with a tiny dab of glue. If desired, apply a matte or gloss finishing spray to help protect your artwork and make cleaning easier.

Caring For Your Finished Crop Art

Crop art can be kept for display long after the fair is over. Keeping your art in a covered display is the best way to keep dust and debris from settling onto your masterpiece. If you are planning a covered display, it’s best to make the original design to match the dimensions of your display rather than the other way around. If it is kept in the open air, use a feather duster to gently brush away the dust.

Remember that seed art can fade in direct light, so the best choice is to store it away from windows.

Final Thoughts

Crop art is a timeless craft that combines creativity, patience, and natural materials. Whether you’re a beginner or an experienced crafter, creating seed art is a fun way to express your artistic side and connect with a long-standing tradition celebrated across the United States. With the right materials, a bit of patience, and attention to detail, you can produce vibrant, lasting artwork perfect for display in your home, at fairs, or as unique gifts.

This article about crop art was written for Hobby Farms magazine. Click here to subscribe.

Categories
Poultry

Raising Chicks in the Fall: 5 Breeds to Choose

Raising chicks in the fall offers surprising benefits, whether you’re starting a new flock, adding to an existing flock, or raising meat birds. While spring is traditionally thought of as chick season—when hens go broody and hatcheries send their winter catalogs—autumn flocks can give you hardier birds and higher egg production in the first year.

However, there are advantages to getting chicks in the fall. I was originally attracted to the idea that fall-hatched pullets would ultimately provide more eggs during the first year than spring-hatched pullets. When chicks are hatched in the spring, they reach egg-laying maturity as the summer days are getting shorter, which means they will lay fewer eggs. Although they often lay through the winter, it won’t be anywhere close to an egg a day, which can be expected from most of the better egg-laying breeds throughout summer. They don’t hit their stride and peak production until they are close to 1 year old.

Fall-hatched pullets, on the other hand, reach maturity in the dark of winter, but because of the short days, their bodies defer laying until the days get longer, giving them a couple of more months to mature. At that time, they will quickly shift into maximum production, laying an egg almost every day. Because they are more mature, they also start laying larger eggs from the beginning, so you won’t see many, if any, tiny eggs.

Starting chicks in the fall also has benefits for those in southern states.

“Once spring chicks are of laying age, it gets too hot, so they lay fewer eggs and take a summer break,” says D’Lorin Nail, of Canton, Texas. “Then it gets cooler, and the days get shorter, so they take a winter break.”

If you’re raising chicks in the fall, choosing the right breed can make all the difference in egg production, hardiness, and temperament. These five breeds are excellent options for autumn flocks, whether you want top layers, friendly family birds, or fast-growing meat birds.

1. ISA Browns: A Top Choice for Fall Chickens

isa brown browns chicken breed
Pengo/CC BY-SA 3.0

ISA Browns were developed more than 30 years ago for top egg-laying abilities, and about 60 percent of the world’s brown eggs are laid by this hybrid sex-linked chicken. (ISA stands for Institut de Sélection Animale, the company that developed the hybrid.)

2. Rhode Island Reds for Raising Chicks in the Fall

rhode island red reds chicken breed
Garrett Heath/Flickr

Rhode Island Reds produce more eggs than any other dual-purpose (meat-and-egg) bird, laying an average of more than 200 large, brown eggs annually.

3. Australorps: Excellent Fall-Hatched Chicks

australorp australorps chicken breed
Palauenc05/CC BY-SA 3.0

This is Australia’s national breed. Australorps are master layers of more than 250-plus large brown eggs annually, laying well into winter.

4. Plymouth Rocks for Raising Fall Chicks

chicken breeds eggs chickens plymouth rock rocks
cskk/Flickr

Plymouth Rocks are hardy, dual-purpose, all-American birds that are friendly, quiet and able to adapt to many different climates and living situations.

5. Cornish Cross Broilers: Perfect for Raising Meat for the Fall & Winter

Cornish Cross can be included in a raising chicks for fall list for meat
Robyn Anderson/Flickr

Cornish Cross Broilers can still be ordered, raised and harvested before the first snowfall, depending on where you live. These immense, meaty birds can be ready for harvest at just six weeks of age.

This article about raising chicks in the fall was written for Hobby Farms and Chickens magazines. Click here to subscribe.

Categories
Poultry

Chicken Feathers: Understanding Feather Scoring

Chicken feathers serve a number of purposes for both birds and humans. For hens, their feathers provide camouflage and protection from the weather. For the roosters, they are a way to win mates. For scientists, farmers and show judges, feathers provide a measure of poultry health. While annual molting is a normal part of a chicken’s lifecycle, other feather loss can be a sign of something wrong in your flock.

Chicken Feather Loss and Health Concerns

There are many reasons chickens may lose their feathers that suggest health issues in the bird. Parasites, illnesses, stress and other culprits are all possible issues.

Chicken Feather Loss from Parasites

Poultry mites can infest chickens and burrow into the skin next to the feathers. This causes the birds to pull out their feathers in an attempt to rid themselves of the irritation. Other mites and lice can cause similar reactions. Signs of these parasites on birds are often a signal that the entire flock is infested and likely the coop and run as well.

It is important to verify that parasites are the issue before treatment. Bacteria or fungal infections can also cause feather loss in a flock and often require medication.

Nutritional Deficiencies and Feather Problems in Chickens

Feathers are made up primarily of protein and birds may consume a flock mate’s feathers to make up for a protein deficit. Other micronutrient deficiencies can cause cannibalizing behaviors as well. Keep in mind that nutritional needs will vary depending on the breed, time of year, age of the birds and other factors.

Bald chickens can also be a symptom of exposure to toxins or overheating. While it can easily be attributed to a stress problem, feather picking because of extreme temperatures, lack of fresh water or high ammonia levels can be symptom of much more severe issues. In fact, feather picking and levels of loss are often used by animal welfare experts to determine the safety and health of a flock.

Stress and Feather Plucking in Chickens

Some stress-induced feather pulling may exist in even a healthy flock since pecking order clashes can involve physical altercations. However, if the behavior persists or birds are found with severe feather loss, this is often more than normal, competitive behavior. Feather loss can be caused by higher-status hens bullying flock mates. Boredom, cramped quarters, predators and other stressors can result in chickens plucking out each other’s feathers.

If birds appear to be stressed, widening runs and providing enrichment activities can help to reduce issues with overcrowding or lack of stimulation. Roosters can help with the regulation of a flock, though if there are too few hens for an amorous male, over-mating may also cause feather loss in the hens. In this case, it is caused by him repeatedly mounting them and pulling their feathers out.

Feather Scoring for Chicken Health

Feather scoring is a measure of feather loss in a flock. Measuring about 50% of the birds in a flock is suggested to best determine the over-all flock health, and a single bird missing large numbers of feathers is not likely to be seen as a sign of concern. Scoring is done on a scale of 0-2 and should not be done when birds are molting.

Level 0 Feather Score: Healthy Chickens

Birds with a score of zero are missing no feathers or may be missing a single feather here and there at most. There should be no skin showing. Checking the area around the vent is important.

rooster with almost no chicken feathers missing
Level 0: This handsome rooster is missing no feathers, shows no bare patches and everything is lying smoothly. However, as his male chicks begin to grow up sparring matches will likely change this until they are separated out. Photo by Sherri Talbot

Level 1 Feather Score: Mild Feather Damage

Birds with a score of one may have small amounts of skin showing and will have noticeable missing or broken feathers. The bird may look slightly ruffled.

Level 2 Feather Score: Severe Feather Loss in Chickens

Birds with a score of two have large swaths of skin showing, major feathers may be broken, and the bird will look quite ragged. Flocks with a high number of level 2 scores have also been correlated with high levels of illness in the birds, underweight flocks and poorer production in laying hens.

chicken feathers are missing on this hen's head and body
Level 2: This bird is borderline, but was overbred by a rooster who liked her a LOT! She is missing feathers on her head and body and, while it isn’t visible in this shot, there is a bare patch on her back where she has been mounted repeatedly. Photo by Sherri Talbot

Since chickens are prey animals, they will often hide issues and can be difficult to diagnose. Knowing the possible signs and symptoms associated with feather loss can help identify issues in a flock more quickly.

This story about chicken feathers and scoring was written for Chickens magazine. Click here to subscribe.

Categories
Poultry

Raising Baby Chickens in the Fall: 5 Reasons to Start a Flock

Raising baby chickens in the fall is not always top of mind. Springtime is synonymous with babies. As temperatures rise, days get longer and animals get frisky. Broody hens spend more time sitting on their eggs and cheeping chicks start showing up in feed-supply stores. It’s no surprise that spring is also the season when most people start their flocks. But a growing number of chicken keepers are adding fall flocks to their farms.

“Spring is such a popular time, but more people are experimenting with fall flocks,” says Kendra Higgins, director of marketing for Meyer Hatchery and host of The Coop Podcast.

Are you thinking about adding (more) chickens? You don’t have to wait until spring. Consider these six reasons to start a fall flock.

1. Raising Baby Chickens in the Fall Means Double the Fun

Chicks are hard to resist. The same downy feathers, tiny beaks and little cheeps that make chicks Instagram sensations may also tug at your heartstrings.

And adding a fall flock means all of that cuteness isn’t limited to a single season. You can cuddle chicks and watch them grow twice a year. 

British researchers found that watching cute animals reduces stress and anxiety. Who doesn’t want to lower their cortisol levels while raising babies that will eventually provide breakfast?

2. Better Breed Selection When Raising Baby Chickens in the Fall

Is your heart set on a Buff Orpington, Rhode Island Red or Australorp? Do you want chickens that lay blue, green or pink eggs? You might be out of luck in the springtime.

Higgins notes that certain breeds (or breeds that produce certain egg colors) are most in demand in the spring when every established flock-raiser and wannabe chicken keeper calls in their orders to hatcheries. 

Demand has been especially high during the pandemic, making it even more difficult to order spring chicks. Fall ordering is less frenzied.

“Hatcheries get swamped and run out of a lot of breeds,” says Lisa Steele, creator of the website Fresh Eggs Daily and author of Fresh Eggs Daily: Raising Happy, Healthy Chickens Naturally. “Hatcheries realized if they started opening up to fall ordering, people who couldn’t get the breeds they wanted in the spring … had a better chance of getting them in the fall.”

A better selection of breeds could lead to some unfortunate “chicken math” and a flock that isn’t the right fit for your farm or family.

“In the fall, if you’re finding availability, it can be even more exciting,” Higgins says. “Make sure you’re asking questions about whether it’s a breed you really want. Is it a breed that’s also family-friendly? Is it a breed that lays the color of eggs [you want]? Or even the number of eggs …? Is that a breed that you’re going to like?

“Asking all of those questions and really factoring in what works best for you will make you a lot happier with the flock that you end up with.”

It’s true that there might be fewer people clamoring to order cheeping chicks in the fall. But less demand also means hatcheries are hatching a smaller number of chicks, so selection isn’t guaranteed.

3. Raising Chicks in the Fall Helps Bolster Flock Numbers

Illness and predators mean flock numbers can tend to fluctuate. And some of the chicks you ordered in the spring may not be part of the flock by fall.

New chicken keepers are often surprised at the number of predators in their yards. They might underestimate the need for a super secure coop to protect their hens, which leads to unexpected losses. 

Those who purchased just a few birds might find themselves down to a single hen at the end of the season. But you don’t have to make a lone remaining hen wait until next spring to be part of a flock again.

Raising baby chickens in the fall helps rebuild the flock.

Adding to the flock in the fall is also common among those who sell eggs for local markets and need a certain number of hens in their flocks to keep up with demand. 

4. Raise Baby Chickens in the Fall for More Eggs in Spring

Next spring, when other flock-raisers are just setting up their brooders and welcoming new chicks to the farm, the chicks you in the fall will already be laying eggs.

You might also get more eggs from fall-hatched chicks. The reason is that chicks purchased in the spring don’t start laying until the fall. Just as their reproductive systems kick into high gear, the days get shorter. This sends the signal that it’s time to slow down egg production through the winter.

In contrast, chicks hatched in the fall shift into maximum production in the spring, laying almost one egg per day (depending on the breed).

“If you get [chicks] in the fall, they are maturing through the early part of the winter and might put off laying a little bit longer. But when they start laying in the spring, the prime laying season, they are going to be ready to go,” Steele says. 

Higgins adds that adding chicks in the fall could also prevent you from keeping the coop lit for sustained egg production. 

“For those that don’t like to keep the lights on in their coop to try to force the chickens into continuous laying, if you like that natural slowdown, staggering your new additions in your flock by adding some [chicks] in the spring and some in the fall typically will get you year-round production without the added light source,” she says.

5. Fall Chicks Delay Molting and Boost Egg Production

Every year, chickens shed their old feathers and grow new ones. Breed and age determine molting patterns, but biology plays a role, too. Chickens only molt after laying a certain number of eggs. (This prevents molting from robbing hens of the energy needed for egg production). 

Fall flocks start laying full force in the spring. But they might not molt until the following year, skipping the midsummer pause in laying to accommodate molting. This is common for spring-hatched chicks. 

Important Considerations When Raising Baby Chickens in the Fall

While there are compelling reasons to add chicks to the flock—or start a new flock—in the fall, a late-season flock requires a few special considerations.

Hatchery Requirements for Raising Baby Chickens in the Fall

Hatcheries require higher minimum orders in the cooler months. “Our minimum order is three chicks in the warmer months, and it goes up to eight chicks in the colder months,” Higgins explains. “Obviously, the more chicks, the better the body heat [is].”

In the fall, the hatchery ships chicks with heat packs and, depending on temperatures, may add an extra layer of foam to the boxes for added warmth.

Brood Time Needs for Fall-Hatched Chicks

Cooler temperatures in the fall may also mean that chickens need to stay in their brooder for longer periods, especially in states with harsher climates. This is one of the biggest reasons Steele, who raises chickens in Maine, prefers spring chicks to fall flocks. 

“Wherever you live, you need to count back from before your last frost date—or even before your last frost date when your nights start getting down to 40 or 45 degrees [Fahrenheit]—to make sure your chicks are going to be eight to 12 weeks old and have all of their feathers before they go outside,” Steele says.

“You don’t want to be stuck with chickens in the house … until spring. I wouldn’t be comfortable putting three 8-week-old chicks outside when it’s 10 degrees ….”

Choose breeds such as Golden Comets, Rhode Island Reds and Delawares that mature at 16 to 20 weeks old rather than slower-growing breeds such as the Brahma that might not mature (and be ready for cool temperatures) until they are 24 weeks old. 

Integration Concerns When Raising Baby Chickens in the Fall

Integrating fall-hatched chicks into existing flocks can also be a little more difficult in the fall.

“In the summer, we typically recommend putting chicks outside with a divider [between the new chicks and the existing flock]. Or, if you have a small flock, you could even use a dog crate so the two flocks can see each other but can’t reach each other,” Higgins says. “You’ll still want to do that in the winter. But sometimes your coop size can deter just how much freedom you have in that setup.”

Because there are additional considerations associated with establishing a flock in the fall, Steele believes these late-season additions may not be right for novice flock raisers. “The more experience you have raising chickens, the easier it’ll be to raise a fall flock,” she says.

Remember, chicks aren’t the only option for fall flocks. You can also consider adding flocks of ducklings and goslings during this season. Ducklings and goslings are hardier than chicks, more cold-tolerant and feather out faster. These traits make them well-suited to going from the brooder to the coop in cooler weather. 

Will you add chicks in the spring or fall—or both? Whatever you decide,  you’ll benefit from adorable babies, feathered friends and amazing eggs. 

 Do Fall Baby Chickens Lay Bigger Eggs?

There are no scientific studies comparing how egg sizes differ between spring- and fall-hatched flocks. But Lisa Steele cites anecdotal evidence that fall flocks might have an edge.

“Fall chicks tend not to lay those little fairy eggs [because] they wait a little bit longer to start laying,” she says. “Instead of waiting until 18 or 20 weeks to start laying, it might be 24 weeks or 26 weeks so they’ll start off laying full-sized eggs.”

This article about raising baby chickens in the fall was written for Hobby Farms and Chickens magazines. Click here to subscribe.

Categories
Farm Management

Bird Feather Identification: Know What You Find

Bird feather identification can help you understand the wildlife around you. Have you ever found a beautiful feather while on a hike, picked it up and wondered whether you should keep it? Or maybe you have chickens and are hyperaware of hawks in the vicinity, and you want to be able to recognize traces of their presence. Like learning what bird made a nest or what snake shed its skin, identifying a bird by its feathers provides a clue about wild animals in your midst.

Bird Feather Functions

If you thought feathers were just for flying, think again. Consider that there’s more than 60 species of flightless birds and yet they all have feathers. Feathers serve at least 20 other purposes. Here are a sampling of feather functions.

Feathers for Warmth and Weather Protection

Downy feathers and semiplume feathers can be fluffed up to trap air and keep warmth next to the skin. Birds can tuck their heads and settle their bodies onto their legs and feet to keep featherless areas snug and protected. To cool down, a bird can stick its head and feet out. To weather a storm, contour feathers provide rigid resistance to wind. Interlocking barbs as well as oily or waxy coatings help feathers repel water and grime.

How Birds Use Feathers for Feeding

Feathers help birds survive with the special ways they help birds eat. Herons and some other shore birds can use their wings to create shade that masks their silhouette, stealthily hunting and hiding from the view of fish below. Some fish-hunting birds swallow their own feathers to soften the impact of fish bones on their digestive tract. Feathers also help hummingbirds transfer pollen from one flower to the next. In this way, they are helping fertilize blossoms that produce seeds and provide more nectar-rich flowers for future feeding.

Feather Colors, Sounds, and Signals

Colors and patterns of feathers send overt and subtle cues to rivals, mates and family members. To see but not be seen, predators as well as prey benefit from camouflage. However, male birds are typically showier and bolder in order to attract females, although some birds’ colorful feathers are imperceptible to the human range of vision. The sound of feathers also sends signals—drumming, whistling and humming are a few ways birds get attention. Feathers can also mute sounds, such as the fringe on the edges of owl feathers that makes these birds silent hunters.

owl flying with wings spread fully allowing good bird feather identification
Shutterstock

Identifying Types of Bird Feathers

The shape and placement of feathers on birds’ bodies are important to their function. When you find a feather, begin your identification by determining what type of feather it is.

Wing Feathers

feathers wing flight feather
Shutterstock

Typically asymmetrical, with a shorter leading edge to help with flight, these are also windproof because of interlocking barbs (the branches off the central shaft).

Tail Feathers

Symmetrical, with a stiff central shaft, tail feathers are sturdy steering aids during flight.

Contour Feathers

These cover the bird’s body and have interlocking barbs, plus downy fluff near the shaft’s base to insulate the body.

Semiplume Feathers

wild turkey semiplume bird feather
Shutterstock

A central shaft creates a typical feather shape but there’s less structure to these close-to-the-body feathers.

Down Feathers

Without a structural shaft, the lightweight fluff traps body heat and keeps a bird warm.

Laws About Keeping Bird Feathers

Unless you have a permit, it is a federal offense to keep any feathers or any other part, including nests, from a migratory North American bird. The Migratory Bird Treaty Act was updated in 2004 to “not include nonnative species whose occurrences in the United States are solely the result of intentional or unintentional human-assisted introduction(s).” The challenge, however, is determining what kind of bird dropped its feathers that you want to pick up.

Steps for Bird Feather Identification

First, take a picture of it, then leave it where you found it.

Second, narrow the possibilities. Consult a bird identification book for your region or an online guide such as eBird or Cornell’s All About Birds. Make a short list of birds you believe it could be, based on the color, size and season it has appeared.

bald eagle bird feather identification chart for subadults
U.S. Fish & Wildlife Service

Finally, consult the U.S. Fish and Wildlife database of bird feathers, the Feather Atlas. It includes images of flight feathers of hundreds of birds in male, female and juvenile plumage. You can browse by family or enter a specific search term and then compare. For example, you might compare a bald eagle’s feathers with those of a grackle.

Wild birds, which are almost always beyond our reach, glide, flutter, soar and flap across boundaries. Found feathers offer distinct clues to the ecological impact of your property and provide a reason to pause and honor their ephemeral visits.

This article about bird feather identification was written for Hobby Farms and Chickens magazines. Click here to subscribe.

Categories
Farm & Garden

Pressed Flower Crafts: Creative Ways to Preserve Nature’s Beauty

Pressed flower crafts provide a creative way to preserve flowers and leaves, extending their beauty beyond the short growing season. Using a flower press helps maintain the shape and color of the blooms, making them perfect for framing, bookmarks, gift tags, and other decorative projects. For those interested in creating their own press, building a DIY flower press is a simple project that allows full control over the pressing process and materials.

Creative Pressed Flower Crafts to Try

So, what do you do once you’ve pressed the flowers and leaves? Here are three beginner-friendly crafts that are sure to please.

How to Frame Pressed Flowers

One of the simplest ways to display dried flowers, like yarrow, is by framing them in double-pane glass frames. These frames allow flowers and leaves to be arranged in any desired design while keeping them securely in place once the frame is closed. Framed pressed flowers create beautiful decorative pieces and make thoughtful gifts.

To preserve their vibrant colors, it is best to keep the frames out of direct sunlight, as pressed flowers may fade over time.

DIY Pressed Flower Bookmarks

Pressed flowers can be transformed into beautiful bookmarks using a simple layering technique. Start by arranging leaves, dried grass, and pressed flowers in a design on a piece of clear packing tape, sticky side up. Place another piece of tape over the design to seal the materials in place—this method works as an easy alternative to laminating.

Once sealed, trim the edges neatly and punch a hole at the top of the bookmark. Thread twine or ribbon through the hole to finish. This technique can be adapted for a variety of pressed flowers and foliage, creating personalized bookmarks that also make thoughtful gifts.

For added visual interest, consider using colored construction paper as a base to lay out the flowers before sealing them with tape.

Make Unique Pressed Flower Gift Tags

To level up your gift from the heart, create a unique custom gift tag. You can buy pre-cut gift tags or cut your own.

To attach the pressed flowers to the tags, you can use a paintbrush to gently add glue, such as Mod Podge, to the entire surface of the tag. Gently place the pressed flowers and leaves into the design of your choice onto the tag to carefully adhere.

Or you can gently add Mod Podge to the underside of the pressed flowers and carefully attach them to the tag.

Once attached, you can add more Mod Podge to the top of the flower to protect it from lifting off (this is up to your personal preference).

It’s really that simple, but it adds elegance and a homemade touch to any gift.

Flower Crafting: Final Thoughts

Pressed flower crafts offer a simple and creative way to preserve the beauty of nature while making decorative and functional items. From framed art to bookmarks and gift tags, these projects can be adapted for a variety of skill levels and occasions. With a few basic materials and some creativity, anyone can transform pressed flowers into lasting keepsakes.

This article about pressed flower crafts was written for Hobby Farms magazine. Click here to subscribe.

Categories
Farm & Garden

Yarrow Uses: Tea, Tinctures & Dried Flowers for Home and Health

Yarrow uses go far beyond the garden. This hardy perennial (Achillea millefolium) is valued not only for its abundant blooms and vibrant colors but also for its versatility in herbal and home applications. From crafting with dried flowers to brewing soothing tea and preparing a healing tincture, yarrow is a plant with a long tradition of practical and medicinal benefits. Here are three yarrow uses that are perfect for a hobby farm.

1. Using Yarrow for Dried Flowers and Crafts

Yarrow is fantastic to use for pressing and drying. It’s especially easy to incorporate into fall crafting. The small, delicate flowers maintain their color (though you should expect fading) and keep their shape very well.

In the fall, dried flower bouquets can be displayed around the house, which include yarrow, strawflowers, lavender and other flowers, plus herbs and grasses.

2. Yarrow Uses for Herbal Tea

Dried yarrow flowers are good to have on hand for tea making.

To dry yarrow, simply harvest stems with the flowers in bloom. Remove the leaves from the stems and make small bundles. Use a rubber band or twine to hold the bundles together and hang them upside down, out of direct sunlight, in a space with good airflow – similar to how you’d dry other herbs.

Once completely dry, remove the yarrow flowers and store them in an airtight container, out of direct sunlight.

To make tea, in a heat-safe mug, simply pour hot water over 1 to 2 tablespoons of yarrow flowers (a tea ball or tea bag is ideal). Steep for at least five minutes. Strain out the yarrow flowers if you aren’t using a ball/bag. This tea can be enjoyed with fresh lemon and some homemade maple syrup, but those additions are up to personal preference.

3. Yarrow Uses for Healing Tinctures

Yarrow has a large list of medicinal and health benefits, which makes it an ideal candidate for making a tincture with.

A tincture is basically a concentrated liquid that can be used for medicinal purposes. It requires infusing fresh or dried yarrow in alcohol for a period of time, then straining the solids out of the alcohol and using the saved infused liquid for therapeutic reasons.

This tincture is typically used for small cuts, burns and scrapes to help clean and to stop bleeding.

Yarrow Tincture How-To

Supplies:

1 pint-size canning jar with lid and ring
Fresh or dried yarrow flowers
Vodka of your choice
Fine mesh sieve
Measuring cup with pour spout to collect infused liquid
Clean container with lid to store tincture, ideally a dark bottle with dropper or spray top.

Directions:

1. Clean your canning jar with hot, soapy water.

2. Fill the jar halfway with fresh or dried yarrow flowers.

3. Pour enough vodka over the flowers to completely cover them. If using dried yarrow, add a little extra vodka as the dried flowers do absorb more of the vodka than when using fresh flowers.

4. Place the lid on the jar and tightly screw on the ring. Place the infusion in a dark cupboard for at least one month. Occasionally, tip the jar upside down to mix up the ingredients.

5. Pour tincture into a clean bottle and screw on the lid.

Final Thoughts on Yarrow

Yarrow is both a beautiful perennial and a valuable herb. From simple dried flower crafts to soothing tea and powerful tinctures, yarrow uses are practical and accessible. Whether you grow it for its color in the garden or its healing qualities in the home, yarrow offers lasting rewards that make it well worth cultivating.

This article about yarrow uses was written for Hobby Farms magazine. Click here to subscribe.