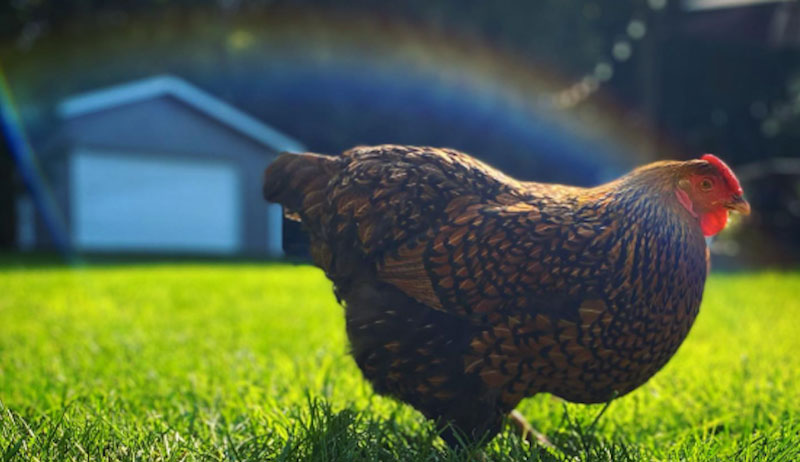
It was Easter when I first got my chickens. Everyone had to find their name on the back of a metal chicken. Then, my grandma and grandpa brought us to their garage, where four chicks awaited us.
That is when I fell in love with taking care of these birds.
After that, we went to a country store many different times, getting more and more chickens. I had help taking care of them for a little bit, but then I got the hang of it. I also got help naming every single hen. I can remember most of their names, but we wrote them down to remember anyway.
As our flock grew, we had to make a bigger chicken coop. We had a rooster for a while, but he was mean and was making the hens mean, so we gave him away. At our peak, we had 26 chickens, but now we have 23.
I have slowly been getting and making things for them. I currently have a harness, a xylophone and a homemade coop.
I take care of my chickens every day and clean the henhouse every Sunday. I do so love my chickens.
Author Victoria C. keeps her chickens in Yakima, Washington. This article originally appeared in the January/February 2023 issue of Chickens magazine.
Have a great story about your flock? Email the story of your birds in ~750 words to chickens@chickensmagazine.com (subject line: Chicken Chat). Be sure to include high-resolution images of yourself, your chickens and/or your coop. The author of each issue’s published essay receives a prize from one of our ad partners. (See print magazine for rules. Sponsor: EG Media Investments LLC)
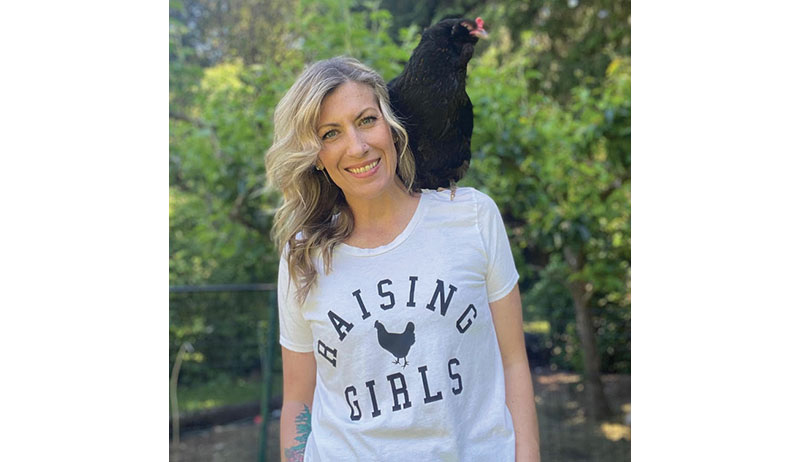
“I didn’t truly get into the idea of hobby or backyard farming until about five years ago,” says Katie from Gregs Chicks, a chicken-focused endeavor based in Poulsbo, Washington. “A neighbor of mine has an amazing 5-acre farm of chickens and occasional pigs. I became absolutely enamored with chickens following a visit to her house.”
When another neighbor of Katie’s added a flock of backyard chicks to their property, she began to have ideas of securing her own brood. When that neighbor relocated, Katie was presented with an opportunity.
“I adopted them and have added to the flock from there!”
Taking time out from tending to her chicks, we spoke to Katie about naming birds after Disney characters and the importance of doing research before bringing chickens home. We also got into the idea of chickens developing interpersonal relationships.
After visiting the aforementioned neighbor, Katie says she started to carry out deep research into raising chickens on a backyard scale.
“There are so many resources out there and it was a little overwhelming,” she recalls, “but the more I learned about them, the more it made sense as a way to incorporate my love of farm animals into my backyard farm plans.”
Alongside the chickens, Katie’s hobby farm includes a raised garden and a greenhouse. She says they’re both beneficial when it comes to keeping the chicks healthy and happy.
After getting to know the various members of her peep, Katie says that she’s discovered just how much each chicken’s personality varies from both breed to breed and individual chick to chick.
“I also am fascinated by their ability to learn routines and associate sounds with people,” she adds. “I am convinced they know the exact sound my car makes versus my family’s vehicles and they respond accordingly by insistently asking—so yelling or clucking—for snacks as soon as I exit my car and round the path to the yard.”
Katie adds that her chickens have also developed interpersonal relationships.
“Yes, pecking order is a thing” she says. “But it seems that so are friendships or preferred associations, which can also be dynamic based on the introduction of new birds.”
“The naming started with the theme of Disney bird characters and unintentionally using ‘boy’-names for hens,” says Katie when asked to detail how she goes about naming her brood. “Once we started, it just kind of continued from there. I am only currently keeping hens and all have names that are traditionally male.
“For instance, Kevin is from the movie Up (yes, I know the bird turns out to be a girl), HeiHei is named for the quirky rooster in Moana, and Steve is named after a character in the Penguins movie.”
When it comes to the current stars of her flock, Katie plumps for Steve. “I will say that Steve is currently the internet’s favorite with her fluffy cheeks and loud voice,” she explains, before adding: “Their names do seem to suit them—especially HeiHei whose namesake is a little hair-brained and a lot goofy. She fits that bill.”
Little Bundles of Feathers &Sunshine
Gregs Chicks
“I truly had not fully understood how much I would love these little bundles of feathers and sunshine,” says Katie when she reflects on her poultry adventures so far. “Their little daily activities, quirky personalities and ridiculously hilarious antics are the bright spot of my day.”
Katie adds that she also feels a sense of pride when she sees how her little flock is thriving.
“Successfully caring for them and receiving not just eggs but their companionship has given me a boost of confidence I didn’t realize I needed,” she says. “It’s a gift in and of itself.”
In this episode, shepherd and Diné fiber artist Roy Kady talks about the importance and traditions of the Navajo-Churro sheep breed, flock management, fiber arts and more.
Recorded on Winter Solstice (in the Northern hemisphere), Roy explains the importance of solstice in Diné lifeways. Learn about the Slow Food USA Navajo-Churro Sheep Presidium, a group created to support and promote endangered foodways—in this case, this rare breed of sheep. Roy tells us what it means to have just 5,000 registered Navajo-Churro sheep and the breed’s their meat, fiber and hardiness characteristics that make them great sheep for a small farm. (Did you know that when managed on range, these sheep can seek out and forage the plants with the properties they need to keep them healthy?)
Hear about Roy’s own flock; what he means when he says, “they manage us”; and the seasonal and rotational grazing methods used in his community. Roy explains how responsible grazing improves the soil. He also offers his advice for breeding and culling sheep to maintain and improve a healthy flock.
Roy tells a story about his family’s history in fiber arts and his own work with wool, from weaving to felting to dying with natural dyes, as well as incorporating nontraditional fibers. Listen until the end to hear about Diné creation stories of the Navajo-Churro sheep and a quick excerpt from a Diné sheep song.
Here are some of the most common and concerning chicken ailments, illnesses and diseases, as well as how to prevent and treat them.
Bumblefoot
Far less fatal and far less serious than some of the other chicken illnesses, bumblefoot is an easily preventable yet unfortunately rather common ailment in young and mature chickens. Bumblefoot is a chronic infection on the footpad, often the result of an injury that became infected. It’s easily diagnosed by locating the abscess on the footpad.
Bumblefoot is very easily prevented, far more so than treating it once it has occurred. Reduce—or eliminate, if you can—any time that your birds spend on wire. Keep the coop and all enclosures clean with deep, dry bedding, and clean the litter regularly. Keep all roosts sanded down and at heights birds can reach.
In short, avoid situations where the feet might become injured.
Bumblefoot can be very difficult to treat. In some cases, a veterinarian can inject penicillin into the swollen area. Otherwise, the abscess needs to be removed manually, dressed properly and kept incredibly clean. For humans, impetigo is a mild health risk, so wear gloves when handling birds with bumblefoot.
Blowout
Properly called prolapse, a blowout occurs when the lower part of the oviduct is turned inside out and ends up on the outside of the vent. It’s a reproductive complication that can occur in any pullet or hen. But it is more common in certain breeds and strains of those breeds.
Applying hemorrhoid cream to the vent and isolating the hen until she improves can remedy minor prolapsed vents. If she’s not treated or left with the flock, the other birds will undoubtedly pick at the vent and worsen the situation. Don’t take chances with flock cannibalism.
Prevention is important but can’t always save a hen from developing a blowout. Some hens are just bred to lay early or lay exceptionally large eggs, making them more prone to prolapse.
Raise breeds that don’t lay gargantuan eggs or start too early. Feed birds a properly managed diet that matches their age and stage of life. Hens with too much fat in their diets can accumulate fat stores in their reproductive system, making reproductive disorders more likely.
Coccidiosis
Several protozoa known as coccidia cause a rapidly advancing, often fatal disease called coccidiosis in very young and developing birds. Nine strains affect poultry.
Coccidia exist everywhere outdoors and are carried and sometimes transmitted from wild birds or other chicken flocks. While it’s possible for adult chickens to contract coccidiosis, it’s most common in chicks 3 to 5 weeks old and in humid, warm and damp conditions.
Unfortunately, the mortality rate of coccidiosis is very high compared to some other chicken illnesses. It’s most easily diagnosed by blood in the stool, but at that stage of development, the disease is almost always fatal, and the bird will not live long. Chicks with coccidiosis will show signs of droopiness, crouching with feathers ruffled, little or no appetite, and slow or no growth in the early stages of the disease.
Good sanitation is a crucial preventative measure against coccidiosis. Keep chick brooders clean, dry and free of excess droppings. Expose chicks gradually to any existing adult flocks to build their systems’ tolerance to the protozoa that live naturally in their environment. This is important for birds born in a hatchery and shipped to new surroundings.
Prevention also includes administering a vaccine on the first day of life. However, there are some caveats.
Vaccines must be given only on the first day of life to be effective, and the inoculations cover only six of the nine strains. Treatment for coccidiosis includes a medication called amprolium. Surviving birds are rarely as strong as birds that never contract the disease.
Dmytro/Adobe Stock
Conjunctivis
The signs of conjunctivitis are clear, but you must look closely at the bird to read them. An affected bird will avoid sunlight and attempt to rub its eyes with its wings. The eyes can appear cloudy, or they might water, later becoming crusty with discharge. Blindness follows in progressed cases.
Mortality varies among birds and flocks, considering the initial and overall health of the hens. It some cases, it resembles a respiratory disease.
Thankfully, conjunctivitis is not contagious. But it is environmental, meaning sanitation and healthy management practices are paramount to preventing it.
Dusty and dry conditions can exacerbate it, but it’s often caused by the buildup of ammonia fumes in flocks confined to coops or enclosures without adequate airflow and thus are rather damp. Prevention is to replace soiled and wet litter with dry and clean bedding, and allow the flock adequate outside time to pasture.
Dehydration
Just like us, chickens can go longer without food than they can without water. When a chicken does drink water, it takes only a bit at a time. You’ll notice it dip its beak in the water, lean its head back and drink it down.
The chicken will do this several times at each visit to the water fount. Because of this, birds need to drink often. Without sufficient water, hens will reduce egg production—an egg is more than 70 percent water, after all—and chicks will fail to thrive.
Dehydration runs on a spectrum. It’s possible for a bird to be deprived of water and not be completely dehydrated. This still has lasting effects on the bird’s health. Laying hens deprived of water for a day or more can take weeks to recover. Going without sufficient water for three days or more can result in a permanent state of weakened egg-laying.
Water deprivation or dehydration can happen for many reasons. Even if their waterer is filled each day, other factors can prevent birds from accessing the water. First, can all of the birds, regardless of size, reach the waterer? Is there something in the water that alters the taste—such as feces or algae—and is it clean? Are birds lower in the pecking order able to reach the waterer or are alpha hens preventing them?
Most importantly, have a good waterer that is built to hold enough water for the size of your flock. Fill it as often as needed so that clean, fresh water is always available. Only you can judge how often that is, based on your climate, flock size, season and style/size of water font.
Birds of different ages need varying amounts of water. The older a bird is, the more water it typically needs. In summer, keep waterers out of direct sun. In winter, take precautionary measures to make sure waterers don’t freeze, preventing the birds from accessing it.
While hotter months tend to suggest the need for more water, proper hydration in the winter is critical to staying warm.
Lastly, invest in a good watering system. Good water founts are raised up at the height of the smallest chicken’s back. They are also designed to prevent roosting and, thus, the contamination of fresh water with droppings.
Egg binding is a very serious reproductive issue that is most common in young birds, called point-of-lay pullets. This ailment occurs when an egg becomes lodged in a chamber of the cloaca. It might be that a young bird is laying exceptionally large eggs, a disease caused the reproductive organs to swell or the issue is a matter of genetics. However it occurs, it’s important to know that an egg-bound hen is in a fatal predicament unless the egg is removed.
How do you know a hen is egg bound? It’s true that chickens will manifest many of the same symptoms for a wide range of illnesses. You have to be a bit of a detective to figure out exactly what’s wrong. With egg binding, there’s a telltale sign, something I call the “penguin stance.”
An egg-bound hen—in addition to not laying, rarely eating or drinking, crouching or walking oddly—will stand in a very unusual position. With her tail tucked downward and her feathers fluffed out just a bit, the egg-bound hen resembles a penguin. She might not move or might move very slowly.
There are several ways to remedy egg binding. Because the egg is blocking the vent, this is not an ailment where you can wait for very long. It’s a serious condition that will kill the bird if untreated. If it’s within your means and your philosophy of chicken keeping, you might take the bird to an avian vet.
If you’re more of a DIYer, you have several options.
Some chicken-keepers can help the hen pass the egg by removing her to an isolated, dark and quiet location away from the flock. Some keepers say their egg-bound hens pass the egg within hours. In addition to this approach, you can submerge the hen’s bottom half in a warm bath and gently massage her abdomen. If the case seems far progressed, it’s possible to remove the egg manually, taking great care not to break the egg in the process.
If you choose to attempt this, do so with another set of hands for assistance.
The best cure for egg binding is prevention. Start with a healthy diet, limiting fatty treats such as scratch in the summer, and providing age-appropriate feeds and making sure the bird has sufficient calcium and phosphorus. Also, allow birds to free-range and exercise.
Avoid using hens that bind frequently as your breeding stock, as they will pass along the trait to their offspring.
Fleas & Flies
Fleas and flies are insects that feed on the blood of chickens and live off the body to breed and perpetuate their life cycles. The European chick flea (Ceratophyllus gallinae) and the western hen flea (Ceratophyllus niger) are the two species most likely to affect North American flocks.
Both flea types breed in nests, bedding and droppings, and they return to the birds for blood meals.
Black flies and biting flies are larger insects found near stagnant water. Filth flies breed in soggy manure and damp bedding.
What’s the harm in a flea or fly, you wonder? Well, an infestation of either insect can lead to weight loss or slow growth in young birds as well as physical damage to meat birds, and it might affect egg production in laying hens. Heavy infestations of fleas or flies can severely weaken chicks and sick birds, perhaps resulting in death.
These insects can also, of course, carry and spread disease and illnesses between chickens.
Because populations of these two insects are supported by damp conditions, keep bedding, nest boxes and litter dry. Check faucets, waterers and roofs for leaks, and remove all sources of stagnant water.
To control flies, clean the coop thoroughly after removing the litter and replacing with fresh bedding. Improve ventilation on very hot days especially, because flies don’t like moving air. Flytraps hung out of reach of the chickens as well as other commercially available fly-control products can help you control the fly population.
In winter, a hen sleeps with her head tucked under a wing. A rooster does not.
In biting cold temperatures, roosters’ extra large combs are exposed to the extremes, putting them at risk. When frozen, a comb or wattle will appear pale. If you can catch this at the frozen stage, apply a warm, wet cloth. Allow it to dry, then apply food-grade oil.
If it has frozen and already thawed, you might notice it’s bright red and swollen. It might appear painful. At this stage, you can still apply food-grade oil or honey on the appendage to promote healing.
Serious cases of frostbite can leave a rooster permanently ill or even infertile. If you suspect frostbite or serious freezing, watch the rooster carefully, as his injury could weaken him, which can leave him susceptible to pecking from the rest of the flock. If necessary, isolate an injured bird for care.
If the wattle or comb turn black and the tissue is dead, it might need to be surgically removed.
There isn’t one easy way to prevent frostbite, but you can take several measures to help. For this and many other reasons, make sure your coop is properly insulated but also has excellent ventilation. Monitor chickens closely during the winter, and make sure they always have fresh water.
Keel Cyst
Better known simply as breast blisters, keel ailments are rather common and progress chronically. These blisters appear on the breasts of growing cockerels or particularly heavy-breasted breeds, each one starting as a blister and eventually growing into a thick callus.
The blister (here’s your warning of something unpleasant to come) is usually filled with a clear liquid, though it can be bloody or contain pus that is cheesy in consistency. Thankfully, mortality is low, and cysts can be prevented by simply keeping your birds in humane and sanitary conditions.
Breast blisters typically affect birds confined to cages or small spaces, where their breast bones rub or are pressed against wire cages, wire walls or roosts they’re forced to touch. Give your flock the space it needs and deserves, and your birds might never be at risk for keel concerns. Large-breasted cocks can be protected against blisters by padding roosts as necessary.
As long as a blister isn’t infected, it won’t pose a threat to humans and isn’t contagious between birds. Some experienced chicken keepers treat keel cysts at home by draining the blisters themselves. But for backyard keepers, it’s highly recommended to consult an avian veterinarian should your bird develop a keel cyst.
Marek’s Disease
Marek’s is truly one of the more concerning chicken illnesses to afflict backyard flocks. It’s common, easily spread and almost always deadly, making it a feared and frustrating issue for those who care for chickens.
A neurological illness, Marek’s affects the nervous system as well as the organs and even skin. The disease is caused by six varieties of the herpes virus. It originates in the feather follicle and lives for years in the bedding and litter of flocks. It can be easily spread from flock to flock by walking in a healthy coop with shoes or boots that walked through a contaminated flock.
Symptoms of a Marek’s case can vary widely. Most notably, a bird will appear paralyzed, probably because of the pressure put on the spinal cord by enlarged nerves and nodules. It might affect a bird’s respiratory system, in which case a sick chicken will gasp or wheeze in addition to having trouble standing or stumbling often. It’s more common in pullets than cockerels, and death occurs usually within two months of the first symptoms appearing.
Prevention is best attained through several avenues. Firstly, practice extremely stringent biosecurity measures, especially when visiting other flocks or farms, buying chicks or handling chickens that aren’t yours. Wash your hands between handling flocks, and keep your coop clean, regularly changing the bedding. The Marek’s disease vaccine is one of the best methods of prevention, though it doesn’t cover all six strains of the virus, in which case, breeding for resistance and keeping a clean coop can help prevent its spread.
Very few birds survive Marek’s, and those that do are lifetime carriers. If you suspect one of your flock members has Marek’s, separate it immediately from the rest of the flock, and take the individual bird to the vet for testing.
The results should inform your next course of action, which usually includes a deep cleaning of the coop and new biosecurity measures.
Newcastle Disease
Newcastle is another unpleasant disease, but the mortality rate is much less than other common chicken illnesses and ailments. Newcastle is caused by the highly contagious paramyxovirus and is spread by ingesting the virus, either from the droppings of other birds or shared feed and water. Transfer can also be airborne.
Newcastle looks like a respiratory disease with the addition of nervous system symptoms. Birds will wheeze and gasp; hens will stop laying eggs. Farmers might see some discharge from a bird’s nasal cavities. A veterinarian can confirm the diagnosis, so take your chicken in as soon as you suspect something.
Treat afflicted birds according to your vet’s recommendations. Usually, birds must be kept warm, hydrated, fed and comfortable. Survivors of Newcastle will be carriers for as long as 30 days but will develop immunity.
Prevention is best done by breeding for genetic resistance. Unfortunately, while good sanitation and coop hygiene are imperative for so many issues, it’s not really a factor when trying to prevent Newcastle. In this case, your best efforts might not make a difference.
Lastly, be mindful of touching your face and eyes after handling a bird with Newcastle, as it can transmit a temporary eye infection to humans.
Omphalitis
Omphalitis, an infection in chicks that occurs after the egg sack isn’t absorbed, can cause a young chicken to die as long as two weeks after hatch. Also known as mushy chick disease, it’s caused by bacteria either in the egg when formed or that gets in through the shell.
Omphalitis is associated with hatching environments that aren’t sufficiently humid, according to Poultry Diseases, edited by Mark Pattison, Paul McMullin, Janet Bradbury and Dennis Alexander. Clinical signs include affected chicks appearing depressed as well as having distended abdomens and a tendency to huddle. Sometimes the navel is visibly thickened, prominent and necrotic.
Santirat/Adobe Stock
Pasted Vent
Pasted vent is another chick ailment, one that is deadly if not addressed but very easy to prevent and cure. Also called “pasty butt,” possibly to lighten the situation, pasted vents occur when feces get compacted around the vent and the chick is unable to defecate. It seems like a minor problem, but it’s nothing to take lightly.
Chicks with pasted vents will die if the disorder is not addressed. Check young chicks daily for the first few weeks of life. Thoroughly but gently clean each chick’s pasted bottom with a warm, wet cloth.
In addition to daily care of chicks, make sure they have a low-stress brooder life, availability of fresh water, appropriate brooder temperature and good feed at all times. With these needs met, pasted vents should clear up quickly.
Pox
Pox of the chicken is considered either wet or dry in variety. It’s not related to chicken pox that affects humans, but it manifests in roughly the same way:
white, wartlike scabs
bumps on the head, face and necks
(potentially) bleeding, scablike rough areas on the fleshy parts of the chicken.
In other words, it’s not pretty.
Unfortunately, pox is a virus that defies your best management practices and is contagious from bird to bird through general contact. If one bird gets it, the whole flock probably will, unless the outbreak is isolated rather quickly.
Pox can be spread through bites from mites and mosquitoes, so keeping populations of those insects at bay can help tremendously. Mortality is low with dry pox, but slightly higher (as much as 50 percent) with wet pox, so address it early and arrange for the proper treatment from your veterinarian if possible.
As with other chicken illnesses, vaccinations are available.
Sour Crop
Sour crop is a yeast infection in the crop, a part of the esophagus or food pipe at the base of the neck where the initial stages of digestion occur. It leads to thickening of the crop wall and dilation of the crop and can cause a bird to lose conditioning and possibly die.
Sour crop is caused by a disruption of the normal bacteria that inhabit the crop, with an overgrowth of candidia (which is a fungal species) often occurring. The disorder happens mainly to hens.
In the book So You Want To Start Keeping Chickens?, author Mark Burrows writes that the fungus develops inside the crop and “in turn will cause the crop to get bigger and fill up with some rather evil smelling liquid.”
Respiratory Infections
Many common chicken illnesses can affect a bird’s respiratory system (which includes the trachea, lungs and air sacs), be it viral, bacterial, fungal or mycoplasmal infections. Common signs of a respiratory infection in a chicken include:
abnormal breathing sounds
bluish-purple face discoloration
conjunctivitis
coughing
dirty wings, from birds wiping their nostrils on them
discharge from the eyes
discharge from the nose
face and/or wattle swelling
gasping
inactivity
production of thin-shelled eggs
reduced egg production
shaking head
slow growth
sneezing
Scaly Leg Mites
These little gray bugs spend their lives on chickens if they’re allowed to infest a flock, and they’re notoriously difficult to eradicate. Many conventional breeders and keepers suggest quickly culling any infested chickens, as the mites spread quickly from bird to bird.
These mites prefer the featherless areas of the chicken, burrowing under the scales on a bird’s leg shanks. This gives the chicken the telltale look of a scaly leg mite infestation: old, raised, crusty leg scales.
If you see a bird with leg mites, you have several options. As mentioned previously, you can cull the bird, though this isn’t usually a viable option for those who keep their birds as pets. The most extreme medication route involves the chemical treatment ivermectin.
Unfortunately, this treatment brings with it a huge drawback: It’s not known how long the medication remains in the body, so it’s not recommended for meat birds or layers. The middle road is a more natural treatment: coating the legs in a mineral oil to smother the mites and heal the legs. This method is not foolproof, but it’s well worth a try.
Just know that the leg scales might never return to normal, even if you do get the mite population under control.
Thrush
A very common upper digestive tract infection, thrush affects about 20 percent of flocks, but thankfully, its fatality rate is less than 5 percent—far better than some other chicken illnesses. Thrush is a highly treatable in fairly young, healthy birds, which can bounce back quickly.
There are important things to know about thrush, including its tendency to come along with other illnesses. Thrush feasts on low gut bacteria, so it’s more likely to appear after a round of antibiotics, which usually follows another illness, such as coccidiosis.
Thrush occurs when natural bacteria that colonize the gut are thrown out of balance by poor health or antibiotics—pretty much the same thing that happens to humans.
The good news? Prevention is easy and very good practice for your flock: Avoid prolonged exposure to antibiotics, keep birds healthy with a varied diet and offer probiotic-rich treats. Chickens love yogurt and don’t mind apple cider vinegar tossed in their water.
Most importantly, keep the coop clean. The bacteria in which thrush (and other illnesses) thrives is transmitted through chicken droppings in the drinking water.
Treatment for thrush is simple but has several components: Clean infected areas, treat drinking water with Epsom salts or apple cider vinegar, and clean mouth sores in the chickens, if necessary. Infected birds should, of course, be isolated for the duration of treatment.
Also consider further medication, such as nystatin, if the case is severe. A trusted avian veterinarian can guide you.
One last word: Practice good sanitation with yourself after handling a bird with thrush. The same bacteria that infects the bird can cause human health risk in the form of mouth and genital infections.
We hope you learned a lot about keeping your flock healthy from illnesses in our chicken health handbook. If you have more health-related questions about your birds, search in the field at the top of this page. Good luck raising happy, healthy chickens.
This article originally appeared in the January/February 2023 issue of Chickens magazine.
We have reached my favorite chapter in the book. I hope it is as fun for you all to read as it’s been for me to write. Who doesn’t love spending their day covered in dirt in the greenhouse? If that’s not you, hold tight, I might change your mind by the end of this chapter.
This chapter covers topics from the benefits of starting seeds to step-by-step how-to’s, deep diving into the differences between hybrids and heirloom varieties, and so much more. I think back to when I started my first garden; I had a handful of watermelon seeds and some plants from the local hardware store about 5 miles (8 km) up the road. I never purchased organic plants, I treated them with harsh chemicals, and my garden sure as heck didn’t thrive like I thought it would. While it did grow wild and free, it left a lot to be desired.
A few years later, I transitioned my entire life to a more sustainable, organic, and healthy lifestyle. At that time, I started leaning into growing and expanding my garden, but I also spent time and diligence researching and understanding heirloom and hybrid varieties and which of them would be better for my tiny organic farm.
I could spend an entire chapter explaining all the cool facts about seed starting, but to spare you what a “fun” afternoon with Jill looks like, we’ll keep to the essentials. I urge you to look up more fun and interesting facts about the seeds you plant, such as where they are bred and sourced, how they’ve evolved through the years, the various sizes of seeds, information about rare varieties, and the endless growing possibilities available to you.
Oh, so, back to those seed-starting essentials I promised to stick to. Let’s start with why we should start our own seeds instead of just buying plants. Isn’t that too much work? That’s certainly what I thought many moons ago. Now I can’t imagine a season passing by without a greenhouse full of freshly seeded trays. Here’s why I choose to start from seed and hope you will do the same.
If you’ve never grown hybrid varieties before, here is your permission to buy the seeds and see how they will forever change how you view production crops.
Starting seeds is an excellent way to get a head start on your growing season. Plus, it’s more cost effective to start your plants, especially if your goal is high production. One potted plant from a nursery will likely cost you more than an entire package of dozens or even hundreds of seeds. One plant versus 50–200 seeds? That’s a no-brainer for me.
The good thing, too, is that planting from seed gives you the liberty to fail and try again. The cost of starting seeds (even for the second or third time) is significantly less than buying multiple potted plants from a nursery.
My favorite thing about starting seeds is the thousands of varieties I can choose from; these are unique varieties I would not be able to find as plants at my local nursery. Tromboncino squash has made its way into my garden for the last four years, and I can assure you I would not be able to find a Tromboncino squash plant for sale in nurseries anywhere near me.
I grow food for more than the yield. I grow food for the experience. The experience of trying new varieties, of seeing vegetables I’d never know if I didn’t grow them for myself. That feeling of growing something new that I started from seed for the first time is nothing short of extraordinary.
Starting seeds does not have to be a terrifying endeavor, but here are a few things to consider before jumping in. Growing from seed allows you to get a head start on the growing season, to grow more unusual varieties, and to get more plants for your money.
Starting Seeds Indoors
Starting seeds indoors has many advantages, especially if you aim to grow intensively and implement succession planting. You can either start your seeds in a greenhouse (which I’ll discuss later) or indoors, using racks and grow lights. Reference the equipment sidebar below to set yourself up for success.
Equipment needed for starting seeds indoors:
Containers (your choice of size) with drainage holes
Deep 10 x 20-inch (25 x 51 cm) plastic trays (with no holes for bottom watering and housing your seedlings if starting them in single pots)
Seed-starting potting soil of your choice
Metal racks (if growing a large quantity) or shelves
Grow lights (these can be anything from inexpensive shop lights to fancy LED lights specific for growing plants)
Seedling heat mat (optional)
Humidity dome
Labels
Markers
Seeds
There is no right or wrong way to start your seeds. Some of mine are started in the glass greenhouse in the cottage garden. The majority are started in my 14 x 36 feet (4 x 11 m) seed-starting tunnel, but every season I ambitiously start a few indoors using a rack and a grow light.
Picture the scene: a lovely garden filled with tidy raised beds, each containing a different type of vegetable, herb, flower, etc. Grass and stone pavers line the paths between the beds.
It’s picturesque and beautiful.
But wait … are those beds made with pressure-treated lumber? You might assume the answer is yes, since pressure-treated lumber is more resistant to rot and decay than untreated lumber. This makes it suitable for outdoor construction.
However, treated lumber isn’t completely immune to rot. And over time the materials used to pressure-treat lumber (arsenic, copper, etc.) can leach into the soil and wind up in the food chain. Plant roots are often where these metals become concentrated, so root vegetables like potatoes and carrots are obviously susceptible to leaching.
But even the leaves of plants like lettuce and spinach can be affected.
The good news is, you don’t have to build your garden beds out of pressure-treated lumber. There are many types of wood that are naturally resistant to rot, moisture, and/or insects, making them durable and suitable for use in gardens.
If you’re looking to steer clear of using treated lumber for your raised garden beds, we have you covered. The following five woods are naturally long-lasting and ideal for building raised garden beds:
1. Cedar
Cedar is widely used in outdoor construction. If you want to shingle your roof in wood, cedar shingles are a fine choice.
In addition to being durable, cedar wood has a lovely appearance and a pleasant aroma. So cedar furniture is a good way to appreciate its qualities. And yes, you can build or buy raised garden beds made from cedar wood.
The wood of the Osage Orange tree is incredibly hard and therefore durable when used outdoors.
Janka ratings measure the hardness of different wood types. Whereas well-known hardwoods like oaks and maples fall in the 1,200-1,500 range, Osage Orange is up in the 2,000s. Driving nails into Osage Orange wood isn’t easy, but if you’re looking for a tough wood for building raised garden beds, you’ve found it.
3. Black Locust
Black Locust wood has long been valued for fence posts and railway ties because it can resist rotting for decades. Like Osage Orange, it’s very hard wood (harder than maple and oak) well-suited to building raised garden beds.
Redwood is yet another quality wood resistant to rot and insect pests. In addition, it’s lovely in appearance with attractive grain, adding a decorative touch to your garden.
If possible, shop for lumber made from the heartwood. This performs better than the sapwood.
5. Teak
Teak isn’t native to North America. It actually grows in the southern and southeastern regions of Asia. But its oily wood is strong and resistant to rot and insects, making it popular for a wide variety of outdoor construction projects.
Of course, these aren’t the only types of wood suitable for building untreated raised garden beds. If you don’t mind replacing the beds on a semi-regular basis, even wood that decays after a few years can be used.
But if you opt to build garden beds from one of these five hardy woods, you’ll be investing in long-lasting lumber without any need to worry about chemical treatments. That sounds like a win-win result!
Let’s celebrate the 125th issueof Hobby Farms and a brand-new year with 125 handy farming tips for use around your farm!
Whether you’ve just bought your first acreage or have plenty of experience, we hope you’ll find some useful ideas that will make your farm life productive, safe, efficient and even fun.
Not all tips will apply to your own situation, of course. But we hope there are a few that really hit home and make you think, “Hmm, that’s interesting. I’ll try it!”
Orcharding Tips
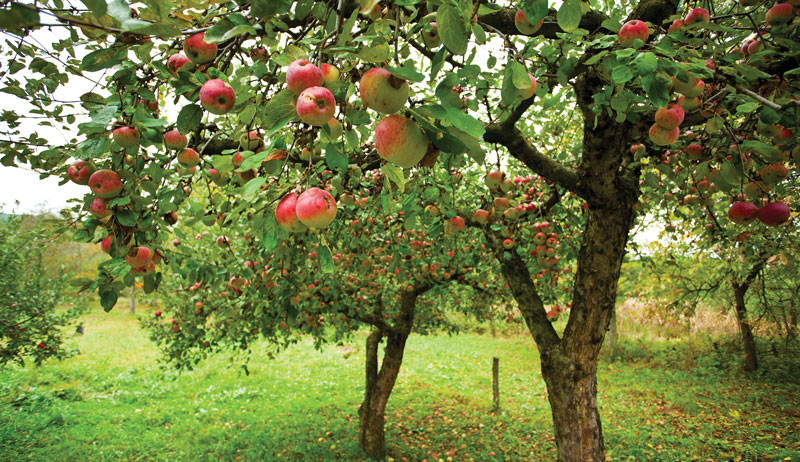
1. When planting fruit trees, consider the expected mature size of each tree. Space them so they won’t crowd each other or nearby buildings when they’re fully grown.
2. For the most part, fruit and nut trees require at least 6 to 8 hours of full sun to produce to their full potential.
3. Rows of windbreak trees can shelter an orchard from cold or drying winds and protect blossoms during the spring, increasing pollinator activity and fruit/nut yields.
4. In the United States, prevailing winds come from the west and northwest. Windbreaks should be planted along the west and north borders of areas you aim to protect.
Xalanx/Adobe Stock
5. Don’t plant windbreaks too close to protected areas. Back them up by at least 50 if not 100 feet. And make sure each windbreak line extends 50 feet farther than the protected area at each end.
6. When planting trees, dig a hole two to three times wider than the roots and a few inches deeper. Backfill those few extra inches with some loose soil so the roots have an easier time growing.
7. Plastic trunk guards help protect young tree trunks from girdling (by hungry critters) and injury (from a careless slip with a string trimmer mower).
8. In addition to trunk guards, white cloth wraps can protect young trunks and branches from sunscald, a cracking of the bark when bright winter sun causes wood to expand and contract with extreme temperature fluctuations.
9. To protect your orchard from deer, construct either a single perimeter fence at least 8 feet tall or a pair of shorter fences spaced 5 to 6 feet apart.
10. Putting down a 3- to 4-inch layer of mulch around trees can help eliminate weeds, improve water retention and protect roots during cold weather. Wood chips, gravel, shredded leaves or bark and grass clippings can all make suitable mulches.
11. Nitrogen (N), phosphorus (P) and potassium (K) are three critical nutrients trees need to thrive. A soil test can reveal if you’re short on one or more. And chemical or organic NPK fertilizers can alleviate the issue (or simply give your trees an extra boost).
12. Walnut trees offer valuable lumber and nuts. But juglone (a reddish yellow crystalline compound) released by the roots can be toxic to other plants, including apple and pear trees.
13. Planting cold-sensitive trees on north-facing slopes can delay their spring awakening and help prevent them from being damaged by late frosts.
14. After planting, potted trees require daily watering for at least the first few weeks, followed by a weekly watering for the first year or two. The commitment is large. But on the upside, potted trees can be purchased in large sizes and kept in their pots until you’re ready to plant.
15. Bare-root trees aren’t as needy after planting. A weekly watering for the first year will likely suffice. But they must be planted right away so their roots don’t dry out, and summer plantings aren’t recommended. You’re limited to spring and fall.
Tire Tips
16. R1 agricultural tires have deep, widely spaced lugs designed to aggressively generate traction over challenging terrain. Because good traction is a key to maximizing tractor performance, R1 tires are a great choice for heavy-duty fieldwork.
17. R3 turf tires are wide with shallow, closely spaced lugs. They’re kind to lawns and are commonly found on riding mowers since they reduce soil compaction and are less likely to put ruts in soft ground. The downside is reduced traction.
Cavan/Adone Stock
18. R4 industrial tires are good all-around tires with sturdy sidewalls capable of supporting heavy loads. They hold up well over hard surfaces (including concrete and gravel) and are suitable for use with forklifts and front-end loaders.
19. Tire chains can provide a significant traction boost in snow and ice. But they shouldn’t be used at high speeds or on dry pavement.
20. Liquid tire ballast can increase traction and lower your tractor’s center of gravity by adding weight to the drive wheels. Beet juice is a favorable choice.
21. Calcium chloride has long been used for liquid tire ballast because it weighs more than water and resists freezing at temperatures well below zero. But it can be hazardous to handle and has a reputation for corroding wheel rims. Use it with an inner tube if at all.
22. Radial tires have treads that flex independently of the sidewall, improving traction and fuel economy while reducing soil compaction. But they’re more expensive, a little less suitable on slopes and not quite as ruggedly tough as old-fashioned bias tires.
23. Inflating tires to the recommended pounds per square inch can increase fuel economy, prolong the lives of the tires and improve performance and safety.
24. ATVs and UTVs have off-road tires and high centers of gravity, making them unstable and difficult to control when operating on pavement. Pavement can also wear down tires, so limit ATV and UTV use to your farm and designated ATV trails, even if local laws allow operation on paved roads.
25. Check tire pressure in cold weather. When that first winter cold snap hits, the PSI in your tires tends to drop suddenly. Keep an eye on the pressure in early winter so you’re not moving heavy equipment on underinflated tires.
26. Keep spare tires and rims on hand. While impractical for every situation, keep a spare tire and rim on hand for mission-critical equipment. This way, in the event of a flat, all you have to do is swap a few lug nuts and keep moving.
27. In a pinch and need something to block a wheel? Grab a triangular wedge of split firewood. It fits right up against the wheel like it was made for it.
Farm Life Tips
28. Attract fireflies to your farm by providing their ideal habitat: tall grasses, logs, leaves, brush, damp areas, darkness (switch off your outdoor lights) and a pesticide/chemical-free environment.
29. Discourage mice from taking up residence in your barn by blocking easy entrances and immediately sweeping up any spilled grain or feed. Use rodent-proof containers for added protection in case any intrepid mice arrive uninvited.
30. Keep paper towels handy. You might not think of them as a must-have farm tool, but you’ll use them for a million and one tasks.
31. Remember this: Farming can be hard. Remember this as well: It’s worth it!
32. Always have extra 5-gallon buckets on hand. You never know when you need them, and when you need them, you need them now.
33. Stop and smell the roses, the freshly mown grass, the tomato leaves, the homemade bread, the dill, the lilacs and the apple blossoms. It only takes a moment, but it will set a lovely tone for your day.
34. Try not to stop and smell the wet farm dogs.
35. Check your boots before putting them on. It’s not unheard of to have a small critter or wasp take up temporary residence while you’re away.
36. Farm dogs need specific jobs, or they’ll invent their own (and you might not like what they choose to oversee!).
37. In many regions, mud is a season, so prepare accordingly. Struggling with inadequate gear during mud season is the No. 1 reason people give up farming. (OK, maybe not, but mud season is tough if you’re not prepared!)
38. Harvest maple sap when the temperatures begin reaching the 40s (degrees Fahrenheit) during the day and dropping back into the 20s at night.
39. Never stop learning. Explore the basics of solar power. Pursue Master Gardener certification. Teach yourself to crochet. Learn to make sourdough bread. Take riding lessons. Read, read, read. Also, learn to identify local poisonous plants for you and your livestock.
40. If you have some DIY skills, you can save money by building your own beekeeping or gardening equipment. You can learn to craft your own raised beds, cold frames, trellises, potting benches, beehives and more.
41. Never underestimate the importance of a good pair of work gloves and the value of good rubber boots.
42. Don’t forget these three must-have items for putting up hay: water, sunscreen and patience.
43. On a farm, you can never have too many brooms. You’ll want them in the house, in the garage, in the barn and any place you move hay/store hay/feed animals.
44. Try new things. It’s easy to fall into a rhythmic routine of farm life with regular chores and tasks pertaining to each season. But always keep an eye out for simple ways to streamline so you can work smarter, not harder. If possible, invest in some tools or equipment that will make routine tasks easier.
45. Fuel stabilizers slow the degradation of stored fuel. Instead of draining the tanks of seasonal equipment, add a fuel stabilizer so the tanks can stay full, reducing the risk of condensation corroding the fuel system.
46. Properly lubricating farm machinery (check the manuals for instructions) can reduce wear and prolong their lifespans.
47. Try premixed coolant. If you’re draining and refreshing the coolant system on multiple tractors, you probably mix your own coolant to save a little money. But for quick top-offs during the height of working season, prediluted 50/50 coolant is a super timesaver.
48. An engine block heater or oil pan heater can help engines (particularly diesel engines) start readily in cold weather.
49. A multigrade oil like 5W-30 also helps engines start in cold temperatures while still providing protection and performance when the engine warms up to operating temperature.
Tractor, Machinery & Tool Tips
50. The bucket on a front-end loader can accomplish a lot. But exchanging the bucket with other attachments (such as a grapple, fork or a hay bale spear) significantly expands the range of projects you can tackle.
51. Hydrostatic transmissions provide an infinite number of increments in their range of speed and can also shift instantly from forward to reverse, making them convenient for working with a front-end loader.
52. A tractor with 60 horsepower can handle more tasks and use larger implements than a tractor with 20 horsepower, expanding your farming capabilities and saving you time on large-scale field work. But the 20-horsepower tractor is likely smaller, lighter weight, and more maneuverable, reducing soil compaction and turf damage when operating in a yard or garden.
53. Engine horsepower and power take-off horsepower aren’t the same rating. PTO horsepower can be meaningfully lower. When pairing a tractor with PTO-powered implements, pay extra attention to the PTO-horsepower rating to make sure your tractor has enough power.
54. Four-wheel drive tractors offer superior traction (especially over challenging terrain such as snow and ice) with decreased wheel slippage, which reduces wear and tear while improving fuel economy.
55. If your tractor or machinery has a handy toolbox, use it wisely! Clean it out and restock it with simple things like a hammer, adjustable wrench, utility knife, multiscrewdriver, flashlight and pliers. Having a range of useful tools on hand can save a lot of time in the field. You might also wear or keep handy a multitool. It’ll save trips to the shed or garage.
56. Maintain UTV drive belts. Unlike your vehicle, UTVs generally transfer power from the engine to the drive wheels via a belt. Keep this critical element in top order through regular inspections. You don’t want to get stranded far from the home place from a minor equipment failure! The ATV equivalent to this is regular drive chain lubrication.
57. Three-point hitches and their accompanying implements come in a wide variety of sizes, ranging from category 0 (the smallest) to category 4. Make sure you purchase implements that match the hitch of your tractor.
58. The lifting power of a three-point hitch can be used to remove fence posts and move rocks, provided the load isn’t heavy enough to tip the front of the tractor off the ground.
59. Suitcase weights, wheel weights, a ballast box, etc. are often necessary to counterbalance heavy loads at the front or rear of a tractor, whether you’re moving rocks with a front-end loader or using a large implement on the three-point hitch.
60. Keep extra batteries handy when using electric tools and machines so you don’t run out of power in the middle of a farm job. Recharging a battery isn’t as quick as refilling a gasoline engine.
61. A zero-turn lawn mower is fast and highly maneuverable because steering is based on operating drive wheels at different speeds or opposite directions. But both wheels need good traction in order to steer.
62. Lawn mower blades should be sharp and balanced to cut cleanly and reduce strain on the engine.
63. String trimmer mowers are useful for mowing areas where you might encounter hidden rocks or forgotten objects, because the cutting string is readily replaceable and striking an object won’t damage blades.
64. Electric tools and machines offer the benefits of reduced noise, less maintenance, no emissions and easier starting compared to gasoline and diesel engines, though in many cases the tradeoff is reduced power.
Fruit-Tree Pruning Tips
65. When pruning plants and shrubs, use bypass shears or loppers—which cut cleanly—for delicate live growth and anvil shears or loppers—which cut with a crushing force for dead wood.
66. Apple and pear trees should be pruned during late winter while the trees are dormant. But stone fruit trees—such as plums—should be pruned around or after spring blossoms have opened.
67. Removing crisscrossing branches and branches that grow inward toward the trunk helps generate an open crown in fruit trees, improving air circulation and sunlight penetration to reduce disease and promote the growth of fruit lower in the crown.
68. In an exception to the previous pruning tips, dead branches can be removed at any time of year.
69. Summer is a good time to prune overly vigorous new growth on fruit trees. But pruning in the fall should be avoided, because it can trigger another round of tender growth that won’t harden off in time for winter.
70. A heading cut shortens a branch back to a leaf bud, encouraging additional branches to develop. A thinning cut removes a branch entirely.
71. When pruning large branches, make a small cut on the underside before cutting the rest from above. This prevents the branch from tearing bark away from the tree trunk when it gives way.
72. Waterspouts (vigorous vertical shoots emerging from odd places) and suckers (new shoots sprouting from the roots) should be pruned off whenever they appear, regardless of season.
73. Will you be ordering a new package of honeybees soon? Ask for a marked queen. You’ll have a much easier time spotting her when doing regular hive checks.
74. To discourage bees from swarming, expand the hive as needed to provide them with enough space. If the hive begins to feel crowded, bees tend to swarm.
75. Keep good records for your beehives. Include the date you installed the bees, dates of your regular hive checks, amount of honey harvested, etc.
76. Plant flowers your bees will love and in return, they’ll be(e) excellent pollinators for your garden. Favorite plants include bee balm, hyssop, sunflowers, catmint, sedum and many others.
77. Before extracting honey, assemble all the necessary tools and equipment. You don’t want to be in the middle of extraction and then realize you don’t have everything you need.
78. If you want to attract mason bees as pollinators for your gardens, provide them with a mud source. Mason bees need mud when they lay eggs, and you’ll encourage them to take up residence near your gardens if you provide the mud.
Cooking & Pantry Tips
79. A well-stocked pantry should contain as much variety as you will regularly use, but don’t waste valuable space on ingredients you really don’t use or your family doesn’t like.
80. Eat what’s in season. There’s nothing as fresh and flavorful as peas and strawberries in spring, tomatoes and raspberries in summer, or pumpkins and apples in autumn. Celebrate the seasons by highlighting the special foods associated with them.
81. When you’re preparing vegetables for drying or dehydrating, pieces should be consistent in size so they’ll dry at a uniform rate.
82. Get kids excited about gardening with a pizza garden. Plant tomatoes, oregano, basil, onions and peppers and watch as your pizza ingredients grow throughout the summer. Then enjoy homemade pizzas at the end of summer!
83. Grow what you like to eat on your farm. Don’t fill an entire garden bed with broccoli if no one in your family will eat it. Save the space for the foods you truly enjoy.
84. When cooking with green tomatoes, choose tomatoes that have reached their mature size and are nearly ripe (but still green, of course).
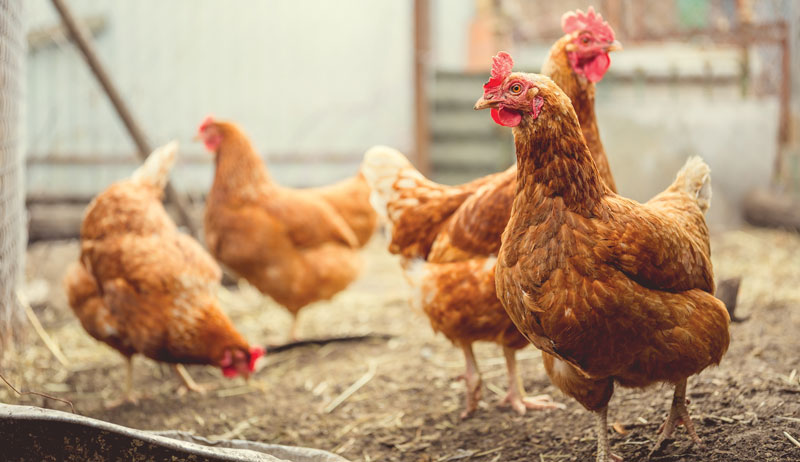
Chicken Tips
85. Choose chickens as your first livestock. Along with beekeeping, chickens are among the easiest and least expensive types of livestock to get into. If you’re a beginner ready to move past the garden and into raising animals, chickens are a great option, and a huge community is out there to turn to for advice.
86. Look at dual-purpose birds. There is a chicken breed out there to suit just about any preference, but hobby farmers with limited space might do well to explore chicken breeds suitable for both eggs and meat—breeds such as Plymouth Rocks.
87. Keep those hens laying. As fall approaches and the hours of daylight decrease, you may notice your hens laying fewer eggs. Encourage them to keep producing by adding a supplemental light source to their coop.
Anton Dios/Adobe Stock
88. Avoid chicken wire for fencing. Chicken wire, with its classic lightweight hexagonal design, is fine for directing hens around the run or inside a large coop to partition birds. But it’s much too thin to act as predator protection. For that you’re better off with a large-gauge 1⁄2-inch hardware cloth.
89. Retain older hens if you’d like. Some poultry-keepers might cull older hens when they stop producing eggs. But senior hens still contribute valuable compost and help keep certain weeds under control. They also help rear youngsters in the flock.
90. Explore chick brooder plates. Heat lamps have their uses, but you can forgo the fire concerns by rearing your chicks with a brooder plate instead. Plus, they use less wattage.
91. Offer a calcium supplement. Hens need plenty of calcium to create proper eggshells, and you can offer a free-choice oyster shell supplement or similar product to meet this need.
92. Consider a heritage breed. Once you have a bit of chicken experience, you might be interested in raising a rare heritage chicken breed and help dwindling numbers recover.
93. Use an automatic coop door timer. Don’t ever worry about “Did I shut the coop door?” after you’ve gone to bed. This simple device will do the job for you.
94. You don’t have to limit your poultry flock to chickens: Explore the benefits of keeping other species to diversify your flock. Eggs from quail, ducks, turkeys, geese and even emus or ostrich provide alternative flavors and different nutritional choices from the classic chicken egg.
95. Enjoy your birds. Don’t become so focused on the eggs that you miss the subtle joys that come from merely stopping to watch the fascinating behavior of your chickens. They’re amazing birds!
96. Get a scoop shovel. If you don’t already own one of these oversized, short-handled shovels, get three! Useful in the barn and farmyard, they also double as awesome snow shovels.
97. Keep a hand saw handy. For small tasks around the farm or woodlot, a handsaw can often complete the job faster than it takes to get a chainsaw ready to roll. Plus, you get a quick workout.
98. Be careful with the locking pliers. For grabbing and holding tasks, it’s hard to beat locking pliers, and you should have a couple pairs around the farm. But they’re so strong that they can actually cause damage to the item you’re gripping. So for stuck nuts you might be better off with a properly fitting wrench.
99. Try a farm jack. Farm jacks are a fast and nonhydraulic means of quickly lifting heavy loads or machinery. Throw one in the back of the pickup when you head out.
100. Use that pitchfork. Sure, the days of harvesting loose hay, straw and other crops are all but gone in the U.S. But that trusty pitchfork is still invaluable for cleaning up hay chaff, compost or deep livestock bedding.
Woodlot Tips
101. Try an electric chainsaw. While not necessarily the right tool for major tree felling and log work, a lithium battery-powered electric chainsaw is a quiet and fast tool for branch work and handling small logs.
102. Experiment with an Alaskan sawmill. Curious about milling your own lumber but don’t have the space or budget for a home sawmill? Simple and inexpensive guide jigs can be used with a large chainsaw to mill lumber on a small scale.
103. Embrace the birch. Birch are awesomely versatile trees. Besides their attractive appearance, birch trees make decent firewood, especially in northern regions where other hardwoods might be rare. Plus, they can be tapped for syrup purposes!
104. Choose the right wood for outdoor projects. Pressure treated lumber is ideal for many outdoor building projects. But don’t overlook the natural rot-resistant properties of woods like cedar or tamarack.
105. Manage carefully. You might seek some advice for the long-term goals and sustainability of your small woodlot. Selecting dead or weak standing trees for firewood and refilling the area with new plantings can help keep the forest producing in the future.
Winter Tips
106. Keep a pointed shovel handy in winter—not for digging soil, but for removing compressed snow and ice from around doors and walkways.
107. Store batteries in a warm location. Cold weather is hard on batteries. If you keep a machine outdoors with no block heater, try moving the battery to a heated outbuilding for easier starting.
108. Clear paths early! Try to do it before everyone has a chance to compact the snow down.
109. Use the downtime. Why not change oil and other fluids in nonactive machines during the quieter winter months? Use a heated garage if you have one and enjoy a pleasant afternoon.
Horse Tips
110. Keep extra buckets on hand. Horses are notoriously hard on equipment, and it’s worth having additional buckets in the barn for quick replacements during chore time if needed.
111. Use horses for other farm work. Many folks use draft horses for farm or logging work for the sheer enjoyment of it. But you could also consider using horses for cattle work or herding of other livestock. Maybe you’ll be a cowboy yet.
112. Trim hooves about every eight weeks. Some horse owners forgo hoof trimming during the winter months, but your equine really does need routine hoof care all year long.
113. Train foals early. That newborn foal is small now, but he’s going to grow quickly. Take advantage of the earliest weeks to teach the foal how to lead. He’ll naturally want to follow his mother, and you can gently introduce him to the concept of a human walking alongside him.
114. Use fat to add calories. Is your horse looking a little thin coming out of winter? Too much pasture too fast can cause health issues, but a simple fat source like corn oil or a commercial weight-building supplement can help add calories safely.
115. Use a stain remover for winter grooming. Bathing your horse with water may be out of the question in some regions during the winter, but you can help clean unsightly coat stains with a simple spot cleaner.
116. Try a hay bag. Feeding horses hay in a hay bag has a few advantages: It can help prevent waste, it can limit the ingestion of sand or other fine debris, and it can help alleviate horse boredom.
117. Consider square bales. While many horse owners feed round bales, horses tend to be somewhat picky eaters and may trample a great deal of hay on the ground when fed this way. For cost savings, you might want to stick to small squares.
118. Ground your electric fence well. Adding more ground rods to your electric fence system can help it work better. But in the arid or rocky regions of the American west, you may want a hot/ground system, with some of the wires carrying a ground charge to overcome the lack of moisture in the soil.
119. Look at small horses, too! Large horses have their place for sure, but don’t overlook the possibility of getting into a pony breed or even miniature horses. There are many wonderful examples of sub–1,000-pound equines that can be less expensive to own and possibly less intimidating for beginners.
Fun Tips
120. Make trails. Try to make your farm a fun place to be by weaving walking trails through the trees or woods surrounding your fields.
121. Learn to plant by the stars. Ancient cultures relied heavily on the night sky to dictate planting and harvesting times. You can do the same thing with a bit of research. It may not be necessary, but it’s very interesting.
122. Have a farm party. Invite friends and family to a fall farm party to enjoy apple picking, a quick hayride, and croquet in the yard.
123. Identify everything you can. Get a good guidebook, and try to identify as many local plants, mushrooms, birds, animals, and insects on your own land as possible. There are so many you’ll likely never learn them all.
124. Research your farm’s history and see what you can learn from old photos, records and documents. It’s fascinating to learn these tidbits of information, and they can truly deepen your appreciation for your property.
125. Stop and enjoy the view. You put a lot of effort and time into this land. Don’t always be in such a hurry that you can’t stop and enjoy the sight of it. Congratulations, nice work!
Daniel Johnson, J. Keeler Johnson and Samantha Johnson are siblings who frequently write about farming, livestock, gardening and orchards. They live and farm in northern Wisconsin.
This article originally appeared in the November/December 2022 issue of Hobby Farms magazine.
If CES 2023 was any indication, the farm tech sector is really growing. There were new drones that check your crops, vertical gardens you manage from your phone and robots designed for every possible task.
Here’s a look at a few tech devices possibly heading to a farm near you this year.
SentiV Robot Crop-Scouting Drone
Some days, all you really need is the ability to be in three places at once. Until someone builds a teleporter to get us around, the SentiV scouting drone could lend a helping hand.
courtesy of Meropy
Designed by Meropy, the SentiV is a lightweight, autonomous drone that will fly through your fields and cover almost 50 acres in a day. Incredibly, this drone can take in more data than you can, scanning your vegetation for threats, monitoring growth and sensing nutrient and water requirements with a glance.
Have the First Smart Farm Stand on Your Block
When you have a farm stand where you sell eggs, produce or freshly baked bread, you need a place to store your wares before your customer picks them up. That’s where Chekt comes in.
Chekt is a smart food locker system designed to automate how you sell food. The food locker can be switched from hot to cold depending on what you’re selling. Your customers will receive a text that lets them open up the door and take their purchase.
The Evolution of Robot Dogs
While we’re not quite at the point where we can bring home a robot dog to patrol our farms at night, there were a lot of robot dogs revealed at CES 2023 that show the technology may eventually trend that way.
Some robot dogs like Dog-E—a soft, smart robotic dog with artificial intelligence—are more of a family pet. Dog-E can learn tricks, has his own personality and is affectionate to his family.
Other robot dogs, like Aeo, will offer a helping hand in the house. Designed for older adults, this robot can deliver food, lift heavy objects, disinfect surfaces and ensure your medicine is taken at the right time of day.
Don’t Look Now, but There’s a Robot Picking Your Peppers
If you own a farm where peppers are your main food crop, you might be interested in Agrist. Agrist L. Robot, or ‘L’ for short, is a pepper-harvesting robot that can pick through layers of leaves and harvest your pepper crop quickly and precisely.
It has enhanced vision and an AI algorithm to determine which peppers are ready to be picked. And it can find the best clipping point so your peppers are harvested the right way. To move, L will slides along a suspension system that can be set up to fit any farm.
Yard Robots Take over Shoveling Snow & More
The Yarbo 3-in-1 robot can take over a lot of time-draining outdoor chores. It’s a lawn care robot, snow-blowing robot and leaf-blowing robot, all in one.
courtesy of Yarbo
With tank-like treads, it can roll over all types of terrain. And it has an outdoor charging system that lets you keep it outside without worrying about exposing it to the weather. It’s also an autonomous robot so you don’t have to steer it or monitor it while it’s running, and it uses GPS to map out a pathway and stay on track. To switch tasks, you just change the attachment.
Vertical Gardening Is on an Upward Trend
If your farm is located in a climate that keeps you on a seasonal schedule, you may be interested in the new vertical gardens announced at CES 2023. One of them, the Rise Garden, is a modular, indoor vertical garden that looks a lot like a bookcase. This garden has LED full spectrum lights to replace sunshine and is both self-watering and self-fertilizing. With Wi-Fi on board, you can check in on your produce just by looking at the app.
While some of these farm tech devices are prototypes, others are ready or will be ready for purchase this year. Which would you choose for your hobby farm in 2023?
Across the world, trillions of honeybees are hard at work, pollinating vital crops and turning nectar into honey. In various locations near Wilmington, Delaware, more than a million of those bees return home to “microapiaries” under the care of Stephanie Grant.
“I am selective in my locations, as the properties cannot be treated with synthetic herbicides or pesticides,” she says. “There needs to be an abundance of natural resources, including a variety of pollen and nectar sources, as well as a water source. And I need to ensure that the safety of the bees and people are always at the forefront. I believe we need to use nature and work with it, not against it.”
This belief system is what led Grant to pursue Certified Naturally Grown certification for her Sassy Bee Honey two years ago. Largely described as a grassroots alternative to the U.S. Department of Agriculture Certified Organic label, Certified Naturally Grown producers see it as that and more.
“I read the acronym somewhere online, and I did not know what it was. So I researched it,” Grant says. “As I read, I thought it was completely in line with my current philosophy and many of the practices I already followed. I did have to make a few modifications to become certified, but they were changes that are for the betterment of the bees. So I was completely on board.”
For beekeepers, USDA Certified Organic approval is difficult. To start, the National Organic Program doesn’t have an apiculture standard. Rather it relies on the livestock standards, a few items on the allowed synthetic-materials list, plus some “draft guidance”—standards that have been issued but not made official by the National Organic Standards Board.
Because bees can travel miles to forage, a USDA Certified Organic operation must prove their bees forage from plants not treated with prohibited materials in a 1.8-mile radius, which is difficult to come by.
The Certified Naturally Grown label, on the other hand, has an apiary certification, making it easy for beekeepers to understand what is expected of them and best practices for beekeeping in line with nature.
Livestock farmers, mushroom growers, aquaponics producers and vegetable farmers, too, look to Certified Naturally Grown as another way to show their customers they’re serious about responsibly managing their resources.
“In 2002, when the law establishing the [USDA] National Organic Program took effect, farmers were required to complete the organic certification process to continue using the ‘o-word’ or else they’d risk steep fines for breaking the new law,” says Alice Varon, executive director of Certified Naturally Grown. That’s when Certified Naturally Grown was founded by a group of farmers who didn’t want to undergo this government certification.
More than 700 farmers hold this certification as of mid-2022, including several farms that Hobby Farms readers may be familiar with, such as Soul Fire Farm in New York, Indian Line Farm in Massachusetts, Broadfork Farm in Virginia, and River Queen Greens in Louisiana.
Courtesy Stephanie Grant
Getting Educated
Most of Demetra Markis and Dan Ginsburg’s 33-acre Milleflora Farm is in grassland in Sonoma County, California. On the 2 acres under cultivation, they have an orchard and about 1⁄2 acre of no-till, intensively planted vegetables and medicinal herbs. While their flock of two dozen Katahdin and Navajo-Churro sheep isn’t Certified Naturally Grown, the vegetables and herbs are.
Markis produces the herbs for her holistic healthcare clients, and she wanted a label that would demonstrate to them that she uses responsible growing practices.
“I feel like the certified Naturally Grown model is educational, and it tells people in our community that we’re invested in increasing our education around the best sustainable practices,” Markis says.
She takes advantage of Certified Naturally Grown’s educational opportunities as much as possible. As conferences have moved online and become even more accessible, Markis says the farmer-to-farmer panel discussions and hearing from others farming on a similar scope and scale have been invaluable.
Following Standards
Rhinebeck, New York, farmer Suzanne Kelly focuses on long-season crops—such as garlic, ginger, turmeric and saffron—with a variety of more-usual vegetables for farmers market sales and value-added products so nothing goes to waste. Like Markis, she markets her Green Owl Farm products locally as opposed to with larger wholesalers.
Kelly says the Certified Naturally Grown label is nice to show the consumer, but it’s even more helpful to the farmer: “We may all think that we know what we need to be doing, in terms of growing organic food—real organic food—but having the standards there, and to reinforce them every time, benefits the farmer,” Kelly says.
The standards are easy to access on the Certified Naturally Grown website.
“Our standards for produce and livestock certification are based on the [USDA] organic standards but have been modified in particular instances based on feedback from members,” Varon says. “We developed from scratch our standards for apiary, mushroom and aquaponic certification, based on [USDA] organic principles, and with guidance from advisory councils made up of experts in those types of production.”
The largest deviation from the organic rules comes in the livestock production standards. Certified Naturally Grown livestock rules clearly outline the minimum amount of space each animal must be allowed indoors and outdoors. “This was a standard we clarified when first establishing the CNG livestock standards in 2006. It was a point of contention within the organic community where many felt larger organic dairy operations were allowed to skirt the spirit of organic standards by not granting cows adequate access to pasture in the interests of boosting milk production,” Varon says.
Certified Naturally Grown’s feed requirements are less stringent than USDA’s, allowing a more community-based approach to sourcing feeds grown without synthetic fertilizers, pesticides and herbicides or genetically modified seeds. But it’s still a sticking point for livestock farmers, according to Varon.
“The cost of feed that meets this standard puts it out of reach for many producers who are otherwise doing everything according to the highest standards.”
Milleflora Farm’s sheep are an illustration of this challenge. Markis uses the sheep primarily for “community grazing”—a means of maintaining the defensible space to reduce the likelihood of wildfire spread into the populated areas in her rural community.
“CNG quite reasonably has pasture-management and feed requirements for livestock,” Markis says. “And since we graze for much of the year on other people’s land, on roadsides and on community-owned parcels in order to reduce grass as a potential [wildfire] fuel, we just can’t guarantee that all of the land our sheep are put on is managed in a certified manner. Additionally, some grazing circumstances require us to spread flakes of alfalfa among thick stands of invasive grasses in order to guide the sheep toward trampling them down effectively. And there is no local source for organic or CNG-compliant alfalfa in flake form.”
Certified Naturally Grown is considering updating the livestock-feed standard this year, with input from members and the public.
When a producer applies for certification, three requirements must be met:
a declaration certifying they understand and follow Certified Naturally Grown standards
membership dues
a peer inspection
“The entire process can take just a couple of weeks or less,” Varon says. “CNG is very quick to respond to questions and applications. The biggest factor is arranging the on-site inspection by another producer.”
The Paperwork
The application paperwork and records you’re asked to keep are outlined on the Certified Naturally Grown website. These include:
verification of seed sources and amendment purchases
water tests for mushroom producers
a log of water testing and inputs for aquaponics operations
various other forms
First-time applicants print and mail their paperwork. Those getting recertified can do everything online.
The Fees
The cost to become Certified Naturally Grown is flexible, determined by the farmer, starting at $150. Producers can make monthly payments and can look to the organization’s Grassroots Fund and Equity Fund for payment assistance.
The Inspection
Certified Naturally Grown’s third-party inspection is peer-to-peer, rather than by an agency contracted with the government. While in-person inspections are the norm, farms meeting certain standards can request a remote inspection with a senior inspector.
It’s not just Certified Naturally Grown farmers who can inspect an operation, either. Other farmers using “natural” production methods, Certified Organic farmers and extension agents can also step in.
“You trust that they’re going to tell you what they think about your practices,” Markis says. “It’s very intimate. Invite another farmer to come and walk through your beds? It’s very vulnerable. And in that sense, it really builds trust.”
Farmers aren’t allowed to trade inspections of each other’s operations within 24 months, and the farm must have a different inspector each year or have a community observer join the inspection. Part of being Certified Naturally Grown is a requirement that you inspect another farm each year if you have a farm within an hour’s drive.
Kelly has appreciated the process so much that she became a senior inspector and reaches out to farms in her area to offer inspections.
Courtesy Certified Naturally Grown
Getting the Word Out
While Certified Naturally Grown has been in existence for 20 years, it doesn’t have the name recognition of other farming labels.
“I do not believe I have come across a customer who had any idea of what [Certified Naturally Grown] was before hearing it from me,” Grant says. “They know Certified Organic, as that is seen and advertised all over. Education is a big piece of it. As people begin to see the CNG label more, they will know that the grower/beekeeper is one they can trust and share their values.”
The Certified Naturally Grown organization understands that customer education is a part of what their farmers do. “We have produced educational cards and signs that explain what it means for a farm to be Certified Naturally Grown,” Varon says. “We also produce social media content that helps members easily explain what it means that their farm is Certified Naturally Grown.”
The producers who contributed to this article take advantage of these resources. “They sent me a big stack of postcards that I was able to hand out at our local farmers market and community meetings,” Markis says.
“I can make a sign with their logo. They’ve created a really easy-to-use marketing-material resource on their website that you can use for your farm, which is a huge help. So I’m not writing the language or having to design the marketing to explain what CNG is. It allows me to chat with people about exactly what that means and what we’re doing.”
Kelly, too, posts a Certified Naturally Grown sign at her farmers market and festival booths, uses Certified Naturally Grown twist ties for her bunched produce, and puts its stickers on her winter squash. “It is a lot of education, because people don’t know the difference, but people love the idea, when you explain it to them,” she says.
In looking for more of a lifestyle than a label, Certified Naturally Grown’s grassroots sensibility has appealed to now hundreds of farmers.
“CNG is also about so much more than natural or organic practices. It is about sustainability, creativity in methods, integration of our food systems and nature with the ‘human world.’ It is important to know where your food comes from, how it was produced, who produced it,” Grant says.
This article originally appeared in the November/December 2022 issue of Hobby Farms magazine.
Here is another recipe to help you take advantage of citrus season this winter. Whether you favor oranges, lemons, limes or grapefruit, this recipe can be made with all the above. Just follow the simple recipe guidelines and apply it to one or many of the citrus fruits you enjoy most to make yummy candied peels.
Candied citrus peels can be eaten as-is, or used as a garnish for pastries and cocktails, or they can even be chopped and baked into breads, muffins and other treats.
Because citrus is on the “dirty dozen” list, I recommend only using organic fruit or fruit that you can verify was not treated with harsh pesticides. (These chemicals can really impact the flavor, too.)
Ingredients
Peels from oranges, lemons, limes, tangerines or grapefruit
1 cup white granulated sugar
1 cup water
An additional medium size bowl of white granulated sugar for tossing cooked citrus (optional)
Wash and scrub the fruit well, and dry. Use a pairing knife to remove the ends of the fruit. Cut the fruit into quarters and use a spoon to scoop out the fruit flesh and white pith.
Cut the peels into 1/4-inch thick strips.
In a small saucepan, heat sugar and water to a simmer, and stir until the sugar is dissolved. Add citrus peels. Simmer for 15 to 20 minutes, or until the peels are cooked, soft and saturated. (They will have an obvious cooked appearance versus raw.)
Stir occasionally.
While the peels simmer, set up a cookie drying rack over parchment paper. The parchment paper will catch the sugar and/or syrup droppings from the rack.
Working in small batches, use a slotted spoon to remove the citrus rinds from the hot syrup and transfer them to the bowl of sugar. Use another spoon to stir the citrus in the sugar to get it thoroughly coated.
Once the peels are generously coated in sugar, transfer them to the drying rack. Separate the citrus so they don’t touch.
Allow the peels to completely cool and dry, which will take many hours or overnight. Store in an airtight container, such as a canning jar with lid securely tightened on.
Notes
Thick-skinned fruits are easiest to work with and keep the best texture after simmering.
If too much pith is removed, the candy will become very tough.
If you don’t want to toss the simmered peels into granulated sugar, skip that step. Instead, just scoop out the simmered peels onto the cookie rack and let them dry completely.
Boiling the citrus and straining it before cooking in sugar will decrease the bitterness. Sometimes this process is done two or three times. It’s completely up to your personal preference.


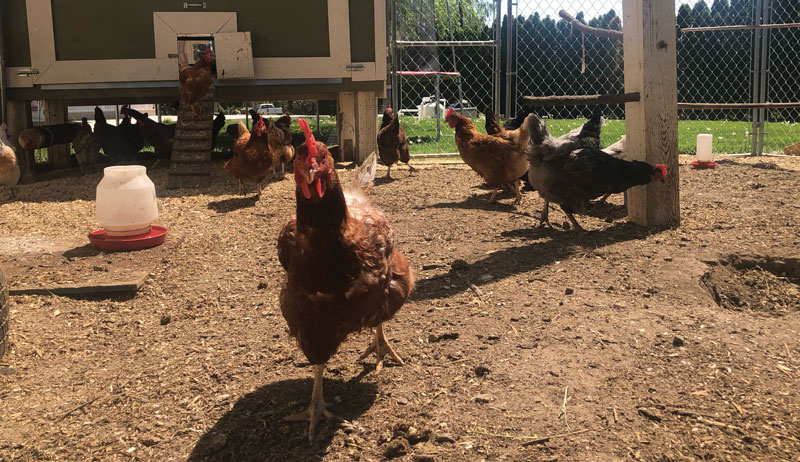
 Author Victoria C. keeps her chickens in Yakima, Washington. This article originally appeared in the January/February 2023 issue of Chickens magazine.