Categories
Animals Breeds Farm & Garden Flock Talk Homesteading Poultry Urban Farm

Ducks Can Bring Real Value To The Backyard

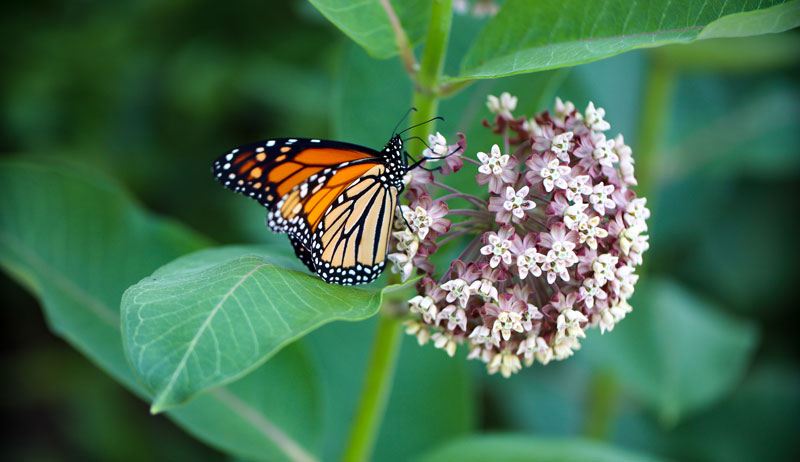
The duck has earned an important—yet underestimated—place in the American psyche. From Donald and Daffy right through to the exploits of Duck Dynasty’s Robertson family, the humble duck plays a central role. So I found it somewhat surprising that the American Livestock Breeds Conservancy lists a whole host of duck breeds as in serious trouble. 

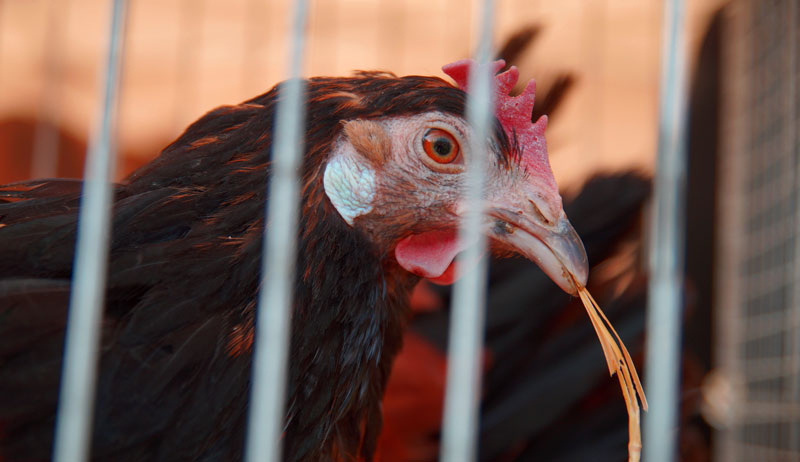
While the popularity of keeping backyard chickens has soared, the keeping of ducks has continued to plummet. This is a great shame, as keeping ducks can be a fascinating, rewarding and sometimes profitable hobby. 

Children absolutely love these comical birds. Through them, they can learn how to relate to animals in general—a valuable contribution in a world increasingly far removed from nature.

But can you really keep these birds in a backyard? I believe you can, if you commit to fully researching and understanding their needs before you make a purchase.

Looking after any form of livestock is a responsibility that should never be undertaken lightly. You also have to be sure that you have enough space and time and can offer a suitable environment for the right type of waterfowl. I (from boyhood) successfully kept ducks of several breeds in a reasonably sized suburban backyard.

My first duck was an impulse buy (not recommended) from a pet shop. He grew into a ridiculously tame male Khaki Campbell. Of course I named him Donald!

Donald was free to wander the garden during the day and locked into a shed at night. One winter’s evening, I got held up at school and a family member who was at home forgot to shut him away. By the time I got home, Donald was gone, only a few feathers and a skid mark in the rose bed that showed his valiant efforts to reach the safety of the house.

A fox had taken him. It was a bitter lesson cruelly learned.

Making a Start

Before anything, please check your local zoning laws. Zoning and health restrictions present an increasing hazard to those wishing to keep any form of poultry in urban and suburban areas. Neighbors may also object to noise, which in certain breeds (such as Call Ducks—a clue is in the name!) can be considerable.

Here is where research is invaluable. Start by attending a local poultry show. There are quieter breeds available and (in complete contrast to chickens), with ducks, the male is the quieter sex. If you don’t need eggs, a couple of pet drakes can provide an excellent pest-reducing service.


Read more: Considering ducks? These birds bring a lot of value!


No Pond? No Problem

You don’t need a pond to keep ducks. You do, however, need to ensure that they can submerge their heads and necks and be able to throw water over themselves.

I have found that the very best receptacle to allow this natural behavior is a simple children’s plastic swimming pool. I received some seriously funny looks when buying five pools in the depths of winter from a local store. But these can easily be emptied, cleaned, refilled and moved to fresh ground.

Silver Appleyard

This beautiful breed takes its name from one of the most famous duck breeders of all time:  Reginald Appleyard. This renowned British poultry breeder and writer first developed the breed the 1930s. He set out to breed a duck that combined size and beauty with lots of large, white eggs.

backyard ducks duck
Kazzazm/Shutterstock

Having kept Silver Appleyards for a number of years, I can say he more than achieved his goal. This gorgeous, quiet duck is easily contained. It’s a perfect example of a dual-purpose breed, as drakes make excellent table birds, full of flavor.

For those with limited space there is even a smaller replica available—the Miniature Silver Appleyard! 

This is a rare duck in the U.S. but well worth seeking out. These ducks the best layers of the small breeds and have quiet, friendly natures—possibly the best duck for a backyard. You can expect around 150 large eggs a year.

Little Black Duck

The origin of this exquisite little duck, the Black East Indian, is shrouded in mystery. What we do know, however, is that it’s a very old breed, described in The Poultry Book back in 1853. It’s strikingly beautiful, with a lustrous green sheen that really has to be seen to be believed.

This little fella can be slightly nervous and would certainly benefit from having its wings clipped. It makes an excellent forager, too.

It’s another perfect duck breed for those lacking space. Sadly, it isn’t renowned for its laying ability. One could expect only 10 to 15 eggs a year.

The Penguin 

Reflecting its comical, upright stance, this duck acquired the nickname—the Penguin Duck. It’s more correctly known as the Indian Runner Duck, though.

This old breed has been found depicted in centuries-old temple wall carvings in its homeland of Indonesia. In 1876, the captain of a tea ship brought this distinctive duck to Scotland, where it was eagerly distributed amongst his farmer friends.

Hens are first-class layers, and its prolific egg-laying abilities brought the breed global fame. You can expect up to 275 eggs per year.

Indian Runners are extremely active. If they’re able to forage for most of the year, they’ll wander far and wide picking up most of what they need.

The Champion Egg-Layer

The Khaki Campbell, a duck breed known all around the world, is famous for its prolific egg-laying ability. Good strains can lay an astonishing 300 eggs a year!

It was named after its creator, Adele Campbell of Gloucestershire, England, who developed it in the late 1800s as a top egg producer. She wasn’t too concerned about its looks.

Perfect for the beginner, ducklings are hardy and easy to rear and, if handled from an early age, get incredibly tame. 


Read more: Duck eggs are the best fresh eggs!


The All-American 

The Cayuga is named after Lake Cayuga, New York. Another black duck that has an almost unbelievable iridescent green sheen to its feathers, the Cayuga is incredibly hardy, an excellent forager and a moderate layer.

backyard ducks duck
Marina_Saw_it/Shutterstock

New owners are often surprised by the presentation of a black egg! This usually occurs at the beginning of the season, after the first dozen or so eggs are laid. They slowly get whiter. 

This is another rare breed that can be difficult to track down, but it’s well worth the effort and deserves more admirers. They’re quiet and, although large and needing a reasonable amount of space to forage, adaptable and willing to put up with smaller quarters than most light breeds of duck.

A Quackless Breed

Hailing from Central and South America, Muscovy ducks make almost no noise except for a gentle hiss. However, that doesn’t make these ducks perfect for a backyard. The reasons are that these powerful birds are excellent flyers and large males can sometimes be aggressive.

However, if you have some land, this duck (the only domesticated breed not derived from the Mallard) makes an excellent choice. 

backyard ducks duck
Lee Connor

Prized for their succulent flesh, the Muscovy is prized as a table bird. The females make fantastic broodies, and both sexes are enthusiastic foragers.

Another huge benefit of this duck is its ability to hoover up bugs! If it creeps or crawls, this duck will eat it. They can lay 30 to 40 eggs a year.

Housing Help

Ever since my tragic loss of Donald, I have been passionate about birds being housed correctly. My ducks are penned in housing made from recycled plastic as I find it easy to clean: A quick jet wash makes them as good as new! Fox-proof wooden housing is just as good. All duck houses, whatever they’re made from, need to be designed with a door that allows easy human access. 

Maintaining hygiene is vitally important in duck-keeping. These are messy birds, and bedding will need changing (and nest boxes need cleaning) at regular intervals. It’s vital that the house is also well ventilated. The thick feathering of waterfowl is all they need for protection from the cold.

Unlike most chickens, ducks won’t obediently put themselves to bed. I’m sure my neighbors have had many a laugh watching me shepherding my ducks into their house for the night. A little tip I’ve learned that makes this job a little easier is to place the house in a corner of their pen.

For bedding, I use wood shavings from untreated wood. Some disprove of their use, citing potential digestive problems if the ducks eat it. But I’ve never encountered this.

Don’t use hay. It’ll get damp and cause mold organisms and fungal spores to form.

Laying ducks should be kept in their house until 9 a.m. This will ensure most eggs are laid in the house instead of around the garden or even in their swimming pool!

A couple of ducks can be kept in a decent-sized backyard, but the success of this will heavily depend on your weather and soil. The ideal ground for duck-keeping is a free-draining, sandy soil. The very worst is a heavy clay. 

However, two or three laying ducks can still be kept, regardless of your soil type, if you pen them on a gravel surface. The gravel needs to be of the large and smooth type. This won’t hurt their delicate feet and will prevent the birds from turning the area into a mud bath.

It will also allow their watery droppings to wash down into the ground.

If you combine this all-weather pen with lots of free-range time (when the weather is dry) on the backyard lawn or rooting around the garden/veggie patch, you should have some very healthy, happy and productive ducks! 


More Information

Duck Eggs

Many of us face increasing economic difficulties, which makes growing our own food even more appealing. One valuable source of protein comes from the humble egg.

Chicken eggs are, of course, the most popular. But duck eggs are usually larger, weighing about 3 ounces or more. They also have a slightly higher fat content and are far richer in flavor. 

The duck egg also contains a lot of albumen (egg white), which makes them highly sought after for baking. A word of warning, however: Duck eggshells are highly porous, so always make sure you maintain a scrupulously clean nest box!

Feeding Ducks

I’ve found the best food for my backyard ducks comes in the form of formulated pellets, predominantly made from a wheat/soya mix alongside many other essential minerals and trace elements. Of course, if they can forage, your birds will find a surprising amount of food for themselves.

Ducks are fantastic at getting rid of pests, such as slugs. In Thailand, rice farms employ thousands of ducks to rid their paddy fields of harmful pests. On a far smaller scale, your birds will do the same in your backyard or parcel of land.

However, especially during the cold, short days of winter or when birds are in full lay—supplementary feeding with pellets is essential.

The birds also enjoy wheat. I often throw a couple of handfuls of grain into their pool. They thoroughly enjoy dabbling under water, and it has the added benefits of washing their eyes and keeping the grain safe from sparrows.

This article originally appeared in the November/December 2022 issue of Chickens magazine.

Categories
Beginning Farmers Crops & Gardening Farm & Garden Farm Management Homesteading Urban Farming

Upgrade Your Greenhouse With Smart Devices

A greenhouse is one of the best additions to any hobby farm. You can start your seeds earlier, protect tree shoots over winter, or just continue your growing season when winter arrives.

Tending to your plants in your greenhouse can be a nice way to spend cold, snowy days. But what if you don’t have a lot of time or you plan on traveling? You can keep growing, even if you’re not home, by setting up a smart greenhouse using the Internet of Things (IOT) and a few smart devices.

What Is a Smart Greenhouse?

A greenhouse is a glass or plastic structure that offers a climate-controlled environment for your plants in the winter. A smart greenhouse takes it one step further. It has smart devices you can use to set up and monitor the perfect growing environment.

The smart devices are connected so you can see and control every variable. From water to light conditions and temperature, you’ll be able to know exactly how your plants are doing without visiting the greenhouse.

How IOT Works for Greenhouses

The Internet of Things sounds complicated, but it’s actually very simple. IOT is a way computers and smart devices send and receive data to you and each other. By giving your smart devices a way to communicate, they can send you information about your plants in real time.

A good example of IOT is IFTTT (If This Then That). IFTTT is a website with services and applets you can use to set up rules for your greenhouse. The services you choose are dependent on which smart devices you own.

With IFTTT, if you’d like your watering system to pause when the temperature drops below 0, you can set a rule for that. If you’d like all of your smart systems to pause during a thunderstorm or high winds, you can set a rule for that, too.


Read more: Here’s why you should consider setting up a greenhouse.


Smart Devices You Can Add to Any Greenhouse

There are commercial-type smart greenhouses with sensors and control panels used to monitor plants during the growth cycle. Most hobby farmers don’t need a setup as elaborate as that. But there are a few easily accessible smart devices you can add to your own greenhouse to provide custom monitoring, watering and light control.

Once you have your devices, you can use a site like IFTTT to link them all together.

Smart Watering or Drip Irrigation

Watering can be one of the most challenging parts of keeping plants in a greenhouse. With a smart watering system or smart drip irrigation, you can water your plants automatically.

Some smart watering systems simply connect to a water source and turn on using a schedule. But you can also choose a watering system with sensors you can place in your soil. When the device senses the soil is dry enough that watering is required, it sends that information to a switch and the water turns on.

Smart Lights Keep Plants Healthy

Smart greenhouse lighting helps plants grow where there is no outside light source. It can also benefit your plants when they are in a greenhouse by keeping lighting consistent from day to day or extending daylight into the dark hours when daylight savings begins.

Smart lights can be controlled via an app, and you can also set them to have different rules. For example, you can set a rule so your lights will turn on at 4 pm during the months when it’s dark outside by 5 pm.

Smart Temperature Control for Your Greenhouse

Some greenhouses will maintain warm temperatures without outside heating. But most require a heater or other heat source to keep plants alive in the dead of winter.

You can find elaborate temperature control systems to buy just for greenhouses. These systems are packaged with a control panel that monitors the heat outside and inside and adjusts it precisely depending on which plants you have. If that’s not in your budget, you can create your own basic system by choosing heaters or fans meant for patios and adding a smart plug you turn off and on using your phone.

If you’d like to automate that system, you can set up a rule that turns the system on or off automatically when the temperature outside drops.

It can be a bit of work to set up a smart greenhouse with everyday smart devices. But having your greenhouse automated means you can be anywhere in the world and still check in and tend to your plants. The peace of mind is worth the effort.

Categories
Animals Beginning Farmers Chickens 101 Crops & Gardening Farm & Garden Farm Management Foraging Health & Nutrition Homesteading Poultry Projects

Video Round Up: 5 Favorite Hobby Farms Stories

Here at Hobby Farms, we do our best to help out folks trying to make their way out there—whether that’s keeping a few laying hens and a lettuce patch in the suburbs; subsisting off the land in an off-grid setup; or selling homegrown organic summer squash at the local farmers market. We’re here to tell stories of people like you, and share tips and expertise for doing things efficiently, sustainably and enjoyably.

Of course, we’re proud to offer this information in the pages of our benchmark magazines, Hobby Farms and Chickens, not to mention our fleet of full-color annual publications such as Hobby Farm Home and Healing Herbs.

We’re always live here at hobbyfarms.com with exclusive articles from our team of experienced contributors. And in recent years we’ve expanded into podcasting with the launch of Hobby Farms Presents: Growing Good, a podcast with and about hobby farmers, small-scale growers and sustainable farmers.

But did you know that, in addition to all this, Hobby Farms offers an ever-growing collection of video articles on a wide variety of farming-related topics right here and over on YouTube? We do!

We absolutely encourage you to check out all of the video content Hobby Farms provides our readers. And to get you started, here are five of our favorite video stories from the past year that you may have missed!

Clipping Chicken Wings

You can clip the flight feathers on your chickens’ wings to limit birds’ mobility and ability to get into trouble around the farm. It’s easy, painless and helpful. Bevin Cohen put together the video above to show us how it’s done.

What the Hay Is Up with Hay Prices?

Quality forage got harder to find this year, while hay prices soared through the roof. Josh and Rachel Porter of Porter Valley Ranch looked into what was going on and delivered tips for feeding livestock all winter long.

A Fall Tree-Planting Tutorial

Fall is the perfect time to plant trees, and the process is pretty simple. In this video Russell Graves provides a few pointers for putting new trees into the ground in the autumn months.

Sew a Feed Bag Shopping Tote

From chicken feed to bird seed, the empty plastic bags add up—but they don’t have to end up in the landfill. Longtime contributor Susan Brackney shows how to make your own fun and sustainable feed-bag tote.

Support Winter Wellness with Herbs

It’s important to maintain health on the homestead year-round and especially during winter. Bevin Cohen shows us how to use herbs and activities in the colder months to stay in tip-top shape!

Categories
Farm & Garden Food Recipes

Recipe: Spicy Fermented Apple Salsa 

Here is a unique salsa combination that I’m willing to bet you’ve never tried: apple salsa. The sweet and crunchy apple—paired with onion, cilantro and hot peppers—creates the perfect seasonal salsa for your next holiday gathering.  

Yield: 1.5 cups finished salsa 

Ingredients 

  • 1.5 cups apple, cubed into small “salsa-sized” chunks 
  • 2 tbsp. red onion, finely diced 
  • 1/4 cup cilantro, loosely packed (more or less, your choice) 
  • 1/2 hot jalapeño pepper, finely diced (or other hot pepper of choice) 
  • 2 tsp. fresh lime juice 
  • 1 tsp. coarse kosher salt 
  • dash of ground black pepper, to taste (optional) 

In a medium-sized, non-reactive bowl (such as stainless steel or glass), prep ingredients and mix them together. Stir well to distribute the salt. 

Once mixed well, transfer ingredients to a clean glass wide-mouth pint-sized canning jar. Push down ingredients so that none are on the side of the jar.

A jar weight is very helpful with this ferment, as it keeps all of the chopped bits held under the natural brine that is created. Wipe off the rim of the jar and place the canning lid (or airlock lid) on the jar, and tightly screw on the ring. 


Read more: You need these 5 supplies to get started with fermentation.


Fermentation  

This is a two- to three-day ferment. Ferment at room temperature, out of direct sunlight.

If you notice that food has floated to the top of the brine, use a clean utensil to push it back down. Give the salsa a taste after 48 hours of fermentation and, if the ingredients still taste too raw, allow it to ferment another day and give it another sample.

Once the ferment has reached your ideal flavor, transfer it to the refrigerator. This ferment is best enjoyed within two weeks.  

Notes 

Use green apple or red, the choice is yours. Also, it’s your decision if you peel the apples or leave the skins on. 

Add 2 tbsp. finely chopped fresh cranberries for a delicious and colorful twist.  

Categories
Crops & Gardening Farm & Garden Homesteading Permaculture Urban Farming

Plant Native Milkweed Now To Help Monarch Butterflies Next Spring

You may have heard conflicting reports about the status of the beloved monarch butterfly this year. Some news agencies have noted that the monarch is now officially endangered. Others have suggested that things are looking up for the beleaguered butterfly.

No matter which agencies weigh in, the truth of the matter is that monarch butterflies do need our help. And, fortunately, there’s a lot we can do to make a difference for them.

One of the single most impactful actions we can take? Planting milkweed species that are native to our specific areas.

Endangered or Not?

For its part, the U.S. Fish and Wildlife Service has yet to officially list the monarch under the Endangered Species Act, noting that, although such action may be warranted, it is “precluded at this time by higher priority listing actions.” And so, the monarch is a candidate for listing but simply remains under review annually “until we are able to begin developing a proposal to list the monarch.”

However, in July of 2022, the International Union for Conservation of Nature (IUCN) did classify the monarch butterfly as “endangered” via the IUCN “Red List of Threatened Species.”

According to an IUCN news release, “Legal and illegal logging and deforestation to make space for agriculture and urban development has already destroyed substantial areas of the butterflies’ winter shelter in Mexico and California, while pesticides and herbicides used in intensive agriculture across the range kill butterflies and milkweed, the host plant that the larvae of the monarch butterfly feed on.”

monarch butterfly
Susan Brackney

If You Plant It…

Butterfly gardeners have long understood how important it is to provide rich sources of nectar to fuel up adult butterflies in general. But female butterflies also need host plants on which to lay their eggs.

The caterpillars that subsequently hatch out from these eggs devour their host plants in order to complete their next life stages.

When it comes to the monarch butterfly, in particular, the host plant must be milkweed. Ideally, if you are able to grow a thick stand of native milkweed, monarch butterflies will have an easier time finding it. And the sooner your plants are ready in the spring, the better off any early monarchs passing through will be.

Interestingly, where I am located in Indiana, I didn’t notice many monarchs until much later this season. But, as late as October 14th, I had a bright green monarch butterfly chrysalis stuck to the side of my house of all places! It remained there all the way through Halloween. But, on November 1st, a healthy monarch finally emerged. Once its wings were ready and dried, it took off for warmer locales.


Read more: You can learn how to responsibly raise monarch butterflies.


Choose Wisely

There is one type of milkweed you shouldn’t plant, since it can actually end up setting monarch butterflies back. Tropical milkweed (Asclepias curassavica) is not native to Canada or the U.S. Especially when grown in the southern parts of the U.S., tropical milkweed can contribute to the spread of a monarch parasite that has decimated monarch populations over the last couple of decades.

Instead, look for one of the many native milkweed varieties that will perform best in your growing conditions and climate. (If you’re not sure where to start, try the Xerces Society’s Milkweed Finder Tool.)

milkweed monarch butterfly caterpillar
Susan Brackney

Start Now

Once you do have milkweed seeds in hand, you’ll need to make sure they have a period of cold stratification. Without this critical step, your germination rates will be very poor.

Many gardeners choose to plant seeds in moist growing medium and then refrigerate this for several weeks. But there is a much simpler way to have success with milkweed. To start, you’ll need some empty, clear plastic bottles, a permanent marker and a utility knife.

First, mark a straight line across the bottom half inch of your plastic bottle and carefully cut this part away. You should be left with a clear plant cloche.

milkweed seeds
Susan Brackney

Next—provided you know where you want to plant your milkweed and the soil is still somewhat workable—simply scratch up the ground, plant the seeds and water in well. Cover the seeds you planted with the cloches you made.

(You may want to use landscaping pins to secure them to the ground.)

These cloches will protect and keep your planted seeds in place while they go through Mother Nature’s cold spells. Once the danger of frost has passed in the spring, you can remove the cloches.

In the spring, these seeds should enjoy much higher germination rates than they otherwise might. You’ll also have the earliest possible start for the season’s milkweed plants.

Categories
Beginning Farmers Farm & Garden Food Homesteading News

Canning Success with Renee Pottle (Excerpt, “Homemade For Sale”)

The following excerpt is from authors John Ivanko and Lisa Kivirist’s newest book, Homemade for Sale, Second Edition (New Society Publishers, December 2022: pre-order here now at a 20 percent discount) and is reprinted with permission from the publisher.

Homemade for Sale cover canning canned products


“There are all kinds of high-acid canned foods that we can choose to make and sell in our cottage home kitchens under your state’s cottage food law, everything from jams and jellies, fruit, butters, shrubs, pickles, sauerkraut, flavored vinegars, chutneys sauces, even juice,” says Renee Pottle, author of Profitable Preserves: How to Start an Artisan Jam and Jelly Business.

“So how do you know which product is the right one for you?” prompts Pottle. “Many of us have an idea with a recipe in mind, or maybe you grow an excess of apricots on your farm and you would like to make jam out of them. Perhaps you don’t grow anything, but you have a famous peach chutney recipe that all your friends and family tell you that you should make and sell.”

“First of all, whatever your canned product is, it should be something you love to make,” advises Pottle, who’s also a Master Food Preserver, getting started with canning as a child while hanging out in her Nana’s kitchen. “You will be making this product over and over. So, if you’re not crazy about the whole jelly-making process, don’t choose a jelly business.” This applies to any canned food product, not just jelly. The product has to be something you like to do.

“Do you have easy access to the ingredients needed to make your canned food product?” asks Pottle. “And are the ingredients affordable, if it turns out you buy them and not grow them yourself? Finally, when you add up the ingredient and packaging costs, plus factor in your labor, can you sell your products at a profit where you live?”

Sourcing locally or regionally tends to be the best way to keep the costs down and secure the high-quality ingredients, harvested at their peak of ripeness and, therefore, flavor. Beyond affordable and accessible ingredients, she’s quick to point out other potential bottlenecks, like the availability of canning jars, lids, or spices. Supply chain woes can crop up in unanticipated ways, so it’s wise to have a backup plan so production delays can be avoided.


Read more: These 5 methods of food preservation bypass canning altogether.


“Don’t swim upstream,” cautions Pottle. “Avoid choosing a product that you have to convince your customers to buy or that you have to overly explain. Most people understand jams and jellies and pickles and salsa. You might have to explain a regional fruit like marionberries, but people understand jam. However, they might walk right by your beautiful jars of mustard because they don’t understand it as a pickled product.”

“The biggest trade-off when working from our home kitchen is probably giving up a certain level of creativity,” admits Pottle. “Low-acid foods, like pepper jellies, usually aren’t allowed. Anything that includes alcohol, like wine jelly or ale jelly, probably isn’t allowed either under a cottage food law. For example, your state might let you make peach jam, but they won’t let you make persimmon jam. You might be able to make pickles from cucumbers, but not from carrots. The rules seem arbitrary, and to a certain degree they are.”

“Some states will let you make jam at home,” continues Pottle. “Some will let you make pickles at home. Some will let you make sauerkraut at home. Some will let you make two of those, but not the other. Some will let you make all three. So, before you get too excited about what you’re going to produce, make sure that you’ve checked to make sure it’s legal in your state. Either work with the cottage food law you have, or you’ll need to become an advocate and get the law changed in your state.”

“Because our products are in cans, the jars themselves sell your delicious home products at farm stands or pop-up food-related events,” says Pottle, noting that the colorful canned item has plenty of eye appeal and doesn’t need to be covered over by lots of labeling. “Be creative with labels, but there’s no need to get carried away with it. Stick with easy labels. Same for standard jars rather than the more expensive imported ones unless you’re sure you can get a lot more money for each jar sold. Otherwise, you’ll be losing any profit you might have made.”

“Starting a home-based business is always an exciting venture,” shares Pottle. “I’ve started several over the past three or four decades and in various locations and various types. We’re bubbling with optimism, but to keep that optimism, it’s best to avoid costly mistakes. Don’t get emotionally involved with either your product or your packaging. If something is too expensive, you have to be willing to give it up and move on to the next thing.”

“Remember, you are making delicious canned food products you love,” concludes Pottle. “You are sharing it with other people and they are paying you for it.” That’s the perfect recipe for business success.

Categories
Podcast

Episode 42: Jeff Tober


New Jersey farmer Jeff Tober talks farming for ecological and community health, pasture-raised pigs, farm planning and more with host Lisa Munniksma in this episode of Hobby Farms Presents: Growing Good.

Hear about how a potato growing in a compost pile in the Philadelphia suburbs sparked a curiosity in Jeff as a young person that put him on a winding path to farming and eventually to the Pinelands Preservation Alliance’s Rancocas Creek Farm. Learn about the Pinelands Preservation Alliance’s work to preserve the 1.1-million-acre, ecologically important Pinelands National Reserve, including how they came into the 72 acres that is now their Rancocas Creek Farm. 

Jeff talks about developing this farm from essentially a blank slate into a thriving natural space in a way that is chemical-free, involves diverse communities, restores soil health, mitigates stormwater flow, supports pollinators and wildlife, is economically sustainable, and brings in constituents new to PPA. Learn about getting federal Natural Resources Conservation Service and New Jersey’s State Agriculture Development Committee funds for your farm projects and other ideas to “chase every dollar,” as farmers often have to do.

Have your pastured-pig curiosity piqued and consider the ways they can fit into farm ecosystems. Dive deeper into farm planning, from observation to implementation. Get a great idea for engaging the community and getting more organic material for your farm with Rancocas Creek Farm’s Project Pizza Box. Hear also about the New Jersey Agricultural Society, the Farmers Against Hunger program (and how to get your farm involved), and the role of County Agricultural Development Boards in New Jersey. 

Categories
Animals Chicken Coops & Housing Farm & Garden Flock Talk Health & Nutrition Poultry

More Points To Remember When Moving Chickens Across State Lines

So you’re moving! Congratulations on the new chapter of your life. A great adventure awaits you, and guess what? Your flock can join you at your new home.

Yes, there are ordinances, home owner association guidelines, and government regulations to observe. But once you’ve verified that nothing legal stands in your way, you can prepare your chickens for their big move, too.

Here are six important points to review before you pack up and leave.  


Read more: Moving chickens across state lines? Make sure you heed the rules.


Weather/Climate 

If you are moving to a nearby town or even to another location within your state, the climate should be similar to the one your chickens experience at your current home. If you are moving cross country, however, or even just a few states away, the change in humidity and temperature can adversely affect your chickens.

Likewise, moving during the colder months of the year can negatively impact your chickens. You may not have a choice regarding when you move, especially if a job is involved. If you can choose the date of your relocation, try to select a time when your current location and your new destination are most similar in weather.

This is usually during the spring and fall, when temperate weather is more commonplace throughout the country. If you must move when your current weather is sunny 70s but your destination experiences snowy 20s (or vice versa), understand that your birds will need a lot of TLC as they adjust to their new climate.  

Quarantine 

Once a moving date is set, you’ll need to set a quarantine period for your chickens. Follow your new state’s regulations regarding quarantining live poultry prior to transport. Some states may require your flock to be quarantined for four weeks, while others may require more or less time.

Whatever the required quarantine period is, understand that only you, the members of your immediate household and your veterinarian will have access to your birds. No neighbors, no friends who want to say goodbye to their favorite hens, nobody can have access to your flock.

Quarantine also requires that you (and the members of your immediate household) have absolutely no contact with anybody else’s poultry and that you minimize or even eliminate contact with wild birds. These can carry diseases that may affect your chickens.

Once the quarantine period concludes—and this should coincide with your moving date—your veterinarian will provide you with documents and certificates attesting to your flock’s successful quarantine and disease-free status. Keep these documents with you in your vehicle as you travel to your new location. 

Travel Accommodations 

I have learned over the years that the best conveyance for transporting chickens are dog crates and rabbit carriers. These both provide plenty of ventilation, which is necessary since chickens produce a lot of body heat.

If you have a microflock of four or fewer large-fowl hens, a large dog crate should provide your girls with enough space for the trip. Four bantams can comfortably fit in a small dog crate. If you have a larger flock, you will need to obtain multiple crates in order to comfortably accommodate all of your chickens.

Never overcrowd a cage! Moving will be stressful enough for your chickens. To be packed into an enclosure for hours—and possibly days—can result in feather picking and outright fighting. Allot your birds enough room to stretch their wings and move around a little. I’ve personally found that three birds per crate is an ideal number.

Make sure the birds you bunk together get along well or at least have a similar temperament or tolerate each other. Aggressive birds and territorial roosters are best transported in rabbit carriers, where they’ll have individual accommodations with opaque dividers which prevent them from seeing other birds.  


Read more: Traveling with chickens? Check out these important tips.


Keeping Them Comfy

Provide your traveling poultry with plenty of bedding—double the usual amount—for the trip. They’ll need it, as they’ll be hunkering down in it for the majority of the journey.

Mix scratch grains and fresh herbs such as parsley, sage and oregano into the bedding to both entertain and soothe your chickens during the trip.

Each cage and carrier should be outfitted with a clip-in feeder and waterer so that your flock has access to food and water when they want it. Consider using rabbit drinkers, which dispense water when the watering tube is licked. Even if your birds have never used drinkers, they will catch on fast and there will be far less mess in the transport cages.  

Prepare Your Vehicle 

You can’t simply load your chickens onto a moving truck. They will need to travel with you—meaning in the same vehicle—to your new home. If you will be driving a van, a large SUV such as a Suburban, or an RV, you will have plenty of space for your birds’ crates.

If you own an economy car, sedan or smaller SUV, you will need to consider renting a larger vehicle and having somebody else drive your car to your destination.

Prepare the space in which your chickens will be traveling with care. Cover the floor with a heavy-duty tarp, and use furniture-moving blankets to pad the interior. Place the cages close enough to allow the chickens to see each other, but not so close that the crates will tip or crash into each other should you come to a sudden stop.

Never stack the carriers! Put more blankets down between the crates to prevent shifting during transport. Keep the climate control for that part of the vehicle at a temperate 65 degrees. Remember, chickens overheat very easily.

Encourage your birds to snooze during the journey by covering the tops of their crates with towels. Just make sure the towels do not interfere with the crates’ ventilation. If at all possible, travel at night when your chickens are normally sleeping.  

On the Journey 

While you’ll want to get to your new home as soon as possible, you will need to build stops into your itinerary in order to check on your chickens. Stop every two hours or every 150 miles to refill feeders and waterers, readjust towels and blankets, and make sure that everybody is doing well.

Take note of any bird that is faring poorly on the trip. You’ll want to keep a careful eye on her once you have settled in your new home.

Do not release your chickens from their transport cages to let them stretch their legs! Not only will it be a nightmare to herd them all back into their crates but, by releasing them prior to arrival at your destination, you have invalidated both your flock’s quarantine and the certificate of approval for interstate/intrastate travel signed by your veterinarian.

You may find it difficult to see your birds penned up, but stay resolute. It’s only for a little while longer.  

The Unplanned Stop 

Should you be pulled over by law enforcement for whatever reason during your trip, be prepared to present the documents provided by your veterinarian regarding your flock’s quarantine and health.

State authorities tend to be very wary about the transport of live poultry—especially with the threat of avian influenza. The troopers won’t care if your Buffy is a sweetheart or if your Mathilda lays beautiful blue eggs. They will, however, care that your certificates and tests are in order, so let the papers do the talking.  

Temporary Quarters 

Once you’ve arrived at your new home, bring your chickens—still in their cages—into your garage, basement or whatever area you have designated for them. Do not leave them in your vehicle overnight!

If your coop is already in place, inspect it to ascertain that it’s safe and ready for your flock … but don’t release them to their henhouse yet. Wait for the movers to depart. The fewer people around, the less stressful this will be for your birds.

If your coop is not yet ready, do everything you can to make your chickens’ temporary quarters comfortable. Swap in regular feeders and waterers if room permits, adding more herbs and scratch to their bedding, and visit them throughout the day to reassure them.

Once your chickens are in their coop, give them all the time they need to unwind from the stress of moving. They may not lay for a while and their behavior may be guarded and cautious as they acclimate. This is completely normal.

Once they’ve become accustomed to their new location, they’ll be back to their backyard antics as if they’d lived there all their lives.  

Categories
Beginning Farmers Farm & Garden Projects

Make DIY Stovetop Potpourri For Seasonal Simmering

Catching the scent of potpourri simmering is so satisfying. Whether it brings you back to childhood memories or smells like the traditions you want to start, we’ll get you there with a few simple steps. 

This project can be completed by raiding your pantry, and it can include heading out to the woods to forage for needles and greens while walking through the snow. You choose your adventure here.

My boys still love going on the scavenger hunts (foraging) to add to our potpourri. That’s actually how we started this family tradition. I wanted something to do with all the odds and ends we collected on our winter walks.   

This is a 100% kid friendly project. 

About Potpourri

Simmering potpourri started centuries ago to clean the air from dank smells and “sicknesses”. Many of the ingredients we commonly use today have multiple health benefits. Smelling citrus can relieve headaches, cinnamon helps you stay alert, and both rosemary and clove ease stress and anxiety.

We can all use those boosts during the holidays. 

Potpourri recipes vary widely, because they’re extremely flexible. I tend to stick to one of three “collections” when I make these—either apple, citrus or pine, but I do encourage mixing and matching. 

You can use any type of citrus, either thin, dehydrated slices or just the peelings. As I mentioned, there are “collections” of ingredients that work well together. But within those groupings, you can have fun and make it your own!

Amounts of each ingredient can vary depending on what you have on hand—or what you want to forage. It is best to use whole spices (whole cloves, star anise, full cinnamon sticks) as they release their smells slowly and last longer in the pot.   

Potpourri Collections

  • Apple, cinnamon stick, anise, cloves, all spice
  • Pine needles, cedar greens, rosemary, cloves
  • Orange (slices or peelings), cinnamon sticks, cloves 

You can add cranberries and spices like cinnamon, clove and anise to any of the families. 

Directions

Add a few sprigs of greens or a few slices of citrus, a single cinnamon stick and a few teaspoons of whole spices to each batch. Cover generously with water and set to simmer and enjoy.

It really is that simple. 

We often keep a pot simmering and add to it for a few days in a row. Our simmer pot (a cast iron woodstove steamer) sits on top of our wood stove, which we keep burning to help heat our home all winter. A pot on a stove top or a crockpot with the lid off works well too.

It is important to always keep enough water in whatever pot you’re using, as burnt anything ruins the effect very quickly! And always remember to never leave your home with the stove on. 

If making for yourself, feel free to use fresh oranges, apples and cranberries. But if you’re gifting, remember to dehydrate the fruits completely so it stores until the recipient is ready to use it. Some people like to add essential oils like pine, sweet orange or clove to the mixes to add even more scent. 

If gifting, you can make these handmade treats really special with packaging. Since you’ll want to keep this airtight—to not lose the aromas—a canning jar works well. Plus jars are easy to spruce up with some ribbon and handmade tags. 

Hope you get to enjoy your own and the chance to give the gift of slowing down to smell the potpourri to others this holiday season!

Categories
Farm & Garden

4 Farm Successes I’m Thankful For In 2022

Happy Thanksgiving!

Every year since 2016, I’ve taken the week before Thanksgiving Day to look back on a year of farming and count a few things I’m thankful for. Early on, I made lists of tools. What farmer isn’t thankful for the tools that help them accomplish their farming goals?

But recently, I’ve focused instead on highlighting my favorite overall farming successes from the winding-down year. Since we can never spend too much time counting our blessings, I’m keeping the trend rolling for a seventh straight year, sharing a handful of the farm successes I’m thankful for in 2022.

If you feel like joining in, please tell us what farm successes you’re thankful for, too! To kick things off, I’m thankful for…


Read more: Here are 5 farm tools to be thankful for!


Tripling the Size of My Corn Crop

After successfully growing a raised garden bed full of corn in 2021, I made plans during the winter to sharply increase the size of my crop in 2022. I’m thankful to report the results were just as I’d hoped.

I tripled my planting to three beds in 2022. And even though I fell behind on weeding one bed (and didn’t water as frequently as the year before), the corn grew well and fed my family through 11 dinners. Enjoying the sweet taste of sweet corn for so many nights was a highlight of the farming year.

Planting a Peach Tree

My farm is located in a Zone 4 pocket of the USDA Plant Hardiness Zone Map, which emboldened me to try planting a Contender Peach tree this year. Northern Wisconsin isn’t exactly famous peach tree territory. But the Contender Peach is rated to survive in Zone 4, and I’m thankful for the pleasure of watching it grow vigorously since spring.

I planted my Contender Peach near the top of a hill with windbreak trees to the west and north, giving it protection from winter cold. I’ve also mulched the tree with leaves, so I’m optimistic it will survive its first winter and continue growing happily in 2023.

Building a Grape Trellis

In the back of my mind, I’ve always wanted to try growing grapes. My farm came with old grape vines planted decades earlier by a previous owner. But these largely faded away and haven’t been especially productive in the time I’ve known them.

So in 2022, I finally took the plunge and planted a trio of Somerset Seedless Grape plants. I also built them a trellis using four wooden posts (two of them salvaged) and some galvanized wire. This provides the grapes with something to climb.

They’re protected from browsing deer inside my orchard fence, and I’m thankful to anticipate delicious grape crops in the years to come.


Read more: Plan ahead and ready your supplies before building a grape trellis.


Finding a Farm Photo from 80 Years Ago

I’m something of a farm history buff, and I’ve always wondered what my farm looked like during its early days. So I’m thankful that, his year, I was shown a high-resolution aerial photo of my farm from the late 1930s, less than 20 years after its settlement.

It was fascinating to see the barn without its later additions, the massive maples trees in the yard already grown to substantial size, and the old orchard filled with more trees than I ever would have guessed. There’s so much information to be gleaned, and I’m still having fun studying the photo.

What are you thankful for this year?