Categories
Animals Beginning Farmers Farm & Garden Homesteading Large Animals

Meat Goats Are Great For Small Farms!

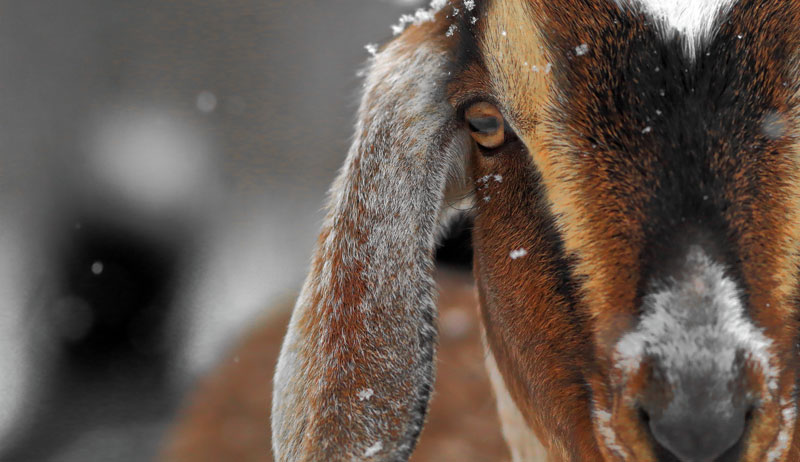
As soon as you step outside the farmhouse, you can hear the happy little cries of a newborn goat in the north pen. With just a shake of the grain bucket, a herd of goats will come running over to inspect whatever treat you might have for them this time. 

Goats are popular animals to have on any homestead thanks to their more compact size and the diversity they offer among the breeds. You can raise goats for meat, milk, fiber, show animals, pack use, transportation and so on. 

There are so many different uses for goats that it’s helpful to take a little time and plan out exactly what purpose you’d like to raise them for. There are several questions you should think about when you first decide to pursue getting goats.

  • Are you wanting to raise your own goats for meat to put in the freezer? Or would you prefer fresh milk every day?
  • How much time do you have to commit to your herd?
  • What is your budget for not only the initial purchase of the goat(s) but also the upkeep and vet bills that will likely come later?
  • Are you looking for a pet for your kids or a 4-H show animal? 

Once you know what the main priorities are for your goats, you can begin the exciting task of researching different breeds to see which one suits you and your family best. Keep in mind, as you look that for an easier experience with your first few meat goats, it might be helpful to stick to a breed that is common or well-known around your area. 

There may be a reason why people mainly keep one or two specific breeds. And if you’re going to breed meat goats later, this could make it easier to find a buck to rent.

Do your research, and ask plenty of questions before you jump in. Sometimes, it’s helpful to go spend some time around someone else’s herd and just get a feel for how the goats act and how comfortable you are with them. 

Getting Ready

When you’ve decided what breed you want to get, it’s time to get your facilities set up and buy your first goat! While you don’t need anything state-of-the-art, it’s helpful if you have a tall (and sturdy) enough fence that they can’t jump out at the drop of a hat. You also need a shelter for them to go inside during bad weather and a few other basic things such as medicine syringes, feed buckets and feed, and water troughs. 

If your meat goats are out on pasture most of the time, a simple shelter such as a three-sided shed will be perfectly fine for them to get out of nasty weather or rain. The size of the shelter will be somewhat determined on how many goats you have and how much time they must spend inside of it. If they live out on pasture and just step inside to get out of occasional bad weather, they should be fine to crowd together for a bit.

If it’s going to be more of a daily occurrence, they’ll need to have access to plenty of room. Too much crowding can induce stress and, in some cases, even sickness. 

Be mindful of what materials you use to build your shelter with or those that are in an existing building. Try to build with solid wood and/or metal such as tin. Avoid pressed wood such as plywood and particle board as goats can get a sudden appetite for even these strange snacks. 

Fences can be constructed from a variety of materials, including hog and cattle panels, combination panels or even an electric fence. The main problem with cattle panels is that, if you have a breed with horns (and many of them do), they tend to reach their head through to the other side and get stuck.

While this can commonly be rectified by just pushing them back through the panel, sometimes the other goats can get aggressive with the one that is stuck and cause damage to their backside. While not known to happen very often, it’s an unpleasant possibility. 

If a hot wire is used, it’s a good idea to run enough strands that it can reach tall enough that the goats won’t be tempted to jump over it. Typically, at least a 4-foot fence is suggested. 


Read more: Sheep and goats bring year-round value to the small farm!


Best Breeds

When it comes to picking your breed of meat goat, there are many different options. Here are just a few:

Boer

Originally from South Africa, Boer goats are one of the most popular breeds of meat goat. Both bucks and does tend to be large-framed animals with a laid-back disposition. It’s not uncommon for a doe to give birth to not only twins but sometimes even triplets.

meat goats
LGA FSM/Shutterstock
Kiko

Kiko goats are known to have massive horns set atop muscular bodies. They came from New Zealand and are considered a “teachable” breed with a calm, although fearless, disposition.

Myotonic

Known for the common trait that causes them to “faint,” Myotonic goats or Tennessee fainting goats are also good meat goats. They are great mothers and typically will have twins or triplets.

Other Purchase Considerations

As you move forward, keep in mind that goats are herd animals, and it’s best to not get just one when raising your own for meat. Once you’ve figured out what your purpose is for them, start out with at least two, maybe even three depending on your family’s needs. 

It’s usually best not to buy your meat goats from a sale barn, as you won’t know any of the history of the animal (unless it’s called out at the time of sale); what animals they’ve encountered during sale day; or if they’re sick, pregnant, etc.

Sale barns can be a dumping place for sick, injured or otherwise undesirable animals that people just want to be rid of. While this isn’t always the case, someone just starting out should ask around and find a reputable breeder. 

There are several ways to find local breeders.

  • Check out the community bulletin boards for any advertised goats for sale.
  • Ask your local vet.
  • Go into a local coop or feed-supply store and ask around
  • Put up “in search of” flyers.

Look for a seller with a good reputation in the local goat community. When you finally meet them, observe how they answer your questions. Are they forthcoming with information and tell you about both the good and bad of whatever animals you’re looking to buy? 

Notice if you’re only shown the select animals you’re considering purchasing or if they’ll let you observe the entire herd. Just like when buying cattle, seeing the herd as a whole will help give you an indication of problems you could possibly run into in the future.

Do any of the animals look sick or suffering from a disease? Are they scrawny or malnourished? Do they look bloated and tight like they might have a bad case of worms? Do you notice any limping due to possible foot rot?

Even if you don’t notice it yourself, ask the seller about these things. Don’t be rude, but kindly ask about the health of the herd and if any have been infected. After all, you’re looking at purchasing some goats from this herd. You’re entitled to know the health history of them. 

If you’ve never worked with the seller before and aren’t sure how honestly they’ll answer you, take along a knowledgeable friend that can help you accurately see any flaws in the animals. Don’t forget to ask the reason that they’re selling. Note the following:

  • Is this how they make a living?
  • Are they just downsizing the herd?
  • Have these goats been pulled from the herd for a particular reason?

Try to avoid kicking off your goat-owning experience with a project goat or one that isn’t particularly healthy.

A healthy goat should be alert with bright eyes. It should move around easily without appearance of joint or leg problems and urinate clear urine. A healthy appetite should be present, and it should chew cud after eating. If buying a doe, even though it’s not specifically a dairy goat, you should check its udder for anything out of the ordinary. The udder should be soft with no hard lumps and normal teats. 

meat goats
Ashleigh Krispense

Home, Sweet Home

Once you’ve made your purchase, it’s time to get them home and settled into their new space. It’s best to have everything ready before you bring them home so it can be an easier transition for your goats and you. 

Depending on if you’re keeping them in a dry lot or out on pasture, the pen and fences should be set up and the shelter cleaned out and ready to use. Water troughs can be disinfected and filled, and a feeding regimen will need to be figured out. Goats should have access to good prairie hay or brome that’s not moldy or musty, and then be supplemented with high-protein pellets and eventually grain, depending on what your plan is for fattening and butchering. 

Goats tend to love good weeds. When given the option of quality grass or weeds, they’ll often choose the weeds. This is one reason some ranchers put out cattle and goats in the same pasture. While the cattle will graze on the good grass, the goats will act as though they’re on clean-up duty and eat the brush and weeds. 

When it comes to the health of your goats, one of the most common issues people run into are goats getting infected with worms. Goats are very susceptible to worms and will get them by ingesting the larvae that the worms have laid on the lower leaves of a plant. The closer to the ground the goats graze the plants, the closer they get to eventually eating the worm larvae.

For this reason, it’s a good idea to employ rotational grazing and move your goats from pasture to pasture over a period of time so they don’t graze the grass (and weeds) down too far. 

If goats are kept in a dry lot, worms don’t present as much of a risk. Goats with worms can certainly be treated, but it’s best to lean heavier on the side of prevention than it is to wait until the goats show symptoms. 

Treatment can range from natural supplements to a pour-on drench that goes over the backs of the animals. Talk to your local vet to see what the best timeline is for treating your goats for worms. Some people do it just once a year. Others might wait until they notice an issue, although this isn’t recommended. 

If you’re turning the goats out to a pasture, walk through it beforehand and look for anything that could potentially be hazardous or deadly to your goats. Some plants can be poisonous to goats (such as hemlock). Old or damaged structures could possibly injure a goat if it were to get stuck in something and stranded.

A stranded goat is very vulnerable to wild dogs or coyotes. 

While a freezer full of fresh meat is certainly rewarding, harvesting your goats is a difficult task to do on a homestead. From the day you bring the animal onto your place to the day it leaves, you’ve done your best to give it a good life and raise it well. That’s what makes this such a bittersweet job.

Be thankful for the home-raised meat that will feed your family and look forward to next year, when you’ll get to start all over again.


More Information

Raising Kids

Goats are generally cool-season breeders, although Boer goats can be bred all year long. The gestation period for a goat is around 5 months and some goats can even have up to three kiddings in a year. This can be rather extreme for the does, so some ranchers prefer to let their herds kid just once each spring. 

A doe’s cycle lasts 18 to 21 days. When the time comes that your meat goats are ready to be bred, a buck can be turned in with the does for an allotted amount of time. For some, this would be two months, so that he would be present over two to three cycles and given plenty of opportunity to service all the does.

The number of does that one buck can service depends on his age. A mature buck (2 years and older) can service around 25 does. 

When five months have passed and it’s time to give birth, a doe will typically become restless and alternate between standing up and laying down. She’ll be slower moving than the rest of the herd and eventually wander away in search of a quiet spot.

Ligaments around the tail head will begin to loosen and her udder will grow extremely full (if it hadn’t already in the previous weeks and days leading up to the birth). Eventually, the ligaments will be so soft or loose in her spine that before she gives birth you will be able to wrap your hand around the end of the spine or tail bone and almost touch your fingers together. 

When the time comes to push, the first of two sacs will make an appearance. The second sac will contain the baby. In a normal delivery, the kid will come out with its face tucked between the two front hooves. A breech delivery is when the baby is born backwards.

Once the kid is on the ground, keep an eye on mama (especially if she is a first-time mom) to make sure that she gets it cleaned off in time. Once clean, it will need to get up and nurse to get that first dose of colostrum into its system. 

meat goats
Ashleigh Krispense

When a goat is about 8 to 12 months old and has reached its target market weight, the time will come to butcher. No matter what the breed, a goat should have a good amount of muscle and be well filled-out before it’s butchered. Some people like to castrate the bucks while they’re still young, others find that it’s not an issue so long as they’re butchered before they reach full maturity.

Read More

This article originally appeared in the September/October 2022 issue of Hobby Farms magazine.

Categories
Animals Farm & Garden Homesteading Large Animals

Video: Feed Your Ruminants Right In Fall & Winter

We are in the middle of the breeding season for sheep and goats, and a shift is happening with their nutritive options and requirements. Summer is officially over and the grass that supplied your ruminants with feed is no longer their No. 1 option.

If you rotationally graze your animals and rely on grass, you can’t solely depend on that anymore. It is the time of the year for farmers to get involved and provide their ruminants with more feed options.

Check out the video above and read on for information on upcoming seasons and our recommendations for how to supplement nature’s options, which align with their pregnancy schedules. As always, check with your local vet for your herd to make sure this schedule works for you.

Early Fall

Early fall and pre-conception are times to flush feed ewes/does and rams/billies. There are articles and videos on Hobby Farms with specifics on how to do this. In short, though, this is the time to up protein through grain and feed.

The concept is to boost nutrition in effort to increase the likelihood of multiples and confirmed pregnancies. For the males, it gives them extra energy to cover the herd.


Read more: Flush feed your sheep to ensure breeding success.


Late Fall/Winter

In late fall through winter, females have been bred and it is time to back off flushing and go to a maintenance schedule. This is not a time for the females to put on weight. Leaves are a healthy source of food that still offer a good amount of nutrition in the form of browse.

Late fall and winter is also a good time to start supplementing with hay as the grass dies back and no longer provides ruminants with a stable feed source.

Make sure you offer a good horse or prairie hay. You can offer this as a free choice or put it out daily. If you are going to offer daily, make sure you give at least one flaker per head per day. Since hay and leaves  are both dry food options, the herd will increase their water intake tremendously. Stay mindful of their water levels. 


Read more: Check out these sheep breeding security tips.


Supplements

When your herd begins eating mainly dry food, it will be time to supplement. Supplementation options include feed blocks, lick tubs and loose minerals.

Sheep need feed blocks made specifically for sheep. These will have no copper and very low amounts of phosphorus. Copper is deadly for sheep, and too much phosphorus creates urinary calculi. 

Goat protein pails are tailored for them and will contain high levels of copper to help naturally worm them and keep parasites at bay. 

Both sheep and goats need free choice minerals. These are offered in blocks and loose in tubs. We recommend the loose tubs, as it is a safer and healthier option for their teeth. 

During late winter, as the females enter their third trimester, it is time to up their nutrition again. This trimester includes major fetus growth, as well as preparing their body for lactation.

These animals need more protein, but not fat. If the females are adding too much weight during this time, it will harm their deliveries and potentially throw their bodies into premature birth.

Keeping the same requirements as the maintenance schedule, it is time to add back grain in small amounts.

Properly feeding through the fall and winter requires intentionality and a careful eye. As the farmer, you must be aware of what nature is providing.

If leaves are not plentiful and the grass dies back faster than normal, you will need to supplement earlier and more frequently. It is all about balance and making sure your herd is well cared for. 

Categories
Farm & Garden News

Get To Know Hobby Farms Presents: Growing Good (Our Podcast!)

The holiday season is right around the corner. Whether you’re planning expansive meals, hunting for holiday decorations or fixing up the farm and home for visits from family and friends, you’ve no doubt got some big plans ahead for the season.

And you know what’s great to help pass the time while testing string lights or stirring batter? Podcasts!

In case you weren’t aware, we’ve got our own podcast here at Hobby Farms. It’s called Hobby Farms Presents: Growing Good, and every other week, host (and former Hobby Farms editor) Lisa Munniksma talks with farmers, food activists and other agriculture influencers and enthusiasts about the good work of growing food to feed communities.

Growing Good is fast approaching 50 episodes of frank, fearless farming conversation, but below you’ll find a quick roundup of our favorite episodes to get you started. Like what you hear? Check out all our past podcast episodes, and make sure to subscribe on your preferred podcast platform so you don’t miss a single chat!


Arwen Donahue


View this post on Instagram


A post shared by Hobby Farms (@hobbyfarmsmag)

Author, artist and farmer Arwen Donahue discusses her life on a Kentucky farm and her new book, Landings: A Crooked Creek Farm Year. Arwen tells us about her and her husband, David Wagoner’s, Three Springs Farm. You’ll hear about how they searched for their niche and revived themselves from burnout in small-scale farming, from 18 years of having a vegetable CSA to growing food for a local restaurant group. Learn about some of the foragable goodies on Arwen’s farm and how you can incorporate foraged items into a CSA.

Arwen discloses the struggles of writing and illustrating a book while farming and also the beauty in combining a farming life and a creative life. Listen to her read a page from Landings and explain how this book depicting drawings and daily journal entries of the farm came into being.


Rasheed Hislop


View this post on Instagram


A post shared by Hobby Farms (@hobbyfarmsmag)

Listen as Rasheed Hislop, a Master Composter, offers you his best tips for small-scale vermicomposting. Get your worm bins ready! Hear about how this Brooklyn-raised farmer’s grandparents, in the Hudson Valley and in Trinidad and Tobago, instilled in him an interest in food production by way of gardening, fishing and cooking from scratch.

Rasheed talks about his work supporting farmers, first with urban farmers and community gardeners through NYC Parks GreenThumb and now with farmers in California’s Central Valley, particularly Black, indigenous and farmers of color, through Community Alliance with Family Farmers and African American Farmers of California. He also gets into the racial equity and planning work being done behind the scenes at nonprofits like CAFF. (Plus, this is your chance to make plans to attend, virtually or in person, the CAFF conference, coming up Feb. 27 to March 3, 2022!)

Learn about the Black Zocalo cooperative’s efforts to teach about growing food, planting native plants and fostering farm-related businesses, including Rosalba Lopez Ramirez’s (Rasheed’s wife’s) Dau Butter skincare line and Rasheed’s seed production for Truelove Seeds. All of this is ultimately to create a movement toward a Black and Indigenous-owned land-based learning center.


Celize Christy


View this post on Instagram


A post shared by Hobby Farms (@hobbyfarmsmag)

Through her work with Practical Farmers of Iowa, Celize Christy organizes farmer-mentorship, land-link and Spanish-language farmer education projects, and she tells us how you can take advantage of these innovative programs. Hear about her work with poultry farmers in Uganda and Rwanda and her thinking on the intersection of livestock and livelihoods.

As a people person who grew up without a farm background and felt the isolation of being unlike others in her early farming education, Celize has taken on the role of supporting folks not always represented in food and farming systems in her community work. She shares with us some success stories coming from small-scale farmers, women farmers and farmers of color in Iowa, as well as tips for homeopathic care for our home flocks and the secret to the brightest egg yolks.


Aaron De La Cerda


View this post on Instagram


A post shared by Hobby Farms (@hobbyfarmsmag)

Aaron De La Cerda talks about the Acta Non Verba Youth Urban Farm Project, fruit gleaning, growing cannabis as a teenager, and why he prefers to be a “lazy” farmer.

You’ll learn about how a life decision he was asked to make in third grade led to him being known as “the plant person” among his family and friends and shaped his career and life trajectory. Aaron talks about growing up with a family full of educators and how this, plus his green thumb and an interest in social justice eventually brought him to nonprofit urban farming work. Hear about his work with unhoused folks, helping the shelter with a garden, and plotting out fruit gleaning opportunities in Merced, California.

Then, get up to speed with the work of Acta Non Verba Youth Urban Farm Project and its kids and family programs. Hear about the community farm at the Oakland A’s baseball stadium, as well as two other urban farms, and the wild growth of ANV’s Beet Box CSA program.

Finally, get Aaron’s advice—hat tip to Masanobu Fukuoka’s book One-Straw Revolution—for hands-off, natural-systems farming, consider the current crisis of “local” food, and hear Aaron’s thoughts on the role and future of urban farming. (Spoiler alert: It isn’t to feed the whole city’s population.)


Lilian Hill


View this post on Instagram


A post shared by Hobby Farms (@hobbyfarmsmag)

Land steward, Native American Food Sovereignty Alliance Executive Director and Hopi Tribe member Lilian Hill talks about dryland farming, traditional foodways, farming systems and more.

Hear about Lilian’s family and community heritage and how she connects with traditional agriculture methods, foodways and food sovereignty work. She tells us about her and her husband’s founding of the Hopi Tutskwa Permaculture Institute—which provides outlets to explore areas of food production, energy, water and small-scale food cooperatives—plus the 15-acre area of farmland her grandparents once farmed and another 2-acre permaculture demonstration site that she and her family continue to steward. Learn, too, about the Native American Food Sovereignty Alliance’s work in restoring food systems that support tribal self-determination and community wellness.

Lilian shares an indigenous point of view—and is real about the difficulty of accessing and sharing this knowledge—on the major weather issues we’re seeing right now and how we can work to restore a balance in nature. Take note of Lilian’s dryland farming advice, from seed selection to soil conditions to water retention and conservation. Stay tuned to the end to hear about what Lilian finds inspiring in the food system today.


Tyler Eshleman


View this post on Instagram


A post shared by Hobby Farms (@hobbyfarmsmag)

At Virsylvia Farm in the high desert of New Mexico, Tyler Eshleman and his wife raise goats for dairy and fiber; sheep for dairy, meat and fiber; alpacas for fiber; laying hens; and some vegetables. Hear about the realities of regenerative farming at 8,000 feet above sea level, from the challenging growing and land conditions to the cooperative workings of fellow farmers. Learn about Tyler’s innovative marketing means to get more local food into the hands of more people in his area: a year-round pay-what-you-can farmstand for his and other farmers’ products, a multi-farm meat CSA, and a goat- and sheep-dairy herdshare. (Also, when you visit him at the farmers market, you can make your own goats-milk ice cream using a bicycle-powered ice cream churner!)

Listen in for Tyler’s best advice for bringing dairy goats to your farm, from goat breeds to feed sourcing and knowing your state’s raw-milk laws. Tyler also talks about his off-farm work with the Quivira Coalition and New Mexico Coalition to Enhance Working Lands, bringing together agricultural and conservation organizations to support farmers and ranchers who are contributing to healthy soils, clean waterways and vibrant communities. And stay tuned until the end to hear Tyler’s favorite ways to eat goat cheese.


Check out more episode of the Hobby Farms Presents: Growing Good podcast here! And make sure you subscribe to the show wherever you listen to podcasts. 

Categories
Beginning Farmers Crops & Gardening Equipment Farm & Garden Farm Management Homesteading Permaculture

Beat The Snow With This Farm Winter Checklist

As winter looms over the farm and we begin to feel we can relax, remember that January and February represent the true the downtime for most growers and small-scale farmers. The months of November and December are when we should clean up our fields, prepare the farm for winter and make a crop plan for next year. 

If we leave a mess from 2022 in the field, we will enter a mess in 2023 when we have a lot to do. So before the snow threatens to cover everything, finish organizing your fields and supplies. Make your crop plan before seeds sell out, and make sure to record observations and data before you forget. 


Read more: When you’re prepping for winter, make sure to start early on your machines.


Pre-Winter Checklist

  • Harvest any last root cellar crops. 
  • Cover any field greens in high tunnels with double row cover to continue harvesting through winter. 
  • Mulch your garlic if you haven’t already with straw or leaf mulch. 
  • Mulch over sensitive perennials that need extra protection from severe winter cold.
  • Put tree guards on fruit trees to prevent rodent damage in winter. 
  • Make sure any labels that have marker names on them for perennials are rewritten so as not to be lost in strong winter light. Use paint markers. 
  • Make sure all hoses are drained and rolled up.
  • Make sure all your field edges have the irrigation headers removed so they are not driven over accidentally (costly mistake!). 
  • Make sure water systems for livestock are in order for winter. 
  • Make sure all supplies for winter farm management are bulk purchased ahead of time. 
  • Make sure hay for livestock is secure for easy handling near animal pens. 
  • Make sure fuels have additives for winter protection.  
  • Clean up your equipment, and store all of it indoors. 
  • Mark all main drives and lanes for snow-removal accuracy and to prevent damage to pasture, gardens and edges. 
  • Pick up anything else that will be lost in the snow! 
  • Tidy the barn and sheds to make sure you are organized for the next season. 
  • Map any weed pressure in your beds that is still visible so you can account for this in your crop planning for 2023 
  • Sort last year’s seed and assess which varieties are still useful for next year and which are no longer viable. You can even do germination tests to be sure.  
  • Make sure all your favorite seed catalogs are on their way. 
  • Go through any catalogs you have and make some wish lists. 
  • Make sure your garden journal is on order and all your notes are ready for crop planning and assessment of the 2023 year.  I always make a year-end assessment in November. Create a plan for your crop planning.   
  • Outline all your planning to-dos. (Professional growers will start crop planning end of November/early December to make sure this job is done before the holidays.) 
  • Make a new crop plan in your preferred spreadsheet software. 
  • Make a crop map to show where you plan to plant everything. 
  • Create seed orders for all the needed crop seeds and perennial transplants. 
  • Place your seed order before seed sell out!  I’m sure to order before the holidays. 
  • If possible, order your supplies before the end of the fiscal year to reduce your taxes owed (or at least reserve with deposit). 
  • Send out special holiday sign-up incentives for your customers for your CSA and market offerings to generate cashflow for seed and supplies. 
Categories
Beginning Farmers Farm & Garden News Urban Farming

Growing For Academic Achievement At Urban Roots Teaching Farm

“We are working to change the way communities eat and learn through garden education,” says Jenny Angius, executive director of operations and development at nonprofit Urban Roots Teaching Farm in Reno, Nevada. “We think there are many ways to use the garden in a way that cultivates a healthier community, in far more ways than just growing things.”

In practice, the venture’s efforts include encouraging children to develop healthy eating habits and take a curious interest in where their food comes from. Urban Roots also highlights cost-effective growing techniques and creative ways to farm in smaller urban spaces.

We spoke to Anguis about repurposing spaces for gardening and the joys of plucking carrots from out of the dirt. We also touched on how to use farming as a way to improve academic achievement.

Learning Lessons Through Gardening

“Gardening teaches myriad lessons,” says Angius. “From children who are discovering how their food is grown for the first time and exploring new flavors and establishing healthy habits they will carry with them to maturity, to adults who are rediscovering that gardening produces bounty and can be a cost-effective method to supplementing their nutrition and easing pocketbook concerns.”

Angius adds that during the early months of the pandemic, the organization noticed a rise in the appetite for gardening education. Since then, Urban Roots Teaching Farm has been focused on accommodating learners of all ages and spreading word about sustainable and responsible gardening methods.

“Our nonprofit seeks to empower others through workshops, accessible learning opportunities and a place for community that we know will stick with them for years to come,” says Angius.


Read more: DragonSpunk helps community gardens become healing spaces.


Mastering Urban Growing

When it comes to the challenges of growing in urban areas, Angius believes that thinking in a flexible way is key.

“There are simple ways for individuals to harness growing these days,” says Angius. “From small-scale countertop herb gardens to tower gardens to community gardens.”

Angius also adds that the organization has noticed an increase in the desire to repurpose larger spaces into community-based growing spaces.

“Those who can influence change are open to discussing how they can help,” says Angius, referring to local elected and appointed officials, corporate partners and stakeholders.

Using Farming to Encourage Academic Achievement

One of the goals of the Urban Roots Teaching Farm is to use gardening as a way to improve and encourage academic achievement.

“There are endless topics we can integrate into gardening lessons. And we consider our teaching garden an extended tool that helps students retain these lessons with greater adoption,” says Angius.

“Students are invested in outcomes from the start to the finish, say from a carrot seed to carrots they harvested and sliced into their salad. We find this investment to improve retention and assist in forming healthier study and academic habits.”


Read more: “Gardening is something anyone can do,” say these urban gardening authors.


Surprising Carrots & Big Hit Tomatoes

Asked what sort of produce seems to amaze students the most, Angius plumps for carrots.

“Kids love the act of plucking carrots from the ground,” says Angius. “Given the vegetable is hidden from plain view, it’s quite the rewarding harvesting activity.”

Tomatoes also get a mention, adds Angius: “Watching tomatoes grow and ripen right on the vine, directly in front of them where they can either pluck and store or pop them right into their mouth is usually a big hit.”

The Key to Growing Yourself

“The act of growing teaches us so much about ourselves and gives us opportunities to learn and improve through trial and error,” says Angius when asked for some introductory gardening words of encouragement. “Whatever you attempt to grow, you’re also growing yourself—and that’s worth a try every day!”

Follow Urban Roots Teaching Farm on Instagram.

Categories
Farm & Garden Food Recipes

Recipe: A Festive & Flavorful Cranberry Shrub

I’m still chipping away at the 15-pound box of fresh cranberries that I got from the farmers market. Cranberry season is fleeting, so we must make the most of it while we have the opportunity. Last week I shared a recipe for how to make cranberry juice. This week I’m going to share a recipe for delicious cranberry shrub.

Unlike all my other shrub recipes, I cook this one to help extract the juice from the berries.

Yield: 2.5 cups finished shrub

Ingredients

  • 2 cups fresh cranberries
  • 1.5 cups white granulated sugar
  • 1 cup orange juice
  • about 1.5 cups raw organic apple cider vinegar (or other drinking vinegar of choice) to finish off after making syrup

Directions

Rinse cranberries, and remove any white or damaged berries and stems. In a medium-sized saucepan, bring the cranberries, orange juice and sugar to a simmer.

Simmer until the berries begin to pop and cook and become soft and deflated. Stir often. The syrup will become bright red once it’s ready to strain.

Keep an eye on the pot as it simmers. It is a syrup and will get hot and bubble over if not carefully watched.

Once the sugar has dissolved and a syrup is made, use a fine mesh strainer to strain out the solids, reserving the syrup in a heat-tolerant measuring cup. Use a spoon to stir out the juice.

Double strain for a cleaner syrup (optional).

Once strained, measure the amount of cranberry syrup that was collected. Add that same amount of vinegar to the syrup (it will be about 1 to 1.5 cups of vinegar) and stir well to mix.

Store in a clean jar with lid tightened on and refrigerate. Enjoy within a few months for best flavor.


Read more: Make your own delectible cranberry juice!


To Serve

Mix about a shot (1 to 2 ounces) of the shrub mixture with water or carbonated water. Serve over ice.

Shrubs also make tasty and unique cocktail mixers. This bright red shrub is perfect to serve during the holiday season.

Side Notes

You can also use brown sugar, coconut sugar, maple syrup or other sugar alternative in place of white granulated sugar.

This method of shrub making can be applied to any fruits and herb combinations. Consider adding orange zest, ground cinnamon or rosemary while simmering the cranberry shrub syrup.

Don’t toss the strained-out fruit solids! They are delicious mixed into plain yogurt or oatmeal, or blended into a smoothie.

This recipe was adapted from WECK Small-Batch Preserving (2018) with permission from Skyhorse Publishing, Inc.

Categories
Beginning Farmers Crops & Gardening Equipment Farm & Garden Homesteading

These Garden Veggies Are Root Cellar Rock Stars

First-rate vegetable storage begins with the soil, as root cellar storability is influenced by growing conditions. Root vegetables grown in soil with an excess of nitrogen will have watery growth and store poorly. Excess watering and watering near harvest time will lead to the same undesirable results. 

Conversely, an abundance of organic matter (and particularly the presence of potassium and calcium in the soil) enhances storability. Potassium sources include seaweed, wood ashes and greensand, as well as most green manures, compost and animal manures (especially pig, horse and sheep).

Calcium is abundant in limestone, bone meal and wood ashes.

Post-Harvest Pointers

While the general post-harvest rule is to cool produce as quickly after harvest as possible and keep it cool (to keep produce respiration and therefore deterioration at a minimum), there are exceptions with some long-term storage produce. 

Curing, or drying, needs to be performed with garlic, onions and shallots by allowing the entire plant to dry before removing the stems and roots. Harvested potatoes should be kept at 55 to 60 degrees Fahrenheit for several weeks before they are placed in storage conditions. 

For sweet potatoes, pumpkins and winter squash, curing allows excess moisture to evaporate and sets/hardens the skin as well. It requires keeping them for 10 to 14 days at 80 to 85 percent relative humidity and 80 to 85 degrees F in a well-ventilated location where they won’t get wet.

Note: Curing is detrimental to, and shouldn’t be done with, acorn-type winter squash. 

There are others steps that will favorably influence produce storage. Of course, the most sound, unblemished, disease-free specimens should be kept. And all produce intended for storage should be handled delicately to avoid bruising or damage. 

Cabbages should retain their stems, being cut directly above their roots rather than below their head. Potatoes shouldn’t be wetted but rather rubbed to remove excess dirt. Root vegetables should be left as long as possible in cool, though not freezing, soil conditions as this will stimulate the production/storage of sugars and starches in the roots and allow your intended storage areas to achieve cool, even temperatures prior to moving in your produce. 

Also, harvested root vegetables should have their greens removed quickly to prevent moisture loss. They should be dug from dry rather than wet ground when possible, and gently cleaned. And remember that while a frost or two will sweeten the flesh of winter squash, it also results in a much shorter storage life.

Perfect Places

Long-term food storage has long taken place in extra closets, backrooms, spare cupboards, basements, porches, garages and the like. People will even use holes or simple structures in the ground as a means of storage. 

For a location to be a suitable root cellar, a few conditions must be met. Though ideal storage conditions are not identical for all produce, generally the location must be dark and well ventilated. 

The optimum temperature  for a root cellar (on average) is right around 50 degrees; too warm or too cool (even short of freezing) are both problems. There is definite variation with ideal storage humidity. While garlic, onions, dry beans, pumpkins and winter squash require less humid conditions, produce such as cabbage and any root does better with levels around 90 percent. 

Principal Players

Raising suitable varieties is very important with long-term produce storage. Sometimes a variety may be the very best from a field of many that all store well. Sometimes it’s a unique variety that truly stands out from others.

Examples of both are listed in this article. 

Here are the absolute musts for winter storage. Mostly staples and a couple of surprises, these are the variety-specific crops to grow.

Alliums

If you like alliums, your storage cup will runneth over! Garlic has many stiff-neck varieties with a respectable storage of many months. German Extra Hardy and Chesnok Red are two favorites. 

However, many soft-necks (with the flexible, braidable stems) are known for exceptionally long storage, with Italian Late and Inchelium Red being very popular varieties. 

For onions, Red Bull is a particularly good red onion for storage. Yellow storage onions and shallots boast wonderful storage in general, so you can take your variety pick. On the other hand, the “storage leek” is much rarer, with Bandit and Musselburgh being the correct choices.


Read more: Plan now to use winter ice to cool your root cellar in summer.


Cabbage

If red cabbage is your pleasure, Ruby Perfection is excellent for storage. If green is your preference, Dottenfelder Storage, European Storage and Langedijker Winterkeeper are exceptional varieties.

root cellar
Leah Smith

However, when it comes to impressive storage (at times reaching months), you should consider savoy cabbage.

More nutritious than a regular green cabbage, savoys are perfect additions to winter soups and casseroles. Though they’re more toothsome than green cabbage, they’re also excellent for raw consumption. Go with Winterfurst.

Carrots

Believe it or not, some carrot varieties don’t have the aptitude for long-term storage. A number of varieties with blunter shapes maintain their quality well, including Bolero, Rodelika and Scarlet Nantes Improved.

Still, the capstone of storage carrots is Rolanka. Its carrots are deep orange and maintain their sweetness for many months. Long in length and large in diameter, attentive culturing can even induce individual carrots to reach 1 pound in size—a serious storage carrot!

Dry Beans

Dry beans can be overlooked as a storage crop for the garden—perhaps because economical, convenient options are readily available elsewhere. But what about the exceptional? 

The world of dry beans offers many wonderful heirloom options, including Aunt Ada’s Italian (blocky shape, tan color), Drabo (white)  and Jacob’s Cattle (highly attractive, white/reddish-brown mottling).

At the top of the list, however, sits Black Valentine.

Having a hardy and vigorous plant, it grows well under adverse conditions. A top source of phytonutrients (as many darkly colored dry beans are), it also holds its shape well in soups. 

Note that when considering growing other dry beans, many can be picked at the green bean stage (as all of these can). Companies will list both “days to picking” in reference to their fresh-picking stage and “days to maturity” for dry-bean shelling—so pay attention.

Kohlrabi

Kohlrabi has become widely known, but you may not be familiar with the storage varieties. While regular kohlrabi must be harvested before they reach 4 inches in diameter, storage varieties achieve much larger sizes. 

They can easily be used to make coleslaw, a gratin or even “mashed faux-tatoes.” Keeping for several months easily, kohlrabi will do best packed in moist sand or sawdust (though any humid location will do). Superschmelz (being 8 to 10 pounds) and the purple-skinned and not as huge Blaril (averaging 2 pounds) are the ones to try.

Melons

The Christmas or Santa Claus melon won’t see you through the winter, but it doesn’t need to! With a mild, very sweet flavor and creamy white flesh with a honeydew texture, it earns its keep handsomely. 

This melon has a mottled, yellow-green skin, is the size and shape of a football and can achieve 9 pounds in weight. Harvested as late in the season as possible and stored in a cool location (such as a refrigerator), its exceptional storability (approximately 6 weeks longer than an average melon) may keep it around to when the snow starts flying!


Read more: Stable root cellar conditions treat your stored veggies right.


Potatoes

One of the most basic of storage vegetables. Potato varieties have early-, mid- and late-season harvest times, with the “lates” being most prone to good storability. Yukon Gold, Russet Burbank and especially Elba are excellent.

But Red Maria goes above and beyond. 

root cellar
Leah Smith

A red-skinned, all-purpose potato with white flesh, Red Maria is unchanged after 5 months in storage when other potatoes are on to wrinkling and sprouting. If Red Maria does sprout, they’re very short, stocky and easily removed.

Begin checking for sprouts in late winter. Toss them into the compost bin, avoiding feeding to animals.

Root Brassicas

Root vegetables were made for long-term storage in the root cellar, of course. Though they may all store fairly well, some standouts emerge. 

For example, there are many superb storage radishes, but the watermelons/red meats offer a very attractive appearance. Try Starburst and Beauty Heart. 

Zuercher is a fine and versatile turnip. It may be harvested at salad turnip size as well as allowed to reach that for storage.

Tomatoes

Everyone tries to extend the “tomato time” of the year for as long as possible, gathering unripened fruits at the end of the season and following specialized procedures to ensure the greatest possible longevity. 

Garden Peach is a very sweet, yellow tomato with a tender skin and is a good keeper, holding easily for a month or two. But if you want tomatoes in April of the following spring, Longkeeper (red) and Golden Treasure (rich yellow) are the tomatoes for you.

Golden Treasure’s distinctly acidic tang and firm skin equips it perfectly for its truly remarkable storage.

Winter Squash

Winter squashes aren’t all created equal when it comes to storage. Acorn is least storable, at only a couple of months.

Hubbard, banana and buttercup will easily store twice as long, actually improving in flavor with storage (try Blue, Sibley and Bonbon, respectively). So, too, will butternuts. 

root cellar butternut squash
Leah Smith

For top-level storage (not to mention superior nutrition), it’s difficult to beat the Waltham. Averaging 4 pounds, possessing an edible skin and widely considered the benchmark of butternuts, it’s an old favorite for a very good reason.

Make room for the production and storage of these crops on your farm. You’ll be glad you did! 


More Information

Dry Ideas

Dehydration is a handy method for keeping food. It’s most popularly done with blueberries, celery, greens (especially kale), hot peppers, mushrooms, snap beans, sweet corn, tomatoes, almost all herbs and apples!

For apple dehydration, your preferences are all-important. If you want an apple that holds its shape very well (for attractive apple rings), try Golden Delicious or Pink Lady.

If you want a very sweet dehydrated apple, choose from Cortland, Fuji and Gala. Looking for a tart taste? Braeburn and Granny Smith are the apples for you.

Cold Comforts

Freezing is a great way to preserve several foods that can’t be kept with (long-term) fresh storage in the root cellar.  It may require produce to be blanched (submerged in boiling water for a short period, then immediately chilled in cold water) or not, depending on the food. 

For Freezing

Blanch

  • broccoli
  • cauliflower
  • celery
  • greens
  • shelling peas
  • snap beans
  • sweet corn

Do not blanch

  • bell peppers
  • berries
  • melon
  • peaches
  • tomatoes
Root Cellar Runners-up

If you have plenty of room to dedicate to winter food (and even some to experiment in), try some of these keepers:

Beet

For serious winter storage, Lutz Green Leaf, aka Winterkeeper, is the one to try.

Cape Gooseberry

Similar to the husk or ground cherry, the cape gooseberry (Physalis peruviana) is a larger fruit with an almost tropical fruit flavor and the same in-the-husk storability. 

Celery

Celery for storage? Try placing plants in 5-gallon pails for continued production. Choose between Fordhook and Giant Pascal.

Mushroom

Darkened conditions (completed with a humidity tent) are perfect for growing a mushroom kit!

Popcorn

Add Vermont Red Kernel to your corn patch and pop away.

Pumpkin

For exceptional flavor and fair storage, try Winter Luxury. For good flavor and exceptional storage, Long Pie.

Sweet Potato

Stores in warmer conditions than the typical root cellar. Try Allgold.

This article originally appeared in the September/October 2022 issue of Hobby Farms magazine.

Categories
Beginning Farmers Crops & Gardening Equipment Farm & Garden Farm Management Homesteading

Build A Winter Greenhouse For Year-Round Growing

With visions of year-round food production, many gardeners stumble upon online resources about the walipini, or pit greenhouse, only to discover they are designed for equatorial geographical locations. If, like me, your romantic visions of year-round fresh greens aren’t stifled by this, then you’ll probably keep searching and discover other options: geodesic domes, heated hoop houses to overcome winter chills or gardening indoors.

Each option has pros and cons of course: large footprints, unreliable warmth, weather-dependent energy costs as well as initial investment. 

My solution is what is found here: a winter growing space that is all (and more) of these. It’s part walipini, part traditional greenhouse, with a convertible top for summer growing! Might I add it’s also easy to build, intuitive to use and relatively inexpensive. 

Basic Dimensions

  • 9-by-16-foot footprint
  • 3-foot flat roof extending from back wall
  • 8-foot sloped boards for glazing
  • 6-foot, 6-inch height overall (This varies with how deep you dig or how tall the stone foundation.)
  • 5-foot-tall doorway

My DIY 

This winter greenhouse is built using a simple 2-by-4 frame, lean-to design. In my case, I took advantage of a privacy fence. This three-sided design makes a world of difference in warmth when compared to a traditional freestanding greenhouse, hoop house or geodesic dome. 

If you don’t have an existing fence as I did, do you have a south-facing wall of your house, shed or barn? Whatever you choose for this back wall, it should be covered with bubble insulation. I used Reflectix. (The white one is more pleasing than the shiny tinfoil version.)

Another item for the back wall: extra field stone, which offers thermal mass to store the sun’s warmth.

Generally speaking, it’s good to build the roof 3 feet out from the back wall. This will give you working headroom. The roof vents are made by not fully attaching the metal roof panels and are held open with a wooden wedge. Make sure they face away from the prevailing wind so they don’t get damaged. 

winter greenhouse project

Other unique features include the following. 

  • The 3-foot flat roof is slightly slanted so that water runs towards the back wall. 
  • A seam in the metal roofing allows water to leak inside the greenhouse.
  • The internal gutter catches rainwater and sends it down a rain chain to fill the rain barrel. 
  • The rain barrel provides thermal mass and year-round water, which is especially critical in the winter when spigots and hoses are frozen.
  • The 2-by-4 inch frame structure is built on 2-foot center, and the glazing is 4-by-8-foot by 14-inch-thick poly, double-wall panels. 

My greenhouse is 16 feet long, which required four full 4-foot-wide panels along the front. From the photos, you’ll notice that my fence runs uphill and changes direction in the middle. Thus, this flexible design can be adapted to many different spaces, shorter or longer. 

The sloped boards are 8-foot long, 2-by-4-inch treated lumber. Notched joints hold the sloped and horizontal roof boards together. On the inside are a few furring strips for hanging potted plants and to run wires for the grow lights.

Furring strips also hold the glazing in place during the cold months and, being attached with screws, can be easily removed during the warm growing season. (Note that some poly panels have an ultraviolet coating on only one side, so take care to remember which side goes up or the poly may degrade.)

Flexible, waterproof 12-volt LED grow light strips (pink and blue) are attached to each of the 8-foot-long sloped boards. For power, these boards are connected via underground cables to a 12-volt battery bank in my home’s basement. Adding more light hours is often more important to many winter-growing plants than adding warmth. So grow lights are a critical part of my design.

Thus, I turn on my lights to extend the “day” by two additional hours each winter evening. This yields measurable growth for my frost-hardy plants and microgreens. 


Read more: Here’s why you should consider setting up a greenhouse.


Location, Location, Location

Site selection is all-important for winter greenhouse success. For maximum sunlight exposure in the northern hemisphere, a south-facing design is critical. Some nuanced features to consider for ease of use: 

  • proximity to a water hose
  • composting needs
  • how water moves across the site
  • access to electricity and how you may route that underground

Of course, sunlight and shade are huge factors. Will shade from trees and/or buildings come into play with winter’s long shadows? Will leafed out trees shade in summer? (This can be a good thing!)

As such, it’s ideal to study the site through all four seasons. Note how much sunlight you get per day.

The best solar-mapping method I have found is to use a digital camera and image editing software. The software needs to allow you to do two things: layer multiple photographs on top of each other and control their opacity. 

Simply pick a day in the middle of each season, and take a picture of your site every few hours. This is best done with a tripod from the exact same vantage point. 

winter greenhouse project

Using the image editing software, stack the three or four images on top of each other while increasing their opacity to reveal a map of shadows and sunlight. This composite image will show the bright sunny spots without shade, spots receiving partial shade and areas that are always shaded throughout the day. 

This will represent a seasonal solar map. Repeat during the other seasons, and you’ll have a good understanding for the year. 

If your house is located near your potential greenhouse site, use Google Project Sunroof to see some basic solar data for your house roof, such as how many hours of sunlight per year received and how shady or sunny the site is. This is also great information if, like I did, you intend to install roof-mounted solar panels to fuel grow lights. 

Groundwork

Before you build the greenhouse structure, you should do all the groundwork, not only for the foundation but also the interior pathway and grow beds. An important note is that my build is on a hill, so if your build is on perfectly flat ground, it’ll look slightly different. 

First, stake off the four corners, and then decide where to put your door. In my location, I positioned the door so that the prevailing wind would blow into the greenhouse. The door hinges are attached to a board on the back wall. As described, this back wall is my privacy fence.

You should start leveling from there. 

Next, level out the footprint for the door wall and the long front wall. These should be all on the same level plane. (My greenhouse is built into a hill with the door on the downhill side, which meant less digging for me and a smaller step down into the greenhouse.) If you’re building into a hill, the end opposite of the door doesn’t need to be leveled on the exact same plane as the door because that will be part of the raised garden bed. 

I put my greenhouse on a stone foundation, starting with the door wall, which raised the entire structure about 6 inches. If you’re building on level ground, you could essentially set the entire structure onto raised-bed timbers.

Once you have the three walls leveled out, it’s time for the interior layout.

Roughly plan the layout of the growing beds. As you can see in my greenhouse in the photos in this article, I have a narrow walkway with two round areas on each end, allowing room to sit and work, plus space for the rain barrel. The back grow bed, against my privacy fence, is only 12 to 18 inches wide.

Because I am taller than 6 feet, I wanted to retain as much of this back area for walking as possible. The small garden bed on the back wall works as a place for tall plants that enjoy shade, grape vines or microgreen trays. 

The larger grow beds are under the sloped glazing. As you ponder their design, consider what materials you might use to build the raised beds since materials can determine the beds’ shape.

Old bricks? They’re good for curved areas. Stones or rocks? Wood? I used a log from a dead tree, and some untreated hardwood boards I had on hand, both of which make for great insect habitat. Before digging, I used a shovel to chop outlines on the ground for my design layout. If you need to “draw” your design on the ground, sprinkling with flour is a good nontoxic option. 

winter greenhouse project

Digging down for pathways will help your plants. For one, the dug dirt will provide fill for raised beds. (This is a great time to mix in compost or garden soil!) Most importantly, the lower pathway will draw cold air down into it. This dropping of the cold air will keep your raised plants just a little more protected during cold nights. So digging down 12 to 18 inches would be a good goal.

Other factors to consider including the following. (There may be more for your particular situation.)

  • how tall you are and the headroom you need
  • if your structure is on the slope of a hill or on level ground
  • how much labor you want to do
  • your water table

Once you have dug down, build the retaining walls. All of the beds need to have walls, otherwise the dirt will collapse over time onto the floor. Lastly, backfill as needed. 

Note: It’s OK if the floor isn’t perfectly level. Because this is convertible and open to the weather during the spring, summer and fall, slanting the floor toward one end allows rainwater to drain away as needed. I slanted my floor so that rainwater would run toward the door wall. (For better drainage, I buried a 2-foot-long piece of black drainage pipe that exits under the wall.)

Finally, cover the floor with something such as pea gravel, which adds extra drainage and keeps things clean and tidy. 

A winter greenhouse can be a flexible place to grow food year-round. It can extend the growing season for some plant species. It can enable frost-hardy plants to live indefinitely. And it can overwinter seed-bearing plants for a microgreen system.

More than a greenhouse, this convertible structure can be a vital part of your growing system at all stages of plant life, staying productive no matter what blows outside. 


More Information

Winter Gardener Plants

Here are five easy-to-grow crops for the winter greenhouse gardener.

Swiss Chard (Fordhook Giant)

It’s difficult to capture how wonderful it is to sneak out to the garden on a snowy night and cut off some large Swiss chard stalks to sauté. Swiss chard is my favorite cut-and-come-again winter greenhouse plant because it gets large in the fall, improves in flavor in the cold and rejuvenates in early summer with hundreds of easy-to-collect seeds for a microgreen system.

Kale (Delaway)

Gardeners might advise to “Watch out for those white cabbage butterflies that love all brassicas!” That’s not such a downer when you have a winter greenhouse.

Kale, another great cut-and-come-again plant, can, fortunately, overwinter in the winter greenhouse producing a harvest before the hungry caterpillars come around. Kale also produces abundant seeds for microgreens.

Carrots

For many, carrots are difficult to germinate, and they take time to grow. But winter greenhouse soil stays damp, so germinating carrots is easier there. They don’t aggressively grow during cold winters, but the seedlings will grow up quite fast as spring nears.

Overwintering carrots is also a great way of getting abundant seed, which I generously sprinkle all over the greenhouse under the larger plants!

Collard Green (Ole Timey Blue)

Collards are another flavorful plant that will live year after year in a winter greenhouse. Planted late in a rotation, they can also provide for fall and winter eating and a nice spring crop of seeds before the caterpillars come!

Spinach

Keeping spinach from bolting can be difficult, so why not grow it during winter or very early spring when snow still blows?! Bolting spinach in the heat of late spring or summer simply means more seeds for microgreens or the next crop.

This article originally appeared in the September/October 2022 issue of Hobby Farms magazine.

Categories
Equipment Farm & Garden Projects

5 Heavy Items You Can Move With A Stone Boat

A number of years ago, I penned an article for hobbyfarms.com explaining how a large, flat piece of wood tied to a tractor via rope or chain could be used to haul heavy items around a farm. I called it the “world’s simplest wagon.” But it’s really more of a sled.

In the years since, I have expanded on the concept in more sophisticated ways. It turns out there’s a name for my wooden wagon/sled. It’s properly called a stone boat. The name is appropriate in that it is perfect for transporting stones.

But I question the “boat” portion, as I’m skeptical whether a stone boat would float under the weight of a giant boulder….

I digress. My current stone boat is built of stout planks, making it durable and suitable for heavy loads. The front curves up so the sled can slide over small obstacles. And I’ve installed eyehooks so I can tie down loads for extra security.

If you don’t have a front-end loader and only infrequently need to move heavy items, this can be a perfect solution. I’ve hauled all manner of heavy loads around the farm, including…


Read more: Does your tractor really need a front-end loader?


Rocks, Stones & Boulders

With a digging bar (and perhaps the assistance of a second person), I can wrestle large boulders on to my stone boat.

There’s no way I could lift them into a wagon (and sliding them up a ramp would be difficult). But flopping/rolling them onto the flat surface is relatively straightforward. Smaller rocks and stones are even easier.

Tree Stumps

In much the same way as stones, I’ve wrestled tree stumps onto my stone boat and hauled them away to decompose in the woods.

Logs

Logs can be a little trickier to move since they’re inclined to roll around, but that’s what the eyehooks are for. You can tie down logs thoroughly and prevent them from moving.

I used a stone boat to move a large number of logs this year, and it worked like a charm.

Small Machines

Rocks, logs, tree stumps—stone boats can move all kinds of heavy natural materials. Manmade items are fair game, too.

Once or twice a winter I wind up tying my self-propelled snow blower to the stone boat so I can haul it from one part of the farm to another.


Read more: Seeking a snowblower? Ask yourself these 6 questions before heading out to purchase.


Supplies

Hay bales, bags of livestock feed and bedding, jugs of water—a stone boat can haul all of these and more. It’s not my first choice for items that can be easily lifted individually (I would rather load a wagon, cart, or wheeled vehicle). But I can certainly carry a heavy load of supplies in a pinch.

Ready to add a stone boat to your arsenal of farm tools? Then you’re in luck, because hobbyfarms.com offers step-by-step instructions for building your own. Before long, you’ll be hauling heavy objects with ease, no front-end loader required.

Categories
Animals Beginning Farmers Farm & Garden Homesteading Large Animals

Bottle Jaw In Sheep: What Does it Mean? 

I’ve been reading a lot of online posts recently from sheep owners about a condition called “bottle jaw.” Many of them have never seen or heard of it and need advice from other sheep farmers.  

To be honest, I have never seen this condition (nor do I hope to!). But as any livestock owner knows, if you keep animals long enough you’ll see all kinds of health conditions. In a nutshell, the condition called bottle jaw is when the sheep has swelling under her jaw, which results from an accumulation of fluid there.  

Barber Pole Worm

According to the Cornell Small Farms Program, in nearly all cases this swelling is caused by a pesky parasite called the barber pole worm. The technical name for this worm is Haemonchus contortus. 

What I find so concerning about this particular parasite is that there really are no early warning signs, and even a really bad infestation does not always have any telltale signs, including bottle jaw or diarrhea. That’s why some people say their sheep “just died out of the blue.”  

The barber pole worm lives in a sheep’s stomach and pierces holes to drink blood. If left long enough, the worms can cause the sheep to become anemic and eventually die. By the time you notice the swelling under the jaw, the barber pole infection has probably been pretty substantial. 

Avoiding Infection

Avoiding infection from the barber pole worm is possibly easier said than done. However, one thing you can do is to make sure that the pastures your sheep graze have at least 4 inches of growth.

Sheep will graze grass lower than that, but worms generally are found in the lower part of the grasses and other plants. Therefore, if you practice rotational grazing, your sheep may benefit from grazing in pastures that have taller grass. 

In addition, there is some evidence that younger sheep and lambs are probably more susceptible to worms. So keep a close eye on them. Older sheep often develop some immunity to this parasite … but it’s not a given. 


Read more: FAMACHA can help you control barber pole worms in your sheep and goats.


Not Always Barber Pole Worm

One other thing to consider is that not all cases of a swollen jaw in sheep are caused by the barber pole worm. For example, there could be an infection or swelling caused by an injury or a bite of some kind. Problems caused by high blood pressure could cause swelling in this area.

There is also a condition in lambs called “milk goiter” that can cause swelling near the upper neck or jaw area. Generally, milk goiter happens when a lamb receives a large amount of milk from the ewe. Most often it will shrink after a short time. 

If you do see signs of barber pole worm infection, the best thing to do is call your large animal vet and find out what type of wormer they recommend. They may even ask you to bring in a fecal sample to confirm the type of worm. (And there can be more than one kind at the same time.)   

It’s important to stay ahead of worm infestations in your sheep. With just a few precautions, you should be able to raise your healthy flock with very few problems.