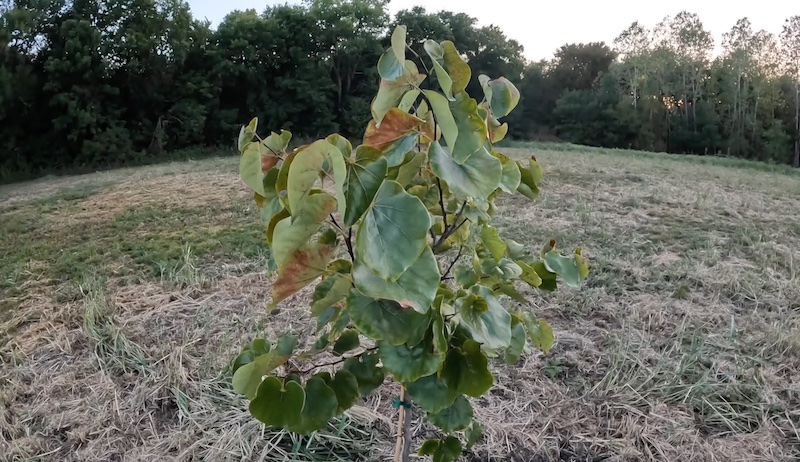
Planting trees doesn’t require a long list of well-honed skills. But there are a few things to keep in mind, and chief among them is timing. Trees really benefit from a fall planting, so if you’re thinking about adding some trees to your land, now’s the perfect time.
Hole Lotta Love
To plant a tree, your first consideration is, obviously, digging a right-sized hole. Take a look at the pot your tree is growing in. You’ll need to dig a hole about twice as wide as this pot to provide plenty of room for the roots to spread out.
But how deep does your hole need to be? In this case, more is definitely not better. In fact, you don’t want a hole as deep as your pot is. Dig a hole about 3/4 of the depth of your tree’s pot, leaving about 2 to 3 inches above ground.
You’ll mound dirt up to this level, rather than backfilling it in to a recessed space.
Before putting the tree into this right-sized hole, I like to drop about 1 cup of all-natural fertilizer into the bottom. I’ll also top-dress the planting after it’s in the ground to provide nutrients as it becomes established and grows.
This may not be necessary, and you can opt against it. But I like to provide these extra nutrients when I plant my trees.
Removing the Tree for Planting
Don’t just pull the tree out of its pot to stick into the ground. Lay the tree down, then mash around the container with your hands. Why is this important? Well, doing this helps any roots stuck to the container come free.
Jerking the plant out of the container without doing this could harm these roots when you take the tree out.
Once you’ve got the tree roots worked free of the pot, you can remove it from the container. Then, massage the root ball with your hands to loosen the roots and ready them for the hole.
Now your tree is ready to go into the hole. To see this process and learn what comes next, check out the video above!
Got kale? It’s one of the last remaining soldiers in my garden, along with Swiss chard, collard greens and leeks. Everything else died off from the hard frost we got a couple weeks ago here in Minnesota.
Temporarily, kale can be kept fresh in a jar of water on the countertop, like a bouquet of flowers.
It also does well clipped and refrigerated, which can keep kale fresh for weeks. To refrigerate, just wash the leaves, dry and store in a plastic bag, such as a gallon-sized freezer bag. Add a couple paper towels to the bag.
If you have a crisper drawer in your refrigerator, even better. Store the kale there.
If I don’t use my kale freshly clipped, I freeze it. Frozen kale is convenient and has many uses. We like to add kale to our smoothies, pastas, quiche and soups.
Harvest and wash leaves, discarding any wilted or bug-eaten leaves. Spiders and other bugs can hide in the wavy pockets of the leaves, so be thorough.
Kale is best blanched. Bring a pot of water large enough to fit the amount of kale you have to a boil. Remove the frilly kale leaves from the stems. Blanch leaves for 2 minutes in the boiling pot of water. After blanching, use a slotted spoon to transfer the kale to a bowl of ice water to stop the cooking process.
Allow to cool completely. Strain the leaves from the ice water and dry.
Freeze kale in plastic freezer bags or other container suitable for freezing in, such as a glass canning jar. Freezer bags designed for freezing are ideal since the air can easily be pushed from the bags and they take up less space than bulkier containers.
When using, just pull what you need from the freezer bag and add it directly to your soup, smoothie or frying pan—no need to thaw first. However, if you prefer to thaw it, you can place the freezer bag into a cold bowl of water or defrost slowly in the refrigerator.
Notes
Measure out kale before freezing, and note and date on container for quick reference.
The editors of Hobby Farms magazine are always on the hunt for great photos of livestock looking good while they say cheese.
In a recent print issue, we ran the best photos submitted by readers. Each one includes the name and city of residence of the person who submitted it.
Send us via email the best images of your brood to hobbyfarms@hobbyfarms.com, with “Say Cheese!” in the subject line. Include your name and address in the body of the email.
We hope to see your livestock photos in an upcoming print issue of Hobby Farms!
Boulder Creek Farm, Colorado
Elizabeth Karvonen, Owenton, Kentucky
Kristen Gilbert, Jamestown, Tennessee
Holly Lutz, Delton, Michigan
Kristi Haedrich, Halifax, Pennsylvania
Malvitz Family Farm, Centerview, Missouri
Marianna Craighead, Milford, Illinois
Nick Larson, Sumner, Washington
Shan Keeler, Lake Ariel, Pennsylvania
Mark Moravy, Spring Hill, Florida
This article originally appeared in the September/October 2022 issue of Hobby Farms magazine.
I first started gardening in college, when, one summer, I took over a small patch of land in my parents’ suburban backyard to grow corn, beans and tomatoes. Some years later, with a house and some kids of my own, my wife and I started tearing up our corner-lot backyard, putting in a small orchard, some berry bushes and a few rows of herbs and veggies. One garden crop, though, quickly emerged as a favorite to grow: garlic.
Why garlic instead of, say, plump tomatoes or prolific okra? While I do like growing both of those quite a lot, garlic is just distinctly satisfying, not to mention easy, to grow. There’s a set-it-and-forget it element to growing backyard bulbs that’s undeniably appealing, though harvesting tender summer scapes is one chore I relish.
And once you’ve stocked the pantry with your own garlic to enjoy ’til next harvest, you won’t want to go back to buying.
What follows are a few tips and tricks I’ve picked up over the past decade-plus of growing garlic for my family.
When to Plant
Typically, garlic is planted in the fall. I like to get mine in the ground in late October for one simple reason: Bulbs will be ready around July 4, which is just easy to plan for.
But as I write this, it’s November. And you may not see this story until December. Did you miss your window of opportunity to grow garlic?
Nope. One year I put off planting until Christmas Eve, a traditional planting date for Irish gardeners (or so I’ve heard). And you can put garlic in the ground in spring for either spring garlic (or green garlic—like scallions) or for later harvest as a bulb (though usually without cloves).
But my family eats a lot of garlic, so big bulbs are best for our needs. Fall plantings, as such, are our standard.
How to Get Seed Garlic
After your first year of growing garlic, your crop will be pretty self-sustaining. Just pick the best bulbs from your harvest and use the cloves to grow next season’s crop.
But what if it’s your first year? Or maybe it’s been a few years and your stock needs refreshing. You can easily find garlic seed stock in nursery catalogs for reasonable prices, though shipping costs are typically substantial, and you’ll push your planting date out quite a bit as you wait on delivery.
Want to plant cloves this weekend? Here’s a quick tip: Just go get some garlic. You can totally head to the grocery store and pick up some organic bulbs (important because conventional garlic is likely sprayed with a growth inhibitor—not what you want from seed garlic) to tear apart and stick in the ground.
Even better? Head to the farmers market and purchase some locally grown seeds. I’m currently on my third year planting German hardy hardneck (because I like scapes, which softneck varieties don’t produce) garlic bought from a market delivery service during 202o’s lockdown. It grows awesome in my suburban backyard plot, and the bulbs get bigger each season as I select for ideal growth.
How to Plant Garlic
You can easily find overcomplicated instructions online for growing garlic, but in truth, you just need to stick some cloves in the ground. Here’s what’s worked for me across three different growing locations.
I’ve selected a pretty sunny space on the edge of my garden for growing garlic. This I attack with my rotary manual tiller (you know, with the four tines at the end) to loosen the soil. I dump a bin of compost onto this growing space and give it another quick till to break up and turn in.
Then I dig two shallow trenches the length of the growing space. Garlic cloves need a depth of 2 inches, with a spacing of 4 to 8 inches between plants. And because I have two rows, I space these about a foot apart (though a minimum of 6 inches will do). That’s a tightly growing crop, and I can easily get 50+ bulbs from my efficient little spot.
Next, it’s time to plant. Place cloves point up (important, but easy to remember if you’ve ever had a garlic clove sprout in the pantry) the requisite 4 to 8 inches apart down the row, then cover it all back up with dirt.
And because this is a fall planting, I like to gather fallen leaves and spread them over the top for insulation. I run my reel mower over the leaves a few times to mulch them for quicker decomposition come warmer weather. Then … I’m done for a while.
In winter, you won’t see much activity. Though the little green shoots that do poke through your winter garden can be a real boon to the senses when everything else is brown and dreary.
This winter dormancy is actually important to the plant, though, as it kick starts the process that eventually results in those big bulbs you’ll roast up next autumn for fantastic fall flavor.
Spring & Summer
As spring thaws bring warmer weather back to your life, the garlic you grow in your patch will spring to life. In my experience, growth starts off slowly, then explodes into a jungle of green once summer takes hold. Through all this, just make sure your garlic stays hydrated. (Mulch helps.)
As mentioned earlier, I am a big fan of scapes —the stalk hardneck garlic plants send off that, if not removed, eventually flower. Practically speaking, removing this stalk diverts energy downward to produce bigger bulbs. From a culinary perspective, cutting scapes gives you an early taste of your homegrown garlic.
If you planted garlic in fall, you should see scapes start to grow in early to mid June. Cut scapes when the stalk curls around itself (or earlier) to avoid tough, woody textures. I cut scapes at a slight angle close to the base using a pair of garden shears, and I typically do this in the high heat of the day so the cut will dry before evening temps introduce threat of disease to the wound.
Scapes taste delicious grilled, and many growers find they make an excellent pesto. I often use fresh scapes in place of garlic (the flavor is just a bit lighter) in stir fry or even pasta sauce. And I wash and toss extra scapes in the freezer to enjoy later (plants send out scapes at the same time, so I typically have a lot of them all at once).
Harvest Time!
I know it’s time to harvest my fall-planted garlic around July 4, but there’s another way to realize it’s time to fetch a garden fork: The plants look terrible. Stalks will start to brown and die a few weeks before it’s time to harvest. Head out to collect your harvest when the stalks look downright dead.
(Note: If you have a lot of garlic, feel free to harvest green in the fall. The delicate flavor is a special treat.)
My tool of choice for harvesting garlic is a potato fork, though I’ve used a pitchfork in the past. Two points to keep in mind when harvesting: 1.) those bulbs are probably farther down than you think and 2.) they’re not always where you assume, so leave plenty of room when plunging those tines into the ground.
Regardless of care, though, you’ll probably nick a bulb or two. That’s fine—just remove the injured cloves and enjoy these bulbs first.
But harvesting is generally an easy task. Push tines into the ground a good 5 to 6 inches away from the stalk and well into the ground, then, once you’re pretty certain you’re under the bulb, pull the handle back to push the plant up. You need to loosen the roots on the underside of your bulb, and don’t think you can simply pull secured garlic out by the stalk. (The stalk is likely to break off, then you have to go searching for the garlic, which is a pain.)
Work the soil loose around the plant, then pull bulb out, going back to rework the soil if you encounter resistance. Once you have a garlic bulb out, move on to the next one until you’ve harvested everything.
As with other edible alliums and tubers, you need to cure your garlic for winter storage. Some people will get fancy and braid the stalks, then hang these to dry. I’ve done that, and I’ve also just lopped off the stalks and laid them out to cure. None of this is as important as it is to let them sit in a low-humidity space for a while so they can dry out without growing mold.
You can, of course, enjoy bulbs as you need them during the two or so weeks they’re curing. This is simply about prepping bulbs for storage through the winter and spring.
Once bulbs are cured, you can trim off any extra stalks or roots and store in a well-ventilated space. (I have a full basket in our basement pantry right now.) And take this time to select your best, biggest bulbs for next year’s crop, setting them aside to plant in next fall’s garlic garden.
Fashion isn’t usually top of mind for farmers. Who gets dressed up to muck out a barn or till a plot? And anyway remote rural areas aren’t typically populated by lookee-loos checking out today’s outfit. But functional farm fashion can make hard labor a bit easier, so check out some clothes, from shoes to slacks (and more), built to work as hard as you do.
The garment of choice whether you’re working on the farm or running errands in town, the Duckworth Powder High Neck is a perfect cold-weather classic. Made of Montana-grown Merino wool, its loose fit looks fantastic over leggings or jeans.
Cool Hat
Nothing says “cool” quite like a sheep in aviators! Made from recycled fishing nets, the mesh back is breathable with an adjustable snap back closure to keep you comfy.
Fall Fleece
The Briar Jacket is made of impressively soft, yet bramble-proof 10.5-ounce stretch cotton. Lined with microfleece, it’s available in both char- coal and field khaki.
Mask Matters
Whether you’re working or playing, the Durango Paisley Silk Wild Rag keeps sun off your neck, dust out of your lungs and sweat from soaking your shirt. At 36-by-36 inches, this solid silk rag works in warm and cold climates alike.
The Columbia Heavenly Vest is aptly named. The perfect water-resistant outer layer, this vest uses thermal reflective technology to warm your core.
Demin Delight
Tailored-style, Longhorn stitched pockets and a snap make the Kaycee Denim shirt transition easily from farm work to a night on the town. The cotton and polyester combo make it lightweight-yet-durable with a traditional denim feel.
Fancy Pants
Made with flexible, breathable, water-repellent fabric, Balsa Pantsinclude articulated knees and a 50-plus UPF rating.
This article originally appeared in the September/October 2022 issue of Hobby Farms magazine.
Kentucky farmer and community organizer Tiffany Bellfield covers family land and legacies, pollinator habitats, Community Farm Alliance, and more on this episode of Hobby Farms Presents: Growing Good.
Hear about the deep history of Ballew Estates, the land that Tiffany’s great-grandfather, Atrus Ballew, who was born an enslaved person, eventually bought and Tiffany now stewards with her cousin, Jim Embry. Learn about how you can build up a natural pollinator habitat on your own farm.
Tiffany talks about being an herbalist and a doula and how opening her farm to women in the community is an act of holistic care. For anyone who’s visited the iconic Alfalfa Restaurant in Lexington, Kentucky, Tiffany gets personal about what the restaurant’s transition into catering and food truck has looked like and how that ties in with her struggle with heir’s property rights.
Get to know the work of Community Farm Alliance in Kentucky, including the equity work this organization has committed to, which resulted in the Kentucky Black Farmer Fund. Also hear about why you should be paying attention to the Farm Bill and how the Inflation Reduction Act is and is not helping farmers—in particular BIPOC farmers.
Soil quality is a major contributor to plant (and planet!) health and resilience. Many aspects of a soil contribute to its overall condition, including
organic matter and humus contents
microbiology
aggregation and porosity
mineral content
Wonderfully, one of the best methods for improving soil quality is using it to grow crops that enhance one or more of these attributes.
Botanical Benefits
Cover crops and green manures are popular methods of introducing soil-enhancing plants into your production system. They can be grown during the winter, in summer between cash crops, or be in place for a full year.
These soil-improving crops offer many and diverse benefits. They can lead to increased soil fertility and water-holding capacity. They can prevent and correct soil erosion and compaction while generally improving texture. And they can be used to absorb excess nutrients (from compost or manure applications, for example) and thus prevent nutrient leaching.
Depending on crop choice and management, they can also result in decreased weed pressures and increased beneficial insect populations.
Improving soil fertility is a specialty of many soil-improving crops, which they achieve in different ways. Legumes fix nitrogen. Some plants produce large quantities of biomass (above and below ground) to add to the soil’s organic matter. Still others mine minerals from the subsoil, making them available in the topsoil.
Many plants transport some of their photosynthetically-produced sugars through their roots and release them to the soil. These act as biological stimulants to the microbial soil community (including mycorrhizal fungi), providing energy for its growth and vitality. In turn, this increases soil water-holding capacity and mineral availability in the soil to the betterment of the plant community.
This can be particularly effective when the soil-improving crops are from plant families typically underrepresented on farms and in gardens. They’ll enhance ecosystem biodiversity at the same time.
The following plants offer a diversity of soil-boosting benefits. Pay attention to their unique attributes and think about how they may work together—whether simultaneously or successionally!
Buckwheat
A familiar green manure that prefers loose, moist (not soggy) soil, buckwheat (Fagopyrum esculentum) is for spring planting and known as an excellent soil conditioner.
Cari Griffith/Shutterstock
Its rapid establishment and tight canopy allow it to shade out and suppress weeds, another of its finest attributes.
An annual and member of the infrequently seen Rhubarb family, buckwheat produces plant root exudates which will improve the soil’s biological diversity. Additionally, they enhance phosphorus availability in the soil.
Favored for erosion control and weed suppression, cowpea (Vigna unguiculata) can reach 3 feet in height. A nitrogen-fixing legume, it also improves soil fertility.
Exceptionally heat and drought tolerant, this annual was made to withstand the harshest of summers. And due to its tolerance of partial-shade conditions, it can be used as a living mulch.
Egyptian or Berseem Clover
An annual with a high rate of nitrogen fixation, Egyptian clover (Trifolium alexandrinum) has a tolerance of a range of soil types (excluding sand) and environmental temperatures. It can also withstand drought conditions, excess soil moisture and excess salinity—though it will positively thrive in slight alkalinity.
In good conditions, this high-quality forage produces enormous biomass. This clover’s rapid growth makes it ideal in various situations, all of which benefit from its ability to suppress weeds.
Forage Chicory
This perennial and member of the sunflower family possesses the familial characteristic of a substantial taproot. Its root system helps it to be drought tolerant, an improver of soil texture, and a miner of minerals.
Forage chicory (Cichorium intybus) favors well to moderately drained soils with medium to high fertility that are in full sun. It’s a favorite of cattle and an excellent addition to a diverse animal diet. And it is, of course, less prone to flowering than its familiar roadside-dwelling relative.
Lacy Phacelia
Attractive to the eye and numerous insects, though due to the itchy pubescence covering it all animals prefer to admire it from a distance, lacy phacelia (Phacelia tanacetifolia) brings balance to soil nutrient levels. More specifically, it’s a nitrogen scavenger. This means it gathers and holds nitrogen in the soil, preventing any run-off and retaining it for use by future crops.
A rapidly growing annual, it suppresses weeds by outcompeting them for water and nutrients. This member of the borage family has a reputation of being a soil-improver that conditions the topsoil better than any other plant.
Korean Radish
Thanks to the large, deeply growing roots of these radishes, Korean Radish, or Asian Daikon Radish, (Raphanus sativus var. longipinnatus) greatly improve soil tilth by breaking up compaction and plow pans. You might want to pull a few for food or animal fodder as well.
Whether planted in spring or in the fall to overwinter, this annual (which is a biennial flowerer) is known as a biofumigant of the soil, producing root exudates that can eliminate root-knot nematodes. The presence of these soil pests can be detrimental to the growth of many plants and is absolutely disastrous to root crop production.
Oat
This annual produces a dense mass of roots that reach far down into the soil, leaving a loosened soil texture as they decompose. Oats (Avena sativa) can be planted early and grown in summer or planted later in the season. They’re cold-hardy enough to continue growth as cool weather moves in but sensitive enough that it will winterkill (see “A Management Position,” below) and become an automatic mulch for the following spring.
A forage-able grass crop and nitrogen scavenger, oats are also known to produce substances that have an allelopathic or chemically inhibiting effect on seed germination, which functions well in weed suppression.
Partridge Pea
This legume is easy to grow provided you offer it a cleanly prepared seed bed. It fails to compete with perennial plants. Growing very well in the summer heat and in average-to-dry soils, partridge pea (Chamaecrista fasciculata) will typically reach 2 feet in height.
A nitrogen fixer (naturally), farmers frequently use it in areas where erosion control is critical. It holds the soil, and its attractive appearance adds beauty valued by humans. Furthermore, in addition to lovely flowers, this plant has extra-floral (nonflower) nectaries and so appeals to many pollinators and other beneficial insects.
Rye (Secale cereale) is exceptional in many respects. Its root production is substantial, producing below-ground biomass reaching into the subsoils. It, too, is a grass with nitrogen scavenging and (strongly) allelopathic traits and is also an inhibitor of root-knot nematodes.
Often considered the hardiest soil-improving crop, rye can be planted in downright chilly soil and therefore has its window for planting open quite late (an advantage when dealing with crops harvested late in the year).
A winter annual, it resumes its growth in the spring. Also, its shade tolerance leads to greater opportunities to combine its growth with other plants, whether simultaneously or successionally.
Sweetclover
Yellow sweetclover (Melilotus officinalis) and white sweetclover (Melilotus alba) are both monumental nitrogen fixers, aboveground biomass producers (potentially reaching 6 feet), nutrient miners and soil compaction rectifiers, all of which is aided by their deep, aggressive taproots.
Though yellow sweetclover (a biennial) has better drought tolerance, heat tolerance and biomass production, white sweetclover (an annual) is taller and “stemmier” and sometimes considered a better soil tilther. These willing self-seeders are ideally planted early during the cool, damp spring months for better establishment.
A Management Position
Soil-improving crops can be implemented on a large (as in plot or field) or small (as in row or bed) scale. It’s just a question of managing them properly based on the situation. But first, there are decisions to be made with your soil-improving crops.
Leah Smith
Are they to be spring, summer or fall planted, and what will they be? Are you prepared to monitor soil-improving crops for diseases or insect outbreaks that may affect neighboring or future cash crops with the same susceptibilities (as can happen with radish or mustard soil-improvers)?
Do you wish to plant a mixture of species to produce a greater effect? For example, when planted together, a legume will fix nitrogen from the atmosphere while a grass will retain it in the soil.
Or a rapidly growing crop will “nurse” a slower one, producing conditions that allow both to become established. (Often this is an annual crop nursing a perennial, though, by way of example, oats nursing Egyptian clover is an annual nursing an annual.)
When it’s time to end your crop, will you do this with mowing, harvesting or grazing and then tillage; rolling/crimping, hand hoeing or manual pulling; or leave it to be winterkilled by cold weather?
Some of the managing you must do is simply timing steps properly. For example, there is terminating your crop before it develops tough stalks that resist decomposition (an issue with rye). And cutting a flowering soil-improvement crop prior to its seed set so that it does not reseed itself in a weedy fashion (sweetclover, hairy vetch and radish, to name a few, are known for this).
Coordinating between cash crops and soil-improving crops must be appropriately timed also. Crop decomposition uses moisture (making it unavailable for the growth of new plants), and its nutrients need time to be released as well.
Further, the allelopathic effects of some soil improvers on seed germination can influence subsequent crops as well as weeds. The effect is temporary and sometimes only on small-seeded crops. Generally, a 2-to-3-week window between improving-crop removal and the planting of your cash crop will avoid any resource competition or unfavorable influences.
And what other uses will you find for your soil-improving crops? Those which produce sufficient biomass may be repeatedly cut as a mulch source prior to flowering [most plants that have reached their reproductive (flowering) stage will not re-grow after being cut]. Others palatable to animals (whether cattle, goats, pigs or chickens) can be used as a food source for them, through grazing or mowing/harvesting.
Moreover, crops allowed to flower will offer food sources and other advantages to beneficial insects, including pollinators. Finally, you should note that traditional flowering plants (e.g., cornflowers, cosmos, dwarf sunflowers) can also be included in a planting to provide beauty, benefit insect populations and enhance diversity while performing soil-improving benefits of their own.
Whether your agrarian aims are personal or professional, or the extent of the soil you steward great or small, it and your plants will respond positively to the use of soil-improving crops.
More Information
Different Strokes for Different Folks
Soil-improving crops will produce a favorable effect when planted in many different situations. Sometimes soil improvement and/or protection is the objective of a planting. Sometimes improving the soil isn’t the primary goal, but it helps to better fulfill the principle purpose as healthy plants in healthy soil will always be more effective at their job.
Many soil-improving crops—such as clovers, vetches, grasses, buckwheat, selfheal, sunflowers, rudbeckias and salvias—can be used in most or all of the plantings below.
Buffer Strip
A buffer strip is land maintained in permanent vegetation in order to help achieve and maintain good air, soil and/or water quality.
It may slow surface runoff, control wind erosion, stabilize a stream bank, provide a space of protection from pesticide drift or perform some other environmental service.
Filter Strip
A filter strip might be thought of as a particular kind of buffer strip. They are in place to reduce the concentrations of (leaching) nitrogen and phosphorus, sediment and pesticides from agricultural land into surface water specifically.
Cover Crop
A cover crop is grown in between cash crops (in the temporal sense) when a cash crop wouldn’t normally be growing. In many places, this means growing in winter and with crops that are winter annuals or perennials (perhaps short-lived ones).
Though cover crops and green manures (directly below) offer essentially identical benefits, erosion prevention is often considered of particular importance with cover cropping as it protects soil that might otherwise be left bare during an unproductive season.
Green Manure
Green manures are grown in place of a cash crop, i.e., grown during the main growing season. Because production time is being “sacrificed” with green manures, cover cropping is the more prevalent of the two practices.
However, it can be possible to grow a green manure and a cash crop in one season if you were to select a very short-season cash crop (leaf lettuce or other cutting greens, radishes, etc.) or a very short-season green manure, such as buckwheat.
Living Mulch
In place during the main growing season—like a green manure—but not taking the place of a cash crop, a living mulch grows underneath the canopy of a cash crop where it has been interplanted or undersown (a cover crop that is grown in between cash crops spatially instead of temporally).
As well as the soil-improving benefits it yields, it lives up to its name and provides the additional benefits of mulching, including soil temperature regulation and moisture retention due to a protected soil surface.
Insectary Strip
Insectary strips can be permanent, incorporating trees and shrubs and involving rigorous maintenance. The temporary or annual insectary strip is more likely to include plants common to these plantings and will also create improved soil conditions for crop planting, as they are located on land that may be put into production.
But the main function of insectary strips is to support beneficial insects with food sources and housing/nesting materials. These are possible benefits of the other planting practices, depending on the plant varieties and maintenance methods used.
Beetle Bank or Beetle Berm
A beetle bank is, again, a planting primarily for the support of beneficial insects, but particularly predaceous ground beetles.
It fosters them as part of an integrated pest management system, intended to reduce reliance on insecticides.
A beetle bank is a raised bed or berm located within or around cash crop areas and planted with an emphasis on native grasses and flowers.
This article originally appeared in the September/October 2022 issue of Hobby Farms magazine.
Dehydrating, or drying, requires a simple process that preserves a surplus of fresh foods for use when those ingredients are long out of season. It has been a common method of preserving throughout history. Today, though, it’s more often associated with making snacks.
Whether you want to make your family healthier, homemade fruit leather or your own beef jerky for a weekend camping trip, an at-home food dehydrator can help you create it.
What is often overlooked is how dehydrating foods expands tastes and textures when cooking at home. Once fully dried, some foods can be used to deepen the flavor of simmering soups while others can be used as crunchy toppings when serving the soup.
Keys to Success
The most time-efficient tool for dehydrating foods is an electric food dehydrator. An affordable and compact option that costs less than $100 is fully capable of doing the job. These appliances allow for optimal temperature and time control. They also promote appropriate air circulation, which plays an important role in dehydrating.
Success requires a temperature that is low enough to gradually remove all of the moisture from the food but not so high that it cooks during the process. Removing moisture is the key to shelf-stable dehydrated foods that don’t grow mold or rot.
The ideal temperature for dehydrating is 140 degrees Fahrenheit. Most food dehydrators have multiple temperature settings. You’ll find many recipe instructions for foods with varying temperature suggestions.
Feel free to follow tested recipes and their suggested temperatures. But there really isn’t a need for so many fluctuations in temperature settings.
Over time, you’ll become familiar with your model of dehydrator. You’ll likely find a consistent temperature for dehydrating and learn the ideal time that results in foods dried to your liking. I find that staying just under 140 degrees at the 131-degree setting on my machine to be effective for drying most fruits and vegetables. It’s the temperature setting used for all the foods we’ll discuss here.
Times & Temps
Dehydrating requires patience. But the good news is that it’s a fairly hands-off process. Once the food is prepped and placed in the dehydrator, you can often leave it overnight and the food will be ready in the morning.
Some manufacturers do suggest rotating trays for better air circulation while the dehydrator is at work. Do some research based on your needs before deciding on a model that is right for you.
Many foods will fully dehydrate in 4 to 8 hours at temperatures between 131 and 140 degrees. Drying times are always approximate due to the impact of humidity. In a more humid environment, foods will take longer to dehydrate.
Foods that Dehydrate Well
The more moisture content a food contains, the longer it will take to dry. Most fruits and vegetables, however, can be dried with an electric food dehydrator.
Berries, stone fruits, apples and pears make ideal candidates for snacking and adding to baked goods. Fresh herbs also dehydrate well—especially dill, thyme and rosemary. Delicate, leafy greens such as lettuce aren’t the best for drying due to their high water content. But kale, fennel fronds and peppers are good options for drying to cook with later.
When experimenting, it’s important not to expect the same results from all home dehydrating as you get when buying dried, packaged foods. Many commercially dried foods have additives or use methods to make them crisp. It’s often not possible to achieve this at home, especially with many high-moisture fruits.
The following five foods are fun and easy to try, once you’re ready to start your dehydration journey.
Mushrooms
These can sometimes go bad quicker than you can use them up, which makes dehydrating them the best option to extend shelf life. Dehydrated mushrooms can be added directly to soups, stews and stir-fry during cooking. You can also slice them very thin before drying, and then use them as a pizza topping.
Wipe any dirt from the mushrooms. Slice into 1⁄4-inch pieces. Arrange on the dehydrator trays with about 1 inch of space between each piece. Dehydrate at 131 degrees for 6 to
8 hours. They should be crisp around the edges and crisp to very slightly chewy inside.
Leeks
Once you dehydrate leeks, you’ll pass on the jar of store-bought dried onion you have in the pantry. These pungent slices become very crispy, making them ideal to sprinkle into soups while cooking or onto pizzas before baking. You can easily crumble them into finer pieces to mix into biscuits, omelets and savory scones.
Trim the top greens and the root end from the leek. Cut in half lengthwise, then slice each half into 1⁄4-inch-wide pieces. Separate each of the layers of the slices. Rinse in a bowl of water to allow any dirt to fall to the bottom. Rinse and dry.
Most dehydrators come with a mesh screen or sheet for drying herbs. You’ll need to use this for leeks to prevent the small pieces from falling through the slats of the tray. Spread in a single layer. Dehydrate at 131 degrees for 4 hours. They should be crisp.
Jalapeños
Crunchy dehydrated jalapeño rings are a must for topping nachos and tacos. They add a little heat and crisp bite to sandwiches, too. Use larger jalapeños to prevent them from falling through the slats of the trays or you can use the same mesh screen recommended for drying leeks.
Wash and dry the jalapeños, then remove the stems. Cut off the bottoms, and use a pairing knife to circle around the inside of the peppers, removing the seeds and ribs. Slice thinly into rings, 1⁄8-to-1⁄4-inch wide. Place on the drying rack at least 1⁄2-inch apart.
Dry at 131 degrees for 6 hours. They should be crisp.
Kale
Dehydrating kale makes an ideal way to use up an abundance from the garden. Curly leaf kale gets especially crisp in the dehydrator, creating a vegetable chip that can be packed along for afternoon snacking. Kale chips also make a crunchy substitute for crackers or croutons when used to garnish soups.
Wash and dry fresh, unwilted kale leaves. Remove the stems, and cut or tear the tender leaves into 1-to-2-inch pieces. The pieces can be arranged more closely together, nearly touching, on dehydrating trays due to their delicate nature and quicker drying times.
Dehydrate at 131 degrees for 4 1⁄2 to 5 hours. They should be crisp, nearly shattering when you take a bite.
When it comes to drying fruit, pears are often passed over for bananas and apples. But their intense sweetness and gritty texture make them both a delicious snack and garnish when dehydrated.
Slices can be added to trail mixes and cereals. Their unique shape makes the slices an attractive topper for rolls, biscuits and breads before baking.
Wash and dry pears, then core and slice about 1⁄4-inch thick. Leave an inch between the slices on the tray to allow for better air circulation for the moisture-rich fruit. Dry at 131 degrees for
6 hours. They should be crisp around the edges and crisp to very slightly chewy inside.
More Information
Storing Dehydrated Foods
Once foods are dehydrated, let them cool before storing in airtight containers. Each time a container is opened it presents the opportunity for air and moisture to get in. Consider storing the dried goods preportioned, such as 1 cup of dried fruit to add to a trail mix or 2 cups of kale chips for a family snack.
Glass jars, such as those used for canning, are ideal for storage. But any airtight storage container will work. Store dehydrated foods in a cool, dark place. While some can last for up to a year, it’s best to use them within 4 to 6 months for optimal flavor.
It’s also important to check on your dehydrated foods regularly when you begin experimenting with dehydrating. Because humidity and temperature can affect drying, you’ll want to inspect them well for mold growth. This is another reason why glass, see-through containers work well for storage. You can see the food inside without opening the lid, exposing the foods to air and moisture.
Once you become familiar with the right drying times for your environment, you’ll gain confidence in dehydrating and better understand your ideal maximum storage times.
This article originally appeared in the September/October 2022 issue of Hobby Farms magazine.
Farm projects almost always take longer than we expect. Moving a pile of rocks in “20 minutes” takes an hour. Painting the porch in “an hour” takes half a day. Cleaning up a brush pile in “an afternoon” takes closer to a week. But winter weather waits for no one. And preparing farm machines for winter is a task best started early.
This is especially true when it comes to preparing important farm machines you’ll use in winter conditions. You don’t want to be hit by a 6-inch snowfall when your tractors, snow blowers, etc. aren’t ready.
Getting Attached
Let me give you an example. This year, I added to my equipment arsenal a lawn tractor equipped with a 4-foot snow blower attachment. My hope is that the tractor-powered snow blower will make quick and effective work of clearing the driveway and primary farm trails during winter, reducing the accumulation of compacted snow and ice that stubbornly refuses to melt in late winter.
I purchased the tractor and snow blower used, so the assembly of the snow blower was already complete. And the tractor was set up to handle its installation. The tractor arrived with its mower deck installed rather than the snow blower, but I didn’t expect switching the two attachments to take especially long.
It would just be a little work across part of an afternoon.
Well, it turns out “a little work” was more like “a lot of work.” Not that it went badly. To the contrary, it went smoothly. It was just a more complicated and time-consuming process than I anticipated.
It started with removing the mower deck. That’s not a hard job, but I had trouble removing a couple of the attachments pins (I’m still not sure why) and lost some time there.
Then there was the tricky process of installing the snow blower mount on the front of the tractor and connecting the mount to the tractor’s hydraulic lifts via a pair of curved metal rods. I spent some time puzzling over a plastic guard installed around the tractor’s PTO. It was evidently designed to protect the PTO and mower drive belt from debris while mowing, but it interfered with the installation of the snow blower (and wasn’t shown in the instruction manual). So I had to stop and remove it.
Then it was time to turn my attention to the snow blower. The instruction manual indicated two separate gear oil reservoirs in need of checking. The first was filled to a suitable level, but the other (containing oil for the auger) was low. Fortunately, I had the correct type of gear oil on hand.
Otherwise, the project would have been slowed even more.
Only after the gear oil situation had been addressed could I actually mount the snow blower to the tractor. This was arguably the simplest part of the process. It locked into position readily, and connecting the drive belt to the PTO wasn’t complicated.
But upon raising the snow blower with the hydraulics, I found it wasn’t rising as high as the instruction manual recommended. This meant I had to adjust the length of the connectors between the snow blower mount and the hydraulic lifts.
Of course, the tractor itself required maintenance, too. A little more hydraulic fluid, an oil change, more air in the tires, the installation of rear ballast weights, etc.
In the end, mounting the snow blower and performing the related maintenance tasks took a good many hours spread out over several days. And I still need to install tire chains on the tractor’s rear wheels.
Fortunately, I started the project well in advance of anticipated snowfall. I wasn’t in a hectic rush to get the tractor and snow blower prepared before an epic winter storm. That’s why it’s important to get an early start on winter preparations—seemingly simple tasks can have many fiddly and time-consuming steps.
It pays to allot more time than you think you’ll need when getting farm machines ready for winter.
Sun rays begin to pierce through the early-morning fog as hens coo softly in their coop. The Guernsey cow waits patiently by the gate, ready to be let inside the barn. She swishes her tail as a couple of flies dance around her. The chilly fall morning makes you shiver inside your warm coat, but a feeling of satisfaction soon fills you as your hands work a steady stream of warm, frothy milk into the pail.
Keeping cattle on your homestead is a big step towards self-sufficiency and less reliance on the supermarket for all of your family’s food needs. If there is an issue with the food supply or a weather-related reason that you can’t make it to the store, it won’t cause as much concern. You’re already used to going to your backyard for meat and dairy needs!
Whether you have a dairy cow or raise a couple of butcher steers for beef, you will find that raising cattle can offer a multitude of benefits. Here are some reasons you should consider adding cattle to your homestead.
Fresh & Safe Homegrown Products
How much more peace of mind do you feel knowing the farmer down the road raised your produce, as opposed to seeing it shipped in from another country and placed on a store shelf?
By raising your own cattle, you can control not only what the animal is fed but also the medications, vaccines and treatment it is given. These can all play a huge part in the quality of meat after it is butchered.
Another reason to enjoy butchering a whole beef is that when you eventually take your steer to the butcher, you will be able to come back with not only ground hamburger, but a variety of steaks, roasts and other cuts of meat to stock your freezer with. If you cook a lot, you’ll greatly enjoy having a good selection of meat in the back freezer.
Each time I come back from the butcher, I race to stuff all that frozen meat in the freezer. While I love having plenty of food, it can be stressful dealing with such a large quantity at one time.
If you don’t plan to use a whole beef, consider selling some of it after it comes back from the locker. Or you can make a plan with a neighbor ahead of time to divide it in half.
It might be a good idea to also check with your local meat locker before you butcher, too. That way you make sure that each party can call in with their own cutting instructions for their half of the meat.
Food Security
Given our ever-changing world, I’ve been pondering more and more what life might look like if we were to face shortages, whether in the food supply or other physical products.
By keeping a flock of chickens and some cattle, you can continue to collect fresh meat, milk, cream, eggs and poultry, no matter what’s going on in the surrounding world. If times ever do get hard, your animals will not only provide fresh food for your family, but you can have something worthwhile to trade with those around you.
Free Fertilizer
While manure can be rather unpleasant to look at, it’s a matter of simply changing your perspective. Look at it as the all-natural miracle dirt that it really is!
After manure has dried completely in the pen, you can add it to a garden bed and till it in. If you prefer not to rototill your garden and practice other methods (such as lasagna gardening), manure can also be used in it as well. Just keep in mind that if garden in a metal stock tank, manure can rust and eat away at the tank eventually.
Pasture Management
Along with keeping your pasture trimmed down and looking pretty, cattle will help reduce fire-risk by grazing the grass to a shorter height.
Having animals in an area can also encourage you to get outside and work on trimming back the trees and brush, removing noxious or harmful weeds, and keeping up any outbuildings or fences nearby. I don’t know about you, but sometimes I find it helpful to have motivation to get moving and tackle a project!
As your homestead grows, so does the work load. Keeping animals requires you to put a routine in place to feed regularly, and, for dairy cattle, milk them on a good schedule.
For example, feeding cattle in an irregular manner can lead to health problems as they become so hungry that they gorge themselves when feed is finally made available. If the grain upsets their stomaches it can lead to bloat and, in some cases, even death.
As your time spent around cattle grows, your knowledge of them will also grow. You’ll learn basic care, feed and nutrition needs, health maintenance and more. Homestead cattle provide a great opportunity for individuals and families alike to learn and grow together.
How to Get Started
For a family looking to raise their own meat, you’ll likely have two options to consider:
1) A young calf that can be bottle-fed and raised around people
2) A larger animal that won’t need as much hands-on care, such as a 300-500 pound steer
There are pros and cons to both. A young calf can be raised by hand and grow up tame and used to people around it. Eventually, some “pets” become so used to humans that, when they are bigger, they become hard to manage and will push people around.
On the other hand, a larger steer will be ready to go to the butcher sooner and not require all of the care that a young calf would. But they can still be dangerous to keep around young children.
Before you purchase your first cow or calf, it’s good to do some reading and studying to make sure that you have at least a basic understanding of what will be required.
Study up on topics such as:
Feeding & Nutrition Needs
A basic feed ration should include a source of roughage, energy and protein. Access to clean, fresh water is required.
Tools
This will vary dependent on whether you get a small calf, a larger butcher steer or a milk cow. You might need everything from bottles and buckets for feeding to syringes and pill pushers for treating sickness.
Facilities
Cattle require a much bigger space commitment than chickens. Plan accordingly for a shelter, pens, working facilities (unless you will haul them somewhere when they need something done), feeders, waters, pasture area, etc.
Health
I would suggest anybody looking to keep cattle get a copy of Heather Smith Thomas’s Cattle Health Handbook to have on hand and study.
Long-time cattleman Ora Hett suggests several things that can be a common ailment or problem among cattle, such as:
pneumonia (or shipping fever, as it can be known)
coccidiosis
bloat
pink eye
foot rot
scours (typically a problem in younger calves that are being bottle fed)
warts (although they can be typically left alone unless they become too large or problematic)
If you have the space and willingness to put in the effort and work needed to keep your herd healthy, cattle can be a great addition to a homestead. They offer the enjoyment of having more animals around, as well as the security of access to fresh meat and dairy. Plus, you get the opportunity to connect with others around you by trading or selling excess product.