Categories
Animals Farm & Garden Large Animals News

Chronic Wasting Disease: An Overview and Update

My first encounter with Chronic Wasting Disease (CWD) was on a vet school projector about 15 years ago. Shown grainy photos of skeletal elk and deer, we learned CWD was making its way across the U.S. in an easterly direction. Coming from across the Rockies, this disease was infecting both wild and captive cervids (members of the deer family) and moving toward Indiana (I went to Purdue University) with increasing reports in Michigan.

Fast forward to 2022 and CWD has gone way beyond Michigan. With cases reported in New York, Pennsylvania, West Virginia and now North Carolina, this debilitating disease is here in the U.S. to stay. Hunters, ranchers, park rangers, field biologists and veterinarians are taught to identify affected animals.

So what exactly is CWD? Is it a threat to our domesticated livestock? Is there a cure? Read on to find out more.

All About Chronic Wasting Disease

CWD was first identified in captive mule deer in Colorado in 1967. This disease is progressively degenerative and affects the neurological system, leading to weakness, paralysis and death, primarily from starvation. It’s a wasting disease in every sense of the word.

Similar to some other neurodegenerative wasting diseases like mad cow disease, CWD is classified as a transmissible spongiform encephalopathy, or TSE. TSEs are now understood to be caused by a novel agent called a prion, which is essentially a protein folded in an incorrect way resulting in tissue damage.

Interestingly, prions do not elicit an immune reaction from the host. Prion diseases are typically rapidly progressive and fatal.


Read more: What should you do if your livestock come down with a rare disease?


Chronic Wasting Disease Transmission

CWD appears to be easily transmissible between wild and captive deer, elk and reindeer. It can be transmitted through direct animal-to-animal contact or contact with saliva or feces. Carcasses of an infected animal can also be infective, as can soil that has been contaminated with any of these tissues or fluids.

This explains the rapid expansion of this disease across the U.S. Fortunately, there have been no documented cases of CWD in domesticated livestock such as cattle and small ruminants. There has also not been any evidence to show that humans are susceptible.

However, hunters in CWD-known areas are advised to not eat animals that look sick or tested positive for CWD. (Hunters can send samples of neural tissue to certain labs for diagnosis on any kill.) Additionally, hunters that field dress are advised to wear gloves and minimize handling of the brain and spinal cord.

As with the other spongiform encephalopathies, there is no treatment for CWD and no vaccine. Cases are always fatal.

Both federal and state governments have instituted surveillance programs to gather data on this spreading disease. Brain samples from road kill and a percentage of hunted animals are periodically sent to diagnostic labs for testing to find out more about disease prevalence.

For farms that raise captive cervids, many states have mandatory monitoring programs. Chronic Wasting Disease Alliance is an excellent, up-to-date resource for more information.

Categories
Beginning Farmers Crops & Gardening Farm & Garden Farm Management Homesteading Permaculture

Plant A Tallgrass Prairie On Your Farm

There is always extra space on the farm, homestead or backyard for something other than vegetables and fruit. Why not consider a spot of prairie? 

Tallgrass prairie is one of the most endangered terrestrial ecosystems on the planet. These prairies used to stretch across North America in the U.S. and Canada. They were home to bison, many bird and butterfly species, and other wildlife. They were edible and medicinal wild lands with fruits, berries, herbs and game. 

Tallgrass prairies also are powerful carbon sinks, able to sequester and store carbon in the soil. They tolerate drought with deep root systems and a complex population of site-suitable plant species.

We can create prairie restoration projects on our properties and bring back some of the species and benefits these ecosystems have.

Where Should You Add Prairie?

You can plant a spot of tallgrass prairie in as little as 25 square feet. With proper site-suitable design, a selection of prairie plants could suit a low-lying area in your yard, even gathering water from a rooftop downspout. 

They can also be equally suitable to the dry, ditch-side spaces along roads in your community. 

On the farm, prairie plants can be re-introduced into pasture to provide diverse fodder for livestock. And market gardens and organic growers can create prairie buffer strips along fence lines to maintain buffers needed for organic certification. 

Riparian buffers on larger properties can use trees and prairie plants to maximize reduction of stormwater overland flow into river systems. As such, they can act to sink nutrient, pesticide and silt run-off.

Prairie bird species are rapidly declining in America. Monarch butterflies are a well-known species in need of habitat restoration, too. But these creatures and more can easily make a home in even a small prairie spot in your yard. 

Meanwhile, bison farms—a lucrative niche in the grass-fed beef industry—can carve out a further specialty by returning these animals to their native forage.

tallgrass prairie seedlings
Zach Loeks

Good Quality Plants

An import starting place for prairie restoration is good quality plants and seed. For projects under 1/4 acre, transplanting is recommended. Transplants are best started in deep cells with adequate room for root development. 

Prairie plants should be encouraged to send their roots deep right away after planting. Look for plants with healthy roots—not root-bound, yellowing, water-logged and/or decaying.  Source form local, specialized nurseries or start some yourself.


Read more: Maximize your seed starting success with these tips and tricks.


Techniques

Techniques popular in market gardens—such as bed forming, packing and row marking—will serve well for ecosystem restoration projects. You want a firm seed bed, loose below to facilitate transplanting and firm on top to prevent exposure of young roots. Top this with 1 inch of compost and roll/pack it as a topsoil (A horizon). 

Mark the rows 12 inches apart and plant your transplants every 12 inches in the row. Make sure to alternate between large and small plants in swathes to allow partitioning of space and resources. 

Creeping ground covers and tall plant will compliment well.  Once planted, mulch between the plant (in and between rows) with leaves, grass clippings or wood chips.  Don’t use hay with grass seeds! 

Make sure to add nitrogen sources in the first years to help break down the carbon-rich mulch.

Establishment

Plants like big bluestem take their time to establish. Many prairie plants will eventually grow over your head every year. But initially they are slower to establish than other landscaping plants/grasses. 

Keep the plantings watered in dry periods in the first year, but don’t overdo it. Be patient, and remember we want those roots to reach down into the soil to look for water so they become drought resistant!

Don’t Forget Some Edibles

Add some wild bergamot, mints, strawberries, raspberries, chokecherries and saskatoon to the mix for large spots. These edibles are common in prairies, especially along woodland edge environments. 

You can have your prairie and eat it too!

Want to learn more? Check out my lecture on modular prairie design for examples and designs!

Grow On1

Zach

Categories
Farm & Garden Food Recipes

Recipe: Festive, Flavorful Cranberry Juice

Cranberries are one of my very favorite things to preserve with. Each fall I pick up 15 to 20 pounds of fresh berries from the farmers market and make various cranberry jams, jellies, butters, chutney, sauces, relishes and juice. They are relatively inexpensive when purchased fresh in bulk and are the perfect seasonal ingredient for fall preserving.

I kick off the holiday season with a batch of cranberry-apple jam. It’s a real crowd pleaser and makes a fantastic homemade gift.  

Once I’ve made all my cranberry-based preserves for the season, I use the leftover cranberries to make juice. Cranberry juice is incredibly simple to make, requiring just a few ingredients. The juice can be stored in the refrigerator and used within a couple of weeks, or frozen for later use.  

There are a few methods of making cranberry juice, but here is my go-to process. This recipe yields a flavorful juice that can be used in numerous ways.

We use cranberry juice mainly for mixing up cocktails or for various punches served over the holidays. I like to mix a splash or two into orange juice and sometimes add an ounce or two of vodka, which makes a cocktail we lovingly named, “Uncle Tim”—named after my uncle that used to favor the drink.  

Yield: 2 quarts  


Read more: Add some zing to the holidays with this fermented cranberry relish!


Ingredients 

  • 1.5 pounds fresh cranberries (8 cups fresh whole cranberries) 
  • 8 cups water 
  • 1/4 cup white granulated sugar, or more if a sweeter juice is desired (sugar is optional) 

Directions 

Wash and strain cranberries. Remove any white, soft or damaged berries as well as stems. 

Add berries and water to a large stock pot and bring to a simmer. Simmer about five to 10 minutes, until the cranberries soften. You will hear the cranberries pop as they cook and split.

The water will blend with the juice and turn red. Cranberries will appear deflated. Once cooked, remove the pot from the heat and allow to slightly cool. 

Strain the cranberries through a fine mesh sieve with a large bowl or measuring cup underneath to collect the juice. You can also use layered cheesecloth or a jelly bag to strain the juice if you prefer.  

Pour strained juice into a medium-sized saucepan and reheat to a gentle simmer. Stir in sugar (optional step) until dissolved. 

Refrigerator Instructions

Ladle the juice into clean canning jars. Add washed lids and tighten on the rings. Once cooled, refrigerate, and enjoy juice within two weeks. 

Freezing Instructions  

Transfer to a freezer-safe container, such as a wide-mouth glass jar. Leave 2 inches of headspace to allow space for the juice to expand while freezing. Allow juice to completely cool before transferring in the freezer. 

Notes  

You can re-strain the juice through a paper coffee filter for a clearer finished juice. 

The strained-out solids can be re-cooked and re-strained. This, however, will result in a more diluted juice. 

Consider repurposing the strained-out cranberry solids to make something else with, such as cranberry relish or sauce.  

Keep juice unsweetened by not adding any sugar, or sweeten it more and double the sugar in the recipe. The choice is completely up to your personal preference.  

Do not boil juice or it will turn into jelly. 

Dilute juice with water or soda when serving. For a more concentrated cranberry juice, half the water in the recipe.  

Categories
Beginning Farmers Farm & Garden Foraging Homesteading

Pheasant Back Mushrooms & Homesteading With The Mighty Muskquatch

“Wandering children have an uncanny ability to find things adults easily miss,” says Jonah Curtis as he looks back on childhood days raised on family property at the end of a dirt road in northern Michigan. “I was given a lot of freedom to explore on my own.”

These sort of early memories instilled a love of wanderlust and foraging in Curtis, which has now successfully translated into his own homesteading journey, broadcast to the world via his Mighty Muskquatch Instagram account.

Taking a moment out from homesteading duties, we spoke to Curtis about the importance of food security and the advantages of freeze-drying. We also got the story behind some ginormous foraged Pheasant Back mushrooms.

The Importance of Preserving Food

Preserving food is a key part of Curtis’s approach to homesteading and utilizing the land.

“We grew, foraged, hunted or caught quality food,” recalls Curtis of his upbringing. “That type of food often comes in bulk, and so we wanted to preserve food for other seasons. Also, our family did not have much money. We needed thrift to assure that we would have plenty despite any financial difficulties.”

It’s a mentality that has stuck with Curtis throughout his life. “I continue it for a few reasons,” he says. “I enjoy quality food and I find the best way to assure quality is to do it myself. I also still consider food security very important and choose to handle that myself. A third reason is that I enjoy being outside as often as possible, alone and with my family.

“These reasons have all been magnified by my life as a husband and father, as it is now my duty to care for my family.”

Stop Cutting Corners

When it comes to food preservation tips, Curtis says that number one is to avoid cutting corners.

“I’m pretty fastidious by nature, so this is not often an issue for me,” he explains. “However, I have been crunched for time and rushed steps and have found this can lead to poor results or even dangerous outcomes. Now I make sure to do each step correctly.”


Read more: Focus on removing bottlenecks to improve farm efficiency.


The Benefits of Freeze-Drying

Along with canning, Curtis also advocates for freeze-drying as a way to preserve food.

“The benefits are that the food is shelf stable, light, quickly and easily used and keeps a very high level of nutritional value,” he explains. “It is not for everyone, though, and to get proper use and value from the machine, one would need to use it quite a lot.”

Behold Pheasant Back Mushrooms

Back in September, Curtis showcased some giant Pheasant Back mushrooms he’d foraged.

“I used a bit of it in a turkey soup, sautéed some slices for burgers, and freeze-dried the rest in chunks and slices to be used in winter soups,” he says of the mushroom that’s also known as Dryad’s Saddle.


Read more: Grow your own mushrooms for flavor and profit!


Finding Focus Through Farming

Looking over what his homestead means to him, Curtis says “this answer has moved for me over time.” But over the last few years, he says he’s found himself focusing on a clear answer.

“The most rewarding part now is knowing the story of the food that my family consumes and being able to spend time on our homestead working with my wife and our children.”

Follow Mighty Muskquatch on Instagram.

Categories
Animals Beekeeping Beginning Farmers Farm & Garden Homesteading

Grow Forage To Help Feed Honeybees Pollen & Nectar

Timing—and, namely, timely access to good food—is everything to a honeybee. “Pollen is the honeybees’ protein source, and nectar is their carbohydrate source,” Amy Vu says. Vu is a state specialized program extension agent with the University of Florida Institute of Food and Agricultural Sciences Honey Bee Research and Extension Lab.

Ideally, you should offer a mix of pollen- and nectar-rich trees, shrubs, perennials and annuals that will flower in succession. That means providing some food sources that will pay dividends for your hives long into late fall and still others that will serve them during very early spring.

“Just as people need a balanced diet, we try to get a balanced diet of pollen and nectar resources for the honeybees,” Vu says. “That helps them to do just about everything in the colony. They make wax and honeycomb. They feed the brood in the colony.

“There are lots of things that they do with those nectar and pollen resources.”

For queen bees, that includes laying eggs to build up the requisite population numbers to take full advantage of the coming nectar flow. And, when it comes to pollen, it’s not just the quantity of available sources that matters. Quality counts for a lot, too.

Pollen Power

“Those pollen sources that are rich in essential amino acids are really going to be the most useful for honeybees,” says William Kern. Kern is an associate professor in the department of entomology and nematology at the Fort Lauderdale Research and Education Center of the University of Florida. 

Honeybees require several essential amino acids, including arginine, leucine, lysine and tryptophan, among others. The concentrations of these amino acids, as well as proteins, found in pollen vary widely depending on plant sources. Such variations in pollen quality can greatly influence a colony’s spring buildup and overall success.

According to a 2018 study published in the American Journal of Entomology, “Pollen containing less than 20 percent crude protein cannot satisfy the colony requirements for its development and optimum honey production. The level of protein in bees’ food significantly affects the amount of brood reared, the protein content of bee hemolymph, the metabolism, and the quality of food for the larvae. Low protein content in pollen also reduces the resistance of honeybees to diseases.”

Although providing ample forage outside of the summer months can be challenging, the forage we are able to provide just might pack a slightly bigger nutritional punch. After analyzing various pollen types that honeybees had collected over the 2012, 2013 and 2014 seasons, the study’s authors determined that spring-blooming plants had higher protein contents (21.1 to 27.8 percent) than their summer (13.9 to 23.5 percent) and fall (15.1 to 25.1 percent) counterparts.

Those higher protein levels appeared to give the honeybees a notable boost. 

“The nutritional value of pollen varies between different plant species and may differ significantly in amino acid composition and/or concentration, and this affects the growth of a bee colony,” the authors state. “There is a relationship between the nutritional value of pollen and the development, reproduction and productivity of bee colonies.”


Read more: Seasonal shifts mean nectar flow changes for bees.


Trees Please!

With so much at stake, how can you be sure your hives have enough natural forage? Offering your bees access to plenty of early-
blooming trees is one of the most effective ways to meet their nutritional needs. 

“For the eastern U.S., the Midwest and southern Canada, some of your best choices are going to be the maples,” Kern says. “They’re one of the first trees to flower, and they’re a good choice for pollen.

“The other good pollen source that’s really early is the willow. As soon as it’s warm enough for the bees to start foraging, those trees will be flowering. The maples, oftentimes, will flower before they even have any leaves. And the willows will produce their catkins generally before they start leafing out fully.”

Depending on your location and climate, sugar and red maple trees are good choices. As for the willows, Kern says, “For most of the country, that’s going to be the black willow. And, for the southeast, it’s going to be the coastal willow.”

White and weeping willows are also good, early pollen sources. If you’re looking for smaller, bee-friendly trees or shrubs that flower early, you might also consider redbuds, northern spicebush, serviceberry or peach, plum or cherry trees.
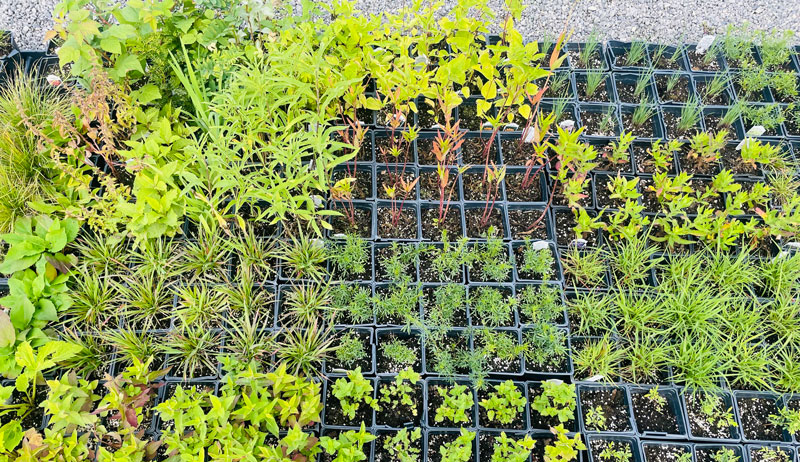
Block Party

As for herbaceous plants that can perform for bees in late-winter or early-spring, consider cover crops. Vetches or early clovers, as well as plants in the brassica family such as rapeseed, radishes or turnips, just might fit the bill where you live.

“Members of the mustard family are pretty tolerant of the cold weather,” Kern says. “They’re some of the first flowering plants. Even if you want to put out a plot for deer and you’re going to use things like daikon radish or sugar beets, those would be early flowering. So, as soon as the frost was over, they’d come up and produce flowers.”

Because they typically span large areas, cover crops can afford bees at least one extra benefit. Once in bloom, these sections of land provide uniform blocks of color and scent. This makes them potentially easier for honeybees to discover.

So, when adding bee-attracting annual or perennial flowering plants to your landscape, place large blocks of the same plant variety together. This like-with-like planting scheme can give early foragers a much-needed assist.

As Matthew Shepherd and colleagues explain in The Xerces Society’s Pollinator Conservation Handbook, “It is preferable to create a block of color with a single species. It is even better to group a single species of native plants, since the blooms of a particular native species will tend to vary little in color. Hybrids, on the other hand, are bred for their colors and often display a vast range.”

“A single pack of lupine seed, for example, may yield blooms of many colors, while native lupines of the same species will all be the same color,” Shepherd says.

And, although they may not be as showy or varied as their hybrid competition, many nonhybrids are richer sources of nectar or pollen as well. (In fact, “pollenless” varieties are now for sale. While these may make cut-flower bouquets less messy, they aren’t likely to boost your bees’ protein levels.)


Read more: Protect your bees against common predators.


More Plant Possibilities

As you think about which flowering plants to add for your bees, consider your growing conditions and your specific needs. Need later fall-flowering plants? You might add a block of New England asters or several different kinds of goldenrod. (There is showy goldenrod, stiff goldenrod, tall goldenrod, late goldenrod and many more.)

Or, if you need more early bloomers, find out which native wildflowers are among the first to pop up in your area and include as wide a variety of those as you can. For instance, known as “white beardtongue,” smooth penstemon is one early bloomer that thrives in most U.S. hardiness zones and is native to the eastern U.S. Out west, the California poppy comes on early and is an important pollen source.

Check in with your regional plant association, native plant specialty growers, or your state’s department of natural resources for extra guidance on your native wildflowers.

You can also plant spring-flowering bulbs—especially crocuses and snowdrops—for still more early forage. Of course, not all flowering bulbs will satisfy your honeybees. 

“If you get some of the hybrid irises, they may not be good pollen producers,” Kern says. “And, generally, tulips will produce pollen. But I’m not sure they’re really great nectar sources.”

Certain floral colors will also be more appealing than others. “Specifically look for flowers that are either white or blue,” Kern says. “And some of the red flowers are OK. If you look at them with an ultraviolet light, they actually have nectar guides.”

Wonderful Weeds?

Interestingly, some of the best forage you can provide requires the least amount of effort from you. “In the old days before we were going from row to row with no-till crops, you had fence rows,” Kern says. “And fence rows had all kinds of plant diversity that would provide food for pollinators, as well as for birds and other things.”

Land you allow to go a little bit wild can provide a wealth of forage—forage that can take a beating. “We have a plant [in Florida]—Spanish needles—that flowers all winter long,” Kern says. “It even tolerates mild frosts.”

Henbit is similarly tough, albeit under­appreciated. “That is another early flowering plant,” he says. “And it has a bilateral flower just like mints do. So it’s attractive to both native bees and honeybees.”

Even if your own weedy patch is modest, early violets, dandelions, chickweed and other volunteers could thrive in that untended habitat. And its impact on your bees could be sizable.

“If you could set aside even a tenth of an acre, that would be very helpful for the bees,” Kern says. 

This article originally appeared in the September/October 2022 issue of Hobby Farms magazine.

Categories
Animals Beginning Farmers Farm & Garden Homesteading News Poultry

Consider A Heritage Breed Turkey This Thanksgiving

It’s early November as I write this, and my mind has turned from spooky skeletons and dancing ghosts to upcoming holiday feasts. And while plenty of garden produce will feature on this month’s Thanksgiving table, for many of us the holiday is largely a chance to enjoy some tasty turkey, roasted carefully to perfection and enjoyed around a table with family and friends.

As farmers, though, we know there’s so much more potential for Turkey Day than a standard supermarket bird. Most readily available frozen turkeys are conventional breeds, raised for efficiency over taste and too often a glaringly subpar poultry product.

We’re growers, though, and Thanksgiving is a day to honor the hard work it takes to raise the delicious, nutritious foodstuff that sustains us. And to that end, heritage animal breeds—and, for this specific occasion, turkey breeds—truly showcase how superior thoughtfully growing food can be.

Conventional vs. Heritage

What do we mean by “heritage breed”? It’s not a hard-and-fast legal definition, turns out, but more aligned with the loose notion of just being “old timey.”

The Livestock Conservancy terms heritage breeds as “traditional livestock breeds that were raised by our forefathers.” As an organization founded to preserve older breeds from extinction, the Livestock Conservancy keeps extensive information about older breeds, particularly animals whose existence is threatened by modern agricultural practices and priorities.

Some dismiss the notion of “heritage” as simply relishing inconvenience, and it’s true that many modern conventional breeds offer a number of advantages, particularly in the pursuit of profitable farming. Conventional turkeys have been developed for maximum feed efficiency, for example, converting rations more easily into meat. For a product sold by the pound, this both eases the farmer’s feed bill and maximizes market potential.

Conventional breeds typically grow faster, too, a real bonus for farmers who need to maximize use of limited land. And conventional breeds can be less costly to stock, too (though good luck breeding them). For farmers, however, these benefits are balanced against cons such as decreased fertility and compromised immunity.


Read more: Interested in raising turkeys? Learn more from this collection of turkey tales!


Benefits of Heritage Breeds

While conventional turkey breeds offer distinct advantages, these meat breeds fall short in two important areas: tradition and taste.

Tradition

First, tradition. You may have heard that Benjamin Franklin was so enamored with domestic wild turkeys that he lobbied for the winged creature to be enshrined as the national bird. But the turkey’s history predates even the idea of the U.S. by many centuries.

First domesticated by Aztec and Mayans more than two millennia ago, turkeys were encountered by Spanish explorers in the 16th century, who took them back to Spain and developed the birds into captive breeds. These improved breeds then made their way back to North America in the 1600s, where popularity grew all the more with the 1863 creation of Thanksgiving as a national holiday (following almost a century of unofficial celebration) and the 1874 creation of the American Poultry Association.

But as the popularity of turkey traditions grew, 20th century demand for mid-November poultry drove the development of more easily produced (if less satisfying) table birds. Today you can get a supermarket turkey pretty cheaply, putting Thanksgiving within reach of a wide range of people.

But, unfortunately, this agricultural product bears little resemblance to the main course of Thanksgivings past.

Taste

The other major tradeoff conventional turkeys present is in taste. In short, heritage turkeys actually taste like something, while conventional breeds typically offer a blander dining experience.

Conventionally raised turkey typically has a saltier flavor, due to brines designed to preserve moisture. (It’s true that heritage birds, with their pasture-worked muscle, are often “drier” on the tongue, though brining can lock in more moisture.)

Conversely, heritage birds have more dark meat with a firmer texture and somewhat “gamey” taste, due in no small part to pasturing practices of small farmers who typically undertake raising heritage birds. And heritage birds, with their longer grow-out time, provide a richer, more deeply textured meat from an extended lifespan before processing.

How to Buy Heritage Turkey

Want to raise some a heritage turkey or two of your own? That’s a great plan—for next year. For this year’s feast, however, you’re going to need to seek out a local farmer to procure your Thanksgiving bird.

You can hit up the local farmers market, though chances are small-scale growers filled up their waitlists months ago. Independent grocers often offer access to locally grown turkeys, though, and online services such as Market Wagon and Local Harvest can help connect you with local growers, too.

In terms of what you’re looking for, remember that “heritage breed” is a loose label, though the Livestock Conservancy does have a few guidelines for how they use the term. (Note that the organization encourages growing older livestock varieties as a means of preserving endangered breeds.)

  • Naturally mating with a 70 to 80 percent fertility rate (you can buy chicks, but the breed should be capable of low-maintenance reproduction)
  •  Long productive outdoor lifespan compared to the two to four years conventional poultry can live, usually indoors
  • A slow growth rate, typically ready in 28 weeks compared to the 14 to 18 weeks it takes a conventional bird to mature

Is all this more work? Sure it is. But as we give gratitude for another annual harvest, we owe it to ourselves, our loved ones and the animals who feed us to foster an awareness of and appreciation for what sustains us.

And don’t forget to start researching heritage breed turkey now so you can raise your own birds for next Thanksgiving!

Categories
Beginning Farmers Equipment Farm & Garden Farm Management Homesteading

Get A Leg Up On Apple Picking With An Orchard Ladder

Although orchard ladders are very stable when used as intended, be aware of the usage limitations. As with any task, there is the right tool for the job at hand. An orchard ladder is designed for orchard and landscape maintenance use, where it’s used on soil or turf-type surfaces.

The feet and pole typically don’t have rubber feet and can’t be used on hard surfaces such as floors, concrete, pavement, etc. 

“There also is not a spreader bar between the main frame of the ladder and the third leg (pole) to keep it from spreading,” according to Tallman Ladders. “All three points that come in contact with the ground depend on slight penetration of the turf or soil to remain stable.”


Read more: Need to clean up an old orchard? Here are some tips for pruning and rejuvenating old apple trees.


Orchard Ladder Tips

With that in mind, the company recommends the following safety precautions when using an orchard ladder. 

  • Inspect your ladder upon receipt and before each use. Check to see that all rivets and parts are tight. Never use a damaged, bent or broken ladder.
  • Don’t use around energized electrical equipment. Aluminum conducts electricity.
  • Don’t overload. Ladders are designed for one person only. 
  • Do position your orchard ladder properly. Steps should be level (rails at 72 degrees), and the third leg straight out from center line of ladder on level ground. For hillside use, the third leg should be placed uphill. For cross sloping ground, adjust the third leg slightly down slope for greater stability.
  • Don’t overreach and lose your balance. Move the ladder closer to your work if you can’t keep your belt buckle area between rails.
  • Don’t sit on top of a ladder or stand on the top two steps.
  • Destroy the ladder if it is exposed to fire, high heat or strong chemicals. Tempered aluminum alloy will lose strength if exposed to the above.

This article originally appeared in the September/October 2022 issue of Hobby Farms magazine.

Categories
Crops & Gardening Equipment Farm & Garden

A Lawn Mower Can Shred Leaves, But Be Careful How Many

Every year, I add compost to my raised garden beds, providing a nutrient boost while replacing soil lost to the annual removal of spent plant root balls. This year, I’m going a step further by working shredded sugar maple leaves into the beds.

They’re a good source of carbon and offer other valuable goodies like calcium and magnesium.

Why You Should Shred Leaves

There are many mature sugar maple trees on my farm, including a quartet of massive specimens that stand alone in the yard. Come autumn it’s not hard to gather a virtually pure collection of sugar maple leaves.

But rather than dump them whole into my garden beds, I wish to shred them first. This speeds up their decomposition and lessens the likelihood of leaves compacting into water-impermeable mats.

A dedicated leaf shredder is a good way to shred leaves. I lack such a machine, though, so I decided to use my riding lawn mower instead. A large volume of leaves had accumulated on the edge of my lawn, at a point where the grass starts growing taller and prevents them from blowing away.

I figured I could drive my lawn mower up and down this area a few times and quickly shred the leaves into small pieces perfect for my garden beds.


Read more: These 4 steps will  help you get your garden beds ready for winter.


Merits of a Mower

So did my mower shred these leaves well? Yes … and no. To my surprise, the results were mixed.

There’s no doubt my lawn mower is capable of shredding leaves nicely. It’s a garden tractor with a 20-horsepower engine and a 4-foot mower deck raised and lowered by hydraulics.

It’s a quality machine. But it wasn’t ready to deal with the sheer volume of leaves I asked it to tackle.

It’s not a stretch for mature sugar maples to produce more than 100,000 leaves in a year, and when four of those mature trees have dumped all their leaves in a yard … that’s a lot of leaves. Even figuring that some blew away down a nearby slope, the number of leaves caught on the edge of the field had to be substantial, measuring well into the thousands.

Certainly the accumulated area I intended to mow measured 6 inches deep, maybe deeper.


Read more: Consider these 4 types of mowers for your farm needs.


Too Many Leaves!

Therein lay my problem. Even with the mower deck raised to its highest point, and even while creeping forward at a speed barely above zero miles per hour, the lawn mower couldn’t swallow up all the available leaves. As I drove forward, leaves started piling up against the front of the deck … and around the front tires … and on top of the mower deck … and even under the mower deck, where the blades evidently couldn’t chop up leaves fast enough.

Just as my mower deck tried to bottom out on the crazy pile of leaves it had accumulated like a snowplow, I shifted into reverse and gave it a break. My mower had definitely done a good job shredding the leaves that made it to the blades. But it had shot the shredded leaves out the side so they were mixed with unmowed leaves.

This required me to mow the adjacent path while traveling in the opposite direction. Again, the mower deck accumulated leaves like mad and tried to bottom out on a pile of its own creation.

In the end, I did mow a lot of leaves and successfully incorporated them into my garden beds. But it wasn’t nearly as simple as I expected.

I suppose a bagger attachment for the mower deck would have caught the shredded leaves before they mixed with nearby unmowed leaves. But it wouldn’t have stopped the mower deck from trying to bottom out.

The takeaway? A lawn mower can be used as a leaf shredder—but be careful how many leaves you try to shred. Pick a lighter area of your lawn and avoid deep piles of leaves. You don’t want to overwhelm your mower deck and risk damaging your machine.

Categories
Beginning Farmers Equipment Farm & Garden News

Let Your John Deere Gator Drive With AutoTrac

John Deere Gators are a lot of fun to drive, but just imagine if your Gator could handle the driving while you travel to different spots around your farm. All you would have to do is sit in the driver’s seat and watch while your Gator cruises along your property lines or takes you on a pass through your field. You could check your fences, flag issues in the fields, and perform any jobs you need to get done, all from the comfort of your reliable utility vehicle.

If you bring home a new John Deere Gator in 2023, you’ll have that option. Even better? If you own a Gator right now, it could already be compatible with the AutoTrac feature.

AutoTrac Takes You Where You Want to Go

John Deere’s AutoTrac is a smart feature built into some new models of John Deere Gator. It’s a bit different from the auto steering systems large-scale farm tractors used in the 80s and 90s. It still offers hands-free steering. But AutoTrack is an automated guidance system the Gator uses to navigate around your property.

Unlike the self-driving John Deere tractor, though, you do have to be in the vehicle to use AutoTrac,

AutoTrac itself is not new. It’s been available for John Deere tractors for a while. And there has also been an option for picking up an AutoTrac kit and retrofitting compatible Gator vehicles for a few years, too.

But this is the first year the Gator has been packaged with AutoTrac built in. It’s going to be a real-time saver for hobby farmers.

John Deere Gator AutoTec

Use Your Gator for Small Spaces & Muddy Places

One of the best parts of owning a Gator is that takes over where your tractor leaves off. It can’t rototill your fields or scoop up rocks. But you can make your day a lot easier by choosing from 100 different attachments and implements designed for the Gator.

There are attachments for spraying and towing, as well as tools for boundary mapping. You can also add a blade to plow snow or a winch for towing.

A Gator is helpful because it can drive into small spaces a lot easier than a tractor. 4×4 Gators are lighter so are less likely to be buried in mud than a tractor, too.

A Gator that has AutoTrac can become an even more powerful tool for your hobby farm. It will use a touchscreen display and GPS coordinates to control the vehicle. All you have to do is set where you’d like to go, take your hands off the wheel, and relax while you’re safely transported by your utility vehicle.


Read more: Self-driving tractors could soon come to a field near you.


How AutoTrac Can Help a Hobby Farmer

Anyone who owns a hobby farm knows that the days are long and don’t always end when the sun goes down. Fatigue makes for careless driving, and that can be just as dangerous on a farmer’s field as it is on a busy road.

With a hand-free driving system like AutoTrac, you can stay on task for longer. You don’t have to worry you’ll make a careless mistake while driving tired. Your Gator will drive for you!

You can focus on your other tools and tasks and let the Gator be your chauffeur.

Is Your Gator AutoTrac Ready?

AutoTrac will be built into models 835 and 865 in 2023 John Deere Gators. It’s also available as an add-on for older Gators that are compatible with the AutoTrac display and receiver.

You’ll need a subscription to use the system. Once you sign up, though, you can input your GPS coordinates, sit back, and let your Gator take the wheel.

Categories
Animals Farm & Garden Large Animals

Flush Feeding Maximizes Sheep Breeding Success

Fall breeding is happening now and diligent hobby farmers are doing everything in their power to ensure success—including flush feeding.

Flush feeding refers to increasing nutrition intake for sheep prior to breeding. This technique has been shown to optimize conception rate and the chance of multiples. Being intentional about flush feeding is a proven way to increase lambing percentage, and thus increase the profitability of a sheep farm.

The Advantages of Flush Feeding

Flush feeding, in short, involves increasing animal feed to encourage improved breeding rates. This is most often achieved by providing ewes supplementary high-quality feed with the goal of increasing weight gain and thereby:

  • Increasing lambing percentage
  • Improving contraception rates
  • Ensuring optimal ovulation rate
  • Increasing odds of multiples
  • Increasing energy rates  

Read more: Check out this video for more tips for a better sheep breeding season.


The Hows of Flush Feeding Ewes

Flush feeding using good-quality hay, fresh pasture and/or higher-protein grain should begin two to six weeks before breeding and continue into the first stage of gestation. There are several combinations of feed available to use. All regimens should be high in protein (between 10 to 16 percent), high in fat, and high in vitamins and minerals. 

Body condition and overall health of animals plays a large role in the success of pregnancy.  The goal is to reach a 3.5 rating for animals’ body conditioning.

Ewes in poor condition can easily get pregnancy toxemia because their body has to  break down its own fat to meet nutritional needs of the embryo. Overly fat ewes are also susceptible to stress syndrome of pregnancy toxemia because the extra weight is too hard on their body.

Assessing body condition and treating nutritionally will be the best way to ensure safe pregancy for your ewes. 


Read more: Here’s how you can evaluate the body conditioning score of your sheep this breeding season.


Feeding Improves Virility of Rams, Too

Don’t forget about the rams! This feeding technique can also maximize sperm production and energy levels in rams. This nutritional boost prior to breeding season can double the sperm count.

Body condition is also important for rams at breeding time. 

Understanding ideal body conditions and intentionally feeding your flock in preparation for breeding season are manageable steps for all hobby harmers to increase their spring profits.