My family and I were very pleased with our garden’s output this year. But we did notice one problem as we tended our plot: The tools were too far away, probably 150 feet from our growing space. As anyone who grows food knows, this can mean lots of walking back and forth to fetch tools as needs arise. The solution? I’m going to build a garden shed.
The structure won’t be anything fancy. An 8-by-12-foot shelter should suffice to hold our soil, tools, hoses and other garden necessities.
This need for a garden shed wasn’t a surprise, and we’d already begun preparations for it. Thus far, this mainly means leveling a predetermined area with soil from our home build. But now it’s time to rough dimensions on our building site.
For starters, we know we need the shed to be square with our existing outbuilding. As that outbuilding was built to also be square with our house, I know that, if I determine placement based on this building, it will also be squared up with the house.
(Is this necessary? No, but I think things just look nicer when all the lines are parallel to each other.)
How will I do this? Well, first I gather up a few simple tools:
string
four stakes
a hammer
I tie the string to the third post of my four-post outbuilding porch, then walk to the future shed pad, stretching the string as I go. Once I’ve reached the point where my back post will go, I can drive a stake and tie the string to it.
So long as the string is just touching the first and second post on my outbuilding, I can be certain my line is parallel to the outbuilding.
Then I can measure the length of my intended garden shed (in my case, 8 feet) and drive a second stake to establish the inner corner. Measuring 12 feet from each of these stakes, I can drive two more stakes 8 feet apart to rough in the back corners of my garden shed.
Check out the video to see this plan in action, and stay tuned for future videos of this garden shed build.
Linda recently moved from Nebraska to Oklahoma. As much as she and her husband had looked forward to settling into their new home, she was very much saddened by the loss of her backyard flock. Since she was moving across state lines, she had to find a new home for the quartet of Buff Orpington girls she had lovingly raised since baby chickdom.
She fortunately had found someone who’d keep the four hens together. But she still tears up about leaving them behind.
“I’ll be getting new babies next spring,” she noted. “But I really wish I could have brought them with us.”
Linda’s plight struck a nerve with me. My husband, Jae, and I have often spoken about leaving Michigan behind for the warmer, dryer weather of the Southwest. I’ve joked that we’d need a special trailer to transport our flocks along with us.
In all seriousness, however, I had no idea what regulations exist regarding the transport of live poultry between state lines. I’m well versed in the NPIP regulations regarding shipping day-old chicks and adult birds. But bringing them along as you drive from one state to another? No idea.
I’ve definitely seen livestock trucks on the interstates, the ventilation holes revealing the cargo within to be hogs, sheep and cows. I’ve never seen a truck transporting chickens … or any live poultry, for that matter. Time to do some digging!
New Town, New Rules
While more and more municipalities permit the keeping of backyard flocks, not every town allows this. If microflock ownership is a non-negotiable point for you, contact the ordinance officer of your intended new town to inquire about backyard-flock regulations.
If the home you are considering is part of an association, you’ll want to contact the association secretary to verify whether backyard flocks are allowed there. Better to find out up front whether you can keep chickens in your intended relocation destination than to arrive with your flock and discover you have to rehome them.
Once you’ve confirmed that you can indeed keep chickens at your new location, you will need to contact your new state’s Department of Agriculture to ask about regulations regarding the transport/import of live poultry from another state. Each state defines its own rules covering the length of quarantine prior to and immediately following transport; required documents from an inspecting veterinarian; and even the number of non-commercial birds that can be brought in.
Many states are vigilant about avian influenza and other highly transmissible poultry diseases. So there may be bans in place that prohibit transporting chickens from specific states.
Skipping any steps required by your intended state—or any states you’ll be traveling through—may result in serious consequences for you and your flock. You can find state agricultural departments here.
Federal Code of Regulations
You will also want to familiarize yourself with Title 9 of the Code of Federal Regulations (CFR), specifically Chapter 1, Subchapter C, which covers the interstate transportation of animals, including poultry.
Regulations exist covering:
general transportation practices
the inspection and certification of poultry for interstate movement
feeding, watering and resting livestock
Despite the legalese, the CFR provides a lot of valuable and helpful information to anyone considering transporting chickens via interstate travel.
Getting a veterinarian to certify your flock as healthy is a bit more complicated than it may seem. Your destination state may specify whether a general veterinarian can inspect and certify your flock or whether this must be done by a livestock or avian veterinarian.
If a specialized veterinarian is required, ask your local veterinarian or your state extension office for a referral. Chances are a specialized vet will have done these type of evaluations before. But, just to err on the side of caution, let whichever veterinarian you use know that they must check with your destination state’s agriculture department (and those of states you’re traveling through) for any specific forms that must be completed and whether these must either be filed prior to your move or accompany your click … or both.
The veterinarian will also find guidelines as to how close to your departure date they must inspect your flock.
As it turned out, Linda could have brought her girls along with her to Oklahoma. She isn’t planning on moving any time soon (“never again” might be more specific). But now I know what I must do should we finally decide to leave Michigan behind for Nevada or New Mexico… and now you do, too!
Water is an essential resource for each of us, and, if you’re responsible for crops and livestock, you can’t afford any disruptions in its supply. As a result, some farms install their own water storage systems as a hedge against increasing periods of drought and extreme weather. These can be as simple as a few extra rain barrels or as complex as a 3,000-gallon, food-grade cistern.
In part, knowing which cistern type, size and location might be right for you depends on your intended uses for the water you collect. For instance, without access to publicly available, treated water or a nearby spring or well, private rainwater collection and storage can be a household’s primary source of drinking water.
In these cases, large cisterns are typically situated so that rainwater collected from the roof can be treated and pumped directly to the house.
Household Systems
Household cistern systems for drinking water are fairly complex to set up and maintain. “Periodically draining, disinfecting, cleaning and refilling the tank is something that people who have cisterns as their drinking water supplies for their homes … have to [do] periodically,” Jennifer Fetter says. Fetter works as an extension educator in Water Resources for Penn State Extension.
“You want to make sure it’s free of human pathogens and other health risks before you drink it,” she continues. (That goes for using it with livestock and pets, too.)
Non-treated, non-potable water does have some uses indoors. “Rainwater catchment systems connected to toilet flushing is something that a lot of environmentally friendly buildings have adopted,” Fetter explains.
Even if you aren’t planning to drink the rainwater you collect, you do need to think carefully about the way you use it. Harvested rainwater is great for watering non-edibles. But vegetables you plan to pick and eat raw—like spinach, lettuce and other salad greens—are particularly susceptible to contamination from E. coli bacteria and internal parasites such as Cryptosporidium and Giardia.
“When rainwater runs over your rooftop, think about who else is hanging out on your rooftop,” Fetter explains. “You’ve got birds, raccoons and squirrels up there, and they’re not minding where they go to the bathroom. All of that is getting washed into … those cistern systems.”
Different kinds of roofing shingles and even the walls of your rainwater catchment containers can leach volatile chemicals into your water, too.
Testing & Treatment
“You want to think about testing, if you’re going to end up having to use the water for something more than washing, [flushing] toilets, and landscape and gardening,” Fetter says.
“Test your water, find out what kind of contaminants you’re dealing with, and find out what kinds of treatment systems can address those contaminants, so that you’ve got that treatment system at the ready in the event that you need to use it.”
She recommends using a state-accredited laboratory. Not sure where to start? “It’s a little different in every state. But, generally speaking, either the state’s Department of Health or their Department of Environmental Protection has something to do with drinking water safety and testing,” Fetter says.
The Environmental Protection Agency also offers online resources including state-by-state lab listings. Once you get test results back, you’ll know what problems you need to correct. Chemical chlorination and UV light application are the two main methods used to disinfect water.
And, from carbon filtration to reverse osmosis and beyond, there are many different water filtration systems available to help eliminate various pathogens and impurities.
“There is no perfect filtration system that can solve all problems,” Fetter cautions. “You should find out what kinds of things are in your water so that you know what kind of treatment you might need.”
If you do opt to add a cistern, your intended uses and climate can help dictate whether it goes above- or below-ground. “One of the benefits for an underground cistern is that you don’t have to worry about it freezing if you live in a part of the United States that gets pretty cold winters,” Fetter says.
So, if you’ll need year-round access to your stored water and you live in a cold climate, you’ll likely need an underground tank. However, these can cost several thousand dollars to install.
If you’ll only access harvested rainwater during the growing season and you live in a relatively warm climate, you can likely get away with leaving smaller, above-ground containers outside year-round. But those in colder climates should drain and store water storage containers until after the last frost.
Finally, Fetter cautions, “There are still some places in the United States where … you can’t harvest rainwater without a permit. So, you need to know your local laws and make sure that you’re not setting up a cistern in a place where the water rights are owned by someone else.”
Your chickens give you plenty of enjoyment. They’re fun and interesting to watch. They help keep your weeds and insect population controlled. And they provide that touch of rustic charm to your property.
But come on. The real reason you host those hens can be summed up in a few words: scrambled, poached, over-easy, sunny-side up and hard-boiled!
For many of us, those fresh eggs are what it’s all about. Given the importance of egg laying, it’s only natural that you’d want to extend you hens’ laying season as long as possible in order to gather as many eggs as you can in a year. And you’re in luck, as there are a few simple things you can do to maximize farm’s egg potential.
So let’s take a look at them.
All About the Light
If you’re experienced in chicken-keeping, you’re probably already aware that your hens generally lay the most eggs during the height of summer. Those numbers dwindle off as cold weather approaches.
What’s happening? This has less to do with heat, and everything to do with light. Your hens require about 14 hours of daylight before their bodies kick into egg production mode. By the time summer is at its height, your birds are at peak egg production.
It’s no accident that your hens produce the most eggs in the summer and decrease toward winter. Despite your culinary intentions for unfertilized chicken eggs, the main purpose of eggs from a chicken’s point of view is to produce chicks. Baby chicks hatching in a natural winter environment (no incubator) is not a good idea!
Producing eggs during cold weather is also a drain on a chicken’s energy resources that they could instead put to use in staying warm. Your hens’ bodies “know” this (it’s called photoperiodism) and thus attempt to avoid laying eggs in the winter.
No January quiche for you!
Here’s the good news. You can easily alter the number of hours your hens are exposed to “daylight” with some inexpensive, simple and safe artificial lighting. Because you aren’t aiming to raise chicks in the cold (you just want the eggs) and you have a nice warm coop where your chickens can go to get out of the weather, artificially extending the laying season in the spring and fall is a safe method to try.
Unlike heat lamps or other heat sources that some chicken owners might use to incubate a brooder or keep the coop warm during frigid weather, your goal here is simply to increase the amount of light your hens are exposed to. This will trigger the starting of egg-laying season in the spring or extend it in the fall—possibly well into winter.
While you could utilize classic incandescent lighting for the purpose of extending your hens’ laying season, there are a couple of reasons why you might not want to.
For one, incandescent bulbs put off some heat. In a coop situation, this could be undesirable during the nonwinter months when you’re trying to encourage your hens to lay. It’s just an unwanted heat source that might unnecessarily increase the temperature in the coop.
Incandescent lighting also uses more wattage, “pound for pound,” than an LED of the same brightness.
Consider the Color Temperature
What incandescent lighting does have going for it is the warm color of the light. This is called the light’s “temperature.” But it has nothing to do with actual heat.
Low temperature lighting (with a rating of, say, 2,700 kelvins) is “warm” with a yellowish cast, while high temperature lighting (in excess of 5,000 kelvins) is “cool” with a whiter or bluish cast.
For the purpose of extending laying seasons, warm lighting is best, as it does a better job stimulating a hen’s laying tendencies. So aim to avoid bulbs with an overly bluish colorcast.
LED is A-OK
LED lighting will work just fine for your egg-laying birds, as long as you select bulbs with warm color temperatures. In fact, LEDs may just be your best option. They run cool and are power-efficient enough to run off of a small solar panel on your coop’s roof, so you don’t have to worry about running electricity from your home down to the coop.
They also aren’t prone to failure in cold weather the way fluorescent lighting can be.
Moderate the Brightness
Your egg-encouraging lighting doesn’t actually have to be very bright. A 25- to 60-watt (or equivalent) bulb should get the job done.
Choose a Light Fixture
Lastly, you’ll need a coop-safe light fixture that is suitably rated and sealed for outdoor use in a livestock situation and hung in a safe location that is inaccessible to the hens. Plan to keep this light free from dust.
Perfect Timing
Install a timer
The idea isn’t to run artificially lighting all night. You just want to add some lighting to extend the day. Some people recommend doing this in the morning, others opt to add light in the evening after sunset.
Either way, you don’t necessarily need to make any late-night runs to chicken coop to flick a switch. Instead, just install your light fixture on a simple timer that can handle the job for you.
Don’t Overdo It
More isn’t always better. You only want to extend your hens’ exposure to light by a few extra hours. And you don’t want to over-run your artificial light source.
You probably want to avoid subjecting your chickens to an excess of 16 to 17 hours of daylight, as this can actually decrease egg production.
And don’t leave your light on all night. The chickens need a good night’s sleep!
Add Light Slowly
Think about your own “internal clock” and how jarring even a small adjustment in time can be—the shift from standard time to daylight saving time, for instance.
It’s no different for your chickens, so aim to increase their artificial lighting over a period of about 30 minutes every week for several weeks so that the change isn’t so sudden to your hens.
If you’re trying to keep your hens laying longer into the fall months, don’t wait until daylight is under 14 hours before you start running additional lighting. By then it will be too late and the chickens’ reproductive systems will be shutting down.
Instead, aim to begin adding your light source once total daylight decreases to about 15 hours per day.
Consider Your Coop Location
Your coop may not be easily movable, but, for what it’s worth, a coop located in heavy shade may affect your hens’ laying season, reducing the number of eggs produced.
On the other hand, many chicken owners prefer to have their coops located outside of direct sunlight to help limit the heat of summer. You may have to experiment in your exact climate and situation to find a balance between light for laying and shade for keeping cool.
A hen in great health that is receiving excellent daily nutrition will have better chances of maintaining a long-term egg production schedule. Keep your hens well fed, and they’ll keep you loaded up with eggs!
Good luck with your flock.
More Information
Benefits of Time Off
With a little bit of effort and some planning on your end, it’s a very attainable goal to extend your laying season at both ends of the summer. But with all of that said, keep in mind that some downtime during the middle of winter each year isn’t necessarily a bad thing.
In fact, it can be quite beneficial to your flock.
Allowing hens to take a few winter months off of egg laying gives their bodies time to rest and time to put calories and nutrients into surviving winter instead of producing eggs. It’s also an important time to regrow their feathers, as many hens use their egg lay-off to molt and refresh their appearance with a lovely set of brand-new plumage (although some breeds that have been developed for laying may have minimized molting seasons).
The bottom line is that extending the laying season is just fine. Some hen-keepers do try to keep their flocks laying all year long. But you may want to avoid pressuring and pushing your hens to produce too long into cold weather without a break.
This article originally appeared in the September/October 2022 issue of Chickens magazine.
Listen in on this conversation with land steward, Native American Food Sovereignty Alliance Executive Director and Hopi Tribe member Lilian Hill as she talks about dryland farming, traditional foodways, farming systems and more.
Hear about Lilian’s family and community heritage and how she connects with traditional agriculture methods, foodways and food sovereignty work. She tells us about her and her husband’s founding of the Hopi Tutskwa Permaculture Institute—which provides outlets to explore areas of food production, energy, water and small-scale food cooperatives—plus the 15-acre area of farmland her grandparents once farmed and another 2-acre permaculture demonstration site that she and her family continue to steward. Learn, too, about the Native American Food Sovereignty Alliance’s work in restoring food systems that support tribal self-determination and community wellness.
Lilian shares an indigenous point of view—and is real about the difficulty of accessing and sharing this knowledge—on the major weather issues we’re seeing right now and how we can work to restore a balance in nature. Take note of Lilian’s dryland farming advice, from seed selection to soil conditions to water retention and conservation. Stay tuned to the end to hear about what Lilian finds inspiring in the food system today.
Nutritionism, a concept that writer Michael Pollan has addressed and condemned in recent years in his book In Defense of Food (2009), suggests that individual nutrients can provide a complete diet, rather than whole foods themselves. Simply, it’s the idea that the nutritional value of a food is only equal to the sum of its presently identifiable parts.
Processed foods, including chicken feeds, often contain synthetic versions of added nutrients. We tend to value a nutrient itself, rather than the whole of its natural food origin. Foods in their most natural forms possibly contain beneficial nutrients or combinations of them we’ve yet to discover.
Chicken-feed labels reinforce the reliability of laboratory nutrition analyses. But do industry standards beat the entirety of known and unknown nutrition in a natural polyculture lawn?
Due to the demands we place on our livestock, like laying an egg every 25 hours, there’s no disputing the continued need for grain feed. The ideal nutrient formulations are developed to get maximum output from feathered egg machines. But, if we imagine that nutrition is complete in processed feeds, should we assume that grain feed is enough to satisfy a plant- and animal-eating omnivore?
Consuming nutrients is only one reason to eat. The rituals of finding food and the act of eating that we humans enjoy are not lost on chickens. Like a human going out for a steak and a salad, the act of foraging for plants and animals—foods that birds can smell and taste—completes the satiating meal experience.
For satisfying diets that nurture the whole chicken, providing access to forage through every season is essential for raising a healthy and happy backyard flock. Here are some free-ranging tips, by the season.
Autumn Answers
As the days grow shorter, chickens have fewer daylight hours to feed and forage. But they still need to produce enough heat to last through longer, colder nights.
Flora
As the flock adapts to these changes in preparation for winter, minimal human clearing of the garden will have free-ranging chickens wild with purpose. They will turn the soil, clearing it of weeds as they unearth pests, loosen roots and fertilize the garden.
Haul in some compost, and the flock will mix it in for you. They’ll munch on some of the organisms that have been multiplying in the warmth of the decomposing pile. Others will survive and contribute to the garden’s ecosystem.
Fauna
While mice are year-round pests, fall sends these little mammals looking for warmer locations to nest. With cozy bedding and plentiful grains nearby, a chicken coop is an oasis for a squeaky little mouse.
Passive chickens will coexist with small rodents. But an aggressive forager won’t hesitate to stuff its crop with a mouse.
Once it catches the mouse, it incapacitates it by hitting it against the ground, likely killing it. Then the chicken will swallow it whole, like a gull eating a fish. It’s a horrifying but fascinating sight. To witness it is an educational lesson in the true nature of the chicken.
Functionality
A mobile coop or a temporary fenced pen can be placed on top of raised beds and over other garden areas to restrict a flock to a specific place for foraging at the end of the growing season.
Simply lure them to the area by turning some soil. Sprinkle scratch grains if they need convincing.
Because confined chickens are usually kept from the garden, moving chickens to the garden under a protective structure will work the soil and unearth a bounty of crop-damaging pests, such as grubs, and even termites in aging raised beds.
Winter Wonders
Natural wintertime foraging is either very limited or simply impossible, depending on the flock’s geographic location. But working to decrease the seasonal stress of inactivity, boredom and dry feed rations can make a big difference in their emotional health.
Flora
It’s important to encourage chickens to get out of the coop, too. Idle chickens feeling cooped up for too long can become moody and even aggressive towards flockmates.
Boredom in confinement, for some chickens, can lead to cannibalism and result in death. Creating conditions where chickens can satisfy their natural behaviors nurtures the whole flock’s overall well-being.
When the snow is about shank deep (or when the chickens won’t venture outside in comfortably cold temperatures) shovel walking paths through the yard, but carefully so as not to damage the sod.
A flat path will allow the free-ranging flock to walk on top of the snow and around the yard. Sprinkle kitchen scraps, sprouted seeds, legumes or scratch grains along the trails to simulate the mental and physical exercise of foraging. Living foods will provide a nutrition boost.
But feeding scratch grains before dusk will help chickens burn them for increased internal heat overnight.
Fauna
Winter can be a hungry time, with crunchy beasts in short supply. Freeze-dried mealworms make great fantasy forage to satisfy the chicken’s inner carnivore.
Sprinkle mealworms along a shoveled path, or cast them over fresh coop bedding. Giving the compost a good turn or two every now and then will help break down new additions to the bin before spring, while unearthing the protein buffet living inside.
The flock will enjoy this temporary distraction from the boredom of winter.
Functionality
You can reuse an old window tilted toward the south-facing sun in a cold frame. The temperature inside the frame will stay warm enough to grow grazing greens for the flock through the winter. Just cut fresh greens, leaving them long enough to regrow, and deliver them to the chicken run like grass clippings.
Chickens also enjoy fresh, living greens grown in the kitchen. Sprouting seeds, grains and legumes in the kitchen takes a little time. But in terms of flock enjoyment and supplemental nutrition, growing a quart-size canning jar of sprouts each week demands very little time and counter space.
As with other chicken supplements, sprinkle sprouts for active foraging.
Spring’s sudden greening is irresistible to foraging chickens.
Flora
As spring blossoms, the chickens will keep the grasses, clover and other greens trimmed nicely until the lengthening days force growth beyond their beaks’ control. Their hard work can even reduce the need to mow the backyard half as often as the front.
While planting gardens and flowers for the growing season, be mindful of plants that are poisonous to chickens, such as the bulbs and greens of daffodils and tulips, and the greens of all nightshades, including tomatoes and potatoes. Protect free-ranging chickens from these plants until the plants are well-established in the garden.
Chickens are trendy creatures, preferring the novelty of new additions and freshly turned earth to passé garden staples that excited them before the last heavy rain.
Fauna
The insect explosion of spring cues a thrilling game of skill. Chickens’ keen eyesight, especially up close, will have them munching on insects and organisms humans can’t see, and even chasing wasps and carpenter bees. This protein boost to the flock’s diet tends to be in line with the seasonal increase in egg laying, giving backyard eggs and chickens’ active legs a big boost in overall nutrition.
Before planting the garden, put the flock to work. Give the soil a quick turn, and let the flock forage for fresh weed sprouts and pests that have moved in and reproduced as the soil has warmed.
This leaves the gardener with little else to do but plant and water the garden.
Functionality
Landscape the coop by planting a chicken garden around the outside of the run. Patricia Foreman, author of City Chicks, calls this the “browse line,” where chickens can reach a little of what grows from a plant at a protective distance.
Planting crops along the browse line ensures that plenty of food will be shared between you and your free-ranging flock all growing season. Cucumber, zucchini and tender lettuces are great options.
Summer’s Stress
Summer is a stressful season, especially for heavy breeds, such as Australorps or Brahmas, and feather-footed breeds, such as Cochins. Because the hottest days can be dangerous, chickens need a bit of help getting through the dog days of the season. Access to forage can help.
Flora
Chickens often avoid eating because they know that digesting food creates more internal heat, and they’re already uncomfortable. Creating a place for chickens to relax and literally chill out can relieve unnecessary stress and keep the hens laying eggs through the summer.
By allowing a shady part of the yard to go wild with the grass and weeds growing long, the plants, roots and soil will retain more moisture. This keeps the entire area cooler than the surrounding air, wicking heat away from the chickens’ bodies.
Once chickens can no longer keep up with trimming the grass in their shady forage area, it will go to seed, which is good. Free-ranging chickens love foraging seeds from the grass tassels.
Bugs and insects will also take refuge in this cooler shelter. This makes it the perfect place for a flock to rest, hide, play and hunt for animal protein.
As the garden matures, sharing produce extras, leftovers or losses—tomatoes, watermelon, etc.—provides nutrition and hydration. They can be chilled or frozen first to give chickens some relief from oppressive heat.
Fauna
Few other backyard pest-control treatments create ambiance and fresh eggs. Eliminating the need for professional pest services, chickens’ voracious appetites make backyards more livable.
In Southern states, a free-ranging flock can remove potentially dangerous critters, such as black widow spiders, not to mention disease-carrying ticks and mosquitoes that plague every yard.
Female mosquitoes lay eggs everywhere. It’s where water happens to pool that becomes a skeeter incubator. While chickens don’t seem interested in adult mosquitoes, a backyard flock that is allowed to free-range will greatly reduce the population of mosquitoes in the yard by foraging for their larvae.
However, chickens do eat adult ticks. They can virtually eliminate even the most abundant population in a single yard.
Functionality
The lawn and its inhabitants are an abundant source of whole foods that contain vitamins, minerals, omega-3 fatty acids, carotenes and protein, among others. Collect grass clippings from your nontreated yard, and serve them up fresh inside the your chicken run.
Your free-ranging birds will forage through the damp clippings for plants and animals. What’s left will decompose and disappear into the run floor.
Shebeko/Shutterstock
Given the opportunity, the average chicken can eat about 7 pounds of supplemental foods per month, according to Foreman. So, a small flock of five residential chickens can eat 35 pounds of kitchen scraps, yard waste and backyard pests every four weeks.
Indulging your chickens’ natural free-ranging and foraging instincts will fulfill more than just their bodies’ nutritional requirements. With the ability to recycle hundreds of pounds of waste and bothersome backyard pests per year, allowing year-round free-ranging honors a flock’s desire for joyful eating.
Kitchen scraps can attract unwanted pests. Chickens will control pests that live in the yard naturally. But inviting new ones isn’t ideal.
Feed only as much as a flock can eat within about 20 minutes. Abandoned leftovers attract ants, rodents and wild birds.
Love Them Bugs!
Despite any human desire to feed chickens a vegetarian diet, every chicken will seek out animal protein in living worms, larvae, insects, spiders and the occasional rodent. As true omnivores, they can’t live their best lives without eating animals.
This article originally appeared in the September/October 2022 issue of Chickens magazine.
The dog days of summer are almost over. The harvest is becoming abundant. For many of us, that means preserving what the garden and coop provided. Salt-cured egg yolks, which we discuss below, keep your layers’ eggs safe to eat while the hens enjoy a deserved winter break.
If your hens have had a productive summer, then you’ve probably been enjoying eggs every day, done every which way imaginable, and baking up a storm, with still plenty left over. Of course, the flavor of just-gathered eggs can’t be beaten. But sometimes it’s just not possible to eat them fast enough.
Selling at the gate and sharing is great, but so is saving for later.
Preserving the Bounty
Folks have eaten eggs since the dawn of human time. It started with opportunistic nest-robbing and evolved into keeping domestic fowl for meat and eggs. But because we’ve only had artificial refrigeration for a couple of centuries, that left our ancestors plenty of time to come up with some innovative ways of storing all those extra eggs of spring and summer for the lean times.
Putting up fruits and veggies can be a simple task—as easy as bagging and freezing. But storing eggs is a bit trickier. Every method produces a different result, from weird to wonderful.
In China, for thousands of years, eggs were—and still are—preserved in a mixture of ash, clay and salt, among other ingredients. This turns them blackish-green and gelatinous inside.
For most North Americans, thousand-year or century eggs, as they’re known, are an acquired taste to be sure. In Japan, eggs are preserved by fermentation in miso—a salty fermented soybean paste—and a long soak in soy sauce also does the trick.
Early Europeans and North American settlers stored untreated and unwashed eggs for many months in root cellars, just as is, but also preserved them in water and pickling lime, or water glass—water and sodium silicate. This fascinating method can result in occasional losses, but many homesteaders still swear by it, as it doesn’t affect the flavor, texture or behavior of the eggs in cooking and baking.
Of course, pickling is popular. And hard-boiled and peeled eggs can be added to sauerkraut for a sort of pickling-fermentation hybrid.
Alcohol is another good preservative, being able to kill off most dangerous bacteria at the right strength. The Dutch have a traditional tipple of egg yolks and brandy called advocaat or aged eggnog, where egg yolks are blended with sugar and copious amounts of spirits, then kept for months.
Today, we have the luxury of popping extra eggs into the freezer or dehydrator for use in cooking and baking as needed. But sometimes the old ways are best. There’s a certain romance to some of these old-time recipes, born purely of necessity.
Just imagine, if refrigeration had always been available, we might not have invented pickled, cured and smoked foods. What a shame that would be!
Salting foods for preservation is another technique folks have employed for thousands of years, with fish and meats to vegetables, nuts and olives. The beauty of salt curing is that it preserves, while drawing out moisture, which enhances and concentrates the flavors. Salting also changes the texture of the foods it preserves, making things chewy and dry, just waiting to plump up again in the cooking.
Salt- and air-curing can transform foods from liquid to solid. One of the most striking examples of this is salt-cured egg yolks.
Signe Langford
The practice of separating and salt-curing egg yolks isn’t common in North America, but this centuries-old technique is easy and fun, and the results are versatile and delicious.
Preserving yolks in a deep bed of salt (and sometimes sugar, more on that in a bit) renders them firm, reminiscent of a hard cheese such as Parmesan, preserves their bright-orange color and transforms them into a rich condiment for grating over pastas, salads or potato dishes. Salted egg yolks add a salty richness and a lot of visual interest when brought out to the table with a grater on the side.
About that sugar: Some methods call for a 60/40 salt to sugar blend for the curing. Like salt, sugar is also a desiccant and preservative. Depending on the ratio of sugar to salt, it can also add a subtle sweetness to the final preserved yolk.
These semisweet and salty yolks are good for adding a surprising finishing touch to puddings; think crème brulée, salted caramel, chocolate mousse. In traditional Asian pastries, such as moon cakes, a morsel of salt-cured egg yolk is the treasure buried in sweetened red bean paste, wrapped in pastry.
Follow these easy, step-by-step instructions to try your hand at this wonderful old technique.
Ingredients
Here’s what you need to make salt-cured egg yolks.
Kosher or coarse sea salt
granulated sugar (optional—depending on how you expect to use the yolks later.)
cheesecloth
cotton string
a nonreactive container—glass or enamelware
as many free-run egg yolks as you want to preserve
Step 1
Into a nonreactive container—a glass casserole dish is good for this—add a deep layer (about 3 inches) of salt or a salt and sugar mixture.
You can get a little creative here, too, and add a bit of truffle salt, spice- or herb-infused salt, or even a smoked salt; whole peppercorns; a few saffron threads; or even vanilla sugar.
Step 2
Use the back of a teaspoon to make little depressions in the salt mixture for the yolks to nestle in. Separate as many eggs as you want to cure and place each yolk in its own little lightly water-dampened dish. Then very gingerly tip the yolks out of their dishes and into the indents in the salt.
It’s important to dampen the little dishes because the yolk can stick to a dry dish—or dry hand!—and tear. Cover the yolks with another deep layer of your chosen salt mixture and place them in the fridge, covered, for 5 to 7 days.
Of course, in ancient times, they would have just been put somewhere cool and dark to cure—cache in the ground, root cellar, larder—but if you can find room in the fridge, do so.
Step 3
At the 5-day mark, take a peek. If the yolks are still too soft to handle, rebury and allow another couple of days in the cure. When the yolks feel solid to the touch, you’re ready for the next step.
Step 4
Now it’s time to dig up the yolks. Be as careful as an archaeologist unearthing rare artifacts. Although the yolks feel solid, they might still be a bit fragile at this point.
Remove each yolk from the curing bed and gently rinse under cold running water to remove the crusty salt layer. Set aside onto a fresh, clean kitchen or paper towel.
A less-than-pristine towel can introduce bacteria that may ruin the whole batch.
Step 5
Now this bit is optional. Some experts suggest baking the yolks in the oven at its lowest possible setting until hard or processing in a dehydrator. Some skip this step entirely in favor of the more old-fashioned approach of hanging to air dry.
We hung the yolks for this article.
Signe Langford
To hang and air-dry, prepare a double-layered, 6-inch square of cheesecloth and a 12-inch length of kitchen twine—one for each yolk—then set each rinsed yolk into the center of a square. Pull the corners of the cheesecloth up around each yolk like a little coin purse, and cinch shut with a length of kitchen twine. Either arrange on a wire rack or suspend the yolks in their cloth hammocks for air-drying.
The handle of a long wooden spoon suspended over a pot works well. So does a wire basket that allows plenty of airflow all around and under.
Place the wrapped yolks in the fridge or cool pantry and leave them there for about two more weeks, until they are quite hard. Wrapped in cheesecloth and suspended for air circulation, the preserved yolks will keep for several months in the fridge or pantry. If left in the open, however, they will continue to dry as they hang. So for consistently softer yolks, after air-drying, transfer the eggs to a covered container, and keep refrigerated.
Salt-cured egg yolks are more of a condiment or seasoning than a snack. They are rich and salty, and they add a wonderful hit of creamy umami to soups and stews, pastas, salads, fish, cooked potatoes, rice, grits or even plain-old buttered toast. They’re a great alternative to anchovies grated over pizza and added to Caesar salad. And when grated over hot buttery pasta, they silkily melt, adding richness to the simplest recipes.
The single blade on the side of a box grater will give thicker slices of yolk that are perfect tossed into a salad of thinly sliced radish and cucumber.
Let your imagination take you on a tasty journey.
Just make sure to cure enough yolks so you’ll have some when spring rolls around and that first asparagus of the season is up. There’s nothing like steamed or poached asparagus awash in butter, lemon and a sunny layer of salt-cured egg yolks!
More Information
All Those Egg Whites
Salt-cured egg yolks leave you with whites, of course. But there are so many uses for egg whites:
Make an egg-white omelet.
Freeze them all together or individually in an ice-cube tray.
Bake an angel food cake.
Whip up a meringue for a pie or pavlova.
Coat sweet potato sticks for the crispiest oven-baked fries.
Use frothed egg whites to candy edible flowers or make spices cling to roasted nuts.
Pour egg whites into stock to clarify consommé.
Add egg whites to a shaker for a frothy cocktail.
Use egg whites to bind the cream in a panna cotta.
Make your own marshmallows.
Make some nougat with sugar or honey, roasted nuts and whipped egg whites.
Don’t forget egg whites are the magic ingredient that hold coconut macaroons together, and make them light and crispy.
This article originally appeared in the September/October 2022 issue of Chickens magazine.
Summer is over, autumn is in full swing, and winter looms on the horizon. On my northern Wisconsin farm, it’s time to start preparing my garden for winter, a lengthy but important process to ensure the garden beds are ready for planting as soon as temperatures warm back up again in the spring.
These days, I plant almost exclusively in raised beds, which present a tidy appearance while helping control weeds and clearly separate different types of plants. Raised garden beds also offer precise control over soil composition. But that control can mean extra effort preparing them for winter.
Exactly how you proceed with prepping seasonal garden beds for winter may vary depending on where you live. But the following four steps should prove helpful in many situations.
Emptying the beds is the best place to begin. Start by clearing away bulky materials like stems and leaves. Consider removing entire plants (roots and all) to lessen the likelihood of diseases and pests overwintering on decaying material.
Also, don’t forget to clean up fallen fruit. I know from experience that if you leave fallen tomatoes behind, you’ll get a crop of random volunteer tomato seedlings in the spring.
2. Adjust the Soil Composition
Especially if you’re caring for raised garden beds, you may want to adjust the soil composition before winter. Sometimes over the course of a growing season, I come to realize I’ve added too much compost and not enough topsoil to a raised bed, or vice versa.
You’ll be able to evaluate over the course of a season if your plants are fighting to grow through dense soil or struggling to retain moisture in loose soil. Autumn is a good time to make corrections.
At the same time you adjust the soil composition, consider adding compost, grass clippings, shredded leaves, etc. to give the soil a general nutrients boost. A soil test can help determine if your soil is lacking anything specific, in which case you can correct with an appropriate amendment.
Mulching soil for winter is also beneficial, keeping out the worst of winter cold and providing protection from erosion. A nice layer of organic mulch can simultaneously feed your soil and present something of a barrier against weeds in the spring.
4. Label What You Grew in the Beds
Crop rotation is important to avoid draining a bed of the nutrients needed to grow a specific plant. And you shouldn’t assume you’ll remember from one year to the next what you grew in each bed.
Consider creating a chart or map to mark down the plants you grew in each bed, then refer to it the following spring when you start planting. Or if you have raised garden beds and are concerned about misplacing your map (it happens), use paint or an outdoor marker to label each bed directly.
Prepping garden beds for winter can be a big task, but just think—they’ll be ready to go first thing in the spring. Maybe you can start harvesting garden vegetables earlier than usual!
If it hasn’t happened to you yet, it will. Anyone with chickens knows the feeling of going to the pen and finding fresh eggs have disappeared or worse: Your chickens are dead. It’s a terrible feeling that can’t be avoided altogether if you own chickens. Unfortunately, chickens are toward the bottom of just about any farmyard food chain, and a chicken dinner is too tempting for a predator to resist.
You get picked on when you are 10 inches tall and can’t fight all that well. That’s the fate of many chickens.
But to keep your chickens safe, you have to be proactive and vigilant. It starts with understanding the dangers your flock faces and working diligently to stave off the intruders. In reality, all sorts of hazards wait to prey upon your flock.
Chickens aren’t only tasty to us, but they’re tasty to a whole menagerie of wildlife that lives on the periphery of humans. While many critters live harmoniously around our chickens, you never see any of the potential threats coming or going.
Every now and then, however, a predator gets the taste of chicken.
Raccoons
Raccoons are one of the most common mammals found in the United States. Highly adaptable, they range from the Central American isthmus north to southern Canada and can be found living in rural and urban areas alike. Raccoons are also crafty, intelligent and have articulating fingers to manipulate the environments around them. They are masters at figuring out how to get to your chickens. As the old saying goes: “Give them an inch, and they’ll take a mile.”
If you find your hens dead and only their heads were eaten, it was probably a raccoon. If they can’t get in, kill and eat the entire bird, they’ll grab the chickens by the head, pull them through the wire and eat what they can. If you find headless chickens lying near the fence, chances are a raccoon did it.
Consequently, chickens are especially vulnerable to raccoon depredation at night. Raccoons are egg eaters as well. However, when they eat eggs, they leave quite a mess.
Opossums
Opossums are the only marsupial found in North America. Therefore, opossums are gestated in a womb and birthed live.
After birth, their young migrate into a pouch on the female’s belly. There, they nurse and continue to mature until they can live beyond their mother’s body. Smaller than a raccoon and about the size of a house cat, opossums are nocturnal and move slow in their search for food. These mammals resemble giant rats and are widespread across the U.S. except for the Mountain West.
Like raccoons, opossums are omnivorous. They’ll rob food from your compost pile and steal kibbles from your trashcan. While not a classic chicken killer, opossums are in the predator category of nest raiders. They have a propensity for stealing eggs and may occasionally kill a chick.
When they raid a nest, they generally do a thorough job cleaning up their mess, although they will leave a few shell scraps and some egg interior behind.
One day I walked out to my coop and saw a hole torn in the top of the wire. Counting the chickens, I saw they were all accounted for. The next day I went back out to the coop and saw a bobcat in the chicken run. He had eaten the entrails and some of the breast from a chicken, and when he saw me, he escaped from the new hole he’d torn in the fence.
Kerry Hargrove/Shutterstock
When I counted the chickens, two were dead, and two were missing. I scoured the woods behind my house to see if they’d escaped and were foraging. Instead, I found them covered with leaves and twigs—classic caching behavior exhibited by bobcats.
Bobcats are found over the entire U.S. into southern Canada. They are enigmatic mammals and rarely seen. But bobcats are everywhere. In fact, some of the highest bobcat densities found anywhere are suburban bobcats that live in the Dallas/Fort Worth metroplex.
Like foxes, bobcats will take the entire bird and hide it in a cache for later consumption.
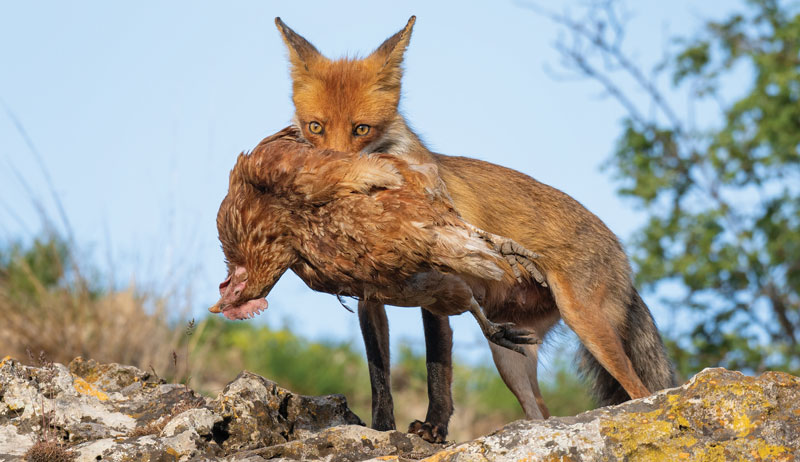
Foxes
You’ve heard all the sayings: “Crazy like a fox,” or “Don’t let the fox guard the henhouse.” They all make sense when you put the expressions in context with how crafty a fox is as a hunter and hence chicken predator. These small canines are witty, intelligent and adaptable.
Where you live in the country depends on the type of fox you’ll see. The red fox and the gray fox are two species that inhabit the U.S. Red foxes are found in Alaska, Canada and much of the states (except for the Desert Southwest).
Gray foxes are found across much of the lower 40 states.
If your chickens go missing completely, suspect a fox. Foxes will take eggs and live chickens and leave no trace. They’ll often steal more than one chicken in a raid and cache it nearby to eat later.
Skunks
Skunks are primarily egg stealers, but this stinky predator will also eat the entrails from a chicken given the opportunity. Skunks are common mesomammals. The striped skunk is the most widely distributed species of skunks.
However, in the southwestern U.S., hooded and hognose skunks are also present.
Learning to discern if a skunk’s been present is easy: Just smell for them. While skunks spray when threatened, that musky smell follows them everywhere. If they are startled by one of your chickens, they’ll spray to defend themselves. Skunks will dig, but it’s unlikely they’ll purposefully target your chickens. Instead, they are more opportunists than anything else.
Bobcats are stealthy, foxes are sneaky, and raccoons and the others come in the night. The coyote, however, is the most daring predator of all the chicken killers. Once, while preparing supper in our country kitchen, I stood at the kitchen sink and looked out the window, watching our chickens peck around in the backyard.
While the chickens were oblivious to their surroundings, I was not. As I watched out the window, I saw a young, healthy coyote lurking in the brush beyond our manicured backyard, where the chickens were. When I ran outside to intervene, the song dog was about to make his final lunge for the poultry.
Coyotes are the ultimate opportunists, and like bobcats, they’re highly adaptable and live in the suburbs and rural environs. Cunning, they’ll essentially formulate a plan before they raid your chickens—stealing one before running off into the wild. As such, you can find them all over the continent.
While coyotes will dig, they aren’t as dangerous to chickens that stay penned up. Instead, they prefer to catch the ones that free-range.
Snakes
Snakes (we’ll use that term generally) aren’t much of a threat to grown chickens. Instead, they eat eggs and chicks.
The problem is that when snakes eat, they eat their food whole. Therefore, you might never see any evidence of their presence unless you catch them in the act. While there isn’t one single species of snake that affect your chickens, any snake big enough to swallow an egg can make an impact.
Snakes are especially difficult to control because they can wiggle through the tiniest crevices. I’ve often caught a snake in the henhouse when they got in, swallowed an egg whole, and then couldn’t get back out of the same hole because of the egg they’d yet to digest. Therefore, watch for small cracks and crevices in your henhouse and keep them covered.
Snakes can climb walls, too, and you’ll be amazed at how they can get into a place you thought impossible.
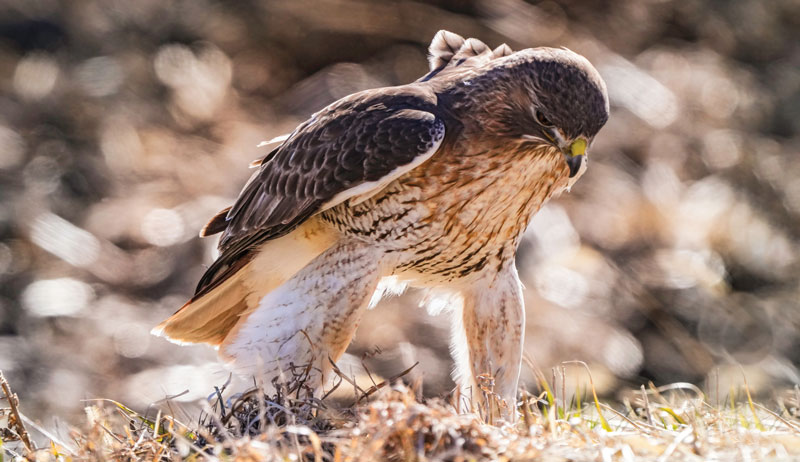
Hawks & Owls
Like snakes, several species of hawks and owls can affect your chickens. If you find chickens missing or a carcass plucked and eaten, chances are it was a hawk or owl.
Georgi Baird/Shutterstock
The difference is that hawks hunt during the day and owls hunt at night. Chickens locked up in a house at night aren’t susceptible to predation. The same holds true during the day. Chickens confined to a run are safer from avian predators.
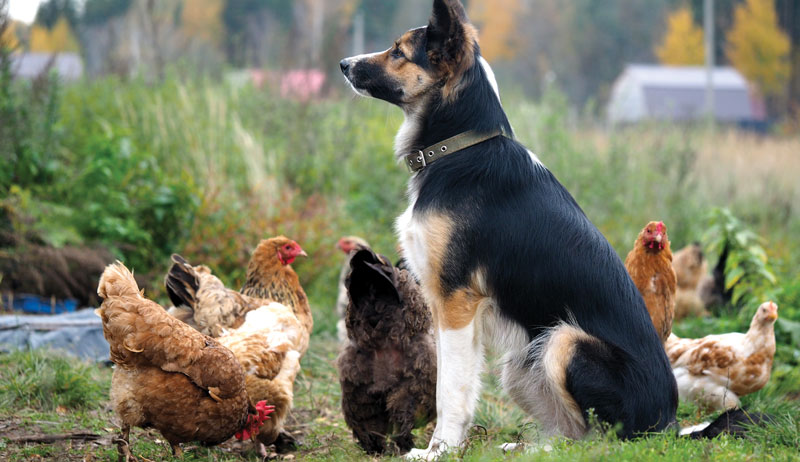
Pets
While dogs and cats hold a special place on our farms, they can also be deadly to chickens. Growing up, I remember a farm dog or two running through the hen flock for fun only to have their creator instincts kick in and a chicken end up dead. Alternatively, cats are deadly on chicks and chickens as well.
After all, they are predators. Predators will do what’s instinctual.
Irina Kozorog/Shutterstock
While there’s no one way to acclimate household pets to your chickens, just make sure your pets are fed well and often to eliminate the urge to take an easy meal. In addition, admonish your pets whenever they attempt to disturb your chickens.
Aside from your pets, watch out for feral animals like stray dogs and cats that may affect your flock. Feral cats are especially deadly to all kinds of birds. Therefore, use appropriate animal control measures to take care of any wild dog or cat problem.
Animal Control
If a predator is discovered, animal control is always an option. That means dispatching the animal by killing it or relocating it to another place. Whatever you think is the best course of action, you must check your local game laws and regulations to see what your options may be.
In general, for example, hawks and owls are protected animals, so you just can’t go around killing them. Do your homework, find out what you can and can’t do in predator control, and build your plan accordingly.
The best chicken predator control, though, is prevention. Stay diligent and predators will soon learn your chickens aren’t an easy meal. They will lose interest in your flock.
More Information
How to Adapt
Living with predators around can be daunting, but you can mitigate predator damage that they may do to your chicken flock with good planning. Diligence and fidelity to your flock is vital. It’s an ongoing job, and the better you stay on top of the potential problem, the safer your chickens will be.
It’s better to play offense against predators rather than be related to playing defense. With that in mind, follow these tips.
Scout with Game Cameras
Used by hunters to scout for game animals, you can employ game cameras around your chicken coop to be your eyes in the field to spy on what may be snooping around. A motion-activated basic camera will cost you about $50.
In contrast, cameras that instantaneously send an image to your smartphone cost a little more. Either is effective in helping you scout what’s snooping around your chickens when you aren’t there.
Check Your Pen Daily
This is a no-brainer, but it may be the most effective strategy. By checking your pen daily, you can look for holes in the wire or coop, dig marks around the outside of the enclosure, or animal tracks or droppings. You’ll be able to stay ahead of any developing threats.
This article originally appeared in the September/October 2022 issue of Chickens magazine.
If you’ve had a tough day (or week) or find yourself sore from throwing one too many hay bales around, you might have considered getting a massage. Therapeutic massages have grown in popularity and in the scientific literature over the years as researchers gather evidence that shows various massage methods really can be a significant benefit to humans.
But what about our animals? Have you ever considered giving your cow a massage? Don’t laugh. Livestock massage just might be the next new thing.
Hands on the Horse
Sports massage and physiotherapy in horses has a long history. There are numerous types of massage specialties available for equines. Some even come with certifications, such as CEMP (certified equine massage therapy). A quick Google search will likely locate at least one equine massage specialist in your area.
Riders of top equine athletes, from endurance horses to Olympic contenders, tout the benefits of regular equine massage. As athletes, horses develop tightness, trigger points and muscle knots just like we do. But they just can’t communicate this to us in nuanced ways.
It’s not infrequent that a stubborn but subtle lameness or behavioral problem such as bucking (or acting “sour” when the saddle goes on) is alleviated by a thorough physical exam followed by some physical therapy that includes massage.
OK, so horses are somewhat unique in that we actually ride them. But what about our other farm animals, like our beloved ruminants?
As public concerns over animal welfare increase scrutiny on the farm, many producers and hobby farmers are working on maximizing “cow comfort.” This concept supports the design of barns and other facilities with the animal’s natural needs in mind, such as stall space and access, as well as flooring considerations.
These aspects can make a big difference in how an animal moves, rests and interacts with her herd mates—all important pieces to her overall health and well-being. Adding to this, some farmers have installed cow scratching posts in various ingenious designs.
Imagine large bristle brushes that allow a cow to scratch her head, back and shoulders.
A paper published in 2020 tried to objectively develop a massage protocol for goats and measure their reactions to it. They concluded that, “Stroking massage promoted positive interactions between the masseur and the goats, especially when applied individually.”
So here we have scientific data proving that goats like being petted. While most goat owners already knew that, it’s useful to have this type of data in the scientific literature. It may encourage other researchers to study other types of human-animal interaction that may benefit overall animal welfare.
Now back to the original question: Can you massage your cow? Or rather, should you massage your livestock?
Researchers in Austria demonstrated that when heifers were spoken to in low, soft voices, their heart rates lowered, a reliable signal indicating their stress level decreased. A previous study by the same researchers indicated that heifers responded positively to gentle touch as well.
If you take what little information is available regarding physical human touch and ruminants and combine it with common sense and what we already know about interactions with our farm animals, it’s probably safe to conclude that there’s no harm in trying out livestock massage.
Who knows—if you get really good at it, you may wind up with referrals from across the fence line.