Categories
Chickens 101 Farm & Garden Poultry

Book Review: “The Small-Scale Poultry Flock, Revised Edition”

  • Title: The Small-Scale Poultry Flock, Revised Edition: An All-Natural Approach to Raising and Breeding Chickens and Other Fowl for Home and Market Growers 
  • Author: Harvey Ussery
  • Cover Price: $39.95
  • Publication Date: November 1, 2022
  • Publisher: Chelsea Green Publishing

Raising chickens without having a copy of Harvey Ussery’s The Small-Scale Poultry Flock to guide you throughout the process is like setting out on a road trip without a map (or a phone). You may still get there eventually, but with a lot of extra headaches along the way.

It’s been several years since I managed a farm with a sizable poultry enterprise. But when I did, The Small-Scale Poultry Flock was my go-to resource. 

The revised edition packs in even more information than the original, with revisions sprinkled throughout and new sections on topics like clan mating and Icelandics (one of my favorite breeds). 


Read more: Check out this collection of rare & heritage breed chickens!


A Diverse Audience

As its name would suggest, The Small-Scale Poultry Flock is geared towards readers with … well, small-scale flocks. Although this category might include a large number of homesteaders, there are plenty of commercial operations with small-scale flocks as well. 

Again, I personally consulted the book frequently while working with commercial-scale flocks of Black Australorps (as layers) and Buckeyes (as broilers). Numerous sections throughout the book—like those on health, nutrition, etc.—apply to all chickens, regardless of how many you have. 

Still, many parts of the book are geared towards smaller-scale flocks, either at a commercial or homestead scale. This is not, however, a guide book for someone aspiring to run an industrial poultry house.


Read more: The Black Australorp is a chicken-keeper’s favorite.


A Comprehensive Guide

I personally have only encountered a few questions about chickens that The Small-Scale Poultry Flock couldn’t answer. Ussery covers everything from housing (including mobile shelters) to feeding, breeding and butchering in substantial detail. He also discusses various creative ways to integrate your flock into your larger homestead or farm. 

As Ussery emphasizes throughout the book, a poultry flock can be an invaluable part of a farm’s ecology.

As someone who’s long fantasized about making the feed for my own chickens, I was especially impressed by Ussery’s chapter on the topic. He goes into substantial detail on various aspects of making feed, covering everything from ingredient options to storage, mixing and equipment.

Grounded in Experience

One of the things that makes The Small-Scale Poultry Flock unique is Ussery’s deep personal experience with the topics he discusses. Much (if not most) of what Ussery describes throughout the book is based on his decades of experience as a flockster. His deep passion for poultry comes through throughout the book.  

Overall, The Small-Scale Poultry Flock is an indispensable guide for homesteaders or market growers interested in doing it right. I personally have returned to the book again and again for both troubleshooting and inspiration, and have no doubt that I’ll do so with the revised edition as well. 

Categories
Crops & Gardening Farm & Garden Homesteading Urban Farming Video

Video: Save Seeds From Your Squash & Pumpkins

There are a number of reasons why we might want to save seeds from the squash and pumpkins we harvest in the fall. The first is economic. Saving seeds is like saving money. The more seeds we save from our garden this year, the less seeds we will need to purchase for planting next year. 

Another good reason to save our seeds is the preservation of the varieties. Let’s say you grow an old heirloom squash. By saving the seeds, you are doing your part to ensure that variety is preserved for future generations to enjoy.

If you grow for market, some of your customers might have come to love the varieties that you offer. By saving your seeds for next year’s garden, you’ll be sure to have that same squash to offer customers again next year. Depending on a seed catalog to always carry your favorite types is risky. If they suddenly quit offering the squash you were planning to grow, you’d be out of luck.

Unless of course, you saved your seeds! 

Another reason to save our seeds, and possibly the most important, is adaptation. Seeds harvested from your garden are adapted to your climate and your growing techniques. Simply put, seeds harvested from your garden will perform better in your garden than any seeds you purchase elsewhere.


Read more: Check out this video to learn the basics of saving tomato seeds!


How to Save Seeds from Squash & Pumpkins

The first step to successful seed saving is learning to identify mature fruit. We need to let our squash and pumpkins fully ripen in order to get mature viable seed. The squash will signal its ripeness by changing color, typically from green to orange.

Another way to test that your squash’s maturity is by trying to pierce the fruit’s skin with your thumbnail. A fully mature squash will have a hard outer shell. If you can damage the skin with your thumbnail, the fruit isn’t quite ready to harvest for seeds.

Once you’ve identified a mature squash, simply cut it open and remove the seeds by hand. Then we’ll need to wash the seeds to clean them of any bits of fruit. This can be done quickly and easily by using a colander and a garden hose.

If the inside of the squash is extra stringy and clingy, just toss the innards, seeds and all, into a bucket of water and allow it to sit for a couple of hours. The water will help break down the plant material and the seeds will drop to the bottom of the bucket. Dump them out onto a screen and give a good rinse.

Then, put your washed seeds out to dry on a screen or even on a plate. Make sure to label the seeds so you can remember which variety you saved!

Leave the seeds to dry for around seven to 10 days. Once they are completely dry, package them up. For packaging you can use a canning jar or similar container, an envelope, paper bag etc.

Again, make sure your seeds are well labeled, then store them away in a cool, dark place until it’s time to plants your seeds again next spring!

Categories
Crops & Gardening Farm & Garden

Explore The Healing Power Of Hemp

Hemp can be used as a fiber crop, for grain, seed oil and CBD production. It’s a textile, a food crop and a medicinal herb. This singular plant is so valuable that in 2021 more than 500,000 acres of American farmland were dedicated to industrial hemp production. 

This may not seem like much compared to the 90 million acres of corn grown in the U.S. that same year. But considering just 8 years prior, in 2013, total hemp production in the U.S. was zero acres, it would seem hemp might be the next big thing in American agriculture.

It doesn’t matter whether you own a small-scale hobby farm or an extensive for-profit operation. This versatile plant is sure to have something to offer everyone. 

A New Crop with an Old History

While hemp might seem like a new crop in today’s world of modern agriculture, this useful herb has been cultivated on this continent longer than the U.S. has even been a country. Hemp was first introduced to North America in 1606 and quickly became a favorite crop amongst colonial farmers. 

Hemp was used for to make cloth, sails, paper, rope and lamp fuel. This amazing plant was considered so useful that in the 1700s, American farmers were legally required to grow hemp on their farms. George Washington himself grew hemp on his estate, and the first American flags were made from hemp fiber.

Not only is hemp useful, but growing this incredible plant could be considered patriotic. 


Read more: Raise farm profits by growing hemp!


Hemp versus Cannabis

You may have heard these terms used somewhat interchangeably in conversation. But in the eyes of the law, hemp and cannabis are treated very differently.

Be sure to check with your local authorities before growing either of these crops to avoid any potential complications. This could be as simple as a call or email to your local extension office inquiring on the particular rules surrounding hemp production in your area. 

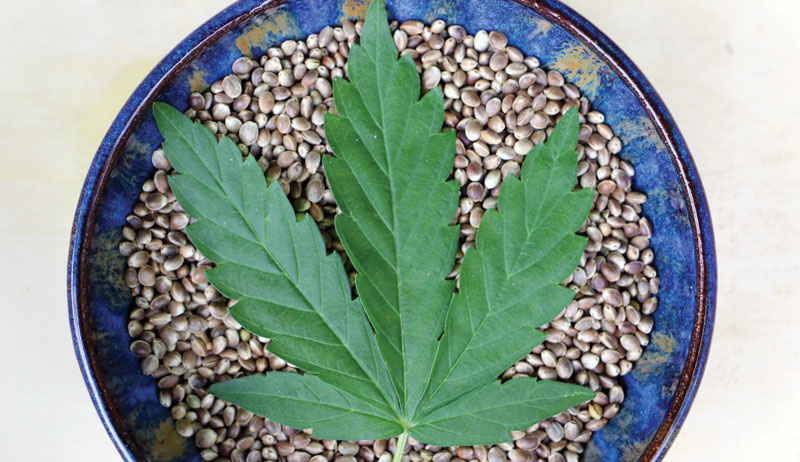
Although these two crops fall under different regulatory stipulations, they are in actuality different cultivars of the same species. To put it simply, hemp is any strain of Cannabis sativa that contains less than 0.3 percent THC (tetrahydrocannabinol, the main psychoactive compound in the plant).

It’s the hemp plant that is grown for its fibrous stalk, healthy seeds and flavorful oils. This is also the plant used to craft medicinal CBD products. On the other hand, the cannabis plant, with its much high content of the chemical compound THC, is grown for recreational uses. 

hemp leaf hempseed CBD

Growing Hemp

Hemp is a fast-growing plant that will thrive in most soil types and can produce a seed crop in 100 to 150 days, depending upon the cultivar. The plants require full sun, and the seedlings require consistent watering for the first few weeks. But once they are established, hemp plants are quite drought tolerant. 

Hemp plants are dioecious, meaning some plants produce exclusively male pollen-shedding flowers while others have entirely female pollen-receptive flowers. If hempseed is your goal, you’ll need a decent population of plants to ensure adequate pollination occurs in order to have reliable seed production. 

The female plants will hold the seeds. When these are mature, the seed heads can easily be cut off by hand using garden shears and collected. Larger-scale growers can use a combine to harvest and thresh their hempseed harvest. 

Seeds harvested by hand should be winnowed to remove any debris. Then they can be stored in food grade buckets or similar containers for up to a year. Add these seeds to salads, snack mixes or yogurt, or practically any other dish to add a crunch texture and deep, nutty flavor.

The seeds can also be pressed to release their vibrant, green oil.

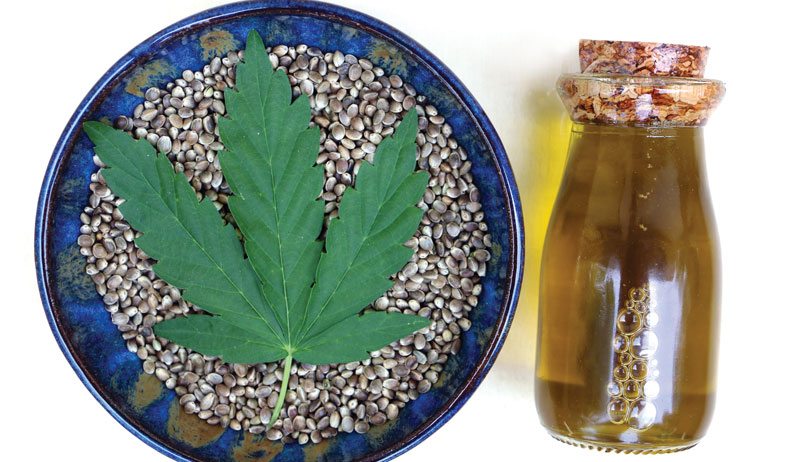
Pressing & Using Hempseed Oil

An acre of hemp will produce an average of 700 pounds of seed. In turn, this yield will produce about 22 gallons of oil.

This same acre of hemp will also produce more than 500 pounds of edible seed meal and almost 1,300 pounds of fiber, making hemp one of the most productive crops you can grow on a farm.

Hempseed oil is also very easy to produce on a small scale at home. Using a simple, hand-turned expeller press, one can produce all of the hempseed oil one might need for a week or more in just a couple of hours’ time.

These basic machines are relatively inexpensive and widely available online. 

With a little bit of creative engineering, these machines can be upgraded to a motorized model. Or, for an off-grid approach, consider converting to a bicycle-powered oil press, making the work easy and fun.

On my farm, we’ve pressed hempseed oil on a Piteba-brand oil press for more than a decade. This single piece of equipment is all we’ve ever need to press plenty of oil for our family’s needs. 

Due to it low smoke point, hempseed oil isn’t meant to be used in high-heat applications such as baking or frying. But it’s ideal for any cold culinary applications where the green, nutty flavor and nutritional benefits of the oil will remain intact.

Try it in salad dressings, marinades or as a finishing oil drizzled on roasted meats and vegetables. Add it to smoothies for a serious nutrition boost. Hempseed oil is rich in omega-6 and omega-3 fatty acids, antioxidants, vitamins A and E, and minerals such as calcium, zinc, magnesium and potassium. 

This nutritious oil is also a perfect choice to include in handcrafted lotions, salves and other herbal wellness products. Hempseed oil is very moisturizing and can be used topically to soften skin and eliminate fine lines, wrinkles and other signs of aging.

The anti-inflammatory oil is also an excellent treatment for acne, as it unclogs pores and reduces scarring. 


Read more: New to hemp? Beware bad actors when purchasing seed.


Hempseed Cake & How to Use It

During the oil extraction process, the hempseeds are crushed and squeezed in the press, coaxing out the flavorful oil. What remains of the seed, after the oil has been removed, is known as the press cake, or seed cake.

This seed cake may be the byproduct of oil production, but it’s certainly not to be wasted. Hempseed cake is completely edible and contains great nutritional value. 

Although a hempseed contains approximately 30 percent oil, it’s impossible to extract all of the seed oil using mechanical extraction methods. This means the seedcake itself still carries a notable amount of oil and provides valuable nutrition.

Pressing your own hempseed oil at home is essentially a zero-waste operation!

For household use, you can mill your hempseed cake into a fine powder using a food processor, and add it to breads, pancakes, smoothies or any other dish that might call for whole hempseeds. I substitute about 14 cup of milled hempseed cake for flour in my regular bread recipe. It bakes up a tasty and healthy loaf, perfect for sandwiches or even my morning toast. 

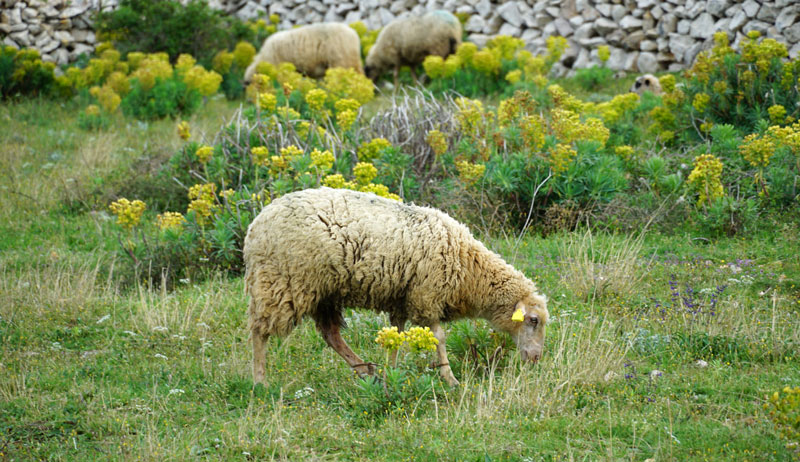
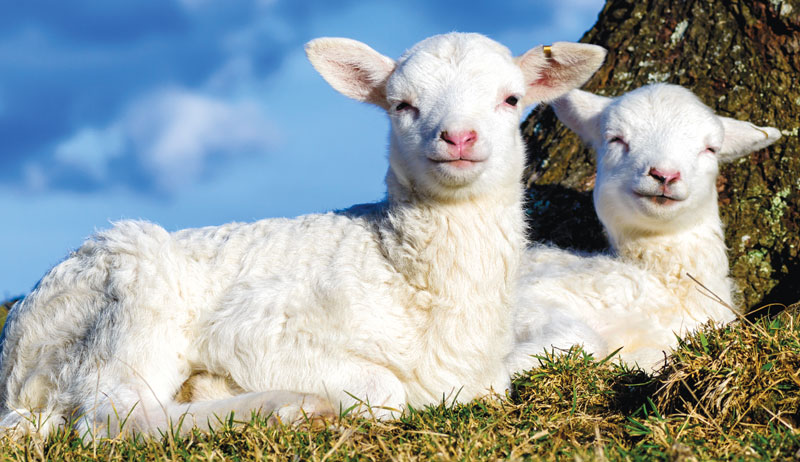
Hempseed cake is also a valuable feed supplement for small livestock. The seeds are high in protein, and sheep, goats and pigs just absolutely love the hempseed’s fresh, green taste. We add crushed hempseeds to our chicken feed as well, and the resulting eggs have a rich flavor and deep, almost orange-colored, yolks. 

Feeding your animals this nutritionally dense food has a notable impact on the quality of their meat, too. Homegrown meat is always better than the mass-market alternatives. But the addition of hempseeds to your livestock’s diet will take their flavor profiles and nutritional values to a whole new level of yum! 

hemp chickens leaf hempseed CBD

Using CBD Around the Farm

CBD, or cannabidiol, is the second most prevalent chemical compound in cannabis plants. It’s also the term used to refer to cannabis products made by extracting this particular compound from the leaves, stems or flowers of the plant. 

CBD oil is produced by extracting CBD from the plant material and diluting it in a carrier oil, typically made from hempseed or coconut oil. CBD tinctures, on the other hand, are made by steeping cannabis plant material in high-proof alcohol solvent.

Both of these methods are effective in extracting the beneficial components from the hemp plant and are often used as the main ingredient in consumable as well as topical wellness products. 

CBD is said to be useful for relieving anxiety, inflammation and chronic pain. The scientific evidence is minimal, but anecdotal evidence in support of these claims is quite widespread. 

Many small-scale farmers have begun utilizing these products around their farm, often as part of an overall wellness regimen for their animals. CBD is also said to increase appetite resulting in weight gain, which is ideal for beef and pork producers. 

Some farmers are finding success giving their animals CBD products for anxiety to help keep the animals more relaxed during transport. It’s widely believed that extreme stress before butchering can negatively impact the flavor of the meat. So the calming effects of CBD might come in handy for this as well. 

It’s important to note that CBD or any other hemp-containing products haven’t been approved by the FDA for use in animals as drugs or food/feed supplements.

Farmers might also benefit from using some CBD on the farm, too. Many topical products are available that are said to be quite effective at relieving sore and tired muscles, an ailment all too familiar to anyone working on a farm.

In addition to this, CBD is thought to help promote a restful night’s sleep. Good rest is critical to a productive day’s work.

Hemp is an ancient plant that offers us many modern uses. Whether it’s for food or medicine, hemp is easy to grow and even easier to use. Learn how to grow, harvest and press your own hempseed oil with my book The Complete Guide to Seed & Nut Oils from New Society Publishers, now available wherever books are sold. 

This article appeared in Healing Herbs, a 2023 specialty publication produced by the editors and writers of Hobby Farms magazine. Aside from this piece, Healing Herbs includes articles on preserving herbs, container herb gardening, tea advice and more. You can purchase this volume, Hobby Farms back issues as well as special editions such as Hobby Farm Home and  Goats 101 by following this link.

Categories
Animals Farm & Garden Large Animals

Use These Herbs To Maintain Sheep Health

Looking for more natural ways to treat you flock of sheep? Consider using homegrown herbs! These beneficial plants continue to prove effective for livestock and humans alike.

What follows is hardly a formal class in herbalism and shouldn’t be considered such. But below, we do provide a basic list of herbs regarded as safe for use by and treatment of sheep.

You have options, too, when administering herbal treatments. You can add herbs to your flock’s food, rub the oils on your sheep’s body or simply allow the animals to graze on the herb.

Let’s look at some common herbs to used by shepherds to keep sheep healthy and aid when health issues arise. If you wish to use herbs for your flock, consider investing in books on herbs to acquire exact dosage and preparation instructions. 


Read more: Chickens love these tasty, nutritious wild herbs!


Common Herbs for Sheep Health

  • Garlic: This allium is used to control the worm burden in sheep.
  • Lavender: Lavender is often used to treat hoof rot 
  • Tea Tree: When mixed in a solution, it can cure fly strike and bug bites.
  • Oregano/Sage/Rosemary: This blend, when added to sheep feed, has proven itself to be a winning combination for lengthening the shelf life of feed. It also can generally improve the health of a flock of sheep when ingested.
  • Yarrow:  Yarrow is commonly used as astringent for cleansing wounds, and the herb also serves to repel flies.
  • Echinacea: The whole plant can be given to treat inflammation as well as boost you animals’ immune systems.
  • Mints: This genus of plant is known to aid digestion and relieve bloat.

Learning to use herbs to keep your sheep healthy and assist when issues arise is cost effective, natural and rewarding. You can use supplements and herbs to keep sheep healthy all year, a natural preventative and powerful defense against problems that do occur.

Overall, herbs provide a plethora of ways to promote and sustain the general health of your sheep. 

Categories
Animals Beekeeping Farm & Garden

At Sassy Bee Honey, Micro Apiaries Are A Passion Project

Categories
Podcast

Episode 37: Kirstin Bailey

Sweet PDZ banner


Hobby Farms Presents: Growing Good Kirstin Bailey

Nebraska farmer Kirstin Bailey talks intergenerational farming, farm transitions, and the free support for farmers offered by the Center for Rural Affairs.

Hear about the four generations of Kirstin’s family living on Fox Run Farms, where they grow fruits and vegetables and keep bees. Kirstin talks about planning a farm business in a rural area, accessing nearby urban markets and bringing the community to the farm. Learn about what it’s like to farm in a place that swings from 100-degree-F-plus temperatures in the summer to -16-degree-F temperatures in the winter.

With a farm that’s been in her family for 123 years, Kirstin talks about how her family has made intentional decisions about succession planning and farm transitions, including the importance of having support to create new farm enterprises to keep the farm viable through the years. Learn about the free support that the Center for Rural Affairs offers to beginning farmers, from business planning to crop- and livestock-specific training. Kirstin has a great success story about a beginner veteran farmer who’s gone through CFRA programs and now has his own thriving farm. 

You have to listen to the end to hear Kirstin’s advice for getting your farm dreams started and keeping them moving! Plus, Kristin shares with us her 13-year-old son’s farm dreams and a little shot of hope for the future of family farming in rural America.

Categories
Animals Farm & Garden Health & Nutrition Poultry

Beyond Poultry Keeping: Becoming An NPIP Tester

Flock keepers wishing to expand their love of chickens beyond their backyard may choose to pursue certifications or degrees in such poultry specialties as meat production, farm management and business.

But not everybody can spare the time for collegiate-level courses, either on or offline. For those chicken owners wishing to give back to their local poultry community without devoting years to study and preparation, one excellent option is to become an NPIP tester. 

What Is NPIP?

The National Poultry Improvement Plan (NPIP) launched in 1935 with the goal of eliminating Salmonella pullorum, a highly contagious avian disease that, in the 1930s, caused up to 80-percent mortality in infant poultry.

Over the years, the NPIP expanded to monitor and test for other diseases including Fowl Typhoid, Avian Influenza, and Mycoplasma. As a cooperative program between the federal governments, state governments and the poultry industry, the NPIP strives to prevent disease, enhance international trade, and  improve poultry and poultry products through the use of new diagnostic technologies. 

What Is an NPIP Tester?

Sick birds can quickly spread contagion when brought together in such social situations as county fairs and poultry exhibitions. Similarly, sickness can cross state lines when breeders sell infected chicks or adult birds to customers.

NPIP testers blood-test flocks to certify them as Pullorum and Fowl Typhoid free, a necessity for dedicated breeders. (Most states prohibit the entry of poultry not certified as Pullorum-Typhoid free.)

NPIP testers also conduct blood testing at poultry exhibitions and fairs to screen and catch infected birds before they enter the competition grounds.


Read more: What can you do when your chicken tests positive for disease?


How Does One Become an NPIP Tester?

Each state has its own parameters and certification program, managed by the Official State Agent (OSA), that administers the NPIP. Typically the OSA offers one or two workshops per year, open to anyone who wishes to be certified as an NPIP tester. A certification workshop can last one to two days and involves both seminars and hands-on training.

Those who pass the examination at the end of the workshop can be certified as NPIP testers. The costs of the workshop and the certification vary from state to state. To learn more about NPIP certification workshops in your state, contact your local OSA.

What Happens Once Certified as an NPIP Tester?

Once your OSA certifies you as an NPIP tester, your name will be added to your state’s database of testers. Any poultry farmer in your area wishing to have their flock certified as Pullorum-Typhoid free will be given your contact information to call and set up an appointment for flock testing.

Likewise, local fairs, poultry exhibitions and 4-H competitions may reach out to you  for assistance testing birds. It never hurts, however, to contact your favorite events to let them know of your availability.

Be aware, however, that you will need to renew your NPIP tester certification every three years. Your OSA will contact you when you are due for renewal. 


Read more: Check out these 7 steps for preparing chickens for the fair.


What Every New NPIP Tester Should Know

As an NPIP tester, you will need specific equipment to carry out your duties. Your OSA should provide you with a list of necessary supplies—ranging from disposable gloves and blood-gathering loops to lighted testing boards—and sources where these can purchased.

The most expensive item you will need is the antigen, or serum, necessary for testing.

A 14ml bottle typically costs about $120. Because it must remain refrigerated, shipping can be costly.

The flip side to this is that NPIP testers set their own rates. You can charge for your services by the bird or by the flock. If you charge by the flock, make sure to scale your pricing according to the size of the flock. This way, you won’t show up expecting to test a backyard quartet of hens only to encounter a small-scale farm with 300 birds. 

Categories
Farm & Garden Food Foraging Recipes

Book Review: “Wildcrafted Vinegars”

  • Title: Wildcrafted Vinegars: Making and Using Unique Acetic Acid Ferments for Quick Pickles, Hot Sauces, Soups, Salad Dressings, Pastes, Mustards and More
  • Author: Pascal Baudar
  • Cover Price: $34.95
  • Publication Date:  October 18, 2022
  • Publisher: Chelsea Green Publishing

I have to admit that prior to reading Pascal Baudar’s Wildcrafted Vinegars, most of my at-home experiments with vinegar failed.  I ran into mold issues, off-flavors and almost-vinegar mixtures that never behaved quite like they should have. 

Now, having read the book, I can see why.  I never fully appreciated (or studied) the science of making vinegar.

Thankfully, Pascal Baudar has. His new book is an excellent resource for the novice (or experienced) vinegar maker. Although the book focuses on making vinegars with a variety of foraged ingredients (think foraged berries, mushrooms, etc.) many of the recipes also involve cultivated ingredients.

Why Make Vinegar?

So, why bother making your own? Unless you’re willing to pay a premium at specialty shops, most grocery-store products leave a lot to be desired. And, the selection tends to be quite limited. 

Once you learn how to make your own vinegar, on the other hand, almost infinite doors open. Wildcrafted Vinegars, for instance, contains recipes for vinegars that incorporate everything from elderflowers to seaweed and smoked hay.

Plus, making your own vinegar is a lot more fun (and fulfilling) than spending more money at the store.

Beginning with the Basics

Unlike many cookbooks (if you can call it that), Wildcrafted Vinegars does more than simply catalog a bunch of recipes. Baudar begins the book by explaining various techniques to make vinegar, as well as the science behind these techniques. 

After walking you through the basics, he then spends some time exploring more alternative methods, like making vinegar from a wild yeast starter or from store-bought juice.


Read more: Pascal Baudar’s Wildcrafted Fermentation is fermentation for foragers!


Exploring Your Local Landscape

Baudar also dedicates a decent portion of the book to infusion, exploring the techniques and possibilities behind infusing your vinegars with a variety of (mostly foraged) ingredients. Although the whole book feels immensely creative, this section was especially eye-opening for me. Who’s ever heard of infusing vinegars to give them a more potent flavor, let alone with ingredients like seaweed? 

Baudar makes a more than convincing case for doing so, however, and for exploring your environment to create vinegars that capture the flavors of your local landscape. 

A Variety of Uses

In case you mistakenly believed that vinegar is just for salad dressings, Baudar dedicates most of the second half of the book to exploring the many uses for his vinegars. Sure, there are some recipes for salad dressings, but there are also recipes for salsas and mustards and hot sauces. 

Baudar even provides an assortment of pickle recipes, and recipes incorporating vinegars into a variety of soups and drinks.

Overall, Wildcrafted Vinegars is an exhilarating and exhaustive guide to both making and using vinegars.

Categories
Equipment Farm Management

Tiny Time Savings Can Add Up Around The Farm

I’ve always been fascinated by how quickly time can fly by, especially on the farm, and how small amounts of time spent repeatedly can add up into hours, days, weeks….

Let’s provide some examples. A mere 15 minutes per day adds up to a staggering 91.25 hours per year—that’s 3.8 days, and 5.4 “awake days” if you figure on sleeping seven hours per night.

Numbers like these provide a strong incentive to perform tasks as efficiently as possible. Not quickly, mind you—haste makes waste. But efficiently, without wasting time unnecessarily.

Certainly farmers ought to have a healthy appreciation for efficiency. It seems like there are never enough hours in a day to get done everything that we would like to get done.

Working efficiently takes on many different forms. It might involve creating dedicated toolboxes for various projects (like fencing repairs), so when an issue pops up, you don’t have to spend time gathering the right collection of tools and supplies from all over your farm.

Or—and this is a big one—it might require eliminating small and barely noticeable time drains around the farm that add up to big time savings.


Read more: Organizing your tools can save you time and effort!


Go with the Flow

Let me give you an example. I recently came to the conclusion that the heavily used yard hydrant in my farm’s barnyard no longer delivered the water pressure it once did. It was a subtle change, but filling water buckets, jugs and tanks was taking longer than in the past.

It’s easy to let these small time losses slide. But again, they really add up. If I’m spending an extra five seconds filling a 5-gallon bucket, and I fill 20 of these buckets per day, that’s 100 seconds per day and more than 10 hours per year. I can get a lot of other projects done in 10 hours!

So the other day, while waiting for a 35-gallon leg tank to fill, I examined the mechanics of my yard hydrant’s handle. A rod running down a vertical pipe in the ground determines how much water flows through the hydrant. The higher the rod is raised by the handle, the more water flows through.

A small gear is supposed to determine how hard the hydrant can be turned on. But even though the gear was set to allow full pressure, the handle didn’t pull the rod as high as it should.

After studying the handle, I realized the issue was the connection between the handle itself and a pivoting part on which the gear is installed. The length of the connection is adjustable by screwing the pivoting part and handle closer together or further apart.

Clearly they weren’t screwed together tightly enough.


Read more: Water your orchards effectively with a 35-gallon leg tank.


Take a Minute to Save Hours Down the Line

Once I stopped and thought about it, I vaguely remembered adjusting the length of the connection during a previous hydrant repair job, not realizing it would affect the water pressure. I quickly disassembled the handle, shortened the connection and put it all back together. I was delighted to find my yard hydrant delivering strong water pressure just like the old days.

I probably spent 20 minutes adjusting the handle. And 20 minutes can be hard to set aside on a busy day, especially when my yard hydrant was technically working fine. But I’ll gain back those 20 minutes (and many, many more) thanks to the water-dispensing efficiency offered by proper hydrant water pressure.

The takeaway? Go ahead and spend the time to save time. If 20 minutes can save you hours over the course of a year, that’s a terrific return on time investment.

Categories
Animals Beginning Farmers Farm & Garden Large Animals

Raise Sheep On Small Farms For Economical Meat

Sheep are the perfect source of red meat for beginning homesteaders. Besides being a safer animal to interact with, their small size makes them manageable and more sustainable on small farms. As a bonus, their meat is known for its tenderness and delicate flavor that is somewhat similar to beef. 

However, sheep are also known for squeezing the wallet if they don’t have a large tract of land to graze on. Fortunately, beginner homesteaders with small acreage can cut costs and economically raise sheep on as little as half an acre. 

Using Bottle-Fed Lambs

Buying sheep can be the largest sum of money you invest in raising them. Depending on the breed and age, a sheep can cost anywhere from $100 to $1,000. However, you can get a sheep for free—or at least less than $50. 

Depending on where you live, sheep farmers often get what are known as “bum” lambs or “bottle-fed” lambs. These lambs are orphaned because their mother has died or abandoned them. In these cases, it’s often more of a hassle for the sheep farmer to raise the lamb than to give away or sell it.

This is where you have an opportunity to get free or low-priced lambs.

A simple internet search of the sheep farmers in your area can connect you with a farmer with bottle-fed lambs. You might find that the sheep farmer you first contact doesn’t have bottle-fed lambs. But sheep farmers are a close-knit community and often network together.

If the shepherd you have contacted doesn’t have bottle-fed lambs, he or she probably knows a farmer who does. 

sheep meat lambs lamb small farms
Fercast/Shutterstock

Bringing Home a Lamb

When you bring your lamb home, you should have already prepared a small enclosure for it. Still, some people are willing to share part of their house with their lambs, especially in the winter when lambs are more susceptible to the cold. But even though lambs are almost puppy-sized for the first few weeks of their lives, they grow fast. 

Overall, keeping lambs indoors is feasible but might end up being more than you care to deal with. The preferable course of action is to have a warm and dry outdoor enclosure, such as a shed or barn.

If you don’t have this setup but still want to go cheap and simple, don’t worry. You can build a shed inexpensively out of old shipping pallets, usually available for free or at low cost in construction yards. You can also apply cheap but durable insulation by wrapping a waterproof tarp or construction plastic around the structure. 

Early Weaning

Milk replacer is necessary for your lambs, although expensive. Common advice is to give lambs milk every two to four hours. But feeding this often can really add up the dollars and may cause diarrhea.

As if that wasn’t expensive enough, lambs have a 14-weak weaning period! At that rate, the cost of just your lambs’ food may not make raising sheep worth it. The best way to get around this expense is early weaning. 

Fortunately, you’ll find that lambs, in early spring climates and with proper shelter, survive very well on only one bottle in the morning and in the evening. That significantly cuts milk costs, but you must still contend with that 14-week weaning period.

The sooner you get your lambs entirely off the bottle and grazing on their own, the less you’ll have to spend unnecessarily. 

Somewhere around the third or fourth week, you’ll probably notice your lambs eagerly trying to nibble grass. They won’t be very good at it, but it’s a good time to take half a bottle away to see if they’ll start shifting to a grass diet. 

To help your success in early weaning, make sure your lamb is outside and around plenty of grass so that they have a chance to explore it as a food source. Once they figure out that they like grass as much as milk, they’ll become dependent on grazing instead of bottle-feeding. Then you’ll no longer have the expense of milk.


Read more: Sheep and goats bring year-round value to the small farm!


Rotational Grazing

Now that the milk is gone, you must deal with having enough feed for your growing sheep. Grain may be an automatic thought, but sheep farmers are finding that, in addition to being expensive, grain makes sheep meat fatty, affects the meat’s flavor and isn’t necessarily the sheep’s natural food source.

A grain diet would be comparable to a human living on cereal 100 percent of the time. Also, if you intend to sell sheep meat, many customers—especially when buying from smaller farms or homesteads—opt for grass-fed-only meat. 

Unless you plan on feeding your sheep through the winter (in which case, hay would be the best food source) the best diet for sheep is a grass-only diet.

At first, this may sound inexpensive because. After all, grass grows everywhere! However, sheep eat through grass like lawnmowers. Also, once they go through the grass blades, they’ll try to pull up the roots, killing the grass and potentially causing themselves dental problems. 

But even if they don’t eat the roots out, their hooves alone can damage the grass and grass roots if they’re kept in the same area long enough. This can leave you with a dirt-patched field that might take years to recover and won’t sustain your sheep until harvest time.

In short, grass feeding can turn into a damaging and expensive way to feed sheep.

Is there a simple solution? Yes—when the sheep eat the grass down, move the sheep.

A popular method used by many homesteaders with little land is rotational grazing. This method sections off a pasture into multiple small sections. The livestock then rotate into the different sections every two or three days. 

The health of your pasture, the rate of your grass growth and how many sheep you have will determine how often you need to move your sheep. A good recommendation for small homesteaders with only half an acre is to start out with no more than two sheep. This small flock will safely allow you to see if your pasture is hardy enough to support sheep until harvesting time. 

Overall, this rotational system ensures you can control how much your sheep eat and that they don’t overtrample or overeat the grass into oblivion. It also ensures grazed grass has time to regrow.

Also, because the sheep leave their manure behind when moved into different sections, the grass will be fertilized and grow back richer. Overall, rotating your sheep helps save money on feed and keeps your fields healthy throughout the spring and summer months. 

sheep meat lambs lamb small farms
Jessica Jainchill

Inexpensive Enclosures

Rotational grazing may save you money, but then comes the problem of sectioning off your pasture. This expense can surpass even the cost of purchasing a full-priced sheep. Also, you may not even be sure that raising sheep is right for you.

Of course, you don’t want to invest in an expensive fence if you’re only going to use it for one year. The usual go-to, electric fencing, quickly becomes expensive when you fence off multiple sections of land.

Fortunately, alternative solutions are available to pick from, each with its own pros and cons. 

The most direct and inexpensive enclosure is a mobile one made from cattle panels. You can purchase panels at different sizes and connect into triangular or square enclosures, depending on your preference. Enclosures of this size are light enough to move easily and can sustain about two sheep if moved once every day or two. 

However, moving it will require you to either drag it (which can damage the paneling over time) or enlist extra hands to help safely move the enclosure. Also, if you want a sturdier structure, you’ll want to drive in T-posts by each panel.

Bracing the paneling with T-posts keeps the sheep from bending the paneling when they lean or rub against the panels, which hair sheep do when they shed. But T-posts will have to be pulled out, moved and redriven into the ground every time you move the mobile enclosure. Whether done by one person or multiple people, removing paneling and driving in the posts can take up to 30 minutes. 

If this method sounds too tedious for you, a mobile sheep pen with a wheeled frame might be more to your taste. You can buy this type of mobile enclosure or make it yourself if you happen to be good at welding.

Wheeled mobile pens have a metal frame at the base with two removable wheels on either side of the frame. This allows one person to pick up one side of the pen and move it without causing panel damage. Though mobile pens can seem expensive, in the long run they save time and keep money in your pocket by preventing wear on your panels. 

But you don’t necessarily need a mobile enclosure. If you have the time, you can build a permanent enclosure and graze your sheep by leading them out to pasture every day. Because you have been your bottle-fed lambs’ food source for most of their lives, they’ll likely follow you wherever you go.

In other words, wherever you are is where they graze. This is great because sometimes you can’t enclose all of the good grass sources on your property. 

If you choose to graze your sheep by leading them to pasture, note that this works best with bottle-fed lambs. But if you aren’t using bottle-fed lambs, you may use a bucket of sweet feed to bribe your sheep until they see you as a food source and someone to follow.

With that in consideration, this method allows you to lead your sheep wherever you want them to graze and bypass a mobile enclosure altogether. 


Read more: Should you feed your sheep kelp meal? We look into the issue.


More Information

Colostrum Concerns

When you find bottle-fed lambs, make sure they have colostrum. Colostrum is the important, nutrient-packed milk that the ewe gives her lamb when it’s born. Ingesting colostrum at the beginning of their lives is essential to your lambs’ survival since colostrum gives them the proper nutrients to boost their immune system during their first few weeks when they’re most susceptible to disease and infection. 

If you’re bringing home newborn lambs, make sure the sheep farmer has already given them colostrum or has some colostrum for you to feed them later. You should also make sure the lamb ingests the colostrum within 12 hours after birth. 

This article originally appeared in the July/August 2022 issue of Hobby Farms magazine.