Categories
Animals Beginning Farmers Farm & Garden Large Animals

Donkeys Make Great Small-Farm Livestock Guardians

The 120-acre ranch in Red River County, Texas, was an appealing change when Gary Wallace retired after 47 years of teaching and began raising cattle. Unfortunately, the coyotes viewed his calves as a convenient food source. When Wallace contacted his local extension office, the county agent said the federal government could train ranch owners to get certified to use cyanide to kill coyotes and gave him a handbook on deterring predators.

“After I read the last chapter, it said a simpler way was to use donkeys, llamas or livestock guardian dogs,” says Wallace, who opted to skip the poison. Rather, in 2005, he bought his first guardian donkey.

The long-eared solution worked better than he could have imagined, and the ranch stopped losing calves to coyotes. He watched in amazement as the donkey would stand guard near the cows when they calved.

Wallace joined the ranks of livestock owners who realize the value of donkeys as guardians.

In southeast Tennessee, Angelia Silvera came to the same conclusion after trying livestock guardian dogs and llamas to protect her sheep and goats. “The last guardian dogs I had barked so much,” she says. “Even with good fencing, some would climb over or dig under. They are high-energy dogs and need a lot of space.

“Guardian dogs can be very aggressive to poultry and young livestock. One of the llamas was very aggressive and would spit all over.”

She found donkeys less noisy and less challenging to fence than guardian dogs. Since getting her first guardian donkey in 2011, Silvera began rescuing and rehabbing them, eventually becoming a donkey trainer. She’s taught them to help with farm chores, including hauling compost and pulling a cultivator.

Silvera also hikes with donkeys and has taught them to carry a pack to accompany her on mushroom foraging expeditions in the woods.

On Long Arm W Ranch, Wallace was so impressed with donkeys that he quit the cattle venture altogether and began selling guard donkeys. “Donkeys are powerful, smart and a joy to be around,” he says.

“It grew to a huge business in my retirement years. At one point, I had as many as 65 guard donkeys for sale and had people coming from all over the U.S.”

Wallace maintained the business until a heart attack in 2020 limited his ranching abilities. (Although Wallace sold the operation, Long Arm W Ranch is still in business.)

How Donkeys Protect

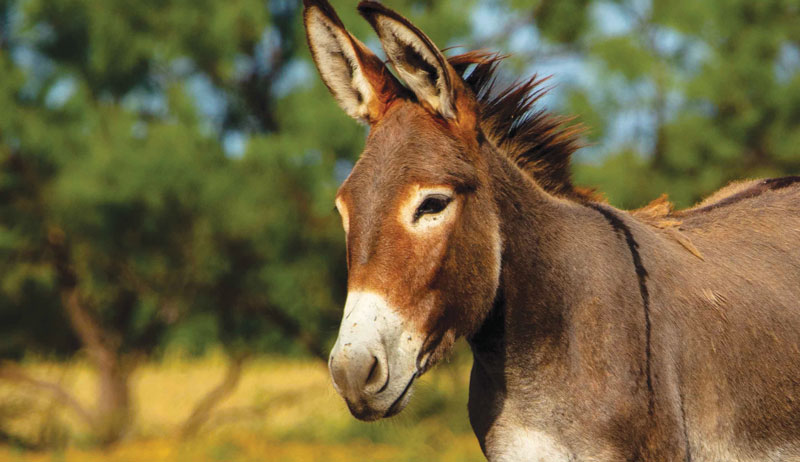
Donkeys have an inherent caution and dislike of canines. Unlike horses, which instinctively flee from any perceived danger, donkeys tend to stand their ground and think through the situation. Donkeys only run if they deem retreat prudent. 

When a canine enters their territory, the donkey often brays loudly and approaches the threat. Some donkeys will charge, which is usually enough to make the predator retreat. When attacking, donkeys use hooves and teeth to get their point across. They will strike out with their front feet, kick with their hind feet and bite.

Although witnesses have seen donkeys kill dogs and coyotes, in most situations, the donkey’s presence and assertive stance is enough to send canine predators looking for easier prey. Donkeys can’t be expected to fend off apex predators, such as mountain lions, bears or wolves.

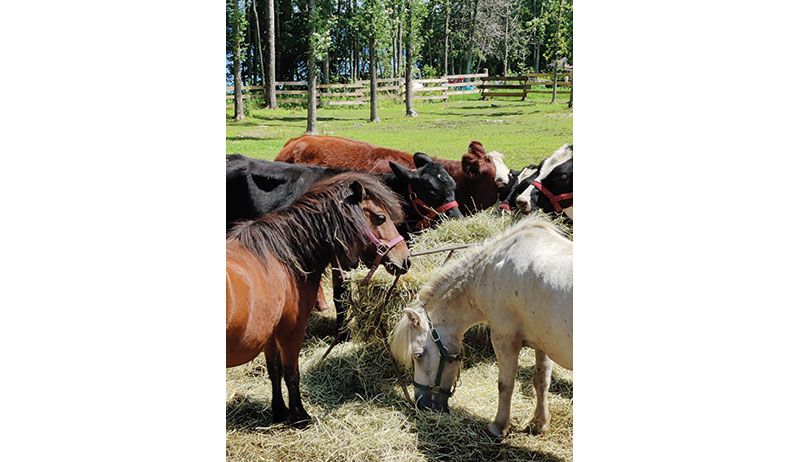
 “Donkeys are most commonly used to protect sheep, goats and cattle,” says Mark Meyers, founder and executive director of Peaceful Valley Donkey Rescue, the largest donkey rescue organization in the U.S.

“They are especially good during calving season because they will stand guard when cows go off to calve.”  Headquartered in San Angelo, Texas, PVDR has satellite facilities in several states. Since its founding in 2000, the 501(c)(3) nonprofit organization has rescued more than 13,000 donkeys. 

“We manage 5 12 million acres of wild donkey habitat and are working with the National Park Service in federal parks that have a zero-donkey policy,” Meyers says. 

Whenever possible, PVDR’s goal is to gentle and adopt out donkeys rescued or removed from the wild. PVDR had its own guardian donkey-training program, which it ended in 2019.

“We felt it sent the wrong message. Our adoption contract calls for equine companionship and requires people to adopt two donkeys unless they already have another equine. We also found that one out of 10 donkeys ended up killing the animals they were supposed to protect,” Meyers says, noting that not every donkey is cut out to be a guardian.

Some believe that donkeys only protect livestock because they are guarding their territory—not the animals themselves. Meyers has seen otherwise.

“I had a donkey that killed two dogs that attacked me when I was out walking because she was guarding me. They’re very protective of each other and whatever they’re bonded to,” he says.

Avoiding Mistakes

Uninformed buyers make several mistakes when it comes to guardian donkeys, including:

  • Buying male donkeys for guardians
  • Expecting a miniature donkey to be a guardian
  • Buying an old donkey
  • Trying to use multiple donkeys as guardians
  • Improper introductions with livestock
  • Turning the guardian into a pet
  • Improper care and feeding

“Jacks are often the cheapest donkeys, and inexperienced people often end up buying one for a guardian,” Silvera says. 

“Males make terrible guardian donkeys,” Meyers says. “We get calls all the time from people who got a male (jack or gelding) guardian and regret it, because they turned on the animals they were supposed to protect.”

For best success with a guardian donkey, the go-to choice is a single jenny (female donkey). 

“If you’re getting a guardian donkey, you want her to bond with the herd, so you just want one,” Meyers says. “Don’t get a mother donkey and her foal and expect them to be guardians because they will bond together.”  


Read more: Miniature Mediterranean donkeys make great companions!


Size Matters

As darling as miniature or Mediterranean donkeys are, they aren’t good guardian candidates. These small donkeys stand about 32 to 34 inches tall and weigh between 200 and 375 pounds. They can’t be expected to guard against predators and may end up being prey themselves.

When looking for a guardian, you want a standard donkey, which range in height from about 12 hands (48 inches at the withers) to 13 hands (52 inches) and weigh around 400 to 500 pounds.

Handling Basics for Donkeys

At the very least, the donkey should be halter broke and stand well enough to have her hooves trimmed, and for the occasional veterinarian visit.

“Many people who get a guard donkey don’t have a trailer. The farmer just drops it off, but that donkey may not even know how to lead,” Silvera says. 

You may be told the donkey is gentle. As Silvera points out, though, “gentle and friendly” doesn’t mean trained.

Getting Ready 

Before you take on a guardian donkey, line up both a veterinarian and farrier experienced with donkeys.

“Donkeys need their hooves trimmed, their teeth done and vaccinations just like a horse,” Meyers says. “Most farriers won’t touch a donkey unless it’s trained to stand for its hooves to be done. Bad hooves are one of the most common things we see in donkeys.”

“Hoof care is important,” Silvera says. “If donkeys have overgrown or poor feet, they can’t be good guardians. If your donkey can’t run, it can’t guard!”


Introduction to Livestock

You’re asking for problems if you buy a donkey and immediat

livestock guardian animals donkey donkeys
Mark Meyers

ely turn them into the field with the livestock they’re expected to guard. As excited as you may be to introduce your new guardian to the herd, don’t rush the process. The donkey has likely just been trailered to your place and everything is new.

“You need to give the donkey time to get over the stress of travel,” Meyers says. Put the donkey in a fenced enclosure by herself so she can decompress for a few days and settle into her new environment.

The next step is to put the donkey in an area with a common fence between her and the animals you want her to protect, whether that be cattle, sheep or goats. Having a fence between them is important at this stage so you can gauge the donkey’s response for two or three days.

If there are any negative reactions on the part of the donkey, such as tail swishing, stomping feet or aggression, keep them in adjacent enclosures until you don’t see any more of this behavior, Silvera says.

“Donkeys are social creatures, so they will usually end up standing at the fence next to the herd/flock,” Meyers says. “If all goes well over a couple days, then put them together.”

Ideally, the donkey should stick around the livestock when turned out together. If she wants nothing to do with them, she’s not likely to make it as a guardian.


Read more: Not sure which livestock guardian animal is right for your farm? Here are some tips.


Fencing & Feed 

If you’re seeking a guard donkey, you likely already have satisfactory fencing to contain livestock. “Donkeys really don’t test fences like horses do,” Meyers says. “Field fence should be fine.” 

Be aware that sheep and goat feed may contain anticoccidial agents. If the label notes ingredients such as monensin or lasalocid, the feed can be lethal for donkeys.

“It can be a problem if the donkey is eating the food of the animals they’re guarding. You have to separate them at feeding time,” Silvera says. 

If separation isn’t possible, create a feeding situation where the donkey absolutely can’t access the livestock feed.

Donkey Care Basics

Your veterinarian can advise on vaccinations needed in your area, as well as deworming and dental care. Keep in mind that donkeys are desert animals designed to live on low-quality forage. Although donkeys need hay during the winter, they don’t need grain or rich, high-protein hay—no alfalfa!

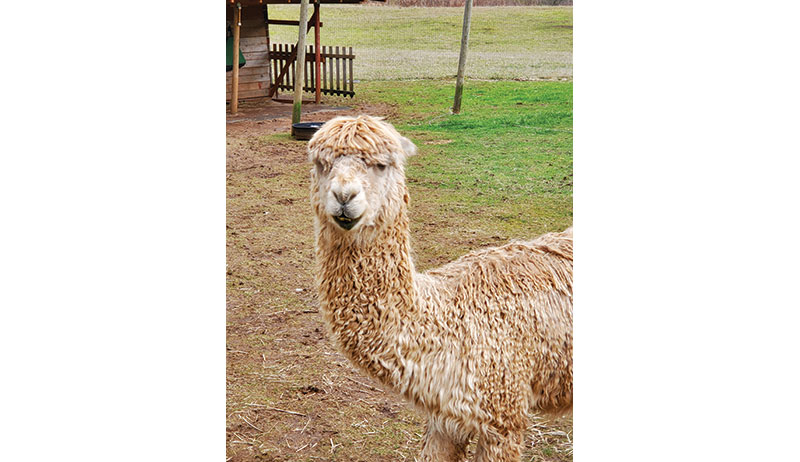
“You also don’t want donkeys on lush pasture 24/7,” Silvera says. “If that’s your situation, donkeys are not recommended. They will get obese and can founder (a painful, life-threatening lameness). Llamas are better guardians if you have rich pastures.” 

Unlike horses, donkeys don’t develop an undercoat that protects them in cold, wet weather. So they need a shelter to get out of the rain.

In addition to unlimited access to clean water, provide a trace mineral salt block.

With good care, donkeys can live into their 30s—or older—gracing you with their long-eared presence for many years.


More Information

Finding a Guardian Donkey                                                                                     

The ideal scenario is to buy a donkey that has already been proven to guard. Word of mouth, websites and bulletin boards at your local feed-supply stores are some of the best resources. Donkey-keeper Angelia Silvera recommends EquineNow.com.

Once you’ve found a potential match, ask the following questions. 

  • Has the donkey been used as a guardian and, if so,
    for what livestock?
  • What is the donkey’s age and sex?
  • Is the donkey halter broken?
  • Has the donkey been vaccinated?
  • Has the donkey had its hooves trimmed and teeth checked?
  • Has the donkey ever been in a trailer?

This article originally appeared in the July/August 2o22 issue of Hobby Farms magazine.

Categories
Beginning Farmers Crops & Gardening Farm & Garden Farm Management Homesteading Permaculture

6 Fall Tasks To Ready Your Small Farm For Winter

When winter is on the horizon, it is well worth preparing your small farm in anticipation of colder weather. As soon as the summer has peaked and you feel fall in the air, it is time to get things done. Gone are the days when I want to push tree guards into frozen ground or pull carrots in a light snow! 

Here are six top tasks for the winter for small farms.  

1. Install Rodent Guards on Trees

All fruit trees need rodent guards over the winter—especially young and establishing ones. These can be pressed an inch into the ground and wrapped around the main stem, up 12 to 36 inches depending on the height of the tree. 

We often take these off in the summer to let the bark harden underneath. It’s important to remember to put those back on, though. 

Don’t leave this job to late in the fall, when it’s too easy to forget or miss some trees. Skipping this important task can be disastrous if a heavy snow fall drives rodents way up into the trees seeking protection. 

2. Store & Ready Hay

Have you cut or purchased enough hay for the winter? If so, now’s the time to place it in a protected, easy-to-access location for winter livestock feeding. 

We have a pole barn beside the main winter paddocks where we can easily access bales and where the snow cannot blow in on them. 


Read more: Check out these 4 methods for handling loose hay.


3. Plant Garlic

Do you plant garlic? If so, it is time to get going. 

You need to have your garlic beds prepared well in advance so that, when it is time to plant in early October, your beds are already made. You also need to have your garlic bulbs on hand and ready. Organize your labor now to do all the cracking, planting and mulching with a good straw. 

Don’t leave these jobs til the last minute! Doing so risks planting into cold soil or scrounging for seed or supplies when they are less available. 

4. Bulk Harvest

Fall is the time for bulk harvesting winter vegetables. Just because you put in a big patch of potatoes, carrots or squash doesn’t mean you are ready to handle them all!  Know when the best harvest week will be for this crop based on its days to maturity and the season. (Watch the plants for signs of maturity.)  

You will need to have crates, bags and bins on hand to help with harvest and the right spaces for curing and storage. If you leave crops too late, they can suffer freeze damage, overmature or get green shoulders. 

Harvest crops in a timely manner. Cure them and move them into your root cellar or dry cellar as needed. 


Read more: Stable root cellar conditions treat your stored veggies right.


5. Clean Up

I cannot stress enough how important it is to spend time in the fall cleaning up all those little things. Stuff left always gets left out on a farm, and these items need to be put away before they get lost in the snow and sustain winter damage. 

Make a purposeful trip around the farm with a truck and/or tractor to collect supplies and put away equipment and tools. 

6. Freeze Damage Prevention

Lastly, I always ask myself what will be damaged by freezing temperatures, then make trips around the farm to winterize against this.

Hoses should be unhooked from hydrants and drained and rolled up. Sprayer backpacks need to be emptied—I often store these in the basement so no water in little parts freeze up. Water catchment from roofs should be unhooked. 

All frost hydrants should be unhooked from hoses and shut properly in good working order.  I also remove batteries from tractors to store in a warm location over the winter. 

This is my short list of key items to make sure we are ready for winter. You may discover additional tasks to attend to, but this list provides a good place to start.

Remember to complete these tasks well in advance so you have time to get to everything without making mistakes. On our farm, we start this process in September and finish it by end of October—plenty of time before winter sets in. 

Grow On,
Zach

Categories
Beginning Farmers Farm & Garden Food Recipes

Recipe: Scrumptious Sweet & Spicy Blueberry Jam

Whip up a couple jars of blueberry jam-with-a-kick to enjoy this fall. Classic blueberry jam is great, but spicing it up adds an unexpected wow factor that makes this jam extra special.

We serve this fiery jam with soft cheeses and crackers at football gatherings. It’s a big hit! 

Yield: 4 cups 

Ingredients 

  • 2 lb fresh blueberries (about 6 cups) 
  • 3 cups granulated white sugar 
  • 2 tbsp. lemon juice 
  • 2 tsp. red pepper flakes (or more for even more spice) 

Directions 

Wash berries, and remove stems and soft/damaged berries. Add berries to a large, heavy-bottomed, nonreactive pot. Use a potato masher to break them down a bit.

Add in the sugar, lemon juice and red pepper flakes. Stir together well. Bring ingredients to a boil, then reduce heat to medium-high.

Simmer for 20 minutes until the jam thickens, stir often.  


Read more: This blueberry-apple fruit leather is easy to make and fun to eat!


Storage

Refrigeration Instructions

Ladle the hot berry mixture into warm prepared jars (canning jars washed with warm soapy water and kept warm until filling). Add washed lids and tighten on the rings.

Once cooled, transfer to the refrigerator and use within two months.  

Water Bath Canning Instructions

Ladle the hot berry mixture into warm prepared jars (canning jars washed with warm soapy water and kept warm until filling). Leave 1/4-inch headspace (room from the jam to the rim of the jar).

Use a clean, dampened, lint-free towel or paper towel to wipe the rims of the jars clean, removing any spillage. Place the canning jar lids on the jars and screw on the rings until they are gently snug (not fully tightened).

Lower the jars into a hot water bath and cover the pot with the lid. Turn up the heat to high. Once the canner reaches a rolling boil, set the timer for 10 minutes.

Adjust cook time for altitude as needed.  

Once water bath processed, carefully remove the jars from the canner and place them on a towel-lined surface for 12 hours without touching. After 12 hours, remove the rings and test that the lids are completely suctioned to the jar. Label and date jars.

These preserved jars of jam will keep for at least one year in the cupboard. Refrigerate after breaking the seal. 


Read more: Ready to start canning? Make sure you have these 10 items on hand.


Notes 

For more information on safe home water bath canning, visit: https://nchfp.uga.edu/publications/usda/GUIDE07_HomeCan_rev0715.pdf 

For a classic blueberry jam, omit the red pepper flakes.  

This recipe was adapted from Can It & Ferment It with permission from Skyhorse Publishing, Inc. 

Categories
Animals Beginning Farmers Farm & Garden Flock Talk Large Animals Poultry

Say Cheese! For Recent Reader Livestock Photos

The editors of Hobby Farms magazine are always on the hunt for great photos of livestock looking good while they say cheese.

In a recent print issue, we ran the best photos submitted by readers. Each one includes the name and city of residence of the person who submitted it.

Send us via email the best images of your brood to hobbyfarms@hobbyfarms.com­, with “Say Cheese!” in the subject line. Include your name and address in the body of the email.

We hope to see your livestock photos in an upcoming print issue of Hobby Farms!

Doreen Blohm of New Richmond, Wisconsin

goat photo say cheese

Gid Zook of Quarryville, Pennsylvania

kitten photo say cheese

Aralynn Cload of Cincinnati, Ohio

pigs photo say cheese

Sara Latour of New Boston, New Hampshire

black chicken photo say cheese

Carol Petritz of Laupahoehoe, Hawaii

goose photo say cheese

Mari Seggerman of Portland, Oregon

hen photo say cheese

Terry Gray of Bradford, Vermont

cow photo say cheese

Zack Clayborn of Prosper, Texas

goats photo say cheese

Amanda Joy Gately via Email

chicken photo say cheese

Stacey St. Amand of Vassalboro, Maine

ponies photo say cheese

TS Elliott of Washougal, Washington

alpaca photo say cheese

Charli Abeyta of Calhan, Colorado

goat photo say cheese

This article originally appeared in the July/August 2022 issue of Hobby Farms magazine.

Categories
Beginning Farmers Farm & Garden Urban Farming

DragonSpunk Helps Community Gardens Become Healing Spaces

“Everything is interrelated,” says Isaiah Powell, the president of DragonSpunk. Based in San Francisco, the organization’s goal is to boost environmental rehabilitation while combating food insecurity and increasing animal habitat restoration.

Along with housing the Calibird Pollinator Sanctuary and running community food gardens, DragonSpunk has also begun to provide a range of microgreens to local residents. “I always had a fascination with watching biology happen,” explains Powell. “So that interest in seeing the planet grow was one of the primary ingredients that you need to have to do this.”

Taking time out from multitasking duties, we spoke to Powell about the importance of green spaces and the future of soil. We also touched on the bioaccumulation powers of sunflowers.

Taking Control of Your Food

“As you see everyday, the food is getting weaker and weaker by the year,” says Powell as he recaps his journey into farming and food awareness issues.

“I always knew that at some point in the future I wanted to control where my food came from and know where my food came from,” continues Powell. “Then fast forward to the pandemic and we’re seeing supply chain disruptions in real time. So that made it more important to grow food.”

Balancing Soil Erosion

Redressing soil erosion is one of the key DragonSpunk mission goals.

“You hear that the top soil around the world is degrading and soil will soon be the new oil,” explains Powell. “So you put all this stuff together. The soil has to be active. Growing up, we thought bacteria was bad, fungus was bad. But no, there’s good fungus.

“So it comes with starting to learn about the soil.”


Read more: Soil fertility management gets your soil in shape.


Spotlighting the Calibird Pollinator Sanctuary

Maintaining the Calibird Pollinator Sanctuary is an integral part of running DragonSpunk.

“The goal is to provide the best habitat for our pollinators,” explains Powell. “We have a lot of natives and attracting plants like the milkweed. It’s to provide habitat for the pollinators and serve as a laboratory.”

“For instance, there’s a lot of schools around here, so the kids come through and ask, ‘Why are you planting sunflowers?’ I tell them they’re bioaccumulators that pull things out of the ground like lead. Now they’re intrigued.”

The Importance of Green Spaces

Promoting the ideals of community gardens is another core focus of the DragonSpunk agenda.

“Community gardens are often in communities that have been neglected and damaged through poverty,” says Powell. “The garden serves as a healing space. It’s therapy. Green spaces are necessary.”


Read more: Keney Park Sustainability Project spreads excitement about urban agriculture.


Inside the DragonSpunk Name

Intrigued about the name of Powell’s organization, DrangonSpunk?

Well, it turns out that’s part of the aim.

“The dragon is about 75,000 years old,” says Powell as he gets into the mythology of the creature. “It came out of South Africa, and it was really associated with water and ensuring good harvests.

“The name is a powerful name and it has an impact. People hear it and they don’t understand it. But it sparks conversation and gets conversations going. That’s good.”

Follow DragonSpunk at Instagram.

Categories
Animals Farm & Garden Farm Management

Watching For Wildlife On the Farm, Part 2: Birds!

Last month we discussed some common mammals hobby farmers might encounter on their property. This month, let’s give mention to another type of frequent farm wildlife encounter: birds.

Birds, Birds, Birds

Barns and other farm structures are no stranger to birds. Outbuildings serve as prime nesting sites for a variety of winged inhabitants, including:

  • barn swallows
  • wrens
  • house sparrows
  • pigeons
  • starlings
  • barn owls
  • numerous other species

Our barns and sheds so frequently house birds that they tend to become just part of the animal milieu. While many avian species are helpful to have around for bug control, sometimes birds on a farm can become a nuisance.

Nesting sites mean the accumulation of bird droppings, which can spread disease and cause corrosion of equipment. Some species are destructive when building nests, impacting insulation and wiring.


Read more: You’ll encounter wildlife on any farm. Here’s what to keep in mind when a mammal shows up.


Barns as a Buffet for Birds

Wild birds also see barns as an easy food source. As discussed last month, trash and uncovered grain will attract all kinds of animals, including some birds. Birds can easily contaminate large stores of exposed feed with droppings as well.

So how do we deal with birds in the barn? The first step is to accept that you will not be able to “bird-proof” your barn completely. This is not only impractical and unnecessary, but not worth the frustration and effort.

The goal should be to discourage and thereby limit the number of birds that call your barn home. You live with the rest.

Limiting is accomplished by employing a variety of tactics. No one tried and true method works in all situations. Here are some tips to help reduce birds in your barn:

  • Keep your barn clean! Sweep up spilled grain and collect and remove trash often.
  • Keep feed inaccessible via sealed containers.
  • Discourage bird entry into barns with wide, open doors by installing plastic strips in the doorways. These allow people/animals/equipment in, but prevents birds from flying in and out.
  • Discourage roosting by placing netting underneath rafters.
  • Install porcupine wires at sites used for frequent roosting or nesting. These work to prevent larger birds from nesting but not smaller birds such as starlings or sparrows.
  • Consider “employing” some barn cats. Depending on the size of the barn, install cat walks along the rafters to aid in feline patrols.

Read more: In the battle for cherries, it’s orchardist versus the birds.


A Note About Protections

One final note on wildlife protection. Almost all birds in the United States are federally protected by the Migratory Bird Treaty Act. The unprotected exceptions are few enough to easily list here: the rock pigeon, European starling and the house sparrow.

A few other game species including but not limited to geese and ducks are also unprotected during hunting season, but hunting licenses are required.

This means that any lethal method (direct or indirect) to remove birds, other than the three species listed, from your property is illegal.

If you have a severe issue with birds on your farm property, call your local Department of Natural Resources (DNR). If, in working with professionals, you’ve concluded that protected birds do need to be removed/harmed on your property, a Migratory Bird Depredation Permit can be obtained from the US Fish and Wildlife Service (FWS). Staff from this office will provide instructions on how to qualify and apply for this permit and how to use it.

Some FWS offices may also have equipment that can be loaned for humane bird removal purposes.

Categories
Animals Beginning Farmers Farm & Garden Homesteading Large Animals

8 Tips For Getting Started With Beef Cattle

The thought of home-raised meat that has been fed by hand, carefully tended to and humanely butchered to fill your family’s freezer is enticing to many a homesteader. Whether it’s a flock of meat chickens in the back coop, some rabbits in the new hutch, or a couple of beef cattle calves that you’ve bought, it’s hard to beat home-grown meat raised right. 

Purchasing and raising beef cattle can seem like a huge step—a daunting thought and rather large commitment. It’s true that cattle are for sure a bigger project than a handful of chicks. But the return you get for your effort is also much greater.

Raising beef cattle can offer a great learning experience for not only you but the entire family! Here are several tips that will help you get started on the right “hoof” when you decide to purchase your first beef cattle:

1. Know the Purpose of Your Beef Cattle

Knowing what the purpose is for your cattle will be helpful when picking out your cattle. It will also benefit you in the long run, as you seek to make them a profitable addition to your homestead. This is true even if the return comes simply in the form of fresh milk for your family and not necessarily additional dollars. 

For example, while Angus beef cattle will produce milk, it’s generally not as much of a quantity as the milk that would come from a dairy cow such as a Holstein or Jersey. So if looking for a high-producing milk cow, Angus likely wouldn’t be one of your top choices. 

2. Look for Good-Quality Animals

High-quality beef cattle with good genetics and calm dispositions are especially desirable. Genetics will play a larger role in your search if you think you might want to eventually begin breeding cattle and are searching for heifers and bulls to raise and breed. 

Good conformation, though not necessarily a major factor for an animal you intend to raise and butcher, is also important if you ever hope to raise cattle to breed. Yet even in the shorter-term scenarios, confirmation can still play a major role.

For example, a heifer with poorly conformed hooves can begin to stand and distribute her weight unevenly among the hooves. This could eventually lead to lameness.

As far as the disposition of the family calf goes, it is very important to consider as it will likely grow up and be handled around (if not by) any children in the family. Look for an animal with a calm nature that has been raised by a gentle handler. Then continue to use gentle handling practices and keep a calm environment for the animal to grow up in. 


Read more: Here are some more tips for purchasing cattle for homegrown beef.


3. Purchase from an Individual

While the thought of stepping into a live sale at a local sale barn might seem intriguing, keep in mind that for a smaller operation it is even more important to bring home the right beef cattle.

Large feedlots can afford to be somewhat less particular. Their animals are not intended to be handled as much or kept in as close of proximity to people as the backyard heifer or steer. Whether it’s temperament, health or genetics, larger-scale operations won’t likely be as particular as a homesteader might. 

One of the most important reasons to avoid buying from a livestock sale? You won’t have much information on the animal you’re purchasing and the amount of sickness it has been exposed to at the sale. From background and handling, previous ailments and the original herd health—not to mention exposure to sickness from simply being at the sale—there are multiple reasons to look for a private seller over a sale barn.

With a private seller, you’ll have a better chance of seeing the original herd the calf comes from, hear about any previous ailments, and hopefully have an open, honest conversation about anything you might have questions on (within reason!). 

4. Know the Needs Before Heading Home

Different animals will have different needs. If you intend to bring home a young calf, you might need to purchase milk replacer and electrolytes to have on hand. If it’s a freshly weaned calf, make sure you have something to offer it that will be “soft” and easy for them to digest, such as hay and grass. 

It’s good to think carefully through each step of caring for your new homestead addition before jumping right in to find yourself in over your head. 

5. Be Diligent about Health 

This point ties in with number three, as you look to purchase beef cattle from an individual. Make sure you take time to ask the seller questions about not only the health of the animal you may purchase but the rest of the herd.

When was the last time this animal was sick? What did it have? 

Ask if you can see the rest of the herd. Look for signs of illness such as any snotty noses, coughing and wheezing, or even signs of lameness throughout the herd. Be aware and keep your eyes open for ailments you might face in the future with your own cattle. 


Read more: An experienced cattle farmer shares tips for raising livestock.


6. Prepare the Facilities 

It’s helpful to come home with a new animal and have the facilities already prepared. This includes basic feed and fresh water, as well as supplemental items like mineral licks.

Feeders and waterers should be cleaned out and filled with fresh feed and water. Make sure your building is solid and not lacking any major repairs. If using electric fencing, make sure the wires are clear of any brush or grass that might interfere and that the battery is working to keep them hot consistently. 

7. In Case of Emergency 

Of course you can’t prepare for every situation that might arise. But it can be helpful to keep a few basic medications on hand.

Consider having treatment options available for ailments such as coccidiosis or BVD (Bovine Viral Diarrhea). If raising small calves, make sure electrolytes are kept handy. Save your trusted veterinarian’s number on speed dial and a good friend to call in case a situation is more serious than you’re comfortable dealing with alone. 

8. Set Your Butcher Date

In today’s world, one of the most common challenges for anyone raising their own meat is finding a good date to get it taken into a locker plant for butchering. Meat lockers book months (if not years) in advance, and people will hog spots or butcher dates like they’ve hogged toilet paper in the past. 

For this reason, even though your bottle calf is a long ways from being ready to butcher, consider doing some calling around to local meat lockers to see how far out they’re taking reservations. If you can, do a little math to figure out how long it might be until you’re ready to butcher. Consider reserving a spot in advance to ensure you’ll have somewhere to take your calf when it’s finally ready to go.

Raising beef cattle can be a very rewarding, educational experience. The longer you have beef cattle on your homestead, the more chances you will have for an experience to catch you by surprise and teach you something new.

Strive to keep a calm mind and an openness to learn from each situation that comes up. Be willing to ask for help and open to trying new things. Before you know it, the seasons will have passed and you’ll have a freezer full of fresh meat! 

Categories
Crops & Gardening Equipment Farm & Garden

4 Ways To Handle & Use Loose Hay

During a recent stretch of hay baling on my farm, both the primary hay baler and the backup baler ran into issues, forcing us to gather raked hay by hand before a rainstorm could strike.

This got me to thinking about loose hay in general, and the best ways to handle it and use it.

Maybe you’re like me and you’re rescuing forage hay off a field when a baler malfunctions. Maybe the twine snapped or slipped off a bale during transport, and you’re left with a (surprisingly large) mess of loose hay far from where you intend to feed it. Or maybe you’ve been feeding hay for months and your barn has accumulated a lot of loose bits along the way. (Hay bales do tend to shed, and those small amounts can add up.)

Regardless, if you have loose hay on hand, take heart. There are plenty of options for dealing with it and putting it to good use. Here are four to get you started:

1. Return Loose Hay to Your Fields

If you’re dealing with a small amount of hay and it’s largely dust, perhaps the simplest solution is to sweep it up, load it into a trailer (a pitchfork and large shovel work great together), and spread it on one of your fields.

You might as well return the nutrients to the soil. Just be careful to spread it thin enough so it doesn’t kill the grass underneath.


Read more: When making square hay bales, make sure they’re not too loose.


2. Gather It in Boxes & Feed Loose

Last winter, I had to deal with a large amount of loose hay generated when small square bales kept bursting free of their twine. It was mostly in the form of bale flakes, so I found I could place the flakes in boxes and transport the boxes around like hay bales.

It was, I admit, a little awkward. But at least the hay stayed in a convenient form for feeding.

3. Bale It Back Up

I elected to box up loose hay last winter because I couldn’t access my hay baler, which was trapped under a lean-to blocked by snowbanks and related pieces of seasonal equipment. But during the spring, summer, and fall, I’m happy to spread loose material on the ground and bale it back up with the speed and convenience of my baler.

The effort isn’t necessarily worthwhile for a small amount. But if you’ve found yourself with a large volume of loose hay, baling it can save time and effort compared to other solutions.


Read more: Think ahead about equipment accessibility this coming winter!


4. Use It for Mulch

If you don’t want to feed your loose forage, consider putting it to use in a different manner. Hay can be suitable as mulch in garden beds and around trees, boosting water retention and providing insulation against winter cold.

A word of warning, though. Hay may contain seeds that can germinate in your soil, so pay attention if strange plants start growing where you laid down hay mulch.

One thing is certain. There are plenty of ways to use loose hay. And you’re bound to find an option that makes sense for your situation.

Categories
Crops & Gardening Farm & Garden Foraging

Weeds—When Not To Worry (Excerpt: “Wild Plant Culture”)

The following excerpt is from Jared Rosenbaum’s forthcoming book Wild Plant Culture (New Society Publishers, November 2022: Pre-order here at a 20 percent discount) and is reprinted with permission from the publisher.

weeds wild plant culture cover


Many people fear weeds. They carry a cultural stigma, and signify failure in the garden or home landscape. With the growing awareness of invasive plant species, this fear has become almost paralyzing for some. 

To dispel that fear, it is best to better understand weeds. Here is a simple two-part perspective on weeds: 

  1. Weeds are a symptomatic response to a particular type of disturbance. 
  2. Shift or eliminate the disturbance, and the weeds will not recruit again. 

There’s two things here that work in our favor. First, weeds need specific types of disturbance to successfully disperse, germinate and thrive. Most weeds are species of exposed bare soils. They are annuals or biennials that take quick advantage of resources that are not tied in to the cycles of an established plant community. They grow, seed and move on, unless the disturbance is repeated. 

Annuals and biennials are primarily a threat to the perennial plants we are nurturing or establishing only when our desired plant community is just a year or two old. For example, a newly seeded meadow on bare soil could be overwhelmed by annual and biennial weeds in its first couple of years unless managed with intermittent mowing designed to keep weeds at the same height as native seedlings. 

Most of the commonly known weeds are annuals. These are the species that show up in the carefully bared soils of vegetable gardens and in the disturbed soils we create with machinery in the urban and suburban landscape. They include amaranth, foxtail grass, lamb’s quarters, purslane, galinsoga, smartweed and horseweed. 

I’d be remiss not to mention that a large percentage of garden weeds are also good edibles. We disturb some soil on our farm every year (with the ostensible purpose of a vegetable garden) in part because of the fantastic crop this yields of amaranth and lamb’s quarters, both exceptional cooked greens. If we didn’t till the soil in this patch, it would rapidly colonize with asters and goldenrods like the meadow just upslope. 

Which leads to the another simple precept about weeds: Most annuals and biennials do not compete effectively with established perennials. 

Right near our “vegetable garden” (AKA annual weed patch) is a small planting of tall coneflower (Rudbeckia laciniata) that we maintain for its edible greens. It’s specifically desirable because it commences new basal leaf growth very early in the spring. As a green, it is available well before any garden vegetable greens like spinach or lettuce are ready to harvest. It’s available well before dandelions, even. 

Here’s a hypothetical scenario. Let’s say one of the lamb’s quarters seeds from the garden fell across the path and landed in the tall coneflower patch. While the lamb’s quarters are germinating (often late in spring), the tall coneflower has basal leaves almost 2 feet across, and is starting to bolt for the season. Maybe it’s a couple of feet tall already. The lamb’s quarters don’t stand a chance. Even an annual weed that germinates just as tall coneflower begins its growth in March would be hard-pressed to maintain the growth or access the resources that this well-established native perennial can. 


Read more: Learn more about foraging lamb’s quarters!


Understanding these two basic precepts about weeds can save us a lot of time and angst as our perennial communities mature. A weed is not a problem sheerly because of its presence, as most of us fear. It is only a problem … when it is a problem. 

The species that are problematic are good to know. Not just by name, but by lifestyle. 

In understanding their tactics and duration, it is possible to understand the nature of the problem they present, and a good deal about avoiding, outsmarting, or eliminating them. 

For example, Japanese stiltgrass is an extremely competitive weed. It is also an annual. It grows in thick swards sprawling over anything shorter in stature and creating great heaps of thatch that only it seems to be able to germinate through. Rodents like to tunnel beneath its thatch and gnaw on native perennials. Woody plants sometimes suffer from insufficient airflow in swards of stiltgrass. 

We mow Japanese stiltgrass right around Labor Day (early September), as it is setting seed. Timed right, it will not have the root reserves to flower again and set seed before the frosts of October. Mowing also chops up the thatch that it would otherwise create, freeing plants and seeds below from its inhibitory effects. If stiltgrass is managed in this way, I’ve seen new infestations disappear in as little as one year. 

Categories
Farm & Garden Food Recipes

Recipe: Bake Homemade, 100% Whole-Wheat Bread

Consuming too many highly processed foods (such as white bread) has been blamed for an increased incidence of diabetes, heart disease, stroke and cancers. Conversely, unrefined foods have been documented as being beneficial for our health. Knowing this, we set out to make a great, homemade, 100-percent whole-wheat bread. 

We quickly learned that can be tricky. If you’re not careful, the result is a dense, unappealing brick. But when done correctly, you get light, deliciously nutty, whole-wheat bread that’s good for you!

Read on to learn how to produce a wonderful loaf every time.

The Ingredients

Because the ingredients for bread are so basic, everything used should be fresh and of the highest quality. The following components are what you’ll need to create terrific bread.

Wheat

Wheat is the most important ingredient, of course. For 100-percent whole-wheat bread, wheat with high gluten and protein (at least 14 percent) content is necessary. Hard red or white (spring or winter) wheat typically has sufficient gluten and protein content. (See “Wheat Berries” below for sources.)

For comparison, all-purpose, whole-wheat flour has about 12 percent protein, while pastry flour has about 7 percent.

Once you’ve located the right wheat, it’s critical that it’s fresh. Whole-grain wheat berries can be stored almost indefinitely at room temperature, but as soon as you grind them into flour, they quickly go rancid. Whole-wheat flour (with no added preservatives) will only keep for about a month at room temperature.

As a result, it can be difficult to get from a store.

Yeast

Yeast has three major functions when baking bread. It makes the dough rise, gain strength and develop flavor. When flour, water and yeast are mixed, the yeast consumes the sugar in the flour and produces a liquid that releases carbon dioxide bubbles into the dough.

If the dough has a strong, elastic gluten structure, it’ll trap the released bubbles and the dough will rise. In addition, this reaction produces flavor in the bread.

It’s essential that the yeast used in bread baking is fresh so that it can drive the reaction described previously. Dry active yeast is used in this recipe because it’s commonly available and reliable. Refrigerated dry active yeast kept in an airtight container will maintain its potency for several months, so be sure to buy it from a refrigerated case.

Water

Water for making bread shouldn’t be very hard or soft. Hard water will inhibit the yeast reaction, whereas soft or distilled water makes a dough that generally doesn’t rise well. Good drinking water typically works well for making bread.

Salt

Salt, like yeast, has three functions in making bread. It adds flavor, strengthens the gluten and regulates yeast growth. Bread made without salt generally tastes flavorless, rises too quickly and has a crumbly texture. For this recipe, kosher salt works well.

Sweeteners

Sweeteners aren’t required for good whole-wheat bread because enough sugar is present in the flour to feed the yeast. However, a sweetener can improve the bread’s flavor and texture.

Honey, molasses, granulated sugar or brown sugar can all be used, but we like honey. Honey can vary tremendously from jar to jar, though, so consider that when choosing it. We prefer to use raw (unpasteurized), lightly colored, local honey.

Fat

Fat, like sweeteners, isn’t absolutely necessary for good bread. But a little bit of oil or butter improves shelf life, flavor and texture. You can use either good-quality butter or olive oil, but make sure that it’s fresh, too.


Read more: Ancient grains and sourdough fuel the farm at Blue Truck Bread.


The Recipe

This recipe makes two, standard-size, 100-percent whole-wheat loaves.

  • 2 teaspoons dry active yeast (14 ounce)
  • 12 cup warm water (approximately 105 to 115 degrees Fahrenheit)
  • 6 cups whole wheat bread flour
  • 2 12 teaspoons kosher salt
  • 2 14 cups lukewarm water
  • 2 tablespoons honey
  • 2 tablespoons olive oil or butter
Step 1: Milling 

(If you’re using preground flour, skip this step.) 

If you find a good source for fresh, whole-wheat flour, then you don’t need to invest in a mill to grind it yourself. However, if you’re committed to making your own whole-grain products, then a mill might make sense.

Whole-wheat kernels are a lot cheaper than whole-wheat flour, and freshly milled wheat tastes better. We like the hard white spring wheat “Prairie Gold” kernels and buy them in 50-pound bags.

There are many bread mills available for grinding flour, from hand-crank models to electric. We use an electric Nutrimill and have been quite happy with it. It wasn’t inexpensive, but it’s convenient, easy to clean and has been running well for years.

If you’re considering buying a mill, avoid one that overheats the flour while grinding. That will negatively impact bread quality.

It’s best to grind only as much flour as you plan to use since freshly ground whole grains go rancid quickly. About 3 12 cups of wheat berries should produce approximately 6 cups of flour for this recipe. Whatever type of mill you choose, set the speed and coarseness of grind so that you get a very finely ground, light brown flour.

Step 2: Mixing

Place the flour in a large bowl, mix in the salt and make a well in the middle of the mixture. Dissolve the honey in the 2 14 cups of water, and add the butter (shaved into small slivers) or oil. Dissolve the yeast in the 12 cup of warm water, making sure it dissolves completely.

Pour both liquid mixtures into the well in the flour. Combine the ingredients slowly to make a smooth batter. After combining, wait a few minutes to ensure the dough has completely absorbed the liquids.

Now, evaluate the dough to determine whether it’s too stiff or watery. Remove the dough from the bowl, and feel it to decide whether it needs more water or flour. 

It should be sticky and wet, but not waterlogged. It also shouldn’t be too stiff, or it’ll turn into bricks. If more flour or water is needed, return the dough to the bowl, add 3 or so tablespoons of flour or water (flour if too watery, water if too stiff), mix well and reevaluate.

Proceed with the next step when the consistency seems perfect.

Step 3: Kneading

To create a great whole-wheat bread, we’ve found that you must knead the dough to develop the gluten structure. We accomplish this using an electric Bosch mixer set to knead for 15 to 20 minutes. (That’s about 600 manual kneading strokes.)

Like a flour mill, an electric mixer to knead bread dough isn’t inexpensive or required. However, an electric mixer makes it much more convenient to make bread. We’ve used the mixer to create so many loaves that it’s turned into an excellent investment.


After adequate kneading, the dough will become very smooth. When gently pulled, it should stretch without tearing. It will lose most of its wetness and become a uniform beige color.

Step 4: Rising

The next step is the first rising. Shape the dough into a round and place it into a clean, ungreased container with the seam side down. The dough may double or triple in volume during rising, so your container needs to be big enough for the dough to rise without constriction.

The container also needs a cover to keep the dough from drying out. (We used a 6-quart plastic container with a lid.) An ideal temperature for rising is about 80 degrees F, which typically means letting the dough rise in the warmest, nondrafty spot you can find.

After about 1 12 hour, the dough should have risen substantially. To determine whether the dough has risen sufficiently, do a finger-poke test. Poke the dough with your moistened finger. The resulting hole shouldn’t fill in at all. If the hole fills in some, the dough needs to rise a little longer.

When the first rise is complete, carefully flatten the risen dough using moist hands. Then, gently remove it from the container using a rubber spatula and fold the dough to form a small, firm ball again. Place it back into the container, and put the cover back on for the second rising.

It should take about half as long as the first, and testing for completion is the same.

After the second rise is complete, dust your working surface (preferably a nonstick mat) lightly with flour and use the rubber spatula to gently remove the dough from the container onto the dusted surface (topside down). Then (again with moist hands) gently flatten the dough into a circle about 1 inch thick. At this point, divide the dough in half. The two halves will become your two loaves.

For each dough half, fold the edges of the dough inward. Then invert the dough ball to form another ball.

Cover the dough balls with a damp cloth, and allow them to rest for approximately 10 minutes. While the dough is resting, it’s a good time to grease two 8–by- 4-inch loaf pans in preparation for baking.

Step 5: Shaping

Now, the dough needs to be shaped into loaves without tearing any of the gluten that’s been developing. To do this, dust your working surface again lightly with flour, put the dough on the working surface, and gently press it into a 1-inch-thick circle.

After that, fold the dough over but not quite in half, making a “smiley” face.

Next, fold the pieces in from the sides. Here you’re trying to make the length of the dough about 23 of the length of your loaf pan.

Then, gently roll the dough in upon itself. Now, press the resulting seam together. Then seal the seam together. And place the loaf seam side down in the greased loaf pan.

Step 6: Final Rising

The final rising occurs in the loaf pans and should take about 30 to 45 minutes. It’s important to keep the surfaces of the loaves moist, so it’s a good idea to cover the loaves again with a damp cloth. 

While the dough is rising, preheat your oven to 425 degrees. The dough is ready for baking when the indentation from the finger poke test fills in slowly. At this point, you don’t want it to remain unfilled (as in the previous risings) because the dough should continue rising slightly in the heat of the oven.

If all the bread-making steps worked properly, the loaves should rise prettily and arch over the top of the pans after the final rise.

Once the dough is ready for the oven, place the loaves on the oven rack near the center. Bake for 10 minutes, then turn the oven
temperature down to 325 degrees. Bake for 45 to 60 minutes more or until the bread tests done with a toothpick.

It may seem like all the kneading, rising and shaping is a lot of work, but the result is glorious, nutty-tasting, 100-percent whole-wheat bread loaves. There really isn’t anything much better than fresh, homemade whole-wheat bread! 


More Information

Wheat Berries

You can find hard white or red wheat berries at the following online sources.

This article originally appeared in the July/August 2022 issue of Hobby Farms magazine.