“We were in our 30s and traveling around and started seeing these great farm-to-table experiences in different places,” says Melanie MacInnes when she looks back on the formation of Locality Brewing, a venture she launched alongside her husband, Andrew, in Fort Langley, British Columbia.
“It was giving more opportunities for families to sit and interact with farms and have nice food and beers,” continues MacInnes. “We thought that was really neat and not something that was really being done in British Columbia with beer. So it was kind of a pipe dream idea.”
Since bringing Locality Brewing to fruition a year ago, the brewhouse has built up a reputation for crafting sterling small-batch beers that are frequently based around the farm-sourced combination of barley, hops and honey.
Flush from celebrating the brewery’s first year anniversary, we spoke to MacInnes about the early roots of the venture and the seamless match between bees and brews. We also got the scoop on borrowing antique equipment from farming museums.
After deciding to experiment with the idea of crafting beer, MacInnes and her husband began by planting an acre of barley.
“We’re in British Columbia, so let’s see if we can even grow it,” she recalls. “We also planted 6 acres of hazelnut trees and started beekeeping with an overall permaculture farm-style goal. We also planted some hops to see how they’d all grow and what works and what doesn’t at first.”
After that initial 1 acre of barley grew, MacInnes and her husband were faced with the problem of harvesting it all.
“We went to the British Columbia farm museum and asked, and they had these old 1890s wooden metal scythes!” she says. “We hand scythed the acre of barley. Then the next step was to thresh them—and again the farming museum had a 1930s threshing machine.”
MacInnes says that integrating the local community into the farm is a key part of their operation. Early hop harvest events reflected this ideal.
“We’d have hop harvests where the community would come and pick the hops and have some beer,” she recalls. “It was just such a lovely setup. So the next logical step would be to start an actual brewery.”
Locality Brewing launched last year, with former Steamworks Brewing Company beer-maker and biochemist, Karen Cheshire, entrusted to direct the venture’s beer menu.
Spotlighting a brew that encapsulates the brewery’s field-to-glass commitment, MacInnes holds up the honey lager.
“When we first started, it was the bees and the barley and the hops, so that has all three in there,” she says. “It’s 100 percent from our farm. We do tours where we show people the hops, the barley, the bees and then the malt house and the brewery.
When asked about the biggest reward that comes with running a farm brewery, MacInnes laughs and says, “You get to drink the beer, which helps with the farming!”
After a pause she adds, “It’s all about the customer interaction. My goal is always to connect people to the ingredients of the food and the drink that they’re having. It’s going back to that idea of families hanging out in an open space and being around grass and trees.”
From now through fall, you may find box turtles slowly crossing through gardens, farm fields and roads. Depending on your location, you could encounter an eastern box turtle or one of their western counterparts. Sadly, it’s all too easy to accidentally injure traveling turtles with farm equipment or the family car.
In general, human activity has made life more difficult for turtles. For instance, illegal traffickers continue to snatch turtles from the wild to be sold as pets. And, as we take more and more of their natural habitat for our own use, turtles must navigate increasingly fragmented landscapes.
Certain pesticides in the environment have also set turtle populations back.
The Big Picture
According to the U.S. Fish & Wildlife Service, “As of 2022, more than 49 species of land, aquatic, and sea turtles are protected as endangered or threatened under the federal Endangered Species Act (ESA).”
Individual states have also enacted protections for some species; however, these vary widely.
Case in point, in my own state of Indiana, it’s illegal to collect box turtles from the wild. It’s also illegal to take box turtle eggs or even empty turtle shells from the wild. (Nevertheless, Indiana law does allow residents to keep box turtles as pets if the animals came from another state.)
Fortunately, outside groups like the Association of Zoos and Aquariums (AZA) also are stepping in to offer extra help. AZA formed the Saving Animals From Extinction (SAFE) program in early 2020. SAFE’s American turtle-related work specifically applies to all box turtle species, as well as bog turtles, spotted turtles, wood turtles and Blanding’s turtles.
Turtles’ natural habitat is at a premium. That’s why, if you tend a farm, forested land or even a large garden, you just might cross paths with them.
Box turtles are omnivorous. Most often they eat insects, slugs, mushrooms, tomatoes and other fruits and veggies. They’re especially active during the cooler parts of the day—think early mornings and evenings.
And, when you see turtles crossing busy roads? These are often females looking for a good spot to lay eggs.
There are a few ways you can help these special creatures.
First, if you see a turtle trying to traverse a busy road, take care not to hit it with your car. If you’re able to do so safely, pull over and carry the turtle across in the direction it was facing.
And, if you’re about to string-trim or mow in potential turtle habitat, take a quick walk-through first. (Terrestrial turtles prefer forest edges and meadows near streams or ponds.)
Have a brush pile you plan to shred? Check it carefully first, too. If you discover a turtle or a turtle nest, give them a wide berth.
A female turtle will dig a shallow trough in the ground in which to lay her eggs. She might lay just one egg or she could lay as many as seven in this nest. Then she covers the eggs up with dirt. About four months later, tiny turtles hatch out of the eggs.
Despite their protective armor, box turtles have plenty of predators. Coyotes and dogs, raccoons, skunks and even crows will eat baby turtles and turtle eggs. As for any turtle hatchlings that do survive? They won’t begin reproducing until they’re 8 to 10 years old.
So, if you do find turtle eggs on your property, you just might want to help protect them. According to the Indiana Department of Natural Resources, “A mesh fence may be placed around a nest to protect eggs from predators. This enclosure should be checked daily to ensure that newly emerging turtles are not caught.”
Sick or Injured Turtles
Despite our best efforts, what if we do manage to injure a turtle? Or what if you find a turtle that appears to be sick or injured? Adult turtles are actually pretty tough. (Some may live to be 60 to 100 years old!) Often, if left alone, they will heal on their own.
Still, if the turtle’s condition appears to be very serious, contact your local wildlife rehabilitation group or similar agency for help. (Your state’s department of natural resources may also be able to connect you with nearby wildlife rehabilitation experts.)
If a wildlife rehabilitation organization asks you to bring the turtle to them for care, always document the turtle’s exact location before you move it. That means taking good photos, making notes and, if you have a smartphone, dropping a GPS “pin” on the location.
Why go to the trouble? Once it’s rehabilitated, the turtle must be returned to its original spot.
Your rehabbed turtle—and most box turtles, actually—live within very limited geographic areas. (The typical eastern box turtle spends its entire life in a home territory measuring just under 1,000 feet in diameter.)
A neighbor of mine finishes a small head of cattle in his small feedlot. He feeds hay and grain, and as a natural byproduct these animals produce manure on top of the grass. To keep this output under control, my friend scrapes this organic matter from the topsoil, creating piles of composted manure.
And because soil in my part of the country has naturally tight clay soil, I put this material to good use to strengthen my garden soil.
Another Value of Farm Neighbors
Keep in mind that neighboring farmers can bring a lot of value to your operation, too. Composted animal manure is definitely a great example of this.
Yes, the material was kind of clumpy when I first got to it. But these clumps broke up easily when I worked the compost into my garden soil.
While it’s true I’ll need to break up my garden soil to incorporate the compost, addition of this material (and future loads, too) will actually strengthen my soil composition. And, of course, the clayey soil will get a boost of nutrients to deliver to garden plants.
Just like anything, compost is only as good as what goes into it. In the case of the compost in the video, the material contains:
cow manure
remnants of hay left uneaten by cattle
a bit of soil mixed in during manure removal
Now, you shouldn’t put fresh manure into a garden, of course, for pathogens it could contain. But this compost has been “cooked” by sitting for an appropriate amount of time. So the cool compost is ready for my garden.
How to Work the Compost In
So how should you add compost to the garden? Check out the video above to see how we spread the material, as well as to see how this compost immediately improved our soil structure.
In 2017, I decided to bring chickens to the inner-city elementary school where I teach in Chicago, Illinois. The students were over the moon at the prospect. Most had never touched a chicken.
But I was nervous—afraid, really. I didn’t have any chicken experience and was hesitant to commit to an animal I didn’t know firsthand. So I signed up for a chicken rental service. My school liked the arrangement so well that 2022 will be our fifth consecutive year of renting chickens.
We’ve never bothered to buy!
Why rent chickens? It seems crazy when a chick costs less than $5. But consider my side of the equation. I didn’t have the equipment, didn’t want the birds year round and worried about everything from lurking predators to the hens spending winter in a playground coop.
Renting chickens is a terrific solution to these problems and not just for me. Many folks discovered chicken rental during the COVID-19 quarantine, and the chicken rental industry is expanding at a dizzying pace, generating tidy profits along the way. In the not-too-distant future, two or three chicken rentals may be competing in every city, town and suburb nationwide.
For School
My chicken-rental story hints at some of the factors driving this niche industry. First, there’s the need for convenience. My rental package includes regularly laying hens, coop, food, feeders and replacement chickens if one dies, all delivered in spring and picked up in fall for a fee just under $1,000.
That’s a lot of money. It’s also a lot of value—one-stop chicken shopping, if you will. I didn’t have to research breeds or drive around town comparing feed prices.
Courtesy Erielle Bakkum
Second, rental chickens provide a limited commitment. Most people new to chickens aren’t sure if they’re in it for the long-term. As a teacher, I badly needed an out if something went wrong, such as if a student got salmonella, parents were up in arms and the school chickens were blamed. I needed a way to give the chickens back without sending them to an animal shelter.
(Chicago’s shelters are overwhelmed with chickens that people have decided they just can’t keep.)
Third and perhaps most important, chicken rentals provide a connection to farm life. The farmers I rent from, Rob and Susan Yeary, have become almost honorary teachers at my school. When their schedules allow, they spend an hour during drop-off talking with students, showing them how to handle the hens, and pointing out features of chicken anatomy. Those wonderful, meet-a-farmer moments are like a field trip to the country without the students ever climbing on a bus.
A rental chicken is more than the bird itself. It’s also a package of supplies, information and support that make the rental experience as fail-proof as possible. One of the advantages of renting chickens is that you always get hens at peak productivity, laying every day. And you’re typically getting a variety known for being docile and laidback—think Barred Rocks and Cinnamon Queens.
Rental packages typically start at two hens and go up to six or higher, with escalating fees, of course.
The coop is a straightforward affair, often smartly painted and with wheels on one end so customers can use it as a chicken tractor. Newbie renters have no idea how simple chickens’ needs are, so some rental businesses offer fancier coops appealing to customers’ sense of whimsy.
Willow City Farm in central Illinois offers a custom coop package. “Sometimes renters have a specific look or larger design they want for the coop,” says owner Tara Davlin Moore. “We did one coop that looked like a city. We did a coop that looked like a Western saloon.”
Renting Chicks
Many rental businesses also rent out chicks to hatch or raise. These packages are separate from the laying hens with a different, usually lower price. It’s not difficult to imagine why families with young children would jump at such an offering. Why go to a petting zoo when your kids can have their own for a couple months?
The length of a rental can vary widely. I have seen chick rentals as short as two weeks and hen rentals as long as seven months. Virtually every chicken rental business offers free delivery and pickup within a certain radius.
Delivery and pickup are typically available outside that area with added fees.
Education Included
A great deal of customer education is built into rentals because most of the customers don’t know much about day-to-day chicken care. Some rental businesses put lots of this information on their websites. Others give customers a homemade manual or a favorite poultry guidebook. Still more is passed along through email exchanges, phone conversations and long chats during the delivery.
Willow City Farm offers, simply, “unlimited phone and email support.”
Toward fall, the business owner reaches out and offers renters a chance to purchase their chickens, often with a package of supplies. It’s a last-minute chance to capitalize on the attachments built up over the long summer.
Variations on a Theme
There are as many ways to structure a chicken rental as there are breeds of chickens. Doug Anderson runs a small business, The Chicken Rental Place, from his home in Goochland County, Virginia. He rents up to 15 coops a season, with at least two hens per coop, while holding down a day job as a design engineer.
Most of his customers are young families. “It gives them a chance to try chickens out without spending a lot of money,” he says.
The growing popularity of rental chickens has also drawn nonfarm businesses to try it. Dave Zahn, for instance, is a carpenter in Imperial, Missouri, who used to spend most of his time remodeling human homes. But Zahn’s sideline businesses—A+ Builds and The Easy Chicken—building pet homes, including deluxe coops with features such as radiant heating and ceiling fans, have grown so big that now they’re his main job.
Zahn rents a coop for $400 plus a delivery fee. He will also buy back unwanted birds from coop renters at season’s end, which is unusual because he doesn’t rent or provide chickens. He is buying back birds the customers purchased and raised on their own.
“That way, they can have confidence that their hens end up with a good home,” he says. Zahn expects to rent 10 coops this season.
Growth Potential
A few businesses have ridden rentals’ surging popularity to become relatively large. Rent the Chicken, started by Phil and Jenn Tompkins in 2013, has more than 30 affiliates (they’re not “franchisees”—it’s a legal thing) in Arizona, Connecticut, Delaware, Florida, Georgia, plus 19 more states, the District of Columbia and three Canadian provinces.
Courtesy helen john photography
The Tompkins do the sales and customer support. Their affiliates throughout the country do the hands-on deliveries and pickups. Rent the Chicken’s sales grew 48 percent from 2020 to 2021. And 50 percent of the company’s renters either adopt the chickens at season’s end or ask for the same birds next year—all but guaranteeing they’ll be repeat customers.
(Full disclosure: The hens at my Chicago elementary school came from Rent the Chicken.)
One Rent the Chicken affiliate is Farmer Joe’s Gardens, a full-service garden center and farm market in Wallingford, Connecticut. Expanding into rental chickens grew out of customers’ interest, according to co-owner Ida DeFrancesco. She and her husband, Joe, opened the retail farm stand in 2010 and had chickens at the farm stand to educate and entertain our community.
Community Relations
During their chicken 101 workshops, they noticed that folks were curious about hens and also paralyzed about how to have their own chickens.
“Offering rental chickens has also deepened our relationships with our community,” Defrancesco says. “Folks want chickens, and they want a guiding hand to start off right. It’s a true joy to share the experiences of chicken-keeping. We get to see barnyard life every day. It’s normal to us.”
Chicken rental lets the community experience a little bit of farm life without having to figure everything out themselves. “From the first pips of life, to the first egg from a young hen, to being followed by your hens when you walk around the yard—we want to share that,” she says. “It’s a natural extension of our agricultural passions.”
Then there’s RentACoop, a completely unrelated business with 15 employees renting in six East Coast states. Started by a young couple, Diana and Tyler Phillips, in 2012, they rent 40 coops a year. That’s a self-imposed limit, because they focus instead on their chick hatching and chick rental business. They rent thousands of chicks a year, mostly to schools and families with children.
RentACoop also sells a significant amount of poultry merchandise. The Phillips develop and manufacture products ideal for the backyard coop owner. “We weren’t thrilled with the poultry products on the market,” Diana Phillips says. “So we set out to create solutions to typical poultry problems. For example, the hens’ waterer was always getting poop in it. So, we created a waterer that the hens can’t poop in!”
The Phillips have a built-in market of thousands for their merchandise via their rental business.
The answer is yes, of course, or else so many folks wouldn’t try out the business. That said, it doesn’t necessarily generate lots of dollars right away, nor are there many folks renting chickens as a full-time occupation.
Jenn Tompkins of Rent the Chicken encourages her regional affiliates, all small farmers, to think of renting as a way to bring in more direct-to-consumer dollars. “We are creating an additional revenue stream, all while helping to bring sustainability, joy and fresh eggs to the backyards of many.”
Tompkins notes that the profit margins can be small during the first years while building coops for customers. Once the rental coops are paid for, profits tick upward.
For Doug Anderson, the Virginia engineer-and-chicken-renter, renting chickens is a passion project that happens to turn a profit. “It generates my fun money,” Anderson says.
Time and again, folks established in the business noted that chicken rentals, like farming itself, are about more than money.
“It’s so fun when you drop off chickens,” Anderson says. One mother arranged the chickens’ drop off to occur during a daughter’s birthday party—to shrieks of delight.
“It’s hard to take a break once you start,” Phillips says, echoing the lament of many a farmer. “We really do it because we love the joy it brings.”
Afinal encouraging word comes from my personal favorite: farmers and Rent the Chicken affiliates Rob and Susan Yeary. Every year, they bring hens down from their Michigan farm to my Chicago elementary school.
“We initially got chickens … as a stress reliever from our busy jobs,” Susan Yeary says. “We soon found out what a joy they are, and renting has allowed us to share the same love with others that didn’t know where to start.”
More Information
For Rent
Find out more about renting chickens from the places mentioned in this article.
When someone hears that I can poultry, they often ask, “Why? Don’t you have a freezer?”Yes, I have a freezer … a huge one. But I also have a pressure canner, and I like to can a portion of our chicken. It’s easy, tastes delicious, frees up space in our freezer and gives us shelf-stable meat for the pantry.
Canning some of your chicken meat is a great alternative to freezing. Also, canning allows you to stock up on chicken and turkey and not be limited by freezer space.
All poultry, including wild game such as duck and dove, can be canned with the following raw-pack method instructions. I’ll use chicken as the example. But just know you can replace it with any poultry.
You may can chicken with or without the bones. Producing jars of bone-in chicken is probably my favorite way to can chicken. It’s easy to cut the chicken into pieces; put them in a couple of prepared jars; add hot water, salt and maybe some dried herbs; and have a cooked whole chicken on the pantry shelf ready to use.
While it may seem like wasted space to can chicken still on the bones, the bones add more nutrition to the chicken and broth. While under pressure, the bones release nutrients such as collagen, which is why the broth will be gelatinous instead of liquid once the jars cool off.
A Whole Chicken
Always start with fresh, quality chicken for canning. If you’ve purchased the chicken, it needs to be canned by the use-by date. It’s perfectly fine to freeze the chicken, then completely thaw it out and can it later if you don’t have time to can it when you purchase it.
If you’ve butchered and dressed the chicken, let it chill for six to 12 hours before canning. This will allow the rigor mortis to fade and the meat to relax. Keep poultry cold until you’re ready to can it.
The skin can be left on the chicken for canning or removed. The skin will add more fat to the jars. If you can pasture-raised chicken, this extra fat can be a good thing because they tend to have less fat in the meat than commercially raised chicken does.
The texture of canned chicken is different than when cooked fresh. It’s not bad, just different—like the difference in texture between white meat and dark meat or a difference between roasted, grilled or boiled chicken.
My personal opinion is that the white meat tends to be a little drier after canning, so I’m not a fan of canning jars of chicken breast for my family. However, some people enjoy that texture and love canning chicken breasts.
The first thing you need to do to can whole chicken is get your pressure canner, jars and lids ready. Chicken is a low-acid food and must be canned in a pressure canner.
Wash your pressure canner, quart jars and lids in hot, soapy water. Use wide mouth jars if you can. They’ll be easier to pack than regular mouth jars.
Add water to the pressure canner according to the manufacturer’s instructions.
The jars need to be kept warm, so put them in the canner while you prepare the chicken. Put the canner on the stove, and heat over medium heat. The water should be about 140 degrees Fahrenheit and not boiling to avoid thermal shock.
Set the lids aside. They don’t need to stay hot.
Prepare the Chicken
Cut the whole chicken into pieces. I like to cut the leg and wings off with a knife, then use kitchen shears to separate the breast from the back. Sometimes, I’ll separate the drumstick and thigh, and cut the breast in half. It just depends on how big they are.
I don’t add the back and spine to the jars. I save those to make broth later. Because the wings don’t have much meat, they can also be saved for broth instead of canning with the whole chicken.
Pack the Jars
Remove a jar from the canner, and pack it with the chicken pieces. I like to put a drumstick, thigh, breast and wing in each jar. You may need to arrange the pieces several times to get them to fit. You’ll want to pack them tightly.
If the chicken is pretty large, you might not able to get half of it in one jar. That’s fine, just use another jar.
Add 1 teaspoon of noniodized salt to each quart jar, if desired. You can also add any dry herbs you like to the jars, although most people avoid adding sage, as it can get bitter while under pressure.
While there is no need to add water to raw packed chicken, there may not be enough natural juices in the chicken to fully cover the meat. Meat that isn’t fully covered may discolor but is perfectly safe to eat. Because I like the meat to be fully covered in liquid, I add hot (not quite boiling) water to my raw-packed whole chicken.
Chicken is packed with a 1 1⁄4-inch headspace because it tends to swell. Use a bubble removal tool and remove any air bubbles if you added water to the jar. If you didn’t add water, there won’t be any air bubbles to remove.
If you don’t have a bubble removal tool, use a silicone spatula or chopstick. Don’t use a butter knife, as the metal can scratch the jar and weaken it.
Recheck the headspace. All the chicken (and water, if added) needs to be about 1 1⁄4 inches from the rim. Wipe the rims with a clean, damp cloth, and put the lid and bands on the jars. Tighten the bands to fingertip tight, like you would a mayonnaise jar.
Put Under Pressure
Place the jars of chicken in the prepared pressure canner, and lock the lid in place. Turn the heat up to high, and when the canner starts venting, set a timer for 10 minutes. You can turn the heat down just a bit.
It doesn’t need to gush out of the vent pipe. But it does need to be a steady stream.
After 10 minutes, put the weight on the canner and bring it up to pressure. When the canner is at 10 pounds per square inch (adjusted for altitude—see below), set a timer for the correct processing time.
The processing times for canning poultry with bones and canning poultry without bones are different. Process the jars of poultry without bones at 10 psi for 75 minutes for pints and 90 minutes for quarts, adjusting for altitude, if needed. Process the jars of poultry with bones for 65 minutes for pints and 75 minutes for quarts, adjusting for altitude, if needed.
When the processing time is finished, turn off the heat and allow the canner to naturally depressurize. This will take 30 to 60 minutes. Refer to the manufacturer’s instructions that came with your canner.
Once the pressure canner has depressurized, lay a clean towel on the counter to set the jars of chicken on. Remove the weight from the vent or open the petcock and let the canner sit for 10 minutes before opening the lid. This keeps the liquid in the jar from surging and lids being compromised.
When you remove the canner lid, remove it away from your face to avoid the blast of steam. Let the jars sit in the canner for another 5 minutes before removing them.
Using a jar lifter, remove the jars from the canner and place them on the prepared kitchen towel to cool. Leave at least 1 inch of space between the jars. Let them cool for 12 to 24 hours and then check the seals.
If everything has sealed, the jars are ready to be stored away. Use home-canned poultry within one year. If a jar didn’t seal correctly, put the jar in the refrigerator to use within a week.
Unlike leftovers, it’s fine that the home-canned chicken has cooled at room temperature for 12 to24 hours. Any bacteria, yeast and mold spores have been destroyed by the canning process.
This article originally appeared in the July/August 2022 issue of Chickens magazine.
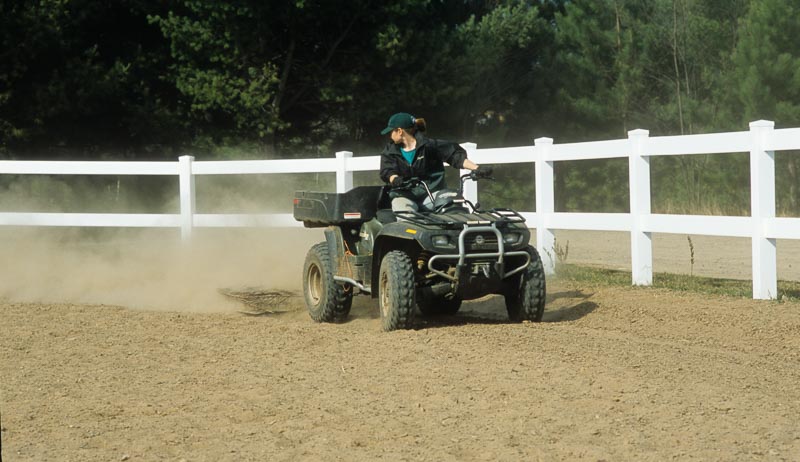
Lately, I’ve been pondering the possibility of adding a new machine to my arsenal of farm equipment: a small UTV for traveling easily to remote regions of the farm.
I’m not looking for a heavy-duty beast with tons of power for hauling supplies and operating implements. These tasks are covered by the farm tractors. Instead, I’m simply looking for a lightweight machine with multiple seats, perfect for carrying a couple of people (and maybe an occasional toolbox or bale of hay) across maintained paths and fields without damaging soft ground like a farm truck might.
This raises an interesting question. Should I opt for a gas-powered UTV or an electric UTV?
Gas or Electric UTV?
It’s easy to assume a gasoline or diesel engine is the way to go for farm equipment. They have the power and torque needed to handle hard work. Refueling is also easy. Just add more gas or diesel and you’re ready to go.
You have to wait for an electric vehicle to recharge before you can resume your work.
But in this case, power isn’t especially important to me. I’m not going to be pushing the UTV to its limits with hard farm chores. And it won’t perform mission-critical work like baling hay.
I’m certain an electric UTV would handle my needs just fine.
As a result, the advantages offered by electric UTVs are highly appealing. For starters, electric UTVs are quiet. This is a big one for me.
Sound Levels
I’ve been impressed with my electric chainsaw because it makes very little noise when cutting. Plus, it’s silent when not actively operating the motor. This stands in stark contrast to my electric chainsaw, which revs loudly when cutting and stays somewhat noisy even when idling.
Noise isn’t necessarily a big deal when a single person is hard at work. But noisy gasoline engines can make it difficult for multiple people to converse over the engine noise. Certainly that’s the case with garden tractors I’ve used. Even when the engine is throttled down, you have to shout (or walk away from the machine) to be clearly heard.
The fact electric vehicles require less maintenance than their gasoline and diesel counterparts is another positive. They have no spark plugs, engine oil, oil filters, etc. to mess with!
No Exhaust
Finally, I should mention electric UTVs don’t emit exhaust. Combined with their quiet nature, this makes electric UTVs ideal for cruising casually around the farm and making frequent stops.
I’m hoping to find a UTV that will allow a couple of people (including people not necessarily up for long walks) to go for pleasant drives across acres of fields and forest trails, checking things out and enjoying the sights and sounds. To this end, a vehicle that sits quietly when parked is more appealing than a gasoline model that idles noisily and puts out exhaust unless you shut it off.
In many cases, the power of a gasoline or diesel engine is necessary for farm equipment. But electric options keep getting better. And the quiet serenity of an electric UTV might be exactly what I’m looking for.
The longer you keep a herd of cattle around your homestead, the greater the chance that you will eventually run into a health problem among the herd. In general, the best recommendation to any animal owner is to have a trustworthy veterinarian on speed dial. It’s also a good idea to find a local rancher or two to visit with and be able to ask questions or advice from in case a situation arises.
Between these two resources (and a few reliable books/veterinary manuals) you should remain well-prepared in case of a health emergency.
By implementing just a few common habits, you can eliminate a variety of problems for your herd. A few simple things can keep your cattle healthier and your vet bills lower!
But problems can always arise. So check out this brief overview of a couple different issue that can commonly plague cattle owners:
Bloat
Bloat can present dangerous problems for cattle. If you notice it in one of your animals, treat as soon as possible.
As cattle eat and digest food, gases build up in their stomach and need release. But sometimes something will obstruct the esophagus. This can lead to an inability to burp and release these gases. As gas continues to build up inside, it can cause part of the stomach to distend and protrude oddly towards the upper left side of the animal (when looking at them from behind).
Some people will try to remedy bloat themselves. But it’s oftentimes best (and safest) to call your vet. Bloated cattle can eventually die if left for too long without proper treatment.
Keep a few rules in place to avoid bloat in the future:
Stick to a regular feeding schedule. Avoid irregular or long gaps of time between each feeding. This can cause cattle to grow famished and gorge themselves at the next available opportunity.
Avoid overfeeding grain.
Supply plenty of roughage in the feed rations: chopped hay, green grass that they can graze on their own, straw, various plant stalks, etc.
Coccidiosis is an intestinal infection caused by parasites and can be very contagious to the other cattle in the herd. If caught early on, it is very treatable. If cattle live in a dirty, muddy environment, coccidiosis is more likely to show up.
Even if the rest of the pen is dry, if stagnant water holes are nearby, cattle will oftentimes choose to drink from the contaminated water even if fresh, clean water is available to them.
Coccidiosis can cause a variety of ailments. From bloody, sour smelling stools to loss of limb control and brain seizures, it can have a very bad effect if not treated in time.
Drain for Dry
The best way to deal with coccidiosis? Lean heavily on the side of prevention by draining water holes and keeping the cattle in a nice, well-draining pen. If it does flare up in your herd, you can treat using a coccidiostat and sulfa pills (and, of course, contact your vet).
Local rancher Todd Krispense (also my father-in-law) shared with me that in extreme cases of coccidiosis they have found the cattle to be depleted in potassium. If cattle have reached the stage of brain seizures, treating them with potassium is the only thing they’ve found to be effective in getting them over the seizures.
As another means of prevention, Todd also shared with me that they feed a lasalocid (an antibiotic and coccidiostat). This stimulates growth in the cattle. When it comes to little calves, you can also feed a supplement very effective in preventing coccidiosis.
Todd also stresses the importance of knowing the source of everything:
Where your cattle themselves came from (look at the original herd they’re coming from, the environment they were in, etc.)
The feed you offer them and its contents
The source of water (natural spring, pond, river, stock tank, etc.). Watch for any signs of contamination.
Maybe you’ve already got a herd in the back pasture. Or perhaps you’re simply toying with the idea of a few calves. Don’t let these ailments or any others talk you out of getting some cattle on your property. They can be a wonderful investment.
With a little forethought and careful planning for an emergency, you’ll be well on your way to a successful cattle-owning experience!
As a hobby farmer, you may live in a place with frequent four-legged visitors—that is, beyond the livestock you care for. Most of us don’t mind sightings of the locals. But there are times when wildlife can present a risk—to themselves or us or our domesticated animals.
Let’s take a closer look at some commonly encountered mammals—next month we’ll talk birds and reptiles—and how we can live peaceably with them in the same environment.
The Usual Suspects
What you may encounter is dependent on your geographical location, as well as the type of immediate environment. Do you live on 100 acres, most of which is open field? Or 12 wooded acres?
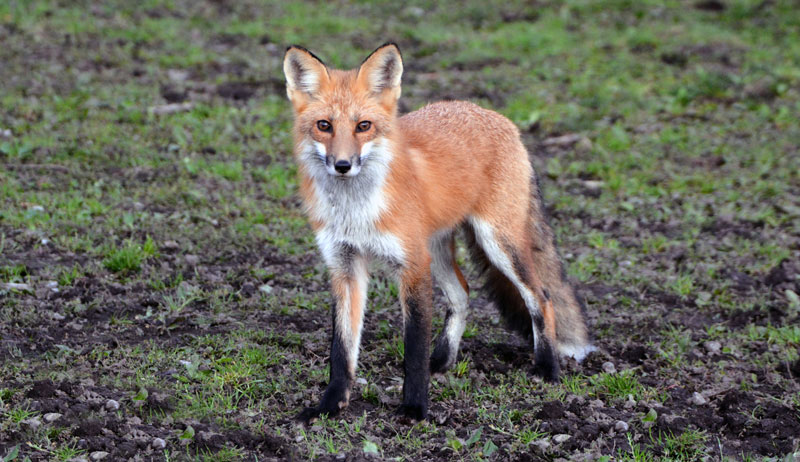
How close are you to other houses? In general, the most common critters found around barns are scavenging omnivores like raccoons, possums and skunks. You’ll commonly see foxes, too.
With a wide-ranging diet, these animals can be attracted to uncovered or unsecured garbage or animal feed. Foxes, with their grand sense of play, are also attracted to things that could be made into toys: shoes, bedding and other objects made of squishy material.
(Foxes around my barn have chewed on the armrests of my tractor, to my annoyance.)
Given this common theme, the mantra that comes to mind for discouraging wildlife from taking up residence on your farm is keep your barn picked up and clean.
Tidy barns mean tight lids on trash cans and feed bins and regular sweeping to remove spilled feed and bedding. Raccoons, with their prehensile fingers, are adept at removing lids. You may need bungee cords and other clamps to keep sneaky little hands out.
This also doubles as protection against the most ubiquitous of farm inhabitants: mice.
Most general barn upkeep is enough to dissuade frequent visitors. It’s amazing sometimes to see what a difference removing a long-standing pile of junk can do in this regard. However, attempting to make your barn completely critter-proof shouldn’t be the goal ,as it’s likely unattainable.
The occasional sighting is fine. Infestations are not.
Waste Not…
Wildlife waste is another aspect to consider. Not always obvious (although my fox friends see fit to leave waste right in the middle of the floor. . .), wildlife feces is something you want to avoid. It spreads disease.
Raccoons spread roundworms, and possums spread a microbe in their feces called Sarcocystis neurona. When horses ingest feed contaminated with possum waste, they are at risk of developing a neurological disease called equine protozoal myeloencephalitis, or EPM.
You can find treatment available. But damage to the spinal cord can be permanent, ending a horse’s athletic career. This can be a devastating disease, and the only prevention is to keep possums away from the barn.
Other microbes in feces, such as types of coccidia, are also a concern for both human and livestock health, resulting in diarrhea and ill thrift.
There’s also the ubiquitous threat of the rabies virus. Wherever you live in the contiguous 48 states, it’s strongly recommended your livestock receive annual vaccinations against rabies.
Close encounters with larger wildlife aren’t as common on the farm but are worth a quick mention.
Out west, mountain lion encounters continue to increase at an impressive rate due to human sprawl. If you know you’re in mountain lion territory, it helps to always be aware. These cats are solitary hunters. Stay alert and look for tracks and scat. If you raise livestock and have young animals on the farm, keep them close until they are strong enough to fend off a predator.
This includes coyotes, as well. You might want to consider investing in a livestock guardian animal such as a dog, donkey or llama.
Bears are another large mammal that can be seen from time to time. Again, keeping a tidy barn with food secure will help deter these animals. But they can be curious. Making noise while working in the barn may help keep these bears away. Some people recommend always having a radio on for added human noise as a deterrent.
What Can You Do?
In most cases, when keeping a hobby farm, wildlife encounters are part of the package. However, there are times when an injured or nuisance animal requires professional assistance.
Local animal control or your Department of Natural Resources (DNR) is your first line of help. Never try to capture or touch a wild animal yourself. This also goes for helping seemingly abandoned young animals. That can’t be stressed enough.
Often, staff at your DNR office also know local wildlife rehab organizations. These individuals are specifically trained in wildlife rescue and rehab. Keep your animal control/DNR number on hand in the barn for easy access.
When starting a farm, it is important to follow some good principles for layout. The organization of roads, buildings, plots and other major infrastructure and field layout can be a major opportunity or constraint for the property owner for years to come. One mistake in layout can result in repeated impediments to easy management every single year!
Here are some principles for property layout for small farms
Understand the Levels of Permanence on Your Property
Some aspects of your property are more easily changed, removed or modified than others.
For instance, you cannot change where the municipal road is or the direction of the prevailing winds. On the other hand, you can more easily change the current vegetation of a field or shift the composition of the soil.
Understand How to Work with Permanent Features, Channel & Direct Environmental Flows
You cannot change the road location. But you could modify your driveway to access your property at the best point for your farm layout.
You cannot change the prevailing winds. But you can put in a wind break.
Strive to understand ways to channel the energy moving through the farm, and work with existing infrastructure.
Understand That Permanent Features Need More Consideration at the Planning Stage
If you want to shift the balance of your sandy soil and increase organic matter, you don’t need a lot of forethought before deciding to amend the soil with organic matter. On the other hand, raising a new building requires much more consideration to avoid placing in in the wrong location.
A poorly placed building can dictate so much about your farm over the years.
Layout Along Common Lines
When you start to design the layout for new roads, lanes, buildings, plots and such, you need to work with the lines that already exist in your property: fence lines, municipal roads, edges of buildings, current laneways, etc.
Build out from these features to make your property easily manageable for tasks such as future mowing, plowing and fencing.
Consider Natural Lines
You also need to work with the natural lines of the land. Consider your hillside slopes, wetlands and drylands, edges of woodlands and fields, old gravel pits and areas with rockier soil types.
When we map and understand the environment of our property, we can plan our farm layout to avoid issues with snow accumulation on roads, woodlot encroachment into a garden and broken tractor implements from stones.
Before you lay out major laneways, plots and buildings, look at the current common and environmental lines, and consider your intended use of different existing fields and areas. Give themes to these areas by employing a circle map technique.
First, print an aerial view of your property. Make a larger, overlapping circle across the entire area (maybe 6 to 9 circles). Then create smaller, themed circles to help focus your intent.
One area can serve primarily as the “farm center” where buildings will be located. Another circled area would probably work best as a back hay field, while an area circled for its good soil should serve as the garden.
Connect These Themes by Design for Flow & Movement
Consider how these different areas connect via roads and lanes, and the movement of energy throughout the property. Make sure they link up in sensible ways for what actually moves between the zones.
If produce from a garden is brought up to the barn area, processed and stored in a cold cellar, then picked up by a truck to go to market, it makes sense to build new infrastructure with this flow in mind.
Don’t place your cold storage between the garden and the wash station. Rather, place the wash station as the first stop from the garden, then lay out roads to flow into the cold cellar and out easily to market.
Consider the Scale of Your Equipment & Prioritize Access
When laying out and constructing roads, buildings and fields, always take into account the scale of your equipment. Your roads should be wide enough to easily pass with your tractor when carrying heavy loads or pulling laden wagons. And you should plan buildings to easily house this same equipment.
With smaller-scale operations using primarily two-wheel tractors, you won’t really need large laneways and infrastructure.
However, consider building larger for a one-time future need, not your daily use. Might you someday need a neighbor’s tractors to get in and plow up 3 acres for you? Do you want access with a pickup truck (or potentially even a crane) to drop some prefabricated concrete arches for a root cellar. (This happened to me!)
Sometimes we are surprised at the scale of laneways we need in the future. So hedge your bets and make accessibility a key part of design. And make this flexible for equipment larger than what you actually use and own.
Straight or Gently Curved
When it comes to layout of roads and field and plots, I prefer to keep them straight or gently curved depending on the slope and the current layout of fields and roads.
Straight and square and rectangular plots are much easier to work with. However, with sloped land there’s some benefit to working on contour. So, in this case, I opt for a gently curving row or garden bed, rather than upfront contour planting.
These are a few, but not all, of the the principles I use for farm property layout.
Pickled beets are my grandma’s favorite. All my grandmas, that is. Here is a quick and easy recipe to preserve them without heating up the kitchen with a hot boiling water bath.
Yield: 1 quart
Ingredients
Main
4 medium beets, cooked, peeled and sliced (or more if using small, tender beets)
Use a vegetable brush to gently scrub the beets clean. Trim off the leafy ends, place the beets in a pot of water and bring to a boil. Cook the beets until they are tender and can easily be pierced with a fork, about 25 minutes. Remove from heat, drain and let cool.
Once cooled enough to handle, trim off the root-end of each beet and use your hands to break the outer layer of skin. Use your thumbs to rub away the skin.
Removing the skin can become a messy job. I recommend having a bowl for the discarded skins and another dish for the peeled beets. I normally do this over a large cutting board.
Once peeled, slice beets to your desired shape and size. I prefer to cut my beets into chunks, but go ahead and slice them if that’s your preference.
Heat a small saucepan over medium high heat with vinegar, water, sugar and salt, stir until the salt and sugar has dissolved and remove from heat. See side notes for alternative seasoning suggestions.
Pack a clean quart canning jar with sliced beets, add in ground cloves. Pour the warm brine over the beets and allow to cool for 30 minutes before refrigerating. Screw on the jar lid and tighten ring.
Transfer to the refrigerator. Best if enjoyed within a couple months.
Other ingredients to consider adding to the pickled beets: one whole cinnamon stick, a couple cloves of fresh garlic, a few whole allspice, a few whole black peppercorns, two bay leaves or even a sliced hot pepper.