Coop de Ville is my first poultry operation, but I studied lots of different plans for my cool coop. The floor is a 4-by-8-foot sheet of plywood raised a foot above the ground. The interior features a roost, two sets of shuttered windows (one would have been enough), three nesting boxes (with room for more), an outside egg door, a sweep-out door, a heat lamp on a timer, and a light-activated chicken door.
The soil here is mostly sand, and the chickens love it. The run is very large, but I had an existing roof to work with. Both feed and rainwater dispensers hang from the ceiling beams. A chicken door leads into a fenced-in yard with wildflowers, garden boxes and an anthill.
Right now, we have three Buckeye and two Silkie hens, and they’re very happy and productive. This spring, I plan to expand my flock!
— Erich Decker-Hoppen, Rio Rancho, New Mexico
This article originally appeared in the July/August 2022 issue of Chickens magazine as a “Cool Coop” feature. Have a cool coop you’d like to share? Email us a short write-up (~250 to 500 words) about your chicken coop along with a few images to chickens@chickensmagazine.com with the subject line One Cool Coop, and include your name and mailing address. Check out Chickens magazine for current prizes and contest rules.
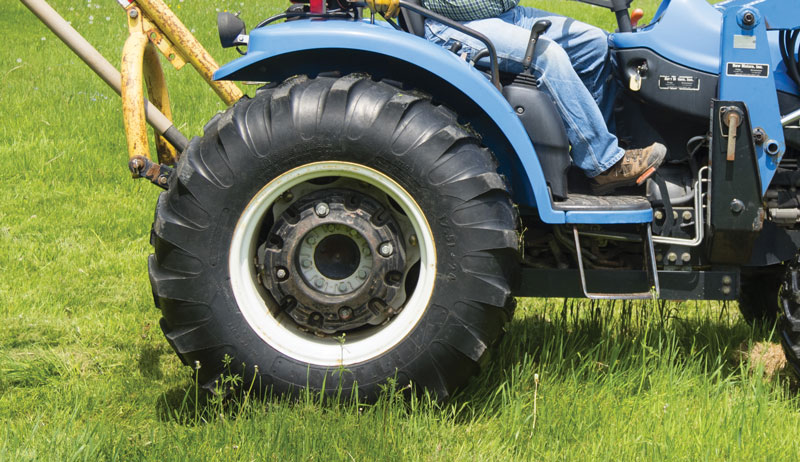
Let’s face it. When it comes to tractor features and accessories, we tend to focus on the flashy: horsepower, attachments, implements, etc. We’re always eager to discuss engine horsepower versus PTO horsepower and exactly how much weight a given front-end loader can lift. In contrast, it’s easy to overlook the nuances of types of tractor tires, fuel stabilizers and ballast for improved balance and traction.
But less flashy doesn’t mean less important. To the contrary, tires, ballast and fuel stabilizers are important—and in some cases essential—to maximize the performance of your tractor.
Let’s give these three overlooked aspects some time in the spotlight and explore how they can make or break a tractor’s performance.
Tires
There’s an old saying about horses that goes, “no hoof, no horse.” Tractors have long since replaced horses for modern fieldwork. But we can apply a similar phrase: no tires, no tractor.
Without suitable tires, even a powerful tractor can struggle to complete its tasks. Equipping your tractor with the right tires for your needs requires some knowledge of tire types, tread designs, accessories and maintenance.
Let’s dig in and highlight the main areas to focus on.
Radial or Bias?
Although you might assume tire technology is standardized, that’s not the case. When it comes to tractor tires, two types—radial tires and bias tires—offer varying strengths and weaknesses.
Radials are Usually Best
In most cases, radial tires offer superior performance. Their design allows the tread to flex independently of the sidewall, which increases traction with the ground, improves fuel economy, reduces soil compaction, provides a smoother ride and prolongs the life of the tread—perhaps to as much three times longer than a bias tire.
But there are some downsides. The fact the tread can flex independently of the sidewall can make radial tires less suitable for negotiating hills and slopes. And the sidewalls can be a vulnerable point if you strike an unseen object while operating.
Daniel Johnson
Time for Bias
This is where bias tires shine. They’re constructed from many layers of overlapping plies, giving them great durability if you’re negotiating rough terrain dotted with rocks, stumps, debris and other obstacles. Their stiffness provides solid performance on slopes. They’re also cheaper than radial tires.
Bias tires can also be less inclined to tear up the ground when turning, because less of the tread will be in contact with the ground at any given moment.
On the other hand, radial tire technology continues to advance, improving their weak spots while doubling down on their advantages. Increased flexion (IF) radials filled to the same pound-force per square inch (PSI) as regular radials can carry 20 percent more weight. Or they can carry the same weight with 20 percent less PSI.
Very high flexion (VF) radials double these metrics to 40 percent. The end result is an even larger tread footprint. This further increases traction and reducing soil compaction.
If you’re not a heavy tractor user, bias tires can be a perfect choice at a solid price point, especially if you find their strong points (durability, less ground tearing on turns, performance on slopes, etc.) appealing. But for serious field work, the longer lifespan and better fuel economy offered by radial tires might offset their higher starting price while providing better performance overall.
Regardless of which type you choose, keep your tires inflated to the recommended PSI. You’ll prolong the life of the tires and improve performance, steering and safety, too.
R1, R2, R3 or R4?
Just as important as the radial versus bias debate is choosing the right tread design for your tractor tires. While variations exist, many tractor tires fall into four broad categories (R1, R2, R3 and R4), with each one offering optimum performance under different conditions.
Let’s explore the four categories and highlight their strengths.
Daniel Johnson
R1
Classic farm tires, also known as agricultural tires. R1 tires are usually narrow with deep treads and widely spaced lugs, all designed to maximize traction and resist clogging under challenging conditions such as mud and snow. They’re aggressive and designed for off-road use. But that’s perfect for many farming tasks. The R1W tire is a variation with tread depths approximately 20 percent deeper than a typical R1 tire, offering even better performance in soggy conditions.
R2
A specialty tire with treads twice as deep as R1 tires, designed for use in very wet conditions like those encountered growing sugarcane or rice. R2 tires aren’t especially suited to general use, though. So unless you need them for cultivating specific crops, R1 or R1W tires are likely a better choice.
R3
Known as turf tires because their shallow tread depths, narrow lug spacings, and wider footprints spread the weight of a tractor across a larger area than R1 tires, helping reduce damage to lawns. R3 tires are perfect for garden work and mowing grass. But traction can suffer in wet conditions.
R4
Industrial tires fall in between R1 and R3 tires when it comes to tread depths and lug spacings. They’re durable tires suitable for operating on hard surfaces, such as concrete and pavement. The treads don’t wear out as quickly, and R4 tires boast tough sidewalls suitable for supporting great weight. They’re a perfect choice when moving heavy loads with a front-end loader or forks. And they’re considered a good general-purpose tire.
Cold temperatures, snowy conditions and slippery ice can make for challenging operating conditions. During the winter, your tractor tires may need some help to perform at their best.
For starters, you need to keep an eye on tire pressure, which can decrease as temperatures drop. Make a habit of checking tire pressure after temperature swings. And add air as necessary to keep the tires at their ideal PSI.
If you’re going to be using your tractor in deep snow or ice, tire chains can significantly improve traction and performance. These metal chains wrap around the tires and provide greater grip in slippery conditions. Just keep in mind, tire chains can’t be used at high speeds (stay below 30 miles per hour) or on dry surfaces. For example, using tire chains on bare pavement can damage the surface and also wear out your tire chains.
Maintaining proper weight distribution across a tractor is important for so many reasons. It’s necessary to achieve proper traction and protect against premature damage to the tire treads (from wheel slippage) or front axle (from excess weight).
It’s also critical from a safety perspective. If you try to lift too much weight with the front-end loader, your rear wheels may lift off the ground. Or if an implement on the three-point hitch is too heavy, the front of the tractor can lift up, reducing (or eliminating) your ability to steer.
Ballast can address these concerns. To maximize traction, ballast increases the weight of the tractor, pushing down on the wheels so they can thoroughly grip the ground. Ballast also serves to counterbalance tractors carrying heavy loads in the front or rear.
There are many types of ballast available. Even implements attached to the tractor can serve as ballast, though operating with a random rotary cutter or box blade in the rear reduces maneuverability.
More formal options for ballast include the following:
Suitcase Weights
Suitcase weights are square or rectangular in shape, with handles for convenient carrying. This gives them an appearance not dissimilar to a suitcase. They come in varying weight amounts and are installed in rows on brackets at the front or rear of the tractor, increasing traction and providing counterweight as needed.
Suitcase weights offer a lot of versatility for adding specific amounts of weight to your machine, since they’re sold in clearly defined sizes and can be easily added or removed.
Ballast Box
A ballast box couldn’t be simpler. It’s a tough metal box mounted on the three-point hitch, designed to be filled with whatever heavy ballast you have handy.
Rocks? Go for it. Concrete blocks? They work fine. Dirt? It might be a bit mess, but it’s suitable. If you need rear ballast to counterbalance heavy lifting with the front-end loader, a ballast box can be the perfect choice.
Concrete Block or Cylinder
Similar to a ballast box, fusing three-point hitch pins inside a concrete block or cylinder can create an effective piece of ballast. Just pick up the concrete with the three-point hitch, and you’re ready to go.
Wheel Weights
This straightforward option adds weight directly over the tires. They install on the wheels (the rims or axles, for example) to increase tire-to-ground traction, with the benefit of removing weight from the tractor’s frame.
Liquid Tire Ballasts
Filling your tires with liquid ballast is a great way to increase weight and traction without straining other parts of the tractor. It also lowers your tractor’s center of gravity, a big plus when negotiating sloping terrain.
Options for liquid tire ballasts include:
Water:It’s inexpensive, safe and readily available. But water is not the heaviest option. It also freezes at the relatively warm temperature of 32 degrees F and can cause wheel rims to rust.
Antifreeze:When mixed with water, antifreeze stays liquid at temperatures well below zero. But it’s also toxic, especially ethylene glycol antifreeze.
Calcium Chloride: An extremely cold-tolerant option—mixed with water, it can resist freezing down to -40 degrees F or less. Its low price and increased weight (40 percent heavier than plain water) are other positives. But calcium chloride is corrosive, has a reputation for damaging wheel rims and can be hazardous to handle.
Beet Juice:A pricier solution, but a good choice since it’s nontoxic, heavier than water, and freeze-resistant down to -35 degrees F.
Windshield Washer Fluid: Weighs similar to or slightly less than water and freezes at a much lower temperature (around -20 degrees F, depending on the formula). But methanol, a highly toxic alcohol, is a common ingredient.
Picking out a backhoe attachment might be more fun than debating whether to equip your tractor with radial or bias tires. And moving piles of garden compost with a front-end loader is probably more satisfying than filling a ballast box with sandbags.
But if you’ve come away with a new respect for the importance of tires, ballast and fuel stabilizers, then our mission is complete. Your tractor will thank you.
More Information
Fuel Stabilizers
While tires and ballast aim to maximize tractor performance, fuel stabilizers work behind the scenes to protect against performance loss due to poor-quality fuel. This applies not only to your tractor, but all your gasoline and diesel-fueled farm equipment.
J. Keeler Johnson
It doesn’t take long for gasoline and diesel fuel to degrade. The exact processes can vary. But exposure to oxygen, light, heat or water can all be problematic.
Gasoline can start to degrade within a couple of months as its most volatile compounds evaporate and reduce combustibility. Degraded gasoline can coat the fuel system with a substance compared to varnish, clogging fuel lines and the carburetor.
Diesel can also degrade quickly under the right circumstances, turning gummy or sludgy and even feeding the growth of microbes that further degrade the fuel. Suffice to say, an engine running on bad fuel might not run at all.
Benefits of Fuel Stabilizers
Bad fuel shouldn’t be a concern if you use your equipment on a regular basis, since you’ll burn through the fuel long before it starts degrading. But if you store fuel for months at a time, or if you’re concerned about fuel degrading inside seasonal equipment (such as a tractor that doesn’t receive much winter use), fuel stabilizers can save the day.
The benefits of fuel stabilizers are twofold. For one, they extend the stable life of the fuel, perhaps to as long as a year or more. Secondly, they allow you to skip the problematic step of draining fuel from seasonal equipment.
Draining fuel is a time-consuming task. It also opens the door for water to condensate inside the empty fuel tank, which can ultimately corrode the fuel system.
On the other hand, if your fuel is stable, you can instead fill up the fuel tanks of out-of-season equipment and reduce the amount of air and water vapor that can enter their systems.
A Basic Premise
Plenty of fuel stabilizers exist on the market, and exact instructions for use may vary from product to product. But the basic idea is simple.
Once you mix a certain amount of stabilizer into the fuel, you’ll be good to go. If you’re adding fuel stabilizer to the tank of an engine, run the engine for several minutes to let the mixture work through the entire system, ensuring the stabilizer can work its magic while the machine is out of use.
This article originally appeared in the May/June 2022 issue of Hobby Farms magazine.
When it comes to having chickens, a road trip is occasionally required. Whether that’s a long distance move or a short trip to a vet, the goal is the same: Get the chickens to their destination as easily and stress-free as possible.
Housing Hints
When traveling with chickens, they’ll certainly need a secure shelter in which to dwell. You can’t simply open the car door and buckle them in. Different people choose different shelters, such as a pet carrier/kennel, wire cage or even a cardboard box with plenty of air holes.
Personally, I use a large, cardboard, moving box modified with some large cutout areas for ventilation. The top flaps provided versatility—darkness when closed and to keep chickens contained, or opened to easily access the chickens.
I place the box in the backseat area with the seat lifted up and the box on the floor. I line the bottom with a towel and some hay for comfort and stability and include food and water bowls. This setup worked well for a recent 10-hour trip with a few stops along the way.
Andrew Taylor, a chicken-keeper in the United Kingdom, also has used cardboard boxes and recommends lining them to prevent leakage. Chickens get “runny poos from stress,” he says, and if it’s a long trip “it’s going to seep through.” He also recommends two chickens to a box. More than that and you can end up with droppings on top of them, which can be a significant health hazard.
Taylor believes boxes are best because chickens like the dark. Darkness can help keep them calm, as they have less visual stimuli to take in.
Kathi Rodgers, a chicken-keeper and blogger at Oak Hill Homestead, used a dog crate for her chickens when she moved to Oklahoma. She took six Buff Orpington hens in a large wire crate with a thick layer of straw on the bottom. She attached water and feed dishes to the wire.
“We checked the water level each time we stopped for gas and added more, if needed,” she says, “but we didn’t fill it completely to help prevent sloshing water.” For a short trip for a single chicken, Rodgers says a small pet carrier with a layer of straw works well. The straw helped keep their feet clean and keep them from slipping on the hard plastic surface.
You can also build an enclosure for the trip. Jeremy DuCheny, a food blogger at One Thousand Foods, uses wire cages that he builds himself for long hauls of multiple chickens. He currently has about 40 chickens and has transported chickens many times.
“These cages are basically just a box framed with rectangles built with 1-by-2 lumber and covered in wire fencing,” he says.
“This box doesn’t have to be too tall but can be built wide enough to fill an entire truck bed. We put straw on the bottom of the pen and, if needed, hook a nipple waterer or feed tray to the side. Ideally, the truck would have a topper as well, so going down the road, the wind speed doesn’t freak the birds out.”
Bethany Scott, from Rural Living Today, uses a laundry basket to take chickens to the vet. “We put them each in a small laundry basket with a layer of alfalfa on the bottom,” she says. To keep them busy she includes “bits of strawberries, including the tops for them to pick at, within the alfalfa.”
Mia McGregor
Environment
It’s important to make chickens’ environment comfortable when traveling. Try to see things from their point of view. They can be sensitive to temperatures, especially heat.
The last thing you want is heat stress, which affects egg production and can be fatal. Signs include panting, rapid breathing, lethargy, and pale combs and wattles. On my trip, I made sure it didn’t get too hot and that there was good ventilation. As needed, I cracked a window or turned on the air-conditioning (not blowing directly at them).
Be sure to have your car inspected before a long ride to give you peace of mind. The last thing you want is for the air-conditioning to be on the fritz, causing stress to your birds.
Keep chickens out of direct sunlight when traveling. If they’re in a wire cage, a thin blanket or towel draped over some of the cage is an option. In addition to shade, it provides privacy and therefore more comfort for the chicken.
You can even bring along a cooler or metal bucket with ice and add a couple ice cubes to a dish or offer chilled treats such as a little watermelon, cucumber or chopped-up leafy greens. Providing frozen water bottles chickens can lay up against is another option.
For extra hydration, consider mixing up an electrolyte mix such as Sav-A-Chick. Adding electrolytes to their water when you get back is a good idea as well.
Noise can also be a nuisance. It’s best to drive without any music playing, but if you must, try soothing classical music. (Your chickens may or may not like it, though.) Minimize other sounds, too, such as the car horn or loud phone sounds.
Minimize abrupt stops and starts. Drive smoothly, and make sure the chickens have a secure enclosure and bedding so they don’t slip and aren’t jostled around too much.
Chickens should also feel secure and have some sense of privacy. An open cage for example might make them feel overly exposed. A towel draped over can provide privacy as well as shade.
If housing more than one chicken together, pick ones who generally get along and check to make sure they are getting along during the trip.
Check on the chickens every couple of hours, making sure they have water and food and are comfortable, and that their living space is relatively clean. Bring extra bedding, a poop scooper, a trash bag, etc. to clean up as needed, as well as plenty of water for refills and some food.
It’s also good to keep an extra empty cage/crate/cardboard box on hand just in case you need to separate chickens or take one to a vet or some other unexpected scenario.
Mia McGregor
Familiarity
As the saying goes, familiarity breeds comfort. To keep chickens more comfortable, keep things familiar when traveling. Use some familiar bedding such as straw from the nesting box to line the bottom of the travel carrier. Let close buddies ride together in the same carrier (if it’s big enough) or be able to see each other.
Use familiar dishes for food and water.
Try to keep the routine the same. For my situation, I had to leave in the early morning while it was still dark out so I kept the cardboard box flaps closed and tried to keep things quiet like it is while chickens sleep at night. Come sunrise, I opened the top of the flap temporarily so the chickens could see daylight like normal. I also fed the same food as usual, along with a few treats of course.
Philip Weiss, a chicken-keeper and travel blogger, also recommends preparing the enclosure at your new destination ahead of time. “This means fresh food and water, clean bedding, and an enclosure that is safe from predators. This will ensure that your chickens can go straight back to normality after the drive.”
Chickens may act a little different during and after traveling. Some chicken-keepers report egg-laying changes such as a brief break in laying after a road trip. Mine weren’t that interested in food during the trip. Giving a few treats such as fruit or a small handful mealworms garnered more interest.
Jeff Neal, an insect breeder from The Critter Depot, recommends black soldier fly larvae. “Good food, like black soldier fly larvae, is more nutritious and filling than grain, and helps keep the chickens more calm during the travel,” he says. “This reduces stress hormones, which helps them continue producing eggs.”
Of course, don’t overdo it on the treats. A small handful is plenty.
After the trip chickens might also take a little while to feel normal (or settle in if you’ve moved to a new place). Make them as comfortable as possible and keep up a normal routine. I kept mine on the house deck in an outdoor dog kennel for a few days while I finished up their new coop.
Traveling with chickens may feel daunting, but it’s completely doable. In my experience, I’ve found chickens to be easy travelers. Hopefully, some of these tips will prove useful to you when transporting your flock!
This article originally appeared in the July/August 2022 issue of Chickens magazine.
Hobby Farms Presents: Growing Good brings you part two of the conversation with Colorado farmer Meighen Lovelace. In this episode, Meighen talks about the Colorado Blueprint to End Hunger and John Ikerd’s work in bringing to life a community food utility—like a rural electric cooperative, but for regionally produced food. Learn about zoning, what you need to know about these rules that dictate how you are allowed to use your property, and who you need to know to change the law, whether you farm in the city, suburbs or country.
Then, get a Farm Bill primer! The Farm Bill is that massive piece of national legislation that is renewed every five years and affects pretty much everything that touches your life, from energy to conservation to nutrition to beginning-farmer programs and more. Meighen breaks down the parts of the Farm Bill and flags areas that you as a small-scale farmer should pay attention to. And Meighen and Lisa offer a little pep talk for you to call your legislators and share your Farm Bill wants.
Listen to the end for Meighen’s favorite farm meal. (This is the first time we’ve heard this veggie as a favorite from all of the podcast guests!)
Be sure to listen back to Episode #33 for the first part of Meighan Lovelace’s conversation, including talk about farming in a water-scarce area, year-round farming with the Salvation Army, permaculture forest greenhouses and more.
As poultry keepers we know that, despite our best attempts at biosecurity and no matter how carefully we keep our coops, occasionally something will evade our efforts and affect our flocks. A sweltering, high-heat day may induce deadly heat stress. Or bacteria unintentionally carried in from a visitor’s farmyard can cause life-threatening contagion. The predatory attacks can present a constant threat depending on where you live.
Our poultry suffer so many potential perils. How do we even sleep at night?
Still, by keeping a secure coop and restricting access to your birds, you do everything possible to keep out uninvited guests. But what if what’s affecting our chickens isn’t a guest but a fungus, an established presence in the environment?
Fungus Among Us
Fungi (the plural of fungus) are unicellular and multicellular organisms that thrive throughout the world. They do not rely on photosynthesis for energy but rather derive their nutrition directly from absorption. They secrete enzymes onto the surfaces they grow on, absorbing the nutrients those enzymes digest.
Taxonomists have identified approximately 100,000 varieties of fungus and believe there may be as many as 1.5 million in the world. While most of these are harmless to other living organisms, several are not. In specific conditions—darkness, temperature, and humidity are all crucial factors—these fungi can produce toxins called mycotoxins that can cause disease and, in extreme cases, death amongst our chickens.
Unfortunately, it is not easy to tell when a fungal disease affects our flock. Unlike viral or bacterial infections, fungal diseases for the most part do not cause such visible symptoms as sneezing, mucous discharge or lethargy. Diagnosis is usually done by microscope, often at the necropsy table.
If you sense a general unwellness amongst your flock, trust your instincts. Fungus may very well cause one of these five fungal conditions in your chickens.
Aflatoxicosis results from highly toxic mycotoxins produced by the fungi Aspergillus flavus, and Penicillium puberlum. These toxins are collectively called aflatoxins. They can establish a tenacious, extremely stable existence in poultry feed.
Afflicted birds display a lack of appetite, an unsteady gait and a tendency to lie down. Anemia and black or bloody diarrhea may develop. Aflatoxicosis has a high mortality rate, and necropsies will show enlarged kidneys and enlarged, discolored liver.
Aspergillosis
Most commonly caused by the fungus Aspergillus fumigatus, aspergillosis can affect all domestic and captivity-raised birds—your chickens, of course, but even zoo penguins are at risk. Younger birds are more at risk to this disease, which causes lesions in the lungs, air sacs and trachea, causing afflicted animals to gasp for air.
Chickens and pigeons may occasionally develop painful, itchy lesions on their skin as well as inflamed eyes. Aspergillosis will affect an entire flock versus a handful of birds, with a high mortality rate.
Also known as thrush, candidiasis is caused by Candida albicans, a saccharomycete fungus more commonly called yeast. C. albicans typically resides within the gastrointestinal tract of animals (including humans), participating in the digestive process and kept in check by the presence of beneficial bacteria.
Candidiasis typically occurs when long-term antibiotics have been used. These antibiotics not only kill off harmful bacteria but the helpful flora as well. This allows C. albicans to flourish unchecked.
Candidiasis can be identified by the thick, bright-white mucus that coats a chicken’s tongue, mouth and esophagus. Oral mucus produces a characteristic strong, fruit-like odor. Fortunately, candidiasis can be treated with an antifungal, Nystatin, available via prescription from a veterinarian.
Trichothecene Mycotoxins
This group of toxins results from many different types of fungus, including Trichothecium, Trichoderma, Stachybotrys and Fusarium. Trichothecenes can adversely affect any animal, from chickens to humans.
These toxins are most commonly associated with spoiled grains such as oats, corn, barley, wheat and sorghum. When continually ingested by chickens, the mycotoxins cause weight loss, decreased appetite and a drop in egg production. Trichothecenes can cause cysts on birds’ feet and legs, as well as ulcers in their mouths.
Zearalenone Mycotoxins
Produced by such fungi as Gibberella zeae, Fusarium cerealis and Fusarium crookwellense, the zearalanone mycotoxins are commonly found in improperly stored animal feeds and cereals.
Zearalenone exposure is pernicious. It is an estrogenic toxin, meaning it attacks the reproductive systems of the afflicted animals. Zearalenone’s mechanisms are not yet fully understood beyond the fact that it severely affects reproduction. Afflicted hens will experience a decrease in egg production and develop peritoneal and oviductal cysts, detected at necropsy.
Preventative Measures
As dangerous as these fungal conditions may be to your flock, you can easily prevent a dangerous fungus from reaching your chickens. First and foremost, store your poultry feed in an airtight container in a dry environment. Humidity can encourage the growth of fungus.
Never feed your flock any feed, scratch, kitchen scraps or other edibles that contain mold or appear clumpy or fuzzy. Dispose of these well away from where your flock ranges.
Establish a routine schedule that involves the thorough cleaning and sanitizing of all of your feeders, including feed lines and feed-storage containers. Buy your feed from a trusted source and regularly inspect your feed grains, especially corn.
If you live in a region known for high humidity, consider using feed additives such as zeolites, clays and propionic acid to control the growth of fungus in your feed.
Finally, frequently clean your coop. Replace moist, soiled litter with fresh, dry bedding to reduce the possibility of fungus establishing itself in your flock’s living quarters.
Every issue of Hobby Farms magazine, our editors search for items useful to hobby farmers, whether heavier equipment such as tractor attachments, garden soil, useful tools, innovative helper items or accessories for livestock management. So take a look at the things we found that can help your farm run better.
Earthquake VERSA
The Earthquake VERSA front tine tiller cultivator (pictured above) can weed, mulch and aerate soil as a cultivator. It will also work as a tiller with its high-performance 99cc engine. Prepare wide open spaces of land in the spring, maintain rows in the summer and do major cleanup in the fall.
Exhalt WDG Insect Growth Regulator
Exhalt WDG Insect Growth Regulator provides control by causing a gradual reduction in the population in and around livestock facilities. The product interrupts the life cycles of labeled pests, including flies, darkling beetles, crickets and German cockroaches. The elimination of adult insects occurs gradually and becomes visible one to two weeks after application. Tank-mixable, the granules can be put into water to dissolve and apply as a liquid spray.
Beyond Peat All-Purpose Garden Soil
Beyond Peat All-Purpose Garden Soil is specially formulated for in-ground growth of vegetables, fruits and herbs. Each bag contains professional-grade organic fertilizer mixed and ready to use right out of the bag for seeding, transplanting and growing. Each bag feeds plants up to three months. Raised bed and potting soil formulas are available, too.
Hemp Pet Bedding
The naturally-grown Hemp Pet Bedding from Eaton Pet and Pasture for brooders and nesting boxes is soft, absorbent and odor-eliminating, a great replacement for shavings.
From Bottle Calf to Beef-Filled Freezer
Author Leeann Ulics Moos wrote From Bottle Calf to Beef-Filled Freezer: A Beginners’ Guide to Raising Your Own Beef for people interested in raising cattle for the first time. The book is designed to walk the reader through the process in a non-intimidating and fun manner. Find her page on Facebook by searching Leeann Ulics Moos-Author or email her at leeann@peoplescom.net.
The Fusion Drill Adaptive Cultivator
The Fusion Drill Adaptive Cultivator attaches to any cordless drill and creates a powerful and lightweight (6.6 pound) tilling option. With an adjustable tilling width up to 8 inches and depth up to 5.5 inches, perfect for mixing and aerating soil in raised beds and small plot gardens.
Steiner Flail Mower
The Steiner Flail Mower lets you transition between rough cut and finish mowing on the fly with two different knife options. No additional deck necessary.
This article originally appeared in the May/June 2022 issue of Hobby Farms magazine.
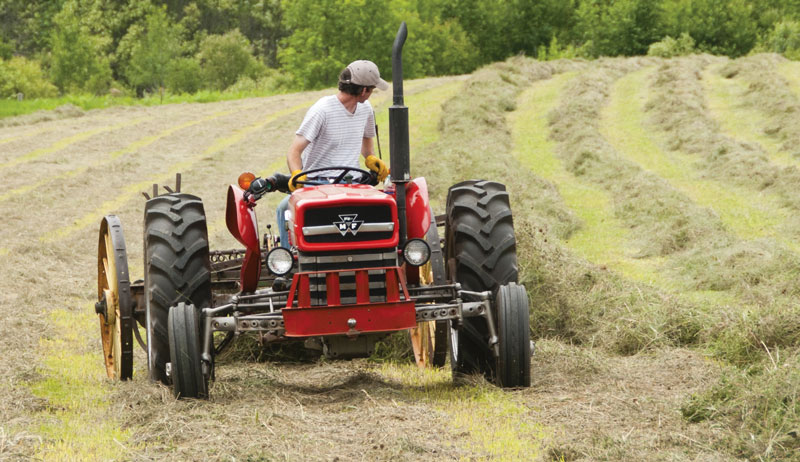
Hay season is officially underway on my northern Wisconsin farm. But the first round of production began on a decidedly experimental note.
Our regular tool for cutting hay? An old mower/conditioner specifically designed for hay production. But the mower/conditioner needed a repair this year. While we waited for the replacement part to arrive, a picture-perfect, four-day stretch of sunny weather popped up in the forecast.
Worth a Shot
Reluctant to let such an ideal haying window pass by, we elected to try cutting one small field with a brush hog. We did question whether the thick, whacking blades of the brush hog would cut hay with enough precision for raking and baling. But we decided to give it a try.
If it worked, we could to bale a field in perfect weather and count our brush hog as an effective backup for the mower/conditioner. If not, we wouldn’t give up many bales from the small field. And at least we’d mow the field.
Rather than cut the whole field at once, we took a couple of test spins around the perimeter to see how the brush hog performed. At this point, several shortcomings became obvious:
Since the brush hog attaches to the tractor via a three-point hitch, it moves with the tractor as a single unit. The cutting height could vary depending on whether the tractor entered a dip or climbed a rise.
Since the brush hog rides directly behind the tractor (instead of offset like our mower/conditioner), achieving a thorough cut would require overlapping each cutting pass to compensate for the tractor tires. This flattens grass immediately before the brush hog passes over.
Since our brush hog is narrower than our mower/conditioner, more passes around the field would be required to cut all the grass.
Since the brush hog rides low to the ground, it bends down the hay as it travels. It slices the hay into much shorter pieces than our mower/conditioner.
In order for the brush hog to dispense the cut hay in rows, we would have to raise its cutting height above that of the mower/conditioner, leaving a larger portion of each grass blade uncut.
Taking these shortcomings into account, we conceded the brush hog didn’t perform as effectively as the mower/conditioner at cutting hay. But after raising its height, the brush hog got the job done. It laid down hay in more-or-less steady rows.
So we proceeded to cut the field and cross our fingers.
From this point on, we were pleasantly surprised. The hay needed three days to dry. But it raked up nicely and baled into light, fluffy bales.
They baled a little loosely (maybe not surprising given how the brush hog cut the hay into such short pieces). But they stacked satisfactorily enough.
All told, we produced 60 bales using our brush hog as the cutter. We expected to produce around 90 with the mower/conditioner, though. So the brush hog evidently left a fair amount of grass uncut.
We definitely won’t upgrade the brush hog to the status of primary hay cutting implement!
But I enjoying knowing it can fill in for the mower/conditioner if absolutely necessary.
Ask any hobby farmer what their biggest concern is in the warm summer months and one of the top 3 will almost always be water. Water issues or the complete lack of water in a drought situation can result in problems with your livestock. If you’re on a well, it can also lead to issues in your home.
To protect farmland and help farmers, everyone needs to get smarter about water management. One of the ways hobby farmers can take charge of water used for crops or gardens is by using a smart irrigation system.
What is smart irrigation?
Most sprinkler systems operate manually. You turn on a tap or open a valve and your water flows to the sprinkler. With a smart irrigation device, instead of manually turning on the water you can control your water flow via an app.
These devices have Wi-Fi and connect to your existing sprinkler system.
The connection of a simple smart watering device can take as little as half an hour. You can find industrial smart water management systems for purchase through a company.
Or opt for simple smart watering devices available at your local retailer or online. Most non-commercial smart irrigation devices will cost under $500.
There are quite a few different smart irrigation devices you can choose from. Your choice will depend on what type of sprinkler system you’re currently using and what type of control you’d like over your watering schedule.
Most types share a few of the same features.
Control Your Watering from Your Phone
Instead of turning your water on and off yourself, a smart irrigation device will give you complete control over watering via an app. The app lets you turn the water on or off, or pause watering. If you’re away and see that your property is having a sudden downpour in the middle of your scheduled watering, you can turn your sprinklers off from anywhere you are.
You’ll also see a history of watering and data on your water usage so you can plan for water bills or limit watering to save money.
Once you connect a smart watering device and set up an account, your device will use onboard software that’s essentially a mini-weather station or weather sensor. This software will connect to your internet connection, satellite data and other proprietary methods. It will then determine current and upcoming weather systems and adjust your watering schedule according to when you’ll have rain.
If you have an outdoor sensor, the sensor will supply data to the device too. So if it’s currently raining and you’re watering, your water will shut off.
Water Based on Need & Location
Some smart watering devices have options within the app to separate your sprinkler system into zones. Depending on the zone your sprinkler is located in, you can choose when to water, how often to water and how much to water.
For example, you may want to water an area that receives greater sunlight more often than you would water an area in the shade. You can designate a zone and set a schedule for that area to receive more water.
Turn off the Water in Low Temperatures
To protect your sprinkler system when the temperatures suddenly drop to freezing levels, a smart watering device will detect the current temperature and automatically turn off the water.
Smarter Water Management
Weather systems are changing and summer temperatures are increasing every year. To preserve natural resources, all hobby farmers need to stay smart about water management.
With smart irrigation devices, technology makes managing water use easier.
Suffering through one of the hottest summers in recent records is no easy chore when you have animals to protect. Any time livestock bodies start to get overheated, they go into stress.
In addition to immediate threats, stress can also weakened animals’ immune systems. Follow these steps to keep your animals safe.
Hydration
Quantity and availability aren’t the only factors to think about when checking waters. Temperatures need to be as cool as possible.
Make sure you change the water often. With lower immune systems, animals don’t have the same ability to fight bacteria in the water.
Make sure to add electrolytes as an alternative option to plain water. Do not put the electrolyte packets in as their only source of hydration. It does taste salty, and if it is the only option the animals may end up drinking less.
Make sure they have access to plenty of shade. Supplemental shade can be as simple as shade cloths attached to trees or buildings, sheets or even trampolines.
Water and food should be in the shade as well. Not only will this keep it cooler, but this placement will also to bring animals out of the heat.
Make sure air can move through the entire area. Barns are helpful for shade, but outbuildings won’t help with heat levels unless air can flow through. Use fans where you can.
Trampolines and shade cloths work well because all sides remain open.
As heat stresses and lowers their immune system, make sure you pay attention to your animals for the onset of any medical issues.
Immediately evaluate any animal that:
doesn’t stay with the group
won’t eat
appears especially lethargic
stumbles around
appears in poor condition
Overheated animals will not have the normal strength to fight any such ailments. Make sure salt and mineral licks are available. Check for parasites often, and keep feeding and grazing areas clean.
These are important general practices when keeping livestock. But in high heat, the practices become critical.
If one of your animals is slow to stand, or appears to not stand well, take them into air conditioning for 30 minutes to see if they improve. If they do, you will need to follow protocol from your vet to treat heat stroke.
There are many species of monarda that can be found growing across North America, but none are as widely spread as Monarda fistulosa. This amazing, native plant grows in almost every state in the country. Some of the common names for monarda are bee balm and wild bergamot. It’s typically under these names that you’ll find this herb for sale at your local greenhouse.
The bees certainly do love the colorful flowers of monarda, as do butterflies, hummingbirds and other pollinators. Monarda is a wonderful addition to the herb garden, but its also grows abundantly in the wild!
Where to Find Wild Monarda
Monarda can typically be found growing along the edge of forests and trails, in fields and other full-sun areas. It prefers moist soil, but is also quite drought tolerant once established.
The plant propagates via underground rhizomes and can quickly spread in areas that they like to grow.
Delicious in the Kitchen
Some species, such as M. didyma, have a sweet, almost citrus aroma. But wild bergamot is much more pungent, with a fragrance and flavor reminiscent of oregano.
The leaves and flowers of this native herb can be used in all the same ways one might use oregano in the kitchen: in tomato sauces, roasted vegetables and grilled meats. It can easily be included in any recipe that calls for oregano.
The leaves are typically used in recipes, but the flower is just as flavorful and makes a delightful garnish on any dish.
Monarda is rich in the volatile oil thymol and is a beneficial medicinal herb because of this. You can brew a tea from this flavorful herb to soothe stomach upset and other digestive issues.
The same tea will help to calm a dry cough or heal a dry, scratchy throat.
The herb is also antibacterial, as well as anti-inflammatory, and can be used topically to heal dry, itchy skin conditions. It’s particularly beneficial on bug bites and bee stings, as well as cuts and scratches.
Simply chew up a monarda leaf, then rub it on the affected area.
The herb can also be infused in oil, and the resulting herbal oil can be crafted into a salve or lotion for topical use throughout the year.
Monarda is an amazing and useful native plant. Just head outside for a hike in the woods or at your neighborhood park to look for some. Find this special plant, harvest it and enjoy the many benefits of monarda!