Categories
Poultry

Choosing the Right Chickens for Your Backyard Flock

Choosing the right chickens for your backyard or homestead involves more than picking the prettiest birds. Whether you’re after eggs, meat, companionship, or sustainability, your ideal chicken breed should match your goals, climate, and lifestyle. Before you bring home chicks, take a step back to consider what you really need—and why it matters.

A Family Tradition of Keeping Chickens

Thirty-odd years ago, my grandparents and great-grandparents could be found in the front yard dressing and preparing hundreds of chickens to be shared between their two families. They would stock their freezers for the upcoming winter, thinking tantalizing thoughts of homemade chicken noodle soup and fried chicken. A self-sustaining lifestyle wasn’t a hobby or wishful notion. It was a reality of life.

If you wanted to eat, you had to work for it. 

Throughout my own childhood, the brooder house was never empty. Fresh eggs filled the fridge that sat in the mudroom.

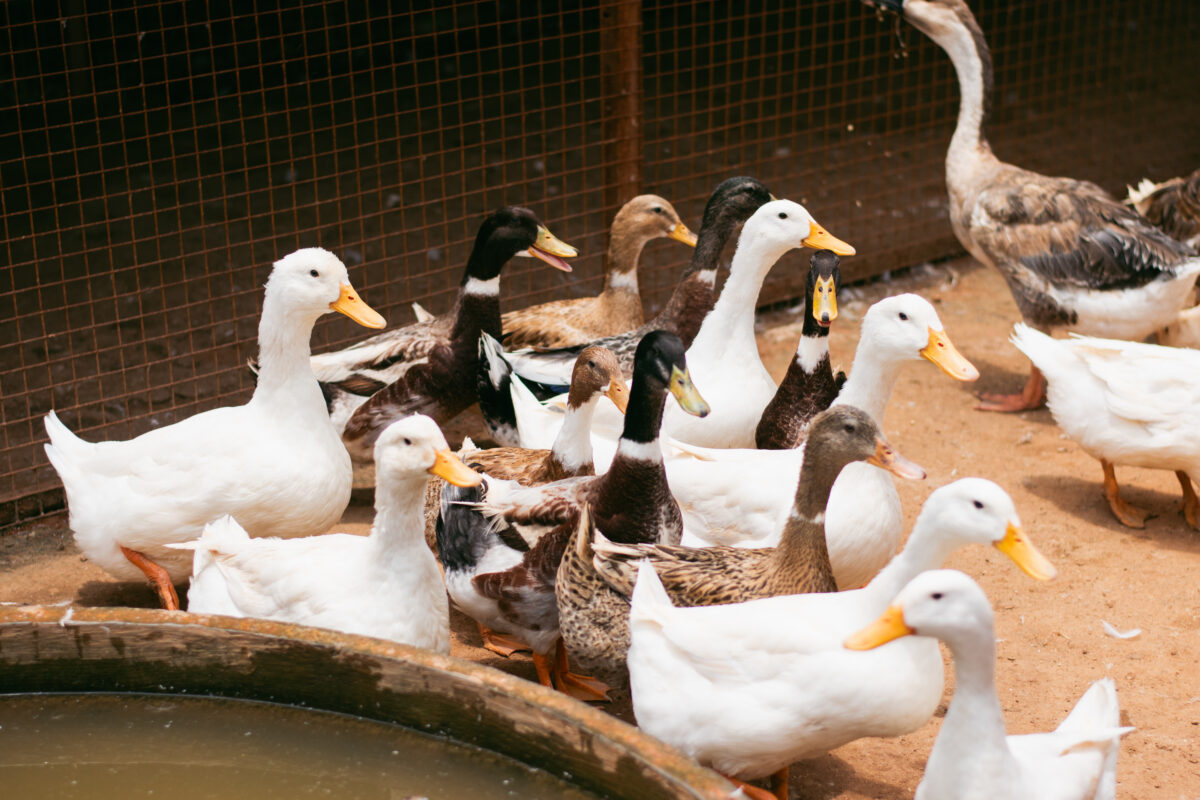
We had a variety of poultry and waterfowl, so from a young age we had sampled the eggs from turkeys, geese, ducks and, of course, our faithful laying hens. 

A few special roosters and hens seemed to have personalities of their own. At one point, my next younger brother and I had each claimed a rooster.—Roovert and Doovert, we comically dubbed them. The two unfortunate souls were chased around the hill by children eager to capture and stroke their beautiful, colored feathers. 

Top Breeds We’ve Raised

My mother was a fan of dual-purpose birds in her henhouse. She preferred to have a breed of chicken that allowed for the roosters to be butchered at a young age. The hens grew old while supplying us with a steady stream of delicious eggs. 

Even to this day, chickens are a staple at my folks’ home. Over the years,  a variety of chicken breeds graced the threshold of the brooder house. But the flock today mainly consists of a mixture of Buff Rocks, Rhode Island Reds, Red Sex Links and Golden Laced Wyandottes.

Later, on my own, I started my own flock—a mix of Dominiques and Golden Lace Wyandottes. A heritage breed with the disposition of the calmest bird I’ve seen, the Dominique has become a favorite in my own henhouse. 

What to Consider Before Choosing a Breed

When choosing the right chickens, you’ll encounter a variety of questions you’ll want to answer before picking a breed. 

  • What do you want these chickens for? To raise for meat (fryers), eggs (layers), both (dual purpose) or just as ornamentals?
  • Will they be show birds and exhibited at poultry shows or just for your own homestead?
  • Will this chicken breed be able to thrive in the climate you live in? 
  • Do you want full-sized chickens or their smaller counterparts, bantams?
  • How serious of an egg-layer are you looking for? 
  • And just for fun: What color of eggs would you like? 

Matching Breeds to Your Purpose

When choosing which breed of chickens to purchase, a little research can go a long way. One of the first things to decide: what purpose you want the birds to serve.

Chickens Raised for Meat

Fryers are chickens with stocky bodies that fill out with muscle, and are fed and grown with the intent to butcher them at a young age. They don’t lay as many eggs as layers or dual-purpose chicken breeds. 

Best Breeds for Egg Production

Layers are chickens that have a more lean body build and lay an average of an egg a day. They’re not intended to be butchered. Rather, they spend the majority of their life producing eggs. The age a hen starts producing at and the number of eggs you get a day will depend on the breed of chicken you choose. An excellent layer should average between 250 to 280 eggs a year. 

Chickens That Offer Both Eggs and Meat

Dual-purpose chickens are meant to provide a bit of both worlds. They’ll have a stockier body than layers and thus be able to be butchered. But the hens will also produce more eggs than fryers, making them able to be kept for years for egg production.

If you decide to go for a dual-purpose breed rather than strictly an egg layer, don’t expect them to produce the same number of eggs. They will still lay an adequate amount. But because they’re meant to fulfill two needs (meat and eggs) their body will also spend energy on building muscle as well.

You might also find that dual-purpose chicken breeds tend to be slower growing than their commercial counterparts, the fryers. Rather than a downside, some people find their slower growth to be a healthier alternative to some fast-maturing fryers.

Why More People Are Raising Chickens

Besides the constant entertainment chickens offer, why else would you want to go through the effort of purchasing them, building a shelter, buying feed and all of the other work it takes to maintain a healthy flock?

Chickens have grown increasingly more popular as people begin to question the health of commercial poultry offered in supermarkets and rising prices. Many people also tend to enjoy the feeling of security offered by growing their own food, whether in the form of a garden, chickens or cattle. 

chicken chickens breed breeds
N_Design/Shutterstock

How Chickens Become Part of Daily Life

The longer you have them, the more woven into your daily life and habits your chickens will become. Kitchen scraps and yard waste can be diverted from the landfill and sent straight to the backyard. In return, you’ll be given fresh, deliciously rich eggs.

If left to free-range, hens will help keep your yard’s pests in check. Things such as ticks, fleas, mosquitoes, grasshoppers, grubs, aphids and even small reptiles are liable to end up on the wrong end of a hen’s beak! 

If you enjoy gardening, chickens can be challenging pets to keep. While they might sneak a few bites of a tomato or dig a tender onion, they’ll mix your topsoil and organic matter as they scratch and kick around the dirt.

Garden pests will dwindle, and both you and the hens will reap the benefits of summertime eggs. Just consider it their way of repaying any missing produce!

Popular Egg-Laying Chicken Breeds

You’ll find a vast number of different breeds offered when choosing the right chickens for your flock. But here are some of the most common and practical layers you could consider adding to (or starting) your flock with.

Rhode Island Reds

Rhode Island Reds are a dual-purpose chicken breed developed in the state of Rhode Island. They are excellent layers and will produce a large, dark brown egg.

Some of the hens can go broody and make good mothers. These are a great option for new or experienced chicken-keepers and easy to care for. 

Red Sex Links

Red Sex Links are a hybrid chicken and, interestingly enough, cannot reproduce purebred offspring. They are the result of a red cock (New Hampshire or Rhode Island Red) mated with a silver-based hen (such as a white Leghorn, Rhode Island White, Silver-Laced Wyandotte, etc.).

They are tremendous layers, producing large, brown eggs, and are quite hardy in a variety of weather environments. 

Barred Plymouth Rocks

Barred Plymouth Rocks are another great dual-purpose breed of chicken, developed in Massachusetts. An extremely popular breed, the hens lay brown eggs and can turn broody, yet overall are hardy, calm birds. 

While their coloring is similar to their relative, the Dominique, the single comb of a Barred Rock will help you differentiate between it and the Dominique, which has a rose comb. 

Leghorns

Leghorns are an active, lively breed developed in Italy. They can come in a variety of colors, two comb variations, and either bantam or large breed size.

Leghorns are hardy and excellent layers of large, white eggs.

Golden Laced Wyandotte

Golden Laced Wyandottes get their name from a Native American tribe that was collectively known as Wendat or Wyandot. The original variety of Wyandotte was the Silver Laced. Today, however, you’ll encounter multiple different varieties including Blue, Black, Buff, Columbian, Partridge, Silver Penciled and White.

They are good layers of brown eggs and can become broody. They are a rather fluffy-looking chicken, thanks to their short tail and back, and loose feathering. 

Australorp

Australorps, developed in Australia, are another dual-purpose chicken breed. They originated from Orpingtons and eventually came to be known as Australorps.

Australorps are excellent layers of brown eggs, and have a single comb and docile disposition. 

chicken chickens breed breeds
Samantha McCourt/Shutterstock

Where to Buy Chicks and What to Know

When choosing the right chickens, chicks can be bought from a variety of places. Local farm-supply stores often host “chick days” and will have stock tanks full of chickens or ducks you can purchase and take home right that day. Many hatcheries also offer the option to order online and have the poultry shipped straight to your local post office for pickup.

Local breeders will also sometimes have poultry for sale. If you decide to buy from an individual, try to get a look at their flock and the living conditions before you purchase any birds. This will give you an idea of not only the history of your birds, but what problems you could run into in the future. 

Here’s a quick rundown of how chicks are often offered for sale.

Straight Run

The chicks have not been sexed (had their gender checked). You are buying a random assortment of cockerels and pullets. 

Cockerels

This is a selection of chicks that is supposed to be males only. Don’t be surprised if a pullet or two slips by once in awhile!

Pullets

These chicks have been sexed and determined to be pullets (or females) only.

Keeping chickens can be quite an adventure at times, but if you’re ready for a little backyard companionship and fresh eggs, they’re the way to go! Be careful on the number of poultry you get for your space, but don’t forget to have a little fun with it. A basket of multi-colored eggs could look beautiful sitting on your kitchen table! 

Frequently Asked Questions About Chickens

Sometimes people have questions they feel are too simple to ask. Don’t be that person! How else can we learn if we don’t start with the basics? Here are a few things you might have wondered about.

Do you need a rooster for your hens to lay eggs?

Nope, you don’t need a rooster for your hens to lay eggs. Roosters simply fertilize the eggs, and the hen does all the work of making them. She can do that just fine without a rooster.

If you think you’ll want a self-sustaining flock in the future (meaning you’ll hatch your own eggs, whether in an incubator or stuck under a broody hen), then you’ll need a rooster. 

Do eggs come in different colors?

Yes! Eggs can come in a rainbow of colors—they aren’t all brown or white! There are varying shades of blue, green, pink, white, brown, etc.

For brown eggs, look at the Buff Rocks, Golden-Laced Wyandottes, Rhode Island Reds, etc. For a more colorful egg such as blue or green, look at the Ameraucanas, Cream Legbars, Olive Eggers and so on. 

What is the difference between a “single” comb and “rose” comb?

A single comb is how a lot of people imagine chickens—with a single flap of skin standing up on top of their head. A rose comb is a more flat and wide piece of skin that looks rather bumpy and lays down close to the head.

If you live in a cold climate, a chicken breed with a rose comb might be somewhat more desirable as it won’t get frostbite as easily. 

How many eggs will my hen lay?

An average layer should produce between 250 to 280 eggs a year. When chickens are just pullets, they will probably lay an egg every three to four days.

As they mature, their eggs will grow larger and they should be producing two eggs every three days. (I typically would look for an egg a day from my full-grown hens, give or take a few.)

Choosing the Right Chickens: Final Thoughts

Choosing the right chickens can be a rewarding first step toward greater self-sufficiency and sustainability. Whether you’re after eggs, meat, or just some feathered friends, take time to match your breed to your climate, space, and goals. Start small, ask questions, and don’t be afraid to enjoy the process. A well-chosen flock can offer more than eggs—it can bring life, rhythm, and purpose to your homestead.

This article about choosing the right chickens was written for Hobby Farms and Chickens magazines. Click here to subscribe.

Categories
Poultry

Rhode Island Red: A Classic Egg-Laying Hen for Every Flock

Rhode Island Red chickens are an iconic American breed. This barnyard hen is an excellent brown egg layer with a friendly personality and has much to offer the backyard flock owner. 

How the Rhode Island Red Was Developed

This breed was first developed in Massachusetts and Rhode Island in the nineteenth century by crossing Brown Leghorns with Javas, Malays, and Cochins. Although no one knows who created the first Rhode Island Reds, this breed soon increased in popularity nationwide. In the early twentieth century, the Rhode Island Red made its way to England, where it was met with great enthusiasm.

The breed was first admitted into the American Poultry Association in 1904.

What These Classic Chickens Look Like

Rhode Island Red chickens come in one color: red. Hens sport dark red feathers, with some individuals appearing almost black. Tail feathers are black, giving these beauties an eye-catching appearance. As with all red chicken breeds, no two hens are colored the same. In general, roosters’ feathers are slightly darker than the females.

Both hens and roosters have single combs and red ear lobes. The beaks are a reddish horn color, while the feet and shanks are yellow. The toes and sides of the shanks may also have red markings.

Today’s Rhode Island Reds are slightly paler in color and smaller in size than the original birds. However, heritage strains of Rhode Island Reds are available for purchase as Heritage Rhode Island Reds at a local hatchery or through a breeder.

Rooster Weight: 8.6 pounds

Hen Weight: 6.6 pounds

Egg Production You Can Count On

The Rhode Island Red is an excellent egg producer, with egg colors ranging from light to dark brown. Each hen produces an average of 4-6 large/extra-large eggs weekly. (An average of 260-300 eggs annually).

Hens of this breed produce eggs for two years before production begins to slow. However, exceptional egg-layers may lay a couple of eggs each spring for ten years.

Known as dual-purpose chickens, these birds can be raised for meat and eggs. Some small-scale farms raise the pullets for eggs and cockerels for beef, but these days, Rhode Island Red chickens have been bred smaller and are usually kept for eggs rather than meat production.

Personality Traits of the Rhode Island Red

Hens are active and confident and dominate the top of the pecking order in a mixed flock. While they can bully other, more docile breeds, if kept happy, most Rhode Island Reds will find their way to the top due to their confident nature, not their bullying habits.

When handled frequently, these hens are friendly and love to snuggle on their favorite human’s lap. They are energetic, curious, docile, and sweet, making them an excellent addition to the family.

Rhode Island Red hens are ideal pets, although their food-motivated personality may make them less ideal for families with small children. Because of their love of food, they are more apt to peck at your hands than other breeds, so care should be taken to discourage this behavior.

Roosters are usually more aggressive than other breeds, so they may not be the best option for individuals seeking a pet rooster. However, roosters are individuals, and some do make excellent pets.

How Long Do These Chickens Live?

The Rhode Island Red chicken’s average life expectancy depends on the quality of nutrition fed and the strain. Feed hens a complete layer ration supplemented with probiotics, prebiotics, and herbs to help them live longer, healthier lives. When kept safe from predators, the average lifespan of production strains is about five to eight years (the average lifespan of most backyard chickens), while heritage strains average 9-10 years. Some hens may live as long as fifteen years.

Common Health Issues in Rhode Island Reds

Rhode Island Red chickens are known to be quite robust and hardy, although they should be checked regularly for lice, mites, and internal parasites.

Like other high-producing breeds, hens of this breed can be prone to several severe egg-laying disorders, such as egg yolk peritonitis, egg binding, and ovarian cancer. Egg production should be monitored closely. Take your hen to a qualified veterinarian at the first sign of an egg-laying disorder.

Due to their extra large combs and wattles, roosters of this breed are susceptible to getting frostbite. During the winter months, protect the combs and wattles by rubbing a little coconut oil over these sensitive areas. Extra caution must be used to ensure that the feathers do not get coconut oil on them, as the oil could damage them.

Keep hens and roosters inside their coop whenever temperatures dip below 30°F to keep anyone from developing frostbite. Like all clean-legged fowl, don’t forget to check the toes for frostbite.

Did You Know? Rhode Island Red Trivia

Golden Comets. Photo by Erin Snyder
  • Golden Comet hens are often referred to as Rhode Island Red hens. Golden Comets have red and white feathers, whereas Rhode Island Reds have red and black feathers.
  • This is one of the most popular chicken breeds kept for egg production worldwide.
  • Golden Comet chicks are crosses between Rhode Island Red roosters and White Leghorn hens.
  • Rhode Island Red hens are seen frequently at petting zoos due to their friendly disposition.

The Rhode Island Red is as American as its name depicts. With their friendly personalities and excellent egg production, it’s easy to see how they have grown in popularity and will for years to come.

This article was written for Chickens magazine. Click here to subscribe.

Categories
Poultry

Rhode Island White: A Rare Dual-Purpose Chicken

Rhode Island White chickens are often thought of as a different color variety of the Rhode Island Red. However, this is not simply a different color variety of the Rhode Island Red; this chicken is a unique breed all its own. 

Breed Origins of the Rhode Island White

The Rhode Island White chicken was developed by crossing White Wyandottes and Partridge Cochins with the rose combed variety of the Leghorn.

The breed was first developed in the late nineteenth century in Peacedale, Rhode Island, by J. Alonso Jocoy. However, it was not admitted to the American Poultry Association (APA) Standard of Perfection until 1903.

Rhode Island White Chicken Appearance

As their name suggests, the Rhode Island White chicken sports snow-white feathers. Their bodies are brick-shaped and solid, giving the appearance of a good dual-purpose breed.

The chicken’s feet, legs, and beak should be bright yellow. Feet and leg color will fade, especially in laying hens as the bird ages.

Combs and wattles should be bright red and waxy, with the rose combed variety being much more popular than the single comb variety.

Like many other breeds, they also come in a bantam variety.

Standard Adult Rooster Weight: 8.5 pounds

Standard Adult Hen Weight: 6.5 pounds

Rhode Island White vs. Rhode Island Red

Rhode Island White chickens are not the same breed as the Rhode Island Red. Despite their similar breed names, these two chickens have so few resemblances that even their breed development has little in common.

Though the breed was supposed to resemble the Rhode Island Red in body type, its white feathers give it a distinct look.

While the two breeds are not related, they do share resemblances, including that both come in single and rose combed varieties. However, the rose combed Rhode Island White, is the only variety recognised by the APA.

Rarity and Sex Link Traits

The Rhode Island White chicken does not have the same popularity as the Rhode Island Red. A fairly rare breed, they are listed as Watch on the American Livestock Conservancy (Meaning there are fewer than three thousand birds in the show ring).

These rare chickens are best known for their ability to carry sex link genes, and can be bred with the Rhode Island Red to create the Red Sex Link.

The downside to owning this breed is that it is so rare that acquiring stock can prove tricky.

Note: Even though these chickens can be used to create a sex link chicken, it is important to know that these chickens are not sex links themselves.

Egg Production and Broodiness

Rhode Island White hens are an excellent choice for individuals living in cold climates, as they are both cold-hardy and lay well during the colder months.

Averaging two hundred to two hundred and fifty extra-large to jumbo light brown eggs (about four to five eggs per week), their egg outputs are compatible with other popular brown egg layers.

While they are good brown egg-laying chickens, if you are looking for a chicken to hatch and brood chicks, they are not the best choice, as these hens rarely go broody.

Raising Rhode Island White Chickens for Meat

When selecting these chickens for meat, be sure to buy from a breeder or hatchery that has a non-egg laying strain for best meat production.

Rhode Island Whites have white skin, which is a preferable trait in meat chickens, and makes processing the carcasses easier.

Roosters reach marketweight between the ages of twelve to sixteen weeks. Since the breed is a dual-purpose breed, many chicken keepers order straight run chicks and butcher the roosters and keep the hens for eggs.

Temperament and Personality

The Rhode Island White is a very friendly chicken with their human family. Hens have a docile personality and make good family pets. Both hens and roosters are hardy, gentle, and tolerate confinement well. While they do enjoy free ranging, use extreme caution as their white feathers make them easy for predators to spot.

Unlike the Rhode Island Red, Rhode Island White roosters are not prone to an aggressive nature. However, bear in mind that roosters of any breed may become aggressive, especially during the breeding season.

Keeping Rhode Island White Chickens in a Flock

Rhode Island White chickens require plenty of room in the coop, as they can be assertive in a mixed flock. While not all strains are prone to aggressive behavior, be sure to monitor your flock carefully for signs of aggression and bullying.

To prevent stress and bullying tendencies, provide them with a spacious coop and run. An overcrowded henhouse must be avoided at all times when owning these beautiful chickens, so be careful to plan your coop and run to be sure adequate space is available.

Final Thoughts

The Rhode Island White chicken is a versatile, cold-hardy, and friendly dual-purpose breed that deserves more attention in backyard and heritage flocks. With impressive egg production, excellent meat quality, and a calm temperament, this rare American breed makes an ideal choice for homesteaders looking to raise a sustainable, multi-purpose chicken. Although acquiring chicks may require some effort, their many benefits make them well worth the search.

This article was written for Hobby Farms and Chickens magazines. Click here to subscribe.

Categories
Homesteading

Home Cheesemaking: A Beginner’s Guide to Crafting Cheese

Home cheesemaking is a surprisingly simple and satisfying process, but it helps to understand the basics before you begin. From ancient Egyptian murals to modern-day farmhouse kitchens, cheese has a long, rich history. Archeologists believe goat cheese dates back to 6000 B.C., and by 4000 B.C., it was already a staple in Sumerian diets. The Greeks, Romans, and even Olympic athletes relied on cheese for sustenance and strength. Today, you can carry on this delicious tradition in your own kitchen with just a few ingredients, basic tools, and a little know-how.

The History of Home Cheesemaking: From Ancient Times to Today

Archeologists believe goat cheese was “invented” around 6000 B.C. We know it was a favorite of the Sumerians by 4000 B.C. Ancient Egyptian murals depict cheese and buttermaking, and cheese is mentioned in the Old Testament.

The Greeks adored cheese. In the eighth century B.C., Homer mentions cheese in his epic poem, “The Odyssey.” Olympic athletes grew fleet and brawny on a mostly-cheese diet.

The caseale, or cheese kitchen, was a fixture in Roman villas. The Romans enjoyed an enormous selection of cheeses, among them curd, soft, hard, smoked and salted varieties, frequently peppered with a plethora of herbs and spices. Hard cheeses were a Roman export commodity and they comprised, along with crusty bread, a goodly portion of a Roman legionnaire’s daily rations.

The first European cheese, quark, is described in records dating to 3 B.C. During the Middle Ages monks began perfecting many of the cheeses we know today.

Cheese making is a relatively simple process that involves the curdling of milk to separate curds (those milky white clumps in ricotta and cottage cheeses) and whey (a clear to yellowish, watery fluid used to make whey cheese).

Following a specific recipe is the key, but understanding the basics before getting started will simplify the process for you.

Understanding Cheese Classifications and Varieties

The USDA bulletin “Cheese Varieties and Descriptions” catalogs 400 varieties of cheese, but far more exist. Cheeses are classified in a number of ways:

  • Fresh: Cottage, Ricotta and farmer cheeses
  • Quick aged: Farmhouse Cheddar, Camembert,  Haloumi
  • Aged: Sharp Cheddar, Bleu, Parmesan
  • Cow: Camembert, Gorgonzola, Asiago
  • Goat: Chevre, Caprino, Aragon
  • Sheep: Pecorino Romano, Manchango, Roquefort
  • Water Buffalo: Mozzarella di Bufala, Borelli, Toma
  • Very Soft: Mascarpone, Neufchâtel, Fromage Blanc
  • Soft: Brie, Limburger, Feta
  • Semisoft: Baby Swiss, Butterkase, Mysost
  • Semihard: Brick, Edam, Gouda
  • Hard: Parmesan, Stilton, Romano

However, classes aren’t carved in stone. Feta can be fashioned of sheep or goat’s milk, Mysost can be soft to semihard. Aging times vary greatly. It depends on who makes the cheese—and that could be you.

Choosing the Right Milk for Home Cheesemaking

You will need milk for all home cheesemaking endeavors. The milk you choose can be homegrown or store-bought, pasteurized and homogenized, or not, whole or skimmed, and the product of cows, goats or sheep.

Cow Milk

Most home cheesemaking recipes assume you’ll use cow milk, but with minor modifications, you can usually substitute goat or sheep milk. Cow milk produces a firm, easy-to-work-with curd. One gallon of cow milk yields roughly two pounds of soft cheese or one pound of hard. And best, it’s readily available.

Goat Milk

Because goat milk is naturally homogenized, goat cheeses are easy to digest. Their tart, tangy flavor is appealing and unique. Goat milk lacks carotene, the substance that gives cow milk its yellow hue, so unless you add coloring, goat cheeses are invariably white. Goat milk curds are delicate, so lower the heat five degrees when using recipes tailored for cow milk. And process goat curds with a gentle hand.

Sheep Milk

Although dairy sheep are scarce in North America, globally, that’s not the case. About 100 million sheep (one-tenth of the world’s population) are milked, and much of that milk goes into cheese. The distinctive flavor, texture and aroma of sheep cheese tickles many palates and lactose-intolerant cheese aficionados can usually digest sheep-milk cheeses. Because it contains 10 percent less water than goat or cow milk and more than twice the solids, sheep milk yields up to two and one-half times more cheese than its competitors. If you’re lucky enough to have sheep milk to use in cow-milk recipes, add three to five times less rennet and only half the recommended salt in your home cheesemaking efforts.

Raw Milk

Raw milk purchased at natural food stores has been filtered and cooled, but not pasteurized. It is higher in vitamin content and considerably more flavorful than processed milk. The bad news: raw milk can harbor tuberculosis, brucellosis and salmonella bacteria. Only raw milk from tested animals should be used in cheese making.

Pasteurized Milk

Pasteurized milk is heat-treated to zap those nasty bacteria. The process robs milk of flavor and makes its vitamins, milk sugars and proteins harder to digest. Still, pasteurized milk is undoubtedly a safer product. Supermarket milk is pasteurized and homogenized. It’s heat-treated and pressurized to thwart cream separation. Store-bought milk yields a smoother, looser curd than home-produced milks, but adding calcium chloride makes it handle more like unpasteurized milk. Worth noting: it takes up to twice as much rennet to curdle homogenized cow milk, so start with the recommended amount and gradually add more solution until those reluctant curds appear.

Whole Milk

Whole milk boasts three and a half to four percent butterfat; its cream content is intact. Hard cheeses made from high-fat milk are generally softer than skim milk varieties but their “mouth feel” is superbly rich and silky.

Skim Milk

Skimmed milk contains zero to two percent butterfat. It’s fine for making reduced-fat and soft cheeses. Hard grating cheeses like Parmesan and Romano are always fashioned from partially skimmed milk. You can enrich seven pints of homogenized fresh or reconstituted skim milk with a pint of heavy cream to recreate raw milk’s great taste and its easier home cheesemaking properties. Regardless of the type of milk you choose, make certain it’s fresh. Don’t crack the container until you’re ready to begin. Rancid or “barn-yardy” milks never make tasty cheese.

Essential Supplies for Successful Home Cheesemaking

Acidifier

Besides the milk, to make cheese, you’ll need an acidifier to convert milk sugar to lactic acid and “ripen” your milk. This can be something as simple as lemon juice or as technical as the special bacterial starter cultures purchased from a cheese-making supplier. Freeze-dried direct-set cultures are a snap to use—pour them directly from the packet into your milk—and they stay fresh in a freezer as long as two years.

Rennet

Next, you’ll need rennet, the enzyme that separates milk into curds and whey. Nearly all cheese making recipes call for rennet. In olden days, cheese makers soaked a scrap of the fourth stomach of a newborn calf or kid in warm brine to create rennet. Although animal rennets are still used, vegetable rennets work equally well. Rennet can be purchased as liquid, tablets and powder. Liquid rennet must be refrigerated, and the others require freezing. Rennet should be measured carefully and diluted in 20 to 50 times its measure of cool, unchlorinated water. The solution should be allowed to age for 20 minutes before using. You can purchase rennet from cheese making suppliers and at natural food stores. “Junket” is a mild rennet sometimes found in grocery stores alongside packaged puddings. In a pinch, it can be used in soft cheese recipes, substituting four or five Junket tablets for each one of commercial rennet.

Citric Acid

For fashioning mozzarella you’ll need citric acid. If you savor tangier cheeses, add lipase powder too. Some pharmacies carry citric acid, and because it’s also used to acidify home-canned tomatoes, you can sometimes find it in grocery or hardware store home-canning displays.

Salt

Coarse, non-iodized cheese salt draws moisture from curd, hastens aging and imparts considerable flavor. Iodized salts won’t do; iodine inhibits starter growth and slows the aging process. Non-iodized pickling and crystal kosher salts work well if you can find them.

Flavorings

Fresh herbs are a traditional flavoring for soft cheeses. If you like, fold in garlic, scallions, chives, horseradish, oregano, sage, dill, basil, parsley, thyme or caraway (alone or in combination) to your recipe. Other possibilities are bacon crumbles and small fruits like blueberries and sliced strawberries. For optimal flavor, age seasoned cheeses in the fridge for a day or two before sampling.

Other Supplies

You’ll also need a stainless steel, enamelware or glass pot large enough to hold a gallon of milk; a two-quart glass bowl; metal measuring and slotted stirring spoons; a colander; butter muslin (if you need to, substitute many layers of grocery store cheesecloth or a single layer of linen or nylon tricot fabric); a cheese-making thermometer (that registers 60 to 220 degrees F); and possibly heavy rubber gloves.

Keeping It Clean: Sanitation Tips for Home Cheesemakers

The golden rule of cheese making: Clean it and keep it clean. Immerse your bowl and utensils in boiling water for at least five minutes before and after every cheese-making session. Swab your work area with a clean cloth dipped in a solution of two tablespoons household bleach to one gallon of water. Wash your hands carefully and often. Don’t let stray bacteria spoil your cheese.

Starting Out: Home Cheesemaking Kits and Tools

The easiest way to get started making cheese is with a kit that simply requires the addition of milk. The New England Cheesemaking Supply, Glenngarry Cheesemaking and Dairy Supply, and Leener’s Brew Works (See “Cheese Making Supplies” at right for contact information) all sell a variety of kits designed with the novice in mind.

New England Cheese Supply’s Mozzarella kit costs only $19.95 and ships with an instruction and recipe booklet, vegetable rennet tablets, citric acid, cheese salt, butter muslin and a cheese-making thermometer. It makes delicious Mozzarella in three-quarter-pound batches, up to 40 pounds per kit. At $11.95, Leener’s kit omits the thermometer but adds lipase powder and calcium chloride, enough of everything to craft nine pounds of cheese. Mozzarella and soft cheese kits are fine introductions to the cheese crafter’s art.

Follow the cheese recipes exactly and you’re on your way. When you savor the inexpensive, scrumptious, preservative-free fruits of your labor, you’ll be hooked. Buy a cheese-making book, craft some molds, build a press and graduate to more and more complex cheeses.

How to Make Mozzarella and Lemon Cheese at Home

Lemon Cheese

After working under small-scale cheese makers in England, France, Holland and Canada, in 1978 Ricki Carroll opened the New England Cheesemaking Supply. Via her website and catalog, Ricki markets supplies and resources gathered from around the globe.

Some are her own creations: cheese making kits, starters, a CD-ROM and video, and the third printing of Home Cheese Making (considered by many to be the “bible” of home cheese making), first published in 1982 as Cheesemaking Made Easy. The user-friendly paperback is packed with recipes for more than 75 homemade cheeses, plus troubleshooting guides and an extensive resources section.

“When I began making cheese, I was part of a do-it-yourself culture,” says Ricki. “We were trying to reclaim the self-sufficiency that made our ancestors the independent folks they were. Today cheese making is the new wave. Our workshops are filled and we sponsored a tour of France last October. I field dozens of phone and e-mail questions every day. Anyone, anywhere, can make cheese. We’re here to help them do it.”

Recipe from Home Cheese Making by Ricki Carroll  (Storey Publishing, 2002, with permission). This moist cheese has a spreadable consistency and a mild, lemony flavor.

Ingredients

  • ½ gallon whole milk
  • Juice of 2 to 3 large lemons or approximately ¼ cup
  • Cheese salt (optional)
  • Herbs (optional)

Preparation

  • In a large pot, directly heat the milk to 175 degrees F. Add the juice from two of the lemons and stir well.
  • Cover and let the milk set for 15 minutes (you are looking for a clear separation of the curds and whey, not milky whey). If the milk has not yet set, add more of the remaining lemon juice until it does set.
  • Pour the curds into a colander lined with butter muslin. Tie the corners of the butter muslin into a knot and hang the bag to drain for one to two hours, or until the curds have stopped draining.
  • Remove the cheese from the bag. Add salt and herbs to taste, if desired.
  • Store in a covered container in the refrigerator for one to two weeks.
  • Yield: About one pound.

Ricki’s 30-Minute Mozzarella

From Home Cheese Making by Ricki Carroll(Storey Publishing, 2002, with permission). The following recipe is a quick and easy way to make fresh Mozzarella at home in less than 30 minutes. Make sure the milk you use for this cheese is NOT ultrapasteurized, otherwise you will end up with Ricotta instead of Mozzarella.

Ingredients

  • 2 level teaspoons citric acid
  • 1 gallon pasteurized whole milk (see Note in Step 1 below)
  • ¼ teaspoon lipase powder (see Note in Step 1 below), dissolved in ¼ cup cool water and allowed to sit for 20 minutes, for a stronger flavor (optional)
  • ¼ teaspoon liquid rennet (or ¼ rennet tablet) diluted in ¼ cup cool, unchlorinated water
  • 1 teaspoon cheese salt (optional)

Preparation

  • Add the citric acid to the milk and stir thoroughly. (If using lipase, add it now) Note: You may use skim milk, but the yield will be lower and the cheese will be drier. If you add lipase to this cheese, you may have to use a bit more rennet, as lipase makes the cheese softer. Try the recipe without it and experiment later.
  • Heat the milk to 88 degrees F. (The milk will start to curdle)
  • Gently stir in the diluted rennet with an up-and-down motion, and continue heating until the temperature reaches 105 degrees F. Turn off the heat and let the curd set until you get a clean break when you insert the thermometer at a 45 degree angle. This will take only a few minutes.
  • The curd should look like thick yogurt. If the whey is still milky, wait a few more minutes.
  • Scoop out the curds with a slotted spoon and put them into a two-quart microwave-safe bowl. Press the curds gently with your hands, pouring off as much whey as possible. Reserve the whey.
  • Microwave the curds on high for one minute. More whey will precipitate from the curd. Again, drain off all excess whey. Quickly work the cheese with a spoon or your hands, forming it into a ball until it is cool enough to touch. (Wear rubber gloves; the cheese has to be almost too hot to touch before it will stretch.)
  • Microwave two more times for 35 seconds each. After each heating, work the cheese into a ball until it is cool enough to touch. Drain all excess whey each time.
  • Knead quickly like bread dough until it is smooth. Sprinkle on the salt, if desired, while you are kneading and stretching. When the cheese stretches like taffy, it is done. If it breaks, the curds will need to be reheated.
  • When the cheese is smooth and shiny, it is ready to eat. Although this mozzarella is best eaten right away, if you must wait, cover it and store in the refrigerator.
  • Yield: ¾ to one pound

Tip: For a firmer cheese, use more rennet. If your cheese is too hard, use less rennet. If the curds turn into the consistency of ricotta cheese and will not come together, change the brand of milk; it may have been heat-treated at the factory to too high a temperature. Most of all, be patient. When you get this to work, you will never stop eating it.

Turning Your Home Cheesemaking Hobby Into a Business

So you want to market artisan cheese? You’re not alone. More than 250 specialty cheese makers handcrafted millions of pounds of artisan cheeses in 2002, with more entering the field each year. And rightfully so. Sales of specialty cheeses topped $2.4 billion in 2000, up four percent from 1999, and are expected to rise an additional four percent per annum through 2005.

One-third of all supermarkets offer full-service cheese counters; almost 60 percent claim artisan cheeses comprise at least half of their selections. Educational signage and handouts tell where cheeses come from, what they taste like, how old they are, how to serve them, with which wines they go best. Most cheese retailers offer samples. As a result, more and more consumers recognize fine cheese.

And American artisan cheese is getting better and better. A panel of 12 international experts at the 24th annual 2002 World Championship Cheese Contest, the largest international cheese competition in the world, awarded American artisan cheese makers 49 honors including 16 “Best of Class,” more than any other nation represented.

Helpful Marketing Information

Advice on Getting into the Cheese Business

Veteran home cheese maker Ricki Carroll, of the New England Cheesemaking Supply, cautions budding cheese entrepreneurs, “Don’t quit your day job. It takes a huge investment in time and money to establish a viable cheese-making venture. The legalities can be overwhelming. Before you invest, make sure this is for you.

“Start small by playing around in the kitchen, taking the time to learn your craft,” she advises. “One of our customers began with our easy Mozzarella kit and now he’s making 45 varieties of cheese in his basement. He’s doing this very scientifically, he’s even built a cave down there to age his cheeses.”

Above all, Ricki advises to educate yourself. “Visit some of the many artisan cheese makers around the country—you’ll find a listing of them on the American Cheese Society website (https://cheesesociety.org). Join the American Cheese Society, go to one of their meetings and meet people who have done it. Go to symposiums. Take one of our European cheese-making tours. Find out what people in your area like. You want to fill a demand with something possibly unique to your area.”

Once you’re ready, if you meet federal and state regulations (and there are a lot of them), start selling at farmers’ markets and festivals. Approach local stores and restaurants about featuring your cheeses. You can accomplish this, but it takes time and expertise.

Resources and Further Reading for Home Cheesemakers

Books:
Home Cheese Making (Storey Books, 2002), by Ricki Carroll

Making Great Cheese: 30 Simple Recipes From Cheddar to Chevre
(Lark Books, 2001), by Barbara Ciletti

Online Resources:
The Gourmet Sleath
Hundreds of cheese-making recipes with detailed descriptions of the cheeses they make.

The Cheese Wizard
Great instructions, recipes and many links.

All About Cheese
The properties of hundreds of cheeses; search by name, country of origin, texture, or milk type.

Cheesemaking & Cheesemakers NetRing
12 sites devoted to the topic.

This article about home cheesemaking was written for Hobby Farms magazine. Click here to subscribe.

Categories
Large Animals

Dairy Sheep: A Beginner’s Guide

Dairy sheep offer rich, creamy milk that’s packed with nutrition—higher in calcium, phosphorus, and vitamins A, B, and E than cow milk. Their smaller fat globules make the milk easier to digest, and the high solids content makes it ideal for cheese and yogurt. If you love homemade dairy products or simply want another productive addition to your hobby farm, dairy sheep might be the perfect fit. But before you bring home your first ewe, there are some important things to consider.

Why Dairy Sheep Need Companionship

Sheep crave the safety of a flock, so a lone sheep is a stressed sheep. Stress leads to increased parasite loads, depressed immune systems and unhappy sheep. Most researchers say a flock should contain at least three sheep, but a pair of bonded buddies generally suffices. You shouldn’t keep just one sheep.

If you don’t need at least two ewes for milk, keep a castrated male for a single milker’s companion. A friendly goat, camelid or pony might also work, depending on the individuals involved, but a second sheep is always best.

Also, sheep are strongly wired to stay alert and flee from danger. This makes them more reactive than most other barnyard species. It’s not a bad trait, but it’s something to factor into daily handling, especially on the milking stand. A soft voice and lots of kindness go a long way when handling sheep.

Time Commitment of Milking Dairy Sheep

If you’ve milked cows or goats, you already know how much time it takes. If you haven’t, consider that a milking ewe doesn’t allow for holidays, sick leave, nasty weather or weekend sleep-ins.

You or a reliable helper must milk once or twice a day, every day, at roughly the same time, throughout your ewe’s lactation. You’ll also need to have her bred, be with her for lambing and deal with caring for her lambs. If that sounds like more than you’re willing to take on, don’t try dairying, sheep or otherwise.

Choosing the Best Dairy Sheep Breeds

Before buying or even choosing a breed, decide what you need from your sheep. Do you want to raise sheep for only milk? How much milk? Do you want milk and wool? Are meaty lambs part of your vision? Are hardiness and flightiness important?

There are two ways to approach milking: with specialized dairy sheep or with nondairy breed ewes. Dairy ewes offer considerably longer lactations. A dairy ewe’s lactation can last as long as eight months, while a typical nondairy ewe’s lactation usually lasts three to five months. And she’ll produce a whole lot less per milking.

The best bets for high production and long lactations are East Friesian and Lacaune dairy sheep, or crosses of these two breeds.

Top Dairy Sheep Breeds for Milk Production

East Friesian: High Milk Yields & Friendly Disposition

East Friesian sheep are fairly readily available German sheep that typically produce about 1,000 pounds of milk during a 220- to 240-day lactation. The East Friesian is also a wool breed that shears a 9- to 12-pound, 30- to 35-micron, low-luster fleece, with a staple length of roughly 4 to 6 inches. Most East Friesians are white, but a dark brown strain is also available. East Friesian ewes average slightly more than two lambs per lambing, and, bred to heavy breed rams, their lambs are quite meaty. East Friesians are typically docile and friendly, but they’re not particularly hardy.

Lacaune: Hardy Sheep with High Milk Solids

Lacaune sheep are improved French dairy sheep that give slightly less milk than East Friesians, but the milk contains more milk solids. Plus, Lacaunes are hardier sheep. Authentic French Roquefort cheese is crafted using certified Lacaune milk. These are technically wool sheep, but their heads, legs and bellies are wool-free and they tend to shed much of the rest of their fleece, so raising them for wool is counterproductive.

Awassi: Rare, Rugged, and Prolific

Awassi sheep are fat-tailed dairy sheep that originated in the Middle East and are still rare in North America. They’re prolific milkers, second only to East Friesians in production. They’re exceptionally hardy carpet-wool sheep that come in many colors.

Assaf: Dual-Purpose Dairy Breed

Assaf sheep are spin-offs created in Israel by crossing Awassi with East Friesians. The Assaf is a dual-purpose wool-and-dairy breed and, like Awassi, is difficult to find and buy in North America.

Icelandic & Katahdin: Alternative Breeds Worth Milking

Several nondairy breeds produce enough milk during a long enough lactation to warrant milking them, especially because sheep milk freezes beautifully, and it’s easy to save up enough for making cheese. The best of these are Icelandics, a triple-purpose wool-milk-and-meat sheep, and Katahdins, a popular, parasite-resistant hair sheep breed.

How to Select Healthy Udders in Dairy Sheep

Ewes’ udders are placed back farther than those of goats or cows, essentially positioned between their hind legs, so you milk sheep from the rear.

Udders differ by individual. The ewes you choose should have soft, pliable udders with two teats — no more, no less, not even nubs. Extras are considered supernumerary teats. Supernumerary teats are often blind teats, meaning they have no opening to the outside, a condition that can lead to serious udder diseases such as mastitis. Each teat should have a single orifice on the end.

If you hand-milk, make sure the teats are big enough to grasp with at least your thumb and two fingers. Feel the udder carefully, checking for lumpy scar tissue that can indicate past rounds of mastitis, which tends to recur.

Feeding Dairy Sheep for Optimal Milk Yield

It takes good feed to produce a decent supply of milk. In addition to high-quality forage, meaning rich pasture or legume hay, dairy ewes need a measured amount of concentrated feed such as a homemade mix formulated by a nutritionist or a good commercial sheep feed.

They need access to clean water and sheep-specific minerals at all times of the day. Take care that they aren’t exposed to commercial feed or minerals formulated for other species such as goats, horses or cattle. These contain copper, which can slowly accumulate in a sheep’s liver and contribute to copper toxicity. In time, too much copper can kill a sheep.

Key Dairy Sheep Facts at a Glance

Annual Milk Production in Dairy Sheep

Domestic Ewes: 100 to 200 pounds

Dairy/Domestic crossbred Ewes: 300 to 650 pounds

Dairy Ewes: 400 to 1,100 pounds

Dairy Ewe Traits

Mature Body Weight: 150 to 190 pounds

Years to Reach Mature Size: 2 to 3 years

Production Lifespan: 5 to 7 years

Wool Production: 3 to 10 pounds/year

Milk Composition: fat content — 6 to 8 percent; protein content — 5 to 7 percent

Source: Guide to Raising Dairy Sheep, University of Wisconsin-Extension

If you’re ready to embrace the rewarding challenge of raising dairy sheep, you’ll gain more than just rich milk—you’ll become part of a time-honored tradition of small-scale, sustainable dairying. Whether you want to make your own cheese, enjoy nutrient-dense milk, or expand your homestead’s productivity, dairy sheep offer a unique and fulfilling path. Just remember: thoughtful planning, careful breed selection, and daily dedication are the keys to success. So do your homework, start small, and don’t be sheepish—your flock is waiting.

This story about raising dairy sheep was written for Hobby Farms magazine. Click here to subscribe.

Categories
Large Animals

Sheep Nutrition Tips for Every Flock

Sheep nutrition plays a vital role in maintaining flock health, productivity, and longevity. Whether you’re raising sheep for meat, milk, or wool, it’s important to first define their purpose and then tailor their diet accordingly. For example, pregnant ewes require higher energy intake than growing lambs, and all sheep benefit from balanced forage and minerals. Proper sheep nutrition not only improves wool quality but also supports strong growth and disease resistance throughout your flock.

Most sheep are kept on pasture or hay, and if it’s high in protein and of good quality, it’s sufficient in terms of nutrition most of the time. In addition to high-quality forage, sheep must also have a professionally balanced mineral available to them.

Managing Copper in Sheep Nutrition

While all livestock require copper, in the wrong quantities, copper can also be toxic. Sheep are the most sensitive to copper toxicity; thus, you must pay special attention to copper in their diet.

The presence or absence of other minerals in a sheep’s diet can affect how copper is metabolized and contribute to or lessen the chance of copper toxicity. Testing hay and pasture where you plan to graze sheep can make a huge difference in survival rate.

Often, hay alone has more copper than sheep will need, so feeding them a mineral or feed supplement balanced for another livestock species could be fatal. Even grazing sheep on pasture where waste from poultry or pigs—which typically require more copper in their diets—can alter copper levels in the sheep diet.

Feeding Ewes and Lambs for Optimal Nutrition

nutrition sheep lambs ewes
Shutterstock

In terms of sheep nutrition, a pregnant ewe needs a high-energy feed, such as grain, before and after lambing. Slowly increase the concentrate she consumes to about 15 percent of her diet (dry matter) before lambing and then 35 percent of her diet (dry matter) after lambing. This will help prepare her body for the stress of lactation and minimize the possibility of health issues such as pregnancy toxemia or metabolic diseases. The exact amount your ewe will need depends on her age, health and the number of lambs she is expected to have.

Lambs will, of course, need colostrum immediately after birth. If a lamb is nursing or bottle-feeding well, creep feed should be offered between 10 and 14 days old. You can purchase professionally balanced creep feeds for a reasonable price; lambs don’t eat much. While creep feeding aids in rumen development, encouraging consumption of nutritious feed can also reduce the stress of weaning.

If your ewe has a properly balanced diet and both the ewe and the lamb are consuming a high-quality forage, finishing weights for meat lambs can be reached more quickly.

If you are finishing out your lambs on pasture or hay, provide a supplement with greater energy and possibly protein. You can determine which supplement to use by knowing the nutrient composition of the forage you feed your lambs.

Sheep Nutrition: Final Thoughts

Meeting your flock’s sheep nutrition needs starts with understanding the quality of the forage, hay, and supplements you provide. Whether you’re grazing, feeding hay, or incorporating energy-dense grains and balanced minerals, tailoring your approach to the life stage and purpose of each sheep is essential. By regularly testing feed sources and adjusting as needed, you can support healthy growth, improve wool quality, and prevent nutritional issues like copper toxicity—ensuring a strong, productive flock year-round.

This story about sheep nutrition was written for Hobby Farms magazine. Click here to subscribe.

Categories
Poultry

Introducing New Ducks to a Flock: What to Expect

Introducing new ducks to a flock can be challenging, but understanding what to expect makes the process smoother and safer for everyone involved. Ducks, like other poultry, have social hierarchies and routines that can be disrupted by new arrivals. With the right approach, you can help your flock accept new members peacefully and form lasting bonds.

Understanding Pecking Order When Introducing New Ducks

How to introduce new ducks to the flock starts with understanding your flock’s pecking order. A duck’s pecking order is similar to that of a chicken, but usually not as violent. Ducks can still inflict injuries on each other, however, so supervision is needed at all times when introducing new flock members.

Lower-ranking members of the pecking order are more likely to pick on newcomers than ducks at the top of the pecking order.

The top ducks in the flock will generally leave the newcomers alone after establishing their spot at the top of the pecking order, and will only reinforce their leadership when confronted by a newcomer or existing flock member.

Tips for Introducing New Ducks to a Flock

Learning some common tips and tricks is one of the best ways to learn how to introduce new ducks to a flock successfully. While each flock is unique, following these suggestions will make the integration smoother and help reduce stress in both the newcomers and existing members. Here are three pieces of advice to help the transition.

1. Start Slow for a Smooth Flock Introduction

While all poultry and livestock like routine, ducks thrive on it. Their love of routine isn’t a big problem on its own, but it can become a problem when introducing new flock members.

Some flock members will accept new ducks within a couple of minutes, while others will take several days, weeks, months, to even a year or two. (Yes, it really can take that long!)

To the flock owner, this process may seem slow, but ducks are notorious for being stubborn, so it’s best to let them learn to like each other in their own time, rather than to try to rush the integration.

2. Using Physical Barriers to Prevent Injuries

Another tip for introducing new ducks to a flock is setting up a physical barrier. Ducks should be able to see each other to help them warm up to each other and start establishing the new pecking order, without the risk of injury.

The physical barrier you use will depend on your setup, but one of the best barriers to use is a small animal playpen. These playpens can be taken apart, or you can add extra panels to fit the size of your enclosure.

Playpens are also nice as the slots are small enough that persistent feuding ducks can not get their bills or heads through and cause injury. (Playpen panels should have no more than three-quarters of an inch spacing between bars.)

Small animal playpens are also tall enough to stop ducks from flying over them (excluding bantam duck breeds and Muscovy ducks).

3. Why Outdoor Introductions Work Best

If you have an outdoor enclosure for your ducks, introduce new members to the existing flock out there, versus the coop. Ducks tend to be more territorial in the coop versus the run, so keep introductions outside for best success.

When Duck Breeds Don’t Mix Well

Birds of a feather, flock together, is an important thing to remember when learning how to introduce new ducks to a flock. Ducks like ducks that look like themselves, so if raising a flock of Khaki Campbells, it may not be wise to throw in a single Pekin.

Introducing a New Duck Breed to the Flock

If introducing new duck breeds into your flock is high on your bucket list, you can help make the integration easier by adding two or three ducks of the same breed to the existing flock.

Step-by-Step Duck Flock Integration Guide

Successfully introducing new members to your duck flock can be challenging, but with some time, it isn’t impossible.

Start by allowing ducks to see each other on opposite sides of the fence for several weeks before allowing them to interact face-to-face. Never introduce ducklings to adult ducks until ducklings have reached at least eight weeks of age.

Start the introductions in an outside enclosure where you can intervene if necessary. If fights break out and intervention is needed (see below for common aggression signs), separate the two flocks for several days and try again.

Allow new ducks access to the existing flock’s area of the coop, after all members coexist peacefully together in the run. Not all ducks will welcome newcomers into their coop area (even if they coexist outdoors), so be prepared to set up another pen in the coop if needed.

Introducing Male vs. Female Ducks

How to introduce new ducks to a flock will depend on whether you are introducing males or females.

Even in an all-female flock, female ducks are usually more readily welcomed than drakes (male ducks). While lower-ranking females may readily accept a new drake, the queen of the flock may see him as a threat.

If harmony is not quickly restored, consider giving the drake his own pen inside the coop with several ladies of his own, away from the flock’s queen.

Drakes do not usually coexist peacefully with each other unless kept in a bachelor pad (the name given to flocks with all drakes). If housed with females, your best bet is to provide separate housing and ladies for each drake to avoid injuries in both males and females.

Be aware that female ducks introduced to bachelor pads do not stand a chance and should be kept separate from the flock at all times. To keep your lone female duck company, without risking an injury or accidental death, remove one of the drakes from the bachelor pad to live with her.

Managing Stress During Flock Introductions

Ducks love routine and quickly become stressed when their routines are changed. Adding new flock members will naturally mess up your flock’s daily routine, as there are more flock members to share the feeding area with the swimming pool, etc.

This change of events can create stress in the flock. Stressed signs include flop duck (a disorder where a duck suddenly falls down and refuses to get up.) and wing twitching.

If you see these symptoms, isolate the duck(s) for several hours to help them recover.

Separate ducks when fights become too rough or when older ducks refuse to let new members eat or drink to keep stress levels down.

Recognizing and Stopping Aggressive Behavior

The most critical thing to learn about how to introduce new ducks to a flock is learning the signs of aggression and when to intervene during a squabble. Avoiding an injury is important, so be on the lookout for some common signs of aggression.

  • Biting and shaking other ducks’ heads and necks
  • Beating each other with wings
  • Chasing new members with their heads down
  • Chasing new members away from feed and water sources and shady places in the run
  • Feather Pulling
  • Heads held high with wide-open mouths quacking (This behavior is usually followed by a fight.)

When to Intervene

Ducks will sometimes need an intervention when being introduced to each other. Duck fights are not pretty, but learning when the brawl is getting out of control is necessary to allow ducks to sort out their differences without causing an injury.

The first step in introducing new ducks to a flock without causing injury is to never leave fighting ducks unattended. Always be on standby in case you need to quickly intervene.

Interventions should occur when a duck is refusing to let new members eat or drink, or when fights are getting out of control, i.e.,  when ducks are biting at each other’s eyes, excessive amounts of pushing during fights, or chasing that may cause a leg injury.

Protecting Older Ducks During Integration

One of the most overlooked considerations when researching how to introduce new ducks to a flock is ensuring the safety and well-being of your golden ducks. Golden ducks are those flock members that have stood the test of time, laid more eggs than you can count, and are now living out their retirement years as family pets.

Older ducks can not move as quickly as younger flock members and are more prone to injuries and being bullied, as young newcomers may take advantage of them to move up in the pecking order.

If elderly ducks are present in your flock, be sure to be extra vigilant to ensure their safety and well-being.

Knowing how to introduce new ducks to a flock can help prevent flock squabbles and injuries,  and help your flock to coexist peacefully. With time and patience, ducks will often go on to accept new flock members and form lifelong friendships.

This article about introducing new ducks to a flock was written for Hobby Farms and Chickens magazines. Click here to subscribe.

Categories
Farm & Garden

Growing Mushrooms at Home: A Beginner’s Guide

Growing mushrooms at home is easier—and more fun—than you might think. With just a little space, some humidity, and the right starter kit, you can cultivate gourmet varieties like shiitake, oyster, lion’s mane and even portabella right on your kitchen counter.

How I Started Growing Mushrooms at Home

Years ago, I received a box in the mail as a birthday gift from my kids. It contained a big lump of white, popcorn-looking stuff in a plastic bag (so attractive!). How sweet of them to remember me with this … whatever it was! Well, it turned out to be mushrooms.

Of course, my kids knew that I loved mushrooms and would get a kick out of watching them grow. And yes, they grew. With a little coaxing and misting, we enjoyed delicious and, ultimately, fresh shiitake mushrooms for a few weeks.

I tried fruiting it again after the allotted resting period and got a few; then, I lost interest or got busy or didn’t maintain the schedule of misting and soaking … you know how it goes. But now, it’s time again. I’m determined to have mushrooms, as fresh as can be, plucked from my own mushroom farm, right in my own kitchen.

I did a little research of companies that offer kits, whipped out the old credit card, and ordered oysters, portabellas and shiitakes; lion’s mane in a bag; and a shiitake-impregnated log. This time, I read everything I could find to learn the how and why of these mysterious little plants. (Are they plants? Or are they animals?)

What Are Mushrooms, Really?

Mushrooms are certainly not animals, but they do consume decaying animal matter and plants. They aren’t exactly plants either, without real roots, leaves or chlorophyll. Fungi, in a class all their own, include mushrooms, molds and yeasts. They live everywhere: underground, in the air, on our walls and sometimes in our bodies. The mushrooms we eat are the fruiting bodies of certain mycelium (vegetative part of a fungus) strains that carry spores for reproduction.

Choosing the Right Mushrooms to Grow Indoors

Mushrooms can be found growing all around the world. While mushroom hunting is an option, it’s not something that I care to do. Identifying safe, edible mushrooms should be left to the experts. People can become quite ill, and sometimes die, from eating certain poisonous mushrooms.

There are more than 2,000 species of mushrooms that have been classified, with only about 200 being edible. Of those, only a handful are cultivated through mushroom farming or wild-crafted, like morel mushrooms, for sale. Consumed for thousands of years, these mushrooms have been used medicinally and as dyes for fibers, and they also have ceremonial applications. However, it’s the culinary aspects that interest me. Besides tasting so darn good, they are low in calories and high in protein, iron, zinc, fiber, amino acids, vitamins and minerals. What could be better?

Indoor Growing Conditions for Mushrooms

Because I’m attempting to grow mushrooms in my house, not a climate-controlled room, I’m a bit more limited in the varieties I can grow. There are two basic types of mushrooms. One requires a living organism — typically a tree — to survive. This type includes morels, truffles and porcinis that are all wild-crafted and need to grow outdoors. Other mushrooms, such as the portabella, shiitake, oyster and lion’s mane, that I chose, flourish on dead or dying materials, such as composting grains, straw, coffee grounds, wood chips and the like. These will grow indoors.

Another basic requirement is temperature. While the underground portion of the mushroom can survive freezing temperatures, the fruiting portion requires 50 to 75 degrees Fahrenheit, which is obtainable in most households. Each species has its own temperature range and may require a bit of creativity in placement.

Humidity is also a factor. Providing a tent made from a plastic bag will generally do the trick. Mushrooms do need oxygen. There are holes punched in the bags provided by the companies selling the mushrooms. Low, indirect light is the best, so they need a spot away from the windows.

My Favorite Beginner Mushroom Growing Kits

As a beginner, I chose small, inexpensive kits to learn the method and get the fastest results. Kids love to watch the process, and the incubation time is relatively short. These kits were all populated with mycelium and ready to fruit. Growing the mycelium from spores can take months, if not years, to develop. Your kids may lose a little patience with this. (I may lose a little patience with this!)

Mycelium can grow undisturbed for years underground. One of the largest colonies ever discovered is in Oregon.

It’s more than 2,000 acres (more than 3 square miles) in size and believed to be older than 2,400 years. All five of my little colonies fit on my kitchen counter and fruit within a few weeks. This is doable for my busy life.

How to Grow Mushrooms on a Shiitake Log

You can purchase oak logs inoculated with shiitake spawn in several sizes. I chose a 10-inch size. It should produce mushrooms off and on for three to four years with the mycelium it contains, and that which will grow as it consumes the nutrients in the log.

It needs to be soaked for 12 to 16 hours every two weeks for maintenance and can be shocked (soaked in ice water for 24 hours or treated to a day in the freezer) every eight weeks to induce fruiting. It lives quite happily surrounded by houseplants that require high humidity and indirect light.

Using a Shiitake Mushroom Block Kit

When my shiitake patch arrived, I took it out of the plastic bag and checked it over for any fruiting mushrooms. There were none, so it went back in the bag and into the refrigerator for three days. Water was added to cover the patch, and it soaked for three hours. Drained and resting on a tray, I placed a plastic bag over the block of mushroom substrate to keep in the humidity.

After misting two to three times a day for a week, three little brown buttons appeared. One took off and grew into a giant shiitake mushroom weighing 31⁄2 ounces and was 41⁄2 inches in diameter. The others did not develop.

After harvest, I let the patch dry out for 10 days. Then, with a chopstick, I poked three holes into the block and soaked it in water for four hours. The misting schedule resumed. In a week, I harvested 19 medium-sized mushrooms. The process can be repeated three to four times before the mycelium has consumed all the nutrients in the substrate.

Lion’s Mane: A Unique Mushroom to Grow Indoors

The lion’s mane looked very similar to the shiitake patch but was treated differently. There were already small mushrooms growing on top that I removed (supposedly bitter). It stayed in the bag, and the mushrooms grew out of the slits that I cut into it. It also got misted two to three times a day and was tented with a plastic bag. I put some wooden skewers into the top to hold the bag away from the developing mushrooms. In 10 to 12 days, one mushroom had taken the lead and grown into an 8-ounce shaggy lion’s mane measuring about 6-by-4-by-2 inches.

I was very curious to taste this mushroom. It is likened to lobster or crab in taste and texture. I tore half the mushroom into pieces and sautéed it in butter with salt and pepper and just a squeeze of lemon. It had the texture and a slight scent of seafood, but it was not as sweet as I had expected. With the addition of heavy cream and some fresh thyme, it tasted much better, and served over toast, it became our lunch. With the other half, I tried a not-lobster salad recipe that created a great vegetarian version.

Easy-Growing Oyster Mushrooms in a Kit

Back to the Roots is a company that has grown almost as fast as their mushrooms. It was conceived in an apartment kitchen by two college guys. They took spent grounds from the local coffee shop, inoculated them with oyster mushroom spawn, and grew their first bucket of mushrooms.

Now in national distribution in grocery stores and coffee shops across the country, the kits make it easy to grow food in a sustainable manner. The block of mycelium-impregnated coffee grounds came in a plastic bag encased in a cardboard box. I removed it from the box, cut a slit in the bag and soaked it in water for 12 hours. Drained, and back in the box, it got misted three to four times a day. Two weeks later, the mushrooms sprouted and grew into a 4-ounce cluster within the span of five days. After harvest, I cut a slit in the other side of the bag and soaked it; now it’s back in the box for a second flush.

While the oysters looked delicate, they were quite thick and very meaty in texture. I cooked them simply by tearing them into pieces and slicing the stems. They were fried in a bit of olive oil, a small clove of sliced garlic, salt and pepper. I finished with a touch of butter and squeeze of lemon juice, and sprinkled with fresh chives from the garden — delicious!

Watching Portabella Mushrooms Grow

The portabella kit I chose had a different method of cultivation, using composted horse manure. While it seemed like the most boring selection, since I buy portabellas at my local market, it was really the most interesting to watch and the most prolific.

The substrate came in a plastic bag in a large cardboard box. A separate bag of material was included. This casing layer needed to be soaked in warm water and scattered on top of the white substrate. The plastic bag was folded up and the box lid closed. I put it near the heat mat to keep warm (70 to 75 degrees) for a week. In that time, the mycelium crept up the sides and grew into the casing. Then I opened up the box lid, cut the plastic even with the substrate, and another plastic bag was placed over it to hold in the humidity. I also moved it to the garage for a cooler temperature (55 to 65 degrees) required for fruiting.

In 10 days, it started forming tiny brown mushrooms. I harvested 2 pounds, 4 ounces five days after that. After harvest, I continued to mist every day or so, and the pinning began again. The second flush yielded more than a pound, and it’s now starting up again with tiny brown buttons.

Tips for Cooking and Preserving Fresh Mushrooms

Because all mushrooms contain a small amount of toxins, and the cell structure is difficult for our bodies to digest, it’s always recommended to thoroughly cook them. To really taste the flavor of the mushrooms, I like to simply sauté them in a little butter or olive oil. Cream is always a nice addition that readily picks up the earthy flavors.

Always store mushrooms in the refrigerator in a paper bag or wrapped in a paper towel. They should keep for a week or two.

Mushrooms can be preserved by drying in the sun in arid climates or in a dehydrator. Simply cut into uniform pieces, and place on racks. The time required will vary with the amount and thickness of the mushrooms. Dried mushrooms can be rehydrated by soaking in boiling water for 20 to 30 minutes. Powders can also be made from the dried mushrooms by grinding in a small spice or coffee grinder.

Mushrooms need to be cooked before freezing. Sauté them in a little oil, or simmer in water for 5 to 8 minutes. Drain and transfer to zip-lock freezer bags. Use in soups and sauces within six to eight months.

Pickling is a good way to preserve mushrooms if you have a bumper crop. They can be stored in the refrigerator for 2 to 3 weeks or canned by the water-bath method to keep on the shelf for a year. (See “Oh, You Know I Can!” on page 40 of this issue to can using the water-bath method.)

Why Growing Mushrooms at Home Is Worth It

While it might not be as cost-effective to grow mushrooms from kits, I certainly enjoyed eating the mushrooms, and freshness was a big plus. Would I do it again? You bet — to try unusual mushrooms I can’t get at the market or to educate kids about mushroom culture.

What started as a grand science experiment and a way to have the freshest mushrooms to eat has revealed a whole new world. I discovered there is a thriving organism growing right below our feet. Besides giving us delicious, healthy gourmet foods with a variety of earthy flavors, medicines and dyes, the mycelium is connecting the plant world, nourishing trees, composting decayed materials and helping to balance our environment.

Nurturing a kit is a wonderful way to start. It is fascinating as well as sometimes frustrating. I’ve been known to shout “Grow!” a few times, and I was then, with patience and lots of misting, rewarded with delicious mushrooms. The next step is to experiment with creating the substrate inoculated with spawn, and eventually growing spawn from spores. The adventure is only beginning.

What Makes Mushrooms So Delicious?

According to the Mushroom Council, mushrooms are a rich source of umami (pronounced oo-MAH-mee). The darker the mushroom, the more umami it contains. “Umami is the fifth basic taste after sweet, salty, bitter and sour. Derived from the Japanese word umai, meaning delicious, umami is described as a savory, brothy, rich or meaty taste sensation.

It’s a satisfying sense of deep, complete flavor, balancing savory flavors and full-bodied taste with distinctive qualities of aroma and mouthfeel.” For recipes, nutritional information and more, check out the Mushroom Council’s website: www.mushroominfo.com.

Popular Mushroom Varieties to Try Growing

Try your hand at growing one of these mushroom varieties.

CRIMINI: These are basically baby portabellas, similar in appearance to whites but with a light-tan to rich-brown cap and a firmer texture. They have a deeper, earthier flavor than whites. Sauté, broil, microwave or cook almost any way. Their hearty, full-bodied taste makes them an excellent addition to beef, wild game and vegetable dishes.

ENOKI: Enoki have tiny, button-shaped caps and long, spindly stems, and are mild-tasting and crunchy. Before using, trim roots at cluster base. Separate stems before serving. Try them raw in salads and sandwiches, or use them as an ingredient in soups, such as a stock made with soy sauce and tofu.

MAITAKE: These appear rippling and fan-shaped, without caps, and have a distinctive aroma and a rich, woodsy taste. Sauté lightly in butter or oil. For a richer taste in any recipe calling for mushrooms, use maitake. They can be a main-dish ingredient or used in side dishes and soups. Maitake mushrooms are also called “Hen of the Woods.”

OYSTER: These can be gray, pale-yellow or even blue, with a velvety texture. They have a very delicate flavor. Sauté with butter and onions to bring out their flavor, try over linguine with sliced steak and red peppers, sprinkled with grated Parmesan cheese, or pan-fry in olive oil/butter with garlic.

PORTABELLA: This is the larger relative of crimini. Portabella have tan or brown caps that measure up to 6 inches in diameter, and have a deep, meat-like texture and flavor. They can be grilled, broiled or roasted and served as appetizers, entrées or side dishes. Their hearty taste and texture make them a flavorful vegetarian alternative; grill and serve them as “burgers.”

SHIITAKE: Shiitake are tan to dark-brown and have broad, umbrella-shaped caps, wide-open veils, tan gills and curved stems that should be removed. They have a meaty texture and are rich and woodsy when cooked. Taste best when cooked. They add a meaty flavor and texture to stir-fry, pastas, soups, entrées and sides.

WHITE: White mushrooms represent about 90% of the mushrooms consumed in the United States. They have a fairly mild taste and blend well with almost anything. Their flavor intensifies when cooked. They can be sautéed or cooked any way or enjoyed raw in salads. Try them sliced and sautéed on pizza or in pasta, quesadillas or cheeseburgers.

Common Mushroom Growing Terms Explained

Here are some common terms used when discussing mushrooms:

Buttons: tiny mushrooms, next step after pins, starting to take the shape of the full-grown mushroom

Flush: Mushrooms tend to sprout all at once, go into dormancy for a few days or weeks, and then flush again.

Fungus (plural: fungi): A separate class of organisms that feed on organic matter. They include yeasts, molds and mushrooms.

Fruiting Bodies: the mushrooms that we eat or use

Mycelium: the vegetative system of tiny filaments growing underground, in trees or composting matter, comparable to the root system in the plant world

Pins: the first points of the fruiting body showing through the substrate

Spawn: mycelium-impregnated material (plant or animal compost)

Spores: comparable to seeds to spread and colonize new habitats; formed on the underside of the cap in the gills. Once the spores are released the mushroom disintegrates quickly, usually within a week.

Substrate: the growing medium that supports the mycelium (wood, grains, compost)

Growing Mushrooms at Home: Final Thoughts

Growing mushrooms at home has turned out to be more than just a quirky kitchen experiment—it’s become a rewarding, flavorful adventure. From watching tiny pins emerge to harvesting full-grown clusters, the process offers a satisfying mix of science, patience and delicious payoff. While kits may not replace a trip to the grocery store, they do offer something far more valuable: a closer connection to the food we eat and the fascinating fungi that produce it. Whether you’re a curious cook, a gardening enthusiast or just looking for a fun family project, mushrooms are a great place to start.

This article about growing mushrooms at home was written for Hobby Farms magazine. Click here to subscribe.

Categories
Farm & Garden

Mushroom Farming: How to Grow & Sell for Profit

Mushroom farming is sprouting up across the country as more people discover its potential for profit, sustainability, and culinary excitement. Whether you’re selling gourmet varieties at the farmers market, supplying chefs through wholesale channels, or leading agritourism tours in your woods, mushrooms offer unique opportunities for small-scale growers. But while the mushroom farming industry is booming, building a successful mushroom business takes more than just passion—it requires planning, persistence, and the right sales channels.

The mushroom market is growing 5% to 6% each year, according to Tradd Cotter, owner of Mushroom Mountain near Easley, South Carolina, speaking at the Organic Growers School Spring Conference earlier this year in Asheville, North Carolina.

With many consumers no longer content to eat only the white button mushrooms purchased in neat plastic packaging at large-chain grocery stores, think morel mushrooms and more.

“I’ve been involved with the mushroom business for 15 years, and it’s amazing to me to see how much more educated the general public is now,” says Mike Kempenich, owner of the Minnesota-based mushroom-focused business called Gentleman Forager.

If you’ve considered mushroom farming, many business outlets exist for you, but—spoiler alert—none is simple.

Selling Mushrooms at Farmers Markets

mushrooms being grown in an indoor area on metal shelves
Amy Fox

The first market that often comes to mind for home-produced items is the farmers’ market. While farmers’ markets are becoming crowded for vegetable producers, there seems to be room for mushroom growers.

Why Farmers Markets Work for Mushroom Farming

“I take great pleasure in being able to provide the public with a variety of mushrooms they might not otherwise have the opportunity to purchase,” says Amy Fox, owner of Fox Farm & Forage in Apex, North Carolina. “I really take delight in educating my customers and absolutely love it when I am able to convert the reluctant or self-proclaimed mushroom hater to a mushroom lover. Weekly repeat customers are confirmation of my goal: to provide a quality product that people enjoy.”

Fox Farm & Forage, in its second year of operation mushroom farming, has a presence at three Saturday farmers markets in The Triangle area of North Carolina, a region anchored by North Carolina State University, Duke University and the University of North Carolina. That means Fox, her husband and a trusted employee work every Saturday. Finding that trusted employee has been tough.

Challenges of Selling Mushrooms at Markets

“Selling mushrooms is not like selling produce that people are familiar with,” Fox says. “Profits from selling mushrooms directly correlate to being able to engage a potential customer and then having the knowledge to complete the sale. One must be relatively knowledgeable about cooking and be able to make recommendations on which product to use in an indicated culinary application.”

Building Profitable Mushroom Farming Wholesale Accounts

Restaurant sales make up the bulk of Fox’s business, as well as grower Steve Sierigk of Trumansburg, New York.

How to Break into the Wholesale Mushroom Farming Market

“Shiitake growing and selling can be efficiently done if established accounts are eager for the crop,” Sierigk says. And his accounts at Hawk Meadow Farm are: he sells about 1,000 pounds per year, mostly to restaurants.

mushroom farming by growing mushrooms on logs
Hawk Meadow Farm

Wholesale vs. Farmers Market: Which Is Better?

“When I compare the amount of profit made versus the time and expense of wholesale versus farmers markets, wholesale is the obvious winner, hands down,” Fox says. “Also, there is much more room for growth within the wholesale market, whereas farmers markets have a pretty consistent profit ceiling.”

Fox points out that this might not be the case in your area, though. Fox will also continue to sell at farmers markets because wholesale accounts don’t let you connect with your customers in the same way that farmers markets do.

Be aware that in many states, it’s illegal to sell wild-harvested mushrooms to restaurants or wholesale accounts, so check your local state laws.

Adding Mushrooms to a CSA Program

A community-supported-agriculture model—or perhaps a community-supported-fungi model—is less common in the mushroom farming world than in traditional agriculture, but it’s out there.

How Mushroom CSAs Work

In Minneapolis, Kempenich partners with independent grocer Pahl’s Market to offer a mushroom add-on to the market’s vegetable CSA. This is the mushroom CSA’s first year, and 200 people—10 percent of the Pahl’s Market CSA—purchased a share, which exceeded expectations.

Considerations Before Starting a Mushroom CSA

“With more education, over time, we’ll continue to see that number grow,” says Kempenich, who has been foraging for more than 40 years.

He looks at this CSA as a wholesale account for his business because he knows he has a standing order of 200 mushroom units each week. Kempenich cautions that doing this as a stand-alone CSA would be more challenging: “It would be cost-prohibitive up front until you built a substantial number.”

Plus, part of the appeal of this CSA model is getting to partner with another independent, locally owned business.

Using Agritourism to Grow Your Mushroom Brand

While mushroom farming includes mushrooms that are cultivated in growth medium in buildings, they can also be cultivated outdoors. Both are interesting to the consumer, and Sierigk capitalizes on this by offering farm tours.

Hosting Farm Tours to Boost Sales

“The tours are a very different angle on things and require some degree of marketing energy and outlay of cash for advertising and all,” Sierigk says. “Farm tours can become time demanding … however, we really like connections with people that have generally not been exposed to the type of agriculture that we practice.”

Sierigk looks for any opportunity to spend time in the woods—such as leading these tours—and he points out that participants generally make a purchase on the tour, which adds a lot of value.

Foraging Adventures and Educational Events

About four years into his mushroom farming business, Kempenich started leading classes as a break from tending to mushrooms 70 to 80 hours each week. He now runs foraging classes as well as overnight tours through the woods of Minnesota with well-known chefs to forage and then cook mushrooms.

“I like tying everything together,” Kempenich says. “The mushrooms go to a great restaurant, so why not bring the chefs to the woods?” By adding this social aspect to forging, he creates more collective mushroom knowledge and also connects more people to the outdoors.

Selling Medicinal Mushrooms: What to Know

There’s an industry of mushrooms used for medicinal research. In biosecure labs and growing facilities, mushroom cultivators and scientists alike experiment and develop products for medicinal industries.

Regulatory Risks and Selling Restrictions

Independently, however, farms that sell tinctures and supplements from their mushrooms have to be much more careful. Scrutiny from the U.S. Food and Drug Administration has mushroom growers quietly offering these products. Those who make and sell holistic, health-promoting mushroom products must refrain from making any medical claims and can’t make the products on a large scale.

Creating Value-Added Products with Mushrooms

In any agricultural pursuit, waste occurs. How you handle that “waste” is up to you. At the OGS Spring Conference, Cotter, who has grown mushrooms commercially since 1994, suggested value-added additions to any mushroom enterprise.

Dehydrating and Composting for Profit

Dehydrate the mushrooms that you don’t sell at the market today so you can sell them later, and offer compost and vermicompost from your scraps. Partner with others to see your mushrooms in prepared foods, beer and other products.

There are nearly as many ways to profit from mushrooms as there are varieties of mushrooms themselves. None of these enterprise options is a simple, hands-off business, but each has a reward for the mushroom lover.

Quality vs. Quantity in Mushroom Farming

When producing mushrooms indoors, an economy of scale is at work, as you need to build a whole space for cultivation. See “The Mushroom Gold Rush” on page 62 for more about start-up costs. In these operations, mushroom producers such as Fox Farm & Forage’s Amy Fox say the key is to go big.

Indoor Growing Requires Scale

The directive here is quantity plus quality.

When using logs and an outdoor setting, Steve Sierigk, co-owner of Hawk Mountain Farm, suggests quality be the initial focus—forget about quantity right now.

Outdoor Growing Prioritizes Craft and Care

“Start modestly, as there are so many variables that need to be right for this to work well,” he says. “I always recommend quality over quantity in all aspects of natural-log mushroom production. It can be as small as about 100 production logs to give a modest weekly supply. In fact, I always recommend starting small to get the knack for handling the logs and all of the demands of the crop.”

Part of cultivating this quality is to have some idea of what you’re doing before you get started, in business as well as mushroom production. There are too many variables in the market and in production that can’t be learned just by reading a book. Fox has never hired a consultant, but she had known to do so: “It would have saved me thousands,” she says.

This story about mushroom farming was written for Hobby Farms magazine. Click here to subscribe.

Categories
Farm & Garden

Morel Mushrooms: How to Find, Identify and Cook Them

Morel mushrooms are one of the most sought-after wild edibles. Their rich flavor, sponge-like texture, and unique appearance make them a favorite among chefs, foragers, and mushroom hunters alike. In this guide, you’ll learn how to find morel mushrooms in the wild, identify them safely, and cook them to perfection.

Not only do morel mushrooms have a meatier texture than most store-bought mushrooms, but they are relatively easy for beginners to learn to safely identify. As the mountain folks say: “If it’s hollow, you can swallow.” 

What Are Morel Mushrooms?

Morel mushrooms (Mochella deliciosa, M. esculenta, M. elata) somewhat resemble the outline of a cartoon Christmas tree: a fat stalk and a crinkly, conical cap. Cut a morel in half from top to bottom. Both the stalk and cap have enough of a void that you could stick one on every digit like so many finger puppets.

The hollow is also big enough to house a few insects, another reason to slice them open before cooking. But then again, there are some people who say that bugs are the next wave of foraging!

There are a few mushrooms that, with some enthusiastic wishful thinking, look enough like a morel to earn the name “false morels.” But they are mostly solid inside with terrible potential as finger puppets.

No matter whether you are an expert or using our beginners guide to mushrooms, those who find these should leave them be. They are either unappetizing or could play havoc with your digestion.

How to Cook Morel Mushrooms

Always cook morels. The heat denatures a toxin that would send you running to the toilet. In any event, even if you grow your own mushrooms, you don’t want to eat mushrooms raw for three reasons. 

  1. They are about as digestible as wood, so there’s no nutritional value in a raw mushroom. 
  2. A tiny number of people will be mildly allergic to any given mushroom, more so to one that hasn’t been cooked long enough. 
  3. There’s a small chance that on the surface of the mushroom, some woodland bacteria might exist that won’t sit well with some people. Especially if your edible mushrooms were left in the back seat of a hot car all afternoon or left on the counter overnight. Always refrigerate in a paper bag as soon as you get home to reduce the possibility of old-fashioned food poisoning. 

So be a smart mushroom hunter. Cook morel mushrooms and everything else you find for at least a few minutes in butter or fat and only eat a small amount of a new species your first time to learn if you’re sensitive.

And even with all those precautions, experienced mushroom hunters can develop an allergy to morels decades after their first bite. Sometimes—but not always—this is triggered by eating superhuman quantities of morels. So, don’t be greedy. 

When and Where to Find Morels

Morels appear in mid-spring, usually after the last frost, but before the tree leaves come out. They seem to be triggered by a good rain about the time the soil temperature reaches 50 to 53 degrees. 

Being a good morel hunter means being a good tree hunter. The submersed part of a morel—its inedible, stringy mycelia—grows in forest floors in collaboration mostly with mature tulip poplars, but also elms and ashes and among old apple trees in orchards. A dying elm tree can also spur its morels to fruit heavily before their primary food source is lost.

In the Midwest and Pacific Northwest, morels respond to the previous year’s forest fires with great flushes rising from blackened earth. Unfortunately, Southern morels haven’t learned this trick. This makes them a bit more difficult to track down. 

Chefs and farmers-market shoppers will pay $25 to $50 a pound for fresh or dried morel mushrooms. If you’ve ever had them in a stew, perhaps with venison and ramps, you’d understand why.

If you have a surplus, putting them in a dehydrator overnight at about 110 degrees Fahrenheit will let you save them in a jar in your cupboard. Rehydrate for 10 to 20 minutes in warm water, milk, broth or wine before adding to a sauté pan, soup or casserole. 

Tips for Successful Morel Hunting

Don’t be discouraged if you don’t find morel mushrooms on your first foray. Most edible soil-borne mushrooms announce themselves across the forest floor like so many brightly colored periscopes of yellow, orange, red or blue.

But morels camouflage themselves quite well. They wear the brownish grays of fallen leaves, with their outline broken up by a shadowy honeycomb of craters in their caps. 

My technique for finding morels? Like the commander of a luckless sub-chaser, I often stop in disappointment and disgust at being empty-handed even though I’m standing amongst massive tulip poplars. Then I look down at my feet.

Half the time, I’m standing in the middle of an under-the-radar fleet of morels. Then, I use my pocketknife to cut morel mushrooms off at soil level (no sense getting dirt in all those craters). I debate the various ways to cook them on the way home. 

This article originally appeared in Hobby Farms magazine. Click here to subscribe.