For the last six years, we have tapped the large silver maple tree in our backyard. We lived in our home for seven years before attempting to tap our trees. We always assumed that to make homemade maple syrup, we’d need numerous trees to collect sap from.
But our one large silver maple has a big enough circumference that we are able to install three spiles to collect from. From these three taps, we collect enough sap to boil down syrup to last us the entire year. Usually we can make enough to share with friends and family, too.
The spring of 2020 was our personal best year for sap collection. The temperatures were perfect—below freezing overnight and above freezing during the day for about six weeks.
With our excess syrup, we decided to experiment. That’s when we first made these delicious and delicate maple candies.
Since our homemade syrup is so coveted, we only make a small batch of candies. However, you can also make this recipe with purchased 100 percent pure grade A or grade B maple syrup.
The grade B syrup is darker and will offer more of a maple flavor.
In a large, tall-sided pot, bring the maple syrup to a boil. Boil until the candy thermometer reads 237 degrees F, stirring occasionally.
Once it reaches 237 degree F, remove from heat and cool to 175 degrees F, then quickly begin stirring until the syrup lightens in color. This will take a couple minutes.
As soon as it turns, quickly spoon the syrup into the candy molds, or pour it over a lined cookie sheet. The syrup will quickly harden, so time is of the essence.
Once completely cooled, you can carefully remove candies from the molds. If using a cookie sheet, you can break up the cooled candy to bite-sized pieces and enjoy them that way.
Maple sugar candies should be stored in an airtight container. Enjoy within two months.
Side Notes
Make sure you test your candy thermometer for accuracy before beginning this project.
For any hardened maple left over in the pan, you can stir and break up the mixture to create a crumble. This crumble can be used in coffee, tea, on top of ice cream, over muffins or pretty much anything your heart desires.
Be careful not to splatter any hot syrup on yourself, as it’s incredibly hot.
Do not leave the pot of boiling syrup unattended. It could boil over or burn.
The goal candy temperature will change depending on altitude. Generally, you’ll want to reach 27 degrees F above boiling point of water where you located.
In February of 2020, Carol and Anthony Gentile of Tennessee’s Gentile Acres visited a local supermarket and gaped at the empty produce shelves they saw. “I recall seeing an elderly man sadly picking through the few potatoes that were left. And I remember thinking, wow, we are so reliant on what others produce for us!” says Carol.
Picking up on the food shortages and supply chain issues that the start of the COVID-19 pandemic heralded, the Gentiles decided to embrace the idea of self-sufficiency.
“We made the decision to sacrifice our mundane and stressful routine of work and paying bills and a rather unfulfilled life in exchange for big pay checks to a slower pace and a more modest lifestyle and a much happier and fulfilled life,” explains Carol of the decision to found Gentile Acres. “Our hearts are full!”
We spoke to Carol Gentile about focusing a homestead around turkeys and adding artichokes to your garden. We also got insider tips on the art of the turkey massage.
“Life hack: For true happiness, get a turkey!” says Gentile.
Forming a key part of Gentile Acres, the resident turkeys enjoy free run of the homestead’s 25 acres of land. “They enjoy eating all the bugs and fresh raspberries that grow on the property,” says Gentile.
“We go for daily walks with our birds. This was when we learned our turkeys were a lot like our dogs! They would follow us everywhere. We have special whistles for them to come for treats.”
Noticing that some of their turkeys possessed more affection than others, Gentile says she started to grant them turkey massages.
“They’ve learned to come to our feet and open their wings for some quick loving,” she says before adding a disclaimer: “Just be careful putting your face close to turkeys. No matter how loving they can be, they are known to strike at the eyes. We call them sour patch kids!”
“The best way to give a turkey massage is scratching and massaging right under their wings, back and thighs,” explains Gentile. “The closer you get to their back end, the more they will love you. Don’t be afraid to get a little rough. Some like it rough!”
Just know that turkey massages can grow addictive. “Once you start turkey massages you can never stop!” says Gentile. “They will follow you around and spread their wings squawking at you until you oblige.”
If you take a look through Gentile Acres’s Instagram account, you’ll notice some particularly striking artichokes starring in the feed.
“Artichokes were once thought to be in the cactus family because of their beautiful flowers. But they’re actually a part of the thistle family,” says Gentile. “They are pretty much a no-to-minimal maintenance plant.”
When it comes to maximizing artichoke production, Gentile suggests giving them plenty of space to grow and also starting seeds off with a few cold nights for germination.
“They are so beautiful,” she adds. “I would purposely let some go to flower just to admire their beauty. They are large purple thistle-like flowers—garden magic at its finest!”
“I never imagined myself—a city girl—to be cleaning chicken poop, playing in the dirt, ethically raising and harvesting our own meat, seed saving, canning and preserving, making our own soaps, farming and becoming more and more self reliant,” reflects Gentile as she looks back at the Gentile Acres journey so far.
“The relationship we share with our animals and the fruits and vegetables we grow is a truly intimate and rewarding experience,” she continues. “This is real life. This is what it means to be alive, to be connected to the earth and to the animals through love and respect. It is life … liberty. And this is happiness.”
Between feeding my hens and feeding the wild birds, I was awash in empty plastic bags. And because they were designed to be able to hold a lot of weight, they were really heavy-duty. (They were actually quite pretty, too!) I didn’t have the heart to throw them away. Besides, I don’t think my local recycling center takes them anyway. But I decided I could sew an old feed bag into an attractive, reusable shopping tote.
I take you through all the steps to make your own in the video above. To start, you’ll need one large plastic feed sack—the plastic woven kind that usually opens via a string stitched across the top.
Other Supplies
Besides your empty feed sack, to sew a feed-bag shopping tote you’ll also need:
Cutting off the bag’s bottom edge will make cleaning it with warm, soapy water that much easier. You can turn it inside-out and back again to scrub, rinse and hang up to dry.
Once the bag is dry, use a tape measure or ruler to draw a straight line across the its bottom edge. Carefully cut away any excess material until this bottom edge is straight.
With the bag turned inside-out, stitch the bottom closed. (I typically sew a half-inch to an inch away from this bottom edge.) With it still turned inside-out, crease the original edges of the sides of the bag, so that a rectangular bottom begins to take shape. You should be able to fashion a triangular flap along the the bottom right and left side of the bag. Measure, mark and stitch across both of these to create the market bag’s box-like bottom.
Next, you’ll trim the top edge off of your bag and cut out a larger portion of the top to fashion into handles. Exactly where you cut depends on how large you want your bag to be and how much of its artwork you want to show.
In this video, I show you how to sew a tote with a pair of extra-long shoulder strap handles with a couple of simple folds and stitching. (But if you prefer shorter handles you can cut one of the shoulder straps into two pieces and use those.)
When it’s time to attach your handles, you’ll decide where you want them, measure and mark the top of your bag accordingly, and stitch them on. For durability’s sake, I prefer to fold and stitch my handles under the bag’s top edge a couple of times and follow up with box stitches.
You probably have a field guide or two (or 12?) on your bookshelves—helpful volumes that aid you in identifying wildlife tracks or the nesting habits of North American songbirds. But your bookshelf might be lacking a handy guide to help you navigate the fascinating world of chicken combs.
Good news! This is your lucky day.
Practical & Pretty
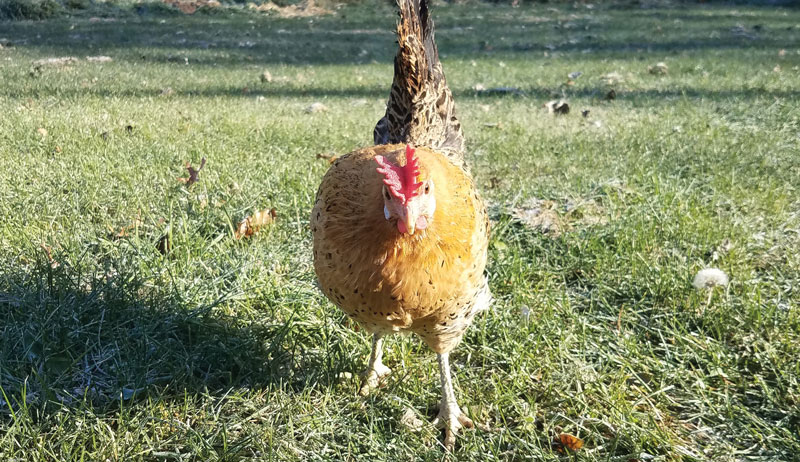
When it comes to chickens, combs and wattles are key elements of their anatomy. A chicken relies on its comb and wattle to regulate its body temperature. And the comb also plays a part in establishing the pecking order of the flock (truly!) and is also a valuable attribute for attracting a mate.
Chickens are thought to recognize other members of the flock in part by their combs.
Combs are also a clue to gender. Roosters have prominent combs that tend to be more vibrant in color, while hens have smaller/shorter combs that may not be as brightly colored.
They can help determine a chicken’s breed, as they’re a distinguishing breed characteristic. And combs can even signal possible health issues. For example, a pale comb can indicate anemia or parasites.
And then there’s the aesthetic factor. It goes without saying that chicken combs are predominantly red. But there are exceptions.
Silkie chickens have combs that are a stunning mulberry color. And, of course, the breathtaking Ayam Cemani chicken has a jet-black comb.
But for the most part, chicken combs are a vibrant red that is the perfect accompaniment to feathers of all palettes.
And that’s just the beginning. With nine different types of chicken combs in a variety of shapes and sizes, there’s a lot to explore. Let’s take a closer look.
A Comb by Any Other Name
Single Comb
The single comb is the most common and the most iconic of all the types of combs. That’s why we give it top billing here.
When the average person thinks of chicken combs (does the average person think of chicken combs?!), this is probably the type they envision.
Daniel Johnson
The single comb features an upright row of five to six jagged points. It’s an eye-catching and attractive comb. And it’s found in a wide number of breeds, including
Australorps
Barnevelders
Catalinas
Orpingtons
Cochins
Sussexes
Plymouth Rocks
Hollands
Jersey Giants
Javas
New Hampshires
Flower-Named Combs
Back in the olden days, when people chose names for the different types of chicken combs, someone must have decided that it would be a great idea to name some of the chicken combs after flowers.
As a result, we have the floral trio of buttercup, carnation and rose combs. Two of these—buttercup and carnation—are rare. But rose combs are found in several breeds including
The buttercup comb features points, similar to the single comb style. But unlike the single comb, the buttercup comb encircles the head like a crown.
cainphotos/Shutterstock
Best suited for warm climates, the buttercup comb is found in only one breed: the Sicilian Buttercup.
Carnation
The carnation is also similar to the single comb, but it adds some extra pizzazz with little spiky spots at the back of the comb. It’s sometimes known as the “king’s comb” and is found in the Penedesenca breed.
Rose
Rose combs don’t look like single combs. But they don’t really look like roses, either. Instead, rose combs are low to the head and quite bumpy, with an interesting spike that sticks out behind the head.
Read more:
Food-Named Combs
Now, everybody knows that there’s only one thing better than chicken combs named after flowers, and that’s chicken combs named after foods! And that brings us to our next trio: pea, strawberry and walnut combs.
Pea
Of the three, pea combs are the most common. They have three low ridges that rise from the beak and go partway up the chicken’s head, with the middle row being the tallest.
Chickens with pea combs are suitable for cold climates. This type of comb is found in
Brahmas
Cornish
Buckeyes
Sumatras
Araucanas
Ameraucanas
Strawberry
It’s been said that the strawberry comb looks like a strawberry (well, it is red), and its round and bumpy texture is reminiscent of that springtime fruit. Strawberry combs are found in Malays.
Walnut
Walnut combs are characteristic of Silkies, Yokohamas and Russian Orloffs. And this type of comb is aptly named, because it really does resemble a walnut.
Its shape makes it a good choice for cold climates. It’s less vulnerable to frostbite.
By the time the comb-naming people got around to these last two, the well of creativity must have been running a little low. Our final two are cushion and V-shaped combs.
Cushion
The cushion comb is neat, tidy and compact without points or spikes. In fact, it looks like a cushion. It’s found in the Chantecler breed and is a suitable comb for cold regions.
V-Shaped
The v-shaped comb looks exactly as you’d imagine a V-shaped comb would look. It’s quite different in appearance than any of the other combs. Some of the breeds that exhibit V-shaped combs include Crèvecoeur, La Flèche, Polish, Houdan and Sultan.
This type is sometimes known as devil’s horn or the horn comb.
Paulette Johnson
Just when you think you’ve mastered all the combs, allow us to complicate things just a bit more: Some chicken breeds boast single and rose combs within their populations, including Anconas, Dorkings, Leghorns, Rhode Island Reds and others.
Have fun as you explore the wide array of chicken combs and their unique characteristics. We hope this guide helps you on your journey!
More Information
A Comb For All Seasons
Climate is an important consideration when choosing a breed. The type of comb plays an important part in the breed’s suitability for a particular area.
Chickens with tall combs, such as the single comb, are better suited to warm regions where frostbite is less of a concern. And conversely, chickens with combs that are close to the head, like walnut or cushion, are better suited to colder climates because frostbite is less likely to harm those combs.
Small combs aren’t completely safe from frostbite, but they’re less vulnerable than large combs.
You can take steps to prevent frostbite by providing appropriate shelter that is warm, dry and well ventilated to minimize moisture. It’s been said that petroleum jelly can help prevent frostbite when applied to combs. This, however, may not be effective in severely cold regions.
This article originally appeared in the March/April 2022 issue of Chickens magazine.
Spring had finally arrived at our farm. The hyacinths and daffodils were blooming, the trees were budding, and the temperature was staying at a wonderfully temperate 50 degrees. We moved the Silkie group back out to their summer-time coop and removed the protective winter paneling from the other henhouses.
I started going on long walks and runs on the nearby trails. We spent Easter enjoying the glorious, sunny weather.
And then Old Man Winter decided to remind us that he wasn’t gone for good just yet.
I woke up this morning feeling unrested, that “grab a blanket and a book” feeling that I get on stormy days. I’m sure it has something to do with the changes in barometric pressure. Still, I dragged myself out of bed, fed the cats, and turned to look outside.
The tumbling white flakes almost sent me right back to bed.
Snow No!
Yes, it was snow. In late April. And it was falling quite steadily. It’s still snowing as I write this, eight hours later. According to weather.com, it will continue to snow for another six hours.
And I’m not talking flurries. I mean big, fat flakes of snow that accumulate on my deck, covering the runs, and making it almost impossible for me to see where Butter Duck, our all-white roaming Ancona duck, could possibly be.
Fortunately—or unfortunately, depending on your point of view—surprise snowstorms at this time of year seem to be a Michigan specialty. I always remember the May I climbed out of the lap pool and had to ride my bike through a snowstorm that started while I was swam.
Because the weather in the northern continental U.S. can be a tad sporty, I was well equipped to handle this galling squall. However, I learned that friends and relatives in Pennsylvania and Maryland also experienced snow and below-freezing temperatures. Winter weather was also expected in other Mid-Atlantic states.
Should you find yourself in an unexpected spring snowstorm, here are four suggestions to ensure your chickens weather the cold weather unscathed.
While I was not about to run around reinstalling all the winter paneling we’d taken down earlier this month, I did make certain that only a couple ventilation panels were open—enough to provide necessary air circulation within the coops.
If your coop vents have shutters or covers, close up the ones that directly face the way the wind and snow blow. This will prevent snow from accumulating inside your coops.
Close any windows that have been opened to let fresh air in, and make certain that all human-access doors are tightly secured. If you know your flock well and know they aren’t about to go outside—and they have a feeder and waterer inside their coop—close the pop doors.
However, if your chickens are curious types that like to stand in the cold snow (like my Ameraucanas), keep their pop door open. And understand that some snow may get in through that entryway.
Check Your Waterers
If it’s cold enough for snow to accumulate, it is undoubtedly cold enough to freeze water. Luckily, we had not yet pulled the base heaters from our coops’ waterers. A quick check showed still-liquid water in those fonts.
The waterer in our Silkie coop was not as fortunate. There is no base heater there, since the coop is not wired for electricity. (The Silkies spend the winter in our pole barn.)
Of course the water had frozen solid.
My rule of thumb—and one I cannot stress enough—is always have double the number of waterers that you need. This way, when winter weather freezes your flock’s drinking water, you can simply swap the frozen font for a fresh waterer.
Believe me, this is much easier and far less time consuming than having to thaw out a frozen waterer in a work basin or kitchen sink. Just be sure to keep the frozen waterer in a warm place, such as a garage, so it can start to thaw out naturally.
Watch Your Delicates
The first thing I did once I got outside was head over to the Silkies. I am very careful with my Silkies, as they are not winter-hardy birds.
They were crammed into one nest box, hiding from the fluffy white stuff coming in through the open vent panels. I scooped out the accumulated snow and damp shavings, and closed all but two vents. Then I gently unjammed the Silkie pile and set them on their coop floor, where they proceeded to eat and scratch as though nothing were out of the ordinary … well, other than their frozen waterer (which I then swapped out).
If your flock includes non-winter hardy birds or if you have mama hens using their body heat to keep their hatchlings warm, you may want to consider moving these more delicate chickens to sturdier shelter until the cold and snow blow over.
A pole barn, a garden or storage shed, garage or even a basement may provide better protection than a coop for more delicate breeds and for babies. Large cardboard boxes or plastic storage tubs such as Rubbermaid totes can serve as brooders in a pinch.
Remember, this is just a temporary measure, not a permanent change in residence. Make sure your birds have plenty of food and water (as well as shavings) in which to nestle down for the night.
Chickens that have grown accustomed to sunny days spent roaming and scratching will not be happy shut up in their coops during a cold snap, whether it’s by your choice or theirs. Unhappy, bored chickens may start picking at each other out of boredom or agitation.
To prevent matters from getting out of hand, provide your birds with a few boredom busters to keep them entertained while the snow falls. Consider the following to keep your birds occupied for hours (and hopefully out of mischief):
suet cakes
wedges of cabbage or lettuce
an ear of cooked corn
a couple handfuls of scratch, tossed onto the coop floor
If your flock, like my Ameraucana flock, insists on being outside during the snowstorm, keep a shovel at hand to clear a pathway for them to walk, especially if you have feather-legged birds like Cochins. There’s no reason to risk frostbite or other ailments just because your chickens want to enjoy the cold weather firsthand.
Other Considerations
Even if you just refreshed the litter inside your coop, you’ll want to quickly add 1 o 2 inches of fresh shavings to the coop floor. This will help absorb snow that gets in through any open vent panels. It will also add a layer of insulation to help retain heat.
More than likely, the moisture from the snow will necessitate a change in litter once the storm is over. So keep fresh shavings handy and stay prepared to spend some time henhouse cleaning.
Also set some time aside to check each of your chickens for frostbitten combs, wattles and toes, especially if your birds insisted on being out in the cold.
Should the sudden snowstorm last more than a few hours, make sure to check your fonts to make sure they have not frozen over again. If they have, the previous fonts should have thawed out by now. If not, run each waterer under lukewarm water until the ice in the saucer trough melts and the cover can be removed.
Then focus the warm water on the font’s interior until the solid ice detaches from the font wall and can be removed.
Never underestimate your birds’ curiosity. Do a head count to make sure no one ventured outside and either sought shelter under shrubbery or hunkered down in the snow to keep warm. I’ve had to wrap warm towels around a couple of curious Ameraucanas over the years. And I always seem to have to defrost iced-over duck wings (swimming during snowstorms!).
Your Own Well-Being
Finally, don’t neglect yourself. We have also grown accustomed to warmer weather and sunshine, and may take a surprise snowstorm lightly. Whether it’s January or April, snowy weather can still chill you to the bone. So dress warmly and wear work gloves if you have them.
Thawing out frozen human fingers … just take my word for it that it’s a pain you’ll never want to experience again. And now, I’m off to check on the Silkies and to see if Butter Duck is hiding under a shrub.
Amultitude of bedding options that can be used in chicken coops exist. Some are readily available and common, while others may take a bit more searching to locate.
No matter which type of chicken bedding you choose, it’s important that it:
absorbs moisture to prevent bacterial growth and minimize ammonia
provides warmth
creates a cushion for the comfort of chickens, chicks and eggs
“Litter” and “bedding” are terms often used interchangeably. Though to get technical, litter is what is spread on the floor of a coop and bedding is what’s used in nest boxes—where chickens bed down for the night if not roosting. These materials need not be the same, though many chicken owners use the same product in both areas to minimize work.
Chickens’ excrement is unique. Though they don’t urinate, the feces they pass is still watery and, if not managed properly, smelly! Additionally, chickens are notorious for playing in water dishes and containers. The water that’s flung around the coop must be absorbed to keep pathogens at bay.
Here are the most common choices backyard chicken-keepers use as bedding that absorbs moisture and keeps chickens comfy.
Wood Shavings
By far the most-common bedding in the United States, pine wood shavings are sold in farm- and feed-supply stores across the country. Available in bigger cubes as livestock bedding (that cover 8 cubic feet) or small-animal bedding (that covers 4 1⁄2 cubic feet), this bedding is common for a multitude of reasons.
Kerrie W/Shutterstock
Pros
brightness, as light-colored shavings reflect watery, winter light
a good insulator, for coops in colder areas of the country
very absorbent
fresh smelling, as shavings control odor well, which means less flies in summer months
easy to clean
minimally dusty
readily available
Cons
easily ingested by young birds searching for food ( may cause crop impactions)
cedar shavings have a powerful aroma that can irritate poultry’s respiratory system
can be expensive if the coop is large
Shavings specifically for chickens will often say the product has been heat-treated to prevent salmonella, E. coli and mold spores. This type of bedding also inhibits bacterial growth, even when wet. And the light color is especially welcome during cold, dark winter months.
There is some controversy regarding using cedar shavings in coops because of the use of plicatic acid. This can break down airway and lung cells, causing respiratory distress and asthma.
Leah Alessandroni beds her seven chickens on fine-flake pine shavings. After much research, Alessandroni decided on this bedding as the product was readily available. Also, she utilizes the deep-litter composting method.
“The fine shavings work really well to keep everything clean and easily mixed,” she says. “They break down faster than the bigger flakes, too.”
Sawdust
Sawdust, finer than wood shavings, is easy to come by but not always the best choice for chicken coops. Notoriously dusty, it’s also imperative that chicken owners know exactly what type of wood produced the sawdust to prevent accidental poisoning of poultry.
Pros
absorbent (smells and moisture)
composts well
lightweight
insulates well
aromatic
Cons
dusty and can cause respiratory issues with chickens
possibly toxic; sawdust to avoid includes that made with treated wood, oak and cedar
tiny enough for chicks to ingest
The main con to sawdust is a big one. Dust that occurs when the chickens play and scratch can cause birds to cough, wheeze and spit. It can also lead to respiratory issues.
If sawdust is used in a small area where birds don’t have much room to move around, it might be fine. But avoid sawdust in areas where there is much feather-fluffing and scratching. If there is an option to have sawdust ground slightly larger or to use sawdust pellets, you can avoid the dustiness.
Straw is made from the tough, yellow stalks of cereal grasses such as barley, oats, rye and wheat after harvest of the grain and chaff. An agricultural byproduct, there are many uses for straw, including as bedding (for people and animals) and construction material (mainly as insulation and roofs).
Straw differs from hay, which is softer and more nutritious. Hay is primarily used as a forage for livestock.
Pros
easy to find
warm (since it’s hollow, it’s a great insulator)
good for garden mulch
Cons
doesn’t absorb urine well
difficult to clean (chicken coops need to be stripped instead of just the soil bedding removed)
possible exposure to pesticides when growing
smelly
can encourage mold
can cause crop impaction if ingested
Laurie Mays, owner of Branded Stock Farm in Paris, Kentucky, purchases straw strictly for her chickens’ nesting boxes, which they are in only at night (during the day the chickens free-range in a poultry-fenced area). Though straw keeps the eggs of her two Americanas’ lay clean, it needs to be changed more frequently than she’s used to. It is convenient and cheap, though, she notes.
Sand used as litter in a coop seems to divide chicken owners unlike any other bedding choice. Owners are often firmly entrenched in either the love-it or hate-it camp.
If using sand as bedding, it’s important to choose the correct type. You also have to ensure the sand is dry when installing in the coop. Play sand should be avoided as bedding, as it retains moisture.
Medium- to coarse-grained sand drains well and are great choices in chicken coops.
If purchasing sand from a gravel company, you may have to make an in-person trip to see the different types of sand they have available, as there aren’t any accepted, industry-wide sand monikers.
The best type of sand is river, construction or bank sand. These contain multiples particle sizes, including small pebbles.
DenisProduction.com/Shutterstock
Pros
easy to clean (sand clumps like cat litter if deep-litter method isn’t used)
fun for chickens to bathe in
inexpensive
minimal dust
encourages clean chicken feet and wears down chicken nails
odor control (says the pro-sand group)
Cons
doesn’t compost
minimal odor control (says the no-sand group)
can clump and compact in crop when ingested
minimal temperature regulation: hot sand in summer can burn chicken feet; cold sand in winter can cause frostbite
can breed bacteria and pathogens
As little as 1⁄4-inch of sand on the coop floor may be sufficient for comfort and cleanliness. But it’s important to note that predators can burrow into the coop through sand floors if no other materials are used.
Additionally, sand can freeze in the winter, losing all of its cushioning abilities.
Hemp
The use of hemp in many ag and industrial settings is on the rise around the world. Its use by poultry enthusiasts is no exception. Made from the center portion of a hemp plant, it’s all-natural and a safe bedding option for show and pleasure birds.
Pros
low dust
nonallergenic
absorbent (hemp can absorb up to four times its weight)
good thermal rating
biodegradable and composts readily
odor and ammonia control
not palatable
repels pests
Cons
may not be readily available
chickens may eat bedding
more expensive than other bedding options
Some flock owners who have used hemp note that it can contain some long fibers that can get tangled on chick’s feet.
Cardboard bedding is comprised of thick pieces that have been shredded into large chunks. Once installed in a coop, the cardboard should be stirred each day. This allows the manure to sit on top of the bedding and dry out.
The bedding should never get wet and heavy.
Pros
absorbent
doesn’t compact as easily as straw or paper
composts quickly
dust free
not easily ingested
Cons
not always visually appealing
doesn’t control odors well
not always out on shelves; must be requested
We should note that the type of cardboard used for chickens should be clean, recycled cardboard. Colored cardboard can include chemicals that can harm your chickens.
Shredded Paper
Many chicken owners have access to newspaper and computer paper. Using these products in a coop can minimize their entry into the waste stream. Shred all paper placing in the coop.
Pros
absorbs quickly
readily available
inexpensive
minimal dust
compostable
Cons
must be changed often
poor odor control
compacts easily when wet
difficult to cover entire coop with—best for boxes
may contain toxins hazardous to chicks
can be slick
chickens may become discolored from ink
Paper bedding emits more ammonia than shavings or straw. So it’s imperative that shredded paper bedding be changed often.
Also, though many papers now use soy-based ink, some still use inks that contain petroleum or heavy metals. These can be unhealthy for chickens (and humans).
Other Plant-Based Options
Depending on the region of the country in which a chicken-keeper resides, there may be other readily available coop bedding options not mentioned in this article. Pine needles, rice hulls or dried leaves come to mind.
In some states, peanut hulls are also used as bedding for chickens, though aflatoxin can be an issue, notes Jacob.
More Information
Value of Compost
The average hen produces 1 cubic foot of manure every six months. Multiply that by the number of hens in a flock, and that’s a lot of manure!
Composting chicken manure is a wonderful way for chickens to provide even more than eggs. They can increase garden yields, as well.
Applying organic matter to soil increases its ability to hold water, as well as improves drainage and reduces erosion. Compost also acts as a food source for soil microbes, which accelerates the breakdown of nutrients into more-available forms.
Though chicken manure can be spread directly on fields, it’s more useful when its composted, says Jacquie Jacob, poultry extension project manager for the University of Kentucky.
Raw manure should not be used on vegetable crops because of food safety issues.
Chicken Litter as Garden Compost
Poultry litter is high in nitrogen (as well as phosphorous and potassium), so it has the potential to burn plants. Chicken manure should be composted for a minimum of five to six weeks to allow time for it to “cool.” This time also allows disease-causing pathogens to be destroyed.
Everything removed from a chicken coop can be composted. This includes manure, undigested food, bedding materials and feathers.
The ratio of chicken manure and bedding to other stuff should be:
30 to 50 percent chicken manure/bedding (called “green” materials because the manure is moist)
50 to 70 percent other stuff: weeds, grass clippings, twigs and branches (so-called “brown” materials because they are dry or dead)
Gather the materials in a compost bin and wet them thoroughly. This will begin the process of raising the internal temperature of the pile. The pile should reach a temperature of between 140 and 160 degrees F for several weeks to reduce the risk of soil-borne pathogens.
The pile should be turned every few weeks to ensure all the manure is composted and to allow oxygen to penetrate the pile and reduce its smell.
Aging Manure
Aging chicken manure is also an option. It takes between six and nine months for chicken manure to break down properly using this method, which follows the same ratio mentioned above.
Once the manure pile is made, it’s left alone to break down. Without the use of heat, the longer compost is aged, the more the population of disease-causing bacteria will decline.
Whether composted or aged, chicken manure should be applied to gardens no later than 90 days prior to harvesting of trellised crops and no later than 120 days prior to harvest of ground-contact crops.
This article originally appeared in the March/April 2022 issue of Chickens magazine.
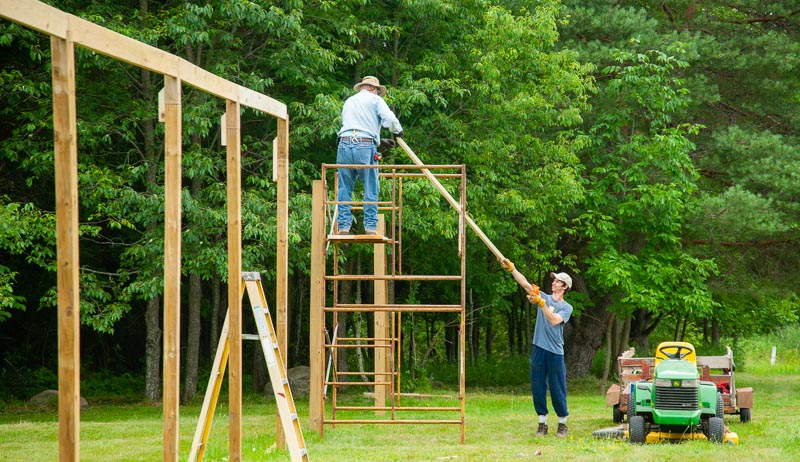
Last December, a large thunderstorm with powerful winds swept across my farm and left a significant trail of damage in its wake. Coniferous trees were hit the hardest, with approximately two dozen uprooted across the farm. The winds even toppled a few hardwoods.
But the biggest blow was delivered to the 8-foot-tall perimeter deer fence surrounding my orchard. The front section is constructed of wooden 4x4s placed in the ground at intervals of 10 feet, with 2x6s running from post to post across the top to tie everything together and present a tidy appearance. Rolls of welded wire run between the 4x4s, creating a formidable barrier to keep deer from snacking on my fruit trees.
Unfortunately, the barrier wasn’t quite formidable enough to withstand the thunderstorm. The freakish blast of wind that felled so many conifers also took down a section of the fence. Seven of the 4x4s snapped off at ground level, while a couple others tipped out of alignment.
Essentially, a large section of fence folded over into the orchard and will now require repair. It settled down on top of a couple slumbering garden beds.
Some of the 2×6 top boards broke loose from the 4x4s during the fall. The welded wire (attached to the posts and top boards with fencing staples), however, more or less kept the fence in one piece during its fall.
The latter point is worth explaining in greater detail, because only a few of the posts are lying flat. The rest precariously balance at semi-upright angles. These are unable to fall further since the welded wire is clinging to standing posts on either side of the broken section.
The welded wire can’t stretch enough for all the broken posts to fall completely.
Time for a Safe Fence Repair
I’m explaining this in detail as I currently ponder the best way to approach the fence repair this spring. Obviously I could tear everything down and start over from scratch. But that’s far from ideal.
I want to salvage as much as I can, particularly the welded wire, which shouldn’t be badly bent out of shape. But no matter what approach I take, I’ll need to be careful. The fencing materials are heavy and the half-collapsed portions surely eager to concede to gravity and fall further.
There’s another important factor in play here: keeping deer out of the orchard while I repair the fence, which is bound to take several days. Back in December, I put up a temporary fence using T-posts and lengths of 6-foot welded wire. This has been a suitable barrier, since the collapsed fence itself is an obstacle deer have no desire to cross.
But once I start deconstructing the damaged fence, I may have to set up a more formidable temporary barrier. A single 6-foot fence will most likely not stop deer from jumping over if they have the desire.
So where do I begin with the main repairs? As soon as the snow melts this spring, I’m going to examine the fence in greater detail and figure out how many of the 2×6 top boards are salvageable.
Did the boards themselves break when the fence collapsed? Did the screws holding everything together give way? This will determine how much replacement lumber I need.
Plan for Putting Things Right
Once I’ve purchased replacement 4x4s and 2x6s to repair broken ones, I’ll aim to carefully remove the welded wire from the injured fence frame. A claw hammer and flathead screwdriver should be sufficient to remove the fencing staples.
Since the fence collapsed inward (with the welded wire sitting on top), I should be able to carefully remove the welded wire and allow the wooden pieces to gently fall away, one by one. Thus, nothing should come crashing down unexpectedly.
Much of the wood will still be usable for other projects. For example, I can cut off the broken ends of the 4x4s and still have healthy 7-foot sections left.
After removing the welded wire from the broken fence frame, I’ll carefully fold the wire out of the way and start installing replacement posts. This will require waiting for dry weather. The broken section of fence crosses a lowland spot that holds a lot of water in spring. The post holes are apt to fill with water and mud if I start too soon.
But once the ground dries out, I’ll aim to remove the broken post stubs and reuse the holes, which are already dug to a suitable depth.
Measuring and trimming the new posts to a uniform height will take some time, as will cutting replacement 2x6s to span across the tops of the posts. I’ll have to haul a circular saw, jigsaw and portable generator out to the job site, just like I did when originally constructing the fence.
But once the new frame is complete, I’ll pull the welded wire back into place, pin it to the frame with fencing staples, and celebrate the successful repair of my orchard fence.
Hoof trimming is important when you keep sheep, but you may wonder why. And if you haven’t trimmed hooves before, you may wonder what tools you need as well as the basics of the chore.
Read on for answers to these questions and more!
Why do you need to trim sheep hooves?
Trimming hooves prevents lameness, and allows the sheep to walk evenly and comfortably. It also lessens chances of hoof rot and other bacteria collecting in the hooves.
The simplest setup is just trimmers that can be used to trim and scrape. You’ll find it easiest to simply lift your sheep in a sitting position to hoof trim.
Slings and trimming stands can be used as well, but if you aren’t showing animals or running a large farm they are not necessary. Always make sure to disinfect everything you will use on the sheep.
How do I trim the hooves?
Use the trimmers to clip evenly to the foot pad. Most hooves will grow in uneven patterns, so following the footpad will always get you back to square one.
Make sure get the tip, back and all sides of the hoof. If mud or any other substance has stuck to their hoof, take the time to scrape it out.
Avoid clipping into the footpad and using unsterilized trimmers.
How often should I trim hooves?
This is a difficult question because, like human nail growth, many factors affect the speed they grow. Wet conditions, vitamins and more play a role in how quickly nails grow.
Anytime you check eyelids or work with your sheep, get used to paying attention to their feet. Each sheep will be different, but as you get to know your flock you will learn what to expect from each one.
Many farmers and homesteaders say that kelp is a great source of filling in micronutrient deficiencies probably missing in our pastures.
I mean, after all, humans eat kelp in lots of forms. First, the obvious is the nori seaweed sheets wrapped around your sushi rolls. But there’s also kelp in your dairy products, frozen food, salad dressing, store-bought baked goods, and even shampoo and toothpaste.
According to the National Oceanic and Atmospheric Administration (NOAA), each year 100,000 to 170,000 wet tons of kelp is harvested from California waters alone.
But Kelp for Sheep?
To be perfectly honest, there really isn’t a lot of research out there about the specific benefits of kelp for sheep. What I have been able to find shows that it has several micronutrients that help with digestion, reproduction and immune system.
So the first thing you should know is that much of this information is anecdotal at best. You definitely should consult with your own vet if you decide to feed your sheep kelp meal.
One interesting fact that I have been told and have read (mostly on websites that advertise their kelp meal) is that it will help the animals with heat stress.
Here in the midwest, that’s probably a good thing for those of us who raise wool sheep. Of course we shear in the spring. But wool begins to grow back over the summer. I often feel very sorry for my sheep in the heat of the late summer and early fall.
Jana Wilson
Prebiotic Fiber & Other Good Stuff
Kelp meal also has been shown to be a good source of prebiotic fiber. This nourishes the good bacteria already in the sheep’s colon.
Kelp also contains a good amount of iodine and cobalt, while being low in copper (something that can be toxic to sheep in larger amounts).
Some sheep farmers I know use kelp and have seen good results. And I have seen what I suspect are the results of feeding kelp meal to the sheep.
I have gone to help with the shearing at a friend’s house for about three or four years. She began feeding kelp last year, just for reference.
What I noticed this year—as the shearer zipped through each sheep in less than 10 minutes—was that the wool on her sheep was longer, fluffier and easier to shear than it had ever been in the past! The sheep shearer, who has been doing these sheep for many years, confirmed that the wool was far easier to cut through than it had ever been.
The only thing that changed? Addition of kelp meal in her salt pans.
So I’ve decided to add some kelp to my sheep salts as well. I use a salt that is fortified with selenium, a trace element that is deficient in most of our soil in the U.S. I’ve mixed the kelp meal into my salt, and the sheep seem to love it.
So I’ll report back on the results of my kelp experiment in about a year or so.
In Other News…
Meanwhile, on the farm, lambing has begun! We had a single ram lamb born Saturday and a lovely, large ewe lamb born today just before I went out to the barn to check on the pregnant ewes.
Both are doing well and healthy. I look forward to seeing the rest of the lambs over the next month! Thankfully, the cold weather seems to have passed here in the Midwest … though the young ram lamb was born while it was snowing outside!
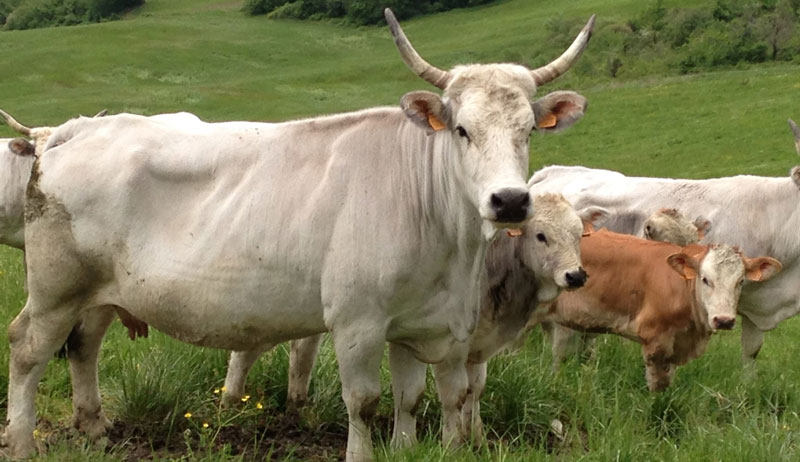
It’s sometimes easy to look at domestic cattle and forget that, as bovids, they share ancestral links to buffalo. Size aside, a quick glance at a well-fed Black Angus lolling in the pasture or a herd of Chaorlais white-dotting a hillside don’t immediately call to mind the mighty hooves of a buffalo stampede.
But some cattle keep that family link front and center. And the massive Romagnola is one such breed.
With an oxen-like physique that calls to mind the primitive draught animals they are, Romangnola cattle boast heavy musculature. Bulls, in fact, can top out at over a ton in weight.
European Roots
Romagnola cattle originate from Italy. The breed is thought to have derived from eastern European Podolian cattle, though this belief is more hearsay than scientific assertion.
What we do know, though, is that Romagnola (initially a collection of sub-breeds) have long been popular draught cattle in Italy. The creatures historically excelled in this role due to the breed’s short, powerful legs and pronounced musculature in the loin, rump, shoulders and lower thigh.
Powerful beasts, these primitive-looking animals were invaluable to early early Europen agriculture for tilling fields for planting. Meat was a secondary use until the mechanization of agriculture, when Romagnola cattle became considered as beef cattle.
What changed? Well, in the mid-19th century, a breeder named Leopoldo Tosi, of San Mauro Pascoli, began selectively breeding the animals for beef characteristics. Such was his success that the Romagnola took first prize for best beef breed in the at the 1900 Paris International Agricultural Fair.
The primary physical distinction of Romagnola cattle, which are among the largest of beef breeds, is heavy musculature. Massive foreparts coupled with short, strong legs bely the breed’s former glory as a fieldwork powerhouse.
The average height of bulls is about 5 feet, while cows top out around 4 1/2 feet.
Romagnola cattle hair is white/ivory, with gray around the eyes, ears, neck and thighs. (Bulls display gray around the shoulders, as well.) The coat will thicken and darken in colder weather, and calves are red/wheat-colored at birth to about 3 months olds. The breed has a black hide under its hair.
Today, farmers and ranchers keep the Romagnola breed primarily for its distinct beef characteristics. But they also benefit from the Romagnola’s maternal capabilities and, notably, climate adaptability.
The Romagnola is the only cattle breed with sweat glands. This unique characteristic allows them to thrive in hot climates. They also adapt well to the cold and to higher altitudes.
In the era of climate change, this wide adaptability could very well prove important.
As an early-maturing breed with good general conformation, this cattle breed (as well as the RomAngus, bred with Angus) offers a number of advantages for today’s beef industry. You’ll find the breed present in pastures throughout the globe.


 If it’s cold enough for snow to accumulate, it is undoubtedly cold enough to freeze water. Luckily, we had not yet pulled the base heaters from our coops’ waterers. A quick check showed still-liquid water in those fonts.