Categories
Animals Chickens 101 Farm & Garden Flock Talk Health & Nutrition Poultry

Chickens Get Bad Habits, But You Can Help

There are no bad chickens, only bad chicken habits. Some chickens jump up to sleep in trees every night or treat themselves to an egg scramble from the nesting box. But it’s up to you to break your chickens of whatever bad habits picked up over time.

If left unattended, you could be out dozens of eggs. In the worst cases, you’ll be out a few chickens, too. 

Thankfully, you can break chickens of bad habits fairly easily. Some common examples follow, with directions on how to break them if you see them pop up in your flock.

Egg Eating 

You’ve picked your chickens carefully, and you have a nice mix of rainbow eggs from all different types of heritage birds. Every day you’ve gone out to pluck beautiful eggs from the nesting boxes. Then, one day, you notice there aren’t as many.

The day after that, even fewer remain. You see a mess of eggshells on the bottom of the nesting box where your eggs used to be. It won’t take you long to put 2 and 2 together.

One of your chickens is eating eggs, one of the most common bad habits in the coop.

Chickens will eat eggs for numerous reasons, from boredom to a lack of protein in their diet. It’s a difficult situation for any flock owner to be in. Eggs are one of the main reasons why people raise chickens.

If you sell your eggs, you’ll be out of income. If you and your family eat them, you’ll be out of food. 

Once your chickens get a taste for eggs, it can be very difficult to break them from this bad habit. That being said, you can try a few different strategies to regain your daily dozen (or two dozen) eggs. 


Read more: Check out these pointers for dealing with egg-eating chickens.


Renovate Your Nesting Boxes

A wide-open nesting box is an invitation to come inside, get comfortable and lay an egg. For some chickens, it’s also an invitation to come inside, see what’s in there and treat themselves to a snack. 

If your chickens eat eggs, the first thing you should do is take a good look at your nesting boxes. Use wood chips for nesting material? Try switching to straw. If you use straw, try switching to wood chips or some other nesting material.

A dark nesting box is less likely to be looked at as a spot to search for snacks. Try adding curtains to darken the area and keep your hens from seeing the eggs lying inside. 

If you’ve tried renovating their existing nesting boxes and you’re still struggling with egg eating, you can find plans online for nesting boxes with a rollaway bottom. You can DIY this type of nesting box yourself. As the hen deposits the egg in the box, the egg will roll into the corner and out of sight so the hen can’t turn around and eat it. 

Condiments

Have you ever looked over your flock and asked yourself, “I wonder if my chickens would like mustard?” The answer is no. No, they do not.

Chickens aren’t fans of mustard. That’s why some chicken owners place eggs in nesting boxes that have been hollowed out and replaced with mustard. 

You can do this by poking a hole on both sides of the egg and blowing until the contents are empty. Once you have an empty eggshell, squeeze some mustard inside the egg. For maximum effect, fill it as much as you can, but try not to let any drip out. 

Place your mustard egg or eggs in your nesting boxes. Then wait until your egg-eaters take a peck at them.

You can set up a camera in your chicken coop if you want to know which chickens head there first to practice bad eating habits. If they do peck at them, they may just be turned off of eggs forever. If not, you’ll have a visual from the camera as to who is eating the eggs and you can choose to isolate them from the nesting boxes temporarily. 

chickens bad habits habit escape fence
Jsita/Shutterstock

Jumping the Fence 

You built a secure coop for your chickens. A fence to keep out predators fortifies it. But what you might not have considered is that it’s not tall enough to keep chickens inside the fence. And for chickens, hopping the fence is a common one amongst bad habits.

For chickens, the grass is always greener on the other side of the coop, and jumping out an is an often-. Even if they have an entire acre to peck around on, some birds will still jump the fence and come into your yard. They might peck at your living room windows or beg for food on your front porch.

Some people find this charming. But if you’ve ever slipped on a pile of chicken droppings when walking onto your porch or you have a rogue rooster crowing loudly outside your window, jumping the fence will lose its appeal very quickly. 

Jumping the fence can also have serious consequences for the chickens. If they graze, unattended predators such as coyotes, hawks or eagles could easily swipe them. 

To stop your chickens from jumping the fence, you can try a few different thing. 

Fortify the Fortress

One of the first things flock owners can do if their chickens jump the fence: Build a coop with a closed run. There are different plans for chicken coops with runs online. The benefit to this type of coop is that your chickens remain in a safe, enclosed area. 

But if a closed coop isn’t for you and you’d like your chickens to be able to free-range more than a small area will allow, you’re going to have to adjust your fence. If you already have a sturdy fence but your chickens jump it, you’ll have to increase the height. 

The average height of a chicken coop fence is approximately 5 feet. To keep your flock inside, you may want to add a layer of fencing to the top of your existing fence to make it 8 or 9 feet tall. You can do that with a layer of mesh fencing on the bottom and a layer of plastic garden fencing or chicken wire on the top.

It might look a little like you’ve set up your own chicken Alcatraz. But it should keep them safe in their area. 

chickens bad habits habit wings clip
loocmill/Shutterstock
Clipping Wings

Wing clipping is a bit of a controversial issue for chicken owners. While some may advocate for wing clipping, others feel as though it’s a lot like declawing a cat. It takes away a bird’s ability to protect itself in sticky situations. 

Ultimately, it’s up to you whether or not you want to clip your bird’s wings. If you plan on doing so, a general tip is to trim them so one side is shorter than the other. Uneven wings will keep your chickens just slightly off-kilter.

This can prevent them from gaining altitude when they try to take off. 

Don’t be surprised if they still manage to jump the fence, even if you’ve clipped their wings. Some birds are lighter than others. And others can parkour a fence or small structure without spreading their wings at all. 

Sleeping in Trees 

Sleeping in trees goes part and parcel with jumping the fence. If you suddenly see a drop in population when you lock your chickens up at night but you find everyone is there for roll call in the morning, you may just have a few tree-sleepers on your hands. 

It’s natural for a chicken to want to sleep as far away from the ground as possible. But when they sleep in trees they are exposed to the elements and predators.

Not only that, but if they choose to sleep in a tree right outside your bedroom window or near your house, you’re going to be treated to a very early wake-up call every morning. Some roosters will even crow all night long if they feel they need to alert the flock to danger. 

chickens bad habits habit sleep trees
Patcharin1602/Shutterstock
What’s Up?

Chickens will return to their roost night after night. So the first step to stopping them from sleeping in a tree is to figure out why they might be doing it in the first place.

Do you have several roosters? Or maybe you know your hens have a strict pecking order? Some of the chickens that have a lower ranking may look for a new home rather than sleep with the enemy. 

If you know the chicken or chickens that get picked on, you can separate them within your coop so they feel safe while sleeping. Some flock owners build a new chicken coop entirely. Others will have several small structures separated within a large fenced area. 

Retrieving a Treed Chicken

If you have a rogue chicken in a nearby tree, the best way to move them is to wait for them to head there to roost. If you can, wait near the tree and pick them up before they manage to get up. It can save you a lot of hassle if your chicken jumps branches until they are too high for your ladder to reach. 

If the chicken is in the tree and accessible by ladder, place the ladder under the tree before the chicken goes there to roost. You don’t want to startle the chicken. They’re very easy to pick up when roosting.

Wait until it’s dark and be sure to take a headlight to help you see. 

Once you have the chicken, your best bet is to place it in an enclosed, locked-down area within your coop and keep it there for a few days. Don’t remove the bird from the chicken population. But don’t allow the bird to be vulnerable to the other birds in case they want to attack it. 

You can let the bird back out into the flock after it’s adjusted to being back in the coop. If you fixed your fences so it can’t jump out, odds are it will stay within the coop from that time on. Just keep in mind that if the bird can find a way out, it most likely will end up back in your tree again. 


Read more: You can help a broody hen hatch her chicks!


Hidden Eggs

If you have a large yard and a lot of free-range chickens, you’ll find a few hidden nests of eggs once in a while. No matter how appealing you make the nesting box, some chickens have a mind of their own. These ladies will lay an egg in whatever spot looks comfortable.

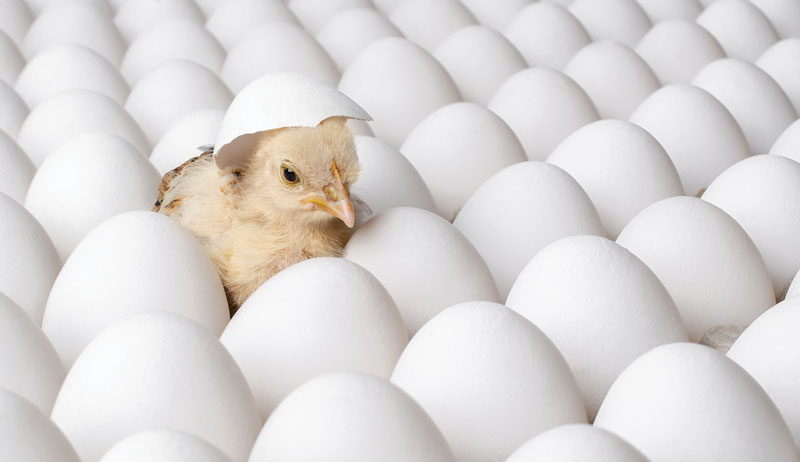
The problem is that if a hen continues to go to a nesting area and lays eggs but you have no idea where that nest is, eventually they’ll amass a large pile of eggs and go broody. Brooding is natural (and not exactly right to list alongside bad habits), but you’ll need to deal with chickens in this state.

A broody hen sitting on a big pile of eggs can mean a large and unexpected addition to your flock. In my time raising chickens, my record for unexpected hatchings is 18 chicks from one hen! 

The only way to stop hidden nests and random egg laying is to make sure you can account for all of your chickens. If you let them free-range, you’ll want to count heads every night to make sure everyone sleeps where they should.

If you do find a nest of eggs and a hen sitting on them, you can pick up hen and eggs and place them in a safe, enclosed area until hatching. That way they’ll have food and water as soon as the babies hatch. You won’t be greeted by a surprise family at your back door! 

 Chickens are the type of animal with an independent mind and a casual disregard for their personal safety, but breaking them of their bad habits ensures your flock will be safe to lay or crow another day. 

This article originally appeared in the March/April 2022 issue of Chickens magazine.

Categories
Crops & Gardening Equipment Farm & Garden Farm Management News

Old Macdonald Had A … Vertical Farm?

What do you picture when you think about farming? For most of us, farming brings to mind a red barn, tractor, crops in the field, or livestock grazing in the grass. Farming has been that way for hundreds of years, but farm technology is evolving to the point where the concept of what a farm is or could be is changing pretty quickly.

Case in point? Vertical farms.

Vertical farming has only been around for a few years. But it’s been so successful it’s clear this is a new method of farming that’s not going anywhere.

What is vertical farming?

Vertical farming, also known as controlled environment agriculture, is the process of growing food indoors in stacks.

If you walked into a vertical farm you’d see a hallway with stacks upon stacks of greens in rows stretching from floor to ceiling. At first glance, you’d think it looks like something out of a sci-fi movie.

And you’d be right about the science part (though the tech is anything but fictional). This type of technology was first developed by NASA in an attempt to grow food in space.

Not long after NASA started experimenting with this type of farming, Elon Musk’s brother Kimbal launched a farming operation called Square Roots. What started in 2016 as a way to grow produce in a major metropolitan area has branched out into a commercial business with vertical farms in New York, Michigan and Wisconsin.


Read more: We tried 3 indoor smart gardens. Here are the results.


How does vertical farming work?

More often than not, vertical farming takes place in a shipping container or another type of indoor space. People are employed to oversee plant health, but everything is completely monitored using automated farm technology that takes over every part of the growth cycle.

You can grow everything from herbs to salad greens to strawberries on a vertical farm.

Benefits of vertical farming

If you grow your own crops, you know the work that goes into every part of the growth process. You also know all of the things that can go wrong when you’re farming.

For starters, there is there only one growing season per year. And your crop could be destroyed by everything from floods to volatile weather to insects. That crop won’t pay off until it’s harvested and sold—and there are no guarantees in farming,

That’s why people find a lot of benefits in vertical farming. Vertical farms can grow 365 days a year for a growing season that never ends. And because they are climate controlled, you don’t have to worry about a weather system moving in.

Hail or rain don’t destroy indoor crops. And it’s always a sunny day in indoor farming. The sun that shines down on a vertical farm is entirely man-made in the form of grow lights.

Furthermore, there are no insects inside vertical farms. Nothing will eat your produce before you can.


Read more: Learn all about integrated pest management to control insects in the garden!


Drawbacks to vertical farming

It’s easy to get excited about vertical farming. But there are a few drawbacks you may want to think about before you jump in with both feet.

For starters, vertical farming start-up is expensive. Shipping containers have jumped in price since the pandemic. Setting up the indoor space to grow could cost you an average of $5.00 or more per square foot.

Vertical farming also requires the use of farm technology to monitor your growth. You’ll need to be plenty tech-savvy to grow indoors.

And you’ll need to pay high energy costs for heating and cooling, too. Vertical farms are completely climate-controlled.

Is vertical farming the way of the future?

With vertical farms popping up all over the USA, it’s clear this new method of farming isn’t going anywhere. As farm technology progresses, it could become less expensive to grow indoors, too.

It’s exciting how people are finding innovative ways to grow food. But fear not—traditional farms aren’t going anywhere either. As long as people want to farm and grow food, nothing will replace the time-honored process of planting and harvesting crops outdoors.

Categories
Crops & Gardening Farm & Garden

Use Worm Counts To Assess Soil Health & Improvement

Christina Curell has spent literally hundreds of hours searching through soil samples on the lookout for worms. “I sat on a bucket for two weeks one summer to count worms,” she recalls. “I was up there from sunup to sundown…. I hauled my water, hauled my soil, and I found two worms in an entire week.”

Just two worms? “This was a research plot and the soil that I was in was not conducive to worms,” she explains. Curell works as the Cover Crop and Soil Health Educator for Michigan State University Extension.

When they’re at work in your garden, worms can boost the soil’s fertility, structure, and its ability to hold moisture. Of course, there are several variables that affect whether your soil is chock full or nearly devoid of worms.

“It all depends on where you’re at, the temperature, the time of year, the soil type—the variables are huge,” Curell says. “So, what I normally tell people is to just go and look for worms.”


Read more: Make worm compost from kitchen scraps!


Who’s Who

Just what should you be looking for exactly when you do worm counts? “There are lots of species of worms, and we tend to lump them together,” Curell says. Put simply, there are a few basic groups of worms—epigeic, endogeic and anecic.

Turn over the damp mulch or leaf litter in a perennial bed and you may come across some surface-dwelling worms. These small worms are in the “epigeic” group. They stay up top, chewing through rotting leaves and other debris.

Red worms fall into this category. “The red worms are the ones that we really like,” Curell says. “They’re the workhorses. They’re kind of small and they’re native.”

Some kinds of epigeic worms also live in cooler compost piles and vermicomposting bins. These worms are experts at breaking down the organic matter found above ground.

When you dig down into the top layer of your soil, you might expose some soil-dwelling or “endogeic” worms. These are usually larger and paler than the epigeic worms. (In fact, some are so pale that you can see any soil they’ve recently eaten.) They make a series of horizontal tunnels as they move through the soil’s top layers.

This, in turn, can help to improve soil structure.

Finally, when you dig down farther still, you reach the realm of the “anecic” worms. These are large, deep-diving nightcrawlers. Working as nature’s tillers, they pull fallen leaves and other surface debris down with them into their vertical burrows. (They’ll even shred spent cornstalks to take back with them as they return to the cool, moist environs they prefer.)

Getting Started

When taking a worm count, Curell usually digs an 18-by-18-inch area in relatively moist soil. “We want to go to a couple of depths when we do this,” she says. “Just go down 3 to 6 inches and count the worms… Then go down the next 6 inches and count. Then go a little bit deeper.”

She continues, “Worms are really good about moving, so, if you don’t [count within] those little increments, they’ll be gone.” Put the dirt you remove in a large bucket or wheelbarrow as you go. Count the worms you see in each layer, total your numbers, and then replace the worms and soil.

Record your results along with the temperature, date and notes on the exact location of your count. Complete additional worm counts in the same spot annually to gauge soil health and improvement. “Make sure that you’re actually testing at the same time of year and that [soil] moisture and temperature are consistent,” Curell recommends.


Read more: Air and water are critical to soil health.


Your Results

So, what if you find very few worms—or no worms at all? “[Taking a worm count] is a fun way of checking for soil health, but it’s not the end all and be all of soil health,” she says. “Especially depending on your soil type—if you’ve got drier soil … you’re not going to find them. They don’t live in droughty soils.”

“Or if you have really, really heavy soil—like heavy clay—they’re not going to be there either,” she continues. “They can’t live in that, because they need air and, also, they need to move. So, it all just depends on your soil type.”

What if your soil is neither droughty nor clay-heavy and you think you should be seeing higher worm counts? Add manure and plant more cover crops.

“One of the things about worms is that they need food,” Curell says. “[Worms are] eating all of those bacteria and fungi that live around the plant roots. . . . So, the more plants that we can get into the system, the more worms we’re going to have.”

Categories
Animals Breeds Chickens 101 Farm & Garden Flock Talk Poultry

Can You Identify This Mystery Chicken Breed?

Chickens and other poultry members come in all sizes, shapes, colors and personalities. Nearly 400 recognized breeds and varieties of poultry exist, including large-fowl and bantam chickens, ducks, geese, turkeys and guinea fowl.

Using our illustration above, the photo below and a few selected hints, can you guess which breed we have depicted here?

The answer to our mystery breed question is below. But first, some hints!

Hints

  • This large, stately appearing chicken originated in China.
  • Chicks are dark gray to smoky white; when mature, these beautiful birds are pure white with dark brown eyes and slatey blue shanks.
  • Hens of this breed lay brown eggs. 
  • These birds are very nice for showing. After the breeding season, Murray McMurray Hatchery’s flock owner keeps a trio of these in his front yard just to look at each day!
Langsham chicken chickens
Julija Ogrodowski/Shutterstock

Mystery Breed Answer

The breed depicted above is the White Langshan. The Langshan is the tallest of the nongame breeds. Although it’s the lightest of the Asiatics, it stands the tallest. Like the other Asiatic breeds, Langshans have feathered shanks—though the feathering isn’t as profuse as Cochins or Brahmas.

The Langshan has a distinctive U-shaped profile. The head and tail form the uprights. It has a large, well-spread tail and great depth of body, white skin and a single comb.

The standard weight for an adult rooster is 91⁄2 pounds; for an adult hen, 7 1⁄2 pounds.

To learn more about this beautiful breed, visit hobbyfarms.com/langshan.

This mystery breed was brought to you by Murray McMurray Hatchery, which provides the highest quality poultry and auxiliary products to its customers and has been a trusted, knowledgeable industry resource for more than 100 years. Whether you are an experienced or novice enthusiast, Murray McMurray is sure you will enjoy its wide selection of breeds and supplies to assist you with raising your flock!

This article originally appeared in the March/April 2022 issue of Chickens magazine.

Categories
Animals Beginning Farmers Chickens 101 Farm & Garden Flock Talk Poultry Urban Farming

Noisy Chickens: All About Fowl Language

My friend Carrie sent me a rather distressed message this weekend. Although she lives in a city where local ordinances allow for backyard flocks, her new neighbor was raising a ruckus about her hens’ noise making.

This new guy was under the impression that only roosters make noise and that hens are silent … and Carrie’s chickens get pretty noisy. The neighbor accused Carrie of mistreating her microflock because her hens obviously suffered distress, as was evidenced by all the noise they made.

Carrie was obviously horrified. She adores her birds and treats them like her own children. To be accused of mistreating her flock? Outright insulting.

Worse than that, however, was the possibility that her neighbor might report her to the city for animal cruelty or neglect. “Can I double check with you?” she asked. “In my experience, chickens in distress are very quiet and healthy birds make some noise. Am I wrong?”

It’s Not Just the Roosters

No, Carrie was not wrong. Most people—and most municipal governments—consider the males the noisier gender. But the females are not silent sweethearts. Hens and older pullets are actually quite chatty and communicative, although the sounds they produce are nowhere near the din belted out by the barnyard boys.

Because of their complex social hierarchy, chickens need to communicate with each other, and that can get noisy. While some of this is done through such body language and actions as pecking, wing flapping and head tilting, most communication occurs verbally.


Read more: Quiet chickens make for good neighbors, so check out these low-noise breeds.


Studying the Sounds

Researchers Nicholas and Elsie Collias of the University of California at Los Angeles spent more than 30 years cataloguing chicken sounds. Their research identified more than 24 unique vocalizations and their meanings.

Biologist Carolynn Smith from Australia’s Macquarie University, however, discovered that chicken communication is much more complex than that. By attaching wireless microphones to chickens (using bra straps!), she and her team were able to identify different vocal responses and inflections depending on the situations in which the chickens found themselves.

Meanwhile, Georgia Institute of Technology research engineer Wayne Daley has recorded more than 1,000 hours of chicken speech and is using software to determine the different sounds made according to the chickens’ emotions.

What You Might Hear

As a chicken keeper, you’ll hear a multitude of sounds from your backyard birds. Among vocalizations made by noisy chickens:

Egg Song

This lengthy cackle sounds like “bawk bawk bawk bawk bawk bawk bawk BAW-KAW!” Hen or pullet in lay will call out this “song” as she lays or immediately afterward … and she will repeat it for several minutes.

The meaning behind the egg song has not yet been pinpointed. Some believe that the layer is letting the world know that she has produced yet another amazing egg and boy, is she ever proud of herself. Others feel that a hen’s egg song expresses her relief to have expelled that uncomfortable egg.

A flock of laying hens will fill the air with egg song multiple times throughout the day.


Read more: Can chickens talk? Sure they can! (And they have lots to say.)


Tidbitting

This series of squeaky staccato clucks sounds like someone repeatedly scuffing their shoe on a freshly waxed floor. Tidbitting is used by roosters and, in female-only flocks, by alpha hens to call flockmates over to just-discovered food. Mother hens also use tidbitting to teach their chicks what to eat in the run and when foraging.

Clucking

The most common form of vocalization, clucks are how hens talk to each other about anything and everything. Scientists such as Smith and Daley hope to further identify the nuances of clucking to further identify the different meanings of the sounds.

Squawking

A hen will squawk loudly when she is startled, surprised or scared. This is the sound you’ll most likely hear if you try to catch your hens or from new hens being taught their place in the flock by an alpha hen.

Hissing

A broody hen will make a distinct hissing sound when she feels her eggs are being threatened. Occasionally, this hiss will also have a guttural warble to it. Hissing is a protective hen’s signal that you are in imminent danger of getting pecked.

Shrieking

Usually vocalized by a rooster, the alpha hen of an all-female flock will let loose a high-pitched, squeaky shriek to signal an aerial predator overhead.

Honking

This sound—which is almost identical to the noise made by squeezing a child’s bike horn or a red clown nose — is made by pullets and hens who discover something surprising while foraging. I’ve never heard it at any other time and, when investigating, have found things such as tiny puddles, a feather, a toad and the hook of a bungee cord. Nothing threatening, but enough to make a girl say the chicken equivalent of “Oh!”

Carrie plans to invite her new neighbor over to meet her hens, see how well they are treated, and gently explain that, while chickens can occasionally get noisy, he has no cause for alarm. Who knows? We can all hope that he’ll grow to enjoy the rural sounds of chicken communication.

Categories
Animals Beginning Farmers Chicken Coops & Housing Chickens 101 Farm & Garden Poultry Poultry Equipment

How To Start Hatching Chicks With An Egg Incubator

Incubators have been around since ancient Egypt. Beginning with mud ovens that are still in use today to our more modern countertop models, incubating eggs has been around for thousands of years.

The American incubator was first patented in 1844, and the first electric incubator came in 1922. All came with the purpose of hatching more birds out and doing so safely. With natural brooding, the mother hen isn’t controlled. She may abandon her chicks or even eat her eggs.

She may also abandon her eggs before they hatch or is easily accessible to predators. 

When beginning with incubating, many factors will come into play. Humidity, temperature, rotating eggs and the time of incubation for different species can be overwhelming when first starting out. Each of the incubators that I will be going over are all fairly easy to use and come with directions. 

Please remember to always follow the recommended guidelines that come with your incubator. Depending on what you are hatching, there are different humidities and temperatures that you will be following. It can range from incubator to incubator, and outside humidity and temperature can affect your hatching.

It’s best practice to keep your incubator in a temperature-controlled environment. 

If I knew then what I know now, I would have bypassed the smaller incubators and saved some money. I do understand that some people can hatch only five to 10 eggs at a time. But to me hatching was very addictive. My current incubator is a GQF cabinet incubator, which I love fully and can easily fit upwards of 200-plus eggs, depending on what I am hatching.

I’ll cover that particular incubator later in the article. 

chick chicken eggs incubator
GQF Manufacturing Co.

Hova-Bator

This incubator from GQF Manufacturing Co. is the least expensive of the incubators I’ll be covering. It’s a very basic incubator, but you can get add-ons that are made to fit it and make your hatching experience easier. 

The very basic model starts at about $55. This price reflects a manual incubator, meaning that you’ll have to manage the temperature and humidity, and you’ll have to hand-turn your eggs. Marking eggs will be very helpful in that process. 

It’s also a still-air incubator so the air in the incubator can become stagnant. Hot spots may also be an issue within still air for which you’ll need to monitor. Humidity will need to be carefully monitored also, and over time, you’ll learn how and what methods help with humidity. 

This incubator can fit up to 42 chicken eggs. You can purchase an automatic egg turner that will fit perfectly, and if you would like to upgrade to a circulated-air incubator, you can also purchase a fan kit that easily attaches to the original model.

There are also some Hova-Bator kits that include all of this in the initial purchase. This incubator can handle button-quail eggs up to emu eggs. Find out more at www.gqfmfg.com. 

chick chicken eggs incubator
Marissa King

Nurture Right 360° 

I haven’t used the Nurture Right 360° Egg Incubator, but my friend and business partner, Brittani Walker, swears by. She prefers this incubator, whereas I am more fond of my GQF model. 

Cost-wise, this incubator is pretty efficient, starting at about $150 dollars depending on your area. This is the only incubator Harris Farms offers, so other models don’t exist. 

The Nurture Right can hold up to 22 eggs and has an auto turner, an auto shutoff for egg turning three days before hatch and an LCD display from which you can monitor the temperature and humidity. This incubator also includes a built-in egg candler, which is a very useful tool right where and when you need it. 

This model includes an external watering port so you can add water easily to raise the humidity. It doesn’t have alarms to alert but does offer a 360-degree view, and it can handle pheasants, quail, chicken, duck and turkey eggs. Larger eggs have to be turned by hand. 


Read more: Consider these 3 points when selecting the right incubator for you.


IncuView™ All-In-One Automatic Egg Incubator 

This fully automatic incubator starts at about $195. It has a large see-through lid and can hold up to 27 chicken eggs and accommodate any eggs, any size, up to goose. 

This incubator has a fully clear dome much like the Nurture Right, but while the Nurture Right is round, this incubator is square. It has a fully automatic egg turner and thermostat. The thermostat comes preset at 99.5 degrees F. It also has a built-in humidity reader and has a hatch timer. 

This incubator is also a fan-operated incubator, and the fan is included with the initial setup. This incubator looks easy to clean out, but to add water to adjust your humidity, you’ll need to open the lid. There isn’t an external port available. This incubator also doesn’t have any alarming systems if the temperature or humidity gets out of whack.

It does include a lot of the functions of more expensive incubators at a cheaper price.  

Rcom Pro 

This tabletop incubator ranges in size. I personally used one of these during my first years of incubating and absolutely adored it. They do run kind of expensive, averaging from $250 to more than $600. It’s a fully automated system once you close the lid. All you have to do is add water for humidity reasons, set it and forget it. I always had great hatch rates with this brand. 

The smallest size holds 20 chicken eggs; the largest tabletop, 50. This incubator can also incubate button quail, quail, duck, pheasant and larger eggs such as turkey and geese but they’ll have to be turned by hand. 

A few helpful benefits of this incubator include an external watering hole, a window lid and a computer-pairing option that allows you to track your incubation data in real time. It also has a counter and alarms available depending on which model you choose. 

Cleanup on this incubator is very easy as well. You don’t have to scrub out the trays. Wiping it out with a damp rag does just fine, and there aren’t many hard areas to clean on it. 

chick chicken eggs incubator
Brinsea

Brinsea Mini II 

This tabletop incubator can fit comfortably in just about any setting depending on which model you get. There is a very small model that holds seven eggs and other models that can go up to cabinet-size. 

A few of my poultry peeps swear by this incubator. Much like the Rcom, the mini Brinseas also have alarms to alert you if the temperature or humidity gets out of normal ranges. This incubator also has a clear lid, an external watering entry and a hatch-day countdown time with automatic egg turner turn-off at day 18.

Temperature settings are set at 99.5 degrees F, but it’s adjustable. This incubator is very low maintenance and perfect for beginners. It’s also very small so you can fit it comfortably in many different places. 

Brinsea’s bigger models still have many of the same features that the mini does. These incubators start at about $200 and range up depending on model and size. This incubator can accommodate about 12 quail or pheasant eggs or seven chicken or ducks eggs. 


Read more: So you have day-old chicks. Congrats! Now what do you do?


GQF 1502 Sportsman 

This model starts off at $750 and goes up. The reason I have included this here is because it’s easy to use and can hatch up to 360 chicken eggs and more than 1,000 quail eggs. If you’re beginning to hatch but plan on hatching large quantities, this incubator will be perfect for you. 

I personally attest to GQF’s customer service being amazing. They go above and beyond for their customers. The space is amazing, but it’s a large incubator. You’ll need a large area to keep it. 

It comes with a fully automatic turner, an LCD gauge for temperature and humidity, and a hatching tray. What I love most about this incubator is that you can stage many different cycles of hatches and you don’t have to wait until a hatch is finished to throw another one in. 

If I knew then what I know now, I would have gone straight to this incubator from the beginning (as I hinted at earlier, hatching is addictive, be forewarned). This incubator has removable trays that clean very easily and you can buy a bucket system to make even less work for yourself. There is a window that you can look through or you can opt for a clear door. 

The price on this incubator is well worth it, but compared to the smaller incubators, it can be difficult to clean—especially if you are smaller. Getting the back corners can be hard. 

Another great thing I love about this incubator is that it can hatch whatever egg you want. It doesn’t matter the kind or size. I have hatched as small as button quail all the way up to emu-sized eggs. 

Ova Easy by Brinsea

This cabinet model offered by Brinsea holds up to 96 chicken eggs. This model is smaller than most cabinet incubators but still holds many eggs. With a starting price of $1,099, it’s the most expensive on our list. 

The Ova Easy has alarms to alert if the temperature gets too low and an automatic egg turning system. This incubator can fit all sorts of sizes of eggs very easily up to goose and turkey. This incubator also has an LCD screen that shows humidity and temperature. 

It’s very easy to use, but a separate humidity kit will have to be purchased. It also has a one-push shelf-leveling button. This brings your egg shelves upright from turning so that you can easily set your eggs. 

Regardless of which egg incubator you choose, always follow the recommended guidelines and settings. They’ll vary from each brand. Whatever your plans are for hatching, these incubators are the best and will cover all of those needs.

Good luck and happy hatching! 

This article originally appeared in the March/April 2022 issue of Chickens magazine.

Categories
Crops & Gardening Equipment Farm & Garden

12 Tools You Need For National Gardening Day

Did you know April 14 is National Gardening Day? Whether you’re an experienced gardener or a newcomer just getting started, April 14 is the perfect day to celebrate the joy of planting your own garden.

Depending on where you live, April 14 might also be the perfect day for preparing or planting a garden. Of course, gardening is much easier when you’re equipped with proper tools. If you’re just getting started, we’ve compiled a list of 12 helpful tools to have.

You don’t necessarily need them all to begin with (especially if you’re starting small). But diving in with both feet isn’t a bad strategy either.

Let’s explore some tools for a great National Gardening Day!


Read more: Ready to get gardening? Early spring is the right time to plant these crops.


  1. Digging Shovel or Spade

A digging shovel or spade is perfect for digging up the ground at the start of a project, whether you’re preparing your garden area or digging a large hole for a shrub or tree. They’ll slice through sod and remove loose rocks so you can prepare the perfect planting space.

  1. Garden Fork

Similar to a spade, but with tines instead of a solid blade, a garden fork (also known as a spading fork or digging fork) is another great tool for turning over the soil and removing rocks.

  1. Rake

There are many types of rakes you might need. A leaf rake is useful for cleaning up leaves and grass clippings. A bow rake is a tougher tool, though, perfect for removing rocks and smoothing soil.

  1. Draw Hoe & (or) Scuffle Hoe

As with rakes, hoes come in many styles. Draw hoes are suited for breaking up and working the soil. Scuffle hoes are geared more toward removing weeds.

Depending on the size of your garden and the extent of your ambitions, you might want to have multiple types of hoes on hand to cover all the bases.

  1. Trowel

Sometimes a shovel is bigger than you need. That’s what a trowel comes in handy.

It’s essentially a small handheld shovel perfect for digging small holes and weeding. Transplanting seedlings? A trowel might be just the tool you need.

  1. Hand Cultivators

Hand cultivators come in many different styles. They’re commonly shaped like miniature garden forks or rakes, with tines of varying numbers, shapes and sizes.

In any case, they’re suitable for one-handed soil cultivation (including weeding, mixing and more) on a small scale.

  1. Pruning Shears/Loppers

When pruning small plants, pruning shears (which fit in the palm of your hand) are a great tool. For pruning larger, woodier growth, pruning loppers (with two-handed operation) are the tool of choice.

Be sure to opt for bypass pruners (as opposed to anvil pruners) when trimming live growth. Bypass pruners leave a cleaner cut suitable for quick healing.


Read more: What are the differences between pruning shears and loppers?


  1. Watering Can, Garden Hose, Etc.

Plants won’t grow without water. So keep your garden happy with one or more convenient watering options.

For a small garden, a watering can might be all you need. For larger plantings, a garden hose (preferably with an adjustable wand on the end to control the intensity of the flow) can be a timesaver.

  1. Wheelbarrow, Gardening Gart, Etc.

For moving soil and compost into your garden (or weeds and rocks out of it), a wheelbarrow or gardening cart is a great option. Naturally, they come in many varieties.

Should a wheelbarrow have one or two wheels? Should a gardening cart be constructed from metal or polypropylene? Conduct a little research to choose the best option for your needs.

  1. Bamboo Pole Planter

You don’t have to purchase  every tool specifically from a store. A bamboo pole (or something similar) and a single clothespin can create a simple, adjustable tool for planting seeds to the correct depth.

Check out our explainer for more information on building a bamboo pole planter.

  1. Tape Measure

It’s important to provide each plant with enough room to grow. A tape measure is handy for spacing seeds and seedlings appropriately for their mature size.

  1. Gloves and Safety Glasses

Don’t forget about personal protection! Keep your hands safe with a pair of gloves. And wear safety glasses if there’s any risk of eye injury.

Have a happy National Gardening Day!

Categories
Animals Breeds Farm & Garden Large Animals

Love My Breed: Belted Galloway Cattle

We asked, and you answered. Virginia farmer Dr. Colette Loll wrote in to tell us all about keeping the Belted Galloway breed of cattle!


My passion for Belted Galloway cattle began after visiting the Fearrington House Inn in Pittsboro, North Carolina, with my family. We discovered their herd to be beautiful and surprisingly docile. So when we purchased a small farm in Virginia, we immediately thought of getting some Belties. 

Pasture Partners

In addition to the visual impact of their broad, white stripes on our pastoral landscape, the small Belted Galloway herd serves as an essential partner in sustainable pasture management.

We rotate them through fields and allow the grass to recover between grazing, increasing biodiversity and creating healthier soil. They are a vital part of our conservation strategy because of their unselective grazing habits, which assist in improving our fields for many species of plant and wildlife.


Read more: Learn more about the Galloway cattle breeds!


Built Tough

Belted Galloway cattle have been designed by a long history of selective breeding and evolutionary pressure to be hard as nails. Their double coats help them easily endure cold and wet weather, so they don’t require indoor shelter. This was critical because we had not yet built a barn.

The breed is also known for easy outdoor calving, essential for new cattle owners. It was a relief to have a trouble-free first calving season!

belted galloway cattle galloways
Dr. Colette Loll

As most Beltie owners likely discover, it’s difficult not to fall in love with these cows. Their gentle demeanor and overall friendliness allow us to interact with them frequently. It’s not unusual for us to be working in the garden and turn around to find ourselves surrounded by our Belties looking for an oat cookie. 

Dr. Colette Loll, Brooke Hill Farm, Marshall, Virginia

This article originally appeared in the March/April 2022 issue of Hobby Farms magazine.

Categories
Animals Farm & Garden Large Animals

Getting Spring Pastures Ready For Cattle

We’ve already entered the first weeks of April, and I feel like winter has flown by! Before we know it, the hills will burst forth with new green grass. We will turn out cattle in the pastures, and windmills will faithfully stand guard as they begin once again to fill stock tanks with water. 

In a previous article, we talked about the benefits of keeping cattle out on grass as opposed to in a regular pen. We also looked at some of the qualities that make for a good grazing pasture and how to keep it up.

We won’t cover all of that again today. But let’s look at what you might need to do to prepare your pasture and make sure it’s ready to graze when you are. 

This last week, we loaded the stock trailer with four wheelers and tools, and we all piled into various vehicles and headed out to the cattle pastures east of town. Turning off the highway, we had to traverse a few miles of gravel road to reach the first pasture.

The Flint Hills are starting to transition from brown to green. But these colors are nothing near as vibrant as the occasional pasture that has already had the dead grass burned off. As the new growth begins to shoot forth, these pastures take on the look of Ireland and make for a spectacular view. 

But before you turn the cattle out on your pastures, make sure you check the following few things off your list.


Read more: Keep these things in mind when considering putting cattle on pasture.


Removing Trees & Noxious Weeds

To keep a pasture in working order, you must regularly maintain the land. An unchecked piece of ground will quickly fill up with cedar trees until it becomes a regular Kansas forest. 

In addition to cedar trees, you’ll want to watch for certain noxious weeds are as well. A regular weed is simply a plant that grows where it’s not supposed to. An invasive weed is one that could spread aggressively and become invasive outside of its natural space.

But a noxious weed is a plant legally declared as able to cause damage to the environment (crops, natural resources, nursery plants, etc.) or injury/danger to humans or livestock. 

For example, a musk thistle, while beautiful to the eye with the spiky, purple flower it puts out, presents a nightmare for ranchers. If left unchecked, this invasive plant will spread to neighboring pastures. When we find a clump of this plant in the pasture, the lucky person that gets to clean them up dons a glove, grabs an empty feed sack, and begins tossing the seed heads into the bag for a later burning. 

Checking Pasture Fence

We also need to keep the fences strong and upright before turning out the cattle. We did this just this last week on our farm.

The guys drove around the pasture on ATVs looking for any broken wires or damage. They’d occasionally come back to the truck for more tools, then head back out to finish tying up loose ends. (Pun intended!)

As you ride around checking the fences, you can also check for any pieces of debris that might have made their way into the pasture. These could harm the cattle. 


Read more: These 9 tips will get you ready for keeping cattle on your farm.


Reviewing Water Supply

You’ll also want to make sure you have a plan for an adequate water source. If you don’t plan to haul water to the herd, make sure your windmill works properly and consistently. Or ensure your pond is fairly reliable and able to stay full for quite awhile.

Rivers and streams that cut through the property can also be a good source of water, so long as they don’t become contaminated or dry up. The last thing you want is a bunch of cattle stranded without any water during hot summer days. 

Burning the Cattle Pastures 

One of the biggest jobs the guys tackle during these early spring days is burning the pastures. Not every pasture gets burned every year. But you can determine if burning will be helpful that year or not by looking at:

  • how uneven the grass is (possibly caused by cattle grazing too heavily in a particular area)
  • length of grass
  • quantity of dead grass 

Burning not only helps clean up the grass, but it will prune back any small trees and kill the ticks or parasitic worms that might hide in the dead grass.

Sometimes you have to weigh the pros and cons of a situation. Tall grass in the pasture can be helpful for holding moisture in the ground. It can also pose a danger if a wildfire starts up. The fire will run through the pasture so quickly (due to an excess of fuel) and put the cattle at even greater danger.

Another reason to avoid tall grass? It can poke, scratch or irritate their eyes to the point they can no longer see. 

As the grass begins to grow back after spring burning (and hopefully a nice rain), it will come in lush and beautiful. Before you know it, you’ll be turning a trailer-load of cattle out into a clean, ready-to-graze pasture.

Stay diligent as you check back in on them. But with plenty of fresh water, the right environment and little-to-no illness, you should see a successful grazing season. 

Categories
Beginning Farmers Crops & Gardening Farm & Garden Farm Management

Square Your Garden Plots & Blocks With Math!

For most large-scale production squaring, a field is as easy as plowing parallel to your road. But small-scale growers often subdivide larger fields and need to have more precision to also make raised beds within these fields.   

Your garden plot should be square. This means that, where the plot length and width meet, you should see a 90-degree angle. Otherwise, some beds might narrow somewhere as you try to fit a quantity of equal width beds into a plot plowed askew.

The Pythagorean theorem says that the sum of the squares of the legs of a right triangle is equal to the square of the length of the hypotenuse (A2 + B2 = C2).  And you can use this equation to ensure your new plot has a right angle where the plot width and length meet.  

You can also use the 3-4-5 rule for squaring.

How to Determine Field Calculations 

How does this measurement and calculation work in the actual field? Follow these steps.

Stake the Plot 
  • Stake the future plot’s (top) corner!  Attach the end of the measure tape to the stake’s bottom center. 
  • Measure down the plot’s edge with a measuring tape (not a measuring wheel) until you reach the correct plot width (12 beds x 4-foot beds = 48 feet).  Two people are helpful to make sure the tape is taught. We’ll call this measuring down the headlands. 
  • Place another stake at the 48-foot mark!! 
  • Now, turn 90 degrees to measure plot length (100 feet), and place another stake at the 100-foot mark!
  • The line between the second and third garden stakes should  square to the line between stakes one and two (if you actually walked at a 90-degree angle).
  • Check the angle by returning to the second stake’s corner and using the 3-4-5 rule. 

Read more: You can rotate crops in very small growing spaces by keeping these things in mind.


Gather Two Helpers

Next, have helper No. 1, let’s call them Jaimie, stand at the third stake and pull the measuring tape taught against (but not tied to) the stake. 

You will be making measurements (with helper No. 2, let’s call them Billie) to confirm if the angle is correct. If the angle isn’t correct, you can howl at Jaime to move the stake up or down field to improve the angle until it is correct. 

Pythagorean Theorem in 3, 2, 1…

So how do we use the 3-4-5 rule for squaring?  This is short for of the Pythagorean theorem! 

The 3-4-5 rule for squaring is often used in construction—for example, to check a foundation before pouring a concrete slab.  This rule states that if you mark off a 3-foot measurement on one leg of triangle from a point, then mark off a 4-foot point on the other leg, then the hypothenuse of this triangle will be 5 feet. 

That’s it! Here’s how you can use it in the field.

  • You and Billie can mark 3 feet from the second stake toward the first stake, sticking  a flag and marking 4 feet from the second stake toward the third stake. Then, stick in a flag. 
  • Measure the diagonal between these flags. It should be close to 5 feet. 
  • If it is short of 5 feet, then have Jamie (who is facing you and Billie) move the third stake to their left (further down the headland). If the measurement was over 5 feet, then Billie should walk up the headland. They are either decreasing or increasing the angle until it is 90 degrees, at which point the triangle hypothenuse will measure 5 feet.   
  • Now, you can measure another 100 feet from the first stake, and/or 48 feet from the third stake, to find the point for a fourth stake. They should meet. 

Read more: Thinking about purchasing farmland? Mind these important tips.


Double-Check Your Garden Plot For Square

You can double check your whole garden plot is square by applying (A2 + B2 = C2) for the entire plot .

Mentally connect the first, second and third stakes to create a much larger triangle! You just need to find out what the hypotenuse of this plot-sized triangle is. The hypotenuse would be the distance between the first and third stakes at a diagonal.   

So, we do the calculation (A2 + B2 = C2) where A is the plot width; B is the plot length; and C is the measurement between the first and third stakes (the hypotenuse).   

482 + 1002 = C2, or (48 x 48) + (100 x100) = C2 

or

(2304) + (10,000) is 12,304 = C2 

Get C2 alone by finding its square root. Remember, what is done to one side need be done to the other. So, the square root of C2 is just C, and the square root of 12,304 is 110.92.  So, 110.92 = C, or the hypotenuse of a triangle with a 100-foot and 48-foot wing is 110.92 feet. 

You can easily find the square root can be found using a calculator.

So now we have everything we need.  (A2 + B2 = C2) gave us the hypotenuse of this triangle: 110.92 feet.  If we measure between the first stake and the last stake at a diagonal (the hypothenuse), we should have 110.92 feet.   

If it isn’t correct, you can adjust accordingly, as before, by directing Jamie to move the third stake. 

Just make sure you also take into account the common lines in the property (fences, hedges, roads, laneways). A squared garden plot set at an angle within the property doesn’t work as well as a set square within the square … without being too much of a square about it all!