When Tara Sirny was growing up, she considered herself to be “a horse girl.” But later in life, after meeting a couple of miniature donkeys that a neighbor was caring for, she fell for the braying animals.
A little further down the road, Sirny’s husband surprised her with a rescue donkey named Rio for their wedding anniversary. Now she presides over the Minnesota-based I Da Ranch, where donkeys and felines live together.
We spoke to Sirny about common misconceptions concerning donkeys and what it’s really like to live in their company. We also touched on the way the resident cats bless the donkeys with comforting head scratches.
“Donkeys are no different than a lot of animals to care for,” says Sirny. “I do chores in the morning and evening, which consists of feeding them, giving them water and treats, mucking the stalls, and grooming them.”
She adds that she loves talking and relaxing with the donkeys. “I don’t view them as demanding at all—actually quite the opposite.”
Sirny says she’s found her donkeys to be smart and gentle creatures—even though they’re often stereotyped as being stubborn.
“Some curious things that I have learned is it takes time to gain their trust,” she explains, “and also how each of their personalities shines through.”
Rio and Jenna are the I Da Ranch’s resident donkeys. Sirny characterizes Rio as being “the affectionate one” and says “she is constantly seeking attention and hugs. I love how she rests her head on my shoulders and her eyes talk to me, letting me know she is right there.”
When it comes to Jenna, Sirny calls her “very sweet natured” and says “she is shy and still timid as she had a lot of issues before we rescued her. She gets nervous for some things like brushing but does really well for the farrier.”
Along with Rio and Jenna, I Da Ranch also houses a number of felines.
“They get along great,” says Sirny. “Mind you, the cats do have their own stall they live in, but they are constantly in contact with each other. Rio has more interest in the cats than Jenna. Rio will put her head by the cats to get head scratches. It’s so cute.”
The donkeys at I Da Ranch are rescues, and Sirny is full of encouragement for anyone else considering providing a home for an animal in need.
“Love really does conquer all,” she says. “If you are having reservations about a rescue animal, keep in mind they were left in the situation for a reason and mostly they lacked the fundamental necessities that we all need: Love, food, water and attention. Just have the patience, and the rewards are great.”
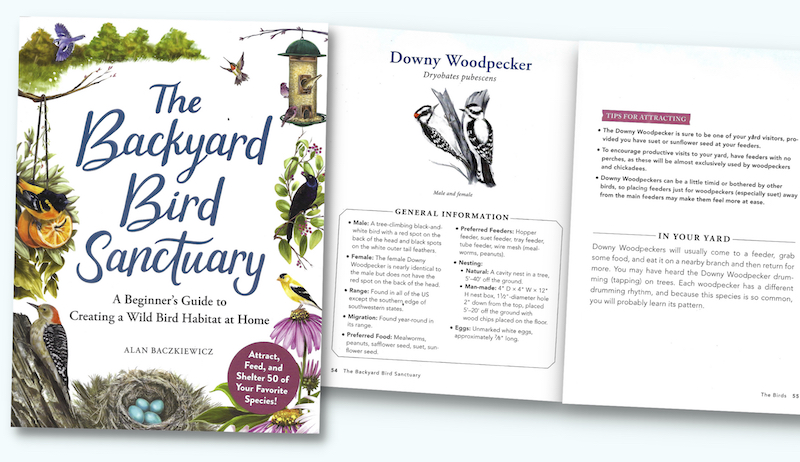
Buffalo, New York-based author Alan Baczkiewicz became an avid birder as a teenager, when his parents took steps to attract bird populations to the backyard. “I was in high school when I first started,” he recalls. “My parents put up bird feeders. We had a suburban yard of just trees and grass.”
The Backyard Bird Sanctuary showcases 50 bird species commonly found in backyards across the U.S. For each one, Baczkiewicz profiles preferred foods and feeder types, migration habits and natural ranges, bird nesting habits and even descriptions of each bird’s eggs.
Baczkiewicz knew he had to add this last part. After all, neighbors on his street—with bits of eggshell in hand—routinely visit him to ask, “What bird was this from?”
“I thought that would be a nice addition, because people are always finding eggshells in their yards in springtime,” he says. “And sometimes eggs are indicative of what [species] they’re from.”
The book is particularly well-suited for beginning birdwatchers. “It’s for somebody who doesn’t have any bird feeders in their yard,” he says. “It’s just down from the basics. You’re starting with a fresh yard. You’ve got grass. What do you do to make it enticing for the birds to come in?”
And not just any birds. Baczkiewicz offers enough detail for readers to formulate feeding strategies to attract specific types of birds. For instance, in his own yard, he separates several different food sources.
This helps to attract certain birds and disperse the concentration of at least two nuisance species—starlings and house sparrows.
Care & Feeding
“I have one feeding system at my house,” Baczkiewicz explains. “It’s just one pole with a squirrel baffle at the bottom. And we have shepherd’s hook extensions with [six individual feeders for] sunflower, thistle, safflower, suet and peanuts [in the shell.] There’s one other one with peanuts in a mesh container. That’s for the woodpeckers—so the blue jays don’t take them all.”
He continues, “Every food source is separated by a few feet with the shepherd’s hooks going in opposite directions. You’ll get starlings on the suet feeder. The goldfinches and the house finches will be on the safflower and the thistle. And, because the starlings don’t want the thistle or the safflower, they don’t go on there.
“The woodpeckers and the chickadees will go to the mesh feeder with the peanuts in it. I have a little tray feeder that holds the peanuts for the blue jays, so they go to that. And, for the most part, they keep it civil.”
Even dropped seeds will attract specific birds, including doves, grackles, red-winged blackbirds and the occasional junco.
Of course, that doesn’t mean you have to go broke buying multiple types of seed. “If you have black oil sunflower seeds at one feeder, you’re going to have birds there no matter what,” Baczkiewicz says. “You’re going to get finches, chickadees, woodpeckers—you’re going to pull in a lot just with black oil sunflower.”
Just don’t expect to see visiting birds right away. “Usually, you’re looking at about four or five days before anybody comes to it,” he adds. “They have to find it.”
Water & Shelter
Providing a water source also helps. “That can attract some spring migrants,” he says. “You might get some warblers that maybe don’t want to eat there but are looking for a water source.”
As a teen, Baczkiewicz simply turned a garbage can lid into a bird bath. “That was just something nice and easy, because, back then, I didn’t have money to spend on anything,” he remembers.
Natural plantings of trees and shrubs will also give birds a leg up. These can be important food sources in and of themselves. However, when positioned near—but not too near—bird feeders, such plantings provide birds with much-needed protection, too.
Susan Brackney
Take Note
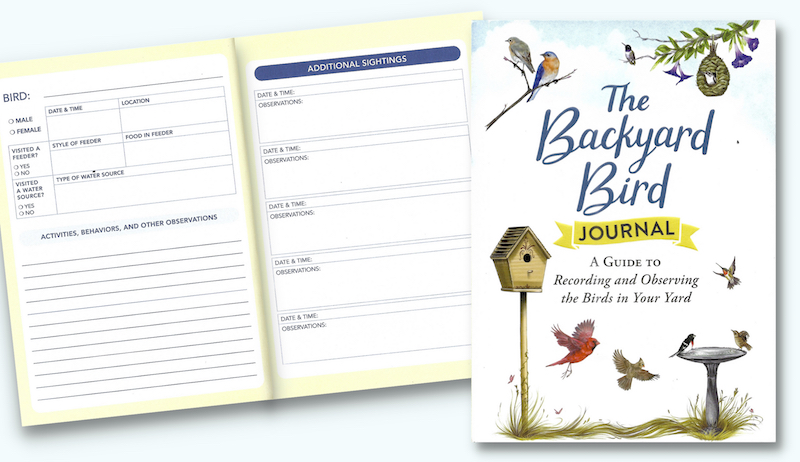
Once you’ve started attracting new birds to your yard, you might want to keep tabs on them for posterity. To that end, check out The Backyard Bird Journal: A Guide to Recording and Observing the Birds in Your Yard. The companion book includes spots for recording the different species you see, their feeding habits, activities, behaviors and more.
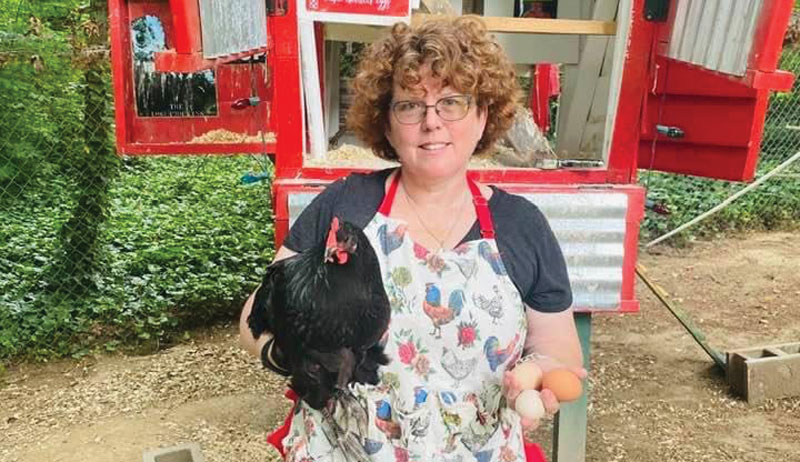
I have always wanted to own a small patch of land, grow veggies, and have chickens and a miniature cow—a small but eclectic happy place. I bought my house in Hendersonville, North Carolina, in 2014 and immediately started planning to make a safe and secure place for the chickens-to-be.
First and foremost, I read Chickens for Dummies and, of course, Chickens magazine and joined a couple of Facebook groups, asking questions and reading posts. But, me being me, I knew I couldn’t have a normal chicken coop. I started looking for quirky coop ideas and finally found one that spoke to me.
However, I lacked the tools and know-how that were required to make such a funky little “coopsicle.”
When I was an art teacher, I relied upon donations of paper, paints and other odds and ends to make my curriculum shine. I knew that reaching out to the community was one way to get things done and also include kids to become involved in community projects.
With that in mind, I approached a local high school shop teacher and told him of my idea.
I ended up giving the shop class a “donation” and the blue prints to my dream coop. The students signed on to make a coop as their senior project, meaning it would take upward of a year to complete. I told the students that if they had any weird ideas, they should go with them—the weirder, the better.
Getting Things Ready
Meanwhile, I prepped the yard, bushwhacked the underbrush and looked for cost-effective fencing. During the year, the shop teacher would send periodical photographic evidence of the progress of the coop, and I would get more excited. As the year progressed, I got the more-mundane-but-necessary aspects of the chicken yard together.
At my job at the veterans’ administration, we have a little group in our department that we call the “Woodchuck Club” where we call out to our members when we need help with certain house/yard projects. Everyone shows up, pitches in and tackles the job. Usually pizza and beer are involved, but mostly we come together to help out and have fun.
This is how I got my fence-post holes dug and beams put in. The fencing came along later when one of my friends sold me their old chicken wire and fencing.
After another Woodchuck Club callout, we spent the better part of a morning tearing down one member’s chicken yard and rolling up the fencing and deer netting that protected the overhead. It was enough to encircle my small chicken yard.
Delivery Day
Spring came round, and the coop was finally delivered. The teacher and some of his bigger students unloaded it in the backyard. Then they carefully raised it, placed it on the 4-by-4-inch posts and secured it in place.
The hardest work complete, it now fell to me to start to put on the finishing touches. Painting was a breeze, but the interior touches I knew would take a while, as I was going a little crazy on Pinterest gathering ideas. I was having to wait to get the fencing put up as that would take another gathering later on in the summer. So I had time to start making the inside of the coop easy to clean and interesting at the same time.
I laid down the sticky back flooring that looked like wood because I wanted to be able to easily clean it. But I then learned that the chickens might find that too hard to walk on, so down went a layer of sand and then wood chips.
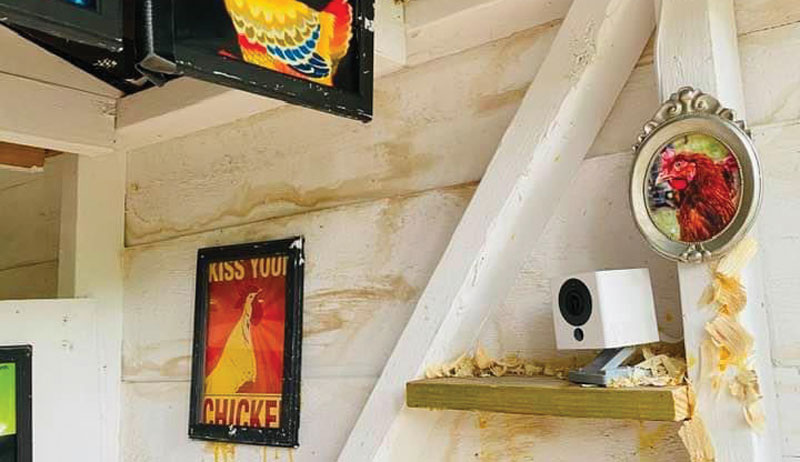
I bought some old torn-up picture frames and printed pictures of alternative chicken-themed movie mash-ups. Then, I put in a children’s xylophone for the hens to plunk and plink about on when they got bored.
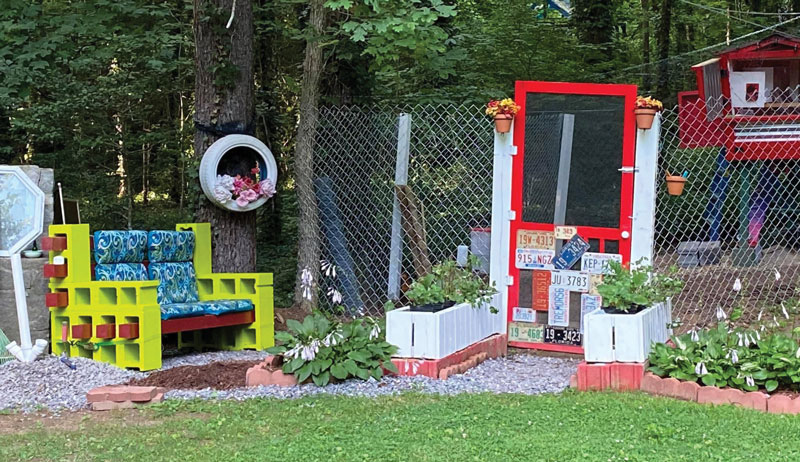
I brought over two old flower boxes that were rotting away to line the pathway to the door to the chicken yard. I ended up raising them up on cinder blocks, painting them and filling them with chicken-friendly plants. Another cinder-block project went in next to the yard, a bench with cushions so I could sit and admire my chickens from a location that stayed shady all day.
The planks that went up to the coop were spray painted in rainbow colors just because it looked cool and bright and happy. On the door into the coop yard are the names of my girls, a list of treats (painted in green) that chickens can have and a short list of things (in red) that they can’t have.
Chicken Time!
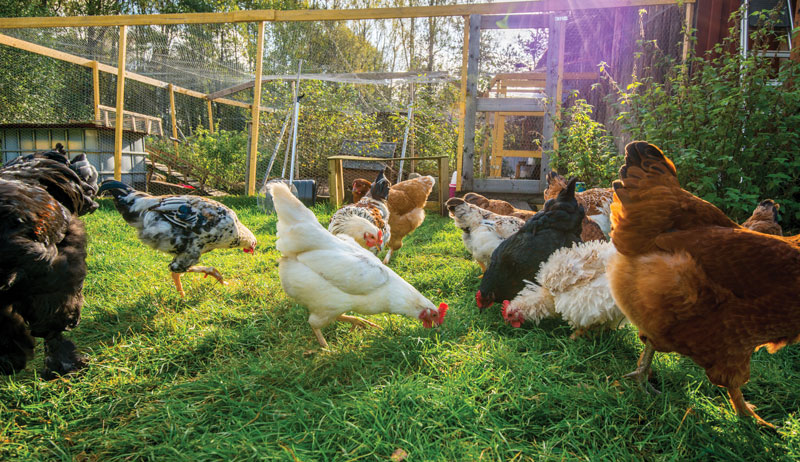
All in all, it took 4 years, from dropping off the coop plans to the shop class to the day I finally brought home the chicks, until the time I finally released the fully feathered pullets out to the yard.
I spend a lot of time out in the backyard in the summer, tending to my girls or sitting on the bench and just listening to them cluck and fuss about the yard. It’s very relaxing and peaceful. The final touch was adding cameras so I can tune in and check on them from wherever I am to make sure they’re happy.
Tammy L. Haurilick lives with her family and flock in Hendersonville, North Carolina. This article originally appeared in the March/April 2022 issue of Chickens magazine.
A column about worms and your chickens may give the heebie-jeebies, but remember that with knowledge comes power. Learning the basics of worms, how to prevent them in your flock and how to treat them will help your chickens live a healthy life.
Worms are basically parasites that live in your chicken’s digestive system. They typically don’t kill your chickens (any parasite wants to keep the host alive). But moderate infections can result in emaciated chickens and birds that show signs of diarrhea.
In addition, severe cases can cause impaired feed efficiency and production. In extreme cases (i.e., heavy parasitic loads and co-infections), some worms can cause relatively high mortality rates. To that point, when owners see worms in their chickens’ poop, they commonly ask, “Should we worm our chickens?”
Like most things in medicine, I would answer, “It depends.”
It’s definitely not normal when chickens have a lot of worms. However, “normal” loads of most worms are relatively harmless. In fact, having some worms helps generate a robust immune response.
This means treatment needs to be based on clinical signs consistent with worm infestation and, in some cases, a clinical diagnosis. A measured approach helps reduce the potential for resistance to dewormers and helps avoid loss of eggs associated with post-treatment withdrawal times.
This article will provide some basic information on common worms, how to prevent them and when to treat.
Know Your Enemy
As noted, worms are very common. And at some point, most chicken owners have to deal with them. However, all worms aren’t created equal, making identification an important step when assessing the significance when finding worms.
While many different types of worms can parasitize chickens, for this article we’ll focus on the five most common types.
large roundworms
thread or capillary worms
cecal worms
tapeworms
gape-worms
The following is a brief description of the most common worms mentioned above and in “Common Internal Parasites,” below.
Roundworms, or ascarids, are very common in backyard poultry. Adult worms grow to about 1 1⁄2 to 3 inches long by approximately 1⁄8 of an inch wide. Extensive infection may reduce egg production.
Death may occur due to intestinal obstruction in immunosuppressed birds or those with a co-infection of a second disease.
Capillary Worms
You’ll find capillary worms, or capillaria, in the crop or esophagus and capillaria eggs in the lining of the intestines. They may cause thickening or inflammation of the crop tissue and focal lesions in the intestinal tract.
Severe infestation may lead to mortality.
Cecal Worms
Cecal worms are found in the ceca of chickens, in the lower gastrointestinal tract. The worms themselves don’t pose a major threat. But they can carry the agent that causes blackhead disease, or histomoniasis. Histomoniasis affects chickens but is primarily associated with mortality in turkeys.
Consequently, you shouldn’t raise turkeys in the same environment as chickens. Chickens can carry the relatively common cecal worms.
Tapeworms
Tapeworms, or cestodes, are flattened, ribbon-shaped worms composed of numerous segments or divisions that live primarily in the intestinal tract. Infections result in emaciation in mature flocks, especially if severe infestation is exacerbated by malnutrition or immunosuppression.
Depending on the species, tapeworms can grow more than five inches.
Gapeworms
Gapeworms, or Syngamus, are found in the trachea and respiratory tree. These worms are also called “forked worms” because the male and female worms are always locked in copulation and form a “Y.”
The term “gapeworm” comes from a heavily-infected bird’s tendency to gasp or “gape.” Worms can grow up to 1 inch and block the trachea, causing suffocation. Chicks suffer the most danger because of their relatively small trachea.
Diagnosis
You can diagnose the worms listed previously in a variety of ways. With a high load, you’ll see roundworms and tapeworms with the naked eye in feces. You can take a fresh fecal sample to your veterinarian to identify worms present in the GI tract. Ask for a fecal flotation test or a fresh smear of feces.
Postmortem examination of mucosal scrapings of affected tissue (respiratory or intestinal) can also help in gauging the health status of the remainder of your flock.
Chickens can pick up worms and their eggs from the feces of other chickens or birds—including wild birds. Often insects act as the intermediate host by carrying worm eggs, which then get deposited in the chicken after they ingest the insect.
In general, you’ll find worms in the respiratory or intestinal tract.
kdalsin/Shutterstock
Breaking the Cycle
Prevention of disease is always more desirable than treatment. To do this, we need to understand the environmental conditions worms thrive in along with how they reproduce and infect their host.
While worms and their eggs will always be present at some level within the poultry environment, you can mitigate their ability to cause disease with proper husbandry and management of your flock and their environment. In general, control measures should focus on sanitation, interruption of the life cycle and the strategic use of efficacious dewormers.
Keep the coop and surrounding area clean. Lack of cleanliness commonly causes poultry disease.
Several general sanitation measures to take include:
the complete cleaning and disinfecting of house and equipment before starting baby chicks or housing layer
daily cleaning of waterers
keeping litter dry and clean
For example, help control tapeworms by reducing the flies that act as intermediate hosts. And control flies through proper manure management and overall general cleanliness.
If at all possible, after a heavy infection, move your flock to land that has not been occupied by chickens. Any area that has manure on it consistently will eventually have a high load of bacteria, viruses and parasites.
Biosecurity
Practice good biosecurity. Worm eggs infect new facilities through contaminated equipment. Make sure to not share equipment with other flocks before properly disinfecting it.
In addition, controlling worms presents a challenge in backyard flocks due to the common presence of mixed-aged flocks. In mixed-aged flocks, older, apparently healthy chickens can shed eggs in their feces and subsequently infect the younger chicks.
If you do have mixed-aged flocks, consider treating or testing the older birds before introducing chicks.
When & How to Treat
In general, only eggs and poop should come out of the vent. Seeing worms likely indicates an unhealthy worm burden. If one or two of your chickens carry high worm burdens, treat the entire flock.
All of the chickens share the same environment.
While other medications are effective against internal parasites, Piperazine is the only FDA-approved treatment for internal parasite in meat- and egg-producing birds. Resistance does occur, though. So it’s important to use only when necessary, such as after you see or diagnose worms or have seen clinical signs.
Other drugs listed in “Common Internal Parasites ” are considered extra-label. Their use requires a prescription from a licensed veterinarian. Piperzine is added to drinking water. Take special care to use dechlorinated water (the case with any medication added to water.)
For any drug, refer to the Food Animal Residue Avoidance Databank with respect to the most up-to-date information on withdrawal times for eggs and meat, which may be different.
While Piperazine has a relatively wide spectrum of activity, it isn’t effective against all of the different worms we’ve discussed. Another concern: Different worms can develop resistance to Piperazine and other treatments over time.
Consequently, limit use of Piperzine and other dewormers to treating specific problems. Scheduled “worming” may not be advisable. Before you worm, ask yourself, “Why?”
Good management will go a long way toward protecting your flock from worms and other diseases. If your flock is showing clinical signs of worm infestation and you’re able to identify the type(s) of worms present, the treatments mentioned in this column should be considered.
More Information
Common Internal Parasites
Here are five common internal parasites backyard chicken-keeper might find in their flocks, the symptoms caused and what treatment to follow.
Note: Piperazine is the only FDA-approved treatment for internal parasites in meat- and egg-producing birds. Other drugs listed are considered extra-label, and their use requires a prescription from a licensed veterinarian.
Roundworms (aka ascarids)
Symptoms: long, yellow-white worms in intestine, droopiness, weight loss, diarrhea, death
Symptoms: hairlike worms in crop and upper intestines, oral inflammatory masses, hemorrhagic inflammation of commissure of beak droopiness, weight loss, death
Symptoms: red, forked worms in trachea, gasping, coughing
Treatment(s): Ivermectin, Fenbendazole
Are You at Risk?
The worms mentioned in this column aren’t “zoonotic.” They don’t cause disease in humans.
However, several other diseases that chickens carry are zoonotic, including the bacteria campylobacter along with salmonella. Therefore, always wash your hands after handling your chickens.
This article originally appeared in the March/April 2022 issue of Chickens magazine.
It may be the very early days of spring right at this moment, but time flies. Before you know it, your garden will be ready for action. But one challenge of planing crops in early spring is the lingering chilly temperatures. Some days it might be brilliantly warm and awesome, but the next day might be cool and cloudy. Plus, early season frosts may threaten to loiter long after the snow has melted.
There’s no doubt that you’ll need to hold off planting cold-sensitive crops until the danger of frost has passed (hello, indoor tomato trays!), but many vegetables can handle the weather of early spring. On the seed packets of some of these varieties, you might have seen a phrase such as “plant as soon as the ground can be worked” or something similar, to indicate that these crops can be sown very early in the year.
Let’s take a closer look at that phrase, and explore some of the early-spring crops you can look forward to getting in the ground right away this year. This is gardening for the impatient!
When Is Soon?
So what does “as soon as the ground can be worked” really mean? Partly, it’s a temperature indication. In very cold climates, garden soil may actually freeze solid during much of the winter (sometimes down a few inches), so obviously folks in those regions must wait until the ground thaws before considering spring planting. (Though I did once successfully plant some late-autumn garlic well into December by literally breaking through a 1/2-inch surface layer of semi-frozen soil to reach the fluffy soil below.)
But there’s a lot more to the phrase than just the absence of frost. Early spring often means overly wet soil—the type that can be worked into a ball with your hands. This doesn’t count as ground that can be worked. Instead, your best bet for success will come once the soil has dried sufficiently to be fluffy and crumbly.
Those two factors—warm and dry soil—are the basics that combine to form soil that is ready for planting. But if you enjoy bringing a scientific attitude to your gardening (maybe you routinely monitor your garden’s soil pH), a simple soil thermometer can help you determine if the soil temperature is within the range that your particular seed varieties prefer.
“As soon as the ground can be worked” plant choices include the following.
Peas
Peas are wonderfully cold-hardy and can be planted from seeds as long as the soil temperature is above about 40 degrees F and below 70 degrees, basically any time after the ground has thawed. They thrive in cool temperatures and make an excellent early spring crop. Plant them as soon as you can!
If you’d like to experiment, try sowing pea seeds in the fall and allowing them overwinter in the soil. If you time this correctly, the seeds should lay dormant in the soil (it’s OK if they freeze) until warmer weather arrives again. This can give your pea plants a head start in the spring, and it’s rather nice to take a walk in the early spring and see a couple of pea sprouts popping out of the ground—almost as if you didn’t do any work for your crops!
The downside is that some of the seeds may rot if the soil is damp for a long time, and small critters (hello, mice and voles) will have more time to seize the seeds before they germinate.
In temperate regions, you may even be able to plant peas in the fall and allow them to germinate and begin developing a root system. As long as the winter isn’t terribly severe, many of the young seedlings may survive the winter and gain a head start for the next year. Obviously, cold frames and other frost prevention methods will help greatly.
This technique is more common in the U.K. but is definitely possible in certain areas of the U.S.
Nothing beats fresh, homegrown lettuce for salads and sandwiches, and you won’t have to wait long! Not only are many lettuce varieties quick to mature, easy to grow and adaptable to container gardening, they’re also pretty cold hardy.
You can get the seeds in the ground well before your final frost date. They’ll just need a soil temperature of about 40 degrees F or higher to germinate. For many of the cool-season crops, germination will occur faster with warmer soil, up to a point.
Carrots
Carrots like cool weather but also a little bit of moisture, so they’re a great early-season choice. You’ll want to make sure your soil is free of small rocks or similar debris that might disrupt the growth of the carrots.
Carrot seed germination is a slow process, but the seeds will sprout even in soil temperatures as low as 45 degrees. Get your carrot seeds in the ground about three weeks prior to your last average frost date.
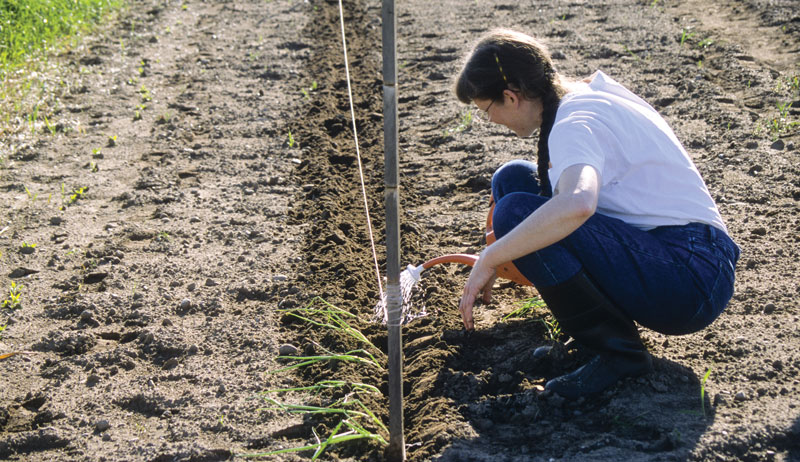
Onions
Onions are another cold-tolerant vegetable that should be among the first crops you put in the ground in the spring. This is especially true if you plant onion “starts” or “sets” rather than seeds, as the starts are a bit more cold-resistant.
The quicker you’re able to get your onions in the ground, the faster you’ll be enjoying that extra fresh crunch on your salad or hamburger.
Potatoes
Some varieties of potatoes require a long growing season (120 days isn’t uncommon), so it’s in your best interest to get them growing quickly. Fortunately, potatoes definitely fall into the “as soon as the ground can be worked” category. Just make sure the soil is light and loamy (not too heavy) before you start digging your 4- to 6-inch-deep potato trenches.
You don’t want to try to plant seed potatoes in soil that is still soggy from snow melting and winter rains. Aim for a soil temperature of about 40 to 50 degrees F before planting.
Radishes
Another root crop to plant in early spring, radishes are the speed demons of the vegetable garden, with some varieties maturing in just 20 days! Couple this with their love for cool weather and you have a quick crop you just might be eating before you even have all of your other vegetables planted.
Spinach
No need to start spinach seeds indoors. Instead, get them in the ground as soon as you can. Spinach grows well in cool weather and is prone to bolting if the weather turns too warm. Spinach seeds will take root as long as the soil temperature is above 45 degrees.
And the old jokes about Popeye have a bit of truth. Spinach is highly nutritious and healthy!
Turnips
This is another quick-growing cool-season crop that doesn’t tolerate heat very well. Aim for a soil temperature above 45 to 50 degrees and get the seeds in the ground a couple of weeks before your last average frost date.
Beets
When it comes to cold temperatures, beets are tough. Mature plants in the fall can handle temperatures down into the low 20s, and spring seeds can be planted as soon as the soil is ready and about 50 degrees.
Many gardeners grow beets in succession, planting another round every couple of weeks until the heat of summer becomes too harsh for the plants to thrive.
Nutrition-savvy gardeners know that kale is one of those super vegetables, a great source of calcium and folic acid as well as vitamins A and C.
Kale is a hardy vegetable and one that definitely doesn’t mind chilly temperatures. In fact, it prefers growing in cold weather and even tastes better during cool temperatures. Why not get some in the ground right away?
As you can see, there are plenty of reasons to get out in the garden and work the soil as soon as you’re able. With a little bit of cooperation from the weather, you should be enjoying your early spring crops before summer. Have fun!
More Information
Frosty Flowers
Vegetables aren’t your only early-spring option. There are plenty of frost-friendly flowers to brighten up your garden efforts. Depending on your region, some of these may even be planted in the fall for an extra-early spring show.
calendula
dianthus
geranium
osteospermum (African daisies)
pansy
snapdragon
Frost Protection
Cold-hardy as your iceberg lettuce or snow peas may be, a late-spring frost can still cause serious damage if the temperature dips down for a prolonged period during a clear, high-pressure night.
In some instances, you can plan ahead and utilize cold frames to give a layer of frost protection and even encourage your young veggies to mature more quickly than they might otherwise. But even without cold frames, it’s relatively easy to protect plants early in the year, as they’re still small and short.
Plastic sheeting can work well for large areas (especially raised beds), but in a pinch you can always use sheets, blankets and towels. For individual small plants, cloches are an obvious choice, but you can also try drinking glasses or even paper/plastic cups.
Watering the garden before the evening of a frost can also help prevent the temperature near the ground from dipping down into the danger zone.
The goal of all of these ideas is to simply add a layer of protection for a brief period. By the next day, it’ll probably be nice and warm again!
This article originally appeared in the January/February 2022 issue of Hobby Farms magazine.
Up here in Northern Wisconsin, spring thaw can be a dramatic time of year. As temperatures warm up, huge quantities of snow and ice start to melt. And the right combination of meltwater, shade and topography can present highly challenging conditions.
On my farm, the upper portion of the driveway is shaded by tall coniferous trees growing on either side. East of the driveway lies a flat yard. West of the driveway, the ground slopes downhill.
Even with frequent plowing, a formidable layer of snow and ice accumulates over the driveway during the course of winter. In a perfect world, the snow and ice would sublimate directly from their solid states to gaseous forms, skipping the water stage entirely.
Almost as good would be for meltwater to flow down the western hill and avoid muddying the driveway. This, I eventually figured out, could be realized by installing a driveway culvert.
Instead, the specific conditions of my upper driveway have historically conspired to create difficult spring conditions. The shade from the conifers allows the snow and ice to survive longer into spring. And the crown of the driveway prevents meltwater on the eastern side from flowing down the western slope. Instead, it forms large puddles on the eastern side that freeze at night into hard, slippery layers.
Almost as bad is when mushy snow rutted up by tire tracks freezes solid in contorted shapes. This makes vehicle passage bumpy at best and impossible at worst.
Following one particularly long and memorable winter (“memorable” in the sense of, “it wasn’t fun at all, but we’ll never forget it,”) I decided to conquer the driveway conditions with a small construction project. I challenged myself to install a culvert underneath the driveway, with a drain on the eastern side carrying water under the driveway to the western slope.
How to Install a Culvert to Drain Driveway Water
Digging the culvert wasn’t too difficult. A compact utility tractor with a backhoe attachment was sufficient to dig a trench. In this I laid a PVC pipe with an elbow joint rising up to form the drain.
By placing the drain hole in a naturally low spot of the yard (just off the edge of the driveway), the drain was effectively designed to gather water from pretty much the entire eastern side of the upper driveway.
The results of the culvert have been well worth the construction effort. At the start of winter, I place a plastic cap over the drain to prevent snow and ice from clogging the pipe. I also place a stake in the ground to mark the location of the drain.
As spring approaches and the snow begins to melt, I grab a shovel and digging bar and chip away the ice until I find the drain cap and remove it. This provides the accumulating meltwater an avenue of escape.
It’s strangely satisfying to watch a significant volume of water rush down a drain like a whirlpool, dramatically improving the condition of the driveway in the process. Without puddles of water freezing and thawing with temperature swings, the driveway stays much drier even as the snow melts.
It also helps reduce the amount of slushy snow, diminishing rutting and improving driving conditions during the thaw.
Putting in a driveway culvert takes some time and effort. But the results are beneficial all year round. Also, it truly changes the game for areas that encounter challenging spring thaws.
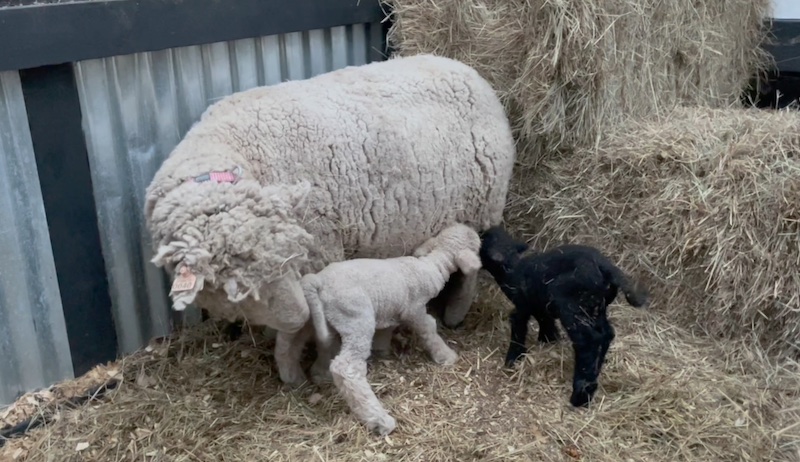
In this video Josh, from Porter Valley Ranch, explains how quick and easy banding sheep tails can be with an Elastrator and bands.
First, what does it mean to band the tail of a lamb? Simply put, it’s the application of a rubber band at a precise location on a young animal’s tail. Blood is cut off to the banded area, and the tail will fall off in short time.
Many people don’t even know lambs are born with tails, as tail banding (or docking) is such a common procedure. But why do shepherds remove a lamb’s tail?
You may guess the reason for lamb tail banding comes down to aesthetics, and it’s true that there are tail standards for show lambs. But for the average shepherd, the reason is much more utilitarian. Lambs’ tails catch a lot of excreted feces and urine, providing a moist environment that attracts flies.
So, left intact, a lamb’s tail is a serious invitation to fly strike–simply put, maggots in the animal’s flesh.
And, while banding may seem unpleasant to us farmers, for the animal the procedure causes only brief discomfort.
In this video we perform the simple procedure in the three simple steps, outlined below.
Clean the area. Use rubbing alcohol and a clean rag to clean all sides of the tail near where you plan to band.
Step Two
Select the spot. Shepherds have different opinions on where exactly to select the banding placement. Josh shows his general rule of thumb, which is to find where the skin ends on the bottom of the lamb tail, and band there.
Step Three
Use the Elastrator and band to widely go around the tail. Once the location is selected release the Elastrator and the band should roll onto the tail.
Banding should be done within the first week the lamb is born. Tails will take up to two weeks to fall off.
Hello, spring! We’ve rounded the corner and, though seasonally early, it’s time to get excited for another year of farm production.
The dining room table is littered with seed catalogues. People are tracking in mud every time they come in the door, and every day increases our desire to get out on the homestead and start growing things.
Now is the time to start thinking about getting this year’s pig.
The homestead year is really a cycle of varying sources for perfect pig calories, and Spring is where it all starts. You want to be ready when the deluge comes so you can make the most of it.Finding, selecting, buying, and bringing home a pig for your plenty is something you want to plan for.
Buying Baby Piglets
Wherever your homestead is, there is probably someone nearby who raises pigs. We’re not talking about a commercial scale operation. We mean a neighbor who keeps a few sows and breeds them for local folks.
Large-scale operations raise piglets using methods that may not be compatible with homestead needs and expectations. So why buy from them?Let’s look around and find a farm selling piglets that’s more consistent with our ideals.
If you don’t already know a farmer with some pigs to sell, check with the nearest rural school system and see if they have a 4-H club. Or call the county fair office and ask them about local pig availability.
Where there is a county fair, you are sure to find young piglets somewhere close by!
When you find and get hold of a breeder, be sure to tell him you are looking for feeder pigs, not “club” (4-H) piglets. In the spring, when competition pigs are being sold, piglet prices may be many times higher than the rest of the year. But after the best animals have selected to be fair animals, the rest of the piglets go for “homesteader” prices.
Why pay more if you don’t have to? While prices vary a lot, it is normal to pay anywhere from one to two dollars per pound for a young piglet.
Time to Buy
The time to buy a piglet is when there is one available!Piglet prices are generally figured for a 50-pound animal. So if you are paying a dollar a pound, your piglet should cost $50, right?
Keep in mind, though, that it’s not unusual to see a litter of young pigs offered for sale before they have reached the 50 lb. mark, and still the price is $50 each.This is because piglets are sold by the unit, not the pound.
Think you’ll wait a couple of weeks, until these animals have put on some weight (at the farmer’s expense) before you buy, to make sure you’re getting your money’s worth?
You can do that. But don’t be surprised if, in the meantime, all the baby pigs have been sold.
The time to buy a piglet is when they are available! There is no Pig Store where they keep baby pigs on the back shelf, ready for the next purchaser. Piglets are only available four months or so after a farmer has seen fit to breed a sow, so if you delay too long getting yours, the next chance could be four months away.
Don’t begrudge the farmer his price. A homestead pig is a valuable asset.
If you can’t find a local farmer with piglets ready when you want one, check online farm groups and classified services. Craigslist, unlike some online services, does let farmers offer animals for sale, and can be a good way to find what you are looking for.
Other online venues may forbid advertising animal sales but can still be a good way to make contact with folks who raise piglets.Reach out to folks posting cute pictures of their latest litter and inquire—discretely!—what their plans are, then complete the transaction off-line.
Still another way to find a pig farmer in your area is to inquire at the local feed store. Most small-scale farmers buy feed for their animals at least part of the year, and the folks at the feed store can usually tell you about them.
It’s not unusual for local farms to leave a business card or small poster advertising their products and services. Give these folks a call and keep local resources … well, local.
Don’t let spring find you without a pig in the pig pen. Be ready to deal with all the surplus on your homestead when it comes. Turn those “waste” nutrients into bacon!
In previous articles, we covered the concept of growing in guilds, or growing crops together that share common requirements. We also looked at the maximum efficiency of grouping three guilds or beds together to grow in what I call triads.
But we also know about the proven importance of plot rotation to soil health and crop resilience. In this application, too, the guild concept has notable advantages, especially for backyard gardeners who grow in very small spaces.
In the text and infographic below, let’s look at how growers can execute crop plot rotation in very small spaces.
The crop rotation schedule for very small-scale growers will be the same as for other growers. The difference is the limited plot size.
For very small growers, this means most of the rotation groups are held in reserve over the years. These crops are only planted when it is their turn to occupy the very small garden space.
courtesy of Zach Loeks
2. Very Small Plot Crop Rotation (above)
A very small-scale backyard gardener may only grow a guild of one triad as their entire plot. Or maybe they grow up to three triads as their entire plot.
This limits the number of rotation groups that can actually practically grow in any one year.
As such the guild crop rotation is managed over the years by growing only one to three rotation groups each year. In this way the grower can also focus on a limited number of varieties each year for best management practices.
For instance managing disease on very small property becomes problematic if all crops are grown in a small plot at the same time each year. Why? Because there is always an adjacency issue.
Every couple of months I fill the dehydrator with sliced fruit. My daughter loves snacking on dehydrated fruit, so it doesn’t last long around here. Plus, dehydrated fruit like these banana chips makes an easy snack to grab on the go.
I don’t bother pretreating my fruit for discoloration, as it doesn’t bother me one bit and has no impact on the flavor.
My preferred method for drying fruit is to dry it in my food dehydrator, but you can also dry fruit in your home oven. Dry time varies depending on the humidity where you are located and the size and thickness of your slices, but here is a general guide to making banana chips.
Yield: As much as you’d like
Supplies
Ripe bananas (yellow with brown spots)
Ground cinnamon (optional)
Honey (optional for crispier chips)
Cutting board
Knife
Food dehydrator or oven (ideally with convection setting)
Peel the bananas and cut into 1/8 to 1/4-inch coins.
Lay fruit on dehydrator tray in a single layer (or a parchment paper-lined baking sheet if using oven), leaving space between each slice so that they are not touching. Dipping the slices in honey makes crispier banana chips, but it’s not at all necessary. I always sprinkle some ground cinnamon over the banana slices before dehydrating, but this step is also optional.
Dry your banana chips at 135 degrees F if using a food dehydrator or at 175 to 200 degrees F (depending on how low your oven will go) if using an oven. A food dehydrator will take six to 10 hours to dry, maybe longer if it’s humid in your home. An oven will take three to four hours. It is recommended to check on the slices periodically and to even turn them occasionally though the drying process to help them along. Dehydrated slices should be leathery but not moist.
Allow the banana chips to dry cool completely before storing. Store in an airtight, dry place. I keep mine in a clamp jar in the pantry.