Categories
Animals Beginning Farmers Farm & Garden Flock Talk Poultry Urban Farming

Follow The Farmer-ish Journey Of Chick Outta Water

“I definitely do not consider myself a farmer—more farmer-ish,” says Susan from the popular Chick Outta Water Instagram account. Based in Washtenaw County in Michigan, Susan presides over a flock of backyard chickens that all began when she added three Isa Brown pullets to her property.

“I had been curious about chickens when I … met friends who kept them in small back yards,” explains Susan. “The fresh eggs were delicious, and I was fascinated how kitchen scraps could be given as treats and avoided the trash!”

Taking a moment out from tending to her chicks, we spoke to Susan about the roots of Chick Outta Water and how a TJ Maxx score helped shape her early backyard setup. We also got into the fun and games of naming chickens.

Starting Chick Outta Water

Susan’s farmer-ish journey began when she grew some tomato, pepper and cucumber plants while living in a condo apartment.

After moving to a larger spot, she added beds and decided to “constantly change up what we grow each year based on family needs and past season experiences.”


Read more: Should you vaccinate a flock of backyard chickens?


Introducing Chickens

When it comes to adding backyard chickens to her property, Susan originally heeded encouragement from “one of my actual farmer friends who offered to get a few extra chicks in the spring.” After the same friend raised the chicks until they were ready for outside coop life, Susan embraced the three Isa Brown pullets and says “we haven’t looked back!”

Building on the joy of keeping chickens, Susan adds, “I also love that kitchen scraps that aren’t composted can be re-routed to the birds as treats instead of headed into landfills. They in turn give us amazing fertilizer for the garden.”

TJ Maxx Versus the Predators

Predators pose a huge problem for backyard chickens. “We lost two of the three in that first winter to hawks,” recalls Susan. “They lived in a small prefabricated coop—from TJ Maxx of all places!—so we let them out occasionally in the run. [But] since it was uncovered, the hawks still had access.”

Since those early days, Susan says she made some key changes to help to ward off hawks. But now the prowling eyes of coyotes have stepped in.

“It’s always a work in progress and learning what works best,” she says.


Read more: Protect your flock against predators with these tips.


How to Name a Chick

“When we first started, we mostly named our chickens with ironic food names,” says Susan. “Our first three were Buffalo, Strips and Martha (for my friend who got us started).”

Since then, Noodle Soup, Dumpling, McNuggets, Cashew and Parmesan have been added to the mix. But Susan says that, as the number of chickens increased, it grew trickier to keep up.

“We started letting friends help pick names, my daughter named a couple and I just pick something I find amusing,” she says. “The last three I named were Tikka, Masala and Shwarma. My niece helped pick Gelato, Sorbet and Fro-yo.”

Therapeutic Scratching & Pecking

“Chickens are so rewarding,” says Susan as she looks over her peep. “I love watching them go out in the yard or woods scratching and pecking. It’s therapeutic! They all seem to have their own personalities, which I never realized before we got them.”

Follow Chick Outta Water at Instagram.

Categories
Crops & Gardening Farm & Garden Urban Farming

Attract Birds, Wow Neighbors & Brighten Your Bouquets With A Mixed Sunflower Garden

It seems as if there are as many reasons to grow sunflowers as there are different types to try. Sunflowers can produce loads of nutritious pollen and seeds to support area insects and wildlife. The impossibly tall kinds can serve as living trellises for vining beans, morning glories and more. And some of the smaller, branching types make eye-popping additions to cut-flower bouquets.

No matter why you might want to grow your own sunflowers, you’ll need a garden spot that gets plenty of sun. If you have the space, you could easily fill a half-acre field with the nodding, cheerful flowers. But, thanks to some of the dwarf varieties now available, you could grow just a couple of the beauties on a small-but-sunny balcony instead.

Novelty Varieties

Recently, I’ve been experimenting with rare and novelty varieties to see just how tall my sunflowers can grow. Got room to spread out? (And maybe some kiddos or neighbors you’d like to delight?)

In that case, you might want to try some of these.

Mammoth Grey Stripe and Mongolian Giant are available in most garden centers and big box stores. Both can produce monster-sized seeds on flower heads that are more than a foot wide. While Mammoth Grey Stripe typically reaches 10 to 12 feet tall, I’ve had Mongolian Giants grow even taller. Although each of these will develop extra-thick trunks to support their heavy heads, you may need to offer additional support.

I’ve also had great luck with two other extra-tall varieties—Skyscraper and Eiffel Tower. I ordered both of these through the Seed Savers Exchange. There, participating gardeners share their open-pollinated and heirloom seeds via this online community.

Although Exchange participation was once reserved for Seed Savers Exchange members, it’s now open to the public.

At minimum, Skyscraper can reach 12 feet. But in rich soil—and with a little support as needed—it can zoom beyond that. Skyscraper produces multiple branches of 12- to 14-inch-wide flowers. As for Eiffel Tower, it’s a rarer variety hailing from the United Kingdom. In the right conditions, it can grow up to 18 feet tall.

If that’s a little too tall for you, you might want to try the more diminutive Tall Orange Sunflower. Mine were just over 5 feet high with fluffy, doubled blooms.


Read more: Pretty up your plate with some garden-grown edible flowers!


Helping Birds & Bees

I offer area birds black oil sunflower seed well into spring and sometimes find volunteer sunflowers growing beneath the feeder. I’ve successfully transplanted many of these, and the birds flock to the resulting seed heads in mid- to late summer.

If you hope to attract butterflies, bees and other beneficial insects, you’ll want to plant sunflowers which offer plenty of pollen. (Be aware that some hybrid varieties do not produce pollen. There’s a whole class of “pollenless” sunflowers, in fact.)

The Lemon Queen Sunflower is one reliable nectar-and-pollen-producer that’s attractive to insects and simple to grow. (It’s also the star of the Great Sunflower Project, a Citizen Science bee-counting initiative that’s been around since 2008.) Lemon Queen will grow to be between 5 and seven 7 tall and produces multiple branches of pale yellow flowers.

I also really like The Birds & Bees mix from Renee’s Garden. The sunflowers range from 6 to 8 feet tall and produce nutritious, oil-rich seeds. Goldfinches and bumblebees, in particular, were some of my most frequent visitors.

Better Bouquets

With flowers of deep burgundy-chocolate and bronze, both the Velvet Queen and Evening Sun sunflower varieties add drama to cut-flower arrangements. Velvet Queen produces 4-inch-wide blooms and can grow from 5 to 7 feet tall. Evening Sun can grow up to 8 feet tall.

Its flowers are also slightly larger.

The Goldy Honey Bear Sunflower is also worth a look. Like Tall Orange, it produces fuzzy, pettable blooms; however, Goldy Honey Bear is shorter. A pollen-less variety, Goldy Honey Bear produces 5- to 10-inch, yellow blooms on 4-foot-tall stalks.

What’s more, the stems are long enough for use in bouquets.


Read more: Grow these old-fashioned flowers in your garden for something ‘new.’


Small but Mighty

If you don’t have much space, you can opt for dwarf varieties like Dwarf Sunspot. It produces 10-inch, yellow flowers but only grows 2 to 3 feet high. And the Gold Ring Sunflower is even smaller, reaching just 20 inches tall with 2- to 4-inch blooms.

Get Growing

Whichever sunflowers you try, most can tolerate even so-so soil. But they’ll really thrive in nutrient-rich, well-draining conditions. And, although sunflowers can be transplanted, I’ve found that mine grow best when I direct-sow them outdoors. Provided I’ve included adequate protection for them, that is.

To keep rabbits, deer and other nibblers out, I surround my seedlings with plastic cloches and temporary fencing. Once my plants are well-established, I simply remove the extra protection.

Categories
Beginning Farmers Farm & Garden Food Homesteading

Basic Rules For Canning Meat (Book Excerpt)

Only can good-quality meat, and if you’ve purchased meat, it needs to be canned by the “use by” date. You want to be careful to not can any meat that may have gone bad. If the meat has a pungent smell or feels slimy, it should be thrown away, even if it hasn’t passed its use-by date.

Beef and pork should be kept cold until you’re ready to can it. If you’re processing your own animals, make sure you’re using good slaughtering procedures that keep the meat clean and sanitary. Home-processed meat should be chilled at 40 degrees Fahrenheit as soon as possible, and beef should be aged 3 to 10 days, depending on how much fat is covering the carcass. Home-processed pork does not need to be aged.

Trim gristle, bruised spots and fat from the meat before canning it. You don’t have to go crazy, trying to get every little bit of fat off; just trim the visible fat. There will always be some fat in the finished jars; you just don’t want an excessive amount of it. If a jar has too much fat in it, it can climb up the sides of the jars during processing and prevent the lids from properly sealing.

If the meat can’t be canned within a few days of aging, slaughtering or being purchased, it will need to be frozen. It can still be canned at a later date; it will just need to be thawed out first.

The texture of canned meat is a little different than when meat is cooked fresh. It will usually be more tender since the pressure canning tenderizes the meat. This means that tough cuts of meat, such as brisket, end up being tender without the long, slow cooking usually needed to make them tender.

We’ve found that pressure canning meats tends to make them a little drier, especially lean cuts like flank steak. The USDA allows for using a little bit of fat to brown lean meat before canning. You don’t want to add a lot of fat to the meat, but browning it in fat is perfectly safe.

Our favorite meat to use for most recipes is brisket because it has fat marbled throughout the meat, which makes the meat less dry when canned.

Ground meats that are packed in broth or water end up a little “watery” in texture. One way to reduce the watery texture is to quickly fry the ground meat, sausage patties or meatballs to heat them up before serving. Gently press down on the meat, patties and meatballs to help them release the excess water. I don’t find this is always necessary, but I do if I’m adding canned meatballs to spaghetti sauce. Just know that if you do think the texture is too watery, frying will help.

Beef and pork strips, cubes and chunks can be canned with the hot-pack method or the raw-pack method. Ground meat must be canned using the hot pack-method.


Read more: Check out these pressure canning basics!


Canning Cured Meats

If you want to have a lively discussion among a group of canners, just ask if sausage, bacon, ham and other cured meats can be canned. You’ll get answers that range from, “Absolutely, they’re just like other meats. I do it all the time and no one has ever died,” to “Absolutely not! It’s unsafe, and you’ll kill someone.” Like many things in life, the truth is somewhere between these two extremes.

Cured meat is not just like other meat; the curing process makes the meat more dense and, therefore, harder for the heat to penetrate. The USDA doesn’t have any published processing times for canning any cured meat. We don’t know if the times are the same as uncured meat or not, so I err on the side of safety and don’t can jars of cured meats.

However, there are tested and approved recipes that have cured meat as ingredients. I’ve tweaked several of those recipes by altering the spices to create versions of our family favorites.

Breakfast sausage, which is an uncured sausage, is safe to can; just remember that some people report that sage, which is a common ingredient in sausage, turns bitter when pressure canned.

Uncured link or cased sausage is also safe to can. This is harder to find unless you make your own sausage. The texture ends up being a little more moist or watery than it is when you grill or pan fry link sausage, but the flavor is great. 

This recipe for chicken and vegetable soup originally appeared in the January/February 2022 issue of Hobby Farms magazine. It is reprinted with permission from Pressure Canning for Beginners and Beyond by Angi Schneider, Page Street Publishing Co., 2021. Angi Schneider has been gardening and preserving food for more than 25 years. She is the creator of SchneiderPeeps and lives on a 1 12-acre homestead with her family on the Gulf Coast of Texas.

Categories
Podcast

Episode 26: Zoe Fuller


Young farmer Zoe Fuller talks about the growing agriculture scene in Alaska, where US farming statistics are being turned on their heads. You’ll hear about small-scale farmers coming together in the Matanuska Valley and creating a community-based economy in Alaska. Hear also about indigenous foodways and salmon-safe farming practices to protect salmon sources and waterways. 

Learn about what it’s like to farm at Singing Nettle Farm in Southcentral Alaska’s short but productive growing season. And learn about root cellaring as Zoe shares her root cellar experience and recent experimentation for keeping farm-grown food through the winter. 

Listen to the end to hear Zoe’s favorite all-local Alaskan food meal. It’s so simple and perfect for the busy farming season.

Categories
Animals Chickens 101 Farm & Garden Health & Nutrition Poultry

When Avian Influenza Affects Your Community

My phone conveyed a panicked message from my friend Carrie last Tuesday morning. “I keep getting info from our health department about avian influenza. I am freaking out! Can I even keep my hens?”

I had no idea what Carrie was talking about. I am usually on top of things when it comes to poultry-industry announcements. But it was very early in the morning and I hadn’t had a chance to look at any notifications or emails since before the weekend.

I quickly fired off a text to one of my university contacts, asking if he’d heard about anything poultry-related going on in Nebraska. I’d just begun writing a reassuring response to Carrie when a reply text arrived: CHECK APHIS!

Research Required

APHIS—the Animal and Plant Health Inspection Service—is run by the US Department of Agriculture (USDA). It is one of the most reliable sources in the country for backyard-flock and livestock biosecurity. Sure enough, the top news story item filled me in immediately: USDA Confirms Highly Pathogenic Avian Influenza [HPAI] in a Non-Commercial Backyard Flock (Non-Poultry) in Nebraska.

Fortunately for Carrie—and for her beloved hens—the infected flock was located in Merrick County, more than an hour east of her location. The State of Nebraska sent out mass notifications across the entire state, however, informing the public about the HPAI outbreak.

This was indeed the correct and required action for the state to take. But the notice unfortunately seems to have badly frightened backyard chicken owners.

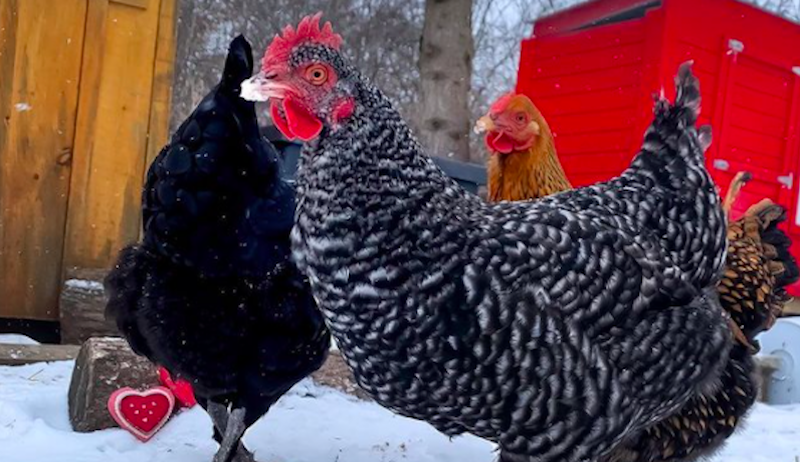
Carrie, normally a very level-headed individual, was absolutely unnerved that her hens might contract or carry the illness despite her having raised them in a contained environment from the moment they hatched. I in turn expressed my concern that other poultry owners might have panicked and euthanized their birds instead of seeking more information.


Read more: Basic biosecurity can do a lot to protect your flock against the avian influenza outbreak.


HPAI on the Move

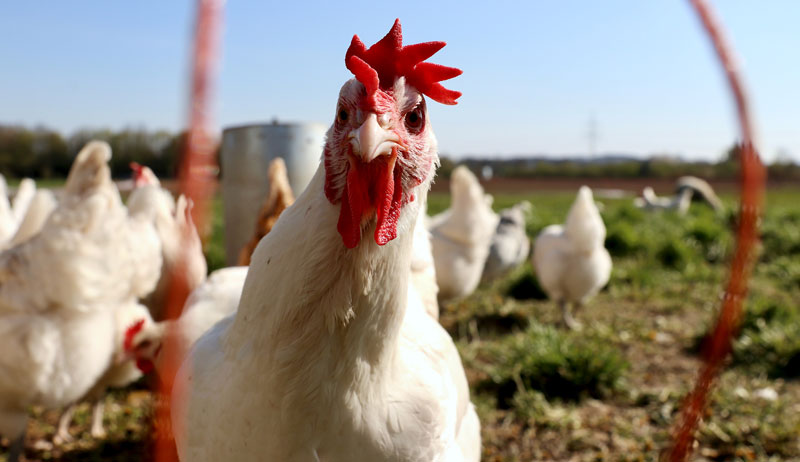
Sadly, Nebraska is not the only state whose flocks have been affected by HPAI. Through the APHIS National Veterinary Services Laboratory in Ames, IA, the USDA to date has confirmed the presence of HPAI in both backyard and commercial chicken flocks in Delaware, Iowa, Kansas, Maryland, Missouri and Wisconsin and in commercial turkey flocks in Indiana, Iowa, Missouri and South Dakota.

In addition, five states—Illinois, Kansas, Maine, Missouri, and New Hampshire—had confirmed cases in non-poultry backyard flocks, just like Nebraska.

What Does This Mean for the Infected Flocks?

Unfortunately, HPAI decimates flocks. According to Dr. R.M. Fulton, DVM, PhD, and Diplomate of the American College of Poultry Veterinarians, this virus has up to 100-percent morbidity (rate of contagion) and up to 100-percent mortality.

HPAI rips through a flock so swiftly that the key clinical sign for the disease is dead birds. Other signs include:

  • blistered, purple-blue combs
  • swollen faces
  • blood in the trachea and esophagus
  • a hemorrhaged small intestine and/or heart

The only means of eradicating the disease once confirmed in a flock is to euthanize the flock.

The USDA has teamed with animal health officials in each affected state to quarantine the affected premises and euthanize the flocks in an effort to prevent the spread of HPAI. In addition, the USDA and state officials are conducting surveillance and testing of backyard and commercial flocks and migratory-bird populations around the affected areas.


Read more: Chicken euthanasia can be heartbreaking, but here are some tips for helping your bird pass on.


What Does This Mean for My Chickens?

For the vast majority of backyard flock owners, a state-issued notification regarding HPAI serves as a reminder to practice biosecurity. The APHIS web site has a page devoted to backyard biosecurity for flock owners as well as a downloadable pamphlet.

Three of their main tips include:

  • Keep your backyard flock in a fully enclosed run that prevents contact with migratory birds, especially such commonly encountered birds as Canada geese and house sparrows. According to APHIS, wild birds can be infected with HPAI and show no signs of illness, potentially passing the virus to backyard poultry flocks. APHIS is anticipating an increase in confirmed HPAI cases as more wild birds return from their winter away.
  • Keep a designated pair of work boots in a tightly sealed tub near the entrance to your chicken run. Wear these only in the run and coop. This way, you minimize the potential of tracking disease-infected wild-bird droppings into your chickens’ living area.
  • Tires—from a car, truck or even a wheelbarrow—can pick up and transmit germs from one area to another, as can lawn and garden equipment and tools. Keep these away from your poultry habitat and disinfect them after use, especially if you have lent them out to your neighbors or friends.

What Does This Mean for Me?

Other than perhaps a little anxiety, most likely not much. The USDA carefully disposes of the bodies of all depopulated birds, typically by incineration. So there is no worry that their infected meat or eggs will enter the human food system.

As for the virus jumping from bird to human, there is no cause for concern. The USDA clearly notes that not one human case of HPAI has ever been detected in the U.S. Furthermore, according to Dr. Fulton, avian influenza may simply cause conjunctivitis (pink eye) in humans.

Should your flock be one of the ones with confirmed HPAI, the loss of your birds is regrettable but inevitable. One comfort is that APHIS features an indemnity and compensation program to flock owners whose animals were euthanized to prevent the spread of HPAI.

What Exactly is HPAI?

Highly pathogenic avian influenza is a Type-A Orthomyxovirus, an extremely contagious respiratory disease similar to the human flu. There are lesser types or avian influenza nonpathogenic AI and low-pathogenic AI—but highly pathogenic is the deadliest, frequently killing birds without any noticeable symptoms.

The disease affects all commercial poultry, although waterfowl such as ducks and geese seem to resist the disease and instead become carriers of the virus. The U.S. has an extremely advanced AI surveillance program, working with both state officials as well as international organizations such as the World Organization for Animal Health (OIE) to limit animal products in defined areas that pose a risk of contagion.

I did my best to calm Carrie down and reassure her that she had no need for concern regarding HPAI and her beloved layers. I am still concerned about those chickens in danger of being unnecessarily euthanized by their owners. This article, I hope, will help educate and prevent the unnecessary slaughter of backyard flocks.

Naturally, I am concerned about the HPAI outbreak and how swiftly it is spreading across the U.S. Keep up to date with the map and search feature on this interactive APHIS page. You can also find a list of APHIS-confirmed HPAI cases here.

And, should you receive notification of an HPAI outbreak in your state, know that you have resources available to you online before you take any action with your flock.


Categories
Beginning Farmers Crops & Gardening Farm & Garden Homesteading Urban Farming

Seed Starting Tips & Tricks For Maximum Success

You can certainly buy your plant starts in the spring from your local greenhouse or farmers market. But your selection is limited by what plants are available commercially. When you grow your garden plants from seed, you’ll encounter almost no limit to what varieties you can choose. 

Where to Get Seeds 

There are many options for purchasing seeds, including online sources, printed seed catalogs and your local garden center. Take the time to look for small, locally owned seed companies. Purchasing these businesses supports your local economy, of course. But you’ll also be able to buy locally adapted seeds, which will perform the best in your climate.  

If you are lucky enough to have a seed library in your community, be sure to stop in and check out some seeds. Seed libraries are an amazing resource for seeds, gardening knowledge and community building. 


Read more: Got great tomatoes? Save those seeds! This video shows you how it’s done.


When to Start Seeds 

Before you even gather your supplies for planting, you need to determine when is the best time to start your seeds. This can easily be done once you know the last frost date in your area. Many of our seeds need to be started six to eight weeks before the last frost date, others at four to six weeks before and some right around this date.  

You’ll find this information on the back of your seed packets. Simply take your late frost date and subtract the appropriate amount of time. Then you’ll have the best dates for starting those seeds indoors.  

Gather Your Supplies 

In addition to our seeds, we’ll also need containers and soil. There are a number of options for containers to start our seeds in. I prefer planting cell trays. They provide just enough space to get the plants established, and they typically come with a clear plastic humidity dome, turning the seed starting tray into a mini greenhouse. 

At Small House Farm, we typically purchase a pre-made seed starting mix, mostly coconut coir with a small amount of organic fertilizer. Coconut coir and peat moss are the most common seed starting mediums. They’re light, airy and easy for the young seedlings to push through when they sprout.  

Many of the crops that need to be started early—such as tomatoes, peppers and eggplants—will germinate best at soil temperatures of 75 degrees F or higher. To accomplish this, you’ll need to use heat mats placed beneath your planting trays. Alternatively, you could place your seed trays on a radiator or even the top of your refrigerator to warm your soil.  

Your young plants will also need light to grow. There are many types of grow lights available on the market, and the cost varies widely. At Small House Farm, we simply use shop lights, as they fit our budget and have worked well for us.   


Read more: Seed Savers are leading the seed preservation movement.


Let’s Get Planting! 

Premoisten your seed starting mix, then plant your seeds at a depth of approximately 1 1/2 times the width of the seed. Water thoroughly, cover the tray with your humidity dome and place the seeds on the heat mats, under lights.  

Ensure the soil stays moist while you wait for germination. Some seeds may take up to 14 days to germinate, so stay patient! 

Once the seeds have sprouted, you can remove the humidity dome. After your young plants have developed two sets of true leaves, it’s time to transplant them into larger containers. Use an organic potting soil or a mixture of compost and top soil that you can blend at home. Continue to keep the plants under lights and well-watered.  

When the risk of frost passes and the soil reaches a temperature that your plants can tolerate, it’s time to transplant your plants out into the garden.  

Categories
Crops & Gardening Farm & Garden

5 New Plants I’m Excited To Grow In 2022

The arrival of spring is always an exciting time. Up here in Northern Wisconsin, the snow is (finally) starting to melt, and it won’t be long until garden and orchard work can resume.

I spend time each winter shopping through seed, garden and nursery catalogs planning which plants I want to purchase. Some tried-and-true stalwarts always make the list (Sungold tomatoes are a must), but part of the fun is experimenting with new plants and varieties.

You never know which will turn out to be massively successful.

I’m ready to roll on the tools and equipment front. I built a bunch of new garden beds last year, and my orchard deer fence is dutifully protecting my trees from hungry browsers. I have rolls of welded wire and lots of T-posts for extra garden fencing, I’m well stocked on shovels/spades/etc., and I have all the compost I need. As soon as the danger of frost is past (or in the case of bare-root plants, even sooner), I’m ready to start planting.

To share my excitement, here are five new plants I’m looking forward to trying in 2022:

  1. Contender Peach Tree

Northern Wisconsin isn’t exactly the peach tree capital of the world, but my region falls into Zone 4 on the USDA Hardiness Zones map, which means it should be warm enough to grow Contender Peach Trees.

By planting them at the top of a hill, sheltered against the prevailing winds by rows of windbreak trees, I hope to simultaneously keep my Contender Peach Trees out of lowland frost pockets and protect them from cold winter breezes. Throw in mulching to protect their roots, and I’m optimistic they’ll survive the Wisconsin winters.


Read more: What do the USDA hardiness zones actually mean for gardeners?


  1. Somerset Seedless Grape

Old grape vines have grown on my farm for decades, but they produce small fruit with lots of seeds. And I’m afraid they’re more than a little sour.

That’s why I’m ready to try Somerset Seedless Grapes. They’re hardy to Zone 4, and their seedless nature is appealing. But the simple possibility of growing tasty grapes is reason enough to give them a try.

  1. Josee Reblooming Lilac

I love lilacs, so I couldn’t pass on the chance to grow a Josee Reblooming Lilac. It’s a dwarf variety that blooms multiple times throughout the year, spreading the joy of lilac blossoms beyond the usual once-per-year window.

I already have the perfect planting spot in mind—at the corner of two intersecting paths in my orchard, where it will serve a small but attractive centerpiece. This is one of the plants I’m most excited to grow in 2022.


Read more: Flowers as food? Yes! Try these 5 kinds of edible flowers in your garden.


  1. American Giant Hybrid Sunflower

There’s something inherently fun about growing a plant with “giant” in its name, and when the giant in question is a lovely as a sunflower, that goes double.

American Giant Hybrid Sunflowers are supposed to be capable of reaching 15 feet tall. I intend to plant mine in a wind-sheltered area, give them rich soil and plenty of water, and see how high they’ll rise.

  1. Yukon Gem Potato

Last year, I grew a small but successful corn crop, which I’ll repeat (and expand) in 2022. For good measure, I’m planting another farming staple: potatoes, specifically Yukon Gem Potatoes.

Yukon Gem is an improved variety of Yukon Gold. And since I love eating baked potatoes, growing my own has a lot of appeal.

Which plants are you excited to try in 2022?

Categories
Animals Beginning Farmers Breeds Farm & Garden Large Animals

Love My Breed: Get To Know Pygmy Goats

We asked, and you answered. Here’s what pygmy goat-keepers wrote in to tell us about their love for the breed!


Small but Mighty

Pygmies are the smallest breed of goat in the world. Even though they are small, they are useful livestock in many settings. They can be ideal for a small suburban or rural homestead.

“They don’t require much space [and] efficiently turn forage and hay. They are easy to handle and rarely aggressive. Even the bucks are sweet natured. 

“Quality is the key word, rather than quantity. But for their size, pygmies can produce quite a lot. Pygmy milk is amazing. It’s very rich, high solids, very sweet and stays fresh, if handled properly, for weeks.

Maggie Leman
Dunnellon, Florida
www.magidans.com


Smaller Minimizes Problems

“The Pygmy goat’s smaller size enables keeping it with other animals with minimal problems, injuries or destruction of property. They can be kept in pens with adequate shelter—in large, fenced-in areas with access to a barn; or a combination of the two, without excessive cost—because of their hardiness and ability to withstand cold and heat. Like every other goat breed, they don’t like the rain.” 

PJ LaRue Smith
Campbell, Texas
RoseOak’s Playful Pygmies
www.facebook.com/roseoakranch


Read more: Why get goats? There are a number of really great reasons!


Great for Beginners

“I love pygmy goats because they are cute and fun. They all have such unique personalities. Pygmy goats are small and compact and don’t take up a lot of space, like other livestock, making them perfect for small acreages or backyards if you are only going to have a couple. Pygmies make sense on a hobby farm because they have many uses other than being adorable. 

“Products such as cheese and soap can be made from their milk, weed control, though pygmies tend to be more of a browser than a grazer, and some are used for meat. 

“Pygmies are great for beginners. I recommend a mentor or breeder to assist with the ins and outs of goat ownership, especially breeding — someone to help you learn care, general maintenance, housing and feeding. Joining a 4-H club is a great place for children to get started.” 

Andrea Pursley
High Caliber Pygmy Goats
Klamath Falls, Oregon


Hooked on Pygmies

Pygmy goats are good-natured, intelligent and very people-oriented. I’m a third-generation dairy cattle breeder, and my daughter got two pygmies for a 4-H project. I was hooked after that.

“I have bred and shown pygmy goats for 20 years and have been a 4-H pygmy goat leader, helping youth and new owners learn to love them as well. Their manure doesn’t attract flies unless it sits in water.

“Most kids can be raised on their dams. Once basic health and care is learned, they’re good for beginners. Breeding is not for beginners, though. Kidding dwarfs needs training to handle some assisted birth needs.”  

Gina Miller
Valle Verde Pygmies
Ferndale, California 


Read more: Getting goats? Take these steps to prevent shipping fever when bringing them home.


Tell Us Why You Love Your Breed

Do you have a favorite breed of livestock that you think is the best? Tell us about it. Are Tamworths the best pig to keep? Are Jerseys your pick for a hobby farm cow. Or are Orpingtons the chillest farm chicken?

Email us your thoughts (~250 words) and a photo of you and your livestock to hobbyfarms@hobbyfarms.com (subject line: I Love My Livestock!). We’ll publish our favorites in upcoming issues. 

This article originally appeared in the January/February 2022 issue of Hobby Farms magazine.

Categories
Animals Beginning Farmers Farm & Garden Homesteading Large Animals

Did My Informal Lambing Calculator Backfire This Year?

I will be the first to admit that my informal lambing calculator (done in my head) might not be the most scientific method of determining when my lambs are due.

In fact, as I let my hopefully pregnant ewes out a few days ago, I noticed one first-timer looked about ready to pop. She was even starting to bag up a bit.  Wait a minute, I thought. Weren’t my ewes due starting mid-April?

This seems a little early….

By the Calendar

I try to keep notes about my sheep, such as their vaccination and worming dates. However I do know from experience that if I don’t write such things down, I will forget!

And so, when I looked at my notes, I saw that, yes, I’d noted the ewes were due on or about April 15.  And that seemed fine. Except then I Googled lamb calculator and found a table that shows I may have been off a week or even two weeks!  While the average gestation period for a lamb is 147 days, it can range from 144 to 152 days.

I found a sheep gestation calculator and put in the date that my ram joined the ewes … November 8.  According to that calculator, my ewes could give birth anytime from March 26 to April 16.


Read more: What do you need for lambing season? Here’s an overview of what you should have on hand.


Getting Ready

There are a few things you need to be ready for about a month before your lambing calculator predicts the arrival of lambs. So I figure I have slid in under the wire.

CDT Vaccination

First off: the CDT or overeating and tetanus vaccination. You need to administer that to your pregnant ewes in the last month —but at least two weeks—before they give birth. In this way, the lamb will receive passive immunity from the diseases when they nurse.

This immunity will last for about six weeks. At this time the lambs will be ready for CDT vaccines of their own.


Read more: Why vaccinate sheep? For an ounce of prevention.


Nutrition Notes

Secondly, nutrition becomes even more vital than ever in the last 40 to 45 days before lambing, when the majority of the fetal growth occurs. It’s important to ensure the ewes have top-quality hay and feed, and plenty of it, during this time as well as during the nursing phase after the lambs are born.

Purdue University has a great article about feeding the ewe flock that you might want to check out.

I lamb in the warmer months into the spring. So I don’t have to worry about an intensive setup for indoor lambing. My ewes will lamb just fine out in the pasture. I do, however, have some spaces set up for alone time between new moms and babies during the first 24-48 hours.

I had planned on cleaning out my sheds and setting up small lambing “jugs” (where ewe and lamb can bond) a little later in the month. But I’ll move that task up a few weeks as well.

I don’t use a harness on my ram to know when each ewe is bred exactly.  After all, I only have 10 ewes that may or may not be pregnant. But you can loosely consider that, because ewes come into heat about every 17 days, there will probably be a three-week span of time when my ewes will give birth.

I’m glad I re-checked my due dates for my lambs! I’ll move up the preparations just a bit, and I don’t anticipate any problems. However, the upcoming month will be a busy one. And, hopefully, at the end I’ll have a healthy flock of new mothers and lambs.

Glad I checked that lambing calculator!

Categories
Beginning Farmers Farm & Garden Farm Management Homesteading

Stay Farm Fit With These Workout Exercises

Farming is the most dangerous occupation in the country. Hobby farming doesn’t make it less dangerous. It’s important to be physically fit to keep you safe doing the work you love. 

I was 48 years old when my now ex-husband and I started our hobby farm raising registered beef cattle breeding stock. We were both fit (although overweight), but we could manage 50-pound bags of feed and 70-pound square bales of hay, assist with calving, walk miles to find missing animals and work cattle for vaccinations without too much physical strain. 

We both worked full time off the farm. During the winter I often complained that I didn’t see my cattle in daylight from Sunday afternoon until the following Saturday morning.

My doctor kept telling me I needed to do exercises, but I replied I spent a full hour or more each day taking care of my farm and cattle herd. I walked a lot between pastures and the barns, and lifted hay bales and bags of grain. I climbed on and off my tractor and got lots of stretching, pulling netting off 600 pound round bales. 

Work out? I worked out, I assured him. 

He always agreed I was active. But he also insisted I needed an exercise program, such as weight lifting or a regular exercise class, to stay strong and healthy going forward. 


Read more: “What if one of us gets hurt?”


Finding Fitness

I resisted his advice for several more years and ended up having a partial knee replacement. The surgery was a major turning point. Age caught up with me fast. The recovery was much longer than I’d expected. My posture and gait were bad, my balance was way off and my muscle strength was half what it had been.

After the knee surgery I spent three months in physical therapy strengthening my knee and leg. I let the therapist know from the beginning that I raised beef cattle and I wanted to get fit enough to continue working my animals. 

We worked almost entirely on my lower body and made very good progress. At the same time, I felt I needed some upper body work. I found weight lifting and exercise videos for people over 50 on YouTube and started training my upper body at home.

I also lost more than 50 pounds. 

Now at age 70 I feel better than I have in 10 years. Right here on the farm, I perform some structured exercises every day for 15 to 20 minutes, including some light weight lifting. My overall strength is twice what it was two years ago. My posture, gait and balance are good enough that I feel confident in continuing to care for my livestock.


Read more: Keep these safety tips in mind to avoid injury.


My Farm Workout

Not all exercises are right for every person. You definitely want to get your doctor’s OK before starting any exercise program. 

Here’s my five favorite farm fit exercises performed outdoors in just 15 minutes. I always warm my core first by stretching my arms above my head 10 times each arm, then twisting gently while raising arms side to side 10 times. 

  1. Barn Wall Pushups: 15 pushups, minimum two sets. Good for upper and lower body.
  2. Squats: 15 squats, at least three sets. These really warm you up on a cold day.
  3. Prone Hip Extensions (bent over with flat back and holding on to a pipe gate): 15 lifts each leg for three sets. Firms up your glutes and keeps hips mobile.
  4. Heel Raises (holding onto pipe gate): 10 raises for 3 sets. Strengthens shins and ankles.
  5. Standing Leg Lifts (hanging on to fence post): 10 lifts front, 10 lifts side, 10 lifts back diagonal. Works abs at the same time.