Growing up, Kelsey Vick of Homemade Montana Homestead recalls a childhood filled with chickens, fruit trees and a large garden that inspired fond memories of “incorporating a hobby farm into my daily life.”
After noticing the empty store shelves during the start of the pandemic in 2020, Vick was moved to get back to being self-sufficient and started Homemade Montana Homestead. It’s a venture with a mission to return to focusing on the basics and striving towards a state of being self-reliant—helped in part by a rooster named Ziggy.
Taking time out from homesteading duties, Vick spoke with us about organizing and accomplishing DIY tasks and the joys of the Idaho pasture pig breed. We also got the scoop on making elderberry syrup.
The early pandemic sight of empty grocery store shelves prompted Vick to pursue a path to self-sufficiency.
“I knew I needed to step back in time and learn how to preserve and take care of my family without the constant need of a grocery store,” she recalls.
“The more I dive down the self-sufficiency road, the more I love it—and yet the more I realize how reliant we are on our current supply system. My goal is to work towards self-sufficiency, but it’s a long road. It’s not impossible, but it’s not easy either.”
Vick says that her most challenging DIY project to date has been preparing a fenced pasture for her feeder pigs.
“We cut all our own timber, peeled all the logs for posts by hand, dug almost 55 post holes 32-inches deep, and stretched all the new fence,” she recalls. “Now when we step back and look at it, we love seeing the pig shed my husband built and all the beautiful fencing.”
Vick adds that next on the agenda is researching and learning more about the Idaho pasture pig breed that will benefit from the “new roomy living area.”
Vick recently posted a recipe for elderberry syrup to Homemade Montana Homestead’s social media channels. (It includes the addition of ground ginger, cinnamon and raw honey.) “Elderberry syrup is a great way to give your immune system a little boost,” says Vick.
When it comes to incorporating elderberry syrup into your mealtimes, Vick recommends drizzling it over pancakes and mixing a spoonful with soda water and apple cider vinegar for a homemade tonic.
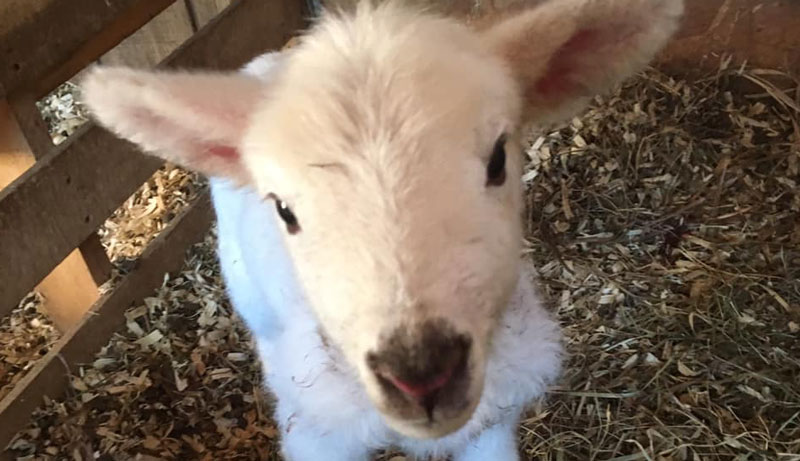
One of the stars of Homemade Montana Homestead is a rooster named Ziggy.”The rooster I never wanted is now the rooster I don’t want to lose,” explains Vick. “Don’t get me wrong, he’s definitely still a mean rooster. But I love his personality.
“When I picked up my chickens at the feed store I had them double check all of my chicks to ensure I didn’t have a rooster,” continues Vick. “However, as the weeks went by I noticed one of my chickens I called Sunflower was terrorizing all the other chickens. A few more weeks passed and it was obvious Sunflower was a top dog, a rooster.
“I planned to rid the farm of Sunflower, but I could barley catch the darn thing. So as he zig-zagged away from me and around the pen, I decided to name him Ziggy.”
Vick adds that Ziggy still “runs in fear from me” but that she’s “grateful he’s around to protect my ladies.”
On a daily basis, Vick takes huge joy from collecting chicken eggs at her homestead. “It’s by far the most rewarding because it’s like collecting a rent check every day,” she says. “I also love stepping down to the basement to grab some of my home-canned goods. But in the summer, nothing beats filling a basket full of fruit and veggies that we grew.”
Come spring, brick-and-mortar garden shops as well as online nurseries typically roll out their strawberry plant stock. And home gardeners like me dutifully snap them up. But that’s not necessarily because spring’s the very best season to start one’s strawberries.
Justin Ballew is a commercial horticulture agent with Clemson University Cooperative Extension. He provides South Carolina growers with expertise on a variety of crops including strawberries. And, as it happens, we may be able to learn a thing or two from those bigger strawberry operations.
“One thing home gardeners do that’s very inconsistent with the commercial grower is related to planting date,” Ballew notes.
“Commercial growers are planting [June-bearing strawberries] in the fall—usually around the middle of October. And I see home growers planting first thing in the spring, about the time things start getting warm. So the plants that were planted in the fall have had all winter long to grow and develop. They’re going to bloom and yield a lot better than the plants that are planted early in the spring.”
As a result, those growers are able to start harvesting as early as the end of March. The picking continues through April, most of May and sometimes into June.
June-Bearing & Beyond
When shopping for strawberry plants, you’ll likely see some described as June-bearing. Others may be designated as ever-bearing or day neutral.
“The day neutrals will produce just about year-round,” Ballew says. June-bearers, on the other hand, fruit heavily in the spring. And, as the weather warms, June-bearers stop producing blooms and instead spend their energy on vegetative growth.
Many commercial operations grow June-bearers like Chandler, Camarosa, Sweet Charlie and Ruby June as annuals—even though the plants are, technically, biennials. “Strawberry plants will hang around for two growing seasons,” Ballew explains. “But, once we’re finished picking late in the spring, we terminate that crop…. Then in the following fall, we plant all fresh plants.”
That’s partly because the strawberry plants don’t always yield as well during their second year. Starting with fresh plants each year can help mitigate disease and insect infestations, too.
Some commercial growers extend their strawberry production by planting ever-bearing varieties in late summer. “Then, we can generally pick a few berries off of them later in the fall,” he adds.
Depending on your local climate, you might even be able to harvest some ever-bearing strawberries during the winter and into the early spring.
Whether you intend to grow your own strawberries as annuals or keep the same patch going long-term, careful soil preparation is key. “We always recommend folks get a soil test,” Ballew says. “That will tell them about their soil pH and nutrients. Then they can make the adjustments needed.”
As for planting? “One big error that we see in commercial fields—and I’m sure it happens in home gardens as well—is that folks plant strawberries too deep,” he says. “Strawberries don’t tolerate that well at all.”
Bury their delicate crowns too far and they can rot. Or plants won’t be as vigorous as they could be. “They don’t grow as many side crowns, they don’t put on as many leaves, and they end up not yielding as well either,” Ballew continues.
If you’re planting soil-rooted plugs, set them into the ground, barely covering their tops with your native soil. As for bare root stock? “We put those in the ground so that we can see about 2/3 of the crown,” Ballew says. “Then we make sure to firm up the soil around that crown.”
He adds, “With bare root plants, it’s very common for people to fold or bunch the roots up and just stuff them into a hole in the soil. When that happens, the plant doesn’t respond very well…. Make sure the roots go straight down into the hole that you’re planting.”
Once plants are in place, keep an eye out for creatures great and small. You may need to use hardware cloth cages or netting to keep birds from snatching your fruit.
And if you notice your plants looking stunted or turning yellow, you could have spider mites. “They have little needle-like mouthparts that they stick into the leaf,” Ballew says. “They breed very quickly and can do a lot of damage before we really realize it.”
You can try to control spider mites with horticultural oil or insecticidal soaps. Still, a better long-term solution may be to encourage beneficial predatory insects. Some species of thrips naturally feed on mite eggs.
“The ‘big-eyed bugs’ are also a very good predator of spider mites,” Ballew concludes.
We typically don’t worry over testing a show chicken for diseases as we prepare for a fair or poultry exhibition. Our thoughts turn to the condition of the show cages at the event, on the availability of fresh water, on the parking situation, on kinds of competition amongst the other birds. Testing a chicken prior to entering the exhibition hall? Just a formality we all have to deal with.
Until it’s no longer a formality and becomes a shocking reality.
Why Does My Bird Need Testing?
Because Pullorum disease (caused by the bacteria Salmonella pullorum) and Fowl typhoid (caused by the bacteria Salmonella gallinarum) are such devastating afflictions, with 100-percent mortality, poultry shows require that all birds being brought onto the premises must test negative for these illnesses, collectively called Pullorum-Typhoid (PT).
Even if a chicken looks perfectly healthy, it still requires testing for diseases. Why? Because it may carry PT. That means you chicken can spread these diseases.
Testing occurs on site by testers certified by the National Poultry Improvement Plan (NPIP). This nationwide program was established in 1935 in response to Pullorum’s calamitous effects on the U.S. poultry industry.
When it your bird’s turn arrives, the tester will conduct a rapid whole-blood plate test. This involves carefully drawing blood from the brachial vein located on the underside of your chicken’s wing.
The tester will hold the chicken firmly to ensure it does not injure itself by flapping during the blood draw. For larger birds, an assistant may need to hold the bird steady while the tester draws the blood sample.
A special tool called a bleeding needle draws the sample. This device has an end loop that gathers the blood.
The blood sample then gets mixed together on a special testing plate with a drop of a liquid antigen containing killed strains of the bacteria. Your tester then tilts and rotates the testing plate for approximately two minutes, watching for any reaction.
After two minutes, the tester places the testing plate on an illuminated box for easy result readability.
Reading the Testing Results
When illuminated, the testing plate will clearly show either a positive or a negative result. If the result reads as negative, the blood/antigen sample will simply look like a translucent red or blue smear (dye added to the antigen makes the results easier to read).
If the result comes back positive, however, clumps will form, caused by antibodies in the chicken’s blood combining with the dead bacteria in the antigen. This clumping, called agglutination, will draw the dye in, leaving the remaining sample more transparent in color.
Birds whose rapid whole-blood plate tests yield positive results are called reactors. Should your bird test positive as a reactor, the tester will band its leg and place it in a special quarantine pen, safely away from the testing area and from all other birds.
After approximately 15 minutes, the rapid whole-blood plate test happen again, using blood from the other wing. If this result is negative, then your chicken will be marked as having tested negative. You can then proceed into the fair or exhibition.
Should the second rapid plate test return a positive result, however, your chicken—and all of the birds you brought to the event—will be returned to you. You will need to leave, and your state’s Department of Agriculture (or poultry association, depending on your state) will receive notification.
Your flock will receive a “hold order,” requiring quarantine of all of your poultry. During this time, you should not have any interaction with anyone else’s flock. This will ensure that you do not inadvertently carry the bacteria to other people’s birds.
Follow-Up Testing
Your state’s animal diagnostic lab will contact you to arrange a time to draw a blood sample from your reactor. This blood sample will undergo either a tube agglutination test or a microagglutination test at the diagnostic lab.
If this test comes back negative, your flock is free and clear.
Should the test come back positive, however, you will get a choice. You can continue your quarantine for an additional 30 days, then retest the reactor. Or you can voluntarily release your reactor chicken to the state for euthanasia and further testing for the PT diseases.
Should you choose to extend your quarantine, your reactor will receive another blood sample draw after 30 days for testing. Positive results will require the release of the reactor to the state for euthanizing and culturing.
The Final Steps
When you release your reactor to your state for euthanasia and study, your state’s veterinary diagnostic laboratory will carefully culture its internal organs, watching for the growth of Salmonella pullorum and Salmonella gallinarum bacteria. If the cultures remain bacteria free, then your flock is considered PT free and the quarantine is lifted.
Should the cultures indeed grow either bacteria, then a positive diagnosis of PT is indicated.
This requires the veterinary diagnostic lab to notify both your state veterinarian’s office and the United States Department of Agriculture (USDA). Together, these agencies will make the difficult decision of either requiring the euthanasia of your entire flock or extending the quarantine and retesting until your entire flock tests negative.
Raising chickens has been an increasingly popular pastime for years, be it on a small farm, a rural sprawling lawn or in a suburban backyard. Even urban chickens have become a thing. By and large chickens are easy to manage, generally predictable and fairly uncomplicated.Because of this you might say they are the gateway drug to keeping a mixed flock of poultry.
Ask anyone who has kept chickens for some time, and they’ll likely tell you that they have tried—or at the very least considered—adding at least one other type of bird to their flock: ducks, geese, guineas, turkeys, maybe even peafowl or pheasants.
Having several varieties of fowl can be entertaining and beneficial. Different species offer different benefits.
Ducks provide eggs praised for baking, and ducks are prolific slug hunters in your garden. They’re also quirky and fun to watch.
Guinea fowl are master tick eaters as well as effective alarm bells. They have odd little faces and are very amusing when they run.
Geese are great protectors, excellent weeders and can be wonderful companions.
Peafowl and other exotics are simply beautiful, elegant and fascinating to watch.
The benefits of a mixed flock are endless. But what holds many people back is a lack of space or inability to supply multiple housing situations. Each individual species does have different needs, but done right, you can successfully house a mixed flock.
One Coop? No Problem
Keeping your birds all together in a single coop and run can save space, time and money. One housing situation means less building material, fencing, electricity and work. While we do it with a rather large flock, this scenario really benefits those who prefer a more reasonable number of birds.
If you’re raising your flock in a small suburban yard, for instance, you may not want to address separate housing for each species—a duck house for just two ducks, a coop for a few chickens, a run for a lone goose.
Having a single, larger coop and one run allows you to efficiently house more birds in a smaller space while still giving them the room they need to flourish.
Anika Wilson
Space Sensitives
Whether you free-range your birds or not, a sizable, fully predator-proof run attached to the coop with 24-hour access is always a good idea. This place should allow your flock to move about outdoors while still contained.
Preferably this run would have at least a partial solid roof, especially in areas with extreme sun, excessive rain or snowy winters. Having a decent run will give your birds options, space and, most importantly, fresh air even when not free-ranging. The larger you can make this area, the better.
We like to use different levels in our run to help mitigate any potential bullying issues, as well as provide more space in a small area. By adding plenty of higher perches, low hiding nooks and multilevel platforms, you can maximize the space and give each breed a little place of their own.
A simple picnic table in the center of the run could do the trick. So could a pile of brush in a corner for someone to hide under and a branch set up for perching. Or, you could get creative.
Safe for Eggs
You’ll also want to give everyone a safe, dry space to lay eggs. Our ducks and chickens often share a single nesting box at ground level. But we provide several to give them options.
The smaller bantam chickens mostly utilize the higher boxes. The ducks, guineas (who are natural woodland layers) and the bigger chickens prefer the lower ones. Despite the fact that they’ll often all lay in the same few boxes, or in no box at all, options will cut down on skirmishes.
Our indoor coop area consists of several perches at different heights to accommodate a variety of species, while still allowing for a lower area, protected from the perchers’ falling poo with a single angled roof, for our ground sleepers.
Having open-access to the run also gives your flock more room for sleeping space. Ducks and many game fowl prefer to spend the night outdoors.
Dynamics, Behaviors & Disease
The second most important thing in keeping a mixed flock is to tune in to your birds’ behavior patterns, and understand and intervene in the instance of bullying or illness. Simply put, the larger the space the birds share, the fewer the issues.
Until the harmony of your flock is established, keep an eye on coop dynamics, especially with young birds coming into maturity. Raise everyone together from day-olds if possible, so that everyone is accustomed to one another. The more you watch your birds interact, the more aware of their needs you will be.
Small squabbles are normal and necessary. By nature, birds must establish a pecking order. This order may change over time as dominate birds age and grow weaker or as new members join the flock.
Stephanie Frey/Shutterstock
Space to Recover
Knowing when to intervene and having a space in the coop where you can isolate injured or bullied birds for short periods is essential.
In a coop/run with lots of space, this could be a separate cordoned off area. You could also use something as simple as an old dog kennel with an opaque tarp over one end.
The space should separate the bird from the flock, without stressing it, so it can still see and interact with its roommates but also retreat when it needs to. The ability to separate birds in this way also helps with acclimating new members to the flock and separating mothers with their babies from curious pecks and prods.
Different birds are more susceptible to different diseases. So read up on the specific species and breeds you intend to keep. Also arm yourself with an understanding of how particular illnesses effect different birds so that you can intervene in any issues quickly and effectively.
If you’re able to free-range the birds during the day, this is ideal. This gives them less time in close quarters where disease can spread more readily and small disputes occur more frequently.
Most backyard birds have similar needs when it comes to housing and their immediate environment. You’ll find some clear differences between the way waterfowl and other poultry/game fowl affect their surroundings.
Ducks and geese, for example will make an absolute mess if they have access to open containers of water. To avoid having different setups for each species, save on electricity in winter and add to the communal atmosphere of the coop, we supply large, low, water barrels that everyone can reach.
These we cover with wide-spaced fencing wire, such as deer fencing or cattle grid. This allows everyone to reach the water, but prevents anyone from getting in it. It cuts down on cleaning frequency, inside and outside of the water dish, and allows a single water heater in cold temperatures.
Water & Cleaning
In warmer months (or climates), having some deeper and some shallower water containers spread out around the run can also be a good idea to reduce competition. Remembering that waterfowl must always have access to water, they can fully submerge their heads in.
The indoor area however, must be cleared regularly. For this, wood shavings are your best friend. Easily swept away and absorbent, they also add a pleasant smell to the coop.
Using straw bedding is not recommended unless you plan to clean very frequently. While chickens love it, straw and duck poo are the perfect recipe for a very stinky situation.
Jean-Philippe BABU/Shutterstock
Food & Health
The disadvantage of a mixed flock in relation to their feeding is that you have to be more aware of what each creature needs nutritionally and what foods or medications can be dangerous.
Medicated feed can’t be fed to a mixed flock. It’s not as simple as buying chicken pellets or waterfowl crumble.
Each type of bird needs slightly varied percentages of different nutrients. Feed labeled “multiflock” isn’t necessarily always good for everyone. High-protein foods can be detrimental to ducks, causing angle wing and increasing their weight unsafely. For game fowl, though, high protein is beneficial.
I like to use a standard layer pellet and add in black oil sunflower seeds and dried corn for the peafowl, meal worms for the ducks and other seeds and snacks that everyone can enjoy. In winter, I regularly supply green goodies such as chopped kale, baby leaf spinach and grated carrot.
Feeding time in a mixed run can get hectic. This is the time when the most disagreements occur between flock residents. Having several food dishes spread around the coop allows everyone to eat in relative peace.
Basic Needs
The basic supplemental nutrition needs of your flock will also be subject to what your intended use for the birds is—i.e., eggs, meat or optics—as well as the breeds you raise and your surrounding environment. Full nutritional charts are easy to find online.
At first, all of this can be daunting, but despite there being quite a lot to consider when creating a mixed flock, once everything is in place, you’ll be glad you did your homework and happy to be housing communally.
There is nothing like coming out in the morning to open the coop door and witnessing all the little personalities and conversations going on. Mixed flocks are a joy to watch and raise!
More Information
Medication Mention
Very few preventative medications can be given to all birds in equal dosages, and some debate as to whether preventatives should be used at all, which is ultimately why I chose to go the natural rout when it comes to preventative measures and treats.
By free-ranging, the birds are able to source a lot of their own nutritional needs, but when cooped up in winter or bad weather, I successfully supplement with garlic and herbs. I also provide our ducks with regular rations of nutritional yeast, high in niacin, which is important to their growth and health and can be mixed in with the flock’s drinking water or sprinkled over their feed.
Dirty Old Ducks?
Ducks are likely to be your messiest residents. So if you intend to keep some, having proper flooring in the run is also important. A cement, linoleum or stone floor will be easiest to clean in a coop, but make sure the run is lined with something softer.
Ducks especially, but other birds as well, are prone to bumblefoot if kept on hard surfaces for too long. I use wood chips over a dirt floor in my run and allow my chickens to do the heavy lifting when it comes to cleaning. Their constant scratching means that the floor base is always rotating and aerating and is largely kept clean without human intervention.
I do one big scoop-out in spring after long freeze periods, and otherwise leave them to it. Sand or pea gravel would also be effective flooring, allowing water to drain and chickens to still scratch. We prefer the wood chips though, because they eventually have a second life as garden compost.
This article originally appeared in the January/February 2022 issue of Chickens magazine.
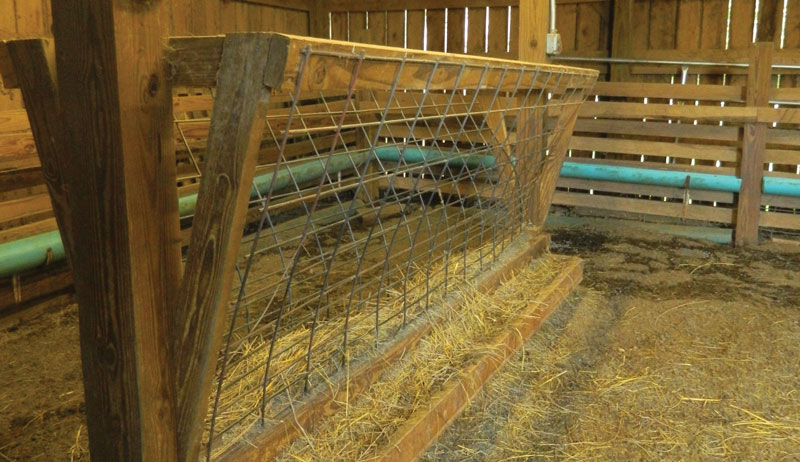
Whether you are just starting out or you are a seasoned farmer, constructing livestock handling facilities that meet your needs and are budget-friendly can be a daunting task. Here’s how three small farmers with different operations from the Sequatchie Valley of Tennessee accomplished these goals and more.
Cattle
One look at the gate latches on J.D. Vandergriff’s Black Angus cow/calf farm near Whitwell, Tennessee, will give you some idea as to the ingenuity that led to the creation of his cattle handling facilities. They are as unique as they are functional and affordable.
Vandergriff, recently retired, has farmed his entire life, first alongside his father and later on his own. He has an affection for repurposing a variety of materials including the recycled lug wrenches he’s converted into sliding gate latches.
Everything Is Repurposed
It’s this same thought process that led to the design of his cattle-handling facilities. He spent hours visualizing and sketching out what he hoped to build to match with the materials he already had on hand. Then, he made adjustments to his design as he went by running cattle through it to test what worked and what didn’t.
The materials in Vandergriff’s cattle chute are diverse and come from recycled wood, a garage door and a head gate. His father won the latter at a Farm Bureau meeting in the 1960s; Vandergriff found it in the loft of his barn.
Everything has been reutilized. This includes the chain-link gates, given to him by his former employer when they were being replaced with new ones. Same with the existing barn that houses his handling facilities.
“The wood [for the chute] is all repurposed lumber,” he says. “Part of it was from a swimming pool deck for my niece and her husband.”
Hope Ellis-Ashburn
An Ingenious Design
Vandergriff has slanted the boards in his chute so that he has different position options to lock the cattle in place. He read research that said cattle work better with a solid wall. But he likes the wood slats on his chute.
They allow him to reach through to the cattle and believes that the construction design still works well to limit their field of vision.
But Vandergriff wasn’t finished with repurposed materials yet. “Those panels are from a [salvaged] commercial garage door,” he says. His swing gate at the back of his chute is from part of an old wood stock frame made for a pickup truck. He uses car valves as the pins for that gate.
Describing the process he used after cutting the garage door to the appropriate size, he drilled holes and put wood behind the holes in the metal to hold the steel bar he uses to keep the cattle from backing up.
He also built wood shelves to hold supplies on the outside of the chute and a platform to stand on in the event it was needed. Due to its design, Vandergriff can easily work his cattle alone.
Good points aside, he had one chief motivating reason for the design of his facilities. “It was cheap!” he says.
The only possible downside to Vandergriff’s facility is his limited ability to work with hooves for trimming, draining abscesses, etc. He hasn’t had to face this situation yet. But he has a wench system in mind that would allow him to do so.
It’s difficult to put a price on Vandergriff’s handling facilities due to the nature of how he obtained his materials. Given the fact that his budget was quite low, though, it would be considered an affordable option for a small farmer.
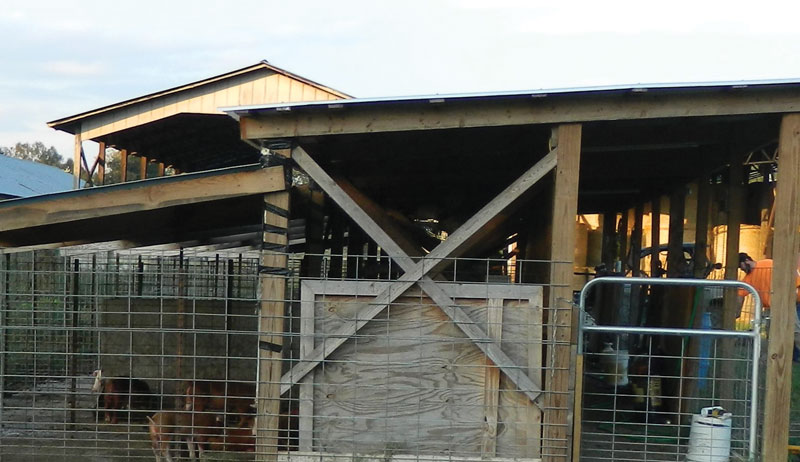
Young farmer Baylor Layne took a different approach when building his hog barn for his small farrow-to-feeder operation. Layne, 20, was raised on his family’s farm, also near Whitwell.
Two years ago he decided to take on raising Hereford, Duroc and Yorkshire cross hogs. He drew from his experience working in his family’s chicken houses as well as with their commercial beef herd.
Hope Ellis-Ashburn
A Borrowed Design
Although he made some design modifications of his own, Layne used a friend and mentor’s barn as the design template for his 56-by-16-foot farrowing shed.
“Dad and I built it from the ground up,” he says. “We poured the concrete and set the T posts. We set the posts in the ground and poured a 4-inch think concrete pad around the posts. When the hogs rub up against the posts, they can’t break them.”
Layne used cattle panels to construct the individual pens. Doors are constructed of plywood and framed with metal tubing. A family member who is a welder lent his expertise to aid in their construction.
All of the wood used in the building’s construction is treated. It, along with the tin for the roof, was sourced from local building-supply stores.
Learning Experience
When Layne first started, he had five pens. Because he and his family provided the labor, the cost of materials (at a manageable $2,600) was his sole expense. His building grew as he learned.
“Once I learned a little more about it, I wanted two weaning pens,” he says. In addition, he now has a total of six farrowing pens.
Layne recommends a 7-by-16-foot farrowing pen for a single sow. But a smaller 6-by-16-foot pen would work for feeding a hog out.
“If I had it to do over, I would make my pens 10-by-20-foot to better accommodate the size of my sows,” he says. To prevent the possibility of his pigs getting out, he would also exchange the cattle panels on the barn’s perimeter for 4-by-4-foot sheep panels.
Presently, chicken wire works to deter that possibility.
Layne currently has 26 pigs. This includes a boar, five sows and 20 piglets. He makes use of fans and automatic waterers for all. While he hand-feeds the boar and sows, his piglets have automatic feeders.
Because of their smaller size, Layne doesn’t need to have a true handling facility. He does, however, have a designated area where, using obstetrical chains, he can suspend piglets from a barn post for castration.
For ease of use and working independently, Layne recommends the splurge of going automatic if at all possible. He would eventually like to make his operation entirely automated.
Sheep/Goats
Like Vandergriff, Randy Allen is a lifelong farmer. Fourteen years ago, he sought to diversify his commercial beef operation on his Dunlap, Tennessee, farm by adding a small Kiko meat goat herd.
Initially his plans also included a few sheep. But now he focuses solely on goats. Although some of his females will sell for breeding stock, he sells the majority of his goats at a commercial auction.
Although not extravagant, Allen’s investment in his facilities is the largest of the producers interviewed. In his spare time, he took a hands-on approach to draw out his 30-by-40-foot barn. However, he invested in the expense of having it built.
When his barn was erected in 2006, construction costs were far less. Allen estimates that a similar structure would cost approximately $20,000 to build today.
Hope Ellis-Ashburn
Design Learning
The barn and its handling facilities have been a learning experience for him. If he had it to do over, he has several things that he would change. The first is an increase in the overall size of the structure to better accommodate bringing in equipment to clean it.
Because he didn’t want to be in with the goats at feeding time, his original design included a walkway behind the feeders and a separate hay manger. But the kids jump in the trough and older goats sometimes get their horns stuck in his hay manger. So he would like to change the location of the feed trough and take steps to redesign the manger.
Allen does enjoy the autonomy that his current facility allows in terms of being able to work his goats independently. But he would also rework the funneling system of gates that he currently uses when working the goats in such a way that it was more encouraging for them to enter the head gate.
Extra expenses aside, Allen recommends one must-have piece of equipment.
“It’s good to have a working head gate,” he says. He also recommends kidding pens. “You need a place to separate them sometimes, especially new mommas.”
Veterinarian Troy Pickett has been practicing out of Kirk Veterinary Clinic in Kimball, Tennessee, for the past seven years. The majority of his farm calls related to livestock come from cattle producers.
“It will be more along the lines of dystocia or some type of respiratory illness,” he says.
What Pickett considers necessary in terms of working facilities depends largely on the situation. “I can usually make some type of catch area with a rope work if I have to,” he says. “The less stress on them the better. I prefer an alleyway with a way to block them in between. I can live without a head gate if I have some type of board to block them with.”
Although he can work without it, Pickett recommends spending a little of your facilities budget on gates and panels. He has also found that a bud box—a usually smaller-in-size rectangular box that, by its design, works to encourage cattle to go into a chute or alleyway—works well.
Whether your budget is large, small or somewhere in between or whether you are a DIYer, prefer to take a more hands-off approach or a combination of the two, these producers demonstrate that you too can design a livestock handling facility that is right for your situation.
More Information
Need Help?
Some states, such as Tennessee, have specific cost-sharing funds set aside to assist producers with the construction of livestock handling facilities. Check with your county’s extension office to see if your state offers assistance.
This article originally appeared in the January/February 2022 issue of Hobby Farms magazine.
Tire chains, also called snow chains, can be essential for maintaining good tire traction on snow and ice. When winter weather strikes, adding chains to you tractor, farm truck, etc. can improve performance and safety under challenging conditions.
But getting the most out of them requires more thought and care than randomly purchasing a set of chains and hoping they do the job. The following six tips can help you get the best performance from your tire chains.
Make sure your tire chains are sized correctly.
Tire chains come in many different designs, and choosing the perfect type will depend on the vehicle you’re operating, the amount of snow you receive in a typical winter and the frequency with which you plan on using chains.
But regardless of the design you ultimately choose, buying the correct size is critical. There are three numbers you need to know:
the width of the tire from sidewall to sidewall
the tire height aspect ratio
the diameter of the tire
The measurements you need are likely inscribed on the sides of tires, though the exact formula and numbers listed can vary depending on the type of tire.
The good news is, chains are adjustable and typically fit a few different sizes of tires. Manufacturers often provide handy guides for finding the right size chains, so a little research and number-crunching will ensure you purchase the right size.
How many tires chains do you need? A two-wheel drive vehicle typically needs a single pair of chains, installed on the drive wheels to maximize traction. But a four-wheel drive vehicle will ideally have chains installed on all four tires, requiring the purchase of two sets of chains.
Make sure the chains are properly tightened.
Some types of tire chains are self-tightening. But others require a bit of work to ensure they’re secured snugly around the tires.
After installing the chains and tightening them as best you can, drive forward a short distance, park the vehicle, and tighten any more slack that has appeared in the chains.
Don’t use tire chains on pavement.
Tire chains are terrific on snow and ice, but they’re not suitable for use on hard surfaces like pavement. In fact, driving with tire chains on pavement can damage both the surface of the road and the chains themselves.
If you’re going to operate on dry roads, remove the chains—you’ll save them from wearing out prematurely.
Tire chains are meant to provide traction under challenging conditions, with an emphasis on the “challenging conditions.” Just because you’ve installed tire chains doesn’t mean you can operate your vehicle as though conditions are perfect.
Steering can be affected, and driving at high speeds is not advised. Chains can break loose and cause damage.
So how fast is too fast? Staying under 30 miles per hour is a good target. You probably don’t have to worry about exceeding this limit when operating a tractor around your farm. But if you’re putting tire chains on your farm truck, this is important to keep in mind.
Consider adding ballast, too.
Tire chains aren’t the only winter add-on you should consider. In order to achieve enough traction for hard jobs like clearing snow, you may need ballast to increase the amount of weight pressing down on the drive wheels.
Ballast comes in many forms. For a farm truck, it might be a load of sandbags in the bed. For tractors, it might be suitcase weights, wheel weights, or even rocks piled into a ballast box.
Liquid tire ballast can be particularly effective. But make sure you’ve chosen a liquid that can handle winter temperatures. Straight water won’t cut it in the cold.
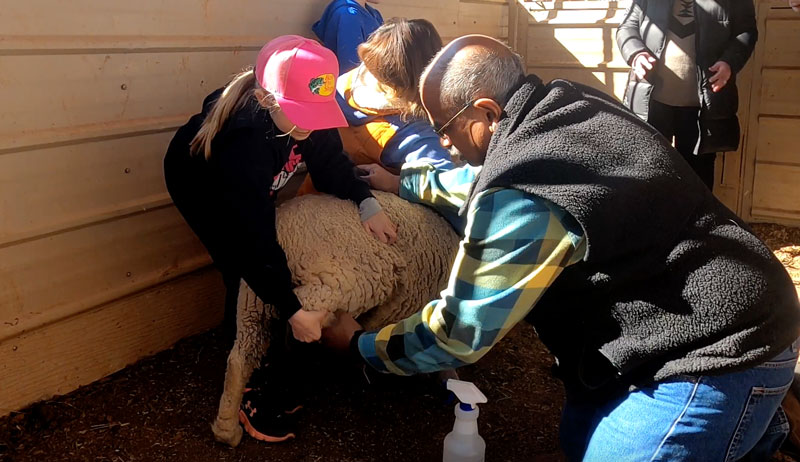
Hobby farm breeders all over the world are hoping, wishing and praying their sheep and goats are bred this season. For the past few months they’ve created waitlists of future buyers ,and now it’s time to deliver (pun intended).
Goats and sheep have the same 145-day gestation cycle. Therefore, the methods of diagnosing pregnancies and timelines of development are the same.
Sheep have lots of wool this time of year, making it more difficult to see the ewes filling out.
We met with Dr. Lionel J. Dawson (BVSC., MS DACT), a professor at both Langston University and Oklahoma State University specializing in small ruminant animals. In the video above, he explains and demonstrates ways you can check your animals at home. He also teaches how and when a veterinarian can get involved.
17-34 days: Change the chalk marker color. If a ewe or doe was marked the first time and not again, you can assume she is pregnant from the first cycle.
30-35 days: Biopryn lab tests can be administered.
35+ days: Ultrasounds can confirm.
60 + days: Doppler machines can be used.
90-100 days: Blockment kicking can be performed (visual demonstration in the video).
100-145 days: Physical signs should be present. Mammary glands will develop and, once milked, the color of the milk will show you how close the baby is. The vulva will swell and have discharge.
As Dr. Dawson checks out our animals, we learn one of our ewes is not bred. As breeders it is time to decide if we will forgo this breeding season with this ewe or intervene with medical assistance.
Dawson addresses this in the video when he speaks about using a CIDR and separating the ewe to prepare her body for another attempt at pregnancy. He cautions viewers to make sure you know without a doubt the ewe is not pregnant before administering any future attempts because it will harm the ewe and unborn baby if there is a chance she is pregnant.
In conclusion, the most successful way to track pregnancies is being certain when conception happens. It is not practical for everyone to keep 24-hour surveillance during breeding season, so chalk marking is the best way to know an attempt has been made.
Dawson explains to change chalk colors each 17 days and, if the ewe or doe is only chalked once, you can be 80 percent sure she has been bred. From then you will follow the pregnancy timeline.
Last month I wrote about how to identify hypothermia in lambs, as a number of my friends are lambing during the winter months.
To recap:
“The first sign you may see is the lamb lying for long periods on its side, head down. Young lambs may lie like that if they are out in the sun, but for the most part they will have their head up. You will need to go nudge it with your hand or foot and see if it will get up.
“A healthy lamb will stand up and stretch, then go find its mother to nurse a bit. If your lamb does that, they are probably just fine. If not, you may need to do a bit more.
“One thing you can and should do immediately is take the lamb’s temperature. A normal temperature for a lamb is about 102 degrees F. If it’s at 100 degrees F or less, your lamb most likely is suffering from hypothermia.
“Other possible signs of hypothermia are weakness, not being able to get up and crying excessively.”
How to Treat Hypothermia in Lambs
Of course, the first thing I recommend is calling your vet. But sometimes this isn’t possible or there just isn’t time.
So I went back to my mentor and friend, Denice Rackley, to ask her what I should do if I need to act quickly to save a lamb that is cold and not nursing.
First of all, if a lamb is about 99 to 101 degrees F, it is mildly hypothermic. Below 99 degrees F is severely hypothermic. This tells you how quickly you need to act.
If a lamb is below 101 degrees F, Denice recommends looking at three factors:
Are they older or younger than 5 hours old?
Are they able to stand?
Do they have a suck reflex and are they able to swallow?
Then move the lamb to a warm place near a heat source while you assess the situation and figure out the next step.
First off, lambs are born with brown fat that protects them for a few hours until they are able to nurse and get energy from their mother’s colostrum and then milk. But if they are unable to nurse or swallow, you may have to help out with a jump start.
Denice recommends using a stomach tube to get some much-needed energy into the lamb’s stomach. Or you can do an intraperitoneal injection (near the abdomen) of glucose.
I have purchased a feeding tube and it’s in my lambing kit. But luckily have not yet had to use it. Each year I watch videos to remind myself what to do in case I would have to tube feed a lamb.
Here is one from Purdue University that seems fairly straightforward.
While I really don’t want to have to have my lambs get to this stage, if I have to give them an intraperitoneal injection, I’ll try to be as ready as I possibly can! The Ohio State University Sheep Team offers instructions and glucose dosages here in case you need to do that as well.
Denice notes that warming the lamb first is always preferable, but if the lamb is more than five hours old and has not nursed, it has used up its reserve of warming brown fat. So, getting the energy into the lamb will be your first goal before you spend time warming it.
If your hypothermic lamb is able to suckle, you can try giving it some colostrum in a bottle. Either get the colostrum by milking the ewe or using a mix you can purchase and mix with warm water.
When the lamb’s body temperature has returned to normal, it’s always best to return the lamb to the ewe and allow it to try to nurse normally. You will still need to keep an eye on the lamb, however. Ensure that milk is coming from the ewe’s teats and that the lamb is swallowing.
I hope none of you ever have to experience this type of lambing emergency, but it’s really best to be prepared. Just having the supplies on hand and having a general idea of what you need to do in your head could be the key to keeping all of your lambs healthy and happy!
Lambing season is just around the corner and, while our minds might be focused on ensuring a comfortable and safe environment for our expectant ewes, our hearts are looking forward to the adorable balls of fluff that will be joining us soon.
Baby lambs charm us with their curiosity and escapades, swiftly filling our smartphones with snapshots of their adorable antics. But constantly calling your little ones “baby” and “lambie” can get tiring, not to mention confusing!
End the bamboozlement by giving each of your newborn lambs names of their own, perhaps from the following selections.
Sounding Off
Sheep have one of the most recognizable vocalizations in the animal kingdom. Reflect that distinctive sound in your lamb’s name:
Lambs don’t stay little forever. Consider names that encapsulate the adult animals your baby lambs will one day be, such as:
Ewedora
Ewegenia
Ewenice
Ewerydice
Rambo
Ramon
Ramsay
Ramses
Starring Role
Lambs and sheep feature prominently in literature, programming and even comic books. Give your little one a touch of star power by naming them after some of their famous fellows:
Gentle Heart (from “Care Bears”)
Lamb Chop (from Shari Lewis)
Lily (from “Minnie ‘n Me”)
Merry (from “Stray Sheep”)
Bo (from “US Acres”)
Lanolin (from “US Acres”)
Shaun the Sheep (from “Wallace and Grommet”)
Woolly (from “When Sheep Can’t Sleep”)
Gaming Time
Sheep in video games? You better believe it! If you enjoy gaming, consider choosing names for your little lambs from this list of electric sheep:
If your pastures are showing signs of wear and tear, patches of open ground, more weeds than grass, overgrazing last fall or mud damage this winter,it’s time to rehab them with frost seeding.Frost seeding is an inexpensive and easy way to rejuvenate overgrazed or weather-damaged livestock pastures and hayfields without tilling or disturbing already established grasses and legumes.
As the soil freezes and thaws, the seeds are “drilled” into the ground—nature’s way of no-till seeding. All you need is winter days with daytime temperatures above freezing and night time temperatures below freezing. You also need seed, of course, and a means to broadcast it.
Small pastures of less than 5 acres can be seeded with a hand cranked seeder. The seeders broadcast the seed in 6- to 12-foot widths depending on the seeder and the seed.
Hand cranked broadcast seeders come in several sizes. You can use an inexpensive shoulder-strapped bag or a bigger backpack type with capacity of 25 to 60 pounds of seed. It’s a perfect method for keeping small pastures and paddocks in tip-top shape to nourish your valuable livestock.
If your pastures are more than 5 acres, you may want to invest in a broadcast seeder that can attach to an ATV or tractor.
Most pastures are seeded with cool-season grasses (such as fescue, rye, orchard grass and timothy) and legumes (such as clovers and alfalfa). Grasses supply carbohydrates and some proteins for all types of grazing livestock.Legumes provide higher quality protein.
Pastures that double as hay fields are good candidates for frost seeding legumes.
Legumes are the most successful seed for frost seeding, with medium Red Clover leading the pack. Other clovers such as White Clover and Ladino Clover are also good choices but can be less hardy than Red Clover. Red Clover, however, is not a long-standing perennial legume. Re-seeding Red Clover every three or four years will ensure your pastures always include a quality legume.
If you determine you need to seed both grasses and legumes, seed them separately. Grass seed is smaller and doesn’t broadcast as far as the larger legume seeds, giving uneven results if mixed together.
Cost of Seed
Seed of all kinds is expensive. You may be tempted to use less than the recommended amount of seed per acre because you are frost seeding over existing pasture. Studies show that frost seeding the recommended amounts for prepared seed beds yields better stand densities when frost seeding existing pastures.
This is particularly important for legumes. Keep in mind your cost of seeding is minimal—your time and an inexpensive broadcast seeder—which should overcome your reluctance to spread recommended pounds per acre.
Successfully establishing legumes with frost seeding requires control of grass and weed competition. Frost seeded pastures can actually benefit from grazing. A light grazing opens up the ground to the sun and helps keep weed competition from stifling the newly germinated seedlings’ growth.
An ideal grazing program would start with goats and end with cattle, but light grazing of any livestock is beneficial. Mowing will also help establish the new stand.
The Right Pasture for Your Animals
If you are raising cattle or horses, they will love pastures with an even mix of grasses and legumes. Pastured chickens will also benefit from legume-rich pastures.
Sheep and hogs like clover pastures but can experience bloat from pastures too heavy with alfalfa. Goats prefer grasses over legumes.
Camelids such as alpacas and llamas need a grass pasture. They are not true ruminants and legumes can cause digestive problems.You can purchase pasture mixes designed specifically for camelids.