After fermentation, the beets will become more tender than when eaten raw, though will still retain a nice crunchiness. Reminiscent of a canned pickled beet, these fermented beets deliver the healthy-belly benefits of probiotics.
Yield: 1 quart
Ingredients
Main
6 small, tender beets (about 1.5lbs)
3 whole cloves
1 tsp raw honey (optional)
1 whole cinnamon stick (optional)
Brine
1 tbsp. coarse kosher salt, dissolved in 2 cups water
Preparation
Gently scrub beets clean of any dirt, but do not peel. The bacteria naturally present in the skin aids in the process of fermentation.
Trim the ends of the beets off. Cut beets into uniform sizes, about 1/2- or 1-inch cubes. The benefit of cutting them in like-size pieces is that they will ferment evenly.
Add the clove (and optional honey and cinnamon stick) to the bottom of the jar. Then fill jar with beet chunks, leaving 2 inches of headspace (room from the beets to the rim of the jar).
Once the jar is filled, mix up the brine. Pour the brine over the beets until they are completely submerged by at least 1/4 inch of brine. If you have a small fermentation jar weight, add it to the jar to hold down the beets under the brine.
Remove any small pieces of food that float up to the top of the brine, as produce above the brine will increase the risk of the ferment spoiling. Wipe off the rim of the jar with a clean dampened towel.
Finally, add the canning jar lid and tightly screw on the ring.
This is a two-week ferment. Ferment at room temperature, ideally between 60 to 75 degrees F (15 to 23 degrees C), and keep out of direct sunlight.
Check on the ferment daily to make sure the brine is covering all the produce. If the produce has floated above the brine level, use a clean utensil to push it back below the brine.
Burp the jar daily. Unscrew the lid briefly and tighten it back on to allow any built-up gas to release (and avoid possible jar breakage or the ferment from overflowing).
After 1 week, taste test a chunk of beet to see if it has a sour, tangy fermented flavor or if it still tastes like beets in the raw form. If it still tastes too raw, allow it to ferment another few days and taste test again.
Likely this will take two weeks to ferment, though it is truly up to your personal flavor preference to determine when it’s “done.” Once the ferment reaches an ideal flavor, transfer the jar into the refrigerator, with the brine and all.
Fermentation does not stop once the ferment is transferred to the refrigerator, however it does slow the process way down. The taste and texture will continue to change, therefore this ferment is best enjoyed within six months.
If you do not have a glass jar weight, you can improvise by using an easily removable small food-grade glass dish that fits inside the jar. Or, if you have a smaller glass canning jar that can fit into the mouth of the jar you are fermenting with, you can also use that to keep the produce pushed under the brine.
Here are a few ways to enjoy your fermented beets.
Eat them as you would other pickled beets, as a side dish.
Slice them up and add them to a salad.
Snack on them between meals for a healthy flavor filled snack.
Mix them with feta and make a beet salad.
Don’t forget to drink the beet brine after eating the fermented beets. The brine is chockfull of health benefits.
This recipe has been adapted fromCan It & Ferment Itby Stephanie Thurow with permission from Skyhorse Publishing, Inc.
“We’ve always just loved the timeless and classic look of black and white,” says Sara Easley when she recounts the decision to base Carolina Sugarberry Farms around a striking black and white farmhouse. “We find a lot of beauty in keeping things simple, minimalistic and fresh looking.”
Situated in Ravenel, South Carolina, Easley and her husband now preside over land populated by four goats and 12 chickens. The couple turned a love for animals into “our own little slice of paradise.”
We spoke to Easley about the joys of Nigerian dwarf goats and basing their house and farm name around a Southern Living floor plan. We also got into bonds that form between a hobby farmer and the animals.
Easley says that she and her husband decided to formally start a farm after they both sadly lost a parent. “We realized life is too short to wait on making our dreams come true,” she says.
When it came time to name their hobby farm, the couple took inspiration from having based their house around a Southern Living floor plan titled Sugarberry Cottage.
Goats are an essential part of the daily goings on at Carolina Sugarberry Farms. “We decided on Nigerian dwarf goats because they are ridiculously cute as babies and seemed to be a manageable option for beginning hobby farmers like ourselves,” explains Easley.
“With their smaller size, they didn’t require building a big barn or an extensive pasture.”
Reflecting on the decision to add goats to the farm, Easley says that one of the early lessons they’ve picked up on is that “contrary to popular belief, goats can be terribly picky and waste a lot of hay. Sometimes it feels like we are just dumping cash straight into our compost pile!”
On the plus side, Easley says, goats are all about human companionship. “We knew they were friendly. But they just love spending time with us and we love being with them just as much.
“Our goats are constantly bringing smiles to our faces and have supplied countless amounts of laughter in our family. Goats are absolutely great for improving your mental health!”
“Goats love to take advantage of opportunities to be mischievous,” says Easley. “Farm chores aren’t an easy task when they are around. They love being right under your feet, jumping in the wheelbarrow and sneaking into the hay stash. It’s their daily mission to escape the pasture, thus why we had to install double gates.
“It’s not unusual to come into the goat house and find one of the mounted hay feeders has been knocked down,” continues Easley. “They love to play with each other and get rather rambunctious, especially first thing in the morning and then usually right before they get put up at night.”
At Carolina Sugarberry Farms, each and every animal is treated as a family pet. “They all know their names and have their own unique personality,” says Easley.
“The most rewarding part is the bonds we’ve made with them. They bring us so much joy. We take a lot of pride that we can give them a quality life right here in our backyard.”
If you didn’t dig a fancy new garden bed last fall, but you still hope to plant asparagus this spring, all is not lost. “It’s OK to plant in the spring and it’s also OK to plant in the fall,” says Rose Hembrook, co-owner of Andy’s Asparagus Acres. “In the fall, you want to wait until it cools off. In the spring, you want to wait until the spring is actually coming on.”
Hembrook is based in Tennessee. Her family has been growing asparagus from seed since 1932. “They’re very slow to grow,” she notes. “By the time a root is 1 year old, [the plant is] almost like a hair—it’s really thin and really small.”
Asparagus ‘Crowns’
It takes three years before the roots of those asparagus seedlings finally will produce viable, harvest-ready spears. As such, purchasing asparagus roots or “crowns” is more practical—especially if you hope to harvest fresh spears anytime soon.
Some nurseries sell 1-, 2- and 3-year-old asparagus crowns. Older crowns usually cost more, but you should be able to harvest sooner. “Three-year plants are usually about ready,” Hembrook says. “They’re an edible size. You can harvest from a two-year [crown], but it’s not going to be fully mature.”
She continues, “A one-year [crown] is a good investment. A lot of people are reluctant, but you’ll be saving money. And, in a couple of years, they’re going to be ready. So, just put them in the back of your garden and let them grow.”
If you’ve never grown asparagus before, you might want to start with just 10 to 25 crowns in your garden. Also, because some varieties will perform better in your particular microclimate than others, you should try more than one. Once you know which varieties work best for you—and which you prefer to eat!—you can add more plants next year.
Mary Washington, Jersey Giant, Jersey Supreme and Purple Passion are among the most common asparagus varieties available. An old-fashioned type, Mary Washington is a prolific producer that can tolerate both extreme cold and heat. And, while Jersey Giant is best-suited for growing in hotter climates, Jersey Supreme handles colder weather well.
For its part, Purple Passion sends up deep purple spears that turn bright green during cooking. It’s also said to contain more sugars than other asparagus types.
Ideal Conditions
Whether you opt for an heirloom variety or the latest hybrid, most asparagus plants thrive in nutrient-rich, well-draining garden soil. “You want a sandy, loam soil that has some good depth to it—at least 12 inches,” Hembrook says. “The roots like to grow deep into the soil.”
They also like moisture levels to be just right. “After you get everything in your planting bed the way you want it, do a [percolation] test,” Hembrook advises. “You make a hole, fill it up with water, and time it to see how long it takes the water to dissipate. If the water washes away too fast, the plants are going to get wet, but they’re not going to get any nutrients. And, if the water sits there a long time, it’s going to cause the roots to rot.
“You want an even flow of water, and all the water should be dissipated within two hours or so.”
Hembrook also recommends maintaining a pH level between 6.8 and 7.1 in your asparagus garden bed. (And if you’ll regularly be adding compost—or watering with compost tea? Plan to test the pH every couple of weeks.)
Once your asparagus bed is ready to plant, place crowns about 18 inches apart and 6 to 12 inches deep. Also, be sure you orient your crowns properly. “[The roots] shouldn’t spread out like an umbrella in your hand,” Hembrook cautions.
“Hold it by the crown and it should just hang straight down. It will have a little wave to it, but it shouldn’t spread out like an umbrella. If it does that, it’s upside-down.”
Once your plants begin to take off, keep an eye out for asparagus beetles and other pests. To attract beneficial insects like lady beetles, flower flies and assassin bugs, plant marigolds nearby.
Hembrook adds, “You can plant garlic in between your asparagus to keep the bugs out. The smell doesn’t go into the [asparagus] spears. Rabbits and squirrels don’t like it either.”
Watering is one other important aspect of care. “One common mistake people do is they plant their asparagus and then every day they’re out there watering it,” Hembrook says. “But if the [asparagus] ferns turn yellow, that’s a good indication that they’re watering too much.”
When you do water, use rain or pond water if you’re able. And, to help prevent fungal disease, water at ground level, rather than sprinkling water on the foliage itself.
We’ve all gotten a chuckle or two out of watching our chickens enjoy leisurely dustbaths and spend hours preening their feathers. We may have even gotten a few photographs to share with our families and fellow poultry enthusiasts. These routine behaviors are not only endearing, they’re also hygienic. Dustbathing and preening are a chicken’s way of keeping herself clean.
For the most part, that’s all the beautifying our birds will ever need.
Like everything in life, however, there are always exceptions. Breeders who raise exhibition poultry—or who just want to show their birds at the local fair—groom their chickens prior to arriving at the exhibition hall or fairgrounds. Owners of show-business birds risk losing jobs if their birds are dirty.
And it goes without saying that those who keep house chickens as pets stay on top of their chickens’ cleanliness.
While I was very active in my state’s show circuit, I actually learned how to beautify a bird via a different route. One of my White Silkies, Altaria, had discovered the dubitable pleasures of hopping up and down in a puddle.
Perhaps there were earthworms in it? I have no idea.
All I knew was that my beautiful girl looked like she’d played four hours of football in the rain. Fortunately, several show-poultry friends came to my rescue—not Altaria’s; she could have cared less—and within a couple of hours, my Silkie was more lovely than ever.
I had almost everything needed to achieve this at home. Over the years, I’ve added a few more essentials for grooming chickens to my list, too. If you want to keep your bird beautiful, consider keeping the following 11 items on hand.
Your local feed shop or farm-supply store is your best bet for this. They most likely carry a variety of shallow tubs—both heavy black rubber and galvanized steel—to serve as feeders for livestock.
To bathe a bird, a shallow tub is absolutely necessary. Don’t fill it to the top. All you need are about 3 inches of lukewarm water in which to stand your bird to wash her (2 inches for a bantam).
Always keep one hand (you may need an assistant) on your bird to keep her calm. Also, more importantly, this will keep her from leaping out of the tub and making herself even messier. Some chickens actually find warm water relaxing and may settle down without so much as a squawk.
No More Tears Shampoo
This gentle baby shampoo is the best option for washing and grooming your chickens. It has minimal irritants that can affect your chicken’s eyes and other sensitive areas.
Just put a small amount—about the size of a quarter—on your palm and lather it up to apply to your chicken. Gently lather her, lifting up her wings to wash their undersides. Take extra care washing around her head and neck.
Handled Scrub Brush
A small, handled brush—the kind used to scrub stains on laundry—will help clean your chicken’s talons and feet. As chickens tend to get these caked with dirt, dust and droppings, properly grooming feet will take a little more elbow grease.
Small Pitcher
Keep fresh water at the ready to help rinse your bird once you’ve washed her. The water in your basin may no longer be clear enough to use to get all the soap off of her. A small pitcher will provide you with more control and direction as you carefully sluice the soap off.
Bluing
Laundry bluing is a grooming must if you want your white chickens to gleam like freshly fallen snow. Use bio-degradable laundry bluing (available in your supermarket or on Amazon) to refresh your white bird’s yellowed feathers. Just add a minimal amount—I use barely a tablespoon—to the lukewarm tub water. Mix thoroughly before setting your bird in the water.
Note: adding more bluing to your bird’s bath water will not make her a brighter white. It will make her blue … in more ways than one.
Earmark one of your old towels—perhaps the one no longer part of a set, or one with bleach marks on it—as your bird-drying towel. The moment you lift your hen out of the bathing tub, fully wrap her in the towel and pat her as dry as possible.
You may need to reverse the towel to use the non-wet parts. Better yet, use two towels to absorb as much moisture from your chicken’s feathers as possible.
Hair Dryer
A hair dryer with a diffuser is the best way to fully dry and fluff your hen’s feathers. You may need an assistant to hold your hen in place. She may react to the feel of hot air being blown at her… and, most likely, to the sound of a hair dryer.
Do not hold the dryer too close to your hen. Rather, gently go back and forth along her feathers until she is completely dry.
Baby Hair Brush
If you have Silkie chickens, you will need a baby hair brush for grooming this breed’s feathers. Blow drying a Silkie without brushing her feathers out afterwards will make your chicken look like she just escaped from a wind tunnel.
A small, soft brush especially designed for ultra-fine baby hair is the perfect tool for getting Silkie feathers back under control.
Cat/Small Dog Nail Clipper
A broken chicken claw is a very common occurrence in the barnyard and run. After all, our birds use their claws to scratch in the dirt, to preen and pick at their feathers, and—for roosters—as grippers during mating.
Usually, scratching will keep talons trim and you’ll only need the clipper to even out a sharp edge on a broken claw. Some birds—usually less active older birds and bantams kept in show brooders—will need regular trimming of their talons. If not trimmed, the claws will grow long and circle under the foot. This makes it very difficult for the chicken to walk or care for itself.
Your clipper can also be used on the rare occasion that your chicken’s beak needs trimming because of overgrowth or breakage.
Buffer/File
Just like our own fingernails, a chicken’s claws can be filed to remove rough spots and buffed until they shine. This level of grooming is usually only done to exhibition c and to chickens used in modeling and acting gigs.
A metal file will last longer and will leave less striations on your hen’s talons than an emory board.
Nail Polish
Yes, nail polish. A clear coat of nail polish on chicken talons keep them pretty and presentable, especially if your chicken is a show-business chicken.
However, you can be more adventurous! I know of several house-chicken owners who polish their chicken’s talons in a variety of colors, especially during the holidays. Feel free to do go all-out when grooming your backyard chickens (if you so desire)!
Vaccinating our chickens represents an outstanding example of disease prevention, if done correctly. That said, you need to understand what vaccines do and don’t do. Vaccines aren’t cure-alls!
To that point, chicken keepers need to have good biosecurity to reduce exposure to better protect the flock against disease.
You’ll find a range of vaccines and vaccination programs. Vaccination programs are designed based primarily on :
risk of getting the disease
availability of vaccines
climatic conditions
type of chickens (broiler versus layer)
economics
Big picture: In addition to biosecurity, consider vaccines if you live in affected areas and want an extra level of protection.
How They Work
When you vaccinate, you essentially produce a mild form of the disease in order to elicit an immune response in your chickens. However, the vaccine strain is purposely a mild form as opposed to a virulent form that can cause disease and death. Note that vaccines don’t cause disease. (Note: mRNA and subunit vaccines work a little different than how more traditional vaccines work, which I just described.)
One thing that makes vaccines complicated? That they don’t work 100 percent of the time. (After all, nothing in medicine works 100 percent of the time.)
This has caused some people to become skeptical of their efficacy. Psychologically, we remember “vaccine failure” (i.e., we gave our chicken a Marek’s disease vaccine and the chicken ended up contracting Marek’s) versus all the times we had vaccinated birds that didn’t get Marek’s.
Vaccine failure can happen for several reasons. Improper storage/preparation of the vaccine could be to blame. So could mismatch between the vaccine strain and the strain to which the birds were exposed. (This is why pharmaceutical companies periodically have to, ever so slightly, change the vaccine to keep up with the latest-and-greatest version of the disease-causing agent.)
Which Ones?
Vaccination in backyard poultry can be somewhat confusing and challenging. Many vaccines are available for commercial poultry that aren’t appropriate for backyard poultry.
For example, live vaccines against infectious bronchitis (IB) and infectious lagyngotracheitis (ILT) can actually “revert to virulence.” This would cause an outbreak of disease that can spread beyond the vaccinated flock.
In addition, the potential for new variants can result from reassortants between wild-type and vaccine strains making it even more difficult to treat affected poultry. For these reasons, most poultry experts recommend against vaccinating against IB and ILT.
It’s only recommend that backyard-poultry enthusiasts use in order of importance, based on the prevalence of disease in backyard flocks.
The following is a brief summary of all three of these vaccines with a focus on when to use these vaccines in chicks and as young birds (up to 10 weeks of age).
Marek’s Disease Vaccine
Vaccination against Marek’s constitutes a great example of successful disease control in veterinary medicine. However, because the virus is so prevalent in the environment (e.g., infection of chicks can occur almost immediately after hatching), the ideal times for vaccination is in-ovo (in the egg) administration on the 18th day of incubation or by subcutaneous administration at 1 day of age.
If you purchase chicks from a feed-supply store or hatchery, try to get chicks that are in-ovo vaccinated or vaccinated at day 1 of age by the store or hatchery.
If you hatch your own eggs, the in-ovo vaccine isn’t an option. You won’t have the necessary machinery to vaccinate your chickens this way. Luckily vaccination at day 1 of age provides effective protection.
Administration
You can purchase the lyophilized herpes virus of turkey (HVT) vaccine at many feed-supply stores or online. Reconstitute the vaccine and give subcutaneously (aka underneath the skin) at 1 day of age.
Unfortunately, the lyophilized HVT vaccine is the least effective of the Marek’s vaccines because of when it’s given relative to the in-ovo vaccine.
Marek’s vaccines are very effective in preventing Marek’s disease and the resulting tumor formation that Marek’s disease typically causes. But the vaccine isn’t considered “sterilizing.” Therefore, it doesn’t prevent infection and/or shedding of the pathogenic Marek’s virus.
In addition, due to the neutralizing effect of maternal antibodies on HVT, this vaccine can prove ineffective in chicks. This depends on the vaccine status of the hen or in situations of severe Marek’s field exposure.
Regardless of vaccine status, place day-old chicks in thoroughly decontaminated areas to allow vaccinated birds time to develop immunity.
The virulent forms of Newcastle disease (vND) are serious, highly contagious and deadly in birds. In addition to biosecurity, consider vaccination against this disease, especially in geographical areas near affected flocks.
Administration
You can often find vaccines for the LaSota and B1 strains available in feed-supply stores. Just make sure they’re licensed in the U.S.
In addition, follow the instructions and/or consult a veterinarian. The best way to deliver the vaccine is via the eye-drop method. Also, know that the vaccines can produce some mild clinical signs, including a drop in egg production and mild respiratory signs.
Vaccinations against vND often need to be given at least twice a year to remain efficacious after the initial vaccines at 18 days of age, 6 weeks and 12 weeks. Again, vaccination isn’t a substitute for good biosecurity, the best way to prevent your flock from getting infected from all infectious diseases including vND.
LaSota and B1 vaccines only protect against disease. This means that your vaccinated birds, if exposed, can be asymptomatic carriers. For this reason, if you take your chickens to poultry events, don’t vaccinate them against vND because you may asymptomatically spread vND!
There are many different strains of avian pox. However, in North America the most common type of pox virus associated with poultry is dry pox. Mortality or death is uncommon. But the drop in egg production and/or the downgrading of the carcass due to skin lesions can deliver significant economic repercussions.
The virus typically spreads in two ways. It can spread via mosquitoes, which get the virus from feeding on an infected bird and then feeding on other birds in the flock. It can also spread through contact from the scabs of an infected bird with an unaffected birds (i.e., interflock transmission).
Also, the virus can transfer on shoes, clothing, equipment and other fomites.
This is especially significant for operations with mixed-aged flocks. Susceptible younger birds are often placed with older birds in houses that haven’t been cleaned and disinfected.
If a flock is at risk—based on history of neighboring flocks—or if the flock has been previously affected by avian pox, vaccination should be considered in addition to mosquito control.
Administration
Vaccinate chickens via a wing-stick method, using a two-needle applicator. Examine vaccinated birds for “vaccination takes” (i.e., an area of swelling and scab formation at the injection site) 7 to 10 days after vaccination. You can vaccinate a flock of chickens starting at 1 day of age with some of the attenuated vaccines.
However, in most cases you can wait until 4 weeks of age. Give a booster 1 month before egg production starts.
Vaccinate at-risk flocks annually—ideally in the spring or summer, because the disease is more likely in the fall and winter—if pox has been demonstrated in the area. Use both the pigeon pox vaccine in combo with the fowl pox vaccine to achieve maximum coverage.
Regardless of vaccination status, you absolutely need to follow good biosecurity practices. These include simple steps such as:
washing hands and scrubbing boots before and after entering a poultry area
cleaning and disinfecting tires and equipment before moving them off the property
isolating birds returning from shows for 30 days before placing them with the flock
Vaccination for the diseases mentioned work best as part of a general strategy focused on protecting our birds from infectious diseases.
This article originally appeared in the January/February 2022 issue of Chickens magazine.
My family and I wanted chickens for years, but it never seemed like the right time. Once the spring of 2020 rolled around and all travel plans were canceled, we decided to get our own flock established. We were all home more than ever before and finally had the time to invest in such a project—including making and serving tasty treats for a new flock of chickens.
We live just outside of Minneapolis, Minnesota, and our home is in a residential area, which limits the number of chickens we can have. The city ordinance only allows three hens and no roosters (unless your neighbors don’t complain, which they did).
So, we have three hens—an Easter Egger, a Gold Star (a hybrid between a Light Sussex and Rhode Island Red) and a California White.
All breeds were decided upon by what their adult weight would be (our space is limited) and by their cold hardiness (we often get negative winter temperatures). Between the three hens, we get nearly 800 eggs per year, which is more than enough for our small family.
With 800 eggs, we always have enough extra to share with family, neighbors and friends.
Personality Plus
Before owning our small flock, I had no idea that chickens had such personalities. Even from the first day they hatched, they had distinct personality traits.
Phyllis was the sweet, most lovable chick. Smarty Pants was much smarter than the others (she was born one day earlier, and it showed). And Little B. was—well, you get the point. They’ve become a part of our family.
I enjoy their “help” in the gardens and their silly chicken antics. Smarty Pants loves to sneak into my landscaped mulched areas when I’m not looking and scratch around, even though she knows it’s off limits to her. Little B. loves to hop up the ladder of my daughter’s swing set and take in the view from the highest points, and Phyllis loves to walk into my gardens and take a quick bite here and there of my kale, chard, broccoli and cauliflower.
Phyllis thinks she’s being sneaky, but the truth is that I don’t mind one bit and am happy to share.
I especially enjoy early mornings in the summer with them, before the sun rises and heats up everything. I let them out of their poultry pen, and they tour the gardens with me, while I enjoy a mug of coffee. Those mornings are my favorite.
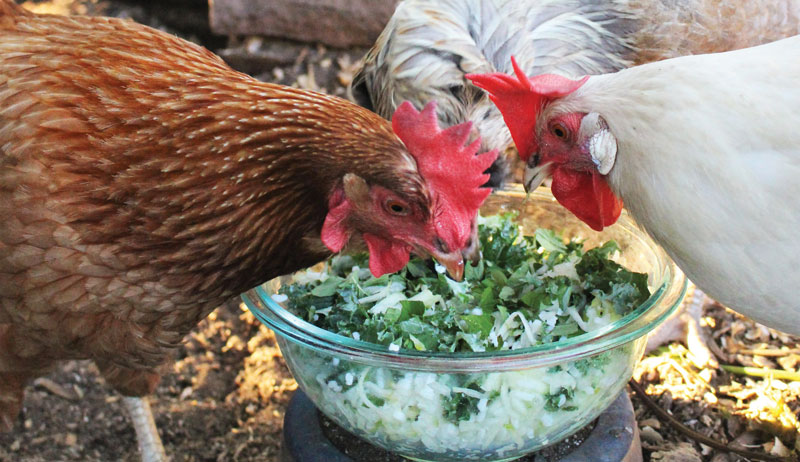
Five of my favorite treats follow that we occasionally make for our adult chickens. Please note that treats are to be given in moderation, and hens shouldn’t have more than a couple tablespoons of treats per day.
Whenever we cook up a batch of organic rice, I always reserve a little for the hens. Then I mix in whatever chicken-friendly scraps I have and add whichever produce I need to use up, such as grated zucchini, chopped kale, chard or other leafy greens.
I continue adding in whatever I have on hand—unsalted nuts or seeds, chopped apples, mashed bananas or other fruit—and then I mix in some herbs. My hens especially enjoy oregano.
I stir it all together and top it off with some dried mealworms or dried fly larvae and some oyster shells. There is no measuring required for this recipe, just a little of this and little of that, and our chickens adore the yummy treats. Plus, it’s a great way to get rid of some kitchen scraps.
Treat 2: Fruit & Veggie Garland
Celebrate the holidays with your hens or celebrate “just because.” Start with good strong string or wire. Then find a tool to push through the fruit and vegetables. I made a large needle out of wire, but a screwdriver or large sewing needle would work as well.
Tie a knot in the string with at least a 6-inch tail and begin threading a variety of chicken-safe fruits and vegetables onto the garland. Cut larger produce into 2- to 3-inch chunks.
Keep the garland 18 inches or shorter so that it doesn’t get too heavy, then tie another knot, leaving at least a 6-inch tail. Attach the garland to the chicken wire/fencing, and watch the hens enjoy their special treat.
Be sure to keep an eye on the hens while they eat, and remove the string/wire once they are finished snacking. String is unsafe for chickens to consume.
Garland ingredients your chickens will love include treats such as Brussels sprouts, grapes, apples, zucchini, cucumber, lettuce, squash, strawberries or watermelon.
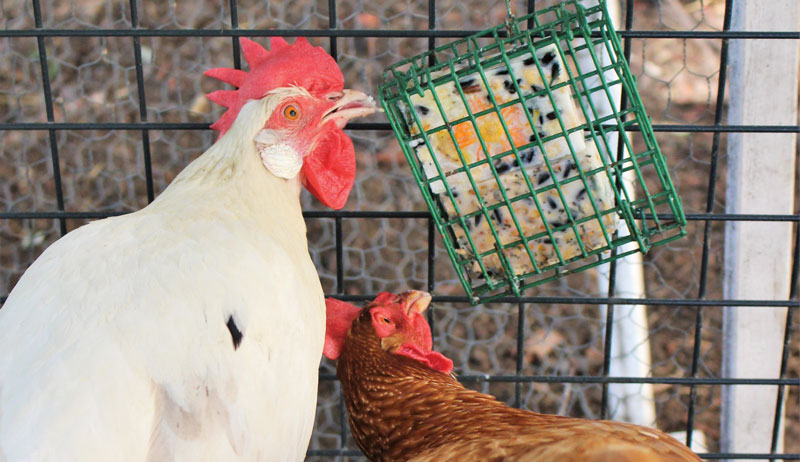
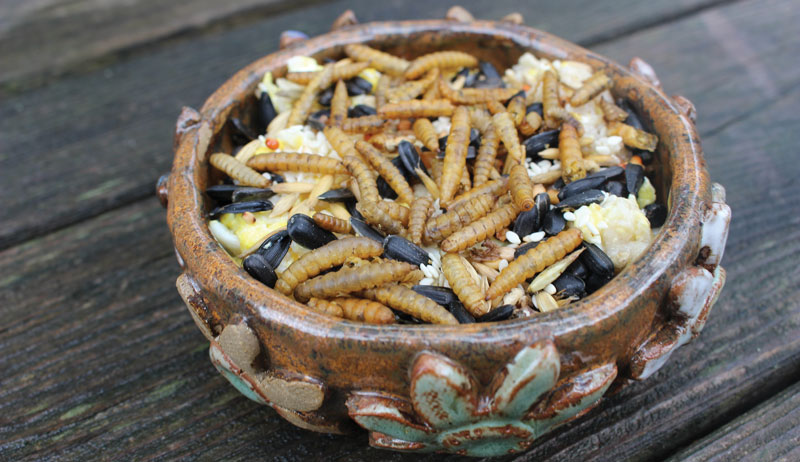
Treat 3: Suet Treat
For this homemade treat, use the following.
Ingredients
1 cup coconut oil
1/2 cup unsalted nuts, chopped (pine nuts, pecans, pistachio or peanuts)
1/2 cup unsalted seeds (sunflower, pumpkin, chia or sesame)
1/2 cup mixed, dried, unsweetened fruit (dried cranberries, apples, blueberries, apricots, raisins or bananas)
1/2 cup mix dehydrated vegetables and herbs (carrots, zucchini, oregano, basil or dried nontoxic flowers, such as marigold or calendula)
1 cup scratch mix
Stephanie Thurow
Preparation
In a medium-size bowl, mix dry ingredients together. Melt coconut oil in a small saucepan on low until liquid. Use a heat-safe glass or metal baking pan as the suet block mold (large enough to fit 3 cups of mix), and line with parchment paper.
I personally prefer to use silicone soap molds for my suet blocks (never used for soap-making, only suet), because the set suet bricks easily pop out without any trouble of lining them with parchment paper.
Fill the prepared mold with the dry ingredients, and slowly pour the liquid coconut oil over the mixture. Allow this to cool for many hours or move to the refrigerator to speed up the process.
The coconut oil will harden and turn white once completely cooled.
To serve, simply give the suet brick to the hens or hang it in a suet feeder. It’s best to avoid serving on very warm days, as the coconut oil will soften and melt.
Treat 4: Fermented Food
The first time I made fermented chicken food was when Phyllis cracked her beak. She couldn’t peck the way she normally did because it would induce bleeding. I decided to add water to her food and let it soak up overnight.
I quickly noticed the hens were extremely enjoying this softened food. Little did I know that I was not only making the food easier for my hens to eat but also making it more beneficial for them.
I learned in Anne Kuo’s book, The Beginner’s Guide to Raising Chickens, that by fermenting chicken feed, it allows the naturally occurring bacteria to unlock the grains—making their enzymes, proteins and nutrients more readily available for the body to absorb—just like in fermented foods that humans eat.
She goes on to say that studies show that fermented chicken feed has many benefits, including better intestinal health, stronger immune systems, shinier feathers, increased egg size, less smelly droppings and stronger disease resistance, including resistance to salmonella and E. coli.
I don’t ferment each meal for my chickens. However, I ferment 1 quart on a weekly basis and they very much appreciate it.
How to Ferment Chicken Feedfor a Small Flock
Measure 2 cups of chicken feed into a clean quart canning jar. Add water until the feed is covered with at least 2 inches of water and stir well. Add more water as needed throughout day 1 so that the feed stays submerged.
Cover with canning jar lid and ring and tighten. Ferment at room temperature, ideally between 60 to 75 degrees F, and keep out of direct sunlight.
Ferment between 1 and 5 days.
Burp the jar daily: Unscrew the lid briefly to allow built up gas to release (and avoid possible jar breakage), then screw it back on tightly. It’s completely normal to see little bubbles or even foamlike bubbling occur at the top of the ferment.
Use a clean spoon to stir down the feed, as it will push up toward the mouth of the jar as it ferments.
The fermented feed may have a sour smell, which is another normal sign of fermentation. To serve, pour the fermented feed into a clean dish for your flock as-is, or stir in any chopped fruit, veggies, leafy greens, oyster shells or treats as you see fit.
It’s obvious when my flock is approaching molting season because they begin instinctively trying to boost their protein intake. They search for bugs and worms in my landscaped gardens and spaces where they normally stay out of during the summer. They know many bugs hide within the mulch.
Stephanie Thurow
At this point, I help them by lifting pots and stones around the yard, so they can peck and scratch the soft soil full of insects that hide below. I also help them by making high protein snacks, such as this recipe.
This is another recipe that I generally don’t measure, I just add a little of this and a little of that. But here is the general outline that I follow.
Ingredients
scrambled eggs
garlic
oats
black oil sunflower seeds
hard red winter wheat berries (or other mixture of wheat)
Cook one egg per every two hens, and scramble with coconut oil and one garlic clove, chopped.
Stir eggs into 1⁄4 cup cooked oatmeal. Mix in 1⁄4 cup high-protein wheat and seeds. Top with brewer’s yeast and grub worms.
Because we live in a residential area without too much space to roam, we like to jazz things up with different snacks and treats for the chickens. I especially like to incorporate treats in the winter, when our ground is covered in snow and frozen solid. The chickens need more food during these months because they’re using energy to stay warm, and treats do the trick!
More Information
Grow Some Herbs
Chickens love herbs, and they make a great treats for a small flock to snack on.
Mint: Helps repel rodents and insects, safe for chickens to eat and is said to be calming for chickens.
Oregano: Known to be a natural antibiotic and immune booster, additionally it’s a guard against a whole host of common chicken illnesses.
Basil: Promotes a healthy respiratory system and a healthy immune system overall.
Lavender: Said to be a natural stress reliever and also an insect repellent. Can be chopped into food fresh or used dried.
This article originally appeared in the January/February 2022 issue of Chickens magazine.
If you’re shopping for a tractor, you’ve probably spent a lot of time comparing the specifications of different models. You’ve analyzed your needs and determined how much horsepower is necessary for cultivating fields and baling hale.
You’ve decided whether you need to invest in a front-end loader, or if you can get by without one.
But there’s another important question you’ll need to ponder: Do you need a four-wheel drive (4WD) tractor, or will two-wheel drive (2WD) be sufficient for your needs?
In many cases, 4WD is a big positive. But 2WD has its own upsides and shouldn’t be overlooked.
Let’s analyze the pros and cons of 4WD vs. 2WD and figure out which you need:
4WD
Pros
The biggest advantage of 4WD is increased traction. You wouldn’t drive a truck through deep snow without four-wheel drive, and much the same applies to tractors. When operating in mud or snow, 4WD offers better performance than 2WD.
The superior traction also comes in handy when using large implements for serious field cultivation. 4WD can decrease wheel slippage, saving wear and tear on the tires while simultaneously improving fuel economy. Tractors with 4WD also offer superior performance on sloping ground.
Cons
The benefits of 4WD come at a price. Generally, a 4WD tractor will be more expensive than a similar 2WD tractor.
There’s also a maneuverability aspect to consider. 4WD tractors excel on open fields where they can put their superior traction to use translating engine power into pulling power. They can’t turn as tight as 2WD tractors, so they’re less suited for working in tight quarters.
Cost savings are the big upside of 2WD tractors, since they tend to be less expensive than 4WD options. The money saved by choosing 2WD can instead be invested in other areas of the tractor, or in better implements and attachments.
Plus, 2WD tractors tend to be more maneuverable than those operating in 4WD. So if you’re going to be operating around the farmyard—in the garden, around trees and buildings, etc.—this can be a subtle but meaningful advantage.
Cons
You can pretty much take the pros offered by 4WD, inverse them, and list them as the cons of 2WD. Traction and fuel efficiency are reduced, especially in challenging conditions like mud or snow. And performance on sloping ground isn’t as good as with 4WD.
If maneuverability and cost aren’t major concerns, a 4WD tractor is going to offer premium performance, particularly in wet conditions. And if you’re a heavy tractor user performing lots of field work, the increased fuel efficiency can even offset the higher initial cost.
On the other hand, 2WD tractors have done good work for many years, especially when operating on flat, dry ground. Their tighter turning radius is useful when working in cramped conditions (or when mowing around trees in your yard). For light work on a hobby farm, a 2WD tractor might be all you need.
When Michele Sullivan Burns of MSB Poultry in Mineral Wells, Texas, met her first Crèvecoeur rooster, his hard-rock hairdo drew her in. A child of the 1980s, Burns knew she wanted to learn everything she could about the bird in front of her and add more like him to her flock. She brought the pompadoured roo home with her, named him Tommy Lee and thus entered the world of unique chicken breeds.
The reasons people get in to the world of rare and heritage breed chickens are as varied as the birds themselves. For Sullivan Burns and many others, it started with the wow factor. For others, like Christine McGoron of American Heritage Farm in Perry, Michigan, it started at the request of her 4-H participant son.
The reasons go on from there, from wanting to introduce more colorful eggs to finding breeds that are cold hardy. However, many of the reasons people continue to raise, breed and care for these rare birds tend to be much more unified.
Raising unique—and frequently endangered—breeds provides chicken farmers, hobbyists and enthusiasts a way to stand out.
Crèvecoeur
Crèvecoeur chickens’ oomph comes from the plumage atop their heads. The roosters have a V-shaped comb, and the hens and roosters sport a spiky pompadour, earning them their Casanova-style name, which is French for “broken heart.”
Before the World Wars, the Crèvecoeur was one of the most popular livestock breeds in France because of its high-quality meat. After WWII, it was thought to be nearly extinct.
Now, the Crèvecoeur is classified as “critically endangered” by The Livestock Conservancy, a nonprofit organization focused on preserving and promoting rare livestock breeds.
Difficult to Find
It can be especially difficult to successfully find, hatch and raise them. “They do not go broody, their hatch rates are minimal and for some reason, they like to die as chicks, even with all the right stuff done,” Sullivan Burns says. “Make sure you have time for them, good feed and the ability to either have an avian vet close, or be able to address medical needs when warranted.”
According to The Livestock Conservancy, these birds don’t do well in temperature extremes and thrive in more moderate climates. Lara Rice, who raises Crèvecoeurs at River’s Edge Farm in Fryeburg, Maine, says that during cold, wet, northeastern winters, their crests and beards can frequently form icicles. So it’s vital to keep them from getting wet.
In addition, their coiffed feathers can pose other problems, such as impeded eyesight and isolation when among other breeds.
“Our Crèvecoeurs are terribly low on the pecking order and are often picked at due to their attention-drawing crests,” Rice says. “They are like magnetic pompoms, just drawing other chickens in.”
For their flaws, though, Rice says Crèvecoeur chickens are extremely adaptable and resilient, as well as have excellent personalities. This breed is the friendliest she has ever raised—so much so that she refers to her Crèvecoeurs as her “other dogs.”
“If you want a chicken with looks and personality, the Crèvecoeur is a dream,” Rice says.
Naked Neck chickens, or Turkens, are exactly what their name implies. Their feathers stop just below their beak and restart at their shoulders, and their bald necks help them be more heat tolerant and resilient.
“They are very good at adapting to weather changes,” says Kim Lockhart, who raises Naked Necks in Tennessee. When she was initially researching what kind of chicken breeds she wanted to raise on her farm, heat and cold tolerance were both at the top of her wish list. This made the bird a perfect fit for her state’s four seasons and high humidity.
Lively Birds
Naked Necks also have a lively personality, Lockhart says. For Roxanna Willoughby of Winlock Naked Necks in Winlock, Washington, that quirkiness is exactly why she chose to raise them. Naked Necks are more intelligent than many other chicken breeds. And this sometimes gets them in trouble.
“If I leave the gate open and they get out of their area, they can be a challenge to round up,” Willoughby says. “With other breeds, I could simply herd them back in. Whereas the Naked Necks might refuse to go back through the gate unless they want to. They don’t recognize boundaries and may decide to escape a fence and go on a walkabout.”
Still, it’s that big personality that she points to as her favorite part. She likes to spend time interacting with her chickens each day. Raising them for meat and eggs has its benefits, too. They have 50 percent fewer feathers than other chicken breeds, which makes for easier processing. They also make excellent mothers and lay more than 200 eggs per year.
“Before I started raising them, I thought they kind of resembled vultures,” Willoughby says. “Now, fully feathered chickens look rather odd and boring to me. Once you raise [Naked Necks], you’re hooked.”
Naked Neck Stats
Size: Large Fowl
Egg Color: White
Country of Origin: France
Use: Dual-Purpose (Meat & Eggs)
The Livestock Conservancy (TLC) Status: Critical
Courtesy Winlock Naked Necks
Phoenix
Male Phoenix bring the pizzazz to the table. Just like peacocks or squirrels, these roosters put their money where their behind is, with long, colorful tail feathers. Before adding a Phoenix to your flock, though, make sure you’re up to the trials of these pretty birds.
“The first thing I tell potential buyers is that these chickens are very nervous, anxious chickens that can be wild and hard to handle,” says Lyndsi Greim of Sumner Knoll Farms in Dade City, Florida. “Out of all our breeds we raise, the Phoenix breed is the craziest. However, if Phoenix chicks are purchased and handled daily, they can become quite docile towards their owners.”
A Tale of Tails
Not only can the chickens themselves have rebellious personalities, but those lovely tails—the very reason many people gravitate toward the breed—require special care. The long tail feathers are extra sensitive and fragile. So the Greims modified their coops to have higher roosting bars, waterers and feeders to help keep them from getting damaged.
The Phoenix breed is best for those hoping to add ornamental or show chicken breeds. In addition to their keeping challenges, they’re also not great layers. The hens do make excellent mothers, though, says David Curneal, who raises a flock of Phoenixes in Eagle Mountain, Utah.
Even still, the main draw to the breed is all in the aesthetics.
“I love the appearance, with the long, flowing tails and intense bright colors,” Curneal says. “I’ve enjoyed my flock for many years. And I’m sure others will enjoy them as well.”
Phoenix Stats
Size: Large Fowl
Egg Color: White
Country of Origin: France
Use: Dual-Purpose (Meat & Eggs)
The Livestock Conservancy (TLC) Status: Critical
Courtesy Sumner Knolls Farms
Sultan
According to The Livestock Conservancy, Sultan chickens have the most combined defining features of any of the heritage chicken breeds. Just behold their large, fluffy crest, muffs and beard!
Other distinguishing structural features include:
V-shaped comb
five toes
feathered legs and feet
a pure white color
The breed gets its name from its origins in Turkey as the chickens Sultans would have grazing their gardens.
For Candi Hay of Frizzle Feathers Farm in Atlanta, Georgia, out of the 16 chicken breeds she raises, her Sultan is the most unique and eye-catching. She currently only has one Sultan in her flock. But Hay looks forward to adding more in the future.
Obvious Ornamentals
However, she emphasized that Sultans are an ornamental breed, as they tend to require more supervision and aren’t great egg producers. What they lack in function, though, they make up for in other positive traits.
“She is the chicken I never knew I needed,” Hay says. “She has a quirky personality, is very unusual look and is beautiful to watch. If you want a chicken solely with tons of personality and that’s beautiful to look at, this is your breed. I now think everyone should have at least one.”
Sultan Stats
Size: Large Fowl
Egg Color: White
Country of Origin: France
Use: Dual-Purpose (Meat & Eggs)
The Livestock Conservancy (TLC) Status: Critical
Consolvo Images/Shutterstock
Araucana
Araucanas can be a difficult breed to raise if your goals are to adhere to breed standards or produce show-quality birds. Each of their defining traits—blue eggs, ear tufts and rumplessness—comes from care to detail in breeding and genetics.
For example, the protruding ear tufts on Araucanas can vary from bird to bird. Some will have no tufts at all, while others will have one tuft. And some will have one on each side of the face.
The gene that carries the tufted trait, though, proves lethal in chicks in the homozygous state, or if they are passed two dominant tuft genes.
Benefits of Rumpless
For this reason, many Araucana breeders choose to breed a tufted to a nontufted to reduce fatality in chicks, according to the Araucana Club of America. The rumpless trait, while not lethal, can pose difficulties to the birds as well, in trying to pass the gene on.
Rumpless Araucanas are missing their last two vertebrae, their oil gland and their tail feathers. This leaves the bird vulnerable to extreme cold and wet weather. It also causes difficulty in mating.
Lastly, the blue egg gene does not carry through to all laying hens. Some will lay olive- or brown-shelled eggs, according to the ACA.
All these characteristics together contribute to the rarity of these chickens and the difficulty of raising them. For Jason Fishbein, of Araucana Addiction in Harleysville, Pennsylvania, that struggle is why he chose Araucanas.
“I breed for the love and the challenge of working with the breed,” he says. “I wanted to raise them because I figured if I was going to have chickens and spend time breeding, I might as well have a breed that is not common and can use help to improve in general.”
Outside of the difficulty of the breed, it’s worth giving Araucanas a shot, as they are intelligent and friendly birds. “The breed is an all-around great breed; [they] lay well and will always be a unique member to a flock,” he says.
While not a breed in and of themselves, frizzles make the list of weirdos within the chicken world because of their crinkly feathers. A bird is a frizzle—meaning its feathers curve up and out—when it carries a frizzle gene.
Any chicken can carry the frizzle gene. So these birds carry some of the personality traits of their primary chicken breeds. However, frizzle breeder Kim McNair, of Brighton, Colorado, says her frizzles are some of the friendliest chickens she’s ever met.
“They have the sweetest and friendliest attitudes,” she says. “They are a lot like small dogs, wanting to be held and getting belly rubs.”
A Note of Caution
Before adding frizzles to your flock, though, be sure you have precautions in place to keep them safe and warm. Frizzles of any breed tend to be more fragile and less cold hardy.
If you are interested in breeding frizzles on your farm, do so with caution. Frizzles should only be bred to nonfrizzles. If two frizzles are bred, it creates a frazzle, in which the bird’s feathers are brittle and the skin extremely sensitive.
In addition to this, other health and physical issues may occur in frazzles.
Frizzle Stats
Size: Large Fowl
Egg Color: White
Country of Origin: France
Use: Dual-Purpose (Meat & Eggs)
The Livestock Conservancy (TLC) Status: Critical
Courtesy Frizzle Feathers Farm
La Flèche
La Flèche are known for their large, protruding V-shaped comb. Their devilish appearance has earned them pseudonyms like “devil bird” or “Satan’s fowl,” according to Oklahoma State University. The chicken itself is black, with its large, red horn-shaped comb protruding from the head of both the hens and roosters.
La Flèche chickens are rare in the U.S., earning them the designation of critically endangered on The Livestock Conservancy’s list. This is in part because the chicken breed fell out of favor once brought to the U.S., as it’s not as cold hardy as other breeds.
Rare Is the Reason!
For McGoron, though, that rarity is why she chooses to raise the birds. Her foray into La Flèche began when her son wanted to raise one for a 4-H project. Soon, however, one chicken led to more La Flèche chickens finding their way onto McGoron’s farm, which now focuses exclusively on heritage livestock breeds.
McGoron believes strongly in helping raise the numbers—and awareness of—the originating poultry breeds from which others stemmed, which contributes to the sustainability of chicken agriculture. Plus, raising heritage chicken breeds is a great niche market, she says.
La Flèche Stats
Size: Large Fowl
Egg Color: White
Country of Origin: France
Use: Dual-Purpose (Meat & Eggs)
The Livestock Conservancy (TLC) Status: Critical
t.balikh/Shutterstock
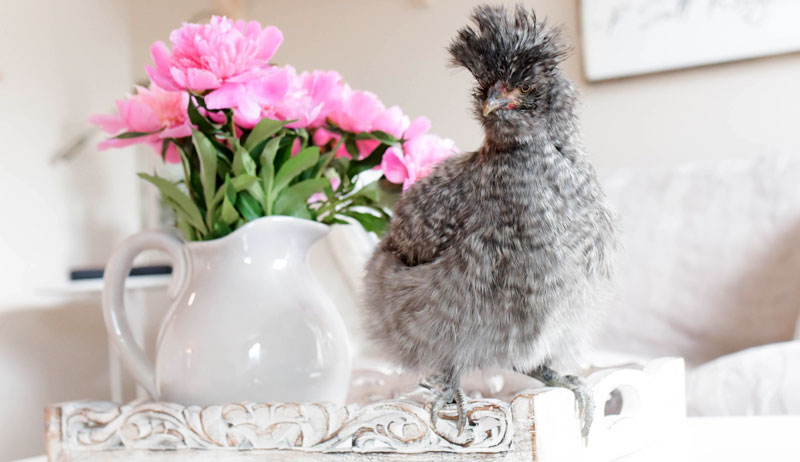
Silkie
Silkie chickens, while not endangered or particularly rare, are one-of-a-kind in the world of chicken breeds because of their fuzzy feathers. Though this is their distinguishing characteristic, other qualities—like turquoise earlobes and an unusual fifth, feathered toe—also set silkies into a league of their own.
Plus, according to many who raise them, Silkies may as well be pets, for their charming personalities and lack of exceptional egg or meat production.
Franchesca Duval, head chicken wrangler at Alchemist Farm & Garden in Sebastopol, California, says every chicken breed—and every chicken within it—is different and has its own energy.
“A Perfect, Benevolent Chicken”
However, the most overarching quality for Silkies is their sweetness. She describes Silkies as “the crown jewel” of mothers, complete with extra fluff and warmth to hatch their chicks. You could give a Silkie a rock to hatch, and it would sit there and try forever, Duval says.
They’re also excellent mothers to chicks that aren’t their own. You can give a Silkie a chick of any age or breed, and it will raise and love it.
“If there was a perfect, benevolent chicken that had the emotion of patience and kindness, it would be a Silkie,” says Duval, who describes herself as a midwife of chickens.
Silkies are also great with children. Duval constantly sees her kids and her Silkies hanging out together, with one of the chickens often riding around in the basket of a bike or the back of a wagon.
Overall, Duval recommends Silkies to anyone who wants to enjoy their chickens, especially those who are looking for small birds for a small space.
“You won’t find a chicken more personable than a Silkie,” she says.
Silkie Stats
Size: Large Fowl
Egg Color: White
Country of Origin: France
Use: Dual-Purpose (Meat & Eggs)
The Livestock Conservancy (TLC) Status: Critical
Courtesy Alchemist Farm & Garden
You Do You
No matter the size of your flock or farm, including off-the-wall chicken breeds is a good way to add something new, interesting and exotic. I hope this guide to some of the weirdest chickens can help you figure out where to start!
This article originally appeared in the January/February 2022 issue of Chickens magazine.
Trees are wondrous monuments to the natural world. Each stands as individual its own miniature ecosystem. If you have fields or a pasture on your farm that seem a bit bare, planting some trees may have crossed your mind.
In fact, the term called silvopasture refers to an integrated tree and grazing livestock production system. Silvopasturing can have beneficial impacts on the environment and your animals and even your bottom line. Let’s look at some aspects to consider regarding putting some trees on your pasture.
Pros:
Shade: If you have livestock, a large, mature tree or two is a convenient source of shade for animals in the heat of the summer
Windbreak: One large tree or a row of trees planted at a strategic location in your pasture can help reduce the impact of wind. This can particularly benefit livestock in the winter.
Erosion fighter: Established root systems help soak up water as well as act as a water filtration system. Leaf canopies can also help disperse rain.
Cons:
Care needed: Young trees need a lot of water to grow well and typically require protection from deer and sometimes grazing livestock. Cattle, sheep and goats in particular can kill a young tree by nibbling it to death. Either fence off new growth with a portable electric fence or utilize a physical barrier around the tree so it has a fighting chance.
Mess: Fallen branches and seeds such as acorns and black walnuts can create pasture debris, which can kill grass and needs to be removed.
Damage: Wind and heavy snow can cause branches to fall. If planted near fencing or a structure, this creates a property damage rick. Depending on how large and flat your area is, one lone tree can also act as a lightning rod. Carefully consider location when planting anything new.
If the answer to the first question of whether to plant a tree is yes, then the next question to consider is what kind of tree. A general recommendation is to choose something native to your geographical area, as it is more likely to thrive with minimal care.
Other considerations include mature size of the tree and how fast it grows.
One final aspect that can narrow the list down quite a bit is a tree’s potential toxicity to livestock. This is a huge topic worthy of its own series of posts. The list is long, geographically-specific and (in some cases) species-specific.
Usually, it’s easier to ask what’s not potentially toxic and go from there.
Many toxic trees are an issue if a branch falls and livestock nibble on wilted leaves. This is the case for red maples, whose wilted leaves are deadly to horses. Wild cherry species and peach trees contain cyanide. Ruminants seem to be more sensitive to these toxins than horses.
Oaks are also frequently categorized as toxic to livestock, but the threat depends on how much other forage is available. Pastures with adequate grass or browsing (for goats) are enough to keep nosy ruminants from nibbling on branches or acorns fallen from trees.
Acorns contain high levels of tannins, which can be toxic at high levels. These are bitter chemicals, and most animals don’t develop a taste for them unless they have nothing else from which to choose. (Pigs are a notable exception, as they enjoy and thrive on acorns.)
So what can you plant? Ash, cedar, hickory and beech are a few common North American trees that are livestock friendly. Talk with knowledgeable staff at your local nursery for more detailed information on native trees in your area, rate of growth, size and durability.
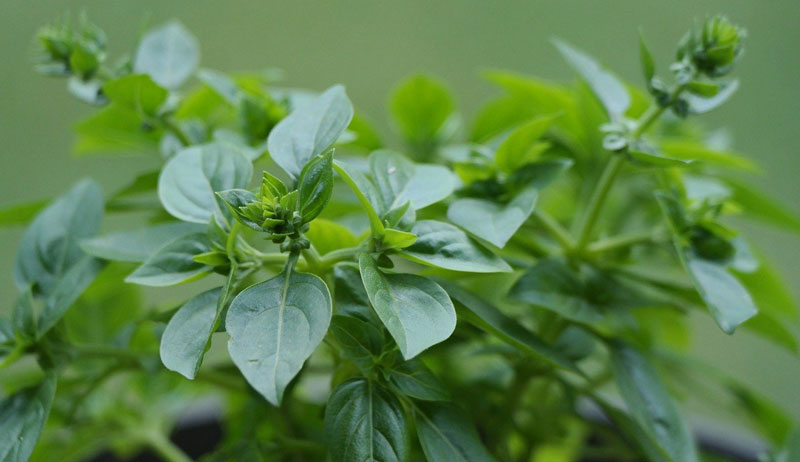
The peppery leaves of oregano are most well-known for their use in Mediterranean cuisine. But for centuries, this pungent herb has also been highly prized for its medicinal qualities.
Originally native to the Mediterranean region, oregano is now naturalized across much of the northern hemisphere. A member of the mint family, the herb is a perennial. However, it is sometimes grown as an annual in areas with harsh winters.
Oregano’s Latin binomial is Origanum vulgare. The genus Origanum combines the words ‘oros’, or mountain, and ‘ganos’, meaning brightness. This name, ‘brightness of the mountain’ fits an herb that cascaded across the sides of the highest hills in Ancient Greece, reflecting the morning light off the dew on its leaves.
The specific epithet, vulgare, typically defines the ‘common’ species within a genus. So many often refer to this herb as common oregano.
The plant is also sometimes referred to as wild marjoram, and it’s closely related to sweet marjoram, O. majorana. These two plants are often used interchangeably, although oregano has a much stronger flavor and aroma.
Two other species of Origanum available to the grower also bear mentioning; O. onites, the Greek oregano and O. syriacum, from Syria. Both are beautiful plants, similar in flavor to the common variety.
Either of these herbs would make a fine addition to the garden.
Oregano in the Kitchen
A list of oregano’s culinary uses would be almost endless as this versatile herb adds a depth of flavor and aroma to many dishes. But this herb most commonly pairs in the kitchen with tomato. This combination is practically ubiquitous!
You’ll find oregano in most tomato-based sauces, like marinara and pizza sauce, but it also brings delicious flavor to roasted meats and vegetables. The woodsy flavor adds vibrance to chicken and other poultry, and it also pairs well with other herbs in seasoning blends.
Oregano, of course, features in the customary “Italian Seasoning” blend found in practically every grocery store and spice cabinet across the country. But it is also an essential ingredient in the more elevated herbes de Provence, a traditional herb mixture from the Provence region of France.
Try infusing the herb, along with rosemary and thyme, in a high-quality vinegar. Let the herbs steep for one to two weeks. Blend with virgin olive oil to create a robustly flavored vinaigrette to drizzle on your salads and vegetable dishes.
Possible medicinal uses predate its extensive culinary history. Ancient Egyptians used oregano both topically and internally for a wide variety of ailments, including stomach upset, minor wounds, infections and skin irritations. It was also prescribed as an antidote for poisoning.
Oregano is still a popular herb in the modern apothecary. A tea brewed from its leaves helps settle digestive issues or ease a persistent cough. Craft a salve to use topically on cuts, scratches and other skin abrasions. An antibacterial herb, oregano also does a great job at healing wounds.
I explore the many medicinal uses of oregano in my book The Artisan Herbalist. If I could only choose a handful herbs to stock in my apothecary, this versatile ally would certainly be one of them!
Oregano is an easy-to-grow herb that should be included in every garden! It prefers full sun but will still do well in partial shade. Oregano is somewhat drought tolerant, and it’s also quite cold-hardy.
Once your plant is well-established, it should thrive for years to come!
You can certainly start your plants from seeds as they germinate quite easily. Start your seeds eight to 10 weeks before your last spring frost. Transplant the young seedlings out into the garden after the weather warms and soil temps reach around 70 degrees F.
This herb is incredibly prolific, and it’s so easy to propagate via root division. Simply separate an already established oregano plant into clumps, ensuring that each piece has some roots still attached, and replant wherever you want your oregano to grow. Be sure to keep the ‘new’ plants well-watered until they’ve settled into their new homes.
Harvest your oregano regularly to encourage new growth and strong, healthy plants.