A big part of farming? Planning for upcoming projects. On my Texas farm, I know that an upcoming project for late winter to early spring is going to be improving drainage for a field I just can’t work after a heavy rain.
The first step: finding the fall of the land in question. While the field in front of my house does appear to be flat, I do struggle to keep it drained. And with a wetland situated on the far end of the field, ideally water would drain from the land into the pond.
Laser Level
In order to determine the fall of my field, I’m going to use a laser level, shown in the video above. Some people call these a “transit,” but that’s not exactly what this is. Rather, it’s a laser plane that shoots a laser across the field, which we can measure at certain points to determine if the land rises or falls.
It’s important to set up the laser plane on a tripod and make sure it, itself, is level. This takes a bit of practice, but the bubble level built in to the machine does help.
I personally like to start at the high ground and work downwards, but that’s just me. I found the area I’d like to see downhill drainage in and took my first reading there. When I intercept the laser, I hear a noise that confirms my place on level ground. This allows me to set my reference point.
When I move downhill, though, I find that when I intercept the laser, I hear no sound. Lifting the device, however, I eventually hear a beeping sound, telling me I’m on lower ground.
If moving the device lower on the stick initiates the sound, though, I’ll know I’m on lower ground. That’s a little more labor intensive, though, which is why I like to start on the high ground.
Check out the video above to see what I do next, what the project tells me and how I can use the measurements I collect.
Palo Blanco Farm And Ranch(@paloblancofarmandranch)
The land that Palo Blanco Farm And Ranch sits on has been in Marcella Juárez’s family for over 160 years. Situated in Laredo, Texas, the venture now brings pioneering regenerative farming practices to the region using solar power and German Hugelkultur raised bed techniques to provide sustainable crops for the local community.
“My great-grandfather used to do dry farming and raise cattle and livestock,” recalls Juárez, who studied agriculture at college before revitalizing the family farm. “I knew I was not only gonna live on the ranch but wanted to make it productive and turn this into my career.”
We spoke to Juárez about the challenges of farming in a region prone to droughts. We also covered new ways to incorporate microgreens into cooking. And she gave us the scoop on the farm’s resident canine guardians.
Juárez says that water management and conservation techniques play key roles when running a modern ranch in an area often afflicted by drought.
“Our grow lights for our microgreens are solar powered along with our home,” she explains. “Microgreens are a very nutritious crop that requires very little water. We also have a hydroponic greenhouse, which drastically reduces the amount of water we need to grow. Hydroponic growing can reduce water usage by up to 90 percent.”
Palo Blanco Farm And Ranch’s commitment to regenerative farming methods involves use of hügelkultur raised beds.
“It’s a practice born out of Germany and also referred to as lasagna gardening because you have layers within your bed,” explains Juárez. “So that’s going to continually feed your soil.”
Juárez says that the local community enthusiastically consumes the microgreens the farm produces.
“Especially down here with Mexican culture, you see people use them more than just a garnish,” she says. “People use them in their cooking the way they’d traditionally use the herb cilantro—so in their salsas and beans and rice. Microgreens are being used beyond just a garnish you throw on top of something.”
Bear and Ruby are a couple of resident canines at Palo Blanco Farm And Ranch. The pair gladly took on the official role of heads of security.
“They alert us to anything going on, like rattlesnakes,” says Juárez. “They can be hit or miss when it comes to helping with the animals—they love to chase! But they really are a benefit living out here on the ranch where it’s very isolated.”
“The land has been in our family for over 160 years,” says Juárez, reflecting on the rewards of being involved in a family farm. “Interest has waned at times. But we’re here and continuing that tradition and also transforming it through sustainable methods.
“The community has been so receptive to what we’re doing. And so many people have told us what we’re doing is needed,” she adds. “So to see we’re impacting the community and see the community wants what we’re doing makes everything so meaningful.”
It’s such a thrilling feeling to sit down with a fresh new paper planner. It’s a time where many possibilities of what “can be” combine with lessons learned resulting in a surge of determination and hope for the new year. Nothing beats the feeling of crossing off items on to-do lists, making notes in margins and visually seeing and memorizing what lies ahead in your week.
But how can you find a planner that fits your hobby farming needs? Is it even possible to combine animal records, meal planning, gardening, goal setting, finances and canning?
The answer is yes! We’ve found three options to make 2022 the most streamlined, efficient and successful year possible.
We’ve reviewed The Homestead Journal Planner, The Farmhouse Planner and the Old-Fashioned On Purpose planner for 2022 and aim to guide you to find your perfect planner. First we will introduce you to each, and then share where we think each one shines best in comparison to each other.
The Homestead Journal Planner
The Homestead Journal Planner ($55) is Homesteaders of America’s flagship product. It contains everything necessary to track, plan and journal on your homestead.
There’s nothing left out in this homestead planner, which acts more like a handbook for your farm. Several areas for journaling suggest you should keep the planner to reference for years to come.
Homesteaders of America is the authority on all things homesteads. So naturally this manual reflects that, providing educational tidbits to learn as you go. HOA focuses on helping you make your homestead a business, and as a result there are several tools to review and plan finances. There are even sections for you to delegate projects or duties to others, which can help management for business owners.
For readers with animals, this one has the most thorough tools for animal records. The planner also includes:
2022 goals and projects worksheets
2022 dates to remember
Seasonal to-do list
Website login records
Important contacts
Monthly financial overview
Daily rhythm printable
Monthly calendar plus notes/to-do/projects
Weekly Calendar plus notes/projects
Daily journal entries
Weekly meal plan
Weekly planting and harvesting schedule
Monthly financial records
Monthly goals and habits tracker
2023 year at a glance
Monthly egg tally
Monthly harvest production record
Homestead production and expense records
Monthly pantry and freezer inventory
Livestock health records
Garden planning
Seed inventory and sowing schedule
Home canning cheat sheets
Curing records
Herbal inventory
New this year: spiral binding, tabs, durable wrap cover
Farm wife and mompreneur, Jessi, designed The Farmhouse Planner ($65) to be the “farmwives’ best friend.” Opportunities to plan field meals, kids activities, date nights, garden maintenance and everything in between are in this planner along with inspirational Bible verses and quotes to inspire you.
With several inventory list pages, you will never forget what you planted, saved and canned. The color photos she includes add a special personal touch, like you’re sitting down with one of your girlfriends.
It is the most compact and easy to grab and use, since it is a very practical size for sticking in your purse or tote. The monthly tabs make it easier than the others to find your place.
The homestead planner is offered in three different designs, with a daily or weekly option. The daily option offers hourly planning 6 am. to 9 p.m. Other features include:
January 2022 to December 2022 monthly calendar views
Daily calendar planning
Hourly schedule from 6 a.m. to 9 p.m.
One day per page, shared weekend pages
Black, sturdy wire binding
Hardcover matte finish
Meal planning
To-do lists
12 monthly tab dividers
Four specialty tabs (Farmhouse Goals, Spring Planting, Fall Harvest and The Journey)
Farmhouse contacts
Goal planning/tracking
Garden budgeting worksheets
Canning planning
Freezer/pantry inventory
Companionship gardening tips
Livestock processing planning
Farmhouse reminders to keep you on track
Journaling pages
Convenient size of 7 by 9 inches
Old-Fashioned on Purpose Planner
The Old-Fashioned on Purpose Planner ($65, digital version $24) author Jill Winger is known as the Homesteading Mentor. Her goal is to teach people how to grow their own food, ditch the grocery store, and create a healthier life through modern homesteading.
She creates podcasts, blogs, online courses, cookbooks and supplies. She claims this planner is her “number one secret to keeping all the balls in the air.”
Cooking is a priority for this planner (naturally), as Jill creates recipes and cooking techniques throughout all of her content. If you want to become better at homegrown cooking, this planner will help you.
In addition, she is very project focused and allows several opportunities for you to prioritize projects and keep them moving forward. And list makers can really get their fix, with several areas for list creating.
Daily planning hours are 6 a.m. to 10 p.m. Covering every detail, Jill provides videos on how to use the planner for those that want to make the very most of it. Features include:
Three questions you must ask yourself before selecting a homestead planner:
How Convenient do I want my planner to be?
If you want an easy “grab and go” planner, The Farmhouse Planner is for you. It’s not overwhelming to open each day, the cover is the most sturdy of this class, and locating your place via the tabs is a great feature.
And with its monthly tabs, you won’t need a bookmark to keep your place (as you will with the other two).
What am I planning?
If it is more than just your day-to-day appointments and shopping lists, you will want to choose The Old-Fashioned on Purpose planner or The Homesteading Journal.
Breeders and bookkeeping homesteaders will appreciate the animal records and financial pages most in The Homesteading Journal.
Canners and cookers will appreciate the Old Fashioned on Purpose pages, which educate and not just record.
Although both of these planners contain pages on canning and finances, each has a little more focus on what I’ve mentioned.
What is my planning strategy?
Research and decide if any of the following “trendy” planning strategies are for you:
time blocking
time boxing
bullet journaling
priority-based tracking
deep work and shallow work
the GTD (getting things done) method
(others)
You’ll find many resources out there to guide you to find best way to manage your time. If you’ve never been a “planner addict” or if you feel like you have never found the right planner, spend time researching time management methods. Once you discover what works best with your work style and personality, then you will be able to select a planner.
In conclusion, all of these are wonderful additions to your hobby farm planning. They all include basic resources for gardening, cooking, meal planning, list making and day planning.
Once you determine what level of time and attention you want to give your planner (and what your number one focus is each day), then you will be able to make the best decision for yourself.
When I planned a surprise weekend away for my husband Jae and myself—our first couples’ getaway in six years—I chose a destination I’d spent a lifetime hearing about: Las Vegas. From countless sit-com scenarios to captivating travelogues, I had great expectations for Sin City.
Casinos, of course, with high-stakes gamblers wagering into the morning. Dazzling shows featuring magicians, glamorous showgirls and internationally renowned entertainers. Elvis impersonators on every street corner. Wedding chapels at every intersection.
And chickens.
Chickens?
Okay, maybe not chickens.
I really wasn’t looking for chickens in Las Vegas, honestly. It was our first afternoon there, and I was in the Welcome to Fabulous Las Vegas gift shops. There are quite a few locations, but this one was in the Forum Shops at Caesar’s Palace.
I was looking for souvenirs to bring home for the kids, and it so happened that this particular store had an entire section for candy. Not that I was going to bring the kids candy, fully knowing that their stockings would soon be stuffed with treats. Still, one particular sweet caught my attention: gummi chicken feet.
Seriously?
I had just watched a program on Food Network in which chicken feet were a key ingredient. Sorry, not my cup of tea. And now here were gummi chicken feet, taunting me.
I asked one of the sales associates if people actually purchased these, given the dozens of other confections available. To my surprise, she told me they were one of their top selling sweets, after jelly beans.
She had no idea why. But she informed me that “everyone loves them.” Sure enough, as I looked through the keychains, magnets and T-shirts, I saw not one but four people buy these gummis.
I wasn’t one of them. But, as longtime readers know, I see chickens everywhere. And now my poultry sense was tingling, heightened and on the lookout for the chickens around Las Vegas.
I didn’t have long to wait. The next morning, the Comedy on Deck tour we took to Hoover Dam stopped at historic Boulder City. There, just a block or so from the historic Boulder Dam Hotel, I had the second chicken encounter of my trip.
An egg encounter, actually.
Sculpted by artist Kimber Fiebiger, “Eggcited” features Humpty Dumpty sitting atop a stack of egg-related books, including “Unscrambling Taxing Problems” and “Off the Wall Thinking.” It was quite possibly the last type of statue I expected to see in a town that commemorates the heart-wrenching history of the Hoover Dam. But I suppose a little levity is always welcome.
After this, it was almost as if chicken-related items jumped out at me all around Vegas. There was the person dressed in a chicken suit standing outside Planet Hollywood, hoping to pose for photos for a handout. (I do believe that Captain America, the Flash, and Batman had better luck with the tourists.) There was Eggslut, a modern, egg-centric cafe located inside The Cosmopolitan. There was the blingy, brightly lit and blaring slot machine featuring flapping white chickens apparently laying golden eggs. (Sorry, no photos allowed inside the casinos.)
And then there was that fabulous pair of sterling-silver egg cups at Tiffany’s, for which I’d have to sell 360 dozen eggs in order to afford their purchase price.
Lucky Ladies
On our last evening in Vegas, Jae and I strolled Las Vegas Boulevard. We took in all the lights and sights that the Strip has to offer. There is so much more to see and experience than what we managed to see during our three days there.
We want to go back, and not just to once again experience the sensational brilliance of the Strip. We also wish to discover the real Las Vegas beyond the boulevard: the one with nearby snow-capped peaks and red-rock canyons. The one where residents can keep backyard birds.
Yes, you can keep up to 10 hens even in the most densely populated residential districts of Las Vegas. I never would have even suspected this had I not struck up a conversation with the casino security guard who stopped me from taking a photo of that chicken slot machine. It turns out he and his wife keep a quartet of bantams in their backyard.
But then again, anything goes in Sin City, even chickens … although most Las Vegas visitors will think of the 6-foot-tall White Leghorn standing outside celebrity chef Richard Blais’ restaurant, The Crack Shack, rather than the backyard variety. Often decked out in local sports-team attire, the Crack Shack chicken is hard to miss.
We look forward to seeing it—and other poultry points of interest—the next time we visit.
Listen in as SharonStone—an urban farmer at Two Sons Farm in Lexington, Kentucky, and coordinator of the Woodhill International Market—tells us about serving the community through gardening education and increasing access to farm-fresh food.
Sharon is a retired teacher and has the most incredible community of people working alongside her to bring fresh food to the Woodhill neighborhood—with something like 32 countries represented in the local school—in a sliding-scale market. She also tells us how she got her start growing food as part of a farmer mentorship program with the Seedleaf urban farming program.
Celtic mythology considered the birch a tree of beginnings often thought to symbolize renewal and purification. It’s interesting to note the tree is a pioneer species, and one of the first saplings to become established in an area recently cleared by fire.
Surely the Celts observed birch’s proclivity to thrive in these environments. This tenacious behavior no doubt helped to shape their beliefs about the tree.
Birches are deciduous, hardwood trees widespread across the northern hemisphere, with more than 60 identified species. And the trees provide a wide range of applications including timber, to make paper, for crafting medicines and as ornamentals.
Many species are short-lived, but they are still a welcome addition to the landscape. From syrup to birch leaf tea, these decorative trees offer both beauty and functionality to those that either grow or forage their wares.
In the Kitchen
You can eat many parts of the birch tree, though you’ll find some parts more palatable than others. Harvest young leaves to consume fresh or steamed. Same with the small twigs—though you may need to cook them a bit longer.
Indigenous foragers have long utilized the inner bark to make a non-rising flour. The flavor is reminiscent of wintergreen. And the sweet birch, Betula lenta, is widely thought to be the most flavorful.
Much like sugar maples, birch trees can be tapped in the spring for sap collection. This sap is loaded with micronutrients and can be enjoyed as is or boiled down into syrup. Due to birch sap’s low sugar content, it takes approximately 100 gallons of birch sap to make just 1 gallon of syrup.
Compare this to maple’s 40:1 production ratio and you’ll understand why birch syrup fetches such a high price on the market. It often sells for more than $200 per gallon!
Birch trees offer a wide range of uses and benefits for the herbal medicine maker. The tree has long been utilized for its anti-inflammatory, antiseptic and astringent qualities.
Boil the young leaves in water to create a potent mouthwash to help prevent gum disease and bad breath. You can use this same decoction as a facewash to help soothe irritated skin and problematic acne.
Twigs steeped in 100 proof vodka make a tincture useful for relieving sore and tired muscles. This anti-inflammatory action derives in part due to methyl salicylates found in the wood. These same compounds give birch that familiar wintergreen flavor.
You can find birch trees growing in temperate and boreal climates across the northern hemisphere.
Typically these trees don’t live long, but lifespans vary from one species to the next. Yellow birch, B. alleghaniensis, can live well over 100 years. White birch, B. papyrafera, however, may only live to be 40 to 50 years old.
Generally speaking, you can grow these trees quite easily. They prefer full sun but also enjoy moist, cool soil. Try to place the trees on the east or north side of your property so that your home can provide afternoon shade.
Birch are thirsty trees and will need to be well-watered in order to thrive. Consider using wood chips or leaf compost to mulch around the base of the trees to help conserve soil moisture.
With their striking appearance, birch trees can be enjoyed as an excellent focal point for your landscape design. Or you can use them to create an intriguing visual effect along walkways or garden paths.
Over the course of New Year’s Day weekend, I committed a few hours to one of my favorite annual pursuits. I poured through the seed and plant catalogs that arrive by mail each winter, planning out the coming year’s garden.
This is always an enjoyable exercise. But it was made even more fun this year by the knowledge I am prepared to pursue a significantly expanded garden. No fewer than 15 new raised beds are waiting to be filled in the main garden. I will also install four extra-large raised beds within the protected confines of my orchard deer fence.
One Problem
The orchard beds are great because they provide a lot of room for growing large plants like pumpkins and watermelons. There’s only one problem. The orchard isn’t as close to a water source as the garden.
Since I’m doubling the number of beds from four to eight for 2022, I’m going to need twice as much water to keep the plants suitably supplied.
This is going to require a little thought. My current solution, which works well, is to place a 35-gallon leg tank filled with water in the back of a wagon and haul it to the orchard using a lawn tractor. But dispensing a tank by gravity takes time. If I were to purchase a larger tank to serve my needs—say, a 70-gallon tank—I’m apt to spend twice as long watering the garden beds.
During the peak of a busy farming summer, I’m concerned I won’t be able to find the extra time.
This is prompting me to explore other options. For example, I could purchase a second 35-gallon tank and dispense water from both tanks at the same time, cutting down on watering time for the expanded garden.
I’m also curious whether the tanks could provide enough water pressure to work effectively with soaker hoses. If I could thread soaker hoses through each bed, I could theoretically open the tanks and let the water flow evenly through each bed without supervision. This would allow me to work on other orchard projects in the meantime.
Of course, time isn’t the only question here. Fresh water weighs about 8.34 pounds per gallon. My 35-gallon leg tank tips the scales at nearly 292 pounds. That’s a fair chunk of weight to haul around with a wagon and lawn tractor.
Part of me wonders if doubling the payload to 584 pounds is asking too much of my tractor. I’ll have to consult the user manual and see how much weight it’s rated to tow. If it exceeds or pushes the limits, I may need to find a different solution.
In addition, I’m pondering whether I can install gutters along the top of my orchard deer fence to catch rainwater and guide it toward a rain barrel. The front section of the fence is made of wood and spans more than 200 feet.
During a heavy summer rainstorm, it might catch a fair amount of water that I wouldn’t have to haul to the expanded garden using the tractor and wagon.
Suffice to say, there are a lot of possibilities to ponder. I don’t know yet which option (or combination of options) will prove most suitable.
But one thing is certain. My expanded garden presents a fun logistical challenge to analyze while waiting for spring!
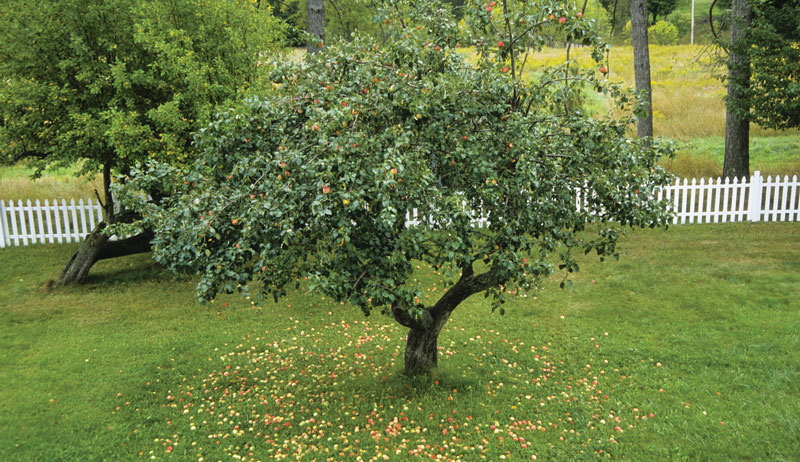
Imagine: You’ve found the perfect farm, a picturesque property packed with all the farming features you’ve dreamed of for years. There’s a cozy farmhouse, a weathered barn, a few small sheds, rolling hayfields … and an old orchard dotted with giant fruit trees!
Does this sound familiar? Mature fruit trees are a common sight on old farms. But age and neglect can prevent these trees from producing fruit the way they should.
Perhaps it’s been years because they were last pruned or fertilized or picked clean of fruit for that matter. Maybe weeds have grown up underneath, and pine trees have grown overhead, choking out and shading the fruit trees.
If you’re fortunate enough to have an old orchard on your farm, a little tender loving care might be all the trees need to turn back the clock and become productive again. The following steps will walk you through the basic process of restoring an old orchard to its former glory.
Take Stock
The first step is to analyze your old orchard and construct a game plan for restoration. Count the number of living trees, and identify the species to figure out the scope of the project.
You might find it difficult to identify the specific named varieties of apples, pears, plums, etc. growing in your orchard. If they’re producing fruit, though, comparing the appearance with older or heirloom varieties known to grow in your region may provide some clues.
The more important goal? Identify the species (an apple here, a pear there) and determine whether you have enough trees for proper blossom pollination. If only one apple tree has survived, and you see that several others have died, you may need to plant replacement trees to ensure fruit production.
Clear Under & Around
A neglected orchard might be overgrown with vegetation, so taming the budding wilderness is a must. Use a riding mower to bring grass and weeds under control or a brush hog, if small trees have taken root.
Clear more carefully around each fruit tree. Use a string trimmer mower or even hand snippers to protect the trunks from damage.
Larger Tasks?
Once the easy work is out of the way, consider whether any larger efforts are needed. Have those spruce trees south of the orchard grown tall enough to shade the fruit trees? Review your orchard at various times of day to see whether the fruit trees receive the minimum 6 to 8 hours of full sun they need for best performance.
If the trees are shaded too much—and if you’re handy with a chainsaw—give them more light by harvesting less desirable trees nearby. Or bring in professionals to handle the cutting and cleanup.
Mind the Windbreaks
Just be wary of cutting down windbreak trees, which may be planted on the west and north edges of the orchard. Windbreaks protect the trees and fruit from heavy winds. This serves to limit damage, conserve water and improve pollination.
If your orchard is unprotected, planting fast-growing windbreak rows a suitable distance to the west and north may improve the health and productivity of your fruit trees.
Once the fruit trees are out in the open, you can begin the actual rejuvenation process. Before pruning any healthy growth, focus on removing damaged, diseased and dead branches.
You can do this any time of year. It will go a long way toward improving the overall appearance of each tree.
How to Prune
When removing branches, try to cut as close to the point of origin (without cutting off the branch collar) as possible. Leave a smooth cut (rather than a protruding stub) that will allow the tree to heal.
And for large branches requiring a saw rather than loppers, make a small cut on the underside of the branch before switching to the top of the branch for the rest of the cut. This will prevent the branch from tearing bark away from the tree when it finally falls away.
Required Tools
Pruning loppers, a hand saw and a chainsaw will accomplish much of the work, though you may need a ladder, scaffolding and/or a pole saw to reach higher branches.
Safety comes first. Wear safety glasses and a long-sleeved shirt to avoid scratches. Move slowly and be sure of your footing and balance when handling tools, especially when working from an elevated position.
If in doubt, bring in professionals.
J. Keeler Johnson
Prune Live Branches
Arguably the most critical step in rejuvenating an old fruit tree is pruning healthy branches. The goal is to encourage fresh growth and open up the canopy for improved sun penetration and air circulation.
Left to their own devices, fruit trees tend to produce overcrowded, crisscrossing branches. These shade the lower crown and limit fruit production to the top of the canopy.
Best Time
The best time to prune healthy branches varies somewhat from species to species. Apples and pears should be tackled in late winter, when the trees are still dormant. Prune stone fruit trees after they wake in the spring, around (and even after) blossom time.
The hope in both cases is for the tree to respond with vigorous new growth, jump-starting the process of healing wounds and developing young branches and fruiting wood. Early summer pruning is useful for controlling overly vigorous new growth (including water sprouts; see below). But late summer or autumn pruning risks triggering tender growth that won’t have time to harden off before winter.
The exact pruning process will vary depending on the type of tree you’re working with, as well as its size, shape and vigor. You’ll come across enough pruning theories to fill a book. And indeed, books and/or online resources are the best way to find detailed and even step-by-step instructions for pruning specific types of trees.
For this article, we’ll aim to overview the process of pruning an overgrown apple tree, which includes the following broad guidelines:
Removing Suckers & Water Sprouts
Removing suckers & water sprouts is perhaps the best place to begin. Suckers sprout up from the roots, while water sprouts grow vertically (often from odd places) on the trunk and branches.
Both are considered detrimental to tree health. They crowd the crown and/or take away energy from more desirable branches.
Cut them off at any time of year.
Open the Crown, Reduce Crisscrossing Branches
Once you’ve removed any obvious problematic growth, you can turn your attention toward opening up the crown & reducing crisscrossing branches. Try to encourage the tree to grow a wide, spreading crown by removing branches that grow inward toward the trunk.
Aim to maintain a symmetrical balance as you proceed, with a roughly equal number of branches on each side of the tree. If two branches try to occupy the same space, remove one so the other can flourish.
Careful Cuts
Trees are good at sealing over pruning wounds with new tissue, especially if you’re cutting small branches close to their points of origin. Bigger wounds naturally take longer for the tree to seal. Make cuts larger than a couple of inches in diameter judiciously, since the tree may require several years to close the wound.
When cutting vertical growth, aim to make sloping cuts whenever possible so moisture will roll off the wound instead of gathering on a flat surface. The use of wound-sealing products is generally discouraged, since they can trap moisture (encouraging decay) and inhibit natural healing.
Two Kinds of Cuts
There are two main pruning cuts you can employ: thinning cuts and heading cuts.
A thinning cut removes the branch at its point of origin, eliminating the branch entirely. A heading cut shortens the branch by cutting it back to one of the lateral buds found at each leaf.
The terminal bud at the end of each branch normally discourages side buds from developing into branches. By removing the terminal bud (as happens with a heading cut), the lateral buds will develop into new branches.
Don’t Go Crazy
In your diligence to open up the crown, it’s important not to prune too much. Advice varies, but for healthy trees (overgrown but not struggling with obvious health issues), you might be able to prune between 15 to 25 percent of the branches in a given year.
But heavy pruning jobs are often reserved for young and vigorous trees.
Older trees are less able to bounce back from the stress of losing so many live branches. So 10 to 15 percent might be a healthier target. And if a tree is clearly struggling—from drought, disease or a lack of key nutrients—you might want to skip pruning entirely. Focus on improving its health first.
Paulette Johnson
Grow out the Bottom
If the tree is taller than you desire, and the lower branches are shaded and unproductive, focus your pruning on the top of the tree while leaving the lower branches largely intact. Allowing more sunlight to reach the lower branches will encourage the growth of new fruiting wood lower in the crown.
Just be aware the top of the tree will try to bounce back with vigorous new growth. Rather than cut back to the desired height in a single season, consider reducing the height gradually over the course of several years.
Maintaining the desired height will also require diligent annual pruning. You may need to prune in both the spring and the summer.
Proper pruning is surely the most imposing aspect of restoring old fruit trees. But it can be highly effective when executed with care and commitment.
Fertilize the Tree
A healthy (but overgrown) fruit tree might not need to be fertilized post-pruning. The root system shouldn’t have difficulty feeding the reduced number of branches.
Fertilizing at this stage might actually be counterproductive, spurning the tree to put on new growth at an overzealous rate that effectively reverses your careful pruning.
But if your old trees are failing to blossom and fruit, or if they show signs of nitrogen deficiency (such as yellowing leaves, small leaves or lackluster growth), feeding them with fertilizer can help them bounce back to peak form. Before applying fertilizers, it never hurts to conduct soil tests and/or tissue samples to determine exactly which nutrients your soil is lacking.
On the other hand, the presence of a mature orchard surely suggests there isn’t anything drastically wrong with your soil. So you may only need a general NPK fertilizer—containing nitrogen, phosphorus and potassium—to feed your trees and give them a boost.
Nitrogen is critical for the vigorous growth of healthy green leaves. Phosphorous contributes to the production of flowers, fruit and roots. And potassium is essential for a wide variety of functions.
Just make sure to check local and state laws regarding the applications of fertilizers before proceeding.
Fertilizer is best applied in the spring, around blossom time, so the nutrients are available during the tree’s busiest growing season. As with pruning, fertilizing too late in the year can prompt trees to produce tender growth that won’t harden in time for winter.
However, late fall—when the trees enter dormancy—is another option. If your soil doesn’t freeze during the winter, the roots will absorb the fertilizer and put it to good use in the spring.
When fertilizing, carefully read the directions to ensure you use an appropriate amount for the size of each tree. Exact instructions will vary depending on the product used. But the goal is to apply the fertilizer evenly beneath the drip line (the outer edge of the canopy), in a broad ring extending both underneath the crown and beyond the crown.
Granular fertilizers spread across the surface of the soil are effective and simple to apply. But heavy watering immediately afterward is necessary to help the nutrients disperse into the soil. Fertilizing before rainfall is an ideal strategy.
Worth the Effort
Rejuvenating an old orchard is often a multiyear project requiring time, effort and money to achieve. But the rewards—including the satisfaction of restoring an integral part of your farm’s history—can be well worth the investment.
More Information
Time for a New Tree?
As tempting as it might be to rejuvenate every old tree in your orchard, you may find that some aren’t worth the time, effort and expense. In some cases, you might be better off removing the old trees and replacing them with new ones.
The types of trees you have will play a role. Even if the tree is healthy, attempting to reinvigorate it with heavy pruning might not achieve the desired results.
Daniel Johnson
Species Matters
Apple and pear trees are considered the best candidates for restoration. But several stone fruit varieties—such as peaches, nectarines and apricots—aren’t as responsive.
Generally speaking, stone fruit trees are less likely to sprout new growth following the heavy pruning typically needed for taming overgrown trees.
Time for a Health Checkup
Another factor is the health of the tree. Unfortunately, trees don’t live forever, and there’s a difference between a neglected tree and a dying tree.
It’s important to determine whether the tree is suffering from rot. If the trunk and main branches have been hollowed out, the tree is likely near the end of its life. Even if the rot isn’t obvious, you may see mushrooms and other fungal growths sprouting around the base of the tree or on the trunk and branches.
This is a sure sign that disease has taken root and the tree may be fighting a losing battle.
At this point in a tree’s life, pruning is more likely to exacerbate stress than trigger a rebound. The best you can do for a dying tree is nurse it along with fertilizers and consistent watering to keep it productive for as long as possible.
However, if the possibility of the tree breaking and falling presents a safety hazard, you may wish to remove the tree preemptively and plant a healthy replacement.
Keep in mind that disease-inducing fungi can linger in the soil even after the dying tree is gone, so consulting a certified arborist before the tree is removed may be necessary to evaluate the risk to any future trees in the area.
This article originally appeared in the November/December 2022 issue of Hobby Farms magazine.
Alpacas, cousins to the llama, are beautiful, intelligent animals native to the Andean Mountain range of South America, particularly Peru, Bolivia and Chile. Long ago, only royalty received alpaca fiber.
Today, you can find alpaca fiber sold several ways:
Handspinners and fiber artists buy raw fleece.
Knitters often purchase alpaca yarn.
Fiber cooperatives’ mills collect alpaca fiber and process it on behalf of the producer.
Two Breed Types of Alpacas
Two breed of alpacas live in the U.S., varying primarily in terms of their fiber. The Huacaya (wuh-KAI-ya) is the more common of the two and has crimpy fleece. On the other hand, the Suri (SUR-ee) is more rare, with fleece that is silky and lustrous with pencil locks.
Adult alpacas stand at approximately 36 inches at the withers and generally weigh between 120 and 200 pounds. They don’t have horns, hooves or claws.
Very quiet and docile, these animals make a minimal amount of sound. They generally make only a pleasant humming sound as a means of communication or to express concern or stress.
Alpacas mostly communicate nonverbally.
They have very strong herd instincts and need the companionship of other alpacas to thrive, preferably three or more. Alpacas are livestock and shouldn’t be treated as house pets.
Fiber Friends
Each year, alpacas produce 5 to 10 pounds of luxurious fiber. No chemicals are employed either during feeding or during the industrial production of alpaca fleece into fiber.
Alpacas don’t require insecticides, herbicides and fertilizers, which pollute the groundwater.
You can use all fiber from an alpaca. Even the fiber from the lower legs, belly, neck, etc. makes great natural weed mats for placing around trees. Alpaca fiber is biodegradable.
This 100 percent natural fiber comes in 16 official colors, offering a full array of choices with no chemical dyes required. If you’d like to dye the wool, you only need 20 percent of a normal dye quantity.
Many people have successful alpaca businesses on small acreage. Environmentally friendly livestock, alpacas require less pasture and food compared to other livestock. Stocking density impacts the health of the animal, so owners need to carefully assess their space.
Vegetation, access to food and water, and shelter influence the amount of space needed.
Alpacas often defecate in communal dung piles. They may create three or four of these areas in a pasture, spread throughout about 10 to 20 percent of the pasture. This makes for easy cleanup, reduced opportunity for parasites and better overall hygiene in the herd.
Shelter requirements vary depending on the weather and predators in the area. As a rule, the animals need at least a three-sided, open shelter, where they can escape from the heat of the sun in summer and from icy wind and snow in winter.
Alpacas appreciate good ventilation. Owners have found that animals use large overhangs outside of the shelter more often than an enclosed barn.
In general, fencing construction and design is dictated by the threat of local predators. Also, fence openings need to be the correct size for alpacas to prevent injury from entangling their neck and limbs.
To learn more about the North American Alpaca Industry, visit their site here.
This article originally appeared in the November/December 2021 issue of Hobby Farms magazine.
When we first began butchering large animals with our community, the process could take multiple days! Of course, there are often several pigs or a couple of steers to be cut and wrapped. But the primary reason things took so long was our own lack of skill.
Only our neighbor Barry had extensive experience with the job. And, in any case, more than half our butchers at that time were children. Now those children are teaching their own children to cut sausage meat, scrape casings and grind fat for lard rendering.
And we’re all a lot better at our jobs!
Even so, there was then and is now a real air of festivity around butchering time, a feeling of community and plenty that makes even messy work, cold hands and feet, and long, tiring days part of the overall fun of the event.Friends come in from all over the county and even farther to help with this homestead harvest.
Everyone wants to do something, even the small children. And there are usually jobs for all.
Butchering time, unless you own a walk-in cooler, is a winter thing. And cold weather means hungry helpers.With so many folks on the farm, hospitality is important!Feeding the crowd takes planning and lots of preparation.
Here are some tips for a joyful butchering party celebration.
Come up with menus that can be prepared in advance, made in large quantities, and don’t require a lot of utensils. One-plate meals are easiest, and the fewer side dishes you need, the easier setup and clean-up will be.
Chili and corn muffins or pasta and garlic bread are good warm foods to stoke up your butchers for an afternoon of cold work. A hot oven stew full of meat and potatoes, or lasagne and salad, are also good options, especially if stove top space is taken up with other cooking.
Serving can be an issue with a large butchering party crowd. At our winter butchering event, the whole community seems to come out. But no table is big enough to seat us all!
If you can’t find room for the entire butchering crew simultaneously, divide the diners into teams and stagger seatings.Often we feed the smallest children early and then put them down for naps or send them out to play before the work crew comes in.
Then, when the outside workers have eaten, the kitchen folks get their meal before they clear away and start dinner.
Don’t forget paper products!Life is going to be a lot easier if you can use disposable dining ware.Go the extra mile and buy biodegradable products. You’ll know it’s more consistent with the good farm work you are already doing.
Shawn & Beth Dougherty
2. Definitely Delegate
Let several people help out with the food preparation and serving.Assigning different meals to the various households attending is one way of keeping the KP duty reasonable. Coordinate meals so the day stays interesting, and keep communication lines open.
Have folks who will make sure the little things don’t get missed, such as:
Is there plenty of coffee in the house?
Who is in charge of serving between-meal snacks?
What about paper products?
Drinks for the non-caffeinated?
Putting one person in charge of “stage management” for your butchering party means everyone knows where to go with questions.
Butchering is an event where you want speed and focus.When possible, put other activities on hold for the day or days.Reschedule appointments, lessons and sports to keep all hands available for the farm tasks.
Where it is practical, prep farm chores the day before to keep necessary tasks streamlined. Making sure stock water tanks are full, livestock are snug, and feed is ready and available before the butchering day will do a great deal to build focus and teamwork during this big job.
4. Dial up the Calories
Cold work burns a lot of energy, so plan snacks for mid-morning and mid-afternoon:cinnamon rolls and hot cocoa, coffee and doughnuts.
Hummus and carrots give a protein boost. So do brownies with lots of nuts.
Keeping hot drinks always available helps the outside workers stay warm, so we make sure the coffee pot is always perking and a pot of hot cocoa shares space with the lard kettle on the fire.
Have fun with this! Break a few dietary rules if you have to. A butchering crew deserves some indulgence, and this is a party after all!
A butchering party is one of the times when the farm gets to see the fruits of its work. So make this a celebration your community will look forward to all year!