If you met Jim Schultz at a farming conference, you wouldn’t place him as a relatively new farmer. In addition to having retired from a career in education, Jim is also an absolute fount of agricultural knowledge.
After a few minutes of chatting, you’d come away convinced that Jim is an organic farming educator somewhere, as opposed to a farmer who began his own operation after retiring from a different career.
An Uncommon Story
Although many people fantasize about leaving their desk jobs to start a career in agriculture, Jim not only took that leap but has found success on the other side. Red Shirt Farm is not a small, hobby operation (not that there’s anything wrong with that).
Rather, it is a rapidly expanding operation with big plans for the future.
Red Shirt Farm sits on 13 acres in Lanesborough, Massachusetts, in the Northwestern corner of the state. The heart of the farm is its no-till vegetable operation, which yields enough produce to support a 130-member CSA, a booth at a local farmers market and several wholesale accounts.
The farm also grows herbs, flowers, berries and fruit.
Red Shirt Farm
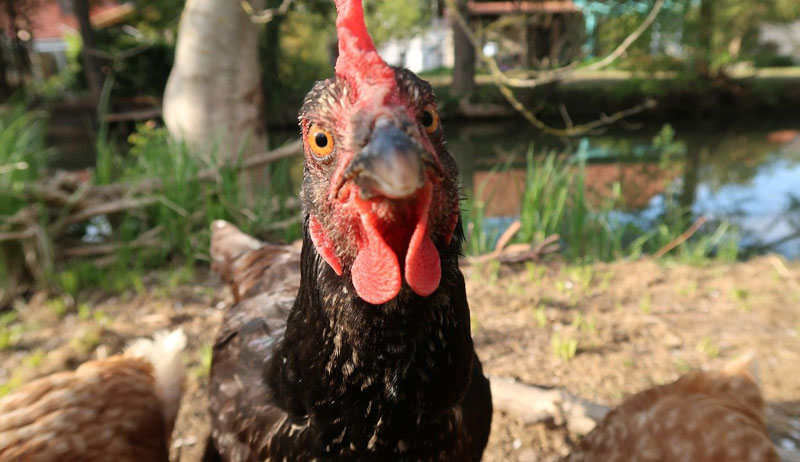
And Red Shirt Farm incorporates livestock into its farm ecosystem. The farm raises pastured pigs annually and breeds pastured chickens and turkeys for both meat and egg production. While Jim has been quietly improving and expanding the farm for years, more and more people have started to take notice.
ACRES USA recently profiled the farm in a cover story, and Jim is a not infrequent speaker for organizations like NOFA Massachusetts.
For many growers (myself included), it’s tempting to mine stories like Jim’s for the keys to success. What were the specific decisions that enabled him to defy the odds of establishing a successful farming business? Perhaps his use of certain grants to fund infrastructure growth? Or access to particular markets?
The truth, as with many things, is that there are no straightforward answers.
I worked at Red Shirt Farm for two seasons starting in 2017. The farm was different back then, but it’s future successes also felt inevitable. During my time there, the farm built its second high tunnel, opened its first wholesale accounts, and grew its CSA membership by 30 percent.
And each of those milestones that the farm achieved came about from countless hours of Jim’s work. Myself and several other young people worked on the farm both of those seasons, and Jim handily outworked us every day.
Beyond just working hard, though, Jim also works “smart” in a way that I’ve seen few other farmers pull off. His substantial knowledge of regenerative farming means that he wastes little time on tasks that aren’t necessary. Maybe Joel Salatin was right when he said you can tell everything you need to know about a farmer by looking at their bookshelf.
Despite the many (many) challenges associated with starting a new farm business, Jim’s story is a testament to the fact that it still can be done—and even after retirement at that.
Get a batch of these quick tomato pickles going and WOW your taste buds. Not only are these cherry tomatoes flavor packed once fermented, but they are also very versatile. Serve on a charcuterie platter or mix them into a salad, stir them into pasta or just pop a couple in your mouth straight from the jar.
Yield: 1 quart jar
Ingredients
Main
3 1/2 cups cherry tomatoes, any variety
2 sprigs fresh rosemary
2 cloves garlic, smashed
2-3 slices of yellow onion, thinly sliced
Brine
1 tbsp. coarse kosher salt dissolved in 2 cups of water
Wash and prep ingredients. Put the rosemary, garlic and onion at the bottom of the jar and fill with cherry tomatoes, leaving 1 to 2 inches of headspace (space from the top of the tomatoes to the rim of the jar). Mix the brine and pour over the ingredients until completely submerged by at least 1/4 inch.
There is no need for a jar weight to weigh the produce under the brine in this case, since this is such a short ferment. Wipe off the rim of the jar with a clean dampened towel, add the canning jar lid, and tightly screw on the ring.
Fermentation
This is a one to three day ferment. Ferment at room temperature, ideally between 60 to 75 degrees F (15 to 23 degrees C) and keep out of direct sunlight.
Burp the jar daily, especially at first when the ferment is very active. Unscrew the lid briefly and tighten it back on to allow any built-up gas to release.
I encourage you to taste a tomato after 12 or 24 hours of fermentation to help you determine how fermented you like them. In this case, fermentation duration is completely a personal preference.
The longer the tomatoes ferment, the softer they will get. Once fermented to your liking, transfer the jar with brine to the refrigerator. Because the tomatoes get soft over time, I prefer to eat them within 2 weeks. However they will last six or more months.
Mix and match herbs and seasonings to create different flavors. Garlic and basil is another favorite combo for these fermented tomatoes.
You may substitute fine sea salt for coarse kosher salt if you prefer. Measurement will remain the same.
This recipe has been adapted from Can It & Ferment It (expanded 2020 edition) with permission from Skyhorse Publishing, Inc. For more recipes, checkoutWECK Small-Batch Preserving, and WECK Home Preservingby Stephanie Thurow.
The future of your flock of sheep is determined by genetics of your dams and sires. When selecting a breeding ram, you should consider desirable traits, health records and a current health assessment.
Large scale operations use data apps and programs that help producers improve genetic predictability in order to produce a more consistent product. This product could be breeding stock, meat or wool.
Hobby farmers are more likely to purchase one breeding ram to cover their flock, bought from another hobby farm. Even though the process is less formal for small-scale sheep farms, the following steps should be taken to select the most desirable ram.
With the understanding that rams make up more than 50 percent of genetics, and on average should have superior genetics to ewes, take the time to make the right choice.
According to the sheep section of the PennState Extension Office website, an ideal breeding ram should have certain physical characteristics. These, as listed on their site, include:
a long, square, level rump,
long, smooth thick muscle,
adequate diameter of cannon bone,
a long, wide loin,
a strong, level, thick top,
well-sprung ribs, or in other words a round rib cage with large volume
a deep forerib,
smooth shoulders,
a masculine neck and head,
a trim neat throat and breast,
strong upright pasterns, and
Adequate and evenly sized testicles
And the feet and legs should be placed directly underneath the animal
The article also warns against the following conditions: “pigeon-toed, knock kneed, bow legged, splay footed, cow hocked, sickle hocked, post legged, buck kneed, calf kneed, and/or weak pasterns.”
To learn more about traits you should read the breed standard for the type of sheep you want to breed. Understand the size, wool type and color characteristics of the breed to identify when selecting a ram.
There are three types of production records in sheep production: on-farm performance records, central performance tests and across-flock EBVs (Expected Breeding Value).
Most small-scale farms will not have EBVs or central performance tests. But they should still keep on-farm performance records.
These reports include individual animal identification, birth dates, weaning weights, vaccination records and information of the birth type, type of rearing and age of dam.
Health Assessment Checklist
A healthy sheep is alert. It should not be secluded from the flock.
Sheep that limp, have abscesses, cloudy eyes or sore mouth lesions, show respiratory symptoms, or are in extremely poor body condition should not be purchased for breeding. If many sheep on a farm appear to be in this condition, choose another breeder.
In addition, check the teeth and mouth of the sheep. Become familiar with how many teeth each age should have. And check to ensure the mouth shape does not have an overshot (parrot mouth) or undershot (monkey mouth). These genetic defects make grazing and getting proper nutrition difficult and get passed on to offspring.
Print the following checklist to take with you to assess the potential ram.
Birth Information
Record for Vaccinations
Birth Record
Weaning Weight and Age
Birth Type (singe, twin, triplet)
Dam’s Age at Birth
Sire’s Age at Birth
Current Health
Alertness: Poor/Healthy
Eyes: Poor/Healthy
Abscesses: Yes/No
Mouth Lesions: Yes/No
Respiratory Issues: Yes/No
Broken Teeth: Yes/No
Desirable Traits
a long, square, level rump,
long, smooth thick muscle,
adequate diameter of cannon bone,
a long, wide loin,
a strong, level, thick top,
well-sprung ribs, or in other words a round rib cage with large volume
a deep forerib,
smooth shoulders,
a masculine neck and head,
a trim neat throat and breast,
strong upright pasterns, and
Adequate and evenly sized testicles
And the feet and legs should be placed directly underneath the animal.
“Growing up on the island of Trinidad, I recall harvesting cassava, bananas and cocoa with my great grandfather,” says Keegan Clifford, a vegetable gardener who currently presides over 13 raised beds in Middletown, Maryland, known simply as Keegan’s Garden on social media
“Gardening has always been a part of my life for as long as I could remember.”
Tapping into the region’s fertile soil, Clifford’s lot has proved to be a bountiful ground for an array of produce that’s headed up by brassicas, root veg and legumes. And he’s successfully transformed his garden into a sanctuary to soothe the demands of a long haul 200 mile work commute.
We spoke to Clifford about the dynamics of raised beds and navigating first and last frost dates. We also got a recommendation for mixing roasted potatoes with basil pesto.
After moving from Trinidad to the United States, Clifford says he originally started gardening as a way to alleviate the rigors of a 200 mile work commute.
“I saw a friend’s picture of her garden on Facebook and a little light went off,” he says. “It was almost like, ‘You should try that.'”
“Maryland has a deep agricultural history since it was founded,” explains Clifford. “The soil here is very fertile, and I’ve experienced the benefits prior to transitioning to a raised bed system.”
Clifford adds that while he’s had to navigate tricky first and last frost dates, he’s managed to “grow a wide variety of brassicas, root crops and legumes.” Extending the season of Keegan’s Garden into February, he says he focuses on “crops that are not only frost tolerant but crops that are winter hardy like spinach, arugula, kale and carrots.”
“For someone just getting into gardening with raised beds, I’d say have a plan,” advises Clifford when asked what tips he’d pass on to someone contemplating trying raised bed gardening at home.
“In my opinion—and it depends on the size of your garden —raised beds can be quite expensive at first,” he says. “Every spring, be sure to add a fresh layer of compost prior to planting, and test your soil before adding fertilizers.”
“I’ve been gardening for a few years now, and I’m still learning,” reflects Clifford of his journey so far. “I still make mistakes and I still have fails. Each gardening season is different. I get to try new crops and experience something I didn’t experience in the years before.
“When it comes to produce, I like nurturing a little seedling into a strong healthy plant that produces something beautiful which I can share with someone.”
Apple trees should generally be planted in early spring, although in warmer regions trees can also be planted in late fall; the question of planting time is important to investigate locally. When the nursery stock is received, inspect the root system to be certain it is moist and protected from drying. The trunk and any limbs should also be inspected for digging and packing damage. If the tree can’t be planted immediately, store the unopened package or potted tree in a cool place out of direct sunlight. On the day of planting, remove the wrapping and examine the root system; if it is dry, soak it for a few hours before planting. To store nursery stock for more than a few days, choose a protected area, dig a temporary trench deep enough to hold the roots, and “heel it in” by placing the stem of the tree at an angle in the trench and covering the roots with soil. Be sure to water thoroughly and keep the tree moist until replanted.
The basic steps for planting an apple tree are illustrated on the following pages [below] by 10-year-old James. Before beginning, beware that the roots must not dry out during planting as just a few minutes of drying wind and sun can severely injure or kill the tree; keep roots in a plastic bag or other protective cover until they are positioned in the hole and ready to be covered with soil. Also avoid using chemical fertilizers at the time of planting which will burn the delicate root system. If the tree is growing on a dwarfing or semi-dwarfing rootstock that requires a support system, it’s best to place the stake in the hole at the time of planting because disturbing the soil after growth begins can damage the root system. Lastly, be sure to identify each tree with a “permanent” label (keeping in mind that even lettering from permanent markers will likely begin to become illegible after two years); a map of your orchard is a wise backup record.
Digging The Hole
Using a shovel or auger (or a tree planter for large installations), dig a hole that is large enough to accommodate the nursery stock roots. A 1-year-old tree, for exam- ple, should have a hole as big as a 5-gallon bucket. After digging the hole, separate the sod, topsoil and subsoil in piles.
To prepare for refilling, break up the sod that will be spread on top. Work amendments and well-rotted compost thoroughly into the topsoil and subsoil with a shovel or hoe. This medium will surround the roots of the newly planted tree. Be aware that any synthetic chemical fertilizer will damage roots.
Positioning the Tree
Standard trees, grafted or not, should be planted the same depth or just slightly deeper than they were growing in the nursery row. A color difference on the stem will show the soil line.
Trees grafted for size control should be planted so that the graft site, a slightly irregular area on the stem, is 3 to 4 inches above ground level. If the graft site is in the ground, the scion will root and a standard-size tree will result.
Filling the Hole & Placing the Tree
Return the best soil (the amended topsoil and subsoil) to the bottom of the newly dug planting hole in the shape of a pyramid. Place the tree upright over the pyramid and extend the roots outward and downward over the hill of soil. Two people working together make it easier.
If you are planting a burlapped root ball, cut the burlap in a number of places to facilitate root growth passage. Continue backfilling the hole with the best soil available, shaking the plant gently up and down and sideways.
Gently Tamping the Soil
After the roots are covered with several inches of soil, use a flat hoe or your foot to gently tamp it down.
This will compress and remove any air pockets, where roots can grow and die, and help provide a solid anchor for the young tree.
Watering the Tree
Soak the tree with water when the hole has been filled about 2⁄3 of the way with soil; then add more soil, leaving a very shallow bowl-shaped ring around the plant to trap water.
Following this initial watering, the tree should receive an inch of rainfall per week or the equivalent via irrigation. Stress from drought is devastating to young fruit trees.
The Fully Prepared Tree
Depending on tree’s specific conditions, it may need to be limed, pruned, limb spread, protected by fencing, and mulched. Apply lime when the soil test indicates the pH is below 6.5. Prune 1-year-old whips back to 30 inches from ground level where the first scaffold limbs will emerge. Older trees with scaffold limbs should be spread as shown to an angle of between 45 and 60 degrees.
Then, if the orchard is not fenced, construct a fence at least 4 feet in diameter and 4 to 6 feet high around each tree. At this point the tree should also be mulched to about 6 inches deep to suppress unwanted vegetation and retain moisture. A small circle around the stem should remain uncovered to discourage collar rot and mice or vole infestation.
Tom Burford, “Professor Apple,” was an orchardist, horticulturist and nurseryman. He was also a consultant specializing in the restoration, re-creation and design of orchards at historic sites and private estates, as well as backyard and commercial orchards. His apple pursuits and adventures took him all over the world, but he always returned home to his native Blue Ridge Mountains in Virginia.
My family and I have kept chickens off and on over the past decade. But in recent years, after moving off the family land where we worked as full-time poultry farmers, we didn’t think they’d work at our new home. Then came the pandemic and, like so many other people, we called up the hatchery and placed an order for six Australorps.
We hand-built our coop (hardly our first such project) from scrap wood I collected while editing for a woodworking magazine. Because we have a lot of hawks in our neighborhood, we constructed a spacious run out of old fencing wire and a decommissioned greenhouse frame.
We raised our little ladies in the basement bathroom, then, when they feathered out, proudly moved them to the coop.
I’m glad we made the decision to become poultry-keepers again. We really appreciate the companionship, amusement and delicious eggs they brought to recent summers. But I also enjoy the endless projects that chicken-keeping provides me.
This year, I added clear roofing to their run and built pop-out nesting boxes onto the coop. I installed an automatic coop door opener and video camera. I even made an auto-waterer out of a 5-gallon bucket and farm-store drinking cups.
But, of course, I can find more to do. (Thank goodness) So, looking ahead to 2022, here are four improvements around the chicken coop I’d like to make—both for my chickens and myself.
1. Increased Ventilation
Our tidy little coop is nothing fancy—just a raised box with a skillion roof. The structure is tucked next to our garage and opens up to their covered run. It’s all very adequate, and I watch the birds happily cavorting through the run all day long.
But I think they could use more ventilation. We had some hot days over the summer, and I know a few nights were very uncomfortable for our ladies.
My chickens’ favorite part of the coop experience is the large, clear-plastic window that they can look out of while cozy on their perch. (They also love to peck at it and make noise whenever my neighbor lets the dog out.) This plastic has grown dirty, though, and really heats things up in the coop during the day.
This year, one of the first chicken coop improvements I want to make is to replace this plastic window with something that can increase ventilation. So I’m keeping an eye out for a similarly sized old window or even metal screen that I can put in there come spring without impeding their view.
My chickens love the dirt floor of their run. And, as the dirt stays dry under the plastic roof, they love to dig dust baths in the dirt to keep themselves “clean” of parasites.
But this year I’d like to make them a little sandbox to dust bathe in. It’ll be nicer for them in general and keep their run floor clear of all those holes. (Just kidding—they’ll still dig holes.)
I figure I’ll just get an untreated fence post and cut it into four pieces to form a rough box. I’ll loosen the dirt floor inside the box. Then I’ll mix some fine sand and dry dirt, with a generous dose of diatomaceous earth to ward off lice and mites. And in summer, when I empty the fire pit, I may put in a bit of ash to the mix (it adds vitamins).
I suspect this will be one of my hens’ favorite chicken coop improvements this year.
3. Herb Garden
My family is “that house” in the neighborhood, as we’ve torn up the front yard for more gardening space. We grow ornamental flowers there, as well as some of the more attractive produce plants. And we grow a lot of herbs.
This year, when choosing our kitchen herbs to grow, I want to be more intentional about growing some specifically for the chickens to enjoy.
We already grow poultry favorites such as sage, parsley and oregano. So it’s just a matter of making sure we plant enough to share.
Because we have hawks and owls in our neighborhood (not to mention opossums, raccoons and the occasional fox), our ladies spend their days in a covered run. They’re comfortable in there, with plenty of space to move. They even have a handful of toys to fend off boredom.
But we’ve always free-ranged our chickens, so it kind of bothers me that they don’t get to wander through the backyard gardens.
While I can’t really open the door and let them out every morning, I do sit out on the patio and watch them when the weather is nice. And I feel like, with a little effort, I can return some of the pleasure they give me during those times by letting them out on field trips.
I’ll probably need to put up some fencing to keep my dogs from messing with them. We have step-in movable fencing at our family farm, so it may be as easy as bringing that to our home. Or perhaps I’ll just usher them into the fenced–in vegetable garden and let them have some tasty treats.
Then, at dusk, I know they’ll head back to the run and coop.
I know my chickens helped us through the difficulties of recent years, so I’m excited to make their 2022 just a little bit better. And chicken coop improvements mean more projects for me in 2022!
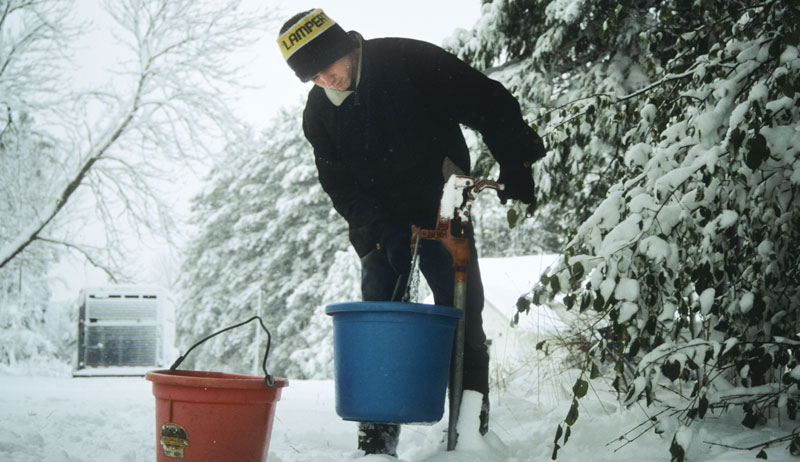
A cold forecast comes across your smartphone: “Snowfall amounts up to 6 inches today, followed by clear and cold temperatures below zero tonight.” Winter is always challenging, but even more so for farmers who manage livestock and must continue to work outdoors around the farm regardless of the temperature.
Heavy snowfall? You still have to haul round bales. Cold temperatures? The barn chores still must go on.
Happily, there are plenty of tricks and tips you can use to help make winter farm life just a little bit better. To that end, here are some techniques, tools and time-savers that you might find helpful next time the cold wind blows in a snowstorm.
You’ll develop a rhythm after a winter or two on your farm, and wisdom from past experiences will help you work more efficiently when the weather turns cold. But here are some ideas to get you started.
Snow Removal
In regions with frequent heavy snowfall, it’s important to remove each snow before allowing people, animals or vehicles to traverse. This isn’t always possible. But if you can plow, snow blow and shovel the paths and lanes first, it prevents foot and wheel traffic from compressing the snow.
Daniel Johnson
Even one person can compact the snow with his or her boots and make it more difficult to remove, and it’s even worse with a truck or ATV. Again, it’s not always practical, but if you can get up before the rest of your farm crew and clear the important paths first, you’ll have an easier time keeping the farmyard functional all winter long.
If you live in a warmer region where each snowfall melts in between the next one, this isn’t as much of a concern.
Warm Lighting
LED lights continue to grow in popularity for energy savings and long life, and maybe you’ve considered upgrading your barn lighting to LED. But be aware of the various light “temperatures” you can choose from.
Some LED lights are labeled as daylight temperature, or about 5,000 Kelvin (K). Despite the name, this is actually a pretty harsh, very white light that looks more like a dentist’s office than a barn and may not be inviting when you come in on a cold, dark night.
To achieve the “warmer” golden glow so familiar from incandescent lighting, look for an LED with a “warm white” temperature like 2,900 K or less. You’ll get that cozy atmosphere you’re looking for.
In my barn, we don’t use LEDs at all and still prefer traditional incandescent lighting for the color and the added bit of warmth they put out.
In areas with mild winters, some people try to keep their animals’ water from freezing using a variety of passive methods. These include things such as insulated buckets, insulated troughs, black plastic to gather heat, old tires around buckets and many more.
Daniel Johnson
The problem with these passive methods is that they aren’t very reliable. You may find yourself expending a lot of effort on something that doesn’t work.
When it becomes really cold out, the water will freeze anyway. Electric heated buckets and trough heaters, on the other hand, are safe, easy to use and work well. This means no more freezing water, no more worrying that it’s dipping down to 20 degrees F overnight.
They do use electricity but not as much as you might guess. A 5-gallon heated bucket only draws about 120 watts of power, controlled by a thermostat so it doesn’t even run 24/7. Why not try a few and see how they work?
Winter Paddocks
Depending on your situation, you may not want your livestock spending the entire winter in their normal pastures. Perhaps you’d like to keep your animals closer to the barnyard during times of heavy snow. Or perhaps you’d like to save your pastures from hoof damage during muddy seasons.
A smaller winter corral—or “sacrifice” paddock—located on a well-draining site can serve this purpose, protecting your main pastures while allowing easy access to your animals.
Snow Fencing
Snow fencing isn’t intended to be a barrier to stop blowing snow. But it can help you control where the drifts occur.
If you live in a region with heavy snowfalls or frequent winter wind, a few hundred feet of carefully placed snow fence can help direct drifts away from driveways, buildings and livestock pastures.
Critter Prevention
Mice, rats, squirrels, voles and other critters don’t want to be left out in the cold either. Don’t be surprised if they try to move into your barns during the winter.
Paulette Johnson
They often particularly seek out the feed and hay storage areas.
For the feed room, seal entrances, utilize rodent control techniques and keep your feed in critter-proof containers. It’s trickier to protect forage from critters, but trapping can be effective and so can barn cats.
Personal Safety
It’s easy to get focused on your animals’ winter welfare, but keep yourself safe as well. Besides dressing warm in layers, insulated clothing and even heated clothes, stay hydrated.
Just like your livestock, people often don’t feel as thirsty in the winter, even when they’re working hard.
Machinery Upkeep
Odds are, you’ll have a bit of extra time in the winter. If you have a suitable building (ideally heated!), you can put some of that time to use by maintaining and preparing machinery for next year.
Nobody said you couldn’t change the filters and fluids on your tractors, ATVs and mowers during the winter. Close the door, turn on the lights and enjoy a cozy indoor day working on your machines while the wind howls away outside.
Everyone will have a different preference when it comes to winter gloves, and there is no shortage of modern cold-weather materials. But it’s worth trying out a pair of good old-fashioned leather gloves with added lining for winter.
Not only is leather tough enough for winter use, it’s somewhat water-resistant and looks like it belongs on a farm.
Headlamp
Winter nights are long, and morning and evening chores often take place in the dark. There’s no question that a quality headlamp will make your tasks easier and safer—especially when working around livestock where you need both hands to function properly.
Generator
Winter wind and ice storms can lead to power outages. Many rural residents keep a generator on hand for their homes. You should seriously consider doing the same.
At the very least you’ll be able to run some lighting and continue to pump water for your animals.
Small Snow Bloweror Snowplow
Even if you have large snow-moving equipment on
your truck or tractor, small walk-behind snow blowers or snow blades on your ATV can be very handy for maneuvering around buildings, gates and pathways.
Snowshoes
By default, if you own a farm, then you own land for snowshoeing. Have fun exploring the hard-to-reach winter places on your property with a pair of snowshoes.
You can also use them to explore wildlife trails and tracks.
Stargazing
Despite the cold, winter is a prime time for backyard astronomy, since the early evenings offer ample opportunity to gaze up at a dark sky. Rural areas naturally tend to have darker skies, safe from the unwanted glare of city lights.
Even an inexpensive telescope can open up literal worlds to explore. Or you can use just your eyes to discover the constellations or watch for meteors.
Feed the Birds
Non-migratory birds have to make a living in the winter and will greatly appreciate a feeder. Plus, you get the enjoyment of watching them.
Be sure to keep the feeder away from your farm buildings, though, as birdseed will attract wildlife (especially in winter).
Take a Ride
You might own a snowmobile for farm chores, but you can also have some fun enjoying your property with it during winter. Don’t get so busy you forget to have fun!
Finally, although it sometimes doesn’t seem like it, winter will come to an end and spring will be upon us before you know it. Why not take a bit of time during a pleasant winter afternoon to make some plans for next year’s efforts? You can consider new crop varieties to try, or make a plan for expanding pastures or garden plots.
Good luck with your winter farm work and play! See you next spring.
More Information
Essential Winter Tools
Sometimes the right tool can just make a job better. You might want to stock your winter tool shed with the following.
Pointed Shovel
While you’re putting away your garden tools this fall, set aside a pointed shovel for winter use. You’ll need it for digging out frozen or compressed snow near doorways (because someone always ignores our first tip on “remove each snow before allowing people, animals or vehicles to traverse!”).
A pointed shovel can also help break through ice buildup around buildings and doors.
Digging Bar
Along with your shovel, a digging bar is ideal for chipping away ice and compressed snow. Keep it on hand even after you’ve put the posthole diggers away for the season.
Scoop Shovel
Dedicated snow shovels are always helpful, but that large poly scoop shovel you use in the barn can easily pull double-duty as a snow shovel. In fact, for clearing large areas of deep snow, I actually prefer scoop shovels as they make it easy to slide large squares of snow around and save wear and tear on my back.
This article originally appeared in the November/December 2021 issue of Hobby Farms magazine.
Happy New Year! I’m always glad to welcome a new year, and I’m excited to see what 2022 has in store. To that end, I’m making my resolutions for farming projects I intend to tackle during the next 12 months.
I suppose you could call them New Year’s resolutions, but I think of them more as inspiration, both for myself and (hopefully) for readers. The goal of this annual exercise isn’t to compile a list of resolutions that must be followed at all costs. Rather, I hope to encourage proactive thinking about fun projects to accomplish during the coming year.
With this goal in mind, here are five of my 2022 New Year’s farming resolutions.
Dramatically Expand Garden Space
It’s safe to say 2021 was a spectacular year for the farm garden. We planted more beds than ever and enjoyed fresh produce throughout the summer and well into fall. Among the highlights were tomatoes (which stayed productive for months) and sweet corn (which received universal praise from all who tasted the freshly picked ears).
We plan to expand the garden even more in 2022. We’ve already constructed 19 new raised beds. We laid these in place during the fall.
As soon as spring arrives, I’ll move wagonloads of compost to fill the beds. And we’ll hopefully be set for another banner year of garden productivity. I can’t wait!
In mid-December, a powerful thunderstorm brought high winds to our farm. While I’m thankful our buildings escaped damage, we lost a large number of towering conifers from our windbreak rows. So storm cleanup will be high on my spring 2022 agenda.
With this in mind, I may need to invest in a quality wood chipper to handle the debris. I normally stash branches in brush piles at remote locations across the farm. But the sheer volume I’ll have to tackle in 2022 has me concerned about running out of suitable space.
A wood chipper will reduce the volume of material to a more manageable size and simultaneously provide me with a useful product: wood chips. That sounds like a win-win situation!
Plant New Trees
Having lost so many trees to the winter storm, I’m tempted to plant replacements in 2022. Perhaps I can use this damaging storm as an opportunity to shake up the farm’s appearance with some fresh plantings.
The windbreak rows are largely compromised of red pines. But maybe I’ll replace them with white pines. I love the fluffy appearance of their five-needle clumps.
And of course, I’ll aim to plant more fruit trees as well, expanding on my young orchard project. Black Ice plums are an annual harvest highlight. A few more trees would boost productivity and help ensure consistently high yields, and planting more is definitely high on my list of farming resolutions for 2022.
Repair or Replace Worn-out Tools & Items
I’m definitely not one to replace tried-and-true tools prematurely. I try to keep them in use as long as possible. Why not squeeze out as much productivity as they can provide?
There’s no need to replace a tool with lots of life left.
But sometimes, even I have to admit an item has reached the end of its useful life. My favorite pair of safety glasses, for example, has become so scratched and fogged I’ll need to replace it before spring.
My trusty pruning loppers still serve faithfully. But I’ll admit their cutting blades have significantly dulled over the course of eight years.
So for 2022, I’m resolving to repair or replace worn-out tools and items. There’s no need to struggle unnecessarily.
I was grateful to spend some time during the fall sitting in an Adirondack chair at the top of my orchard hill, taking in the sights, sounds and smells of lovely autumn days. It was relaxing and uplifting to slow down a little and appreciate the beauty of the farm without worrying about which project to tackle next.
I hope to spend more sunny afternoons enjoying the orchard in 2022. Stopping to count your blessings is always time well spent.
What are your New Year’s farming resolutions for 2022?
Cows, goats, horses, sheep, pigs, chickens … when we first step onto our new homestead, chances are we want to get them all right away. Animals bring so much to whatever homestead venture we have in mind (meat, eggs, milk, companionship). The impulse is to choose a ruminant breed and unleash animals on those open pastures!
Animals certainly add to our pleasures and comforts. But bringing animals (and especially ruminant breeds) on the land can also be the first step to converting unused pastures into a working, productive homestead. Grazing, scratching and manuring are free labor we can use to convert less-than-perfect land into a homestead gem!
Choosing the Right Stock
Although livestock may be our partners in good land alterations, they can also easily be the means of degrading land. Without proper management, horses can graze a pasture down to dirt. Pigs can plow it up so it washes away in the next rain.
Even chickens can do real damage. Look at the moonscape around the chicken house may!
Knowing how to select the right animals for your land, and how to put them to work for good, not damage, is a huge benefit to the new—or even the experienced—homesteader.
And partnering with animals is the best possible tool for land improvement. In fact, it’s how nature does it.
Livestock allow you to make natural modifications to the existing ecosystem without the violence, waste and expense of heavy machinery and toxic chemicals. Animals even leave deposits of fertility as they work. They don’t charge for their services and work full-time, even when we’re not there.
As soon as we bring a ruminant onto the farm, the animal can begin cycling energy (sunlight collected and converted by plants in pastures) to fuel natural cycles of fertility and food generation. So if we start out with the right animal (under proper management), improvements happen even when our own responsibilities keep us elsewhere.
Shawn And Beth Dougherty
Pasture Perfect
There are a lot of factors that may go into choosing what breed and species of animal you want to partner with on your homestead. But before you make any decisions, there are two questions that are essential.
What type of plants are growing here, and who eats that?
What kind of animal suits the topography of my land (degree of slope, soil condition)?
Choosing the right species will depend on the answers to these questions.
You don’t need a degree in plant science to answer this one. You’re not asking for genus and species, but roughly, what is it: grass, weeds, briars, brush?
We’re talking about more or less open ground here. Dense woods don’t lend themselves to pasturage.
Pretty much all short or scrubby growth is grazable. You may think it looks like junk. But whether your predominant plant communities are lovely grass-and-clover pasture, dense weeds, brush or thorny briars, there’s a ruminant that calls that dinner.
Why Not Planted Pasture?
You may ask yourself: Why not just spray the weedy native stuff with glyphosate (the chemical name for the broad spectrum herbicide Roundup) and reseed our pastures with good forage species good for a ruminant? The agricultural extension office for your county will be happy to send out a specialist to design a whole new pasture community for you, tailor-made for whatever species of livestock you would like to raise.
If the ruminant can feed, why stick with native pastures at all?
The Value of Natives
Well, first there’s the expense of spraying and reseeding, and the (very real) chance that the seeds you plant won’t perform as you anticipate. Then there’s the question of environmental appropriateness. Remember, the plants on your homestead are already self-selected for your piece of land.
For some time now, they’ve grown there successfully, performing environmental services such as solar-energy capture and conversion, rainfall harvest and storage, and erosion control. They are volunteers whose willingness to be there, and ability to get along, is already proven.
They’re a winning team. Sometimes it’s a good idea to stick with what you’ve got!
Diverse Community
In addition to this, your native and naturalized pasture plants represent a very diverse community. A large number of species means a large array of environmental services. When you have a really hot, dry year, this pasture will have seen that before. A host of plants will shift into high gear when things are hot and dry.
When you experience low temperatures and excessive rainfall, you’ll already have multiple plant families that take over whenever conditions are cool and wet. Blight might visit one significant pasture plant, but with many other species represented, other members of the community will fill in the gap.
Variety is a good thing!
Medicinal Value
We aren’t even going into the matter of therapeutic plants, that pharmacopoeia of medicinals that nature already provides. Let’s just say the broader the spectrum of plant species available, the more options your animals will have to keep their health optimal.
Many “toxic” pasture species have long been known to possess anthelmintic (gut-worm fighting) and antibiotic properties. Toxic forages can be the pasture’s medicine chest!
And the micronutrients available from various nonforage species allow pasture-wise grazing animals to balance their health without expensive supplements or medications.
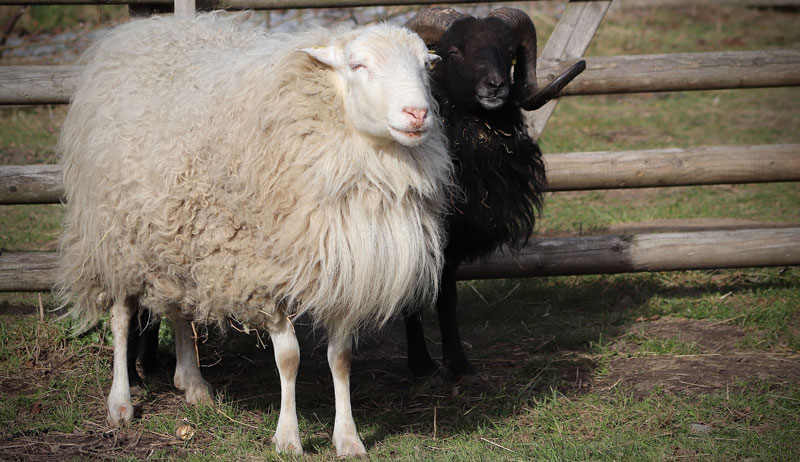
Got Brush?
So, what is growing out there? If it’s briars, brush and prickles, chances are that goats will be your best friends. Sheep are also partial to prickly foods. But goats will outperform all other ruminants when it comes to spiky, woody forages.
Things such as blackberry and raspberry cane, autumn olive, locust and multiflora rose are choice delicacies for the browsing goat. These animals will stand on hind legs or even climb trees to reach a spiky sprig.
Repeated browsing of these plants will control or eliminate them. This makes goats great tools for opening up land for other uses. They’re also cheaper than a bulldozer, and they spread manure at the same time!
Beth Kruprzak/Bargar Farm
Wild & Weedy
We all know a neglected pasture that has become overgrown with weeds. In the autumn, these are the fields that wave with goldenrod and ragweed, purple ironweed and fluffs of seeding Canada thistle.
While it may not look beautiful to us, to sheep this looks like haute cuisine!
Forbs—broadleaved herbaceous plants, what we usually call weeds—are the favorite food of the ovine family. Sheep will move over this kind of pasture, stripping tall stems of their leaves and letting sunlight down to ground level. There, it can stimulate the growth of grass plants, moving your pasture toward a more nutritious grass-and-legume (clover family) mix.
Fattening animals while mowing weeds is a win-win proposition.
Sheep, like goats, can also do a good job on thorny plants. If you have a briar problem and goats turn out to be too difficult for you to keep inside a fence, sheep may be the answer.
Better adapted than goats to grazing (ground-level feeding) in addition to browsing (shoulder-level and higher foraging), sheep make good candidates for a mixed pasture. As well as being easier to confine than are their caprine cousins, sheep are generally tougher, too—less prone to parasites and disease and far less weather-sensitive.
Good Pasture
What about the pasture that is mostly grass or grass and weeds? Cows are probably the answer here. These big producers of beef and milk have a grazing style that especially benefits a grass pasture.
What they don’t eat, they’ll trample, leaving all that valuable organic matter to break down and add fertility to the soil. With good management, every time your ruminant grazes your pasture, the soil grows deeper and more fertile. The plant community gets denser and more diverse, and the animal food more nutritious.
It’s not enough just to know what kind of animal our land is making food for. We also need to make sure that the food is accessible, without damage to the land or the animal.
This is the question of topography, determined by the following questions:
How steep is your land, and what sort of materials is it made from?
Will it be difficult for heavy animals to access?
Is the soil easily compressed or rutted?
Is it stony or heavy with clay? Wet or sandy?
The answers to these questions will determine the size and species of animal best suited to your land.
Stony land, for example, may be difficult for large animals such as cows to access. But it won’t place any obstacle in the way of goats or sheep. Steep hills may be torn up by the hooves of heavy cows but tolerant of their smaller, lighter cousins.
Low-lying land that holds a lot of water is apt to suffer from pugging (compaction and compression) when grazed with bovines. Here, again, sheep or goats might be better choices.
In general, though, the heavy impact of cattle can be a tremendous benefit, chipping hard soil surfaces, crushing tough plant fibers, and driving seeds into the ground. Most land is tolerant of a wide range of impacts. But it’s important to take consideration for your soil.
Also: Not all cows are big! Smaller breeds such as Dexters and old-genetic Jerseys (with a mature weight about half that of commercial beef and dairy breeds) may be well suited to steep or wet areas that would be inappropriate for their larger kin.
Often these unimproved breeds are better suited to a natural diet of grass and forbs anyway, unlike their generally grain-fed cousins.
Linas T/Shutterstock
Good Management
Good grazing is managed grazing. After all, you’re in the business of growing grass, as well as animals. You need to look out for your pasture’s welfare, too!
The science of grazing a ruminant on pastures does make a fascinating study. But you don’t need a lot of biology to begin practicing good pasture management.You can spend a lifetime learning, but a few principles can get you started right away:
Small Paddocks
Often, they should be much smaller than you would think, perhaps as small as your bedroom.
Short Duration
Ideally, there should be no more than a day or two between moves.
Heavy Impact
Most of the time, you want to see a real difference before and after grazing.
Long Rest & Complete Recovery
Plants in your pastures are just as important as your ruminant breeds!
You’ll often see this called mob or intensive grazing. Pulsed, observational grazing makes sure plants aren’t overgrazed and are given time to fully recover before animals can come back for another bite.
Small paddocks mean less selective grazing (because there’s less forage to choose from) and more time before animals return to this paddock (more—because smaller—paddocks equals more days in a rotation).
The selective and overfrequent grazing that happens when we just turn animals loose on the whole pasture, on the other hand, will disadvantage favored forage species and can even kill them off.
You learn good grazing by doing it. Frequent moves will keep impacts positive. And the attention and interest of the farmer supplies instruction.
While it’s good to be prepared when you add any new species to the farm personnel, don’t put it off needlessly! Water, minimal shelter and a fence or tether are all you really need.
Real improvements—building soil, renewing soil fertility, increasing pasture density and complexity—are just waiting to happen, without the purchase of a single sack of feed. Just get your choice of ruminant and unlock the solar power already pouring down on your farm pastures.
This article originally appeared in the November/December 2021 issue of Hobby Farms magazine.
If you look at what keeps your sheep moving and healthy, you have to start with the hoof.
Some folks—especially those out West with drier climates and more rocks to wear down hooves—won’t have to pay as much attention.
But I live in the Midwest, which has become more rainy in recent years and this year, muddy even well into December. Wet ground can cause all kinds of issues with your sheep’s feet. And, if you keep them inside for any amount of time (as I do at night), those issues can compound.
I also discovered in doing some research about sheep’s hooves that having good nutrition can actually cause some issues. If your sheep are well fed, their hooves will grow more quickly.
Keep an Eye on the Feet
As my flock fits the bill for potential hoof problems, I try to keep an eye on their gait. I try to notice any limping or unusual movement each morning when I let them out of the barn.
I did notice one of my (hopefully) pregnant ewes limping a couple of mornings ago. My dog Dash and I got her back in the barn and up against a wall so I could lift up her leg and see what was going on. When I lifted the hoof up, I saw a small stick stuck in between the two points of her hoof.
Ahha! After I pulled it out, I looked a bit more closely. I saw that her hooves were a little overgrown, which may have been how she got the stick stuck in there in the first place.
So I went to retrieve my hoof trimmers and some Hoof ‘n Heal just in case I found any signs of foot rot.
Foot rot is generally more prevalent when the temperatures are warmer. But I didn’t want to assume my ewe wasn’t suffering from this. Certainly having a stick caught in between the two digits of the cloven hoof could have resulted in an injury–which then might invite infection.
Quite often, the bacteria that causes foot rot is brought in by a new sheep and it passes around the flock. Moist conditions make it ideal to spread around.
When I picked up my ewe’s hoof once again, I dug around with the tip of hoof trimmers to remove any packed-in dirt or manure. It’s really best to get all of that out before a hoof trim so you can get a good idea of how overgrown the hoof is.
Her hoof looked clean and dry, even though the front of the hoof and the outside wall was fairly overgrown.
Working from the back of the hoof toward the toe, I trimmed off the outer wall that had grown faster than the inner part. The goal is to trim the bottom of the hoof as flat as possible.
Trimming hooves is not hard, but it does make me nervous. You don’t want to cut too much hoof off and cause bleeding. I bring some iodine with me to put on the hoof if I do cut too close.
Hoof trimming shears come in all types and sizes. I find they don’t stay super sharp for a long time. But since I don’t have to trim all that often, I don’t mind buying new ones when needed.
In general, unless one of the sheep is showing signs of lameness, we will save hoof trimming to be done at the same time as shearing, thus keeping the stress of handling to a minimum.You also don’t want to stress your sheep with hoof trimming during late gestation or during hot weather.
When I finished with my trim of this ewe’s hoof, it looked nice and neat again. I then checked the other three hooves while I had her still, and did a bit more trimming on a few other hooves.
No matter what the cause, never ignore lameness in your sheep. If you can’t figure it out on your own, call a vet to come take a look. Diseases of the hoof can signal other problems that you’ll need to deal with to keep your entire flock healthy and running sound!