With home food fermentation picking up steam, there are many options on the market for what to ferment in and with. It’s great that this movement has grown in popularity. But with so many options out there, it can become overwhelming to know what’s needed (and not needed) to get started.
That’s why I’ve come up with a beginner’s supply list for home fruit and vegetable fermentation.
Food-Safe Jar
A standard quart size regular mouth canning jar is all you really need to get fermenting. It’s a great and inexpensive vessel to begin with. And if you really get into fermenting, you can always graduate to a fermentation crock.
Keith Homan/Shutterstock
They do make fermentation crocks in various sizes, including small ones. But be sure that you purchase your crock from a trusted source so that you know the glaze is safe. My favorite source for crocks is Stone Creek Trading.
Many recipes call for a weight to keep the produce under the brine when fermenting. Keeping the food submerged is key to a successful ferment and helps avoid mold.
Stephanie Thurow
I personally use a small glass jar lid from a WECK jar when fermenting in jars. But there are many jar weight options on the market such as these ones and these.
Self-Burping Lid/Airlock
You can certainly ferment without an airlock. But it does make it easier if you add one to your jar ferment.
meeboonstudio/Shutterstock
Many recipes require you to “burp” the jar daily. Burping a ferment is essentially just unscrewing the canning jar ring, removing the lid and allowing the built-up gas to release. With an airlock, this step is removed.
An airlock allows the ferment to bubble away while keeping dust and bugs out. Here are two of my favorite airlock options for jars: Silicone Air Lock and Standard Air Lock.
All of the fermented recipes I write in my cookbooks include kosher salt. I use kosher salt because it’s easy to find, inexpensive and it makes great ferments.
Angelus_Svetlana/Shutterstock
But if you want to experiment with different sea salts, be my guest. When adjusting recipes to include different types of salts with different fineness, be sure to check a salt conversion chart.
Fresh Organic Produce
Sure, you can make ferments with older produce as well, but you’ll get the biggest bang out of it if you use freshly harvested fruits and vegetables.
Pixel-Shot/Shutterstock
Did you know that by fermenting your produce, you are actually making it more nutritious? Fermented vegetables are easier for the body to digest and the vitamins and nutrients are more readily available for your body to absorb.
Plus, they are full of the good-belly bacteria that we’ve all heard so much about: probiotics.
I hope this supply list helps you get started fermenting at home. It can seem intimidating at first, but once you give it a try you’ll see how easy and delicious it really is.
Side note: Many people prefer to weigh out salt to reach an exact brine salinity. I do not see this being a requirement with fruit and vegetable ferments, unless you sell your ferments and want the same outcome with each product. If you do prefer to weigh your recipes, here is the food scale I recommend.
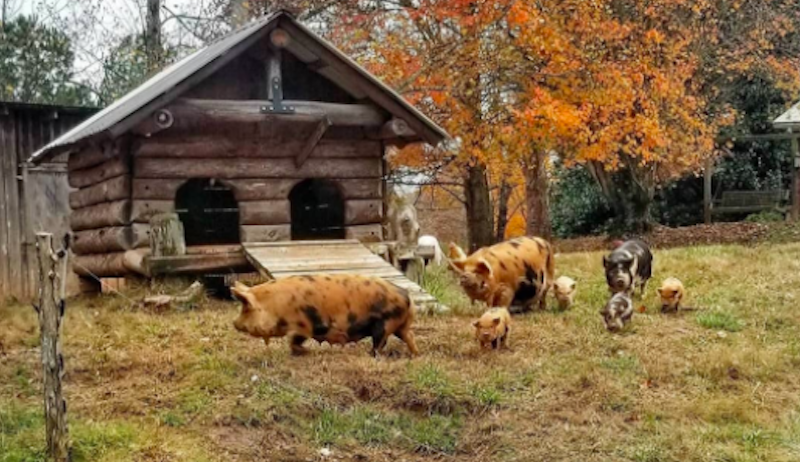
“I want to say farming was born into me,” explains Heather Hansen from Hilltop Farm in Tennessee. As a kid, Hansen would sneak off to hang out and spend the day at a local stable. “They got so used to me they’d let me stay and help out,” she recalls.
After studying agriculture at college, Hansen went ahead and founded Hilltop Farm. Now the family-run farmstead houses an array of Kunekune pigs, goats and poultry, all looked over by the property’s resident Great Pyrenees dogs.
We spoke to Hansen about the appeal of her Kunekune pigs and the importance of livestock guardians. We also got to the bottom of a circular mushroom mystery.
“We had been breeding pigs for 10 years. And I’d taught agriculture classes at the local college and had a pig project going on there,” says Hansen, when asked about how she came to make pigs a focus of Hilltop Farm.
“Pigs are wonderful for various reasons. But here in the mountains, if you free range them, traditional commercial pigs tend to tear up land,” she adds. “In the mountains, that’s not a good thing.”
After Hansen’s husband ran into someone who had some Kunekune pigs, he called her up and told her about the breed. “Within weeks of meeting them, we took up our first Kunekune,” says Hansen.
When it comes to the appeal of Kunekune pigs, Hansen describes the breed as “just different in every way—personality, snout length, marbling in their meat.”
Hansen lauds her Kunekunes as “wonderful” to spend time with. “They’re friendly, they come when they’re called, they sit and wait for treats like dogs. They will let you lay right beside beside them in the stall. And they love to be scratched and brushed. They’re very affectionate pigs.”
Great Pyrenees dogs play a crucial protective role at Hilltop Farm. “Great Pyrenees are a traditional livestock guardian, so they love to protect and bond with livestock—and people as well. And they faithfully protect their herd,” explains Hansen. “That herd can be anything. It can be sheep, it can be ducks. It can be pigs and horses or a combination of any of them, including poultry.”
On a daily basis, Hansen says you’ll find Hilltop Farm’s pack of Great Pyrenees helping to ward off hawks, owls, stray dogs and pesky coyotes.
Recently, Hansen came across a cluster of mushrooms that had grown in a mysterious circular pattern—seemingly of their own volition.
“It’s called a fairy ring,” explains Hansen. “I was told that in the past there must have been a really big tree there. It died and rotted, and the fungus stayed alive under the soil. But when the conditions are right, it just popped out where the trunk would have been.”
“We work as a family. And we have connections to all the animals,” says Hansen, summing up the most rewarding part of running Hilltop Farm. “The animals are loved and cared for. And we establish relationships with them. It’s been great to teach that connection to our children along with the work ethic that goes into good relationships.”
Cold weather has finally hit my garden, but I still managed to get one more set of seeds in the ground just the other day. River oats or Chasmanthium latifolium is an ornamental grass native to much of the U.S. and parts of Mexico. And, in order to germinate in spring, river oat seeds require a period of cold stratification.
Braving the cold to plant them in late fall is one of the simplest and most reliable ways to break this versatile plant’s dormancy.
You may know “river oats” by another name. Some people call Chasmanthium latifolium “sea oats,” “inland sea oats,” “northern sea oats,” “wild oats” or “wood oats.”
I’ve also seen river oats referred to as “spangle grass” or “spike grass.”
Plant Spotlight
I obtained my Chasmanthium latifolium seed from a Missouri-based man via the Seed Savers Exchange (SSE) network. Interestingly, regarding his river oat seed stock, the SSE member noted, “[This is a] different subspecies than sea oats, but [it] can cross with them.”
A clumping, ornamental grass, Chasmanthium latifolium grows rapidly during the spring. River oats’ distinctive seed heads come on in lovely shades of green over the summer. And, by late summer to early fall, they turn a golden brown.
(The last time I grew river oats, some of their seed heads even took on a bright crimson hue. Still, such showy color isn’t necessarily a given.)
In part, what you can expect depends on your available growing conditions. Chasmanthium latifolium can reach up to 5 feet tall. Although the grass has a mostly upright habit, it tends to bend under the weight of its showy seed heads (Incidentally, when thoroughly dried, these seed-bearing stems add visual interest to wreaths and flower arrangements.)
River oat plants can tolerate full sun to partial shade as well as a variety of soil types. However, moist, well-draining growing conditions are ideal.
In fact, these plants are especially well-suited for inclusion in rain gardens. You can mix Chasmanthium latifolium with various sedges, swamp milkweed, queen of the prairie and other moisture-loving plants. These all work together to slow and filter stormwater runoff.
Erosion Control & Planting
If you have erosion-prone areas, you can plant groupings of river oats to help anchor the soil, too. Each individual plant can span about 2 feet across. That means, for thick beds of river oats, you should space plants just 1 to 2 feet apart.
Want a little more breathing room in your landscape? If so, put 3 to 4 feet between each plant instead. And keep in mind that Chasmanthium latifolium spreads via rhizomes as well as by seed. So, under the right circumstances, it can run amok. Fortunately, it’s pretty easy to keep in check—just use a sharp shovel to cut back rhizomes as needed.
Recently, I scattered river oat seeds in a few low-lying, swampy spots on my own property. To start, I turned over the soil, removing patches of grass and weeds as I went along. Next, I amended the area with some finished compost. Then I broke the seed heads apart into individual seeds and evenly distributed them across the planting bed.
Finally, I topped with a light covering of soil, watered well, and finished with a few inches of dried pine needles. (Using clean, dry straw to keep the seeds and soil in place is my usual go-to. It just happens that I had a plethora of pine needles and had run out of straw.)
River oats add value to the landscape in a few other ways. During the warmer months, river oats can support important pollinators.
For instance, you can intersperse this ornamental grass alongside nectar-bearing plants in the butterfly garden to feed many larval-stage skippers. (In particular, you may notice Bell’s roadside skippers (Amblyscirtes belli) and pepper and salt skippers (Amblyscirtes hegon), among others.) They may be smaller and less showy than charismatic species like monarchs and swallowtails, but skippers are no less important.
You might also spot some larval-stage common wood nymphs (Cercyonis pegala) and Northern pearly-eye (Enodia anthedon) butterflies as well.
And during the colder months? Leave your river oat seed heads standing and they’ll provide much-needed food and cover for birds and other critters.
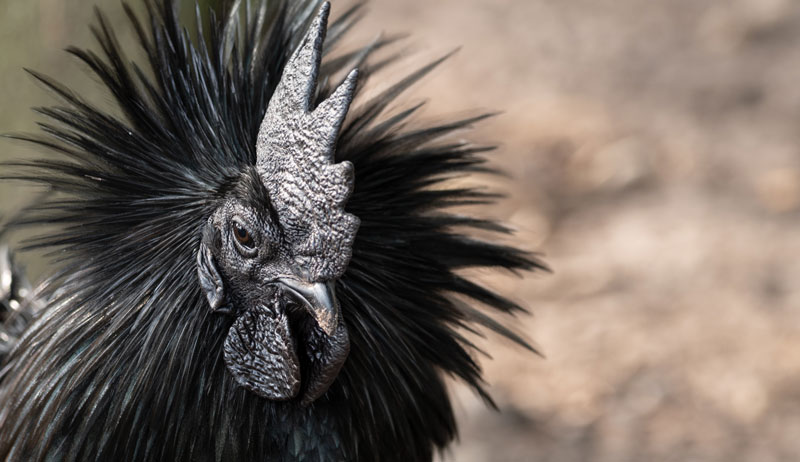
Hailing from Java, Indonesia, it’s believed that the Ayam Cemani is a cousin of the Kadaknath chicken. In its home country, the all-black Ayam Cemani is thought to bring healing and magic properties.
The breed is rare in that it is one of a few breeds that have dermal hyperpigmentation, also referred to as fibromelanosis. Owning my own flock of this magical breed, I have found that they retain many undomesticated features while also allowing people to take part in their lives.
Genetic Mutants
The Ayam Cemani results from a genetic mutation that comes from an Ayam Kedu, a black chicken with red comb and wattles. The Kedu was established in 1924 in Indonesia, and the Cemani is a subspecies.
In Indonesian, Ayam means “chicken” and Cemani means “black.” Only recently have they been considered a separate breed. (The distinction was introduced by more modern civilizations.)
Without proper and strict culling practices, the Ayam Cemani can very easily genetically revert back to the Kedu coloring and type. No matter what line you purchase, this breed will always need work and heavy culling and are difficult to keep pure black.
To keep them this way, they have to always have two of the fibro genes present from the parents to remain all black.
To replicate this, breeders always use the blackest birds. Many grandparent genes do make an appearance in chicks, every now and again.
Many breeders see any white upon hatch as a bad sign. These chicks aren’t kept for future breeding. White is referred to in the breeder world as “leakage.” Some breeders cull upon hatch, while some retain them for meat sales later on in life.
Other breeders keep the chicks with leakage to introduce the fibromelanistic gene into another breed.
Showtime.photo/Shutterstock
Mind the Tongue
In order to preserve this rare occurrence and not lose the genetic print to extinction, breeders must remain resilient. This fibromelanistic gene also has flaws.
Not all pure Ayam Cemanis have black tongues. The exceptionally rare of this rare breed carries these genetics. Most Ayam Cemanis have white to gray tongues with some black on them. Others possess a smoke-gray tongue.
Any type of red or pink present usually means that the birds have been bred to something beside an Ayam Cemani somewhere in the bloodline. Or it can mean that the breeder hasn’t practiced strict culling techniques and the bird is reverting back to an ancestor.
Ayam Cemanis also grow into their fibromelanosis. This means that when they hatch, the darker they are, the darker their “peak” will be. This peak essentially means that it’s the darkest that the bird will get also. It can happen with any color and any breed of chicken and happens with waterfowl.
It’s a normal process of aging but more noticeable on the Cemani because of how dark they are. A discolored toe or feather easily stands out. This can happen anywhere from 1 to 3 years.
With my rooster, I got four good years out of him but only three seasons. He peaked last year. After this last molt, his fibro is dwindling and will get worse as he ages further.
I like to use the example of when human hair starts turning gray. That is exactly what happens to older birds that carry this gene.
Ayam Cemanis are poor layers and don’t grow into very large birds. Contrary to popular belief, this breed doesn’t lay black eggs. Instead, it lays a white to cream colored egg. And the medium-sized fowl lays medium-size eggs.
The hens seem to lay well for about a month, then go on a break for about a month. Hens go broody about once to twice a year and make excellent mothers.
For hens, I keep a mix of Greenfire Farms (the original importer farm) and Raven (a straight Indonesian import) bloodlines. Last year, I let two hens sit, and they each hatched chicks. The rooster also seemed a little more involved than with some of the other breeds that I have.
Each hen that hatched chicks was a great mother—very attentive to the chicks while also wary of their surroundings. They did become distant and shy while they had their chicks but took excellent care of them.
I did separate one hen because she hatched Sebright chicks, a conservative bantam breed. The other Ayam Cemanis in the pen tried to kill the Sebrights. Any chick that was black, they raised.
My top hen was one who had chicks, and every other hen seemed to take a role in caring for the chicks. They herded them around as a group when they were free-ranging. The rooster was very wary of predators. He paid more attention than if it were just the hens out free-ranging.
Cemani Behaviors
The Ayam Cemanis in my flock have kept much of their ancestors’ wild habits and can be really flighty when it comes to trusting humans and predators. Ayam Cemani chicks certainly need more handling than more domesticated breeds in order to trust people.
Ayam Cemani also tend to get bored easily if they remain penned up for an extended period of time. Their first pen was about 3 foot tall, and this wasn’t sufficient for them. They love to fly and perch.
To combat this, their new pen is 6 foot tall. Lots of perches also helps.
Making “boredom busters” activities helps with bullying. In their new pen, I plan on installing a chicken swing and a mirror to help combat boredom on the days that they can’t free-range.
In our area, we have hawks and aerial predators. With the Ayam Cemanis, the hawks fly over them and don’t attempt to make an attack. It could be their dark coloring. With our other breeds, we have to let our livestock guardian dog out with them.
Daniel Beckemeier/Shutterstock
Personal Experience
On our farm, we sell grow-out birds and full-grown birds. This helps us guarantee our fibromelanosis. Our chicks get separated and banded at hatch with different colored leg bands that identify each. We use these to identify their parents and bloodlines.
Every chick hatched receives a number. If they have any amount of white at hatch, they’re put into a cull group, which is grown out for meat use.
Many breeders breed for certain characteristics that they like. Because there is no SOP at the time of this article, breeders typically breed for as black as possible. Some breeders also breed for a wild-type feather, which is drastically different from a smooth-feather look.
We separate our birds into groups for sales, breeding purposes and for chicks we’ll keep for future breeding. We use the following groups for our chicks.
all black with oyster tongue
all black with smoky tongue
all black with foot, pad or nail leakage
culls
The “all black” with oyster and smoky tongues I keep as breeders for following seasons unless there is a genetic need to breed them back to a mother or father. This isn’t ideal. But some situations call for an offspring to be bred back to the mother or father.
Many breeders use this technique for certain genetic expressions that can include comb type, feather type and egg laying.
Selling the Rest
Standard ones that have something that I don’t personally breed for—such as a wild feather type or a comb sprig—we sell to clients. (Same if I just have too many of them.)
In the wild feather type, the vane of the feather doesn’t lay together. It’s rather spread out and resembles a bristle brush texture.
A comb sprig is a protruding piece of comb that isn’t in line with their comb.
The birds that we don’t plan on keeping or selling (culls) stay onsite until they’re ready for processing. We sell our culls as farm-fresh chicken to restaurants or clients looking for something a little different. We never sell live culls, nor should any breeder of this rare gem. Some people could continue breeding them with faults that we do not want in the gene pool.
The rare breed Ayam Cemani needs conservation efforts. They’re great foragers and are exceptionally disease-resistant. The genetic mutation that they carry, along with their adaptability to heat and cold, are great characteristics to keep alive.
More Information
Big Bucks
The price tag on a true Ayam Cemani is a steep one. It can range from $250 up to $2,500! Many breeders rarely sell because the breed is very difficult to get perfect.
If you’re looking at purchasing one, do so from a breeder established with the Ayam Cemani Breeders Association. This group is dedicated to keeping the line genetically preserved and isn’t in this breed for a quick buck.
It’s working toward getting this breed accepted by the American Poultry Association and has developed a strong Standard of Perfection, a written description of the ideal bird. The SOP for the Ayam Cemani hasn’t been released yet but has been submitted to the APA for approval.
All Weather
The Ayam Cemani has proven to be exceptional against weather. Where I live in Tennessee, we have mild winters. This past year, we did dip down into negative numbers for a bit, and the Ayam Cemani pen did the best out of all of our hen pens. They even laid when no other pens were laying, and we had a successful hatch on Christmas Day.
Our summers are hot and humid. Because these birds are all black, we give them extra shade to keep them cooler. Black is notorious for absorbing heat from the sun. Even in temperatures higher than 100 degrees Fahrenheit, they were praiseworthy at how well they handled it. We didn’t even catch one panting.
They do like their dust baths. We filled an empty tire with wood ash, sand and diatomaceous earth to help. But they preferred to make their own holes in the ground.
Extremely Exotic
The exotic look of this fowl makes it stand out amongst any other breed that you’ll find. When their feathers hit the sun, they have an iridescent green tint to them. They can look quite overwhelming with their black toes, black legs, black skin, black comb and wattles, and their black feathering. Even on a gorgeous sunny day, it looks as though you have a chicken shadow following you around.
They also stand very tall and have a game-type stance about them. No other color except black is an Ayam Cemani. Don’t get swept into claims that this breed is any color but black.
With the price tag that Ayam Cemanis have, many people want to cash in on the hype of this poultry. Research and know the breed and breeder before you buy.
This article originally appeared in the November/December 2021 issue of Chickens magazine.
Processing poultry for meat is becoming more common for some backyard-poultry enthusiasts. Small commercial poultry businesses, too, may offer poultry meat at a local farmers market or via a community supported agriculture mechanism.
Some excellent online resources exists that are largely applicable for backyard processors and small commercial producers alike. The Cornell Small Farms Program has a webinar program that includes a section on poultry processing.
A second good resource is the Niche Meat Processor Assistance Network. This service of the Oregon State University Extension Service provides relevant info for small meat processors. Available resources include regulations, webinars and case studies, fact sheets and a video series.
The two most important things to remember when processing poultry are:
keep things cold
always err on the side of caution with respect to discarding or condemning the birds
“When in doubt, throw it out” is a good approach in poultry processing. This helps reduce the potential risk of food poisoning.
During processing, your goal should be to identify and remove carcasses that show evidence of pathological (i.e., disease conditions) and nonpathological (i.e., bruises, breast blisters) lesions.
Most of the abnormal conditions you can visually observe typically relate to meat quality as opposed to food safety. But quality is (of course) important!
This is basically what the USDA’s Food Safety Inspection Service does in large commercial broiler and turkey facilities. Most of what the FSIS does is visual inspection. But they also collect samples for microbiological testing of salmonella and campylobacter (the two most common pathogenic bacteria associated with food-borne outbreaks in poultry).
The practicality of doing this for small producers and backyard enthusiasts is probably not possible. However, you can reasonably focus on visual inspection and the general health of the birds while they’re alive. Just make sure you practice good hygiene.
There is no replacement for a thorough visual inspection of the outside of the carcass, inside of the cavity and visceral organs for evidence of pathological and nonpathological lesions.
The best way to get good at identifying abnormal conditions? Get good at observing what a normal healthy carcass looks like. The more you train your eyes to look at normal muscle, organs and tissues, the more obvious it’ll be when you see abnormal.
In general, when inspecting the outside, inside cavity and viscera, if you do find something abnormal you can oftentimes just trim or remove that specific part. However, remember “when in doubt, throw it out” if you’re unsure.
During your visual inspection, look for the following relatively common occurrences.
Fishermansdaughter/Flickr
Bruises
Broken bones accompanied by (green) hemorrhages indicate that the injury occurred long before slaughter. What you should do: Condemn the entire carcass.
Localized Bruises
A reddish purple bruise indicates that the bruise happened during slaughter. Trim and condemn only affected part.
When doing inspection of the carcasses inside and out, look for any type of contamination such as crop and intestinal contents and feces. If you can’t trimming can’t be done, condemn the entire carcass.
You can try to wash out contaminated carcasses. But it’s important to appreciate that bacteria such as salmonella are very “sticky.” They form biofilms that make removing them entirely impossible.
As a reference, the approximate condemnation rate of commercial broilers is approximately 2 percent. Keep track of your condemnation rate. And identify what diseases and other abnormalities you observe. This is an excellent way to evaluate your husbandry program.
Don’t eat dead birds that died before slaughter. And if you notice significant problems during processing, consider alternatives and mitigations to your husbandry, biosecurity, welfare and other relevant practices.
While all that gives some more specific details, another way to approach your visual inspection is to not use birds that have any of the following:
lumps or spots of any size on the surface of the liver or other organs
any measurable quantity of fluid in the body cavity
fat in a poorly fleshed bird, which is orange rather than yellow or white
any internal organs that are roughly two or more times greater than the normal size of that organ (you can ignore changes in size of the gall bladder)
breast meat with the same coloration as meat of the thighs and legs
meat showing white streaks or an area of abnormal enlargement when compared to the same area on the opposite side of the bird
It’s important to realize that many poultry diseases are “epi- zoonotic.” This means they only affect the birds and don’t affect humans.
However, if the bird has a disease, it’s most likely more susceptible to other diseases including some salmonella species, which are zoonotic (i.e., they can make us sick). Just because your birds “look healthy” doesn’t mean they aren’t carrying zoonotic diseases.
For example, Salmonella heidelberg and Salmonella enteritidis for the most part don’t make the birds sick but do make humans sick. Consequently, when we see abnormalities, the recommendation is, at minimum, to condemn affected tissues. In many cases, including when in doubt, you should just condemn the entire carcass.
However, many zoonotic diseases show no apparent pathology via visual inspection. Hence the reason the FSIS and often the companies themselves do microbiological testing.
The following is a non-exhaustive list of relatively common diseases and other abnormalities to watch out for during your visual inspection:
Leukosis & Other Tumors
Unless the tumor has only affected one visceral organ, the whole carcass should be condemned. Lymphoid leucosis is a tumor-producing epizootic viral disease usually of chickens that are 16 weeks or older.
Due to the age, it’s a more common disease in laying hens. It can, however, affect some younger broiler birds. Look for whitish gray masses in the liver, spleen, ovaries, testes, eyes or muscles. You’ll also see the appearance of nodular enlargement of feather follicles in skin leucosis.
Fishermansdaughter/Flickr
Septicemia-Toxemia (Sep-Tox)
Septicemia refers to the presence of bacteria in the blood stream. When birds become septicemic, their organs begin to malfunction and the cells within their body deteriorate. A bird is only septic for a brief period. Then it either recovers or dies.
However, even if the infection subsides, the carcasses are typically not aesthetically desirable and therefore often condemned. If the bird has septicemia when it is processed, the following may be visualized: petechial (pinpoint) hemorrhages (i.e., bleeding) on the heart, liver, kidneys and muscles.
Unaffected portions of the carcass may be salvaged.
Air Saculitis
This is an infection of one or more of the nine air sacs found in a chicken’s chest and abdomen. The air sacs are normally clear, thin membranes. If they are cloudy or “cheesy,” it can be a sign of infection including E. coli. For our purposes, it’s best to condemn the entire carcass if observed.
The best way to ensure healthy birds for processing is to keep your flock healthy. “Garbage in, garbage out” is an accurate statement when it comes to poultry husbandry. It is much more difficult to address disease issues during processing (as opposed to when the birds are alive) through proper husbandry and biosecurity.
Simply put: If your birds are healthy, processing them into healthy broiler meat is much easier than raising your birds under unhealthy conditions (contact with rodents, poor ventilation, etc.) and then trying to clean the meat.
More Information
Cold Is Your Friend
To keep bacterial growth down, always maintain a “cold chain” with your processed bird. Keeping the carcasses at refrigeration temperatures and below is essential for proper handling.
For commercial poultry, chilling the carcasses within four hours, and the giblets within two hours, to 40 degrees or lower is required. In modern commercial poultry plants, this usually happens within one hour.
Non DIYers
If you want to process your birds but are uncomfortable with slaughter and evisceration and/or you don’t want to pay for all the necessary equipment, a handful of entrepreneurs who specialize in mobile slaughter and processing of poultry for smaller flocks exists. Mobile Poultry Processing Units (MPPUs) can offer a safe option for processing a few birds without having to “get dirty.”
This article originally appeared in the November/December 2021 issue of Chickens magazine.
Christmas is less than one month away, which means—believe it or not—it’s time to start thinking about holiday shopping. Especially if you’re Christmas shopping for a farmer, since they tend to buy things as they need them, and finding a farming-related gift they need (but don’t already own) can be tricky.
Throw in the ongoing issues with supply chains, and it makes sense to start shopping early. The good news is, we’re here to help with seven gift ideas to get your started.
Raised Garden Beds
You can never have too many garden beds, and raised beds offer many benefits. If you’re handy with DIY projects, consider purchasing the materials and assembling raised beds. It’s the gift that keeps on giving with the promise of fresh vegetables the following year!
Wheelbarrow
A quality wheelbarrow can be put to use in so many ways, from carrying tools to moving compost (maybe for filling those brand-new raised garden beds). The only question is whether the wheelbarrow should have one wheel or two—the different designs have varying strengths and weaknesses.
Every farmer should have a pair of safety glasses. Chances are, the farmer in your family already owns a few. But if you notice they’re scratched, fogged or otherwise worn out—why not spring for a new pair? Perhaps you can find a perfect option complete with scratch-resistant lenses and an anti-fog coating.
Electric Chainsaw
Not all chainsaws are powered by gasoline. Electric models are also available. And they offer many advantages compared to their gasoline counterparts. Less noise and maintenance, no exhaust fumes, easy starting—for farmers fond of small-scale yardwork, an electric chainsaw can be the perfect gift.
Rain Gauge
Just how much rain fell during that intense summer shower, and was it enough to water the garden for the day? A rain gauge can provide the answer. Whether you opt for a utilitarian model or a more decorative choice, a rain gauge is a practical gift sure to see steady use. Just be sure the recipient installs it in a suitable location.
If you want to place a personal spin on a gift, why not consider a homemade tool or two? For the farmer planting an orchard, a wooden measuring stick for gauging hole depth and diameter will be a much appreciated Christmas gift. Meanwhile, a gardener might enjoy a simple bamboo pole seed planter with a clothespin for adjusting hole depth. If you think outside the box, the simplest supplies can be turned into useful tools at budget-friendly price points.
A Subscription to Hobby Farms Magazine
Come now, who wouldn’t want to be gifted a farming magazine that pops up in their mailbox all year long? For inspiration, innovative ideas, equipment reviews, tips and tricks, farming news, instructional projects, and much more, a subscription to Hobby Farms magazine will bring joy to any hobby farmer.
Have you raised fowl for a few years already? Perhaps you’re comfortable with harvesting meat and eggs, but now wonder, “What else can I do?” This article explores some extra byproducts you can gain from raising poultry.
Hackle Feathers
Watching the flashy plumage of a rooster’s saddle shine in the sunlight, it’s no wonder someone once decided there had to be a use for those feathers. Rooster saddle feathers, called hackles, are one of the more popular poultry byproducts among devotees of a particular sport, though.
Hackles are utilized for tying customized fishing lures by a few dedicated anglers.
I am not one such dedicated angler, so I visited a local fly-fishing shop to learn more. Matt Paulson, owner of The Superior Fly Angler in Superior, Wisconsin, and employee Aaron Nelson took time to discuss the craft of fly-tying with me.
Paulson says that hackles aren’t quite as big of a deal as they were at, say, the turn of the millennium. Since he opened the business in 1997, he’s seen hackle shelf space decrease while other options for tyers have garnered steam.
Among the hackle options available, the dun and grizzly color patterns are likely the most commonly used. Various poultry species were represented on the wall at the shop, from peacocks to partridges.
Many feathers retained their natural authentic coloring, while some were dyed bright hues.
Capes
Rooster hackles come in what are called capes—feathers still attached to the original skin. (Capes start at the beak/comb and end at the mid-back.)
Hackle providers evaluate the capes for quality, which are frequently pre-numbered to coordinate with the correct size hook(s) an angler might desire to match.
Beyond rooster hackles, some fly-tyers find value in various other feathers, such as hen capes. These would come from the same portion of the bird as rooster capes. But as any poultry fancier knows, they would be duller, rounder feathers.
Schlappen is the portion of the rooster directly behind the tail after the original cape end. Fly-tyers refer to it as “musky bacon.”
Guinea feathers are highly desirable and priced accordingly, although it’s not sold in full or half capes as with hackles. Instead, the individual feathers are strung together before packaging.
Know Your Market
To be successful as a fly-tying feather-provider, it’s likely you’ll want a keen interest in the sport itself.
At the time of this writing, a pack of musky bacon schlappen retailed around $20. A small pack of guinea feathers (either natural or dyed) was about $8.
Paulson mentioned that Hungarian partridge is very hard to get right now. Those capes are running about $50 for retail customers! Also high on the prized feather list are the rooster tails of Lady Amherst pheasants.
When starting out, the thought of harvesting our own meat was mind-boggling. So my family took our birds to a small meat-processing plant in rural Illinois when I was a kid. Just into my early double-digits, I was amazed by the process of converting carcasses to kitchen-ready meat.
Midway through the harvesting process, I noticed the assistant cutting off the chickens’ feet at the joint and putting them into a separate bucket. I leaned over to my mother and quietly asked her why they were doing that.
She was as puzzled as I was, so she asked one of the workers, who looked at the owner. He gave a small grin and said they were poultry byproducts for a local restaurant.
For purposes of this article, the term “chicken feet” refers to the yellow shank of the birds from the backward knee joint all the way down to the toenails. On a backyard scale (aside from starvation), I don’t see any practical purpose for trying to harvest the scant amounts of potentially edible meat from a chicken foot.
serhii.suravikin/Shutterstock
However, I learned from a die-hard DIY friend of mine that poultry feet make particularly useful byproducts: dog treats!
When harvesting meat birds, this family would set aside the feet. Later, they’d clip off the toenails and put the feet into a large dehydrator to preserve for their doggy delight through the winter. While I’ve never personally tried this, I think I’d smoke them before dehydrating.
Please note: Much controversy exists over the feeding of either cooked or uncooked bones to domestic canines. Please consult with your veterinarian before attempting to feed any animal parts to your pets.
Pheasant Feathers
Have you ever seen a decorative hat with fancy feathers atop? These poultry byproducts came from birds such as your own. Pheasant, guinea fowl, peacock, even dyed chicken feathers all have their place in artisan crafts. Or kindergarten crafts, as the case may be.
If you’re artistically inclined yourself, perhaps design some creations you can photograph for inspiration to potential customers. Otherwise, talk to floor managers and clerks at the local craft store or florist shop to find out what’s
in demand.
Who knows? You could become a supplier of these crafty poultry byproducts!
It goes without saying that feathers offered for sale should be squeaky clean with no barn odor. This article is too brief to cover options for cleaning feathers, but keeping your coop clean is a great start.
You can also offer your poultry good clean sand for dry-bathing. Lastly, you could very gently wash the gathered feathers with a light detergent, but take care. Separation of the follicles could devalue the plume or possibly render it useless for the consumer.
Eggshells
Eggshells can be white, brown, green, blue, pink, cream, speckled or variations of these colors. One thing all eggshells have in common, though, is calcium. When the flock’s calcium supplies run low, eggs can be laid with weak and misshapen shells.
Weak shells can lead to broken eggs. And this can start a hen egg-eating as she curiously pecks at the gooey mess that’s suddenly appeared underneath her. (A free-choice feeder of ground oyster shells usually solves any low calcium problems within a few days.)
Poultry eggshells can be dried and finely ground to make a byproduct for human food supplementation. (I can’t, however, imagine children lining up and begging to have it sprinkled on their desserts.) You can also crush and add eggshells to the compost heap.
Or you can “recycle” them and feed shells back to the hens.
To recycle eggshells, you must take extreme care to avoid sparking an egg-eating epidemic in your flock. Eggshells do work as a calcium supplement. But you’ll need to take a few precautions to make sure the shells don’t even remotely resemble eggs if you feed them to the hens.
Kimberly Boyles/Shutterstock
Here are a few recommendations:
Roast the shells in the oven.
Roast fast or slow, so long as they’re dried. You may want to spread aluminum foil on the cooking pan in advance. Shells tend to stick badly. Or you can use a disposable tray left over from a frozen lasagna.
Grind the dried shells.
Process roasted shells through the blender. Grinding the shells to powder after they’ve been dried will make them unrecognizable from the eggs they originally housed.
Mix with other foods.
You can mix a treat for your hens with grains, eggshells and suet. Or simply keep a bucket of kitchen food scraps with a different variety of ingredients each week.
We’ve tried just roasting or crunching the shells. But each time the chickens were smart enough to figure out just where those shells came from and the egg-eating commenced.
May I suggest you save yourself some headaches and follow all three steps? Or maybe just keep toss the shells into the compost heap or hog slop.
This one almost goes without saying, but it’s so obvious I’d be remiss to neglect it! While you may be weary of the manipulation of manure (i.e., cleaning the coop), many gardeners are willing to pay for quality fertilizer from your birds.
The vibrant greens of lettuce fertilized with this poultry byproduct are unparalleled.
If you decide to try marketing manure, consider doing more than shoveling it into the back of a truck and collecting cash. Because selling premium products is best for business, here are a few factors to take into consideration:
Is it ready to use?
Serious gardeners are your target market, and they’ll be most interested in product that is ready to use. In the case of poultry manure, this means that it’s been aged and, if applicable, any residual bedding has been composted.
Fresh, “green” poultry manure is too “hot” to use immediately on a garden. This means that the ammonia content is so high it’ll likely burn the roots of plants. I’ve seen it happen. The aging process “cools” the manure down into a rich, safe fertilizer that retains a high nitrogen content.
Elena Elisseeva/Shutterstock
Your aging system could be as simple as a large rubber tub or trashcan that you flip and stir from time to time. It could also be a fancy three-section composting site built out of wooden pallets.
Whatever you decide, maintain consistency and have patience. If you clean out your coop in the spring, that set should be nicely composted and ready to sell the following year, provided you actually kept turning it, etc. to maintain the composting process.
Is it organic?
This isn’t necessary, but if you happen to feed your birds organic feeds and use organic bedding, make sure to market your manure products as such. It could help you earn a premium price or at least give you an edge over any competition.
How will you package it?
Of course, you could purchase burlap and run straight seams to create your own custom packaging, but … it is manure you’re selling! Likely gardeners won’t really mind if you recycle empty feed bags as fertilizer packaging. They’re interested in the contents.
Think of sizes (and weights) convenient for your targeted customer base. If you’re trying for large-scale gardeners, 50-pound bags might be good. If you’re selling to retirees, perhaps keep the sizes smaller and lighter.
Also consider adding a paid delivery option.
This isn’t at all an exhaustive list of poultry byproducts. We haven’t covered using down from waterfowl (one of my favorites!), quills from geese or the fact that discarded poultry parts can often be fed to hogs for additional calcium, iron and protein.
Despite its limited scope, I hope this article gives you some workable options or inspires better ones.
This article originally appeared in the November/December 2021 issue of Chickens magazine.
I noticed something when I put my ewes and ram together in one pasture so we could get the breeding season off to a start. With 11 adult ewes and an adult ram, the sheep minerals were getting eaten at a very fast rate.
Earlier in the year, the ewes were in different pastures. I hadn’t noticed them going through the minerals as quickly.
But it got me wondering about a sheep’s nutritional needs beyond grass or hay and grain (if you feed it). As it turns out, sheep have very specific requirements that differ from other livestock–including goats.
A Matter of Minerals
As a shepherd, it’s important for you to understand the needs of your flock of sheep.According to the Merck Veterinary Manual, sheep need the following:
Salt (Sodium and chlorine): Sheep need salt to remain strong and healthy, to lactate and to reproduce.
Calcium and Phosphorus: The amount of these minerals varies depending on your pasture make-up of grasses and legumes. But rather than depend on forage alone, it’s best to supplement these in a mineral mix.
Magnesium and Sulfur: Low magnesium in forage can result in a disease called “grass tetany.” Sheep need sulphur for growing both wool and hair.
Potassium: An adequate amount of potassium is necessary for good growth, especially among growing lambs.
Trace minerals, including Cobalt, Copper, Iodine, Iron, Manganese, Molybdenum, Zinc and Selenium: Most of these are not available in great amounts in many parts of the country.
I had heard about copper toxicity, but did not realize that small amounts of copper are necessary for healthy sheep. It’s just when they get too much that they can have copper toxicity. There are not a lot of signs of this except when your sheep dies.
So, making sure that you use a special mixture of minerals made for sheep makes the most sense to me.
Another question I had was whether loose minerals or a mineral block is best for a flock. The Virginia Cooperative Extension recommends feeding loose minerals. The mineral blocks are made hard enough to shed rain water. But that also means sheep may have a more difficult time getting the minerals they need by licking.
And even worse, sheep can break their teeth trying to gnaw on these blocks.
The key is to put out enough minerals so that your sheep can eat them whenever they need them. You don’t need to worry about them overeating the minerals. They know what they need.
When you purchase sheep minerals, read the label to make sure that your purchase has the right ingredients to keep the animals healthy. The cheapest is not always the best to buy in this case.
And here’s my pro tip: Keep the pan of minerals for your sheep in a covered place in case of rain or snow. I can’t tell you the number of times I’ve gone out and found a bowl of watery minerals that no one will eat.
I now keep my pans of loose minerals in the covered shed where we put our sheep up at night. Believe me, they will find the pan just fine!
Your sheep can do well on pasture, grain and fresh, clean water. But don’t neglect the need to ensure they have the vitamin and mineral supplementation that they need to grow, thrive and reproduce.
Corn-husk-wrapped, meat-filled tamales that most of us are familiar with owe their origins to Mexican cuisine. But tamales are a common food in so many cultures around the world. Latin America, the Caribbean, the Philippines and Brazil are just a few examples of regions that have their own version of the tamale. In the U.S., tamales are frequently found throughout the Southwest and often associated with special occasions such as Christmas.
A well-made tamale is a true treat. But one reason why they’re homemade only a few times of year is due to the work involved.
Many traditional recipes use fillings made with slow-cooked meats. And recipes can yield upwards of 40 tamales per batch. That’s a lot of wrapping and steaming, even when the whole family is involved. The good news is that there is a way to merge traditional methods with a little more convenience and less time spent in the kitchen.
And you don’t need to sacrifice the flavor and texture of an outstanding tamale.
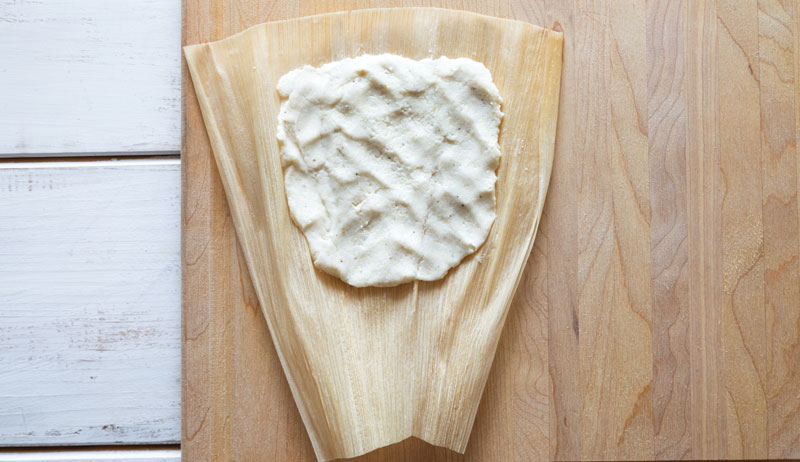
Making the Masa
I went through a few batches of rather dry and hard tamales before I learned the importance of the ingredients in the masa, or dough. Now that I focus my energy on getting the masa right, I have to admit that homemade tamales are even better than those I get from restaurants and food stalls.
Masa Harina Matters
The dough starts with masa harina, the flour. This is easily found in the Mexican or international section of most supermarkets. It’s often translated to “instant corn flour mix” or “instant corn masa mix” on the label.
The most common brand, Maseca, makes a version specifically for tamales. I prefer this one, but as long as it is masa harina, it will work for tamales.
The difference between the masa used for tamales versus tortillas is predominantly the added fat but also some baking powder. The dough of a tamale, once it’s steamed, should be light and fluffy.
This is where the fat, baking powder and extended mixing come in.
About the Fat
Traditionally, pork lard is used as the fat. You can most definitely use that, but it’s not a requirement. Vegetable oil, like in the recipe we’ll make here, can be used as well as vegetable shortening, coconut oil, or a mix of liquid and solid fats of your choosing.
The one thing to remember is that if the recipe you follow uses a liquid fat, and you substitute a solid fat, melt the solid fat before adding it to the dough to ensure you have the right amount for that recipe.
When making the dough, mix the water with the masa harina first. Let it rest shortly. Next, blend in the baking powder, salt and fat.
I like to mix the masa harina and warm water using a wooden spoon. Once it’s ready for the fat, it goes to the mixer. You can use either a hand mixer or a stand mixer. The mixer really is key, because you can blend the dough at a higher speed and incorporate air.
Let it mix for a solid five minutes. In the end it should resemble a thick hummus or a thin, drop biscuit dough.
Tips for the Filling
Whatever type of filling you choose, just be sure that it’s room temperature or only slightly chilled. Hot fillings will melt the masa and create a mess. Cold fillings may increase the steaming time needed to cook the tamales.
Many fillings can be made ahead of time. Get them out of the refrigerator about 30 minutes before you start making your tamales.
The filling should also be relatively dry with no standing liquid. If you add ingredients such as sauces or tomatoes to your meat, allow the liquid to cook off.
The best tamales have a balanced ratio of masa to filling. But once you begin making them, you realize just how little filling you really need. It’s important not to overfill the tamale.
When folded, the masa should cover it completely. It could take a few tries to get it right. Each tamale may vary slightly because the corn husks can vary a little in size.
If you measure out your masa and filling, though, your tamales should be close to equal in size regardless of the husk.
Prepping the Corn Husks
Chances are you’ll buy your dried corn husks in a big bag, which means you’ll need to sort them and brush off any dust or debris before making your tamales. Choose husks that are the most similar in size.
The recipe we’ll make here yields 14 tamales. Always select five or six more husks than you need. This will cover you in case any split or if your measurements are off and you end up with an extra tamale. It will also supply you with strips of corn husk to tie off the tamales before steaming.
The dried husks need to be soaked so they are pliable for making the tamales. Laying them all out in a deep roasting pan works the best. Pour warm water over them until they are submerged. If they float, set a baking pan or skillet on top to weigh them down and keep them in the water.
Soak for about 30 minutes. Once they are softened, drain the water and give them a shake, and they are ready to use.
I’m going to take you step-by-step through making your own tamales using my recipe for tamales with chicken, chiles and cheese. This recipe makes about 14 tamales.
Place the husks in a large shallow pan. Cover with warm water. Allow them to soak for 30 minutes.
Lori Rice
Step 2: Make the filling
Add the 1 tablespoon of oil to a small skillet set over medium-high heat. Add the onion. Cook for 2 minutes, until it just begins to become translucent.
Add the can of chiles, and then the jalapeños. Cook for 3 more minutes, until most of the liquid from the chiles has evaporated. Stir in a 1⁄2 teaspoon of salt.
Transfer the chicken to a medium bowl. Add the contents of the skillet, and stir well. If using unseasoned chicken, add the remaining 1⁄2 teaspoon of salt.
At this point all ingredients are cooked. Feel free to taste and add more salt if desired. Set aside to cool.
Step 3: Start masa
Add the masa harina to a large bowl. You can use the bowl of your stand mixer if you use one. Add the warm water and stir well, mixing it into a thick dough.
Mix in the salt and baking powder. Then add a little oil at a time with the mixer on low until the oil is incorporated. Increase the mixer speed to about medium-high. Mix for 5 minutes.
The masa should be thick but spreadable, resembling thick hummus or a thin drop biscuit batter.
Step 5: Add masa to corn husk
Lay a corn husk in front of you, flat on the countertop, with the larger end at the top. Scoop out about 1⁄3 cup of masa. Place it in the upper portion of the corn, but close to the middle.
Spread or pat out the masa, leaving about 1 1⁄2 inches from the top, 2 inches on the left side and about 1 inch on the right side.
Your measurements don’t have to be exact. The point is that the masa is inside the corn husk and doesn’t squish out when you fold up your tamale.
Lori Rice
Step 6: Add the filling
Spoon about 2 tablespoons of chicken filling down the center of your masa. Top it with 1 tablespoon of shredded cheese.
Step 7: Make the first fold
Fold the left side toward the right side to where the two sides of the masa meet. Press gently to seal them together and tuck your filling inside.
As you do this, you’ll pull back that left side of the corn husk just a little away from the masa.
Lori Rice
Step 8: Fold up
Now fold the right side over the left and press down gently. A little masa will extend over the center of the tamale inside the corn husk.
Step 9: Tie up
Take one of the extra corn husks and tear it into long pieces to create the string you will tie around your tamales. The soaked husks can be fragile. Make sure the pieces are at least a 1⁄2 inch in width so you can pull them tight.
Fold the bottom of the corn husk up, to cover the tamale. Tie the corn husk string around the tamale, hold the bottom flat up and secure in a knot.
Repeat steps 5 through 9 for each tamale.
Lori Rice
Step 10: Steam
Bring a large stock pot filled about 1⁄3 full of water to a boil. Reduce to a simmer. Then place a steaming basket or pasta inset in the pot.
Be sure no water is visible at the bottom of your steamer, where it would come into contact with the tamales.
Add the tamales to the basket with the open end facing up so that they are sitting upright in the steamer. Cover, at least partially, with a lid. Steam for 75 minutes. Check your water at regular intervals and add more if necessary to complete the steaming time.
Remove the tamales from the steaming basket with tongs.
The bonus step is the best part: Now it’s time to enjoy your tamales. To do so, cut the tie or slide it off and open the corn husk.
Top tamales with any number of your favorite toppings. I prefer some crumbled cotija cheese, cilantro and hot sauce. Avocado, Mexican crema or sour cream, and salsa are good topping choices as well.
More Information
Cooking Tamales
To cook tamales, you need to steam them, and tamales need to steam for longer than you might expect, considering that the ingredients are all cooked. To steam:
Fill a large stock pot about 1⁄3 full of water. Bring that water to a boil then reduce it to a simmer. A deep steaming basket works best, but a pasta inset works well if your steaming basket isn’t deep enough to hold the tamales upright. The tamales shouldn’t come into contact with the water. Keep an eye on your water, and add a little more every 20 minutes or so, as needed.
Cover the tamales, at least partially, with a lid while they steam. They should be ready in 60 to 90 minutes.
Freezing Tamales
If you have more tamales than you can handle, they freeze well. You can freeze them before you steam them or after steaming them, once they have cooled. If you’ve frozen them after steaming, you can heat them up in the microwave when you’re ready to eat; I think the best way to reheat them is to put them back in the steamer whether you steamed them before storing or not.
To freeze, wrap each tamale tightly in plastic wrap and then put them inside a freezer-safe bag. They can be frozen for three to six months. I find shorter freezing times prevents the chance freezer burn will occur.
This article appeared in Hobby Farm Home, a 2022 specialty publication produced by the editors and writers of Hobby Farms magazine. You can purchase this volume, Hobby Farms back issues as well as special editions such asBest of Hobby Farms and Urban Farm by following this link.
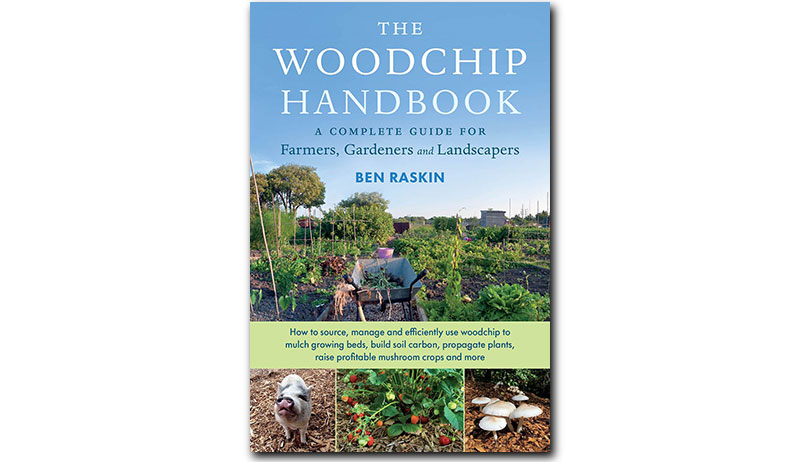
I’ll be honest and say that, before I read Ben Raskin’s book, I was skeptical as to whether or not it would be possible to devote a whole book to the topic of woodchips. I mean, what is there to say, really? You use them as mulch, wait for them to break down, and spread out some more.
Turns out, of course, I was quite wrong. As Raskin shows throughout the book, woodchips can play a valuable role in a farm (or garden) ecosystem. But as with anything else, they can be misunderstood and therefore mismanaged.
Reading The Woodchip Handbook is a good way to set out on the right foot.
The Many Ways to Use Woodchips
Overall, the book gives woodchips an incredibly comprehensive treatment. Raskin begins the book with a brief cultural history of woodchips (did you know that Peter Jensen invented the first woodchipper in 1884?) that arrives at an important point.
Woodchips have been a waste product of human activities for a long time.
And as a result, we’ve gotten good at finding productive ways to use them. As Raskin explains, woodchips can be used as a mulch, in compost, in potting soil or even as a soil amendment. Or, woodchips can be used as a substrate to grow mushrooms or in bedding for animals.
But, as Raskin explains at many points throughout the book, using woodchips in these different ways requires an understanding of these processes. It also requires an understanding of the woodchips themselves
Woodchips from different trees have different characteristics. Some woodchips might have allelopathic (growth-inhibiting) properties. Others might be cut from treated wood that can harbor all sorts of toxins. And woodchips cut from small, young branches can be used much differently than chips from an old tree.
Raskin delves into all of these details throughout the book, and much more as well. He devotes a substantial amount of time to sourcing woodchips. And he also spends a significant amount of time discussing how to chip your own woodchips.
He provides a calculus for when it makes sense to purchase or rent a chipper, as well as some options for setting up a system to grow your own chips on-farm.
Overall, The Woodchip Handbook is a worthwhile read for both farmers and homesteaders. If you’re currently an avid woodchip user, The Woodchip Handbook will help you ensure that you’re getting the most out of your systems. And it will undoubtedly teach you many new things as well.
And if you’re looking to begin using woodchips on your farm or homestead, The Woodchip Handbook is the perfect place to start.