“I’ve always been fascinated at the prolificness of seeds and how one plant can potentially give you hundreds more,” says Brijette Peña, owner of the San Diego Seed Company. “That’s still amazing to me now, even a decade later.”
Specializing in providing locally-sourced organic seeds that are tailored to the demands of the American southwest—along with catering to urban growers dealing with a paucity of space—the latest additions to the San Diego Seed Company’s vibrant vault include Chinese purple hardneck garlic, lizard spinach seeds and eye-catching chocolate cherry sunflower seeds.
We spoke to Peña about repurposing bathtubs into growing containers and adapting seeds to meet the demands drought-prone regions. We also got into the enduring appeal of growing tomatoes.
“We got involved in seeds out of a need,” says Peña when she reflects back on the origin story of her company. “We realized that nobody was really focusing on drought-tolerant varieties for the American southwest,” she adds. “So it all blossomed out of that.”
Addressing the dynamics of growing in southern California, Peña explains that dealing with long warm seasons and short cool seasons factors into which crops prosper.
“We’re looking for varieties that do well in very hot dry climates,” she says. “We get less than 10 inches of rain in a good year. We’re capable of growing warm season varieties from February to November, which is very different to other parts of the United States.”
This year, the San Diego Seed Company conducted a number of successful corn grow outs. “It’s been so much fun shucking the corn and seeing the volume of seed we’ve gotten off of it,” says Peña.
Alongside corn, Peña adds that carrot season is her favorite production period: “It smells amazing and very few people actually get to see a carrot grow from seed. It’s a special experience.”
“We’ve sold a lot of garlic this year,” says Peña when asked about the company’s most popular seeds. “That’s been really fun because people are just really excited to grow their own garlic.”
Peña says that tomatoes are also continually one of the the seed company’s biggest draws. “People love tomatoes because of the massive genetic diversity within that crop group,” she explains. “There’s hundreds of thousands of varieties of tomatoes out there and some are particularly bizarre and people love them.”
When it comes to growing in tight urban spaces, Peña has witnessed her customers getting creative. “I’ve seen people growing in bathtubs and large fiberglass containers,” she says. “We have a huge community of container growers using all different types and sizes, like improvising with a shopping cart lined with burlap. We’ve seen it all.”
I keep chickens, and I have for the better part of the last decade across a few different properties. Currently, my family has a coop with six 1-year-old Australorps on a small, suburban lot.
I also have anxiety, which can make leaving the house for a night or longer difficult. It’s true that I’m a homebody, preferring the contours of my couch to calls from the great unknown. And after staying at home for … a year? more? due to the pandemic, walking out the front door feels like an unfamiliar, even dangerou endeavor.
But the real world does beckon. And as the holidays and travel to far-flung family members’ homes approach, I needed to figure out how to sleep in a bed I didn’t purchase without constantly worrying over our small flock.
Perhaps you, like I did, picked up some chickens during lockdown. And maybe now you’re wondering how to travel overnight without worrying over the safety of your chickens safety the entire time. So here are some things I do to keep poultry panic at bay while away from home.
A Secure Run
After years of free-ranging chickens on our family farm—and losing more than a few to foxes, hawks, minks, etc.—we decided from the get-go to keep our chickens in an enclosed run. The structure is nothing fancy (constructed of chicken wire, pieces from a discarded greenhouse and a clear, corrugated plastic roof), but it keeps our birds safe from the neighborhood hawks and raccoons.
It’s true that our hens don’t get access to growing grass. But between vegetable scraps from the kitchen and garden weeds, they get plenty of fresh vegetation. They’re safe and secure against predators, which is something we all appreciate.
And when we travel, I know the chickens won’t jump the fence or take an impulsive stroll around the neighborhood.
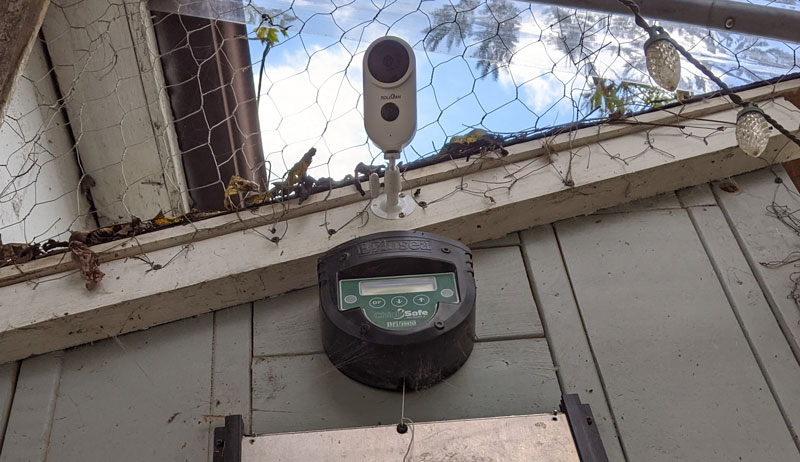
We have a ChickSafe Advanced automatic coop door from Brinsea installed on our hand-built coop, and, boy howdy, do I love it. The metal door panels slide open at sunrise (I’ve fiddled with the sensitivity for a while to account for the clear roof panels and shady location, but I finally dialed in the perfect number) and closed when the sun sets.
This is, of course, an amazing development for those who want to travel and keep chickens. But it’s also great on weekends, when a chicken-keeper might want some extra sleep.
My job is remote, so I’m always home. But I still sometimes don’t physically check on my chickens until well into the afternoon. Virtually, though….
Security Camera
Is it ridiculous to put a wi-fi connected security camera in the chicken coop? Maybe, but devices are so cheap these days that it’s easy to do. And, to me, it makes more sense than my neighbor’s camera broadcasting a steady shot of his grass.
I installed the camera above the coop door, with a view of their feed and water bucket. While it’s true I can’t see the door, I’ve come to trust that devices’ reliability enough to not need to see it open and close. If my wi-fi were better, though, I probably would have installed the camera on the other end, with a view of the run and coop.
Despite being a budget camera, our device gives us everything we need. I turn on motion detection at night to ensure nothing’s messing with the food, water or coop ladder. And when the door opens in the morning, releasing the birds, I get an alert on my phone.
Rodney Wilson
Then I turn off motion detection for the day so I don’t get alerts every time a chicken gets some food or water.
When I travel, I can keep an eye on my chickens from afar. And when I’m home, I’m also known to catch a quick look at the flock from a cozy spot on the couch.
There are numerous options for supplying large amounts of feed at a time. Automatic feeders are especially attractive, with doors that only open when chickens step on an activator.
I haven’t gone that far yet, though. Instead, I just hung a 15-pound feeder from the top of our run, situated to hang right at the level of my hens’ heads.
Because it’s under the plastic roof, food is protected from rain and snow. It’s true that the feeder is open and unattended at night for other creatures to access. But I know they don’t because of the security camera. If I start getting alerts, though, I may switch to an automatic feeder.
Rodney Wilson
Bucket Waterer
Chickens, like most livestock, need a constant supply of fresh, clean water. And there are plenty of products that can do that for you, including auto-filling cups that connect to your garden hose.
But I’ve found that an inexpensive 5-gallon system works best for my setup. I drilled and screwed in two cup waterers that I picked up at Tractor Supply Company. I fill up the bucket, pop on the lid to keep out debris and am good to go for a week or more.
One note: Consider the placement of your water cups before drilling holes. I planned to put my bucket on an old, upturned pot for easier access, so my cups are installed close to the bucket bottom. If you plan to set yours on the ground, though, you’ll need to install about an inch or higher from the ground.
My chickens figured out the cups right away, pushing the yellow stopper aside to drink the fresh, cool water. (“What about when the waterer freezes?” you may ask. And I’ll probably need to answer that soon enough.)
I didn’t add all of these coop security measures at once. But this is what I have now, and when I travel and do a gut check, I appreciate not having to worry about our flock while we’re not home to care for them.
The end of the growing season means many things for us farmers. In an ideal world, the coming winter is a time to rest, reflect on the previous growing season and make plans for the next one. And, in addition to being qualitative, that reflection should be quantitative as well. Here are some financial analyses that you can use this off-season to better understand the last growing season and begin to prepare for another year of farming.
Types of Financial Analysis
In office work environments, people distinguish between documents that are meant for internal or external consumption. I like to think about financial analyses in the same way. Financial statements meant for external consumption are the ones that someone else (frequently a lender) wants you to create.
Financial analyses meant for internal consumption, on the other hand, are meant only to be useful. They are statements that help see where your business stands, or which aspects of it are or are not working.
These are some of the financial statements that I try to run (or update) at the end of every farming season. This list is by no means exhaustive, but together these three analyses will start you in the right direction.
If you assiduously track your expenses throughout the growing season, you can skip this step. And if you don’t, I recommend that you start. I personally track my operating expenses alongside my budget in real time so that I can always see if I’m about to go over any category.
If you haven’t already checked your operating budget for the year, though, do so now. Did you spend far more in a specific area than expected?
Balance Sheet
A balance sheet is a favorite request of lenders, but it can offer you some valuable information as well. People commonly describe a balance sheet as a “snapshot” of your business at a particular moment.
In essence, a balance sheet compares the farm’s assets (money in the bank, value of equipment, etc.) with its liabilities (money owed). The difference between those two is the farm’s equity.
A balance sheet shouldn’t be taken as the absolute indicator of financial health, but it does provide a useful perspective of your farming business. It can also be helpful to compare balance sheets over time to see how your equity grows (hopefully). Michigan State University Extension has a helpful balance sheet template for those putting one together for the first time.
Enterprise analyses are investigations of the profitability (or not) of a particular part of your business. You might be making a $1.00 profit for every bunch of beets you sell, for instance, but losing $0.50 on every bunch of carrots. (Yes, that is possible).
In short, an enterprise analysis works by comparing the cost to produce an individual item (say one bunch of carrots) with the price you’re selling it for. Determining the exact cost can require some careful record keeping. But, estimates can sometimes get you pretty close if you’re just starting out.
Although financial analyses might not be the most exciting part about farming, they are critically important. And those farmers who work to understand and improve their finances are sure to have a better farm business in the long run.
On and off over the past couple years, I have been working on clearing small, twisted apple trees from my farm’s older pastures. It might sound strange at first, but having wild apple trees take over old livestock pastures is a known phenomenon.
I’m not opposed to letting some of the nicest trees grow up and produce fruit (as some already have). But the numerous smaller trees must go in order to keep things tidy and restore the pastures to full productivity. The question is, what’s the best way to go about removing the trees?
Since I’m not looking to plow and plant the pastures, I don’t have to worry so much about removing the roots. I just need to cut the trees below ground level and mow the pastures for a few years. Then the roots should die off and eventually rot away.
This leaves me with two options. I can brush hog the trees, or cut them down by hand.
I’m always game to experiment in search of the best solution to any project. So of course, I’ve tried both approaches. Along the way, I’ve found pros and cons for each.
If you want to quickly get a pasture looking nice (at least from a distance), brush hogging is a great solution. Using powerful thwacking blades, a brush hog can slice through small trees and cut down grass and weeds at the same time. That’s a big positive if you’re working in late summer when the trees disappear among the brush.
A single mowing can make a huge difference. And if you hit the area a second time later on, the results will look even better.
Cons
Brush hogging is a bit messy. The blades will shatter trees and spread them across the pasture. You’ll need to rake up the bits and pieces.
And since the blades can’t cut all the way to ground level, the trees will leave behind battered stumps that stick up out of the ground. These can be hazardous for humans and livestock alive, not to mention riding mowers with blades that cut closer to the ground than a brush hog.
You may have to go back and cut these stumps by hand. That takes time and effort. And since they’re no longer attached to visible trees, finding every stump can be challenging.
If you want to do a tidy job, hand clearing is the way to go. Using pruning loppers, a hand saw and maybe a digging shovel, you can travel from one tree to the next. Simply cut it down just below ground level, leaving no visible stumps behind.
Since you’re cutting down entire trees, you won’t have to deal with the mess of shredded branches left behind by a brush hog. And if you have to cut down all the stumps left behind by a brush hog anyway, hand clearing isn’t necessarily more laborious.
Having the tree trunks to grab hold of can actually give you more leverage for reaching belowground to cut the trees.
Cons
It takes time to clear a large number of trees by hand. You won’t get the rapid visual improvement offered by brush hogging.
Hand clearing is also best done in the spring, before grass and weeds grow up. Once brush takes over, it’s harder to find small trees and readily reach their stumps. Speaking of which, small pasture-grown apple trees tend to grow in very twisted, gnarly ways. So you may have to cut some of the branches to reach the base of each tree.
After experimenting with both techniques, I’m personally drawn to hand clearing. It’s tidier and doesn’t really take more time. But if you need fast results—or if you’re looking to clear a field in late summer—brush hogging can be an equally good place to start.
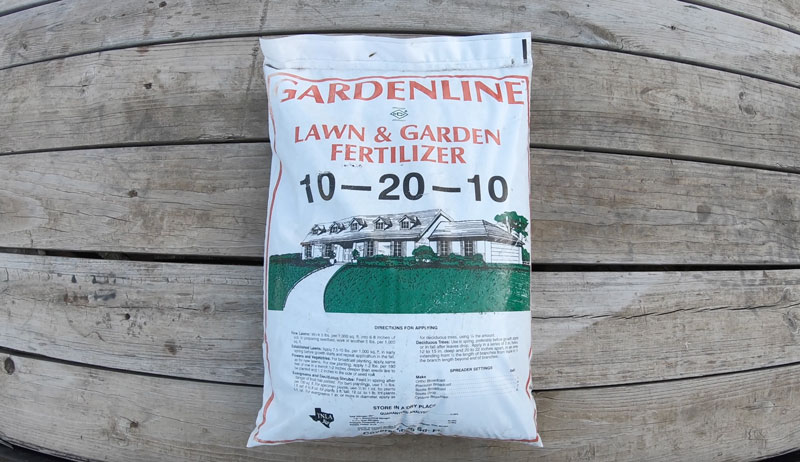
Fall is a great time to fertilize your grass, both growth in your lawn and in the pasture. But when you go to purchase your bags of fertilizer, you may wonder what the numerical information means. So let’s take a look at the three numbers on a fertilizer bag and explore what they mean.
The three numbers on a bag of fertilizer indicate the “big three” nutrients required by all plant life. They are:
Nitrogen
Phosphorus
Potassium
When you see the three numbers on the front of a fertilizer bag (for example, in the video, I have 10-20-10), you can know that’s what they refer to. And to easily remember which is which, just know that the three nutrients are listed in alphabetical order.
What Do the Numbers on a Fertilizer Bag Mean for Me?
Knowing what these numbers refer to is important. But you also need to know how much your soil and grass need.
The simple answer to this question is you need to get a soil test. I got a soil test on my farm’s soil, and the results indicated that my grass needed:
10 percent nitrogen
20 percent phosphorus
10 percent potassium
But wait … that only adds up to 4o percent of the material in my bag of fertilizer. What’s the other 60 percent in there? It’s just the carriers that make up the granules. So in a 50-pound bag, 30 pounds is just the stuff that holds the essential nutrients.
How Do I Know How Many Bags of Fertilizer I Need, Though?
When I got back my soil test, it told me I needed 10 pounds of potassium in my 4,000-square-foot yard. But how many bags of fertilizer did I need?
Well, the answer to that comes down to math. I know that in my bag of 10-20-10, there is only 5 pounds of potassium (10 percent of the 50-pound bag). And, according to the information on the bag, one bag of fertilizer will cover 4,000 square feet.
So, I needed to put down two bags.
On your soil, though, your needs might not be so straightforward. Every soil analysis is different, every soil is different, and every fertilization recommendation is different.
But if you understand what the numbers of a bag of fertilizer mean, you should be able to do the math to figure out what fertilizer and how much of it you need.
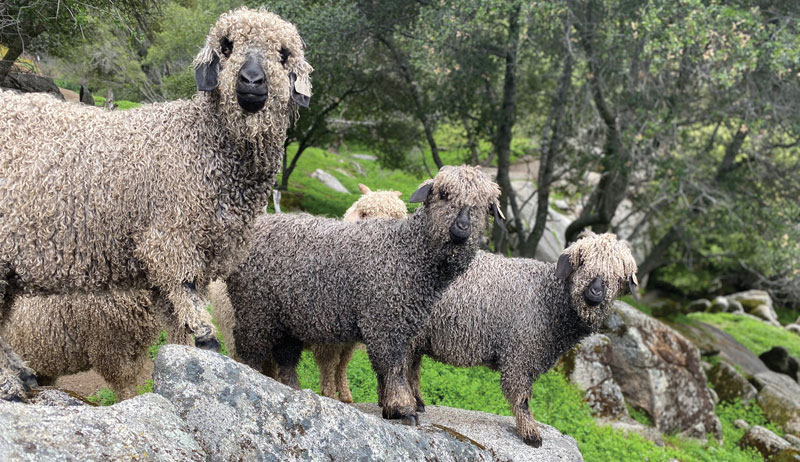
When you think of mohair, your thoughts probably turn to a scratchy, heather-pink sweater your mom or grandma wore in the 1960s. That sweater left a trail of fuzz clinging to everything it touched! Today, though, anyone who raises Angora Goats will meet that vintage reflection with staunch debate.
Breeding a Better Fiber
In the 1980s and 1990s, producers fine-tuned the Angora breed to one that grows soft, luxurious white mohair for the goat’s entire lifetime. They effectively left behind the itchy stigma of yesteryear.
Simultaneously, a movement in the Pacific Northwest took off in the niche hand-spinner community. Avid fiber artists sought to raise a backyard animal that would produce skin-touch soft fiber in a spectrum of natural colors for use in hand-spun yarns and without a drop of chemical dye.
After years of thoughtful, selective breeding and relentless pursuits to meld the quality of white Angoras, the Colored Angora Goat was developed.
For the Fleece
Today, Colored Angora Goats bring higher prices per pound for their magnificent fleeces, which you can find in:
red
brown
apricot
black
silver
multicolored/patterned
Still exclusively raised on hobby farms across North America, Colored Angora Goats are treasured by those who keep them. Their reasons range from fiber, show, 4-H and FFA projects or brush clearance. Some enjoy just keeping the breed as pets.
Angora Goats are considered the most efficient fiber producers in the world. Mohair grows 1 inch per month, and fleeces average between 5 to 10 pounds each. They produce fiber for two shearings per year (unlike sheep, which are shorn once).
Quiet, docile and easy-going, Angoras are generally easy to keep. As seasonal fall breeders, they don’t possess the strong odors often associated with other goats.
Angora Goats enjoy the company of others. Keeping at least two is always the best plan. Castrated bucks (wethers) produce the softest mohair for a lifetime.
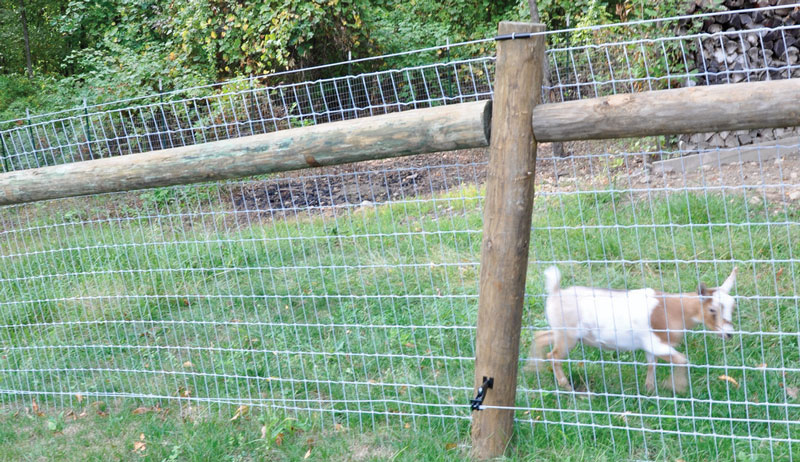
Angora Goats are typically respectful of their surroundings. A woven wire fence of at least 48 inches in height is standard. Treacherous terrain full of thorny plants poses no challenge. Rocks and boulders are seen as opportunities to play and reach for tree limbs.
A simple lean-to roof on higher ground often fulfills a shelter. This offers a place to get out from the weather. Solid walls to block cold winds, especially after shearing, will be essential.
Unlike sheep, goats thrive on brush and low-lying trees. Angoras were first introduced to the Southwest in the 1800s because of the abundance of brushlike forage that other livestock wouldn’t touch. Angora Goats are clever browsers and not terribly picky.
If you’re at all into fermentation, chances are you already know Sandor Katz. His previous books The Art of Fermentation and Wild Fermentation (among others) have introduced untold numbers of readers to the world of fermentation.
And if you’re not into fermentation, you frankly should be. If you farm, homestead or just avidly garden, preserving the harvest is part of what the lifestyle is all about. And freezing a few bags of sauce tomatoes just doesn’t cut it.
Beyond helping you process your harvest, fermentation can be healthy and is also just really fun.
A Global Perspective
Channeling how fun fermentation can be is one of the things that Katz does especially well in Sandor Katz’s Fermentation Journeys. As much as the book is a fermentation cookbook, it is also part travel memoir and culinary history. Throughout the book Katz pairs each recipe with a story of where he initially encountered the technique as well as any adaptations he’s made himself.
Together these stories work to create the sense that Sandor Katz’s Fermentation Journeys is a kind of informal, global survey of fermentation. And maybe it is. Katz makes a point of mentioning how similar fermentation techniques are in cultures from around the world.
And the book is structured to suggest those connections. The section on grains, for instance, contains recipes from numerous regions, including Eastern Europe, Appalachia and China. And the section on beans and seeds (one of my favorites) contains recipes from Japan, Nigeria and Italy (among others).
Take from all of this whatever you will. I personally choose to see Sandor Katz as studying “comparative fermentation” in the same way Joseph Campbell studied comparative religion and literature.
Maybe fermentation is just another way in which many cultures are far more similar than they appear at first glance.
For those simply looking for a practical fermentation guide, Sandor Katz’s Fermentation Journeys, is that too. I’ve personally been making batches of Kisiel (a technique for fermenting grains) and a kind of Chinese rice-water picklessince reading the book.
And beyond containing recipes from many countries, the book also provides a wide sampling of fermentation techniques. Katz includes recipes for vinegars, meads, breads and numerous processes for fermenting vegetables, dairy products and even meat and fish.
There is, in short, something for everyone to ferment.
Perhaps most importantly, Sandor Katz’s Fermentation Journeys is sure to inspire you to start fermenting as well, which alone makes it well worth picking up.
Permanent livestock fencing is a big investment of time and money on the homestead, so it’s important to think through all the key aspects before building it. There are many types to choose from, but it’s critical that the fencing be carefully matched to your farm needs.
Commonly used livestock fence types include:
board
barbed wire
woven wire
high-tensile
cattle panels
electric
combinations of any/all of the above
Aspects to consider when choosing fencing include legalities. The type, age and gender of the livestock to be pastured matters, too. Also look at areas to be fenced and material durability versus cost.
Legalities
The first things to check when planning to pen your animals are the applicable laws in your area. It would be devastating to plan and construct homestead fencing only to find that it wasn’t legal and needed to be removed.
Each state has laws that regulate livestock ownership, and these laws typically require owners to fence their animals. They also define what makes a legal fence, who is responsible for building and maintaining fencing, and who has liability if animals get out.
Many local governments also have fence laws. These may actually prohibit some types of fencing. Good places to start investigating the laws that apply in your area are with an internet search (for state laws). You can also call your city or county planning office.
Livestock fencing is normally used to keep animals in and predators out. However, knowing the type of livestock you intend to keep is crucial to selecting the correct fence type. Specific kinds of fencing are better suited to some species than others.
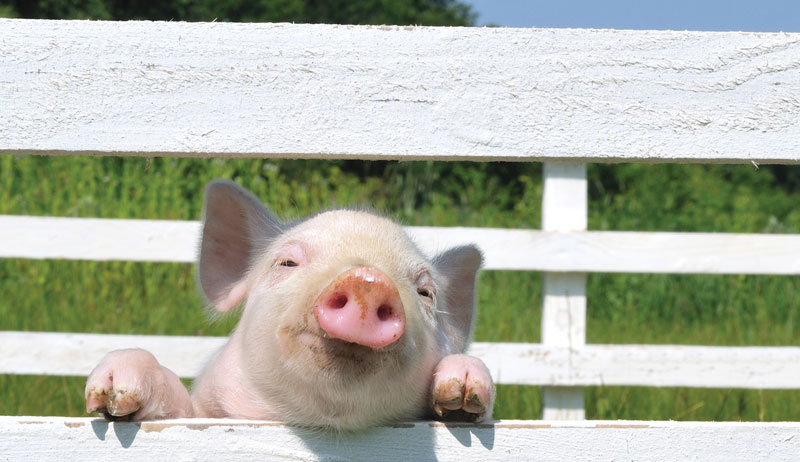
For example, board fencing is often used for cattle, horses or sheep. It is, however, considered less suitable for small animals such as goats, hogs and poultry because they can slip out between the boards.
Try to consider all the types of animals you may own over the life of your farm and how you’ll manage pasturing them. Plan with flexibility in mind because conditions and livestock species frequently change as time passes.
The better you can identify all the animals you intend to keep, the better you can plan fencing that will successfully contain them all.
Lesa Wilke
Map Planned Fence Areas
After determining what types of fences are allowed in your area and what kind of livestock you plan to own, prepare a map of your homestead and the locations to be fenced. Planning what areas are to be used to confine each type of animal is the key to good fencing.
Remember that some types of livestock can be pastured together, if the fencing is selected to accommodate all species.
The easiest way to prepare a map of your farm and the areas you need to fence? Start with an aerial photograph. A good aerial photograph will show the details of your land and can usually be obtained from your local tax office.
Or, you can go to the Google Earth website or app and enter your address. then just print out a two-dimensional aerial map.
As you plan on your aerial map, utilize straight fences wherever possible because they’re cheaper and easier to build. Plan lanes to connect livestock barns and outbuildings with all planned pasture areas. Gates for animals and equipment should be located in the corners of pastures closest to barns for convenient entry and exit.
Also, allow for several feet of empty border around the outside of fences. You need this to easily inspect and maintain them.
Livestock will need access to water in the fields. And it’s often desirable to pasture males, females and weaned young stock separately. Finally, while planning and before actually building, verify exactly where your property lines run. That way you won’t accidentally build your fences on neighbors’ land.
Snow Days
Dave Perozzi, owner of Wrong Direction Farm, raises grass-fed beef and pastured poultry in upstate New York. He recommends that those new to a piece of land, particularly those in snow regions, should plan fences.
But, he advises, wait through the first winter before building them.
“Build fences on the windward side of hedgerows because on the leeward side snow can drift and accumulate to great depths,” he says.
“We have places where trees and topography conspire together to bury 4-foot-tall fences in dense snow. In one case, the neighbors’ bull was able to walk out of his pasture into ours because the snow drifts provided a ramp over the perimeter fence.”
So you know what is legal, the species to be fenced and where the fences will be located. Now’s time to select the specific fence type for each area. Keep in mind that you can combine fencing types to make a more effective solution.
The sidebar below identifies recommended fence types for differing animals. When choosing the fence(s) for your homestead, remember that male livestock may require stronger enclosures, particularly during mating season. Also, young livestock may slip through fencing if the grid or wire spacing is too large.
Material Durability & Cost
No matter what type of fencing you select, choose the highest quality materials you can afford. Selecting durable construction materials presents a greater initial expense initially but can extend the life of a fence by 10 to 20 years.
Cutting costs on materials typically results in livestock losses and fencing that fails prematurely.
Wire
For example, wire for many types of fencing is coated with zinc (galvanized) to prevent rusting. The thickness of the zinc coating controls how long the wire is resistant to rust. Thicker coatings prevent rust longer.
Class 1 fence wire has the thinnest coating, while Class 3 fence wire has the thickest. Choosing a heavier gauge Class 3 wire over a lighter gauge Class 1 wire will cost more. However, it’ll last much longer and require less maintenance.
Lesa Wilke
Posts
Also, a fence is only as strong as its posts. Budget enough to purchase sturdy post.
There are typically two types of posts used, anchor and line posts. Anchor posts are used at corners and gates and give fences strength and stability so should be given priority. Line posts are evenly spaced between the anchor posts and hold up the fencing material.
Posts can be made from wood or metal. But wooden posts should be treated to prevent rotting where they contact the soil.
The type of livestock fencing you choose will dictate how far apart posts are placed. This can range from 8 feet for woven wire fencing to 50 feet for high-tensile fencing. Obviously, it’s extremely important that posts be sized and spaced appropriately so they support your fence for many years.
Unless you know exactly what you will do on your homestead now and in the future, it’s probably not possible to design perfect forever farm fencing. However, by carefully planning and choosing fencing systems and materials, you can give yourself maximum flexibility for whatever your homestead will become.
Strategic planning before building results in enjoyable livestock pastures. You will save time, money and effort down the road.
More Information
Popular Fencing Types
Barbed Wire
These fences are usually constructed using three to five strands of barbed wire spaced 8 to 16 inches apart horizontally. The wire is typically strung on posts spaced 10 to 12 feet apart.
Barbed wire is often used for cattle pastures since cattle have tough hides. However, it’s considered unsuitable for most other livestock because of the risk of injury from the sharp barbs.
Board or Rail
There are many options available today for building board fences. Types of board available include painted, treated, plastic and vinyl coated.
Board fences are commonly 4 to 5 feet tall.
This type of fence is popular on horse farms or situations where expensive animals are being confined. The labor and materials needed to construct these fences make it one of the costliest. Therefore, it’s also often used for smaller pastures and paddocks built to hold larger male livestock.
Cattle Panels
Cattle panels are made of heavy gauge steel 1⁄4 to 3⁄8 inches in diameter welded together in squares. They are 3 to 4 feet high and are usually 16 feet long.
There are panels designed specifically for most types of livestock (i.e., hog panels for hogs, etc.), and they can be configured and reconfigured in many ways. They can also be cut into smaller sections. The individual panels are somewhat expensive, so they are typically used for smaller pasture applications.
Electric
These are normally constructed from multiple strands of smooth electrified wires strung on strong posts. The number of wire strands and horizontal spacing depend on the livestock being fenced. A fence controller is used to energize the wires and selecting a controller that will provide a strong enough shock to deter your livestock is critical.
Once animals learn that they can get through an electric fence, it is difficult to keep them contained. Animals with tough hides or thick coats (such as cattle or sheep) can withstand stronger shocks.
Electric fences are usually cost effective and are frequently used in conjunction with other fence types—to either better contain livestock or to keep predators out. For example, electric strands placed at the top and bottom (on the outside) of woven wire fencing can be used to keep predators like coyotes out.
High-Tensile Wire
For this type of fence, stronger (high-tensile) wire is strung and held in tension between end posts which may be spaced quite far apart. Permanent tension springs and line stretchers maintain tension in the wire.
The number of wire strands used and horizontal placement depend on the livestock being fenced. It’s typical to electrify at least one wire strand to prevent livestock from standing or rubbing on the wires and moving them out of place.
A well-designed high-tensile wire fence is safe for livestock, easily adapted to uneven terrain, has a long life, requires little maintenance and looks good. They provide better livestock restraint and predator control when electrified.
Woven Wire
This type of fencing consists of horizontal and vertical wires woven into a grid with wire “knots” wrapped around the intersecting wires to hold the fence together. The grid spacing selected depends on the animals being fenced with smaller grids being used for smaller livestock. Many combinations of wire sizes and grid spacing as well as fence heights are available. Posts are typically placed 8 to 16 feet apart.
Woven wire fencing is suitable for almost all types of livestock and is particularly popular for containing goats, sheep, poultry and pigs.
This article originally appeared in the September/October 2021 issue of Hobby Farms magazine.
“One day I will have an escape artist hen to deal with and the next I’ll find a hidden nest of eggs that were being laid under a building,” says Katelyn Posego, who runs the Hastie Hen Farm on Whidbey Island, Washington. “They certainly keep you on your toes.”
Originally inspired by the goal of becoming self-sufficient and taking control over the food her family eats, Posego started her farming journey by taking small steps. Five years later, Hastie Hen Farm now fuels Posego’s own family. It also supplies other members of the community.
We spoke to Posego about olive-colored eggs and the intertwined nature of a self-sufficient homestead. We also touched on wine making at home.
Situated on Whidbey Island, Posego says her family can see the ocean from their homestead. “This certainly has its challenges in the construction of the ground,” she explains.
“But our garden area was worked for generations before we bought our home. We continue to work the soil and have added many raised beds to help.
“We are very far north and have shorter, cooler summers,” she continues. “This also makes our summer growing season shorter but offers the advantage of many native plant species due to the moderate climate. Apple trees, cherry trees and blackberries are just a few fruit-bearing plants that do exceptionally well in our region with no human interaction.”
When it comes to collecting and presenting the eggs produced by Hastie Hen Farms’ resident poultry, Posego has a go-to tactic.
“I organize the carton of eggs in groups of three of the same color. This means each dozen has four different colors of eggs,” she says. “This is always quite a surprise for new customers!”
When it comes to personal favorite egg colors, Posego plumps for “a good speckled egg.” She spotlights one hen who lays “the most beautiful olive, green eggs with brown spots.”
If you’re weighing the decision to raise chickens, Posego says that finding a “chicken mentor”—or consulting a local veterinarian—can be a huge help during the early days.
“Chicks are definitely the easiest livestock to just pick up and bring home,” she explains. “But I wish I had read a book or picked the brain of a chicken friend before pulling the trigger.”
A decade ago, Posego started to try out making her own wine at home. “You don’t need a large scale processing environment to make your own fermented beverages,” she says. “Wine can really be as simple and small scale as you like.”
Posego’s own wine adventure started with making mead. She then expanded to hard cider plus red and white wines.
“If you are interested in wine making, it’s much like any other homesteading activity—just do it!” she says. “There are so many kits available that take all of the guesswork out of the process. As you go you will learn what you like and dislike, further refining your winemaking ability.”
“Whether you are growing your own vegetables, raising your own meat or gathering eggs, you witness the work required for every item,” reflects Posego as she sums up the joys of her homesteading lifestyle. “You know the effort that goes into every egg a hen lays, how much food and water they need and what they do in their daily life.
“For each part of your homestead, you are intertwined in the workings,” she continues. “I think this deepens the value of every item and teaches a respect that can only be earned through that day-to-day knowledge.”
In lieu of sending them to the landfill, composting nitrogen-laden food scraps—along with fallen leaves, straw and even cardboard—can pay dividends to you on the farm and to the wider world. That’s because eliminating (or at least reducing) food waste is one of the most meaningful actions we can take to mitigate climate change.
In fact, 20 percent of greenhouse gas emissions from landfills come from food waste.
So, if you don’t currently compost but you could, you definitely should. And if you already have a pile? Ideally, you are encouraging mostly aerobic, rather than anaerobic, decomposition.
When carefully tended, a “hot,” oxygen-rich compost pile breaks down in a jiffy. Unfortunately, there are plenty of gardeners who toss their kitchen scraps and garden waste onto the pile but never add water or run a pitchfork through the mess.
Sure, these colder compost piles eventually decompose. But they’ll also release some degree of potentially harmful methane along the way. How much?
That depends on the size and contents of your pile.
Methane Matters
“Methane is a major contributor to today’s [climate] warming,” says Ilissa Ocko. “It actually contributes more to warming in the short-term than all of the CO2 emissions that we’re emitting today from fossil fuels.” Ocko is senior climate scientist and the Barbra Streisand Chair of Environmental Studies at the Environmental Defense Fund.
Partly, that’s because methane is itself a heat-trapping gas. And it takes about 10 years to break down in our atmosphere.
But even after that methane’s gone? “Ninety percent of the excess heat that is being trapped right now is going into the ocean,” Ocko says. “So, then you get this feedback cycle where a warmer ocean actually emits more carbon dioxide into the atmosphere…. What ends up happening in that case is that signal ends up lasting for hundreds of years.
“The CO2 we emit this year—20 percent of it will still be there, warming the earth, 1,000 years from now. CO2 builds up.”
Of course, compared to the methane released from all of our landfills, wastewater, livestock holdings and rice farms, the methane from one small, “cold” compost pile is negligible. But it all adds up. And, besides, with a little vigilance, you can avoid being part of the problem.
As they decompose your banana peels and other organic matter, the bacteria in your compost pile produce methane. If there’s plenty of oxygen in the pile, this methane is further broken down.
But what happens without enough oxygen? “The process ends at methane, and the methane is emitted,” Ocko says.
Together, your pile’s size, porosity, moisture content and carbon-to-nitrogen ratio determine whether the organisms in your compost are breaking down matter aerobically or anaerobically. It’s worth noting, too, that no pile is exclusively aerobic or anaerobic all of the time. Different kinds of organisms step up at different stages in order to decompose your raw materials.
Recipes for Success
For best results, your compost pile should occupy at least 1 cubic yard, and it should contain a blend of nitrogen-rich “greens” and carbon-rich “browns.” Technically, the ideal ratio for these is 30 parts carbon for every one-part nitrogen by weight.
However, it’s unrealistic to expect perfection. After all, you’ll likely be composting whatever materials you have on hand.
What’s more, each individual material type has its own carbon-to-nitrogen ratio. For instance, say you have some old straw or fallen leaves to break down. By weight, straw is roughly 100 parts carbon to one-part nitrogen. Dry leaves are approximately 50 parts carbon to one-part nitrogen.
Got grass clippings or leftover kitchen scraps? Grass clippings are about 15 parts nitrogen to one part carbon. And, although they’re highly variable, food scraps are around 20 parts nitrogen to one part carbon.
If you aren’t sure whether you’ve managed to blend a reasonable amount of carbon with nitrogen, your compost will offer up some olfactory clues. A pile that smells strongly of ammonia—think matted grass clippings on a hot day—has too much nitrogen.
Just do your best to include as diverse a mix of compostable materials as possible. And, to ensure more even distribution of heavier, wetter items like melon rinds, chop these before adding them in.
Along with its carbon-to-nitrogen ratio, the moisture content and porosity of your compost pile matter, too. Compost should be uniformly moist but not sopping. A pile that is too wet will break down anaerobically. It is also more likely to smell “off.”
To gauge its moisture content, grab a handful of material from the pile and squeeze it in your fist.
If more than a few drops of water drip out, the section sampled is probably too wet.
If the handful you’re testing feels dry to the touch and nothing drips out? You likely need to add water.
To be certain, test more than one section within the pile. If you find a series of alternately wet and dry areas, you might need to more thoroughly mix your ingredients.
And, when it comes to creating space for oxygen to move within and throughout your pile, bulky materials like dried leaves, straw and even small amounts of shredded paper can be invaluable.
So, if after performing the squeeze test you determine that your compost is too waterlogged, you may want to add some of these. Just keep in mind that, because these are typically very carbon-rich, they’ll skew your overall carbon-to-nitrogen ratio.
Susan Brackney
Running Hot & Cold
Measuring the temperature at the center of your compost pile will further help you to determine whether your pile is likely decomposing aerobically or not. Made with extra-long probes and moisture-proof faces, most compost thermometers are designed to be left in place long-term.
If you’re starting a new pile or recently added or turned your material, the temperature at its core may run anywhere from 80 to 100 degrees F for the first few days. Next, with a respectable carbon-to-nitrogen ratio, adequate moisture and decent airflow, your compost should really heat up.
During this “thermophilic” phase, its internal temperature can reach up to 150 degrees. Pile size, makeup and moisture levels will determine how long it stays in this hot state.
An internal temperature that has gone back down to the 80- to 100-degree range may indicate that the center of the pile has become too dry or that it’s time to turn the compost pile. But a change in temperature shouldn’t be your only indicator.
Take a peek at the center of the pile. If it looks dark and crumbly, it may be time to move what’s on the outside edges of the heap to the center and rearrange what’s in the center back out to the edges.
Turn, Turn, Turn?
How often you turn your pile—and the method you use to turn it—also can have a positive or negative environmental impact. For example, to produce compost at scale, many large commercial compost farms rely on fossil fuels to power heavy equipment for shredding and moving raw materials, as well as turning, finishing and delivering compost.
According to Steven Wisbaum, founder of the Vermont-based Champlain Valley Compost Co., “The amount fossil fuel consumed during the various steps of the composting process will impact its ‘net’ carbon footprint.”
Frequency Concerns
Obviously, turning your own small pile with a pitchfork and some elbow grease is a zero-emissions activity. Even so, in his work, “In Defense of the Pile Less Turned: A Case for ‘Low-Input’ Composting,” Wisbaum suggests turning too frequently can be counterproductive.
“Most of the oxygen added to a pile during turning is used up by the microbial populations within hours, or even minutes of turning,” he writes. “Therefore, unless additional oxygen is being provided under pressure (i.e., via ‘forced aeration’) or a pile is turned hourly, the purpose of turning is not to add oxygen.”
Porosity Talk
Instead? Turning improves a pile’s porosity. In other words, it creates additional space for oxygen and carbon dioxide to move throughout the compost.
“If turning is being done primarily to restore porosity and keep the decomposition process moving at a moderate pace,” he writes, “turning can be timed to occur after internal temperatures have dropped 20 to 30 degrees Fahrenheit from a high of 131 to 145 degrees Fahrenheit.”
As you pay close — or closer — attention to your compost, you just may find that you’re generating nutrient-rich compost in a matter of several weeks rather than months. Better still, you’ll have kept all of that material out of your local landfill.
And, if you limited methane and carbon release in the process? “Reducing methane emissions is really the key lever to slowing down the rate of warming in the near-term with the benefit of also helping in the long-term,” Ocko says.
“And CO2 is kind of the opposite. It’s the main lever in that, if we reduce emissions of CO2, that’s our best chance at having a better climate in the long-term.… They definitely feed off of each other.”
This article originally appeared in the September/October 2021 issue of Hobby Farms magazine.