Categories
Beginning Farmers Farm & Garden Homesteading

Going Off The Grid With Ron & Betsy Spomer

If you’re like me, you’ve probably dreamed of someday selling your home in town, moving onto a large tract of land somewhere out in the boonies, growing your own vegetables, hunting for your meat and living happily ever after while enjoying the fruits of your labor of love.

Go ahead. Admit it! It sounds great, doesn’t it?

While many of us dream of such a thing and might even have it on our bucket list for some time down the road, freelance outdoor writer and photographer Ron Spomer and his wife, Betsy, are living their off-grid dream in the mountains of Idaho.

And they love every bit of it.

Living the Dream

After several years of preparation, the Spomers sold their Boise home in the summer of 2018 and moved onto ranchland that they purchased in a remote area of Idaho. It was something Ron had dreamed of for many years.

“I had been thinking about it more than my wife,” Ron says. “I’ve always lived in the country pretty much. I’m a country boy. I had places out in the country—5 acres, 25 acres, stuff like that. And my wife had a career as a nurse in a hospital in Boise, so we had to stay there for quite a few years. But I said, ‘When you’re done and we retire, I want to get back out in the country.

Ron wanted to get back up to northern Idaho, which he really loved. But two of his daughters moved into the Salt Lake area and had five grandkids. He had to decide if he wanted to move farther away from the grandkids or closer.

“So, we drew a circle around Salt Lake, X’d out all the parts that were in Utah and found this place about 14 or 15 miles from the Utah border,” he says. “We’re right off of I-15, so we can just zip right down there and see the kids inside of two hours.”

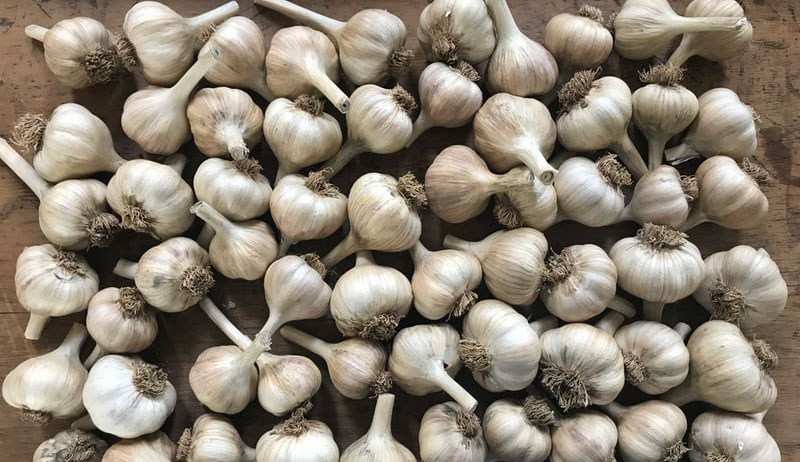
While Ron was all-in for the idea from the start, Betsy was still somewhat hesitant as preparations were being made. But that soon changed after she found out how much she loved country living. She always liked gardening, and when they got there, she started planting. Then she thought it would be cool to get some chickens.

“She just sort of got involved and fell in love with it,” Ron says. “I think she likes it more than I do now.”


Read more: Getting off the grid has never been easier! 


Ranch Life

The ranch is located in a fairly dry area of the state in the foothills of a mountain range that takes portions of the property up to several thousand feet elevation. It already had a 20-year-old house on it, although it was larger than what the couple needed.

Still, the opportunity was hard to pass up.

“The place was spring-fed, and it was all pretty primitive,” Ron says. “It had a nice house on it—too much house for us—but we were like, ‘Well, the house is there. The land is there.’ It’s got a couple of streams running through it.

“There are some draws: It’s pretty hilly and pretty rough. You get the mountain air coming down to cool things, even though it gets hot and dry in the day. It’s not a bad option for the evening. So, we don’t have air conditioning. We save some money on electricity there.”

off-grid off the grid
Ron Spomer

Far Off the Grid

“Off the grid” means different things to different people. For the Spomers, it means that they’re pretty darned self-sufficient when it comes to providing their own utilities and the like.

“Of course, it’s all off the grid, so we have to make all our own energy,” Ron says. 

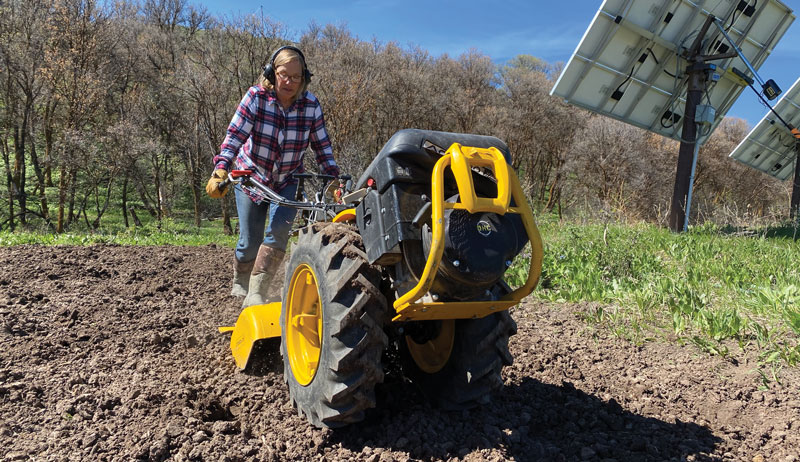
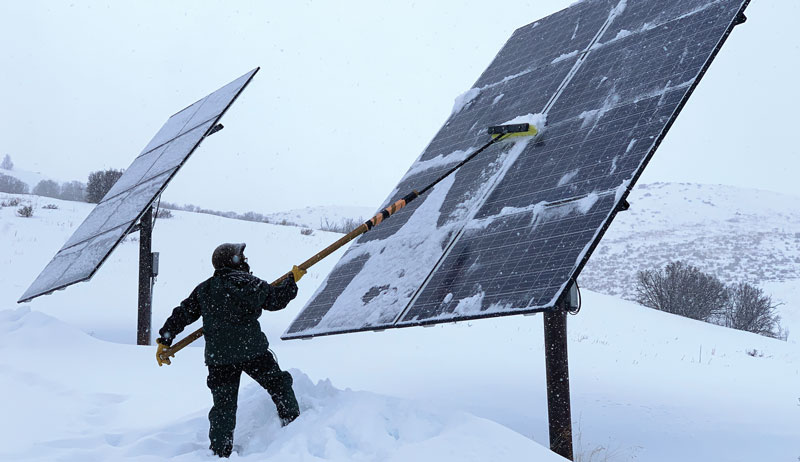
They mainly use solar for off-grid power. The place had a wind turbine on it, but that soon went belly up. After some research, Ron realized that wind wasn’t really the way to go.

“There’s just too much maintenance for what you get back,” he says. “And, of course, you’re at the whims of the wind. 

“You have to take it down and maintain the turbine and all, then put it back up again. And that requires a vehicle, a bunch of pulleys and things, and is a bit of a job.

“And then the darned thing goes out. It burned out inside of two years, and the blades were cracking prior to that, so that would have been another replacement. After two years of that, we realized it just wasn’t worth replacing. And it was cheaper to go with more solar.”

Solar Solutions

Ron admits plenty of people regularly ask him what they do for electricity on cloudy days. The key to getting enough power living off the grid, he says, is having enough solar capability to store plenty of electricity if the need should come along.

“You’re picking up some energy even on the cloudy days with the solar panels,” he says. “So we put in new solar panels to augment what was already here until we’ve got to the point now with our battery storage, we can last for about three-and-a-half to four days with no power coming in, just off what we’ve saved.

“And in a sunny climate like this, that generally works out. We’ve got an emergency backup house generator that runs on propane. Llast year, it only started two times.”

In the winter, they heat the home with a wood-burning fireplace. And they’re fortunate enough to have all the wood they need without having to cut down any trees on their property.

“We’ve got four good-sized maple woodlots,” he said. “Out here in Idaho, we’ve got maple trees, but they’re called mountain maples. There’s a fairly small range in which they are native, but we’re right in the heart of it.

“So I’m burning old maple logs that have been dead and lying on the ground here for years and years. They just last forever in this dry environment.”

A Special Surprise

Despite making their own heat and cooling, the Spomers do have one unexpected modern convenience. “This place came with fiber optics,” Ron says. “We’ve got better internet service than we’ve ever had in the city. It was some kind of federal project to bring fiber optics to a rural community, and this one was a demonstration community. We had no idea. 

When they were looking at the place, they thought they were going to have to get a satellite and have slow service. The real estate agent, however, informed them about the fiber optics going all the way up to the house.

That really helped seal the deal.

Living the Off-Grid Lifestyle

Despite what some might assume, there’s not a typical day in the life of the Spomers on their Idaho ranch. Because Ron still writes for a living, things vary from day to day.

“There aren’t any normal days,” he says. “Anything could happen. I could wake up at 5 a.m. and have four deadlines, and spend all my day sitting in an office with the great outdoors just a pane of glass away.

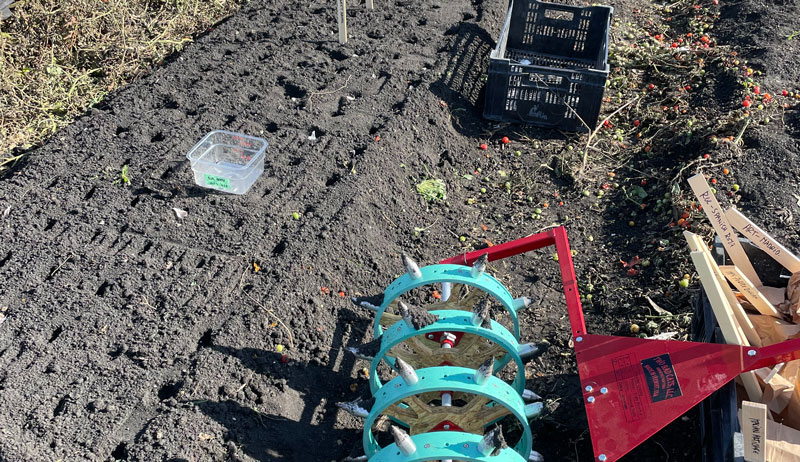
“Or I could get up and not have deadlines, but I actually do have a deadline: I need to get something planted in the garden or something cultivated or some food plots put in. Going out for firewood takes us quite a bit of time every year to get four cords of firewood piled up.”

No Regrets

Despite all the work it takes to keep a place like theirs up and running well, Ron and Betsy haven’t ever regretted their decision to move from town out into the boonies. There have, however, been some challenges that made things difficult—especially at first.

“We really haven’t [second guessed], which is kind of surprising,” Ron says.

“I guess [we were worried] a little the first few months we were in here, when all the old stuff ... started going on the fritz. The solar quit working, the turbine broke, then the emergency generator threw a rod. Even the fireplace started leaking smoke into the ceiling. It turned out to be a small problem, and I was planning to put an insert for efficiency into it anyway. 

“But we got all that fixed. And we had more than enough work getting things repaired and up to snuff. So we’re not having any concerns with boredom around here!”


Read more: An off-grid community might just be the right move for you.


The Reward of Self-Sufficiency

The upside to the couple’s way of life is far greater than any downsides Ron could think of. In fact, it’s easy for him to put into words his favorite part of living and working off the grid and on the ranch.

“It’s got to be that satisfaction of owning your land and knowing that you’re not beholden to anyone else other than the taxes,” he says. “I think most people can instinctively understand that. After all, this country was formed by people who wanted to have their own land and not be at the beck and call of the king or the lord. 

“It’s an old story, but I think it’s a part of human nature. You want to control your destiny and have your own territory, as small or as big as it is. It’s just that incredible feeling of security that you have.

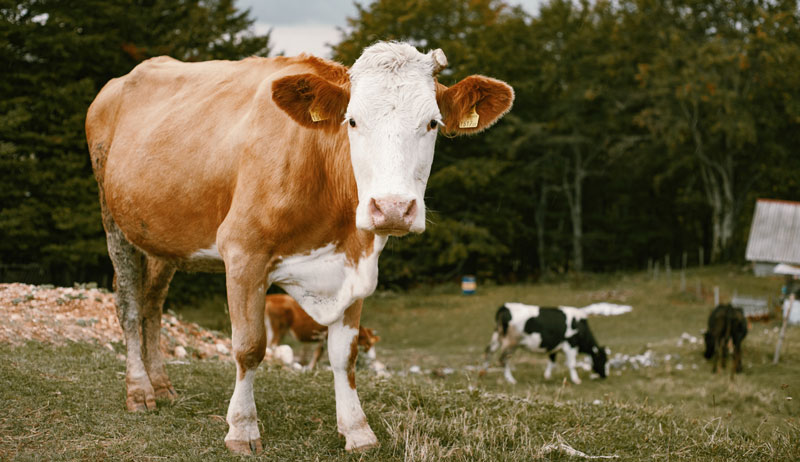
“Add land where you can grow some crops, raise some livestock, go hunting and improve the habitat for wildlife and all those fun things that we enjoy. But at the same time, you know that you are banking for your survival and your family’s. If the stuff hits the fan, we’re in pretty darned good shape. And that’s a wonderfully secure feeling.”

off-grid off the grid
Ron Spomer
Surrounded by Nature

Ron’s second favorite thing about ranch life is what brings many to move out of the city and into more of a country lifestyle, albeit not on quite as grand a scale as the Spomers and their choice to live off the grid.

“[It’s] just being close to nature,” he says. “Anyone who enjoys the country, hunting, the outdoors, birding and all the things that we do, when you’ve got a place like this, you step out the door in the morning and the birds are singing and coming to the feeders, and the deer are walking across the fields.

“And, your dog can go out and do whatever she wants without your neighbor complaining about your dog doing her business on their lawn. It’s just the incredible freedom you get with something like this.” 


More Information

You Can Do It, Too

While many people believe getting away from it all and living off the grid is probably beyond their reach, outdoor writer and photographer Ron Spomer and his wife, Betsy, don’t think that’s true.

“Don’t Give Up”

The key, Ron says, is prioritizing and planning. That’s advice he is happy to share with others.

“First is, don’t give up on the idea, because it’s definitely doable,” he says. “Second, start budgeting for it and saving for it. Don’t just dream about it. Make it happen. And the way to do that is to have some discipline with your buying…. Give up the super foolish things you really don’t need, and keep that dream in mind: ‘We are going to make this happen.’”

Get Your Land

Quickly escalating land prices in some areas can make the process more difficult. So if you can pull the trigger on a move sooner rather than later, you’ll probably be doing yourself a favor.

“If you can, get a place,” Ron says. “Even if you can’t move onto it right away, just get that property. Because land prices can escalate so quickly and so dramatically that you end up going, ‘Wow, we thought we had enough money. In 10 years we were going to buy, but the price of the place has doubled.’

“So if you can, get the property now. You can always build on it later.”

Homestead Health Care

All in all, Ron and Betsy love their backcountry way of life—especially sharing it with their kids and grandkids, who love visiting Grandma and Grandpa at the ranch. The off-grid lifestyle comes with lots of hard work, but it’s work that is enjoyable and also helps keep them healthy.

“We’re going to just keep plugging away here,” Ron says when asked what comes next. “We’re starting to talk about how long can we last and stay on the place before they wheel us off to a home somewhere. 

“Actually, I think it’s part of your health care, the fact that you’re out in the open air, and that you’re physical and working all day, not just sitting around. Plus, it’s the enthusiasm that one has for this lifestyle that I think keeps you young and keeps you going. You just want to be out there doing things, so it’s not a big hassle.

“It’s not like you have to plan a trip, load up the RV and head out for a two-day drive to get somewhere to do something like this. We can just walk out the door anytime we want. So we’re constantly being active outdoors.

“And I think we have things organized well enough that we can stay out here for a good, long time.” 

This article originally appeared in the September/October 2021 issue of Hobby Farms magazine.

Categories
Animals Chicken Coops & Housing Farm & Garden Poultry Poultry Equipment

Making Your Kit Coop Winter Ready, Part Two

Preparing a lightweight, ready-to-assemble coop for the cold of winter is not an insurmountable task. As long as you have performed routine coop maintenance and repairs, shoring up your henhouse for harsh weather can be a breeze.

We previously discussed how to choose a winter location for your coop. And we covered how to winterize the nest boxes, floor and ceiling. Read on to learn the steps for preparing your walls, doors and windows for winter. Plus, I’ll provide one additional step to make your summer coop a cozy winter shelter.

Walls

Unfortunately, most ready-to-assemble coops do not feature space for insulation between their exterior and interior walls. In fact, most of these coops only have the one main wall. In addition, the interior dimensions of these coops are usually minimal. They cannot sacrifice the space needed for installing insulation.

Don’t let this stop you from blocking the chill for your chickens. You can create your own natural insulation! Just surround your coop with straw bales.

Stack these around the exterior of your coop, butting right up against the walls. We usually stack our bales two or three high, depending on the coop we are protecting. Straw is a natural insulator. The bales will not only block the frigid air but also keep your coop’s heat in.

Come spring, this natural insulation can be easily disposed of as compost.


Read more: Check out these other steps for preparing a readymade chicken coop for winter.


Windows

Windows provide warmth and light for your flock during winter days. During winter nights, however, windows are the focal point of your coop’s energy transfer, the location where the heat escapes to the outside through gaps or cracks in the framing.

Fortunately, these issues can easily be resolved with compression weather stripping and caulk. Both are available at your local hardware or home-improvement store.

If the chill is coming through the window panes, consider covering the interior of each window with shrink-and-seal plastic. This heat-triggered window sealant is sold in rolls and in convenient window-insulating kits that handily include weather stripping.

Another option to consider is purchasing adhesive plexiglass cut to your windows’ size. Once the plexiglass is aligned with your window, peel the backing off and press the plexiglass to your window surface. Either of these additional window barriers will still allow light to enter the coop while helping keep the heat from leaving.

Doors

Let’s face it: Coop doors are the hardest areas to insulate in a henhouse. Pop doors have to remain open all day to allow the birds to enter and exit the coop. Human-access doors have to open on a daily basis to fill feeders and waterers, do an evening head count, replace soiled litter, and more.

There is no way to block off the doors without reducing or prohibiting their function. What can be done, however, is adding door weather stripping. When sealed, weather stripping stops drafts of cold air from entering.

You can also add an additional protective barrier to your pop door and your human access door. Just purchase a SilveRboard insulation panel. Cut this to the size of your doors, and install it by gluing or stapling. This special polystyrene foam board is covered by a silvery reflective film laminated that not only protects the foam but enhances its insulating properties.

The reflective quality of the SilveRboard might tempt curious chickens to peck at it. So you may want to cover the insulation panel with a thin tarp or other light material. The insulation panel is lightweight and will not weigh down your doors or cause them to shift but will add an extra layer of winter protection.


Read more: Want eggs in the winter? Adding lighting in the coop can help.


Coop Tarps

One final method of protecting your ready-to-assemble coop—or your small, custom-built coop—from the harsh winter weather is by covering the structure with tarps. Most hardware and home-improvement stores sell extra-large, heavy-duty tarps. These can be draped over your coop and staked down, serving as a shield against inclement weather and creating a small area of covered, snow-free space should your birds wish to spend a little time outdoors.

A step up from this would be to use tarps specifically designed for use with chicken coops. These rugged vinyl tarps come in both transparent and opaque styles to allow light to enter while still protecting the coop.

Whichever type of tarp you choose to use, make sure that you do not block your coop’s ventilation openings. Not only does proper ventilation allow for dangerous gases to escape, it also permits the escape of excess moisture, which builds up during the winter months from such origin sources as spilled or splashed drinking water, droppings and even your bird’s exhalations.

Using these suggestions—and those made in Part 1—your flock can be as comfortable in their coop during the winter as they are in the summer. Just remember to:

  • provide fresh water, a nutritious winter feed, and frequently refreshed bedding
  • check for eggs should some of your layers still produce during the colder months
  • inspect your birds regularly for signs of frostbite and dehydration

Before you know it, the longer days of March will be here!

Categories
Equipment Farm & Garden

Go Geothermal With A Ground Source Heat Pump (GSHP)

Ground source heat pumps last longer, require much less maintenance and are far more energy-efficient than conventional air-source systems, such as a furnace or boiler. GSHPs are also more environmentally friendly, having a lower refrigerant charge per ton of cooling.

The only possible drawback is the installation cost. But the small farm with a tractor handy takes care of that problem.

Did you know that more than 50,000 new GSHP systems are installed every year in the United States, in every possible climate and circumstance?

GSHP are ideal for colder climates, too, maintaining a constant operating efficiency down to well below 0 degrees F. The coefficient of performance is a uniform 3.0, while air-source
system efficiency declines uniformly to a COP of 1.0 at 0 degrees, the same as an electric strip heater (pure electric resistance heat).

A household GSHP can also be the heat source for domestic hot water. The hot water costs next to nothing in the summer because the GSHP extracts heat from the house directly into the water heater. Ground-source systems are so efficient because they transfer heat to and from the ground, which is always cooler than the outside air in the summer and warmer in the winter. 


Read more: Solar thermal water systems heat your water with the sun.


How a GSHP Works

The GSHP system equipment inside the house is similar to a conventional air-source heat pump: ductwork plus a fan blowing air across finned cooling coils. However, instead of transferring thermal energy to/from the air at an outside condensing unit, the GSHP exchanges heat with water in a closed-loop buried in the ground.

A small, quiet and very efficient pump circulates the water in the loop.

The ground loop is most often small-diameter piping ready-molded in loops, similar to a slinky laid flat. This loop can be buried vertically in a deep trench created by a backhoe (16 inches wide by 8 feet deep) or laid horizontally in a horizontal ditch made by a bulldozer (4 feet deep by 6 feet wide). 

If the farmhouse has a pond nearby, the ground loop can be put in the water for an even more efficient system. First, water evaporates from the pond’s surface in the summer, cooling the body of water. Then, in the winter, the dark bottom of the pond maximizes solar energy absorption, heating the water.

Both processes make the system more efficient, saving on your utility bills. 

geothermal GSHP
Bill Clark

Got a Tractor?

These trenches and the labor involved account for most of the higher cost of a geothermal system versus conventional heat pump systems. A farmer with a tractor and backhoe can dig the ditches and lay the pipe, leaving the GSHP contractor to fill the tubing, seal it and pressure test the installation.

The ground loop field can also be created by drilling vertical wells, roughly one 125 feet well per ton of cooling. The contractor puts the loop piping in each well then seals the pipe in tight with a bentonite-soil mixture to maximize heat transfer from the piping to/from the ground. 

You can have any combination of these arrangements for the ground loop to fit the topology of your land: horizontal and vertical slinky, vertical wells and pond/stream/river water. You can tap the ground loop to cool and heat air in the house or the barn, provide domestic hot water, or preheat an industrial-grade water source to clean in the milking barn or other facilities on site.


Read more: Here’s more information on installing a geothermal system for your home!


Loop the Loops

A unique feature of this water loop is that you can have any number of auxiliary systems on the loop to heat and cool all year. For example, a water heater takes heat out of the loop, raising the loop temperature. The AC adds heat as the house cools off. 

GSHP loops work because of a good thermal connection to the ground. Moist earth is always the ideal and the most efficient. You can even install the ground loop under or integral to the septic field.

If your area is prone to drought conditions, it’s best to put the loop as deep as possible—perhaps the vertical well arrangement, if possible.

The ground loop has another profound influence on the operation of the HVAC system: It adds thermal mass.

When you add thermal mass to a system, it’s like adding weight to a moving vehicle and momentum. Take your foot off the gas, and you keep moving! The heavier the vehicle, the farther you go without the addition of any further energy.

geothermal GSHP
Bill Clark

An Example

Let’s say you have a bare-bones house, 2-by-4 wood framing and fiberglass insulation—nothing special. When you add thermal mass to the interior—furniture, beds, cabinets, carpets, bookshelves, appliances, brick veneer—you improve the operation of the heating and cooling.

Why? Because once the interior is at the temperature set point, the air doesn’t heat up in the summer until the entire volume of the house—all the mass inside the building envelope—changes temperature. The same is true in the heating season. 

The temperature inside a building with a high thermal mass—the extra mass should be inside the insulation—always lags the outside temperature. In the summer, the temperature inside rises much slower than the outside temperature. Moreover, when the sun goes down and gets cooler outside than inside, the direction of heat flow reverses.

Most of the outdoor heat never even gets inside the building envelope!

The ground loop adds all the thermal mass of the earth inside and around the loop piping. Soil is very heavy—especially moist soil!

A vertical well system has so much added thermal mass that the thermal variation is not only daily but seasonal. For example, extracting all that heat from the house in the summer causes the ground loop field temperature to increase many degrees above normal.

So when you switch to heating later in the year, you have all that extra heat save up to extract at a much higher efficiency—vice versa in the summer.

This article originally appeared in the September/October 2021 issue of Hobby Farms magazine.

Categories
Equipment Farm & Garden

Winter Farm Prep Roundup: Tools & Machines To Gather & Prepare

Winter is coming, but there are plenty of autumn days left for getting ready. That’s good news, because prepping a farm for winter takes time and effort. Simply remembering all the steps can be a challenge in and of itself.

In preparation for the changing of the seasons (getting started early is always better!), we’ve compiled a roundup of tools to gather and tasks to tackle before winter sets in. While our checklist is by no means exhaustive (and can be adapted to suit your specific circumstances), our hope is to jumpstart your thought process so you can head into winter prepped and ready for anything.

Improve Tire Traction on Winter Vehicles

From farm trucks and tractors to ATVs and UTVs, vehicles used in snowy or icy conditions may need snow tires and/or tire chains to handle challenging ground. Maintaining proper tire pressure is important too—we’ve got all the details here.

Prepare Your Garden Tractor for Winter

Installing snow tires and tire chains might not be the only winter maintenance your farm vehicles need. Plan to keep your garden tractor running all winter long (perhaps to operate a snow plow or snow blower attachment)? You may need to add wheel weights and switch to using low-viscosity oil ideal for cold temperatures.

For more details, check out these five steps to prepare you garden tractor for winter.


Read more: You can plow snow with your lawn mower or ATV/UTV. 


Make Sure Your Generator Is Ready for Action

Losing power during a winter storm is problematic for anyone, but on a farm, it can be especially challenging.

If you’re counting on a portable gasoline generator for power backup, make sure it’s ready for winter by following our handy seven-step checklist.

Don’t Forget about Fuel Stabilizers

If you’re putting away seasonal machines for winter, or stockpiling gasoline to last you through the winter, you should consider adding fuel stabilizers to the tanks or cans to make sure the gasoline doesn’t degrade before you can use it up.


Read more: Here are more details about using fuel stabilizers to maintain gas through the winter.


Get a Snow Sled for Hauling Supplies

A polyethylene snow sled is designed for use in snowy and icy conditions. With its low center of gravity, a snow sled can slide easily through tricky conditions without tipping over.

They’re perfect for hauling hay and supplies, as we’ve explained before.

Park Equipment in Thoughtful Locations

If you know you’ll need to use your hay wagon first thing in the spring, it doesn’t make sense to park it down in that low spot shaded by pine trees, where the snow doesn’t melt until April and the ground stays soggy through May.

Putting some thought into parking your equipment for winter can save you time and trouble in the spring.

Stockpile Flashlights

Depending on how far north you live, winter nights can be long and dark. It’s helpful have plenty of bright flashlights on hand so you can light up your work when needed.

Need some tips? We’ve got them here.

Choose the Right Winter Gloves

Stay warm, and you’ll stay productive. Warm winter gloves are critical for keeping out the winter cold and keeping you safe and productive.

But what type of gloves will work best for your winter needs? We have a few thoughts.

Mark Your Driveway for Winter Plowing

Think you know the path your driveway follows? Try finding it when it’s buried under a foot or more of snow and ice.

Keeping plows and snowblowers on the right path (when the path is hidden from view) is harder than you might think. Marking the edges of your driveway with visual indicators like T-posts can help you stay on track and avoid issues in the spring.


Read more: Check out these tips for marking your driveway for easy winter maneuvering.


Gather Tools for Dealing with Ice

Dealing with ice is one of the biggest challenges of winter. These five tools and items will help you defeat even the toughest (and slipperiest) patches of ice.

Have a Plan for Dealing with Snow

Are you prepared to keep your farm functioning if a storm drops 2 feet of snow? Have a plan for dealing with heavy snowfall, whether it involves a snow plow, a snow blower, some snow shovels or (most likely) a combination of the three.

A walk-behind snowblower should undergo annual maintenance before winter, while snow blower and snow plow attachments should be installed on an appropriate vehicle before the first storm hits.

Don’t Forget Rooftop Snow Removal

To limit the risk of roofs caving in from heavy snow loads during , it’s important to remove snow accumulation from the roofs of your farm buildings. A specialty tool might do the trick, or—in a pinch—an apple picker can make a difference.

Here’s hoping the winter of 2021-22 will be mild!

Categories
Crops & Gardening Farm & Garden Foraging Homesteading

Lamb’s Quarters Are A Controversial Forage Find

If you are a gardener you probably spend a lot of time both spring and summer pulling lamb’s quarters (aka aka goosefoot, fat hen and pigweed) from just about any tilled or disturbed part of your flower and vegetable gardens. 

If you are a row crop farmer, lamb’s quarters—a fast growing annual with a long tap root—will take over a corn or soybean field. This significantly decreases crop yield and, in the process, your bottom line. 

However, if you are a forager of wild edibles you probably already count the plant as one of your favorite edible greens.You know they are highly nutritious and a good substitute for spinach.  

A controversial plant? Yes, it certainly is. 

All About Lamb’s Quarters

Lamb’s quarters has been a valuable vegetable crop for many cultures around the world since time began. The seeds (grain) and tender leaves are eaten by both humans and livestock.

For years we thought the plant was brought to this country by Europeans. But recent archaeological research shows it was cultivated by Native Americans in the Carolina’s Piedmont region 8000 years ago. 

Lamb’s quarters is a member of the Amaranth (Amaranthaceous) family of plants and the Goosefoot (chenopodioideae) sub family.  The common official name is chenopodium album.


Read more: There are good reasons to love (and leave) dandelions.


Some Serious Pros

Thomas J. Elpel, in his plant identification guide Botany in a Day, ranks lamb’s quarters at the top of the list of calcium rich foods. The plant also ranks high in vitamins K, A and C and is considered a good source of both fiber and protein. 

The seeds are second only to amaranth seed for nutritional value. In parts of India, lamb’s quarters is still grown in large quantities for its seed for both human and animal consumption. In the wild, its seeds are a highly nutritious food for birds and both large and small mammals.

Other members of the Chenopodium family include quinoa, a trendy and popular grain that is a complete protein.

And a Few Cons

So how did lamb’s quarters fall from grace in the modern world?  Besides being a fast-growing, fast-spreading annual weed producing about 75,000 seeds per plant per year, the plant can be poisonous. Our heavily fertilized crop land and our equally rich garden soils turn this nutrient rich plant into a poisonous problem.

Colorado State University College of Veterinary Medicine, in fact, lists it as a poisonous plant. If soils are rich in organic matter or fertilized, the long tap root sends toxic levels of nitrates to the leaves. 

Swine and sheep are particularly sensitive to nitrate poisoning. Most foragers’ guides warn not to consume the leaves if the plant grows near livestock barns and pens. The nitrate levels can be dangerous.  

Lamb’s quarters leaves also contain oxalates and sulfate that can interfere with your body’s ability to absorb calcium and other nutrients. Oxalic acid can also irritate your stomach lining and be life threatening if eaten raw in quantity.

And too, the plant’s pollen is a source of hay fever.


Read more: Got chickens? Your flock will love these three common weeds!


Caution & Preparation Help Avoid Danger

Most forager guides preach caution when it comes to collecting and eating wild foods. With lamb’s quarters the risks can be mitigated by paying close attention to the where the plants are growing. Only pick leaves growing in nutrient poor soils. 

Oxalic acid concerns can be overcome by cooking the greens before you eat them. Many foragers’ guides have recipes for cooked lamb’s quarters. You will lose some of the vitamins’ potency, but the nutritional value will remain high. 

As they moved from being hunter gathers to deliberate farmers, our forbearers gave up foraged plants for the more nutrient hungry maize, beans and squash. With a little added fertilizer, our ancestors could not only grow a wider variety of foods that could be easily stored through the winter, but larger quantities as well. 

Lamb’s quarters became mostly forgotten, easily found in the wild and picked seasonally as a green vegetable. Today it has been replaced by spinach, Swiss chard, kale and other leafy greens.

Categories
Animals Farm & Garden Large Animals

Considering Beef Or Dairy Cattle? Here Are 7 Bovine Benefits!

From the learning experiences offered by raising playful bucket calves to the pitcher of fresh, whole milk or a juicy, t-bone steak sitting on the kitchen table, there are a multitude of benefits that can come from raising your own cattle. Any homesteader that is looking to become more self-sufficient should take a step into the world of beef or dairy cattle. 

Learning Experiences

There’s nothing quite like doing. No book or magazine will ever teach as much as an afternoon spent working with and handling a group of cattle.

You’ll begin to move a little quicker, understand the pressure points of the animal, and learn from whatever situation arises. From playing vet tech for an injury or illness to watching (and practicing) the proper way to milk a dairy cow—there will always be something to do.


Read more: Meet your meat needs with your own herd of cattle! Here’s how to start.


Homegrown Beef

Quickly seared in a hot, cast iron skillet and then baked in the oven until it’s the perfect tenderness, your steak is almost ready. Drizzle a few spoonfuls of melted butter over the top and set it on a loaded plate of mashed potatoes and sweet garden corn. It’s dinner time!

When raising your cattle, you get to decide not only what they’re fed, but how they’re treated, the pastures they graze in, medications given, etc. You can choose whether to feed more grass or grain and, over all, create the meat that you want.

When the time comes to take them to the processing facility, you’ll get to choose whatever cuts of meat you want: t-bone steaks, chuck steaks, arm roasts, rump roasts, ground hamburger, etc.

Fresh Milk & Dairy Products

If the cattle you choose to raise are dairy cattle (Holstein, Jersey, Brown Swiss, etc.) you’ll find you get two benefits—sweet, whole milk and new baby calves!

Cows don’t continually pump out milk without having babies to tell their bodies to produce it. While calves can be an extra challenge to care for, you might also find them helpful if left to nurse on the cow. This can help cut back the amount of milk you have to carry into the house each day.

If you find yourself overrun with an abundance of fresh milk and cream, you can try your hand at making homemade butter, ice cream, cheese or yogurt. What used to be common everyday tasks are now rare, novel ideas.

Why not revive them and start sharing some fresh butter or cheese with your family and friends?

Pasture Management

Grassland that has grown overrun with trees and brush is an eyesore and oftentimes a challenge to the owner. (Unless, of course, you mean this land as a wildlife habitat or for a specific use.)

Keeping on top of a pasture by regular grazing and upkeep (cutting out trees, noxious weeds, fixing fences, appropriately-timed pasture burning, etc.) can lead to a beautiful and productive piece of property.


Read more: Pasture permaculture is, really, just a matter of good grazing.


Income from Excess Product

When all the dust settles from your first herd of beef or dairy cattle, your freezers will overflow with fresh beef and your fridge with sweet, whole milk. Instead of tackling the abundance with a feeling of dread, why not make the most of it and start selling or bartering with those in your community?

Homegrown hamburger, steaks, roasts, whole milk, butter, cheeses, etc. could be traded for a variety of things. Just be cautious that you’re not giving the meat away too cheaply. You want to be fair, but meat has become a valuable commodity.

Make the most of it and research before you set a price.

If you decide you just want to barter with someone, look for things you need and would use. For example, seek out a local chicken farmer that would trade fresh eggs for milk or a few laying hens for some beef.

All-Natural Fertilizer

You can look at manure from two different perspectives. It’s either nasty and stinks or is a wonderful resource that can be reused in your garden and flower beds!

Before you decide to cover your garden with it, be sure that you’ve let it dry in the pasture or pen until it’s hard and will break apart easily.

Later in the fall, after your garden is empty from the year’s plantings, use a rototiller (unless your plot is big enough to use a tractor) and work it into the ground. It will take some time for the manure to do its job, with the best results usually being after a year.

Stress Relief & Daily Dose of Cuteness

The last benefit is definitely the most fun. Calm cattle can be relaxing to be around. And new baby calves are just straight up adorable!

Children will love playing with a calf. And a laid-back group of cattle (or a cow) can be enjoyable just to have around the homestead. I love it when the heifers or cows have moved into the pasture behind our house during the winter. I can stand at my kitchen sink washing dishes and watch them peacefully graze their days away. 

Whether you decide to pursue beef or dairy cattle, do your research. Read the books and make lists. But most importantly, talk to someone with experience.

Find a local farmer, rancher or homesteader that is willing to take a little time and visit with you. Make notes, ask questions, look at their cattle (if possible) and appreciate the time they give you. They’re all busy with their own work too, so it’s pretty special when someone will take an hour or two and walk you through the steps, give advice, or share their phone number for any future problems you might run into. 

Categories
Crops & Gardening Farm & Garden

Tips For Planting Garlic In The Fall Season

For many, fall is the right time for planting garlic. The garlic will overwinter nestled under the soil, and if you time it right, your bulbs will be ready right around July 4.

While garlic is fairly easy to grow, you do need to follow a few, simple rules when planting it. Here are some key points to keep in mind for best results.

Ready Your Soil

Make sure the soil has been re-prepared in your Permabed by either broadforking and raking or using a grub hoe to work the bed top and then rake. If you use a walking tractor or 4-wheel tractor, then you can power harrow the bed top. 

The bed top should be worked at least 2-3 inches deep for best planting efficiency. Why? Most hardneck garlic is planted by hand, and you want to be able to easily put the garlic into the ground without dealing with hard-packed soil from a whole summer of growing compaction.


Read more: What’s a Permabed? Click here to learn more.


Check Your Width

After the bed has been raked smooth, make sure it is wide enough to handle at least five rows of garlic 6 inches apart. If you have the space, you could even have six rows. 

You can manage this by turning an 18-inch path into a 12-inch path, and a 30-inch bed top into a roughly 40-inch bed top. When it comes to garlic, you want to pack them as tightly as possible to make them more competitive against weeds. 

Because garlic has a linear leaf and is in the ground for almost a full year, you want to minimize weed management. This is done with mulch and with high-density planting.

planting plant garlic garden farm
Zach Loeks

Dibbling Makes for Efficient Planting

Now it is time to dibble. Dibbling is very important because it will make sure you plant exactly five or six rows on a 6-inch spacing.  Garlic is also planted 6 inches in-row. 

You can use a number of different dibbling methods. For large farms, a tractor-mounted dibbler (such as one modified from Water Wheel transplanter’s wheels with adjustable dibbles) works well. 

For hand tools there are a number of great rolling dibblers. Examples include the seed bed roller from Johnny’s, with added adjustable dibbles, and the infinite dibbler from Two Bad Cats.

Dibbling will also make a small hole into the soil to improve planting. In ideal conditions dibbling will allow you to simply push the garlic cloves into the soil instead of having to open a hole with you hand. This results in only three motions required when planting each clove:  

  1. Pick clove out of planting container with right hand.
  2. Press clove into soil with right hand.
  3. Cover clove with left hand.

This economy of motion is critical to making your planting experience ergonomic, efficient and profitable.


Read more: Once your garden is done, you’ll harvest and cure your bulbs. Here’s how.


Get the Right Depth

Planting garlic cloves requires an understanding of seed planting depths. It is too simplistic to simply say plant your garlic 1.5 or 2 inches deep. As with all seeds, depth is a factor of the size of your seeds. 

With garlic this varies quite a bit depending on:

  • the variety
  • size of the seed bulb
  • size of the actual clove  

Some small-bulb garlic varieties have small cloves. Or you may have purchased bulbs with extra large, large or medium cloves. Knowing this, we then apply the basic principle that larger cloves will be planted deep, while smaller cloves are planted shallower. 

I plant cloves twice as deep as they are tall from base to tip—generally 1 to 2”= inches. Also, if your soil is harder come planting day than you desire, you can compensate for this depth by adding more mulch.

planting plant garlic garden farm
Zach Loeks

Clove Orientation Matters (a Lot!)

Remember to plant the flat basal plate side of the clove down, with the tip up. But even knowing this simple rule, it’s all-too possible to get carried, away planting thousands of cloves, and forget to do that for 100 of them. Don’t do that!

Label Your Garlic

Once you’re done planting all your cloves, make sure all the garlic is well labeled. Use wooden stakes in the field and map where everything is in a spreadsheet or design notebook.

Keep posted for future garlic management articles!

Grow On,

Zach

Categories
Podcast

Episode 16: Pantaleon Florez

Through his Maseualkualli Farms in Lawrence, Kansas, Pantaleon Florez has big ideas for farming and food systems equity. Starting out at Common Ground Incubator Farm just before the COVID-19 pandemic began required Panta to be creative in his marketing outlets, shifting away from farmers markets and toward value-added items, restaurant sales and mutual aid food support.

Learn about his research in growing corn using traditional Mexica indigenous methods from the 1500s (spoiler alert: it yielded higher than current no-till methods), what it’s like to farm as part of an incubator farm, and the difference between farming in California and farming in Kansas.

Panta also lets us in on his innovative $1 million food security and farming plan that could change the way $5.9 million worth of food is produced, processed and distributed around his city. He calls it The People’s Century Farm, and you’re going to want to hear about it!

Ancestral Mexica farming research

Maseualkualli Farms website

Maseualkualli Farms Instagram


Categories
Farm & Garden Food Recipes

Recipe: A Tangy Fermented Green Tomato Relish

It’s the end of the growing season here in Minnesota and freezing temperatures are knocking on the door. Sadly, many of my tomatoes will never get a chance to ripen on the vine. But the good news is that there are plenty of ways to enjoy green tomatoes.

This fermented green tomato relish recipe is a great substitute for a pickle relish. Use it mixed into salads, or as a condiment for hot dogs and burgers.

Yield: 1 pint

Ingredients

  • 2 cups green tomatoes (about 1 pound)
  • 1/4 cup yellow onion (about half a small onion)
  • 1 garlic clove
  • 1/2 tsp celery seed
  • 1 tsp yellow mustard seed
  • 1.5 tsp coarse kosher salt
  • 1/2 tsp raw honey (optional)

Read more: Got extra ripe tomatoes? Try this delicious fermented bruschetta recipe!


Preparation

Wash and core tomatoes. Remove and discard any blemishes.

Dice up firm green tomatoes, onions and garlic finely, or use a food processor to gently pulse the tomatoes, onions and garlic to the preferred consistency.

Transfer to a bowl and mix in the remaining ingredients. Stir well. Transfer the mixture to a clean pint canning jar, leaving at least 1/2 inch of headspace (room from the top of the ferment to the rim of the jar).

Wipe off the rim of the jar with a clean dampened towel. Add the canning jar lid and tightly screw on the ring.

Fermentation

This is a five-day ferment. Ferment at room temperature, ideally between 60-75 degrees F (15-23 degrees C) and keep out of direct sunlight. If you have a small fermentation jar weight, add it to the jar to hold the tomato mixture under the brine.

Burp the jar daily. Unscrew the lid briefly and tighten it back on to allow any built-up gas to release (and avoid possible jar breakage or the ferment from overflowing). Stir ferment if you do not have a jar fermentation weight and pat it down to remove any air bubbles within the mixture.

After five days of fermentation, taste test and see if it has the tangy, fermented flavor that it should have developed through the process of fermentation. If it tastes too much like it would in the raw form, replace the lid and ring and allow it to ferment another couple days and taste test again.

Once the ferment has reached an ideal flavor, transfer the jar into the refrigerator.

Fermentation does not stop once the ferment is transferred to the refrigerator. But cooling does slow the process way down. The taste and texture will continue to change, therefore this ferment is best enjoyed within six months.


Read more: Ready to start fermenting? This simple onion pickles recipe is a great place to begin!


Notes

Feel free to use larger green heirloom tomatoes, cherry tomatoes or any tomato in between.

Want spice? Add in one diced jalapeño or other hot pepper of choice before fermenting.

Find more recipes for preserving green tomatoes in Can It & Ferment It by Stephanie Thurow.

Categories
Crops & Gardening Farm & Garden Food

Growing Hopi Blue Corn, Banana Melons & Toothache Plants With Baker Creek Heirloom Seeds

“When people say they have a great tasting tomato, they comare it to the Brandywine tomato,” says Randel Agrella, a horticulturalist at Baker Creek Heirloom Seeds. “It’s still the standard.”

Headquartered in Missouri, Baker Creek has become renowned for offering a vibrant array of rare and intriguing heirloom seeds. There, deep green Abashi bitter melons nestle next to fiery Goronong chili peppers and supersized ancient Manpukuji carrots.

We spoke to Agrella about five heirloom varieties to consider if you’re looking to pep up your garden or hobby farm, including the off-kilter Toothache Plant.

1. Hopi Corn

“I’m personally very interested in southwestern seeds,” says Agrella when asked to pinpoint some of his favorite varieties. “I’d go with some of the Native American corn, like the Hopi Pink and the Hopi Blue.”

Agrella adds that the Hopi varieties of corn aren’t for fresh eating. But they work as a treat for decorative purposes and grinding down into flour.


Read more: Learn about growing storage corn in the garden for a range of uses!


2. Banana Melon

Digging deep, the Baker Creek vault includes seeds for a variety known as Banana Melon. Agrella says that these large, elongated melons are mentioned as far back as 1885 in J. H. Gregory’s seed catalog.

Highlighting the eye-catching nature of the melons, the catalog’s archived entry from that time reads:

“None of the 170 varieties of vegetables exhibited by me at the Essex Agricultural Society in the fall of 1883 created a greater interest than the Banana Melon.”

3. Brandywine Tomato

Baker Creek carries an extensive range of tomato seeds, including Purple Calabash, Black Strawberry and Pink Fangs. But Agrella’s personal pick is Brandywine.

“Brandywine was probably the one that kicked off the heirloom movement,” he says. “Although it’s a wonderful fresh tomato, people don’t realize that it also makes a decent canner. I’ve spoken with Amish people who insist on that one for canning.”

Agrella points out that Brandywines can also sport variable looks, often veering to the “funky” side of things with “kind of lobes on it rather than a smooth round sphere.”

4. Zappalito de Tronco

Zappalito de Tronco was one of the first seeds to pique Agrella’s interest when he began his heirloom journey.

It’s an Argentinian summer squash that Agrella says he discovered while “spending a season reading seed magazines rather than gardening.” Taste wise, the squash skews to the sweeter end of the spectrum and possesses a tender quality.


Read more: Grow fall squash to enjoy all winter long!


5. Toothache Plant

Finally, if you’re really hankering after a conversation starter for your farm or garden, consider picking up some Toothache Plant seeds.

Agrella explains that the lore of the Toothache Plant goes back to “olden times.” It was prized for its medicinal ability to numb the mouth and was recommended to alleviate inflammation issues.

Follow Baker Creek Heirloom Seeds at Instagram.