Categories
Equipment Farm & Garden

Electric Tractors Are The Future Of Farming

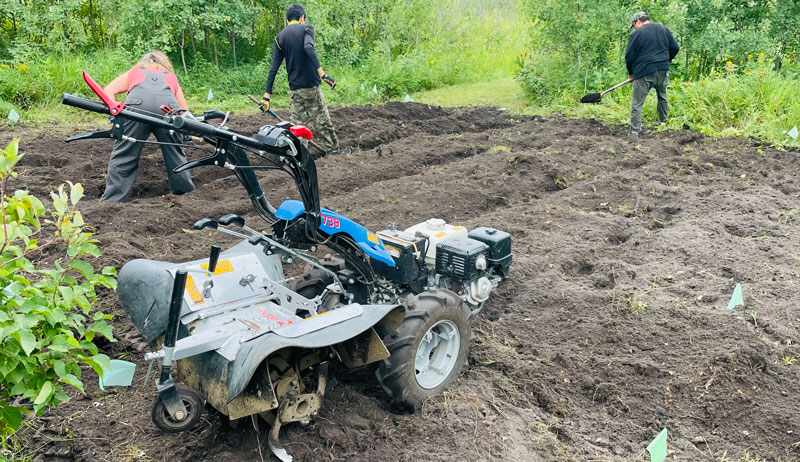
You might not always hear them, but you’ll likely start seeing more electric tractors in fields across the U.S. and, eventually, the world. Unlike their rumbling, diesel-fueled counterparts, electric tractors are much quieter—and cleaner.

“You can hear the birds singing and you can talk with people while you’re on an electric tractor,” says Steve Heckeroth, founder and chairman of the board of Solectrac, an electric tractor company launched in 2012.

“It’s just like day and night for farm workers. It’s no longer destroying their hearing or their lungs, and they can enjoy the fresh air instead of breathing in diesel exhaust.”

By 2017, Heckeroth had already released his first two models—the Compact Electric Tractor (CET) and the eUtility Electric Tractor. (Heckeroth also expects to release another electric tractor, the eFarmer, later this year.) But the zero-emissions farm vehicles were actually a long time coming.

“I’ve been working on electric tractors for 30 years,” he says. 

The seeds for Heckeroth’s work were planted earlier still—on April 20, 1970. “I decided on the first Earth Day that I wanted to find alternatives to burning fossil fuel because I could see that going to be a huge problem for all life on the planet,” he says. 

A trained architect, he initially tried to make an environmental impact in architecture. “Then I switched to transportation and decided that tractors were probably the best electric vehicles,” he says.

“With most electric vehicles, the biggest problem is battery weight. But tractors need weight for traction, so they are an ideal electric vehicle.”

electric tractor tractors
Courtesy of Monarch

Better Batteries

In part, battery technology has finally advanced enough to be able to support farmers’ real-world needs. “When I first started, all there was was lead acid,” Heckeroth says. “The weight and longevity were the biggest problem.”

These days, he uses lithium-ion phosphate battery technology. “That is the safest lithium technology,” he says. “They don’t burn, and you can stick a nail right in them, and they don’t do anything. It’s pretty amazing.”

Lithium-ion phosphate batteries can also last between 3,000 and 5,000 cycles. “That can be anywhere from 10 to 15 years, depending on how much you use the tractor,” Heckeroth says.

Just what’s involved when using an electric tractor versus traditional diesel? If you’re employing an energy-intensive implement or running the tractor for many hours, you may need to fill up on diesel.

Or in the case of an electric tractor, it might be time for a recharge. 

Although Heckeroth’s CET doesn’t have an exchangeable battery pack, the other Solectrac models do. “The bigger tractors have a hitch on the front and a hitch on the back. So if you are running an implement on the rear hitch you have a battery pack on the front and you can keep swapping it out,” he says.

“Or, if you have some implement on the front, you can swap out the battery pack on the back.”

If you have solar arrays on your farm, you could keep an extra charging system docked there. “Where I am in California, most of the vineyards have solar arrays,” Heckeroth says. “So you don’t have to travel too far to swap out a battery.”


Read more: These 20 maintenance tips will help you keep your tractor running great for years.


More Players

Heckeroth may have gotten a head start, but he’s not the only one rolling out electric tractors. Kubota showed off a prototype of its lithium-ion battery-powered tractor last year. And John Deere has been working on an autonomous tractor that plugs into the electrical grid.

For its part, Monarch Tractor released its first electric, driver-optional, smart tractor in April with full production deliveries expected by the end of 2021. “There’s a lot of technology that was already developed, commoditized and made production-ready in the automotive industry. So we took those bits and pieces in coming up with our tractor,” says Praveen Penmetsa, Monarch Tractor co-founder and CEO.

“Our battery, for example, is as large or larger than any of the big electric cars out there in the same already-proven automotive technology. We didn’t want to deploy some technology for farmers that would break down or cause issues.”

The Monarch Tractor battery takes five hours to recharge via a 220-volt system and has battery-swapping capabilities. “You can swap it out in the middle of the field,” Penmetsa says. “That way, you can keep your operation going without having to recharge.

“And our battery, for most operations, lasts eight-plus hours.”

electric tractor tractors
Courtesy of Soletrac

Electric & Driverless

After hearing from would-be customers, Penmetsa and his team had an “aha moment” that led them to automate both the tractor driver and its implement control. “[We heard,] ‘Your tractor, while great, is not changing my economics significantly,” he says. “

‘The diesel cost is not a huge expense for me right now. The cost of the driver is.’”

“So, you can use the tractor like a normal tractor, or if you’re just mowing or spraying or running the same operation three or four times, you can do it once with you on the tractor, and then the tractor can repeat that operation with you off of it,” Penmetsa says.

And, if something goes wrong or looks amiss? The tractor is “smart” enough to send alerts as needed.

“It’s not possible for the farmer to cover every inch of his farm on a weekly basis or a daily basis,” Penmetsa says. “But if the tractor is already out there doing all these operations, we can use its cameras and artificial intelligence to provide ‘actionable insights’ to the farmer.”


Read more: Compact, subcompact, utility—what different types of tractors do.


Cost & Maintenance

On average, you can expect to pay around $50,000 for an electric tractor. You can also expect to save on upkeep, repairs and, of course, the need for fuel.

“There are over 300 moving parts in a diesel engine, so those are all parts that need maintenance,” Heckeroth says. “With an electric motor, there’s only one moving part. With oversize bearings, there is no maintenance required for decades.”

There’s at least one more important savings to consider.

“A typical [diesel-powered] tractor, using the typical life cycle, [emits] 53 tons of carbon dioxide every year,” Penmetsa says. So, a single farmer switching to electric would bring those greenhouse gas emissions to zero.  

This article originally appeared in the July/August 2021 issue of Hobby Farms magazine.

Categories
Animals Chickens 101 Poultry

Can You Identify This Mystery Chicken Breed?

Chickens and other poultry members come in all sizes, shapes, colors and personalities. Nearly 400 recognized breeds and varieties of poultry exist, including large fowl and bantam chickens, ducks, geese, turkeys and guinea fowl.

Using our watercolor illustration, a few selected hints and the following photo, can you guess which breed we have in mind?

The answer to our mystery breed question is below. But first, some hints!

Hints

  • This Mediterranean breed came to America via Italy.
  • Hens of this breed lay between 280 to 320 medium-sized white eggs each year.
  • It was used as a foundation breed for the modern egg-laying hen.
  • Boy, I say boy, this famous cartoon rooster with a voice like a foghorn was one.
leghorn chicken photo
jmfonzy/Pixabay

Mystery Breed Answer

The mystery breed depicted above is the Leghorn! If you’re a fan of classic cartoons, then your first encounter with the Leghorn breed might well have been an animated one. Foghorn J. Leghorn, the mischievous, loudmouth rooster with a penchant for pranks, ruled the barnyard in Warner Bros.’ Looney Tunes and Merrie Melodies cartoons. 

Today, the Leghorn is the most common breed of chicken in the U.S., key to the country’s commercial egg industry. 

This chicken breed’s appeal isn’t purely industrial, however. To discover why heritage poultry breeders and small-flock owners alike are falling back in love with this unique egg-laying machine, click here for a profile of the majestic heritage breed!

This article originally appeared in the July/August 2021 issue of Chickens magazine.

Categories
Chickens 101 Health & Nutrition Poultry

Do Chickens Really Need Apple Cider Vinegar?

Over the past year, we’ve all encountered shortages when we’ve gone grocery shopping. The scarcity of such high-demand items as toilet paper, liquid soap and paper towels makes perfect sense during a global emergency.

Other items, however? I’m still mystified as to why milk-chocolate chips have vanished from every single market near me.

Also impossible to find is red wine vinegar. I’ve literally stood in front of the empty aisle section, wondering where all the red wine vinegar went. Are people making more salads during the pandemic, perhaps? I brought up how perplexed I was by this at a recent poultry-group online chat. Little did I expect the commotion that would follow.

Apparently, every single poultry keeper this side of the Mississippi has been searching for apple cider vinegar (ACV). My fellow flock owners bewailed their failure at procuring this absolute necessity. Several recounted their fruitless attempts to order a bottle/jug/gallon of this liquid gold via online shopping services.

One woman tried unsuccessfully to buy just a cupful from her neighbor.

Soon everyone was expressing their concerns that the health of their flock would be severely compromised without ACV. Almost everyone, that is. I simply kept my mouth shut. Not only do I have close to a gallon of ACV in my pantry, it’s strictly for human consumption.

I never have given my chickens ACV and never will. Here is why.


Read more: These are the 5 nutrients essential to a healthy flock.


Feeds Have All You Need

Commercial feeds are scientifically formulated to provide your chickens with the exact nutritional requirements they require at the different ages and stages of their lives. Decades of dedicated research have resulted in feed formulas featuring the proper balance of minerals, vitamins, proteins, carbohydrates, and fats for your birds to thrive.

Supplements such as ACV can throw off the nutritional balance offered by these complete feeds and potentially interfere in the digestion and absorption of essential nutrients. For optimal health, offer your birds a complete feed plus plenty of fresh water.

GI Jolts

Apple cider vinegar is highly acidic. Undiluted, it serves as a powerful herbicide, killing weeds in a matter of days. Even when it is diluted, its acidity can irritate the delicate tissues of your chickens’ entire gastrointestinal tract.

Additionally, ACV can cause a feeling of fullness and a loss of appetite, which may prevent your flocks from eating the amount of nutritional feed they need for the day. The tannins in ACV can also strip the protective mucus from your birds’ gastrointestinal lining, resulting in your flock experiencing sore throats, nausea and diarrhea.


Read more: Want to save on the feed bill? These 7 tips will help you feed your chickens for less.


Myth-information

Many owners of chickens swear by apple cider vinegar. A splash of it in a poultry waterer can prevent coccidiosis, serve as an electrolyte during stressful times, reduce the smell of fecal matter, and prevent common infections … at least that’s what the popular belief is.

However, there are no scientific studies to support these or any other common concepts. While ACV is a popular culinary additive, adding a sour tang to salad dressings, sauces, and other human foods, there’s no evidence that it does anything of a medical nature when ingested … by people or by poultry.

“There is no proof of any kind that apple cider vinegar provides any health benefits for your chickens,” noted Dr. Richard Fulton, a Michigan State University poultry-science professor and Diplomate of the American College of Veterinary Pathologists. “Other than add a nice flavor to their water.”

This doesn’t mean that you should completely ditch your apple cider vinegar. The addition of ACV to your poultry’s drinking water does seem to prevent the build-up of algae in plastic waterers.

That’s definitely a positive … just not the kind that would cause a panic should your market be out of stock.

Categories
Beginning Farmers Crops & Gardening Farm & Garden Homesteading Urban Farming Video

How To Save Tomato Seeds From Your Garden’s Tomatoes (Video)

There are a number of reasons why someone might want to save their tomato seeds. The first is simple economics. Saving seeds from this year’s crop to plant again next year means I won’t have to purchase tomato seeds again!

But when we save our tomato seeds, we’re saving more than just money. 

Preserving Heirlooms

Some of the best, most flavorful tomatoes that we can grow are known as heirlooms. An heirloom is simply a variety that has been saved and passed down from one generation to the next for at least fifty years.

Every time we save and share our tomato seeds, we’re doing our part to preserve those varieties

Tomatoes don’t necessarily need to be heirlooms for us to save their seeds. The key to success is to grow and save seeds from open-pollinated varieties. Seeds from an open-pollinated variety produce offspring that are identical to the parent plant. 


Read more: Saving seeds from these 6 garden crops is easy and fun!


What You Need to Save Tomato Seeds

There’s very little equipment required to save tomato seeds. The first thing you’ll need, of course, is ripe tomatoes. When a tomato is ripe, the seeds are ready to harvest and the fruit will signal its ripeness by changing colors, from green to red. Or orange, yellow, striped or even purple depending on the variety of tomato that you are growing!

You will also need a cutting board, knife and a container to ferment your tomato seeds in. A canning jar will do the trick, but you can always reuse any jar or container from the kitchen.

How to Extract & Ferment Seeds

When you save tomato seeds, you first need to ferment in order to remove the jelly-like coating that surrounds thes. This coating contains growth inhibitor chemicals, and removing it from our seeds will significantly increase germination rates next season.

Cut your tomato open and squeeze the seeds and juice out of the fruit and into your container. You can also use a small spoon or scoop for this job of you prefer. Add a little bit of water to the jar, cover, then set the container on a window sill for a few days to ferment.

Be sure to label the jar with the name of the variety!

Once the seeds are properly fermented, you’ll notice a white mold beginning to form at the top of the water. This is the signal that your tomato seeds are ready! At this stage, just add a little bit more water to the jar and swirl the liquid around to mix it up well. 


Read more: Buy local, yes—and make sure you’re buying local garden seeds, too.


Getting Your Seeds

The contents of the jar will separate, with the mold, growth inhibitors, immature seeds and other undesirables floating to the top, and nothing but healthy, viable tomato seed sinking to the bottom. Pour off the top of the jar, and then pour the seeds into a fine mesh strainer.

Rinse seeds off and place them out to dry on a paper plate. I recommend labeling the paper plate with the name of the tomato to avoid any confusion. This is particularly important if you are processing seeds from multiple varieties at the same time.

Allow your seeds to dry for around seven to 10 days, until they are completely dry, and then package them up to save until next season. You can use jars, coin envelopes or even small ziplock bags to store your seeds. Juts be sure that they are labeled and kept in a cool, dark location. 

When you harvest and save your tomato seeds, you can easily preserve this year’s harvest to enjoy for years to come!

Categories
Crops & Gardening Equipment

4 Tools You Need For Picking Apples

It’s late August on my northern Wisconsin farm, which means apple harvesting season is underway. The earliest-ripening varieties have been ready for a couple weeks already, with others to follow throughout September and into October. Picking apples is a wonderful pastime. It’s the perfect way to enjoy the literal fruits of your farm.

You can even make an event of it, inviting family and friends to join you on a walk (or hayride) around the farm to harvest apples wherever they grow.

Of course, you won’t get very far without the right tools. The following items will help you maximize your harvest and ensure fruit doesn’t go to waste.

Apple Pickers

Mature apple trees can grow quite tall, and you’ll struggle to reach the highest-growing fruit without apple pickers. Essentially, apple pickers are long wooden or metal poles (often adjustable in length) with a device at one end for harvesting fruit.

Apple pickers come in two main varieties: basket pickers and grabbing pickers. Basket pickers can hold many apples at once, but can cause a bit more branch damage (and drop more fruit) than grabbing pickers, which use rounded claws controlled by a lever to securely harvest one apple at a time.

If you want to try both, go for it! The more apple pickers you have, the more people can harvest at once.


Read more: What’s the right kind of apple picker for your harvest?


Ladder(s)

A ladder is another good option for reaching apples growing in the tops of trees. While any ladder positioned firmly can perform suitably, orchard stepladders—pyramidal in shape with wide bases and three-legged tripod designs—are designed for the specific challenges of harvesting fruit (including uneven terrain) and can provide the most satisfactory results.

Apple Baskets

Unless you intend to pick only what you can carry back in your hands, you need somewhere to store your apples as you harvest them from each tree.

Any box or bag can work in a pinch. But bushel apple baskets are picturesque and possibly more effective—unlike a random cardboard box, you can trust a bushel basket isn’t going to collapse under the weight of its own load.

You can even consider using a specialized apple harvesting basket to make the job easier and faster.


Read more: An advanced fruit-picking bucket can shorten and simplify the process of harvesting fruit.


Refrigerator and/or Freezer

Hopefully, your trees have produced a bumper crop of apples so abundant you can’t possibly eat them all fresh. That’s a great problem to have! But apples don’t last very long sitting in a basket, so to avoid letting the fruit go to waste, you’ll need to place the apples in cold storage to prolong their useful lifespan.

A refrigerator is your first option; whole apples wrapped in plastic can last for a month or two. But a freezer can achieve even better long-term results, keeping apples in good shape for half a year or more. Isn’t the thought of eating your own apples in the middle of winter rather appealing? With a large harvest (and an equally large freezer), you can potentially feast on frozen apples all the way into spring.

Have fun picking apples!

Categories
Food Recipes

Cool Down With These Homemade Ice Cream Recipes

What would summer be without ice cream? Eating it is only half the fun. Making it is the other half. The recipes that follow have all been tweaked by yours truly until each flavor of homemade ice cream could be deemed “blue ribbon” worthy.  

I work with a 1 1/2 quart ice cream maker, so you may want to multiply recipes depending on the size of your machine. If you don’t have a machine, why not?! You can get great ones for under $100. They are easy to operate with limited prep time, and they make incredible ice cream in less than an hour.

You’ll never want to eat store-bought ice cream again!

Also, each recipe calls for beating ingredients, which I do with an egg beater. When I say, “until aerated,” I mean beat until bubbles form on the surface of the mixture and it begins to look frothy. 

Supreme Strawberry 

Fresh and frozen strawberries can be used in this homemade ice cream recipe. Simply thaw fruit first to make smashing easier.  

Ingredients 

For strawberry mixture 

  • 1 1/2 cups strawberry halves 
  • 2 tablespoons brown sugar 

 For ice cream 

  • 2 eggs 
  • 2/3 cup sugar 
  • 18 teaspoon salt 
  • 1 cup milk 
  • 1 cup cream 
  • 1 teaspoon vanilla extract 
Preparation

Smash the strawberry halves with a masher or pastry cutter until only small pieces remain. Then stir in the brown sugar and set aside.

In a medium-sized bowl, beat the eggs, sugar and salt until well mixed and aerated. Next, in a double boiler pan directly on the burner, scald the milk. Once scalded, temper the egg mixture by adding the milk slowly while stirring constantly. 

Return new mixture to the double boiler pan, and place it atop the double boiler base with simmering water. Stir constantly until slightly thickened, remove from heat and cool.

Once the custard base is cooled, beat the cream and vanilla until aerated. Then add the custard base and continue to beat until well combined.

Place into ice cream maker and follow manufacturer’s instructions. When the ice cream is just starting to firm up, add the strawberry mixture and continue until finished. 


Read more: Should you grow your own strawberries? Yes! Here’s why.


Scrumptious Coffee 

The brown sugar helps to enrich the flavor of this refreshing homemade ice cream. Use one tablespoon of instant coffee in a half cup of water if espresso is not available. 

 Ingredients 
  • •1/2 cup espresso (or strong coffee) 
  • 2 eggs 
  • 1/2 cup sugar 
  • 1/2 cup brown sugar 
  • 1/2 teaspoon salt 
  • 2 cups milk 
  • 1 cup cream 
  • 2 teaspoons vanilla extract 
Preparation  

First, prepare espresso. Set aside to cool.  

In a medium-sized bowl, beat the eggs, sugars and salt until well mixed and aerated.  

Next, in a double boiler pan directly on the burner, scald the milk. Once scalded, temper the egg mixture by adding the milk slowly while stirring constantly. Return new mixture to the double boiler pan and place it atop the double boiler base with simmering water.

Stir constantly until slightly thickened, then remove from heat and cool.

Once the espresso and custard base are thoroughly cooled, beat the cream and vanilla until aerated. Then add the espresso and milk mixture and continue to beat until well combined.  

Place into ice-cream maker and follow manufacturer’s instructions. 

homemade ice cream recipes
Leah Smith

Delicious Blackberry 

This ice cream tastes as good as it looks. Mashing the fruit after cooking it helps to release the full extent of juice and pulp from the berries so that you are left with little waste and stupendous flavor. This homemade ice cream, in particular, benefits from sitting for half a day once made for the flavor to intensify. 

Ingredients 

For blackberry mixture 

  • 4 cups blackberries 
  • 1/4 cup sugar 
  • 2 tablespoons lemon juice 

For ice cream 

  • 2 eggs 
  • 23 cup sugar 
  • 18 teaspoon salt 
  • 1 cup milk 
  • 1 cup cream
 Preparation  

In a medium saucepan, place blackberries with the sugar. Cook over low heat, covered, for about 20 minutes until the fruit is broken down. Smash the fruit with a masher or pastry cutter.  

Drain using a fine mesh strainer, pressing berries to extract as much juice/pulp as possible. Once it has drained and begun to cool, stir in lemon juice and set aside to cool completely.  

In a medium-sized bowl, beat the eggs, sugar and salt until well mixed and aerated.  

Next, in a double boiler pan directly on the burner, scald the milk. Once scalded, temper the egg mixture by adding the milk slowly while stirring constantly.  

Return new mixture to the double boiler pan, and place it atop the double boiler base with simmering water. Stir constantly until slightly thickened, remove from heat and cool.  

Once the custard base is cooled, beat the cream until aerated. Then add the custard base and blackberry extraction and continue to beat until well combined.  

Place into ice-cream maker, and follow manufacturer’s instructions. 


Read more: Blackberries and raspberries are popular, and they’re easy to grow at home!


Briny Butter Pecan 

In my family, butter pecan ice cream should have the tang of salt as well as the buttery crunch of pecans. If your family doesn’t agree, just reduce the salt in the ice cream to 1/4 teaspoon. 

Ingredients 

For pecans 

  • 1/2 tablespoon butter 
  • 23 cup finely chopped pecans 
  • 18 teaspoon salt 

For ice cream 

  • 1 1/2 cups milk 
  • 1 1/2 cups cream 
  • 1/2 cup sugar 
  • 13 cup brown sugar 
  • 2 teaspoons vanilla extract 
  • 3/4 teaspoon salt 
Preparation

In a skillet, melt butter. Add pecans and salt, and cook on medium/low heat, stirring constantly, for six to eight minutes (until fragrant; don’t burn). Cool thoroughly!  

Beat together the milk, cream, sugars, vanilla and salt until aerated.

Place into ice cream maker and follow manufacturer’s instructions. When the ice cream is just starting to firm up, add the pecans and continue until finished. 

Eat-a-Peach Brown-Sugar 

The richness of peach matches the richness of the egg yolks and cream perfectly. The brown sugar deepens the peach flavor, while the lemon juice brightens and the almond extract enhances your homemade ice cream. 

Ingredients 

For peach mixture 

  • 2 cups peach slices 
  • 13 cup brown sugar 
  • 2 tablespoon lemon juice 
  • 1/4 teaspoon almond extract, optional 

For ice cream 

  • 3 egg yolks 
  • 2 cups cream, divided 
  • 23 cup sugar 
  • 1/2 teaspoon salt 
Preparation 

Smash the peach slices with a masher or biscuit cutter until only small pieces remain. Then stir in the brown sugar, lemon juice and almond extract, and set aside.  

Place egg yolks in a bowl and beat together.  

Next, in a double boiler pan directly on the burner, scald 1 cup of cream, adding the sugar and salt to dissolve as well. (Watch closely. Don’t allow to burn or boil.) Once scalded, temper the eggs by adding the cream mixture slowly while stirring constantly.  

Return the new mixture to the double boiler pan, and place it atop the double boiler base with simmering water. Stir constantly until slightly thickened. Remove from heat and cool.  

Once the custard base is cooled, beat the remaining 1 cup of cream until aerated. Then add the custard base and continue to beat until well combined.  

Place into ice cream maker, and follow manufacturer’s instructions. When the ice cream is just starting to firm up, add the peach mixture and continue until finished. 

Luscious Chocolate 

Most chocolate ice cream has the right color but an insufficient flavor for a true chocolate lover. Not so here! This homemade chocolate ice cream will not disappoint. 

Ingredients  
  • 3 ounces unsweetened chocolate 
  • 2 cups milk 
  • 1 cup sugar 
  • 1/2 teaspoon salt 
  • 1/4 teaspoon espresso powder 
  • 1 1/2 cups cream 
  • 1 teaspoon vanilla extract 
Preparation  

In double boiler pan, melt chocolate over simmering water in base. Slowly add milk, stirring to keep the chocolate smooth and the two combined.  

Once all of the milk has been added, add the sugar, salt and espresso powder. Stir until dissolved.  

Remove from heat and cool. Once cooled, beat the cream and vanilla until aerated. Then add the chocolate mixture and continue to beat until well combined.  

Place into ice cream maker and follow manufacturer’s instructions. 

homemade ice cream recipes
Leah Smith

Swift & Effortless Vanilla 

With no eggs, no double boiler and nothing to cool, this ice cream can be made quickly with little planning ahead of time, if necessary. Despite its ease of preparation, it makes a great homemade ice cream.

The tapioca starch is the helping hand that allows you to “cut corners” and still have a creamy end product. If you don’t have it on hand, corn starch or even all-purpose flour are adequate stand-ins. 

Ingredients 
  • 3 cups cream 
  • 1 cup milk 
  • 34 cup sugar 
  •  1 12 tablespoons tapioca starch 
  • 1 tablespoon vanilla extract 
  • 12 teaspoon salt 
Preparation 

Beat all ingredients together until aerated. Place into ice cream maker and follow manufacturer’s instructions. 

To maximize flavor, allow recipes to age overnight, with or without custard bases. This also aids smoothness. 

Keep in mind that churning ice cream isn’t just a freezing process, it’s an aerating process. You can actually whip your cream (instead of just beating it a bit) before you mix it in with the other ingredients to help this process along. 

When using add-ins, such as candies or chunks of chocolate, and when making a fruit ice cream, make sure all pieces are chocolate chip size.

Remember, it will be frozen. How big do you really think frozen pieces should be? 

With my recipes, I try to create flavors without requiring you to buy new and exotic flavor extracts. But if you already have extracts that you wish to use (e.g., chocolate or coffee), feel free!

Final note: Don’t add extracts to a hot mixture. Wait until it’s cooled, as the heat will deteriorate the flavor. 

I hope you enjoy these recipes and discover how much fun making homemade ice cream is! The most difficult part is deciding what flavor to create next! 


Sidebar: Keep Your Cool

The simplest and most obvious tip is the most important one: cool everything. 

The cooler your whole operation, the quicker the homemade ice cream will form. The quicker the ice cream forms, the smaller the ice crystals—which will form as the mixture freezes—will be and the softer the resulting ice cream texture.

So make all ingredients cool. Even if you are putting something in that wouldn’t normally be chilled (like chocolate chips), chill it. 

Make sure the bowl of your electric ice cream maker is completely frozen, or your ice is the correct size if you are hand-cranking. On an especially hot day, you may even want to do your final ingredients combining and put your mixture back in the fridge to recool. It’s that important. 

Speedy churning/freezing is also why you shouldn’t overfill your maker, so that you have the right amount of “cooling power” available. No more than 23 full is correct. 

A further note about ice crystals. Time, and especially the slight thawing and refreezing that occurs when you get ice cream in and out of the freezer, all lead to an increase in crystal size and coarser texture. So, you should get your newly churned ice cream into the freezer as soon as possible.

Also, store larger quantities of ice cream in preportioned containers instead of one large one (avoiding the melting and refreezing). Finally, don’t plan on keeping it for as long as you might commercial brands. 

This article originally appeared in the July/August 2021 issue of Hobby Farms magazine.

Categories
Animals Large Animals

How You Can Use Pigs To Build Better Compost

With all its virtues, the homestead pig is one of the most valuable partners you have on the farm. Consider the ways she can help you build a rich, mature compost with a minimum of effort on your part. And she’s even growing your dinner chops at the same time! 

When you grill kebabs, even the onions and peppers will owe a debt to the porkers. The compost that makes them so delicious could have been started right in the pig pen.

What Can Pigs Compost?

What’s appropriate for pig composting? Well, almost anything on the farm. Start with a nice bedding of hay or straw, and add whatever spare nutrients you can scare up. 

The carbon in the bedding will absorb surplus nitrogen and start a process of decomposition. The end result? Lovely, crumbly black compost that’s perfect for growing your favorite vegetables, fruits and flowers.  

And with proper management, your pigs will even turn the compost pile for you. This speeds biological breakdown and ensures good aeration. Really, compost is one of the most important reasons there could be for keeping pigs!

Composting Is an Inside Job

Pigs kept in pens are the easiest to use for compost building. In the pasture or woodlot, pig pressure is less concentrated. Any organic matter gets mixed into the soil. 

But even if your pigs live in the field, a few weeks in the barn around harvest time, or in the winter, can go a log way toward building a substantial compost pile and getting its biological processes jump-started.

Next season, your garden will be thanking you for the good, home-processed compost.


Read more: These are the 7 tools you need for handling manure and compost.


The Pig Pen as a Compost Facility

Think of the pig pen as giant compost facility, and the pig as your large-scale materials-handler.

Throw in the bedding from animal stalls and poultry pens. Instead of a manure heap producing flies and ammonia smells, let your pigs turn animal bedding into crumbly black compost, not to mention bacon and sausages.

Toss in the Garden Trimmings

Put all your garden trimmings in the pig pen, along with plenty of dry bedding. Leaves, straw, hay or other high-carbon organic material work great. Then watch how fast they are ground, shredded, chopped and decomposed. 

And pigs don’t require fossil fuels. They can get their energy directly from the organic matter itself.

Hydration Is Key

Keeping things appropriately hydrated is as important in the pig pen as it is in the compost pile. That means things should neither get too wet, nor too dry.

Fortunately, it’s easy to adjust the hydration of your pig’s bedding simply by offering additions of hay, straw, leaves, shucks, cobs or stalks. You just need dry, carbonaceous matter that absorbs moisture and locks down nitrogen (the source of a barnyard ‘ammonia’ smell). 

Pig urine and spilled drinking water will generally supply all the moisture necessary. Properly hydrated compost breaks down fast and completely, turning waste into black gold. And the process only requires piggy muscles to do it.


Read more: Should you compost? Yes! Here’s how you can get started.


Drop in Some Shell Corn

Encourage your pigs to root in their deep bedding by scattering a handful of ‘shell’ corn (dry, whole corn kernels) into each layer as it is added. Digging for the corn will turn and aerate accumulated organic matter. And this hastens decomposition.

‘Urine’ for a Treat

Urine, often lost by soaking into the soil or by evaporation when animals are kept in the barn, immediately incorporates into deep, fluffy pig bedding. And the valuable nitrogen and other nutrients are saved and built into your farm compost. 

Careful husbanding resources results in prize-quality vegetables, fruits and flowers.

Pigs convert waste garden products into pork chops and rich, black compost for growing more vegetables. Think of the animals as near-perpetual energy machines for the homesteaders’ garden. 

It would be a shame to overlook all the great possibilities!


Sidebar: Can I Use Wood Chips?

It’s true that wood chips meet some of the most important qualifications for good pig bedding. They are cheap, abundant and high in carbon. But we avoid using them as pig bedding for two reasons:

  1. They tend to become a hard, packed surface, not particularly absorbent or inviting to a pig’s rooting instincts.
  2. They break down much more slowly than hay or straw.

Wood chip bedding for pigs commits the farmer to a couple of year’s decomposition, at the very least, before a good garden compost is achieved. Hay and straw, on the other hand, tend to break down quickly—especially so because the pigs look upon them as food.

Categories
Beginning Farmers Crops & Gardening Farm & Garden Permaculture

Tips For Starting First-Year Garden Beds (Part One)

In our previous article we talked about how a good garden season can be seen as a series of great tricks that be strung together for a successful season in the growing beds. And one of the most important seasons for a grower is the very first one. 

Year one—whether you are a gardener, homesteader or start-up market garden—is a make-or-break year. In a typical scenario, new growers will often be overwhelmed by weeds. They may also fail to properly prepare garden soil and neglect a solid irrigation system.

Recently I built a garden for a friend who needed a fresh start. This individual noted they were too busy to keep up with weeds and didn’t have enough time to dedicate to a proper garden setup. 

So, we applied several of my favorite grower tricks to make a foolproof first-year garden. In this article and the two that will follow, we’ll look at these pro grower tricks—what they are and why I like to use them.


Read more: You can develop and link growing “tricks” for greater success in the garden.


Proper Plot Layout Is Key  

We measured the space available and settled on building six 25-foot beds with 12-inch paths and 36-inch bed tops (48-inch beds). We also allocated space for a 48-inch perimeter to the entire garden. This allows for easy access and prevents encroachment of weeds from the periphery. 

A proper layout is key to any good garden. You need to fit your garden into spaces you have available. Looking to your fence lines, edges of woodlot, garage sides and even old fence lines as guiding lines to square off your new plot. 

I call all of these lines “common lines.” They exist on all properties. So we can trust them to serve as starting points for new garden space layout. 

It is also important to settle on a good number of garden beds that fit sensibly in the space and also work well for overall garden practices. In this case six beds were chosen because the space would fit five to seven beds, and I design garden guilds using three-bed units called triads. 

We flagged the area needed to fit six 48-inch by 25-foot Permabeds.

Next up: Primary Tillage

Next this area was micro-plowed using a BCS 770 walking tractor with a rotary plow. We needed to completely loosen the garden soil at the beginning to ensure we could easily form raised garden beds. This was, the grass and weeds currently present will start to die. In this way, further defines the growing space. 

I always plow a little wider and longer than I need to. This way, I can have more flexibility in squaring up my plot afterwards.


Read more: Permabeds, cover crops and tarps keep the garden ready.


Carefully Choose Permabed Layout

Next came the time to build our six Permabeds. Because the soil was sandy and had good organic matter, I saw we could move ahead and form the raised beds without any secondary tillage.

We re-flagged the edges of the garden plot, then, moving from right to left along the south side, we stuck a flag in the ground every 4 feet. This marked the center of all the paths. 

We then proceed to mark the four-foot markers on the northern side of the garden. Then we worked as a team of three, with two people holding the tape measure at each flag and the third person running the back of a shovel along the soil to mark a line in the soil. 

We did this for all of the paths between all of the future beds.

Categories
Food Recipes

Recipe: Fabulous Fermented Sweet Corn Relish

Here in Minnesota, we look forward to sweet corn all summer long. We have fields upon fields of corn growing all over the state. By the 4th of July, everyone has taken note whether or not the corn has grown to “knee high” yet (that’s the official way to measure that it’s on schedule here in the midwest).

When the first ears of fresh sweet corn appear at the farm stands, it’s truly a celebratory occasion. Meals are planned around what can be served with corn. There are few things as delicious as biting into a freshly harvested ear of sweet corn.

That being said, it makes sense to try and preserve some of the goodness. That’s why I developed this fermented sweet corn relish recipe. 

Through fermentation, the flavors meld together, yet the corn remains crunchy and delicious. This fermented sweet corn relish can be eaten as a side dish, stirred into a salad, used as a condiment to top pulled pork sandwiches, tacos or other proteins. 

Yield: 1 quart jar

Ingredients

Main
  • 2.5 cups fresh corn kernels
  • 1/2 cup bell pepper, diced
  • 1/2 cup yellow onion, finely chopped
  • 1 garlic clove, chopped
  • 1 jalapeño, finely minced (optional for spice)
Brine
  • 1 tbsp. coarse kosher salt, dissolved in 2 cups water

Read more: Sweet corn is a delicious summer treat, but storage corn does a lot, too!


Preparation

Shuck and rinse corn. Shave the kernels off the cob, and reserve them in a bowl. Prep the bell pepper, onion, garlic and jalapeno (optional), and mix with corn.

Transfer mixture into a clean quart size canning jar. 

Mix brine ingredients and pour over the corn mixture until the corn is completely submerged by at least 1/2 inch. Leave at least 1 inch of headspace so that the ferment has room to bubble without overflowing. (Headspace: the room from the top of the brine to the top of the jar rim.)

If you have a small fermentation jar weight, add it to the jar to hold down the produce under the brine. Remove any small pieces of food that float up to the top of the brine, as anything above the brine will increase the risk of mold.

Wipe off the rim of the jar with a clean dampened towel. Add the canning jar lid and tightly screw on the ring.

Fermentation

This fermented sweet corn relish is a two- to four-day ferment. Ferment at room temperature, ideally between 60-75 degrees F (15-23 degrees C) and keep out of direct sunlight.

Burp the jar daily. Just unscrew the lid briefly and tighten it back on to allow any built-up gas to release (and avoid possible jar breakage or the ferment from overflowing). It is completely normal to see little bubbles or even foam-like bubbling occur at the top of the ferment.

Check on the ferment daily to make sure that the brine covers all the produce. If any produce has floated above the brine level, use a clean utensil to push it back below the brine. 

Taste test at day two to check the flavor. If ingredients still taste very raw, allow it to ferment another 24 hours and taste again. Once the flavors have transformed to your liking, transfer the jar into the refrigerator, with the brine and all.

Fermentation does not stop once you put the fermentin the refrigerator, however it does slow the process way down. The taste and texture will continue to change. Therefore, you should enjoy this ferment within six months. 


Read more: Check out this tasty fermented onion pepper relish recipe!


Side Notes

Use the freshest corn you can find. The fresher, the better.

You may substitute the jalapeño for 1 tsp. dried red pepper flakes.

If you do not have a glass jar weight, you can improvise by using an easily removable small food-grade glass dish that fits inside the jar. Or, if you have a smaller glass canning jar that can fit into the mouth of the jar you are fermenting with, you can use that to keep the produce pushed under the brine.

If you are unsure if your water is safe for fermentation, you can boil it and allow it to cool to room temperature before stirring in the salt to make your brine.

You may substitute fine sea salt instead of coarse kosher salt if you prefer. The measurement will remain the same for this recipe.

This recipe has been adapted from WECK Home Preserving with permission from Skyhorse Publishing, Inc.

Categories
Crops & Gardening Farm & Garden Food

Growing Rice & Microgreens With Blue Moon Acres

Since launching in 1992, the New Jersey-based Blue Moon Acres farm has cultivated a reputation as a premium producer of microgreens and, more lately, rice.

Run by owners Jim and Kathy Lyons, it turns out that a pesky parasite was partly behind the decision to found the venture.

“I had a moment when I went out west and contracted a parasite of some sort and my digestion got screwed up,” says Jim Lyons. “I don’t think it was ever properly diagnosed, so as a result of that I changed my diet.”

Lyons was studying macrobiotics in Boston at the time. “One of the big tenets of macrobiotics was always eat locally,” he explains. “It was also plant based. So I just became fascinated with the idea of growing my own food.”

We spoke to Lyons about breaking through with microgreens and battling weeds. We also got into chefs who manage to make plates of food look like artwork.

Discovering Microgreens

When Lyons looks back on the decision to make microgreens a key part of Blue Moon Acres, he recalls being inspired by a nearby farmer who was growing the tiny produce.

“We were very bottom line oriented at that point,” he says. “How can you farm and grow stuff and make a living at it? We had five acres and were trying to make a go of it as a CSA, and it was clear that financially that wasn’t going to work. So we went in the direction of microgreens.”


Read more: Learn how you can get started growing microgreens from someone who knows.


Starting Small & Growing

After growing an early crop of microgreens, Lyons called up his cousin who was managing the New York Yacht Club and asked if he could approach their chef.

“He gave us a few names, and I started making sales calls,” he recalls. “We had literally a 10 by 48-foot greenhouse. We started small and worked from there.”

Spotlighting Micro Watercress

Out of this year’s bounty of microgreens, Lyons says that he and his wife Kathy are pretty smitten with the micro watercress.

“We were just looking at the micro watercress and admiring how beautiful it is,” he says. “It’s really quite amazing. It’s so tiny, but it’s such a perfectly formed leaf.”


Read more: We’ve got the secret to crisp, flavorful watercress!


A Pretty Pricey Salad

At first, Lyons says that he noticed chefs using Blue Moon Acres’ microgreens “primarily to adorn plates up at the very finest restaurants in New York City.” He adds with a laugh that, “Some were using it as an entire salad—which was a pretty pricey salad!”

Furthering the idea of using microgreens as “a beautiful garnish,” Lyons explains how “we don’t always just eat with our mouths—we also eat with our eyes. That’s what some chefs are doing, making a plate that looks like artwork.”

Growing Rice in New Jersey

In 2014, Lyons managed to pull off the surprising feat of growing rice in New Jersey—although he had to overcome an early setback.

“The first year was weeds!” he says. “My first year was a complete disaster. I thought I could stay on top of the weeds, but I was sadly mistaken. You had to get the weeds under control.

“This year I’m kinda having a problem with weeds again. It’s not like microgreens where you can get another batch going every few weeks. With rice, you really have just one year.”

Follow Blue Moon Acres at Instagram.