Nearly every gardener has at least one. It could be a whole drawer, a small box, or maybe plastic bin brimming with mystery seeds. How old were these again? Are they still good? Now, what was this one?
Despite our best efforts, it’s easy to end up with an out-of-control seed collection. Fortunately, Kathryn Gilbery recently shared some of the most common seed storage mistakes people make—and tips for avoiding them.
And she should know. Gilbery serves as the Exchange and Outreach Coordinator for Seed Savers Exchange.
1) Storing seed too soon
“Seeds need to be properly dried before they go into storage,” Gilbery says. “If they aren’t dry enough, then they’re at risk for mold or other fungus issues.”
Even seeds in unopened, paper packets can take on moisture in humid climates. Whether you’re inspecting mail-ordered seed or you’ve scored seeds from a neighbor, use the “fingernail test” to assess dryness. “Poke [a seed] with your fingernail and, if it squishes or leaves a dent, then it’s not dry enough,” Gilbery explains.
If need be, spread seeds out on a screen to dry. You can speed this process with a box fan. Just don’t overdo it!
Not sure whether seeds are too dry? You can go beyond the fingernail test to find out.
Pinch the seed between your fingers. Seeds that crush very easily have likely lost too much moisture. And, unfortunately, Gilbery notes, “There isn’t really a way to reclaim a seed that has been over-dried.”
3) Allowing weevils, mice & other pests access to your seeds
Assorted creatures easily chew through paper bags, envelopes or even cloth sacks to get to the delicious seeds inside. Small glass jars or plastic bottles are preferable, since these help keep pests out.
They’re also more airtight and can help keep moisture at bay. “If you’re really interested in long-term preservation, one of the best practices is storing seeds in something less permeable [than paper],” Gilbery adds.
4) Failing to use cold storage when warranted
“If it’s seed that you’re just going to be planting within a couple months or a year, then it’s going to be just fine at room temperature,” she says. “But, if you want those seeds backed up for the future, then refrigerating or freezing is an option.”
Cold temperatures can extend seed longevity by many years. Just be sure to dry seeds thoroughly and place in an airtight, glass or plastic container ahead of cold storage.
And when it’s finally time to take these seeds out?
“When you take something out of a cold place and bring it to a warmer place, it’s going to condense,” Gilbery says. “So, when we take seeds out of the freezer here, we leave them on the counter for about four hours. That’s so none of the condensation can get inside of the package.”
Dry, dark places—think closets and cupboards—are best for long-term seed viability.
6) Exposing seeds to too much temperature fluctuation
Bursts of air conditioning and the heat from a sunny window can be enough to affect stored seeds’ germination rates. “You want to find the most stable temperature in your house,” Gilbery says. “That might be a basement or a closet—something that has remains steady.”
7) Seeds are poorly labeled—or not labeled at all
After emptying store-bought seeds into an airtight bottle, be sure to save the original seed packet. “You can put the packet inside the jar,” Gilbery suggests. “There’s lots of good information on that seed packet, so they’re always good to keep around.”
Next, add a sticky label to the outside of the bottle. At Seed Savers, Gilbery says, “We always label the outside of the container, but we also put a label on the inside of the container for our larger seed storage. That way, if the outside label was to fall off, then you’d still have the label on the inside.”
Keep Growing
Even if you’ve kept your seeds in less-than-ideal conditions, Gilbery says, “It’s helpful to remember that seeds really want to grow—they want to live and thrive. So, go ahead and try planting them. People are usually surprised at what grows.”
For more on seed storage and saving your very own seed, check out The Seed Garden: The Art & Practice of Seed Saving. Over time and with practice, you’ll get better at making important observations about your plants’ growing conditions and the seeds they produce.
You’ll get better at harvesting, processing and, yes, storing this seed, too.
For the third time that morning, I glanced up to study the chicken coop. For some reason, it demanded my attention, so I walked down to stand beside the decades-old poultry place. Countless generations of feathered folk had found dry, comfortable accommodations within its walls.
But time has a funny way of pulling pranks. The once-proud structure was now reduced to the ignoble statues of junk receptacle.
Pulling open the batten door required some serious muscle. I felt like I was opening King Tut’s inner chambers. Peering into the cobwebs revealed Old Jessie’s harness and collar, plus a mix of push lawn mowers and bicycles.
It seemed a shame to let the building continue to deteriorate. But realistically, what could I do?
For some time I had wanted another outdoor shed. The chicken coop measured 16-by-16 feet—more than adequate for a workbench with plenty of room. Suddenly, endless possibilities swirled before me with the cheerful finished structure increasingly clear in my mind.
After a lunch of leftovers and outlining the possibilities, the project manger on our spread (aka my wife) soon OK’d the notion. Filled with confidence, I marched down to the former poultry house brimming with ideas.
Planning Ahead
With the project now clear, I needed to decide how to keep the work flowing smoothly. The roof would come off first, then the walls. Finally, I would pry the frame apart in order to access the overall condition.
I intended to reuse as much lumber as possible. So with wrecking bar in hand, I stepped forward.
The first few boards pulled off were badly end-splintered before I remembered how to use the big 3-foot pry bar’s nail-puller notch. All nails or spikes that looked usable I tossed into a large pail.
Now, a slightly bent nail is not a lost cause, and a whack or two with a ball peen hammer soon returns it to usefulness. Is saving spikes or nails worth it? Plenty of country structures hold solid with second- or third-generation fasteners.
What about used shingles? Some rural reclaimers use them, while some never would. But it’s possible if they can be removed in one solid piece.
If you are so inclined, pry up all six roof nails carefully. Don’t tackle them with a shovel.
Lorain Ebbett-Rideout
Rotten Turn of Events
Once I pulled off the roof, some of the boards turned out to be beyond salvage. I also discovered several totally rotten 2-by-6s.
With the sun now shining in, I tackled pulling off the inside and outside walls. Again, there were more rotten boards, but the bulk of the framing 2-by-4s and 2-by-6s were in decent shape.
Plus, I had a big bucket of fasteners ready for a new job. All in all, it wasn’t as bad as I had feared.
With the bare frame dismantled and sorted carefully nearby, it was down to the foundations, which proved to be an unexpected cost. The old turkey tower stood solid on cement blocks grounded in coarse gravel, common in smaller country builds.
But with the blocks beyond salvageable condition, the old chicken coop needed 12 new heavy holders.
So with a yard full of lumber in various conditions, I now needed to face the facts: This project required more building supplies than I expected. An expensive trip to town was in order, or so it seemed.
A country wood-salvager just never knows where a few boards might show up, and mine came about like most: unexpectedly.
A neighbor stopped by to ask about the hay crop and noticed my scattered lumber piles. “Did the old coop finally blow down?” she asked. I explained my repurposing project, and then she inquired if I would have enough lumber?
I replied that it seemed like I was running short. As luck would have it, she had a stack of used lumber in her tractor-shed loft that was in her way. If I wanted it, I could come get it.
Dropping everything, I fired up my tractor, hooked on the wagon and hustled over. A quick survey revealed several dozen boards along with assorted length 2-inch lumber.
Yeehaw! I pushed the whole works out off the loft and loaded down the wagon.
My kind neighbor was pleased to have her loft emptied because she expected to fill it with future acquisitions of some sort. Best of all, she wanted a heavy 8-foot cabinet with a solid top gone, too, which I used to make the workbench.
The lumber’s rough condition fit in perfectly with my reclamation plans. I triple thanked her and set the throttle for home.
Lorain Ebbett-Rideout
Prettying It Up
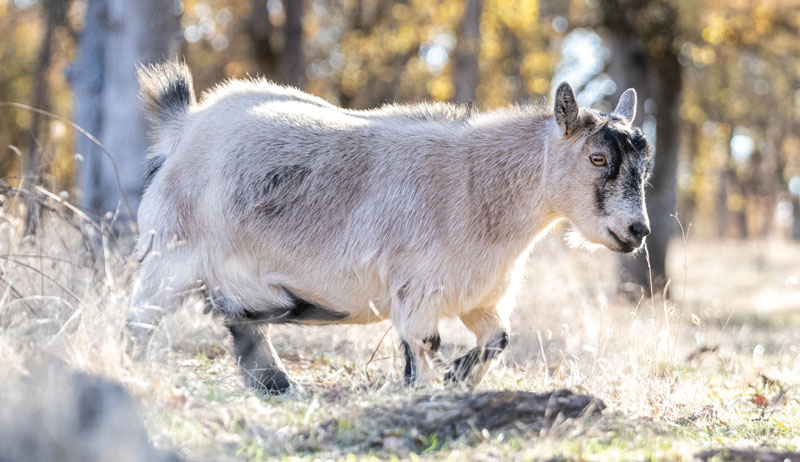
Along with the teardown, I also needed to do some landscaping. Nasty scrub bushes had taken over, and the rank grass was loaded with prickly burdocks. I usually leave burdock for the wild turkey who enjoy them and the goats who see everything as European cuisine.
A bit of work with the tractor bucket, a few loads of soddy soil and leveling the surrounding area straightened things up nicely.
As the yard around the repurposed chicken coop improved, I also took down a a few problem trees and added them to next winter’s wood.
If you are repurposing a structure, why not do the same with the landscape? More air circulation along with steady sun ensured this salvage build will stand for another 40-odd seasons—even if I do not!
Dry Inside & Out
Once the footing was solid, and the floor reframed and planked in with 2-by-6s, it was a steady progress. The wall frames were put up in a single day, then the roof trusses prepared with enough pitch to get the rain running quickly or the snow building up.
Using a roof square, I worked out the correct pitch. To be honest, the first couple attempts weren’t right, but I soon had a template I could copy.
Don’t rush a roof, and use that 4-foot level often!
Once the roof was straight and true, I moved on to double-boarding the four walls with recycled lumber. The totally reclaimed roof got a layer of black, 15-pound tar paper with metal edge flashing to keep drips away from the former poultry house walls, finished in asphalt 3-tab shingles.
Roofing materials, along with the cement blocks, were the only major off-site purchases.
At this point, things had progressed satisfactorily, but now it was time to get creative. I added a 10-foot run-under roof to one gable end, away for the prevalent winds. Oh, this portion of the project was fun and took longer to get right then the whole roof had!
I botched several 2-by-4s, but once it went on, I was pleased. It provided an outdoor work area with cover, and most importantly it pleased the project manager, too. With the door hung and recycled workbench installed, the reclaimed chicken coop was ready for work.
The thought of tearing and tossing this former turkey/chicken deluxe was never even briefly considered, and a reduction of waste into the environment is always worth the effort. This build was all about recycling, and it turned out well.
So the next time you stand before a weather-worn poultry palace look close. There’s new life in those old boards just waiting to be released!
Sidebar: Busted Buildings
If you’re short on old structures for lumber, don’t worry. Rural areas have all sorts of unused or ignored structures with potential lumber recycling possibilities. Stock barns, feed covers, woodsheds, tool or tractor buildings—the possibilities are endless for a wood scrounger.
But there’s a couple country buildings best avoided: the outhouse and the smokehouse.
The first is, well, obvious, and the same goes for any floors from animal sheds. Years of manure make for poor lumber, which is why I removed and tossed the chicken coop floor.
But the smoke house, you say, is clean; why not recycle it? Years of tasty smoked meat smells are impossible for a varmint to not notice. Any prowling meat hunter will happily take a poultry dinner as a consolation prize for the promised pork supper. So why put the temptation out there?
When asking country folks about their old buildings, be polite and upfront about your plans. Be sure to offer to pay, and if they’re agreeable, be extra careful to remove only what was agreed on. And try to work as clean as possible, leaving no nails to punch tires.
Doing a professional removal job might lead to more standing lumber needed for future projects!
This article originally appeared in the July/August 2021 issue of Hobby Farms magazine.
Sometimes, chickens can be just like children. One minute, they’re perfectly fine and happily running around the yard. The next minute, they’re sadly sitting off by themselves, nursing some sort of injury.
Shelly’s White Orpington girl, Maizie, was not eating with her usual gusto. Nor was she foraging and cavorting with her flockmates like usual. Instead, the year-old pullet was keeping to herself, her feathers droopy and her disposition even more so.
Concerned, Shelly carefully examined her languid layer, only to discover a dark grey-purple spot on the side of the bird’s pale pink beak. Thinking it was dirt, Shelly attempted to rub the smudge off. Maizie reacted accordingly, squawking loudly and indignantly leaping off Shelly’s lap. Shelly was shocked.
“I didn’t think chickens felt pain,” she messaged me. “Could that be a bruise?”
The Black & Blue Truth
A bird’s beak consists mostly of bone and keratin, the same protein that comprises human fingernails, horse hooves and rhinoceros horns. Between these two tough components exists a vascular layer of nerves and tiny blood vessels called capillaries.
Just as in humans, a bruise on chickens’ beak results from some sort of physical trauma. This trauma causes the capillaries near the site of impact to break, releasing blood that pools beneath the surface of the skin.
In the case of a beak injury, the blood pools beneath the outer keratin layer. This produces a bruise that may appear purple, gray, blue or brown, depending on the color of the beak.
Since chickens use their beaks for everything from preening and eating to fighting and mating, there are ample opportunities for a beak injury to occur. An aggressive pecking-order battle or an overzealous rooster could be the cause behind the bruise.
Not all injuries originate from another bird, however. Chickens can hurt themselves by falling off their perch while they sleep or by running into a wall, a tree or other immoveable object while their attention is temporarily diverted (by, for example, a butterfly).
Lamentably, little can be done to treat a bruise other than icing it and gently massaging the injury. But neither of these treaments would work on a beak due to the thickness of the keratinous layer.
Fortunately, a chicken’s beak, like its talons, is in a continual state of growth. This means that the bruise mark will slowly work its way down to the very tip of the beak, where it will be ground away by regular daily use.
There are, however, several steps to take should you notice that your bird’s beak is bruised:
First, gently clean the surface of the beak with a soft, damp cloth. Inspect the injury to ascertain if there are any fractures or breaks that would require veterinary care.
Second, offer your injured bird food it can eat more easily with its bruised beak, such as a warm mash or slurry.
Third, consider adding electrolytes to your chickens’ drinking water for a couple of days to help alleviate stress the injured bird is feeling.
Finally, if the trauma was indeed caused by another chicken, consider separating the offender from the rest of your flock. Or, if the belligerent behavior continues, you may need to rehome the aggressive bird.
Fortunately, Shelly found no further injury upon inspecting Maizie’s beak. Since her microflock consists of the White Orpington and three other sweet-natured Orpington pullets—all of whom worriedly hovered close by while Maizie was being examined—Shelly could only conclude that Maizie’s bruise was somehow self inflicted.
“I guess that’s life with chickens, huh?” she messaged me later. I couldn’t have said it better myself.
Throwing a rain barrel in here or there used to be a nice-to-have for many gardeners. But as we experience more unpredictable weather patterns (including heavy flooding and more periods of drought) rainwater collection systems are rapidly moving to the need-to-have category.
Replacing standard hoses and sprinklers with spot watering and drip irrigation is also gaining ground. Harvesting rainwater—particularly during extremely heavy rains—reduces stormwater runoff, thereby protecting area watersheds.
It also mitigates topsoil and nutrient loss from your own land.
Extra Benefits
Mary Ann Capehart serves as instructional specialist for Water Wise, a program within the University of Arizona Cooperative Extension service. According to Capehart, rainwater is particularly prized for its ability to help flush salts out of the soil.
“Groundwater—especially in the West—tends to have high salinity,” she says. Because its naturally high mineral content can make nutrient uptake more difficult for plants, even an occasional watering with rainwater can make a big difference.
Gardeners making the switch from municipal water sources to rainwater may notice their plants perking up, too. Some municipal water supplies may contain chemical disinfection byproducts.
“Chlorine evaporates, but chloramine does not,” Capehart says. “And more water treatment plants are turning to chloramine.”
Municipal water also can contain emerging contaminants such as pharmaceuticals, microbeads from personal care products, fertilizers, herbicides and pesticides.
“Plants respond a lot better to rainwater,” says Jonathan Meier, owner of Rain Brothers, a company in Columbus, Ohio, that specialize in sales and service of everything related to cisterns. “And a small-scale rainwater collection system will pay for itself within a season typically—especially if someone is on municipal water.”
Meier began selling rain catchment equipment in 2007, and he says 2020 was his best year so far. “People were stuck at home and thinking more about backyard conservation or backyard gardens,” he says.
Sarah Sojka, vice president of the American Rainwater Catchment Systems Association Foundation board and an associate professor of environmental studies and physics at Randolph College, has noticed an uptick in interest in rainwater collection, too. “We’ve seen increases in people coming to the [ARCSA] website,” she says.
“It is actually really hard to track how many rainwater harvesting systems there are out there, particularly because they range so dramatically in size from a 100-gallon barrel to 1-million-gallon, underground storage system, or a 1- or 2-million-gallon pond.”
What’s Your Capacity?
If you are in the western U.S., you might already rely on a rain catchment system, but you may need to switch to even larger tank in the coming years. “Normally, we would have a giant monsoon, and you would get as much [rainwater] as you could that one time of year and then save it for the really dry spells,” Capehart says.
“[However,] we are losing rainfall altogether, so [when it does rain,] it’s like, ‘Ooh! How much can I harvest?’”
Whether you have a modest rain barrel and want to upgrade or you’re starting from scratch, you can follow a simple formula to find out what will work best for your needs.
“It’s a balance between your roof size — because you’re not going to be able to capture more than what hits that roof in a given period of time — and how much water you actually use,” Capehart says.
“The engineering formula for stormwater calculations is 0.6 gallons per square foot of roof,” Meier says. In other words: If, for instance, your roof area is 1,000 square feet, you would multiply that by 0.6 gallons. If you get an inch of rain, you could collect 600 gallons of rainwater from a roof that size.
Next, determine the amount of rainwater you’re likely to use. “If I am watering this much area, and I only have a 55-gallon drum, how effective is that going to be?” Sojka asks.
If you already have an established garden, you can assess your water usage with a hose meter. “They’re not expensive, and then you can see how much you’re watering,” Capehart says. “Water by hand [with the metered hose], see how much water your plants need, and then you can think, ‘If I was doing this every week or even more during the hot periods, what would that look like?’”
While individual rain barrels hold about 55 gallons each, larger, aboveground tanks can accommodate 500 gallons or more. “When you think about how much you might want [in order] to water a tree in a drought, for instance, it would be something like 1,000 gallons,” Capehart says.
If you get frequent rains, you might not need a behemoth storage tank. But if rain is scarce, it’s better to capture as much as you can while you have the chance.
Rainwater Collection Caveats
Before you spend a dime on barrels, tanks or cisterns, check in with your county extension agency or water resource board to make sure you’re legally allowed to harvest rainwater where you live.
“One of the things that’s challenging with rainwater harvesting is that it’s regulated by so many different people,” Sojka says. “It’s regulated on the water rights side. It’s regulated on a health side. Sometimes, it’s regulated on a stormwater runoff side.”
Let’s say you’ve secured the all-clear and you think you’ve got the numbers and sizes of your catchment tanks all figured out. That’s a good start, but it’s just the start. “The top mistake I see people making is selecting the wrong downspout to harvest from,” Meier says. “Just because you have a downspout on the house doesn’t mean that you have a lot of water coming off of it.”
He recommends locating the largest area of your roof that’s being drained and harvesting from that particular spout. Also, be sure the pipes that go from the roof gutter to your rain barrel are large enough to capture even very heavy flows.
You should also take care to divert your barrel’s overflow well away from your home’s foundation. “We have to think about what happens with failure,” Sojka says. “What happens if the little spigot at the bottom of your rainwater container starts leaking? Where is that leak going to go?”
Ivanova Tetyana/Shutterstock
Higher Ground
Something else to consider? “A lot of people put in a system of rain barrels and they’re like, ‘Oh, I’m just going to fill the watering can over here and I’ll carry it over to my garden and it will be no big deal,’ Sojka says. “But within a month of doing that, they’re like, ‘I’m just going to use the hose, because this is a pain.’”
To get good use from your collection system, you may want to incorporate a small pump or elevate your barrels in order to increase your potential water pressure.
“We recommend a 2-foot elevation on the barrel,” Meier says. “That will give a little bit of water pressure, but it’ll also make that water higher, so that it can flow better to the spots you’re trying to water.”
Still, don’t expect to use just any standard drip irrigation hose with this setup. “Most drip irrigation needs at least 20 psi, and you’re not going to get that from a lot of smaller rain tanks,” Capehart says. “But there are things that you can use that are very low psi like certain irrigating tapes.”
Some rainwater collection equipment suppliers also sell low-pressure emitters to be used with gravity-fed rain barrels.
Incorporating a drip system is a much more efficient use of water. “You will extend the duration that you can use your rain barrel, and, because [the drip system] waters slowly, the roots of the plants have a longer time to absorb moisture,” Meier says.
If you do choose to use a specialty drip hose or irrigating tape, watch for sediment build-up. “Drip hoses can clog pretty easily, if you are not careful about water quality,” Sojka says.
Keep It Clean
Your rainwater quality partly depends on the degree to which you maintain your catchment system. “Rain is pretty clean — especially if you do some prefiltration before it hits the tank,” Capehart says. At minimum, that means keeping roof gutters clean and free of leaves, sticks and other debris.
If possible, you should also keep your tank in the shade. This will help to reduce or eliminate algae growth in your rainwater storage containers. (And, in the case of plastic catchment systems, the less exposure to plastic-degrading UV rays, the better.)
Rainwater collection systems should also be mosquito-tight. “Make sure that you have sealed the openings with netting to prevent mosquito breeding,” Sojka says. “All of these are things that people need to think about, and they are not particularly hard. But it is a little more than just cutting off a gutter and dumping it into a barrel.”
Once you have your system dialed in, rain harvesting can be downright fun. “A really cool byproduct of rain harvesting is how you stay in closer contact with the seasons, the rainfall and the cycles of rain,” Capehart admits. “That does make it very exciting when it rains. And it is really high-quality water.”
This article originally appeared in the July/August 2021 issue of Hobby Farms magazine.
Never judge an animal by its size. Many small livestock breeds can still work for their living. They till the land, spread manure on fields and provide ample meat, milk, fleece and eggs for the average family on a far smaller acreage.
Plus, small and miniature livestock breeds do it all for less feed and water. And they produce less waste than their larger equivalents. You really can’t get much better than that.
Let’s take a look at some of the small breeds that prove that bigger isn’t always better!
Dexter Cattle
Ireland also gave us a small cattle breed. In fact, the Dexter is the smallest of all cow breeds in Europe. As with so many of the miniature breeds (though Dexters aren’t minis—they’re in fact the smallest, non-miniature breed of cow), these hardy, dual-purpose animals provide excellent beef and milk.
Calving problems are rare, and they’re long-lived.
Their low weight also makes them easier on the land. This prevents damage, especially in wetter areas.
The Dexter is primarily a beef breed. Calves grow fast, maturing in 12 to 18 months as finished beef. Dexter cows also give more milk for their body weight than any other breed.
There’s a growing interest in these small, gentle cattle because they require less feed than other breeds. And yet they can thrive in a variety of climates.
Dexters come in three solid colors: black (predominant), dun and red. Not only are these cattle efficient in beef and milk production, but their small size and good temperament make Dexters nice to have around.
Calves weigh about 45 pounds at birth. When they are weaned at about 7 months, they weigh between 350 and 500 pounds. A mature cow weighs between 600 and 700 pounds. Bulls tip the scales at about 1,000 pounds.
Both sexes will continue to grow until 5 or 6 years of age, and their average lifespan is more than 20 years. They are known for their ease of calving and continue to calve until age 16 to 18.
The North American Babydoll Southdown Sheep Association refers to the diminutive breed as “charming creatures” because of their dispositions and adorable appearance. The polled (hornless) breed originated in England and was improved upon in the late 1700s by John Ellman.
Ewes make excellent mothers, often producing multiples. Ewes, and the more masculine-looking rams, reach heights of 18 to 24 inches. Babydoll Southdowns sport sought-after springy fleece, with natural loft, in shades of off-white or black (fades to shades of brown and gray) that one can spin into luxurious fiber.
Thanks to being easy-keepers, with a small size and docile temperament, the breed is often raised as a pet or used in 4-H projects, remaining active and sound for 8 to 10 years or longer.
Babydoll Southdowns make excellent foragers and many employ them to keep grass trimmed and weeds down.
Nigerian Dwarf Goat
If you like the thought of small goat breeds but still wish to milk, then maybe take a look at the Nigerian Dwarf. The American Nigerian Dwarf Dairy Association and its skilled breeders have done a truly remarkable job in producing and refining this extremely useful goat breed.
Courtesy Brandee Green, Brandee’s Mobile Hoof Care
They are elegant looking animals—perfect dairy goats in miniature!
This caprine breed originated in West Africa and resembles a small version of large dairy goat breeds. Height in does is between 17 to 22 1/2 inches, with averages at 21 1/2. Bucks top height is 23 1/2 inches, averaging 23.
Both does and bucks boast soft coats with short to medium hair in a number of color combinations, including black, chocolate, Dalmatian (black-and-white spotted), and gold and white.
But it isn’t all about looks. This gentle little goat is already renowned for its milk that’s celebrated for its high butterfat content. These dwarves are also extremely friendly, hardy and thrive in almost any climate.
They’re perfect for the beginner, as a pet or used in 4-H projects.
Harlequin Sheep
As adults, Harlequins are miniature sheep with ewes weighing from 80 to 120 pounds and rams weighing 90 to 150 at maturity. At this weight, they can be ideal for children, teens, seniors and everyone in between.
Being naturally polled (hornless), keepers don’t need to worry about serious injury. Additionally, Harlequins produce fine, medium-staple length wool highly desired by spinners and fiber artists.
This mini is a hardy breed that requires little more than good grazing land, fresh water, shelter and predator protection. They are easy lambers, often having multiples over many years. Ewes are attentive mothers, rarely requiring assistance when giving birth.
Despite being relatively rare, Harlequins are affordable. If you are considering them to obtain or maintain an ag exemption on your land, or purchasing for your kids or grandkids as a 4-H or FFA project, you’ll find they’re truly worth their weight in gold due to their versatility on the farm, in your yard or in the show ring.
In fact, Steve Williams showed the first Harlequin sheep at the Great State Fair of Texas in 2017, where they placed first, second and third! Williams then went on to show at the world-famous Houston Stock Show, garnering two Reserve Champion titles.
This small cattle breed was the result of an Australian research project carried out by the Trangie Research Centre. Aberdeen Angus were initially imported from Canada in 1929, with additional imports brought over from the U.S. and U.K. The research focused upon growth rate versus profitability, and three separate herds were established:
one with a high rate of growth in their first year (High Line)
one with a low rate of growth (Low Line)
a control group (Control Line)
The experiment ran for 19 years, by the end of which, the Low Line animals were 30 percent smaller than the High Line group.
But don’t call these beautiful bovines dwarves. American Aberdeen cattle don’t carry the dwarfism gene that so many other small breeds do. This means even first-time heifers usually calve easily.
They are a naturally docile breed and easily handled so they’re perfect for small acreage.
Farmer Brady Haynes from Colorado is new to American Aberdeens. What drew him to the breed is the idea of efficiency.
“More beef per acre is the whole point,” he says. “The other thing is the fact that they marble on grass. They’ve been bred to fatten on grass. That was their whole point—no corn, no soy or anything.
“High-quality meat on marginal rations is efficient. Efficiency is what helps the environment.”
Shetland Sheep
Shetland sheep boast a wide range of colors and soft wool, excellent meat, small size, disease resistance and ability to take good care of themselves.
Small, hardy and long-lived, Shetlands have retained primitive survival instincts. Ewes typically lamb unassisted, and lambs are quick to gain their feet and start nursing.
Some can shed fleece (called rooing), which is easily plucked by hand.
Shetlands typically breed in season. In the northern areas of North America, this starts in October and November for lambs born in spring.
Twins are common, with newborns weighing between 4 and 7 pounds.
Rams weigh from 90 to 125 pounds; ewes 75 to 100 pounds. Rams possess spiraled horns. Ewes are typically polled.
Shetlands have a dished face, and good width between medium-sized ears carried above the horizontal, and expressive eyes. The characteristic fluke-shaped tail is naturally short and doesn’t require docking.
Shetlands come in 11 different colors with 30 distinct marking patterns. Colors range from white to grays to black, and from light to dark brown.
Single-coated Shetlands typically have soft, downy wool, with a lot of crimp with a staple of about 2 to 4 inches. Double-coated Shetlands have fleece ranging from 6 to as much as 10 inches. The outer coat is more hairlike, while the undercoat is soft. The outer coat serves as a protective layer against harsh weather.
A third type of fleece (intermediate) is now the most common type. Length ranges from 4 to 6 inches. All three types of fleece should be consistent front to back, with a very soft handle.
Their small stature makes Shetlands easy to handle and keep on small acreage. Even novice shepherds can use Shetlands to produce exquisite wool, delicious meat and quality breeding stock. The breed association provides support.
Kunekune Pig
Have you ever fancied keeping pigs but are put off by their intimidating size, rooting behaviors and possible destruction of fencing? Well, look no further than the truly delightful Kunekune!
This very special porcine hails from New Zealand and was originally bred by the Maoris. Although it’s undeniably cute, this little piggy is more useful than its Disney-like looks first suggest.
They’re docile, easily handled and extremely friendly animals, and they’re also cost-effective to keep. Unlike most pig breeds, these small animals like to graze. They’ll certainly keep an orchard clear of all fallen fruit and, being grass-fed, they produce the most wonderful high-quality compost that can be used to enrich the soil throughout the farmstead.
And yes, Kunekune can, of course, also be eaten! In a time when producers are looking for responsible/sustainable ways to provide meat for the family, the Kunekune is the standout choice for small acreage pork production. This mid-sized, lard-type heritage hog has been applauded for its delicious, red, well-marbled meat and flavorful fat.
Many call this the best pig for charcuterie, and chefs clamor to put the breed on their menus.
They aren’t prone to root or roam, and their size, temperament and ease of keeping make them perfect for most farms, from urban to rural. Farmers for the breed are in demand to increase availability of Kunekune Pedigree Pork in the U.S. and Canada.
American Guinea Hog
This little black pig is likely derived from the Essex Pig, which was immensely popular when first imported into the U.S. from England in the 1820s. Although small (ranging from a third to half the size of a regular hog), this isn’t a dwarf breed so it has very few problems when breeding.
Carlos da Cunha/Shutterstock
The sows make excellent mothers, producing four to eight piglets. And given their small size, they don’t require farrowing crates.
They’re solid black with large pricked ears and a straight or very slightly dished snout. Described as a true miniature pig, Guineas are proportionate in stature, unlike the potbellied pig, which is a dwarf.
With a docile disposition, they make an excellent homestead pig. Historically, Guinea Hogs foraged for their own food, eating rodents and other small animals, grass, roots and nuts, and cleaning out garden beds.
They produce hams, bacon and lard.
The sweet, buttery-tasting pork is extremely moist and tender. On average, you can expect to harvest up to 65 percent of the live hog weight when choosing more traditional cuts.
Katahdin Sheep
Katahdins make hardy, low-maintenance meat animals and produce excellent lamb crops throughout their long productive lives. The lambs yield a lean, mild-tasting carcass that holds appeal for specialty markets. These adaptable sheep are also useful in land management and cross-breeding programs.
Although this breed’s name sounds quite exotic, the Katahdin hair sheep actually originated on a farm in north-central Maine run by Michael and Barbara Piel. An amateur geneticist and avid livestock raiser, Michael Piel had initially looked into utilizing sheep to graze power lines and for other forms of land management.
However, his focus later shifted to the development of a meat sheep that wouldn’t require shearing. In the early 1970s, Piel picked about 120 of his finest ewes and named them after the highest mountain in Maine, Mount Katahdin.
The Ossabaw Island Hog
This small, feral-looking, heavy-coated and bristly breed descend from swine that Spanish explorers left off the coast of Georgia on Ossabaw Island almost 400 years ago. Unlike the Guinea, they come in a rainbow of colors. These pigs have long snouts, heavy shoulders and prick ears fringed with long hair.
Harsh weather conditions and food availability has naturally reduced its size. Some individuals weigh little more than 25 pounds. Their maximum height is around 20 inches.
Critically endangered, a small number are now kept by farmers throughout the country who celebrate their ability to fatten on grazing, roots and bark and yet still produce smaller cuts of well-marbled, juicy meat.
Ossabaw Island Hogs are hardy, self-sufficient pigs that like their own space. For anyone wanting land cleared, long-snouted Ossabaw Island hogs are peerless rooters.
Pygmy Goat
Africa is the home to about a quarter of the world’s goat population, and a wide variety of different types flourish throughout this vast continent. Dwarf breeds are common from Senegal to the center as far as Southern Sudan.
National Pygmy Goat Association
As a child, I kept several of these adorable animals. I can attest to the fact that they make wonderful pets.
As the Pygmy’s name suggests, this goat breed is petite, with a height of just 16 to 23 inches and weighing in at 60 to 80 pounds (about the size of a large dog).
Their animated nature makes Pygmy goats popular pets. But the breed also has a place on the farm. Females produce excellent milk that can be used in cheese-making.
Does are strong breeders. Their first breeding typically occurs between 12 and 18 months, and after a five-month gestation period, does can bear one to four kids every year. Kids are fully weaned around 3 months of age.
Like other breeds, the small goats are social and do best in a herd atmosphere. They are active and need ample space for exercise.
Miniature Mediterranean Donkey
My mom is a huge fan of the Miniature Donkey. Who wouldn’t fall in love with this long-eared diminutive equine?
This lovable little donkey originally came from Sardinia and Sicily. Today, it’s almost extinct on its native islands, so we have American breeders to thank for its preservation.
Now, I get that they are completely adorable. But I have in the past asked my mom, “What are they really good for?” She soon put me right.
“Firstly, and probably most important of all, they make truly wonderful pets. And because of their small size and very reliable, gentle temperaments, they are particularly good for children. They are also excellent for those who would like to keep the larger equines but simply can’t because of lack of means, space or maybe those whose health/age now doesn’t allow them to manage the larger animals. The larger minis can be used for driving, and they can also be ridden, with supervision, by small children.”
Miniature Mediterranean Donkeys also make good therapy animals, and pack burro racing is becoming popular.
Sidebar: Tiny Turkeys
I adore turkeys and have kept and bred numerous varieties, my favorite being the Buff. Now, we are all familiar with bantams and of course the smaller duck breeds, but what about a miniature turkey?
The Beltsville Small White was created in the 1930s in Beltsville, Maryland, to create a bird that would fit apartment refrigerators. In 1941, this small turkey was released to the public, and by the 1950s, farmers were raising millions of them.
Its fall from grace was just as fast as its meteoric rise. Although considered a fine bird for family use, the hotel/restaurant trade demanded a larger, meatier bird from which they could obtain more slices of meat. By the 1970s, the Beltsville Small White was facing extinction.
Today, it’s still incredibly rare. The Beltsville has numerous plus points over its larger, broader-breasted brethren. It has excellent reproductive qualities, and unlike many breeds, it can mate naturally.
The Beltsville is also perfect for the smaller family, especially one that actively wants to avoid waste. Mature toms weigh in at 21 pounds; hens, 12.
Sidebar: Mini Milker
Another miniature cow that is provoking a whole lot of interest is the Miniature Jersey. This beauty, like the standard Jersey, is first and foremost a milk cow. They produce on average between 1 1⁄2 to 3 gallons of milk a day.
Of course, this is far less than the standard size but more than enough for the average family. They come with all the positive traits miniatures bring: being able to be kept on a smaller acreage, requiring less feed and being easy to handle.
This article originally appeared in the July/August 2021 issue of Hobby Farms magazine.
In my last article, we discussed ways to help cattle survive during the summer heat. Today, however, we’ll be learning about how a drought can affect cattle. We’ll also look at what you can do to prepare for it and the best ways to cope during dry weather.
When you have reached the point that your area is in a full drought, some tough decisions might have to be made depending on how long the drought lasts. If it’s just for a short period, your two main priorities will be finding enough feed and securing water for the cattle.
A local rancher explained to me that this is why they keep a year’s worth of hay on hand. By figuring up a rough estimate of how much hay would be needed to keep your animals fed for a year, you can then stockpile hay (or other feed) to keep in reserve. If an emergency comes about later on, you won’t be scrambling to find feed like everyone else or paying outrageous prices.
If the drought continues to last for a lengthy period, you may have to consider options such as weaning the calves early or downsizing your herd of cattle.
There are a few ways you can try to help cattle out during a tough season. How you feed and care for your cattle will depend on where they are (i.e. steers in a drylot, cows out on grass, etc.). For the cattle in a feedlot, some of the best things you can do include:
If you’re running short on hay, consider buying more protein (such as distillers or grain) to help supplement and stretch your hay reserves.
Be careful to avoid overcrowding the pen.
Put up sun shades to offer relief from the sun.
Fog or mist the cattle with water if there’s no breeze blowing through the pen. Avoid creating water holes in the pen, but continue to wet them down again as soon as they’re dried off. To get an idea of a sprinkler setup, check out your local sale barns, as they often have them.
Remember that so long as there is a breeze through the pen, they will probably survive. It will still be rough. But cattle can sweat (unlike hogs), and that breeze will help cool the animal and evaporate the sweat.
For cattle out on grass, you should of course be cautious and keep an eye on them during drought. But if they have a pond with decent water in it, they should be able to handle the heat. If no pond is available, make sure there are a few trees around.
Here are a few things you can consider if you have cows out on grass during a drought:
If there isn’t enough grass in the pasture alone, start providing protein such as range cubes or grain.
Consider weaning the calves off of the cows early, then sending the calves to a drylot. This will help take some stress off of the cows.
Make a plan of how much it will take to feed your cows over a certain period of time and start accumulating feed.
While culling is never a fun option, remember that you cannot afford to get attached to individual animals. Don’t continue to save underperforming cows for “one more round” next year.
If culling is something you decide to do, the open cows should go first. Old cows go second, and underproducing cows third.
If you have a cow herd, you should be keeping good records anyway, but especially during a drought. For an example of why records are so important, let’s say that you have a 5-year-old cow. During a normal summer, you’re supplementing her hay with protein. She should be able to keep her body condition up just fine. If you notice that her condition is beginning to worsen (keep in mind that this is a normal summer, not a drought), you’ll want to keep record of that. If her calf in the spring is a heifer, that trait will most likely be passed on to that calf and thus not one you would want to keep.
How to Look for Overheated Cattle
If you find yourself with some extremely overheated cattle, a few things to look for include:
rapid breathing
frothing at the mouth
tongue hanging out (a possible sign)
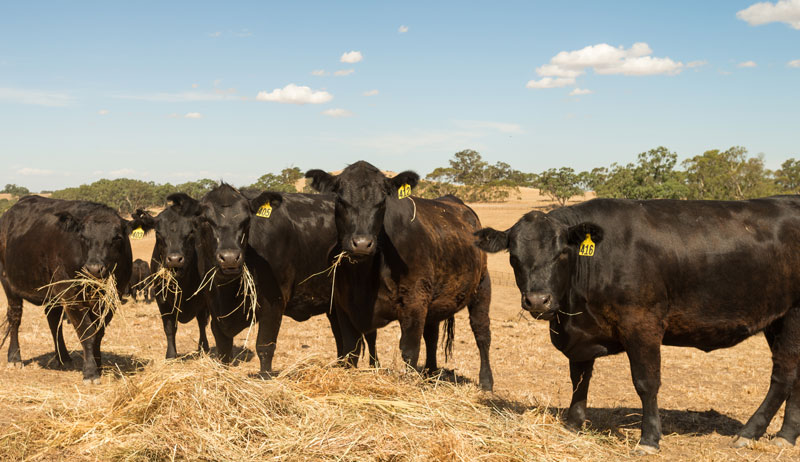
The animals might also pace back and forth trying to find a cooler place. Black Angus are some of the most affected cattle, especially the bulls. Bulls tend to carry so much weight (from muscle, not fat) and have such thick skin that the heat just affects them worse than it would a steer or cow.
As you continue to care for your cattle, you’ll run into a few unexpected events along the way. They’re not the end of the world or something you can’t handle (even if it requires getting a little help).
Just work to be prepared ahead of time. Keep plenty of hay or feed around, as well as supplies. Know the location of your emergency water sources. And do the best you can with what you have.
Take a deep breath. It’ll be a new season before you know it.
Hobby farms should be productive, sure. But that doesn’t mean your slice of paradise can’t be nice to look at, too. That’s why I recently added some sunflowers around our homestead. The flowers bring some summer color to my Texas farm.
They’ll also feed local birds and other wildlife later, in fall.
The sunflowers are growing great. But unfortunately, so is johnsongrass, an aggressive invasive plant that tends to outgrow everything else.
I have to kill the johnsongrass. But to preserve my sunflowers, I need a selective approach that will take out the invasive without hurting the sunflowers.
Spot spraying the grass is the obvious approach. But what I spot spray matters, too, as I don’t want to use a synthetic herbicide like glyphosate in this area. So I mixed up a batch of natural herbicide to take care of the problem.
Make Your Own Natural Herbicide
The natural herbicide I use is easy to mix up in the kitchen. You probably have the ingredients in your pantry already. Here’s what you need:
1 gallon of white vinegar
a cup of table salt
1 tablespoon of dish soap
Easy, right? As an acidic product, vinegar will quickly (and I mean within hours) kill the johnsongrass. Adding salt makes the herbicide more effective, as it will soak into the ground to kill the root system.
And the dish soap? It dissolves surfactants on the plant to make the herbicide stick to the plant while it does its work.
First, mix up your solution. I like to use a simple 2-gallon handheld spot sprayer. You can find similar products at the garden center or farm supply store.
The best time to spray your natural herbicide is when it’s hot and dry. These conditions will ensure the unwelcome plants take up the solution. In the video, you’ll see I sprayed in the middle of the day, when the johnsongrass was most likely to absorb the solution.
Then, just spray troublesome growth. Be careful what you spray, though, as this solution will kill whatever it touches. In a couple of hours, you’ll see the natural herbicide doing its work.
You can re-spray any spots you missed, as well as come back again at a later time to treat new growth. Just don’t overdo it, though, as too much salt isn’t good for the soil.
Listen in as Sinéad Fortune, living in Scotland, explains how Brexit—Great Britain’s exit from the European Union—has left farmers in the United Kingdom in a precarious place. Imagine not being able to purchase French cheese and Spanish olives … and the seeds and supplies you need to keep farming … because of this shift in political borders. Sinéad, the seed sovereignty program manager in the UK and Ireland for The Gaia Foundation, talks about her work in training farmers and community gardeners to produce and save their own seeds, reviving and spreading traditional seed knowledge held by community elders, and network building among groups doing seed sovereignty work.
You’ll also learn what, exactly, is meant by “seed sovereignty” and how that differs in the UK and Ireland from efforts in the US, including the painful and healing conversations this work involves. Hear, too, about what it’s like to live and farm 16 miles from the North Sea, and get advice for growing herbs on your own farm.
There are few gardeners (or farmers) I know who wouldn’t benefit from reading Sally Morgan’s new book, The Healthy Vegetable Garden. For the novice grower, the book is a great introduction to the principles and methods of ecological gardening.
And for the veteran grower, there is sure to be plenty of new information, including incredibly detailed sections on pest and disease control.
A Wealth of Experience
Color me cynical, but I’m always a bit cautious about whom I go to for gardening advice. Let’s just say that over the years I’ve paid the consequences of being too trusting a few times.
It’s hard to read much about Sally Morgan without having the word “expert” come to mind, though. Beyond being a long-time gardener herself, Morgan currently edits Organic Farming magazine and is the author of Living on One Acre or Less andThe Climate Change Garden with Kim Stoddart.
All of which is to say, I’d take advice from her any day.
Before diving into the details of garden management, Morgan spends some time outlining what a “healthy” garden looks like. As she describes it, a healthy garden is much like a natural ecosystem in its diversity and resilience. And, in many ways, a garden’s diversity is a large part of what endows it with resilience to pests, disease and numerous other pressures.
After establishing this vision of health, the rest of the book functions as a kind of guide to realizing it. In terms of content, this translates into a focus on soil health as a well as strategies for preventing (and managing) a variety of pests and diseases.
Overall, the book is not a comprehensive gardening manual. Rather, Morgan’s limited focus allows her to go into greater detail on the topics she does cover, making The Healthy Vegetable Garden a detailed and indispensable resource.
Soil Health
The book begins in earnest with a detailed explanation of soil health. After explaining some basic soil structure and biological processes, Morgan explores a variety of strategies for improving soil health including composting, mulching and minimizing tillage.
This section is sure to contain valuable ideas for both new and experienced growers.
This is where the book really shines. The chapters on pests, disease and bio-controls are intuitive and easy to read, which is itself unique. As a farmer myself, I have several bug and insect guide books, but I tend to treat them as references that I consult only here and there.
With Morgan’s book, though, I found myself reading (and enjoying) these sections the whole way through.
A quick note to U.S. readers: Morgan is based in the U.K. As a result, the pest and disease sections of the book contain some information that’s only relevant to gardeners overseas.
However unfortunate it may be, it turns out that potato beetles, cabbage looper moths and innumerable other pests and diseases thrive on both sides of the Atlantic. So the vast majority of the information applies to North American growers as well.
Overall, Sally Morgan’s The Healthy Vegetable Garden promises to be a valuable resource for new and experienced growers.
In 2014, the team at Burwell Farms planted their inaugural loblolly pine seedings and inoculated them with white Bianchetto truffles sourced from Europe. Since then, the North Carolina-based venture has become a breakthrough American-based truffle supplier.
“We saw it as a rare opportunity to do something unique,” says Burwell Farms president Jeffrey Coker. “We had the ability to put a white truffle on to the South’s most abundant forest tree. Nobody else had done it—that was really the big thing. We knew it would be a challenge but we knew if we pulled it off we’d be unique in the market place.”
Taking time out from official truffle duties, we spoke to Coker about the development of truffle farming in the United States and creative ways to cook with truffles. We also got tips on how to try growing truffles for yourself at home.
Looking back on Burwell Farms’s first truffle season, Coker says they knew they were taking something of a risk attempting to farm white truffles in America.
“It certainly would not have surprised us had we not been able to do it!” he says. “It was a real team effort between scientists and agriculturalists and entrepreneurs. Others are using black truffles but we’re using a white truffle from Europe—it’s an exquisite world class truffle we’re growing on pine trees.”
When asked about early lessons Burwell Farms learned when beginning to farm white truffles, Coker says it was important “not to believe anything that anybody else told us!”
He adds, “Lots of lessons that were learned out in the field contradict popular advice about growing truffles that you’ll find on the internet.”
If you’re interested in growing your own truffles at home, Burwell Farms sells inoculated pine trees. Coker says they grow best in USDA planting zones 6b to 9a.
“A well balanced soil is ideal, so not pure sand or clay,” adds Coker. “Also, you don’t have to, but to have the best chance at commercial production you need to raise the pH level up into the sevens.”
When it comes to cooking with truffles, Coker says that he’s noticed customers “shaving and grating them over practically everything!” He mentions that truffles work great on eggs or turned into butter, which also keeps well in the freezer.
“We’ve tried it on ice cream, and we’ve seen people putting it on honey,” he continues. “My personal favorite is to infuse nuts with truffles—truffle-infused almonds are just heavenly.”
“We have a lot of people that purchase truffles for an anniversary or birthday present,” says Coker when asked what sort of customers Burwell Farms has been attracted.
“Especially in the era of COVID-19, where fine dining is a lot trickier than it used to be, we’ve been shipping a lot more to people’s homes. Truffles have never been as readily available to Americans straight out of the ground until now.”