Categories
Animals Flock Talk Health & Nutrition Poultry

5 Chicken Health Tips For Keeping Your Flock In Shape

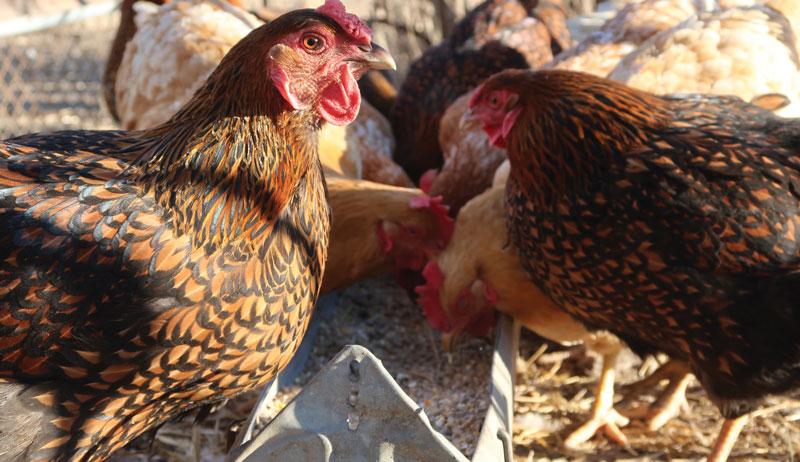
Chickens can be a wonderful addition to any homestead, but like any other kind of livestock, they need a watchful eye and careful attention to keep them in great shape. As you enjoy your flock and the benefits they bring your farm—or even just your backyard—you should implement certain practices to keep them healthy right from the start.

As long-time chicken-keeper Glenn Drowns writes in Storey’s Guide to Raising Poultry (which I highly recommend to any poultry owner), you need to think about caring for your flock in two ways: 

  1. Be proactive in maintaining their health.
  2. Be reactive in any treatment of sick or injured birds. 

By being on top of things from the start such as proper nutrition and a clean habitat, you can eliminate many future ailments.

1. Plan Ahead

Before you even get your first chick, consider several different things that are important to the longevity and overall wellness of your flock. When picking your birds, ask yourself:

  • What purpose do you have behind getting chickens?
  • Do you want them for eggs or meat?
  • What region do you live in?
  • Will your birds need to be cold or heat hardy?
  • How many can you reasonably have based on the amount of space you have to offer them?
  • Will they be able to free-range?
  • If you live in town, are there any rules or regulations you need to observe?

After you’ve made your decision on what breed of birds to pursue, find a reputable breeder or hatchery from which to purchase. The health and wellbeing of their chicken flocks can go a long way to tell you about what your birds will look like in the future. 

Some people buy eggs or chicks off of the internet, while others pick them out at a local feed-supply store. Wherever you get your chicks or eggs, be cautious, do your research and keep your eyes open for any signs of problems or sickness. 

2. Keep a Tidy Coop

From the first day you bring your chicks home, have a place ready for them to live. The coop should be well ventilated and kept fairly clean. With birds comes dust and manure, but to avoid health issues such as respiratory diseases and foot injuries, work on keeping your coop a tidy and pleasant place to live.

Ventilation is an especially important aspect to keep an eye on due to the ammonia that chicken manure produces and its effect on health. Too much ammonia in the air—especially during hot weather—and poor air flow to remove it can result in the loss of your birds.

Keeping a clean coop floor is also helpful to avoid disease. How often you clean the coop or pen depends on the number of birds and amount of space you have.

While a thorough cleaning should be done once or twice a year, regular maintenance will help keep your hens happy and healthy. Think of it this way: If you were one of your hens, would you be happy living in the coop?


Read more: Does your coop need a deep clean? Follow these 10 steps to tidy up your hens’ home.


The Sniff Test

One of the easiest ways to tell if your coop needs a cleaning is to give it a sniff. If you lean down to about your bird’s height, does it smell pleasant? If not, it’s probably time to get your gloves on and go to work!

There are a variety of ways people maintain their coops. Some lay down tarps to catch all of the manure and then simply roll the tarp up, dispose of the litter and clean/disinfect it. Other poultry-keepers use dropping boards underneath the roosts.

Whatever method you prefer, a cleaner will need to be used to disinfect the surfaces as you go. 

You can use vinegar to disinfect as opposed to harsher chemicals. Once you do some research and find out what methods and cleaners will work best for your needs, set up a schedule for how often you want to clean out the coop.

As you clean, check in on the state of your waterers. Birds tend to get manure in them, so in order to help prevent diseases such as coccidiosis, clean them regularly.

While you work in the chicken coop or run, look for things that could possibly affect your birds’s foot health, such as nails, splinters or pieces of broken glass. These could lead to foot injuries in the future if not disposed of.

chicken health chickens poultry
Ashleigh Krispense

3. Food & Nutrition

The feed you provide your birds with plays a huge role in chicken health and wellness. Different kinds and ages of poultry will have different needs, so before you even purchase your first chick, look into nutrition requirements. Keep in mind that they’ll change as the bird matures.

Likewise, fryers will have different needs from layers, etc.

In addition to their regular dietary needs, learn what treats or scraps from the kitchen you can safely give to your birds and which foods to avoid. A cabbage that has been tied up to the top of the pen and dangles down for them to peck is a safe food option that will also provide hours of enjoyment.


Read more: Follow these nutrition basics to ensure your chickens get what they need. .


4. Have a Watchful Eye

A good flock tender should keep an eye out for signs of something being off with any members of the flock. As time goes on, you’ll begin to notice how different birds have their own personalities. Some will be a little more adventurous and curious, while others may prefer to stand a bit away from the rest.

Understanding these quirks and being able to notice when something is out of place can be helpful when trying to determine if one of your feathered friends is suffering from chicken health concerns.

Some things to be on the lookout for can be pretty obvious such as: broken wings or legs, bleeding wounds, broken beaks, bare backs and so on.

While all of these problems will be somewhat easy to recognize, other ailments will require a little more diligence to catch. These might be symptoms of a more serious issue, such as lethargic attitudes, sores on the body, eye or nasal discharge, coughing, troubled breathing or lack of appetite.

Be aware and know what your birds look like at their best so that you can recognize if chicken health starts to go downhill.

5. Learn to ID the Problem

Once you’ve established that there is an issue in the flock, you need to take action. The first step should be to remove the bird from the rest of the flock. This avoids infecting the rest of the poultry, and once chickens see blood or that another is wounded, they can attack and peck an injured bird to death.

Thus, for the safety of the entire flock, move a sick or injured bird to a different location.

You might find that a large dog crate is handy to keep on hand for chickens that need to be isolated. Simply keep fresh water and food—if applicable to the situation—available and set the crate in a quiet, dark place.

If you need to help calm the bird, quietly place a sheet or towel over the crate. At this point, you might have an idea of what is wrong with your chicken, but here are a few basic health concerns to be aware of:

Cuts or Other Injuries

At some point, you’ll have a chicken with a physical injury. For example, a hen with a bloodied, bare back and broken feathers. If you have roosters in your flock, they tend to be the first to get blamed for causing this as excessive mounting during breeding season can lead to their spurs causing the backs of the hen to become bare or raw.

Trimming the spurs of the rooster or putting a “saddle” on the hens’ backs can help alleviate this problem.

Pecking wounds might also come up from time to time. While some breeds just tend to be more aggressive, the pecking could also be part of establishing a pecking order. Either way, keep an eye on the victim of the pecking. 

Once chickens get a taste for blood, they can become cannibalistic and end up killing a wounded flock-mate.

Another problem you might come across will be foot injuries. Some of them can be prevented with a routine checking of the coop for sharp objects or splinters.

If your birds are free-range, they’ll have more opportunity to run into things they shouldn’t, so work to keep your homestead tidy and free of broken glass and odd, sharp things just lying around.

chicken health chickens poultry
Ashleigh Krispense
Egg-Laying Issues

Finding that first egg in the nest is one of the most exciting events of the poultry-keeper’s life. A lot goes into that single egg, as each hen spends around 25 hours producing it. As you gather eggs, you might come across a few odd ones.

A “soft shell” egg usually appears to have a very thin shell casing, but in fact, it has no shell at all. It’s simply the membrane that is holding the yolk and white of the egg inside.

This problem might have occurred because the hen underwent a fair amount of stress or fear and laid the egg prematurely, or she could simply be lacking in calcium or vitamin D. To help avoid this issue in the future, up those nutrients in the poultry feed or water.

The occasional soft egg is nothing to worry about, unless it becomes a regular issue.

Another egg-laying related issue is when a hen becomes egg-bound. This would mean that an egg has become stuck inside of her. This is a serious health issue that needs to be dealt with quickly as the chicken could go into shock.

You’ll be able to identify it as the problem when she strains to push the egg out but it doesn’t budge. At this point, a water-based lubricant and some warm saline solution can be used to gently work the egg out.

Before you run into this problem, read up about the best ways to respond to an egg-bound hen so that you’ll be prepared if the time comes!

Pests

Pesky little creatures such as poultry lice, mites, ticks or worms can lead to big problems if not attended to properly and in a timely manner. One way to help combat the issues of parasites on the body is to add diatomaceous earth to the nests or wherever your birds take their dust baths.

DE is made up of tiny, fossilized organisms that are ground into a fine powder. When used in a chicken’s dust bath, it causes the insects on the body to dry out and die. Before using it, be sure you get food-grade DE and learn how to properly apply it safely so you and your poultry won’t inhale the fine powder.

Diseases

A multitude of other things could cause your poultry to fall ill, but when it comes to diseases, it’s a good idea to learn a bit about them before you encounter any. Understand the difference between viral and bacterial diseases, and learn the basic steps to take when you think a chicken might be suffering from ill health. 

As mentioned earlier, start by removing a sick or injured bird from the rest of the flock if you’re questioning how healthy it is. A few common diseases in chickens include coccidiosis (a parasitic disease), Marek’s (a highly contagious viral disease) and coryza (a respiratory disease).

As you care for you chickens, you’ll learn and grow from your many different experiences. While you work to keep your flock healthy and happy, expect the unexpected.

Things will happen that you’ll have to decide how to respond to. That’s just part of the process. We all make mistakes, learn from our experiences and have to keep on trying!

So pull on your boots, and go gather some eggs. You’ve got to tend to your flock! 

This article originally appeared in the July/August 2021 issue of Chickens magazine.

Categories
Beginning Farmers Farm & Garden Homesteading

Find The Right Off-Grid Community For You & Your Family

Cob Carleton wasn’t looking to move to an off-grid community when he signed up for the visitor program at Dancing Rabbit Ecovillage in northeast Missouri. Instead, the serial entrepreneur agreed to tag along with a friend who was looking to make a move but didn’t want to visit alone. 

“We fell in love with the place,” Carleton says. “The way the people in the community interacted with our children [then ages 5 through 12] … was so authentic. It was the right place and the right time. And it turned out to be a wonderful opportunity for us.”

Carleton has been a resident of Dancing Rabbit Ecovillage since 2007. 

The off-grid community near Rutledge, Missouri, is home to 60 residents and includes such sustainable amenities as:

  • solar power and wind turbines
  • straw insulation
  • composting toilets
  • wood heating
  • extensive recycling programs
  • community gardens
  • a car-sharing co-op 

A New Way of Thinking About Off-Grid Living

Often, the idea of living off the grid conjures up images of remote retreats that require trading food deliveries, ride sharing apps and neighbors for acres of land and total seclusion. Off-grid communities offer an alternative, providing infrastructure for ecological living along with neighbors who share your sustainable beliefs.

Dancing Rabbit Ecovillage is one of a growing number of off-grid communities around the world where residents can achieve their goals of living more sustainable lifestyles while satisfying their desire to live in communities.

“Living off-grid can mean being a hermit at the top of a mountain,” says Peter Moore, business director for Breitenbush Hot Springs Retreat in Detroit, Oregon. “Off-grid communities are the opposite. They are highly social. You have to know what you’re looking for.”

Living in tight-knit communities requires finding the right fit. Thsi is especially true for those where members share space, resources and meals, and might even work together in community businesses. Here are five things to consider when searching for an off-grid community.

off-grid community
Courtesy Dancing Rabbit Ecovillage

1. Research the Options

Before you start scheduling visits to off-grid communities, make a list. 

Consider your ideal location. Some off-grid communities like Earthhaven Ecovillage in Black Mountain, North Carolina, and, the Greater Earthship Community in Tres Piedras, New Mexico, are located near established towns. They enjoy amenities such as restaurants, movie theaters, coffee shops and big box stores.

Others, including Breitenbush Hot Springs Retreat in Detroit, Oregon, are quite remote. 

What’s Important to You?

You’ll also want to think about which attributes of off-grid living are most important:

  • Is your ideal community totally self-sustaining?
  • Do you want an egalitarian community where all resources, including financial resources, are shared?
  • Are you willing to give up your current career to work in a community business?

“It’s a very big adjustment in lifestyle,” says Courtney Brooke Allen, a resident of Earthaven Ecovillage. “You have to ask yourself what tradeoffs you’re willing to make and if it’s worth it for you.”

The Foundation for Intentional Community is a good place to research the diversity of off-grid communities around the world. Its “advanced search” tool helps narrow the options based on criteria such as:

  • geographic location
  • rural or urban setting
  • housing options
  • education
  • religious practices
  • decision-making methods
  • dietary preferences

Use the information to create a list of potential communities to visit.

“You have these complex relationships [in off-grid communities] because your next door neighbors are also the co-owners of the business, friends, lovers, teachers …,” Moore says. “You want to choose carefully.”


Read more: Going off the grid isn’t the challenge it used to be!


2. Schedule a Visit

Off-grid communities often offer several options to meet residents and explore community life. Breitenbush Hot Springs Retreat hosts concerts, workshops and retreats. Earthaven Ecovillage hosts dances and potluck supper and the Twin Oaks Community in Louisa, Virginia, offers three-hour tours and three-week visits. 

During a visit, explore the community to learn about the amenities. Participate in as many activities as possible, and make it a priority to get to know residents. It’s a good opportunity to get a feel for community life.

“Not all communities have the same feel or culture,” Carleton says. “Even in two communities with the same organizational structure and rules, the residents are different. And that impacts how the community feels.”

Immerse Yourself

Committing to a visitor weekend or longer, more immersive experience is often required as a condition of applying to join off-grid communities. These visits often include workshops highlighting the organizational and governmental structures and ground rules for decision-making while participating in community events and networking with residents. 

Those interested in joining the Twin Oaks Community must participate in a three-week visitor period and commit to integrating into community life during the visit. This includes shared housing and transportation, communal meals, solar power and community gardens.

“During the visitor period, people work alongside members to get an idea of what it’s like to live and work here,” explains Valerie Renwick, outreach manager for Twin Oaks Community. 

These visits provide great opportunities to decide whether living in an off-grid community is the right decision. They are also instrumental for deciding which one is the best fit.

Renwick, who has lived at Twin Oaks since 1991, suggests visiting nearby communities even if they don’t seem like an ideal match. She adds, “Short visits, even day visits, to as many communities as possible, even if it’s a community where you know you don’t want to live … gives you a lot more information about what community living looks like and helps hone your own sense of what you do and don’t want in a community.”

3. Understand the Rules

Twin Oaks Community is an egalitarian, income-sharing community where all 100 residents commit to working 42 hours per week in roles that range from childcare to working in the onsite tofu-and hammock-making businesses.

Residents don’t earn salaries for their work. Instead, the community provides for all of their needs from housing and healthcare to a small stipend for spending. Moving to the community means leaving a current occupation. 

Residents at Earthaven Ecovillage can maintain their careers and aren’t required to share income. But residents must commit a minimum of 12 hours per month in community service hours and participate in nonviolent communication classes as part of their membership.

Understanding the rules, which are unique to each off-grid community, are essential. Carleton suggests asking questions about community governance, lease agreements, pet policies and other rules that can help in the decision-making process.

Review the bylaws, too.

“Inevitably, people will disagree and the community needs to have rules for working through that,” Carleton says. “When the going gets tough, people turn to the bylaws.” 

Are There Fees?

Off-grid communities may also charge their residents fees, and the costs range from minimal to considerable. 

At Earthaven Ecovillage, the fees include a $5,000 commons fee and $3,000 joining fee plus $30 per person, per month and $15 per vehicle. 

Dancing Rabbit Ecovillage doesn’t have a buy-in fee. There, monthly fees are based on the amenities residents want to access. Standard fees include a $71.50 per month co-op fee to cover basics like road and fence maintenance and garbage disposal as well as dues that equal two percent of income.

Extra fees are charged for:

  • shower facilities
  • electricity
  • internet
  • phone/message system
  • car sharing program
  • food co-ops that include food

Read more: When you’re off the grid, staying ready for an emergency is critical. Here’s how to prepare for the unexpected.


4. Commit to the Process

Each off-grid community has its own application process. But there is a basic requirement that prospective residents are a good fit for the community. That means current residents are involved in the decision-making process.

“We’re all about being cooperative … and it means making sure it works for lots of people,” Renwick says. “It’s a two-way process.”

Twin Oaks Community asks visitors to take a one-month respite at the end of their three-week visitor period to reflect on the experience. At this time, they decide whether the off-grid, egalitarian community is the right fit.

During this off period, community members meet to discuss prospective residents and their suitability for the Twin Oaks Community lifestyle.

“It’s not that common that people don’t get accepted,” Renwick says. “Occasionally, we’ll ask someone to do another visit. Even more rarely, we’ll tell someone that it doesn’t look like it’s going to work out.”

off-grid community
Courtesy Dancing Rabbit Ecovillage

5. Be Patient

Even when you find the right off grid community, the timing might not be right. Breitenbush Hot Springs Retreat requires prospective residents to participate in working interviews that last from several days to several weeks.

Someone may be an obvious fit, but Moore notes that the community may not have a job opening for someone with their specific skills.“There has to be a match with skillsets, too,” he says.

Currently, Breitenbush Hot Springs Retreat is not adding any new members because a 2020 wildfire destroyed half of their buildings. It left the community without critical infrastructure, including housing. Until the community rebuilds, new resident applications are on hold.

As the interest in off-grid living has increased, Twin Oaks Community has seen an uptick in applications. The community has a limited number of bedrooms. This means the number of residents it can accommodate is limited, too.

“We’ve had available space so there’s been a waiting list,” Renwick says. “As soon as a member leaves, the first person on the waiting list is invited back.”

The average residency period at Twin Oaks Community is eight years. Renwick has lived in the off-grid community since 1991. One resident has been with the community for more than four decades.

Moore has been a resident of the Breitenbush Hot Springs Retreat community since 1978. But some residents stay as few as three years. 

Take the Time to Integrate

It also takes time and patience to fully integrate into an off-grid community, according to Allen. Earthaven Ecovillage offers three- to six-month leases to new residents to allow time to decide if a long-term commitment to an off-grid community is the right fit.

“It takes time to get into the rhythm of a place,” Allen says. “It’s like getting into a relationship with 100 people. It’s an extended family situation. You need time to figure out if it’s going to work.”

For Moore, living in an off-grid community was a great decision. But he knows that it’s a significant lifestyle change. And this makes it essential to do due diligence before making the move.

“Some people visited for a decade or more before applying [to become a resident of Britenbush Hot Springs Retreat]. And some people fall in love on day one,” he says. “An off-grid community is not just place to live … it’s a lifestyle.” 

This article appeared in Living Off the Grid, a 2021 specialty publication produced by the editors and writers of Hobby Farms magazine. Living Off the Grid includes stories on permaculture, growing plants without seeds and long-term produce storage. You can purchase this volume, Hobby Farms back issues as well as special editions such asBest of Hobby Farms and Urban Farm by following this link.

Categories
Equipment

When Hauling Heavy Loads, Respect Payload and Towing Limits

Imagine you’re picking up a load of square bales to feed your livestock. Or maybe you have a collection of flagstone pavers for a decorative gardening project. You’ve fired up your farm truck and hooked up your utility trailer. Now you’re filling the trailer as high as you can.

If you tie it all down, maybe you can bring everything back in a single trip.

But is this the best approach? Not necessarily. Pieces of farm equipment—from trucks and trailers to tractors, ATVs and UTVs—have weight limits. Whether it’s described as a payload capacity, or a lifting limit, or a towing rating, there’s only so much weight they can safely handle.

Exceed these payload limits, and you’re asking to damage your equipment or suffer an accident.

Why Payload Limits Matter

Think about it. You wouldn’t place a million pounds on top of your ATV, right? Your ATV would be flattened.

On a more realistic scale, overloading your equipment can decrease performance and place an undue strain on the shock absorbers. It could even cause breakdowns.

Just because your utility trailer can hold 3,000 pounds when parked doesn’t mean it can handle the load safely when traveling down a bumpy road at 30 mph.

But what exactly do these weight limits refer to? That’s the tricky part. If you don’t understand the various definitions, you can inadvertently overload your equipment without realizing it.

Consider the following examples:

Consider the Utility Trailer

You have a utility trailer with a payload capacity of 2,000 pounds—that’s how much weight the trailer can carry. The ball hitch on your farm truck is rated to tow 2,000 pounds. That’s a perfect match, right?

Wrong.

You’re forgetting the weight of the utility trailer, which must be considered as part of the towing weight. If the trailer weighs 900 pounds, you’re actually towing 2,900 pounds, which means you need a better hitch or a lighter load.


Read more: These are the 4 measurements you need to know when choosing a hitch ball.


Don’t Forget You!

Your ATV has a payload capacity of 400 pounds. That means you shouldn’t have any trouble packing 250 pounds on the racks, right? That depends on how much the driver weighs.

The weight of rider counts as part of the payload limits. So if you weigh 200 pounds, you’re actually putting 450 pounds of weight on the machine—50 pounds more than it’s rated to handle.

What’s the Pivot Point?

The front-end loader of your tractor is rated to lift 1,500 pounds to its maximum height. You want to lift 1,250 pounds with the bucket, which seems manageable. But is the lifting capacity measured at the “pivot pins” or at a point somewhere forward of the pivot pins?

This is a crucial distinction. The lifting power at the pivot pins is something of a theoretical measurement. Attachments (like your loader bucket) sit forward of the pins, and this added distance reduces the lifting capacity.

If your loader can lift 1,500 pounds at the pivot pins, but only 1,000 pounds 20 inches forward of the pivot pins, the latter measurement is a more realistic gauge of lifting power. Picking up 1,250 pounds, then, may be a bridge too far.

Weight Distribution Really Matters

Proper distribution of weight is critical. Let’s say you aim to pick up 900 pounds with a front-end loader rated to lift 1,100 pounds at a point 20 inches forward of the pivot pins.

This is realistic. But unless you’re carrying proper ballast at the rear of the tractor, your tractor is at risk of tipping forward as you try to lift.


Read more: To stay safe, be careful how much you try to lift with your tractor.


Balance the Load

Maintaining balance must also be considered when loading utility trailers. Placing all the weight behind the axle(s) of a trailer creates lifting power at the hitch. This can limit the traction of your vehicle’s rear wheels and/or cause the trailer to “fishtail.”

Either result is dangerous. So a general rule-of-thumb suggests placing 60 percent of your payload in the front of your trailer to avoid these issues.

Balance Your ATV, Too

A similar approach must be utilized when loading the front and rears racks of an ATV. Don’t just fill one rack and leave the other empty. It will throw off the balance of your machine.

If the rear rack is rated to carry twice as much weight as the front rack, and you have 100 pounds to haul, try to put 67 pounds in the rear rack and 33 pounds on the front rack to maintain the proper ratio.

As you can see, weight limits and payload capacities are a bit more complicated than they first appear. But they’re worth knowing (and following) in order to stay safe and reduce wear and tear on your machines.

Categories
Beginning Farmers Equipment Farm & Garden Projects

DIY 5-Gallon Bucket Cold Frame Project

This project is excerpted from The New 5-Gallon Bucket Book: Ingenious DIY Projects, Hacks, and Upcyles by Chris Peterson, copyright 2021 Cool Springs Press. Used with permission. 

5-gallon bucket cold frame cover
Chris Marshall

What You’ll Need

Tools
  • Measuring tape
  • Permanent marker, such as a Sharpie
  • Level
  • Compass or trammel
  • Handsaw
  • Cordless drill and bits
  • Jigsaw or frameless hacksaw
  • Scissors
Materials
  • 5-gal. bucket with snug-fitting lid (white)
  • 6-mil plastic sheeting
  • Epoxy for plastic
  • (2) 21/2” (6.4 cm) galvanized steel butt hinges
  • Machine screws and bolts (to match
  • the hinge holes)
  • Analog stem thermometer
Time

45 minutes

Difficulty

Moderate

Expense

$

Cold frames make any garden more versatile. They are the cousin to the greenhouse, offering a great deal of flexibility to the gardener. The principle behind them is to create a temporary space for tender or overwintering plants where they can be safe from freezing temperatures—and incidentally protected from predators such as insects.

Cold frames are used anywhere the temperature regularly dips into freezing temperature over the winter months. Like all cold frames, this one can be propped open to allow for venting and to prevent plants from overheating.

The structure is used for a few different purposes. It provides a great way to overwinter plants that would not survive a harsh winter in your local climate. They can be left where they are planted and protected in that space (for this use, you’ll want to cut the bottom half of the bucket in half again, so that it can be pressed down into the soil around existing plantings).

More often the cold frame can be used to start plants early, before the soil and air temperature warm to seasonal temperatures. You can also use a cold frame as a transitional space, to harden off seedlings that you’ve started inside but that may be too tender for early spring temperatures.

No matter what purpose you use it for, the plastic will help insulate against cold temperatures in both the soil and air.

It is also plenty durable and can take a beating and still beuseful for years to come.

How You Make It

  1. Remove the bucket handle. With the lid securely attached, carefully measure and mark a cut line across the center of the lid. Use a level to extend the cut line down each side of the bucket and across the center of the bottom. Use a compass or trammel on the bottom and lid of the bucket to mark a centered circle on each. The circle should be about 91/2” (24.1 cm) in diameter on the lid and about 81/2” (21.6 cm) in diameter on the bottom.
  2. Use a handsaw to cut the bucket in half. Use a level as a straightedge to connect the two sides of the marked arcs on the bottom and lid of one bucket half, leaving about 1/2” (1.3 cm) margin between the cut line and cut edge. Drill an access hole and use a jigsaw or frameless hacksaw to cut out the half circles. These will be the end windows for the cold frame.

    DIY 5-gallon bucket cold frame frames
    Chris Peterson
  3. Measure and mark a 10″ × 16″ (25.4 × 40.6 cm) window in the bucket half with the end windows, centered across the body of the bucket. Note: A good shortcut for this is to cut out a 10″ × 16″ (25.4 × 40.6 cm) piece of stiff cardboard and use it as a template to mark the cutout.
  4. Drill an access hole and cut out the 10″ × 16″ (25.4 × 40.6 cm) window.
  5. Use the bucket end windows to mark 6-mil plastic sheeting for the windowpanes. Measure and mark the plastic for the main window. Use a scissors to cut out the windows, leaving 1/2” (1.3 cm) extra all the way around.
  6. Use plastic epoxy to glue the 6-mil plastic windowpanes in place on the inside of the bucket, covering the window openings.

    DIY 5-gallon bucket cold frame frames
    Chris Peterson
  7. Hold the two bucket halves together and mark one long side for the placement of the hinges. They should be centered about 6″ (15.2 cm) apart. Fasten the hinge leaves to one half with the machine screws and bolts, and then to the second half.
  8. Drill the hole for the stem thermometer in between two of the bucket top flanges. The stem should pass through the hole but be snug. Dig a concave hole for the bottom of the cold frame, set it into the ground, and fill the bottom half with soil, making sure the bottom half is sitting level. Plant the plants and close the top of the cold frame. Slide the thermometer in place.

Read more about cold frames—why you should use them, other ways to build them and more—here!

Categories
Animals Large Animals

Hoof Problems: When Feet Go Foul From Laminitis

Welcome to part two of a three-part series where we walk a mile in our livestock’s shoes, er, feet. Last month, we discussed normal hoof anatomy. This month we begin to look at what can go wrong inside the compact and complicated world of the hoof.

Let’s start with a condition called laminitis, often known as founder. Next month, we’ll peek at a few other common hoof maladies.

The Lowdown on Laminitis

Last month we learned there is a bone suspended inside the hoof capsule by a Velcro-like structure called laminae. These laminae are composed of numerous tiny, delicate blood vessels that nourish and support the bone inside the hoof.

When the laminae become damaged, that’s known as laminitis. And this is bad news. Here’s how this can happen.

There are three basic types of laminitis: inflammatory, metabolic and mechanical overload. Grain overload is the classic scenario of an inflammatory cause of laminitis. In cases where an animal gorges on grain (like a horse or cow breaking into the feed room), the rapid increase of highly fermentable carbohydrates wreaks havoc on a digestive system unaccustomed to it.

This sudden imbalance can damage the colon, release toxins, and cause a series of inflammatory chemicals to release.

As these molecules float through the circulatory system, they wind their way through the tiny delicate blood vessels in the laminae. And these blood vessels respond by becoming very, very angry.

Grazing on large amounts of lush, spring grass can also result in this type of laminitis.

Other Causes

You may also see this same type of laminitis in animals very sick in other ways, such as with severe pneumonia or other infectious causes that teeter on sepsis.

Laminitis is always a worry with very sick hooved animals because of this reason.

Inflammatory Laminitis

Inflammatory laminitis typically shows up acutely and severely. It can lead to euthanasia, overshadowing the underlying disease that got the animal sick in the first place.

This is one reason laminitis can be a devastating, heartbreaking condition.

Metabolic Laminitis

Metabolic laminitis is due to the animal’s inability to appropriately manage insulin. This is equine-specific, and a few related conditions can gang up on an animal such as Cushing’s disease, insulin resistance, and yes, a condition called “metabolic syndrome.”

If not managed appropriately through weight control, dietary restrictions and exercise, these conditions can lead to a chronic, slower form of laminitis, which can still ultimately be debilitating.

Mechanical Overload

Mechanical overload is the third cause of laminitis. This is most typically seen when an animal is stalled with a leg injury and compensates by placing too much weight on the opposite leg. We also refer to this as “supporting limb laminitis.”

This may sound familiar to those who follow Thoroughbred racing. Kentucky Derby winner Barbaro was euthanized due to supporting limb laminitis while recovering from a serious injury in the opposite leg.

What to Look For

The classic clinical sign of a foundering animal is one who stands back on his heels. The laminae becomes damaged and dies, causing the hoof, frequently starting with the toe, to loosen from the hoof wall and start to rotate downward.

As you might imagine, this causes incredible pain, and the animal tries to alleviate pressure in the toes. When forced to walk, an acutely laminitic animal will show reluctance and appear to “walk on eggshells.”

You know how painful it is to rip a fingernail off at the nail bed? Imagine having to stand on that nail bed. And that’s likely only a fraction of what laminitis feels like.

And just like an injured finger, acute laminitic hooves are hot to the touch and have a throbbing pulse.

Prevention Is the Best Treatment

Some cases of laminitis can be so severe that the bone actually falls through the sole of the hoof. Cases like this rarely recover. Mild cases of laminitis, if caught and managed early, can recover.

However, the more rotation of the bone, the more difficult it is to make the animal comfortable. Severe cases of laminitis usually end up as humane euthanasia due to animal welfare concerns.

So how to you make sure those sensitive laminae are kept calm and happy? Keep your animals on a balanced diet appropriate for their age, breed, species and activity level. Also keep grain locked up in a secure location.

If you have a breed of horse or pony (donkeys too!) that is an “easy keeper,” overweight, has Cushing’s or Equine Metabolic Syndrome, work closely with your vet to ensure their weight is under control and they are fed an appropriate diet.

Yes, laminitis can be devastating. But most of the time, it can also be prevented.

Categories
Animals Flock Talk Poultry

Hatching A Hobby With Some Brand-New Chickens

My journey with chickens started on a cold January morning in 2019. My mother dropped me off at high school on the first day back from Christmas break. I decided to take the back way into school through the agricultural department, which included my fourth-period class. 

Walking by the back door, I suddenly remembered that our teacher had announced before break that she had ordered baby chicks! I hurried to the window and saw a horse trough with a single lamp glowing on the other side of the classroom. 

I waited anxiously for my teacher. She finally came around the corner and confirmed my suspicions. I rushed inside the second when she unlocked the door. 

As soon as I got there, all noise ceased. Thirty pairs of beady little eyes stared back at me.

Then school started. I had to wait an agonizing three hours before I could see them again.

When class finally started, all of my classmates immediately flocked to the brooder. They were all giddy, giggly and googley-
eyed over the fluffy chicks.

After we were seated, our teacher took them out, and we all got to hold them. That was just the beginning.


Read more: 2020 was a big year for chicken-keeping. Read one family’s story of opening their lives to chickens!


Growing Pains

When the chicks got too big to stay in the tiny brooder, my teacher separated them into multiple brooders in the school’s unused greenhouse.

Now the class had a new job: tidy up the new coops that the woodworking class built to get ready to accept their new occupants. 

After a little weeding, they were soon full of clucking companions. We were taught how to hold them properly. But because they weren’t handled much when young, they flapped around and squawked (or rather, shrieked!).

Oddly though, one of them, a Black Australorp, was very calm and didn’t make a peep despite being held for a while. I was the lucky winner to acquire that chicken, and soon she became my “fowlmate.”

“I am going to name her ‘Mal,’” I said proudly. Her name was inspired by a recently watched veterinarian show, which had a patient that looked just like her. She was the bird that prompted me to do our project for the ag showcase, which was to be displayed to incoming eighth-graders to show the unlimited opportunities of what one could do when they join FFA.

The project—an exhibition on the different breeds of chickens we had. The star of the show—my Mal.


Read more: Want to show your chicken at a poultry exhibition? Here’s how to start.


Forever Home

Five months after my first encounter with those baby chicks, my teacher wrote a notice on the whiteboard. The chickens, it read, would be sold in a couple weeks.

I frantically texted my mom to tell her of the news. We were finally moving to our new forever home.

I quickly bought Mal and some companions—another Australorp (Dory) and three Welsummers (Patricia, Betty and Summer)—and my dad and I bought and assembled an old-fashioned-looking coop. This structure would accommodate Mal and her few friends.

Nineteen months and nine chickens later, I look back on that small project that happened not so long ago. We ran into many bumps in the road, losing some feathered friends, unexpectedly acquiring some roosters, and even experiencing flying problems (have you ever seen a chicken in a tree?!). 

The one thing I learned, though, is that chickens aren’t merely creatures created to lay eggs. They are more like people, with their many different and unique personalities, and the ability to pick us humans up when we feel down.

And you have to be very careful when you start keeping chickens, as you could start learning how to do chicken math! 

Andrew Krueger resides in Sanger, California.

Categories
Podcast

Episode 11: Ariana Taylor-Stanley

You asked, and we found your answer! Everyone is looking for funding for farm projects, and this episode’s guest explains the ins and outs of popular and less-known USDA and NRCS grant programs. Ariana Taylor-Stanley talks about her work with the National Sustainable Agriculture Coalition and why that matters to each of us farming. Learn about “organizing”—but not the kind of organizing that your tool shed desperately needs—and about how you as an individual can help to shape farm policy and shift systems to benefit small-scale agriculture.

Ariana also tells us about her Here We Are Farm in Trumansburg, New York, raising vegetables and dairy sheep, and running a CSA plus having a farmers market presence. She gets real about the complicated relationship she has with owning and farming on the stolen land of the Gayogo̱hó꞉nǫʼ people and how she’s examining the ways in which her farm fits into oppressive social systems. Learn, too, about how she’s able to accept SNAP/EBT for CSA shares through the Healthy Food For All organization.

Lastly, Ariana offers her professional advice on how to apply for the government programs offering funds for high tunnels, pollinator plots, cover crops and more, starting with who to call in the first place.

Categories
Crops & Gardening Farm & Garden

How To Cool Down Your Crops In The Summer Heat

Although the heat of summer is when many vegetables thrive, too much heat won’t do your plants any favors. Even heat-loving plants like tomatoes can easily overheat on especially hot days. So with heat waves becoming more and more frequent, it’s important to have plans in place to keep your crops from overheating.

Here are some tips for keeping your crops cool, as well as some longer-term ideas for creating microclimates on your farm.

Shade Cloth

Shade cloth is exactly what it sounds like: a cloth-like material that blocks a certain percentage of sunlight. Depending on the tightness of the weave, shade cloth can filter out up to 95 percent of incoming light. 

In some cases, growers install shade cloth semi-permanently to grow under for an entire season. In other cases, growers may keep shade cloth on hand to cover a hoophouse or low tunnel on an especially hot day. 

The website for Johnny’s Selected Seeds provides a good overview of how to use various percentages of shade cloth. No matter how you use it, shade cloth is an effective tool for taking the edge off the summer heat.

Irrigation

Many people have strong (sometimes differing) opinions about irrigating vegetables in the summer heat.

I’ll tell you what works for me. If I know a real scorcher is coming, I’ll check the soil early in the morning and run drip-tape lines as needed. Give the plants a good watering but don’t go crazy.  Just because it’s hot doesn’t mean that it’s impossible to overwater.

Most importantly, watering early in the day helps to minimize losses from evaporation. It also sets me up to monitor moisture levels for the rest of the day and run the drip tape again here and there as needed.

Temporary Fencing

If you’re noticing that a section of your garden is baking, setting up a temporary fence can provide a short-term solution. Make sure to orient the fence so that it’s blocking sunlight for whatever portion of the day you want it to. 

I’ve used snow fence and burlap before, but anything that provides shade will work. Just make sure that your fence is strong enough not to blow away in the wind, but not so permanent that you can’t easily take it down.

Long-Term Solution

Although temporary fixes can be helpful, there are also longer-term strategies you can use to help keep your growing area from overheating. For starters, you can use more mulch. Although the mulch won’t cool your crops’ foliage, it will help to keep your soil from overheating and improve water retention. 

Plus, mulching helps to improve your soil health in other ways, including adding organic matter and preventing erosion. 

Permanent windbreaks interspersed throughout your growing area can also create cool microclimates. Beyond providing wind protection and shade, windbreaks can also create habitat for beneficial wildlife and pollinators. Singing Frogs Farm in Sebastopol, CA is notorious for incorporating windbreaks into their fields.

With more and more heat waves coming, it will pay to plan in advance for how to keep your crops cool.

Categories
Animals Beginning Farmers Crops & Gardening Farm & Garden Flock Talk Food Poultry

Scott Family Farm Helps Feed The Community Thanks To A By-Donation Farm Stand

“My desire to be more self-sufficient is driven by wanting to teach my children to be more self-sufficient,” says Hannah Scott when she pinpoints the motivation behind running Scott Family Farm..

Situated in Kitsap County in Washington state, Scott Family Farm has expanded from its early roots providing food and nourishment for Scott’s immediate family to including a by-donation farm stand for the wider community.

“The opportunity to share what we grow with other people is so rewarding,” says Scott.

We spoke to Scott about striving to for self-sufficiency and the joys of living with a goose. We also got her tips on cooking with summer squash.

The Importance of Patience

“When growing your own food, things don’t always go right the first time or every time,” says Scott when talking about some of the early lessons she learned about farming after setting up Scott Family Farm. “So you really have to be patient and adapt.”

Running a Community Farm Stand

A community farm stand has become an integral part of Scott Family Farm. It’s an addition that came out of turbulent worldly circumstances.

“We wanted to be self-sufficient. Very quickly we realized we were growing things and we wanted to share with our community,” explains Scott. “It was 2020, Covid-19 was raging, food security was a real thing. Incomes were changing for people, so the opportunity arose for us to share what we had with the community. So our farm stand was born.”

This year, Scott says their garden was successfully expanded to around 1,500 square feet in a bid to satisfy the popularity of the farm stand.


Read more: Check out these tips for starting your own roadside farm stand.


Implementing a By-Donation Model

The farm stand at the Scott Family Farm runs on a by-donation system. “We don’t expect anything from it,” explains Scott. “People just donate what they can and keep what they need.”

Scott adds that donations “go back into buying seeds for the next round of planting.” She also delights in seeing hand-written notes left in the donation box. “That just means the world. Having food to share with families in the community is just a really heart-warming feeling.”

Spotlighting Squash & Saluting Carrots

This year, Scott says squash and carrots have been a hit in the garden.

“So far, I am loving the squash varieties we have been growing. It’s also the first year being successful with carrots, which was especially fun for the kids. It’s something they can pick out of the ground and get some reward from it.”

Scott adds that she defaults to dicing and sautéing squash in the kitchen. Also, blanching diced squash means it can be handily frozen for use in future seasons.


Read more: Are you ready to start your own “honor system” farm stand?


Get to Know Farrah the Goose

Beyond the farm stand, a goose named Farrah is one of the key components of Scott Family Farm. Farrah was originally added to the ranks to help protect the resident ducks.

“Geese are really good at calling out an aerial threat like a hawk or an eagle. That lets the other birds get to safety,” says Scott. “Now that I’ve had a goose, I think I’ll always have a goose. Their personalities are so fun!”

On a day-to-day basis, Scott adds that Farrah very much behaves like a dog. “She wants to follow us around, she wants to know what we’re doing. She wants to eat what we’re eating and just kind of thinks it’s her farm.”

Follow Scott Family Farm on Instagram.

Categories
Farm & Garden News Urban Farming

Bite Back At Mosquitoes With The ‘Mosquito Habitat Mapper’

The clouds of mosquitoes on my Indiana homestead seem bigger and buzzier than usual this year. I think they’re biting a little harder, too. Turns out, that might not be my faulty memory or just my imagination at work.

“People say, ‘It seems like mosquito bites hurt more than usual, and they bite my ankles more than usual,’” says Dr. Russanne Low. Low is a senior scientist at the Institute for Global Environmental Strategies and the science lead for the GLOBE Observer Mosquito Habitat Mapper project.

She continues, “These invasive species—the Aedes albopictus and Aedes aegyptiare more painful biters. And they bite the ankles!”

What’s more, these species fly during the daytime. Thanks to climate change, mosquito season is also generally longer in many parts of the U.S.


Read more: Ready to ditch the itch? Fight mosquitoes in outdoor areas using these tips.


Who’s Who

Aedes aegypti is sometimes called the yellow fever mosquito. And Aedes albopictus is also known as the Asian tiger mosquito. Both are great at spreading disease-causing pathogens.

“They are two of the vectors that are responsible for some of the really dangerous diseases, including Dengue, Chikungunya, Mayaro, yellow fever, and of course Zika,” Low says.

“These two baddies that now are in the U.S. had not been here [before the 1970s],” she says. “The tiger mosquito … came over in lucky bamboo and also in the used tire trade from East Asia. Now, they’re thoroughly naturalized in the U.S.”

Unfortunately, both also typically breed in manmade containers. Standing water in an old flower pot, abandoned tire or even a stray bottle cap is often all that it takes.

Mapping Mosquitoes

Reducing these mosquito population sources in your own yard or around the farm helps. But there’s much more we can all do to slash their numbers and safeguard public health.

The GLOBE Observer app includes the “Mosquito Habitat Mapper” and the “Land Cover” tools, among others. (GLOBE stands for “Global Learning and Observations to Benefit the Environment.”) Anyone with a smartphone can easily contribute valuable research data using these tools.

“We have more than 126 countries that participate in GLOBE, and I think 74 countries have contributed data to the Mosquito Habitat Mapper,” Low notes.


Read more: You can control mosquitoes around the farm. Here’s how.


How It Works

To use the mapper, you first need to locate a potential mosquito habitat. Found one? Open the Mosquito Habitat Mapper tool on your smartphone and select the “New Observation” option.

“It’s all automated,” Low says. “Like the latitude and longitude come up, and the date and time come up. When you see a place where there’s standing water where there might be mosquitoes, you document it and you take a couple of photos.”

To document your find, you’ll choose a habitat type from a series of possible selections. You can also opt to identify any mosquito larvae you see. “You can put them in a little bag, take them back home, and look at them using a little clip-on microscope or a magnifying glass, [take photos,] and then send those pictures up,” she continues.

Finally, if you are able, dump out standing water that mosquitoes breed in.

Now in its fourth year, the Mosquito Habitat Mapper includes about 30,000 measurements from around the world. “We’ve looked at the data from the first three years. We were looking at the differences between different parts of the world and how people are responding.

“I think the most significant thing from a health perspective is that we were really surprised to find out that in places like South America, almost 90 percent of the people that are using the app are also saying, ‘Yes, we tipped out the water. We mitigated that site.’”

Photo Challenge

From now through August 25th, would-be citizen scientists can also contribute data for a special Mosquito Habitat Photo Challenge. “We have a request from some scientists who are doing research in developing automatic classification using artificial intelligence machine learning,” Low says.

In particular, they need lots of photos of land cover, mosquito habitat and mosquito larvae. She continues, “We said, ‘We can help, because we’ve got all these citizen scientists from around the world who want to contribute to this sort of cutting-edge science.’”

Photo challenge participants first follow the Mosquito Habitat Mapper steps. After uploading your findings, you then have the opportunity to take a land cover measurement.

“The date and time and the latitude/longitude, once again, automatically come up,” Low explains. “Then, you’re asked to take six pictures—up, down, north, south, east and west.”

Don’t know which way’s which? The app’s directional icons will guide you accordingly. After lining up each icon with its corresponding direction, you’ll snap a photo and upload the results.