Homegrown eggs can be a lot like Halloween. There are tricks—tiny “wind eggs” containing nothing but watery whites. And there are treats—larger-than-usual eggs yielding two luscious yolks instead of one. Depending on diet, hens can lay yolks so deeply orange that they rival the color of pumpkins.
And then there are those times when what’s inside the eggshell sends shivers down your spine.
My friend Kama experienced one of these occasions a couple of weeks ago. I can only imagine the shock she must have felt.
Kama was frying up breakfast for her family when she noticed something in the frying pan other than eggs: a significant amount of blood. Kama has been keeping hens for years now. But this was the first time she encountered blood in an egg, and she was understandably alarmed.
What Is a Blood Spot?
What my friend did not know (and what many egg-eating Americans do not realize) is that blood spots are quite common. These most frequently appear as semi-firm dark spots about 2mm in diameter. They may also appear as streaks or splashes of blood.
Finding a blood spot in your egg does not indicate fertility … or infertility, for that matter. Blood spots simply mean that a blood vessel burst during the formation of the egg.
Blood spots typically form in the early stages of egg production. A hen’s ovary releases the yolk, which then travels down the oviduct. As the yolk travels, the remaining parts—the white, membranes, and shell—assemble to create the whole egg.
Should a blood vessel burst during any stage of production, blood may end up in or on the egg.
Blood streaks on an eggshell indicate that a blood vessel burst during the final stages of production, usually as the bird actually lays the egg. This is more common amongst pullets, whose vents are not yet accustomed to passing an egg.
When a blood vessel bursts in the ovary, the blood spot appears on the yolk as no other parts of the egg are yet formed. Blood in the white indicates that the burst blood vessel was located in the oviduct.
Why Did My Chicken’s Blood Vessel Burst?
A blood vessel can burst for a number of reasons. Most frequently, this occurs with pullets who have recently reached point-of-lay. Their bodies haven’t yet adjusted to laying. The passing of an egg can cause both mental and physical stress for these young birds, resulting in the rupture.
The same holds true for older hens whose bodies produce perhaps one egg every week or so. Their bodies are no longer accustomed to regular production.
Blood spots can occur at any age hen, however. To minimize the possibility of blood spots in eggs, ensure that your flock has proper housing, a balanced diet for layers, plentiful water, and room to roam and explore.
Commercial eggs sold at supermarkets must by law be properly scanned, or candled, to separate out reject eggs: those that are fertilized, those that are malformed, and those containing blood spots.
If the egg contains a tiny blood spot—less than a millimeter in size—it may pass through undetected. Most blood spots, however, are easily identified.
Eggs sold by backyard and small-flock owners (or by farm co-ops or feed stores) do not have the scanning capabilities as commercial egg farms do. So blood spots are much more common in farm-fresh eggs, especially amongst brown eggs, where the color of the shell makes detection even trickier.
What Should I Do If My Egg Has a Blood Spot?
Believe it or not, blood spots do not contaminate an egg. Since most blood spots are minuscule and ride on the surface of an egg, they can be easily removed with a sharp knife and the egg prepared as usual.
If you find blood streaks or splashes, such as in Kama’s egg, you can just rinsed them off. Although it’s understable if you want to simply throw out the egg and start over from scratch.
A rule of thumb I have followed for years now: When a recipe calls for eggs, crack the eggs in a separate bowl. This way, if there I run across blood streaks, I don’t contaminate the ingredients already assembled.
Kama was lucky that she was simply frying eggs and not baking a cake. Using a separate bowl might present a bit of a hassle, but better that than having to throw out a lot more than a bloody egg.
You can find nine chicken breeds named after the state in which they originated. But only three states have a chicken as an official symbol. Rhode Island has the Rhode Island Red, New Hampshire has the New Hampshire chicken and Delaware has the Blue Hen.
Here’s a look at each of the chicken breeds named after their state of origin.
Buckeye
Nettie Metcalf of Warren, Ohio, developed the Buckeye as a dual-purpose farmstead chicken that adapts well to cold weather. It’s the only breed classified as American that has a pea comb, a feature that helps it survive Ohio’s bitter winter weather.
When this breed was developed during the late 1800s, it was originally called Pea Comb Rhode Island Red. But that name did not enhance the breed’s popularity. So, since it originated in the Buckeye State, the breed name was changed to Buckeye.
Buckeye chickens come in large and bantam sizes and a single color: a rich reddish brown of about the same shade as a buckeye nut. The hens lay eggs with brown shells and also brood easily.
Although the buckeye tree is the Ohio’s official state tree, the state bird is the Cardinal. Ohio has no official state chicken. You can find more information on this breed on the website maintained by the American Buckeye Poultry Club.
The concept of the California Gray originated in the early 1920s in Corvallis, Oregon, where Professor James Dryden at Oregon Agricultural College (now Oregon State University) crossed barred Plymouth Rocks and white Leghorns to develop a superior white-egg layer. Dryden called his hybrid creation the Oregon.
Ironically, crossbreeding was considered to be heresy at that time. The Oregon legislature even debated eliminating the college’s poultry department.
Upon retiring, Dryden moved to Modesto, California, where his son Horace continued a similar breeding program that eventually led to the development of a new breed. Called the California Gray, its introduction to the public came in 1949.
This breed has a single comb, has no bantam counterpart and comes only in a barred pattern that is autosexing (pullets are darker than cockerels). At maturity, a hen’s barring is white and dark gray, a cock’s barring is white and light gray.
The hens lay white-shell eggs and seldom brood.
The California Gray is known for its gentle temperament and outstanding egg production. Now quite rare, this breed is also used primarily to produce California White hybrid layers.
California has no state chicken. The state bird is the California quail.
Delaware
The Delaware breed was developed in the 1940s from silver sports arising from hybrid broilers created by crossing barred Plymouth Rock cocks with New Hampshire hens. George Ellis, owner of the Indian River Hatchery in Ocean View, Delaware, collected some of these sports to breed back to New Hampshire hens.
The resulting hybrids were called Indian Rivers.
At some point, Ellis selected a superior silver sport rooster called Superman to develop a dual-purpose breed called the Delaware, having the sport’s color pattern—white plumage set off by slight barring in the neck, wing and tail feathers. The Delaware has a single comb, comes in a single color pattern and may be large or bantam.
The hens lay brown-shell eggs and make good broodies.
The Delaware state chicken, however, is not the Delaware but rather the unrelated Delaware Blue Hen. You can find more information on the Delaware from the Delaware Poultry Club United.
Delaware Blue Hen
Although not an American Poultry Association-recognized breed, the Blue Hen Chicken is the official state bird of Delaware. It originated with a game hen dating to Colonial days that noted for her steel-blue feathers and the ferocity of her male offspring.
Besides being the official state bird, the Blue Hen is also the official mascot of the University of Delaware. In the 1960s, the university obtained six pairs identified as Delaware Blue Hen Chickens. They were crossed with blue Andalusians, creating a flock that looks more Mediterranean than game.
The original Blue Hen bloodline apparently no longer exists.
The Iowa Blue originated in the 1920s with John Logsdon of Decorah, Iowa. The breed’s fame derives from its ability to withstand Iowa’s typical hot, humid summers and cold, dry winters.
By the late 1980s, the last remaining viable flock of Iowa Blues belonged to Ransome Bolson of Decorah, who obtained his starter flock from Logsdon’s wife, Dolly.
From that flock, the Iowa Blue returned from the brink of extinction via the work of a group of enthusiasts. They eventually formed the Iowa Blue Chicken Club, which offers a highly detailed downloadable PDF called History and Characteristics of the Iowa Blue.
The original color of the Iowa Blue is not blue, but rather a pattern called silver penciled. More recently, a birchen variety has also been developed.
Iowa Blues are excellent foragers and good at outsmarting predators. Hens lay eggs with pale brown shells, will brood and make protective mothers. This breed has no bantam counterpart.
The official Iowa state bird is the Eastern Goldfinch. Iowa has no state chicken.
Jersey Giant
Brothers John and Thomas Black of Jobstown, New Jersey, developed the Jersey Giant in the late 1800s as an alternative roaster to the turkey. It’s the heaviest known chicken breed—hens mature to 10 pounds; cocks, 13.
Valeryna/Pixabay
Raising Jersey Giants for meat production turned out to be uneconomical as the chickens take too long to grow. They remain popular for their imposing size, calm disposition and cold-hardiness.
The Jersey Giant has a single comb, may be large or bantam, and comes in a few color varieties, of which black and white are the most common. The hens are good layers of brown-shell eggs and make wonderful broodies, although their eggs may take a day or two longer to hatch than those of other breeds. For more info, visit the National Jersey Giants Club’s website.
New Jersey has no state chicken. The official state bird is the Goldfinch.
New Hampshire
Brothers Oliver, Austin and Leslie Hubbard of Walpole, New Hampshire, created this dual-purpose breed in the early 1900s, through the selective breeding of Rhode Island Reds. They sought to improve the breed’s disease resistance, cold hardiness, rate of growth and degree of muscling for the early broiler industry.
New Hamps have a single comb, may be large or bantam, and come in one color variety—a light reddish bay. The hens lay a decent number of eggs with brown shells and may brood (and when they do, they make great mothers).
This breed is the official state poultry of New Hampshire. The New Hampshire Breeders Club of America maintains a private group on Facebook.
Rhode Island Red
The Rhode Island Red was developed in the late 1800s by various farmers in Massachusetts and Rhode Island as a dual-purpose egg and meat chicken. Some strains have since been bred more for egg production than for meat.
Mary Pahlke/Pixabay
Rhode Island Red hens are among the best layers for a heavy breed, producing large eggs with brown shells. Old-strain hens brood and make good mothers. Hens among the strains developed for increased egg production seldom brood.
The official Rhode Island state bird, this breed has two comb varieties (single and rose), comes in one color (a rich mahogany red with a black tail) and may be large or bantam. The breed is championed by the Rhode Island Red Club of America.
Rhode Island White
J. Alonzo Jocoy of Peacedale, Rhode Island developed the Rhode Island White—unrelated to the Rhode Island Red—in the late 1800s. Jocoy wanted a bird similar in conformation to the Rhode Island Red, but with white plumage for easier plucking.
The standardized Rhode Island White has a rose comb, although occasionally throws chicks with single combs. Production Rhode Island Whites more commonly possess single combs.
Mating Rhode Island Red cocks to Rhode Island White hens results in red sex-link hybrid layers.
You can find the Rhode Island White in large or bantam sizes. Hens lay well, producing brown-shell eggs, and seldom brood.
Although calmer in disposition than the Rhode Island Red, the Rhode Island White never attained the same worldwide popularity.
When my wife, Elaine, and I began our chicken-raising career, we—like many first-timers—committed numerous errors. Indeed, the first three or four years (before we learned to keep a chicken first-aid kit), every single bird that came down with some malady died.
We even came up with the maxim that “a sick chicken is a dead chicken.” One particular memory is especially painful to recall.
A Tale of Loss
Boss was the first heritage Rhode Island Red rooster to ever lead our flock. Big, brave and also benevolent toward his hens and us, he possessed all the traits one desires in a roo.
Then one morning, he seemed lethargic and didn’t crow. The second morning saw him increasingly sluggish. A smaller rooster began pecking him.
Boss died the next morning. While examining his vent area, I witnessed hundreds of maggots feeding on him. The poor creature had died of fly strike. Through our ignorance and hesitation, we had done nothing to save him.
Contrast that situation with what happened several years ago. One morning a pullet left the henhouse and instead of joining everyone else at the feeder and waterer, she plopped down in the dirt.
I immediately went to her, searched through her wing and breast feathers, then tipped her over to examine the vent. There, I found about a dozen maggots.
She was in the first stages of fly strike.
I immediately left the run with the young hen and called out to Elaine to ask her to set up our chicken hospital. We then grabbed Prozap Garden & Poultry Dust from the chicken first-aid kit and shook it all over the pullet’s body with special attention to the vent and wings.
Meanwhile, Elaine reopened our chicken sickbay—two tarps laid atop each other, a childproof fence formed into a rectangle on top of the tarps and an old screen door as the ceiling.
After applying the poultry dust, I watched as maggots streamed off the pullet, dying not long after. Next, we “admitted” the pullet to our hospital. There, Elaine had ready brown bread soaked with probiotics, which we also added to her waterer.
My wife also put blueberries, a true super food, in the feeder. Of course, with the pullet ensconced in our infirmary, she was safe from the bullying that chickens direct toward ill flock members.
The next day, our pullet grew perkier and improved steadily over the next three days. On day four of her stay, we deemed her well enough to rejoin her flock.
She even laid an egg a few days later and has been hale and hardy ever since. No longer do we believe in the proverb that a sick chicken is a dead one.
And with that, I’ll let my wife take over.…
Bruce Ingram
Elaine’s First-Aid Kit
My husband, Bruce, is in charge of making the initial diagnosis of whether our chickens are ill or not, as he seems better at noticing if anything is wrong with them.
Bruce is also in charge of letting our birds out of the coop in the morning and providing their food and water for the day. And he likes to watch all of our individual birds start their day and make sure they are acting normally.
But it’s my job to primarily take care of the sick. Here are some of the items necessary for a well-conceived chicken first-aid kit.
Petroleum Jelly
Across many generations this balm has been applied to humans for chapped lips, abrasions, moisturizing and all kinds of minor ailments. Basically, petroleum jelly serves the same purpose for chickens, minus the chapped lips, of course.
We especially use this ointment for combs and wattles showing frostbite, as well as a protection against frost burn.
With their bigger combs and wattles, roosters are especially likely to experience frostbite in the wintertime. And whether a rooster or a hen is being treated for this ailment, you’ll need someone to hold a bird while the other person applies petroleum jelly.
Our chickens simply don’t like this salve rubbed on them so Bruce will hold the squirming individual while I gently rub it on the afflicted part. Despite their protests, we like to think that they sense their combs and wattles feel better afterward.
Sometimes, especially during the winter, we’ll find small mites on these same areas as well as on the legs. Petroleum jelly can be very helpful for smothering mites.
VetRx Poultry Aid
This is an oily solution that is very beneficial in helping soothe a chicken displaying early signs of a cold such as sneezing. Of course, healthy chickens sneeze a great deal with all the dust in their environment.
But if a bird continues to sneeze throughout the day, it may indicate a malady of some kind.
VetRx is very helpful for any kind of respiratory problem and should be in every chicken first-aid kit. I add a few drops, which has a menthol smell, to the edges of the waterer. If a chicken seems overly weak, I will dip bread in the waterer after VetRx has been added and give the treat to her.
This blue salve is what we utilize when a hen has wounds and scratches or abrasions from overly lustful roosters. We also used Hen Healer one time when Don, our alpha Rhode Island Red rooster, lost a spur during a fight with one of his offspring, who shepherds a flock in the adjoining pen.
Usually come morning, the two roos crash into the fencing a few times as part of a fruitless attempt to annihilate the other.
Then they’re done jousting for the day.
But this time, the daily morning skirmish took place a little longer and one of Don’s 2-inch-long spurs became the casualty. The salve was just the thing to keep an infection from occurring as it creates a barrier to insects and dirt.
Bruce Ingram
Vetericyn Plus Antimicrobial Poultry Care
This very beneficial balm helps heal abrasions, cuts, pecking wounds and bare areas due to feather loss. Christine Haxton, a chicken fancier who lives near us, feels the product even encourages regrowth of feathers that are lost due to injury.
Typically, I first spray Vetericyn on the afflicted area to clean and disinfect the wound. Next, I apply any salves or ointments from the chicken first-aid kit.
Sav-A-Chick Probiotic Powder & Electrolyte Powder
We keep Sav-A-Chick in single use packs in our chicken first-aid kit, adding them to the drinking water of any ailing or stressed bird.Usually, we add the probiotic when a chicken has experienced a serious affliction such as fly strike or a minor one such as a cold and/or sneezing.
Also, when any chicken becomes ill with anything and has to be temporarily removed from the flock, every other chicken receives the probiotic, as does the one in the hospital.
We primarily use the electrolyte powder as a pick-me-up on extremely hot days.
Wazine Turkey, Chicken & Swine Wormer
After our chickens stop laying, usually by November, we add Wazine to their waterer as a preventive measure for the winter to come.
Prozap Garden & Poultry Dust
The Prozap dust we use contains Permethrin, which is a synthetic insecticide that repels ticks, flies and many other pests. In fact, as noted earlier, it will kill maggots on contact.
During periods where we see lots of flies, or if there is fly larva in the henhouse droppings, we dust the flock as a preventive measure. When a bird has been stricken with fly strike, we dust that individual before moving it indoors to the chicken hospital.
We no longer believe that a sick chicken is a dead one, and neither should you. Obviously, all of us will lose a bird from time to time.
But having the items on hand to create a chicken hospital and always keeping a well-stocked first-aid kit will potentially keep deaths to a minimum and result in a healthier flock overall.
This article originally appeared in the July/August 2021 issue of Chickens magazine.
Anyone can mow a flat field and do the job well. But mowing sloping ground is another challenge entirely, and one to be undertaken with caution.
We’re not talking about those gently sloping hills that can be easily handled with a riding mower, so long as you travel slowly and carefully. We’re talking about sharp slopes of 15 degrees, 20 degrees, or even more—those areas you’re tempted to let grow up in grass and weeds since they’re so challenging to mow.
But with the right equipment and proper care, you might be surprised how even the most formidable slopes can be cleaned up satisfactorily. On my farm, there is a steep, artificial slope falling away from one side of the house. It’s short, but I’d venture to guess the angle is around 20 degrees in places.
Historically, I’ve let this slope grow up in grass. But in recent years weeds have taken root. So this summer I decided to mow and maintain the slope using several different pieces of equipment:
1. Drive riding mowers straight up or down slopes.
As the user manual might inform you, driving a riding mower across a steep slope is an accident waiting to happen. You risk rolling over.
If you do decide to mow a slope with a riding mower, you should drive straight up or straight down the slope, which is safer and more stable. On the mildest portions of the slope I’m tackling (where the angle is 10 degrees or less), this is the approach I take.
However, you should be aware that if flat ground transitions quickly into a steep slope (as can happen with artificial slopes), the mower deck can bottom out at the transition point and stall your mower so it’s unable to move.
At this point, you have no traction. That’s dangerous.
And if you’re tackling a slope approaching or surpassing 15 percent degrees, you may want to skip the riding mower entirely.
2. For steep slopes, use a push mower or handheld string trimmer.
Rather than using a riding mower on steep slopes, consider using a push mower or string trimmer. They do require more physical exertion on your part. But at least they can’t roll over with you in the driver’s seat.
Unlike with a riding mower, it’s OK to mow across a slope with a push mower. In fact, it can be easier (and safer) than mowing up and down the slope.
Try to mow down a steep slope with a push mower, and you’ll need all your muscle power to keep its momentum in check. Mowing up a steep slope is even more difficult—have you ever tried to push a ~60-pound mower up a 20-degree slope? You’ll exhaust yourself in no time.
But above all, use the approach that feels most comfortable to your footing.
A handheld string trimmer can be the best option of all, allowing you to simply walk the slope however you’re comfortable and not worry about pushing or pulling a heavy push mower around. But string trimmers are best for light-duty work, so you’ll have to hit the slope frequently to keep growth in check.
And if you’re trying to tame an overgrown slope, you may have to start with a push mower before doing cleanup work with the string trimmer. That’s the approach I use when mowing slopes.
3. Rake grass clippings as you go.
Grass clippings and steep slopes don’t mix. Large amounts of grassy debris can become a slipping hazard.
The last thing you need is for you (or your mower) to lose your footing/traction on a steep slope. So as you mow, stop and rake away the clippings to keep your footing firm.
Damp grass and soil can also make for slippery terrain, increasing the risk of an accident. And wet conditions tend to clog mowers, reduce cutting quality and even damage grass.
It’s better to pass on mowing slopes (or even flat ground) when grass is wet.
5. Be careful not to exhaust yourself.
Mowing a steep slope with a push mower or handheld string trimmer can be very tiring, so be careful not to overwork yourself. When you’re exhausted, you’re more likely to slip or lose control of the mower.
Don’t think you have to mow the whole slope at once. Take breaks when you’re tired, and resume when you’re refreshed and strong again.
6. Use common sense!
You know your limits! And you know what’s safe or not. Always wear appropriate safety gear, and realize you might not have the strength or equipment to mow some slopes.
Use common sense, and always prioritize safety over aesthetics. You can always bring in professionals if necessary.
Mowing steep slopes is always tricky. But following these tips and tricks can help you achieve good results.
Fires are an integral part of our ecosystem. However, the past several years have brought unprecedented wildfire activity to the Western U.S., among other regions.
What makes these wildfires unique in addition to their size is that they involve urban areas as opposed to solely woodland areas. This creates two issues with respect to our backyard chickens:
How/if/when to evacuate our chickens during a fire event; and
Understanding the potential food safety risks associated with eating eggs from chickens exposed to ash and other chemicals
Make a Plan
Many of us view our backyard chickens the same way we view our dogs, cats and horses. They are members of our family.
And you definitely need to account for your chickens during wildfires. Therefore, it’s critical to include our chickens in emergency planning.
Previous fire events have shown that residents who don’t plan for their pets and livestock, fail and/or delay evacuation. Likewise, animals left behind are often not properly set up for sheltering in place. This can lead to animal welfare issues and costly search-and-rescue efforts.
Inadequate preparedness can result in:
human and animal death
failures in reunification of animals with owners
additional emotional distress, prolonging community recovery
Get Some Crates
That’s why advanced preparation is key. Just as we have cat carriers for our cats, we need to have some type of chicken crate to account for our backyard chickens. You can easily purchase crates to transport chickens online or at your local farm-supply store.
The crates come in a variety of sizes but are roughly 2 1⁄2 feet long, 2 feet wide and 1 foot tall. Crates fit roughly eight full-grown chickens for several hours.
One challenge? Chickens poop (a lot). And the crates are slotted. So your car could get very dirty and stinky very quickly.
Putting down a heavy-duty trash bag under the crate should at least help with keeping your car clean.
In a perfect world, you would be able to keep the crates in the bed of a pickup and bungee cord the crate in so it doesn’t excessively slide all over the truck bed.
Finally, if your chickens get burned or are otherwise injured, make sure you have contact information for your veterinarian. Or at least have contact information for a vet who treats backyard poultry.
Also have contact information for a diagnostic lab. The state diagnostic labs will often euthanize chickens for free, if needed.
Food Safety
With respect to food safety, one of the risks of urban fires is exposure to chemicals. These include heavy metals, fire retardants and polychlorinated biphenyls (aka PCBs), among others.
Specifically, chemicals previously contained in garages, electrical transformers, roofing shingles, etc. can be released. And they can associate with ash in soil and/or dissolve in surface water.
Due to their foraging behavior, backyard poultry often consume organic and inorganic materials within their allotted space. In fire–
affected environments, this confluence of behavior and environment can lead to the ingestion of the inorganic contaminants described previously.
These can bioaccumulate in tissues—including eggs, which we regularly consume.
However, it’s important to note that food-safety risk and proximity to fire haven’t been identified as risk factors with respect to exposure. That said, the research is promising in this area, and fires are highly unique events.
In other words, understand the risks described in this article. Stay aware of the potential risks if wildfires occur in close proximity to your home and chickens.
The following summarizes two different inorganic chemicals that we have found in backyard eggs. While we haven’t found an association with wildfires, it’s still important to be aware of their presence and potential effects to our chickens.
Lead Worries
Based on previous studies in our lab, there doesn’t appear to be a relationship between lead in eggs and a fire event. In our study, we have found that the presence of lead in eggs from backyard eggs is associated with presence of lead-based paints in homes and proximity to oil refineries.
However, this isn’t settled science. And because lead is highly present in many urban environments, the mechanism for dissemination of lead in the environment following a fire event—specifically, consumption of ash with lead in it and subsequent presence of lead in eggs—remains plausible.
To that point, we have noted 8 percent of backyard poultry with lead levels in backyard eggs that were above the FDAs threshold for daily lead consumption for children. Consequently, regardless of fire, you should stay aware of this potential risk.
If you are concerned, you can send your eggs to a diagnostic lab for testing. Many diagnostic labs will also test soil and water for lead with the goal of identifying the overall risk in your chicken’s environment.
In our study, high lead levels in eggs were found at all premises with soil lead levels greater than 44 ppm. That’s slightly above the average background lead concentration in California soils.
With respect to water, knowing whether your plumbing pipes and fixtures are made before 1986 is important because they can contain elevated levels of lead.
Polychlorinated biphenyls were used in a large number of industrial and commercial applications including dielectric and coolant fluids, plasticizers and pigments and dyes. They were banned in 1979 in the U.S..
But PCBs don’t break down readily in the environment. And they are still detected in air, water, soil and food products.
Among other risks, PCBs can cause cancer. In the same study described previously, 43 percent of eggs from backyard poultry premises had levels of PCBs that exceeded the California Office of Environmental Health Hazard Assessment threshold for exposure.
While it’s unclear exactly how backyard chickens are exposed to PCBs, it’s possible that these chemicals may be present in soils. Chickens, then, would be exposed when they scratch and feed.
As testing soil for PCBs is difficult and costly, if you are concerned about PCBs in your backyard eggs, limit exposure of your chickens to soil. You can provide your chickens food in a feeder that keeps the food off the ground. Or you can confine them to a particular area of the yard, such as in a raised bed that has fresh soil.
Best practices for risk reduction of heavy metals such as lead, PCBs and other inorganic toxicants include using a chicken feeder that prevents spillage onto the ground. Soils have been previously identified as a source of lead in chicken eggs.
Remember, chickens forage directly off the ground. This makes them highly susceptible to ingesting contaminants present in the soil.
Stay Prepared
Wildfire events and natural disasters are relatively rare, but it’s important to stay prepared—for you and your chickens. Having a plan before the natural disaster remains an essential step toward making good decisions when the event occurs.
As noted, there appears to be no correlation between proximity to wildfires and levels of these contaminants in eggs from backyard chickens. However, you should consider this issue or question not-settled science.
Definitely keep abreast of these issues. Our backyard chickens occupy a unique role in our homes as companions and food animals, and we need to protect them from wildfires and their effects.
Considering all the potential issues associated with the well-being of our chickens and ourselves—before, during and after a disaster such as a wildfire—is an important consideration for us and them.
This article originally appeared in the July/August 2021 issue of Chickens magazine.
In my previous two articles, I explained that I break garden soil fertility management into three stages. We stepped back and looked at the important roles air and water play in these three stages, too.
Now we’re going to look at the final two stages of garden soil fertility management:
Forming and finishing garden beds
Seasonally recreating gardens for succession planting
Stage Two: Forming Permabeds
Stage two of garden soil fertility management occurs in sync with the second phase of garden transition—namely, forming Permabeds from scratch.
In this phase, the garden plot is organized into raised garden beds that have a specific width and height for your scale of operation.Up until now the plot has been in cover cropped land with an application of composted manure (stage one).
Mow the Cover Crop
Now is the time to flail mow the cover crop. You can use a BCS tractor with a flail mower or larger tractor with a flail mower, depending on your scale. The flail mower will chop the cover crop into small pieces that are easily integrated into the soil to decompose.
Now, you can form your beds with a bed former and power harrow. The beds will be raised up roughly at first, but before you do a second pass with a power harrow, you can apply more compost to the bed top.
A typical compost mix will work fine, and you can source what is available in your area. Mine is made from a mix of composted manure, rotten hay and straw bales, and some decomposed hardwood tree mulch, all mixed with a local sand to lighten it up. (Most of our local soils are clay based.)
Apply this compost to the bed top, 1 to 3 inches thick depending on budget and how much you want to loosen and improve your soil. Then power harrow this into the top 3 inches of the soil.
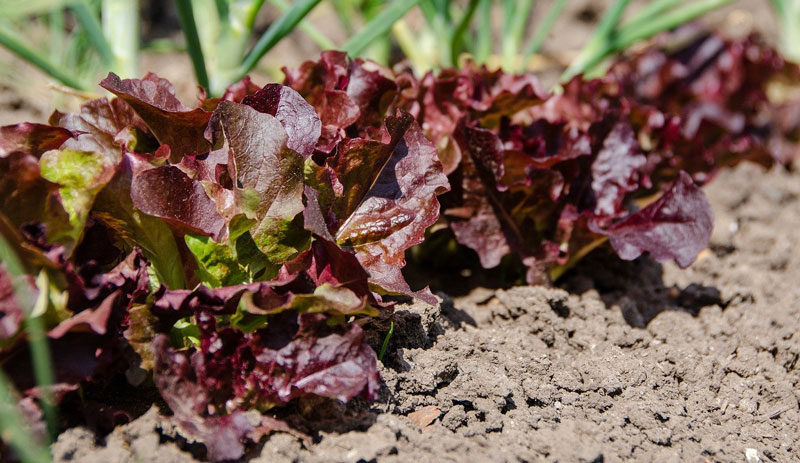
Essentially, you are enriching the top of the garden bed to form a new garden top soil. In science terms, this is your “A horizon.” The A horizon of most soil is higher in organic matter, with a darker, richer and more crumbly soil color and texture.
This makes soil more stable against erosion and compaction. It also provides overall better soil-to-seed contact in those top inches for best germination of fine seeds like carrots, arugula and lettuce.
Stage two is about building your garden beds and making a soil that is layered like a natural ecosystem. But you’ll also gain garden quality nutrient availability for years of better crop growth.
Stage Three
The final stage of garden soil fertility management mirrors the third phase of garden formation—namely, the period of continuous garden fertility management through the annual crop cycle. In this period there are three main fertility management techniques I apply.
1. Reapply Compost
First, I reapply the compost from stage two onto the bed tops. I do this every one to three years for the first decade of gardening.In stage three, though, I only apply 1 inch of compost.
Here’s my schedule for applying compost during that decade:
I apply it each year for three years,
once again at the six-year mark
and again at the nine-year mark.
At the end of this decade, you’re left with a Permabed of upmost quality. And it’s not hard—the compost spreader from my two-wheel tractor does a great job at this.
You can also apply compost by hand with shovels and a wheel barrow, or by shoveling out of a compact tractor’s bucket.
Secondly, I use cover crops to help fix, store and cycle nutrients back into the soil. Cover crops are used in rotation with the vegetables. And I select certain cover crops to help fix certain nutrients:
Clovers fix nitrogen
Buckwheat sequesters phosphorous
Winter rye builds copious organic matter
Each cover crop has its own season as well. Winter rye will overwinter and hold soil against erosion. Buckwheat germinates and grows best in summer. And clovers need a good 18 inches to establish properly.
I grow cover crops in the beds after flail mowing the vegetables.I also grow some cover crops, like white clovers and annual rye grass, in the paths—for instance, between beds of kale and cabbage.
3. Side-dress Heavy-feeder Crops
Thirdly, I side-dress (apply nutrients close to the roots of) heavy-feeder crops, like melons, tomatoes, peppers and broccoli. For this, I use micro-nutrient blends and soluble plant fertilizers.
For years, I have favored blends made by Neptune’s Harvest.Their nutrients are readily available, and different blends can achieve different results, for instance:
encourage root development in spring and fall for perennials
enhance green-leafy growth for greens and tomatoes in spring
enhance flowering and fruiting in summer
I apply these with a backpack sprayer calibrated to the right ratio, and I walk and spray the soil along a line of the crop row.You can also do foliar sprays, but I like to feed the soil, as this encourages healthy soil life, too.
Side-dressing could also include granular fertilizers like blood and bone meal, kelp meal and rock minerals. You could also set up some seeders to side-dress granular nutrients. Many older Farmall tractors allow you to side-mount a fertilizer attachment.
Side-dressing gives heavy-feeding crops an extra boost to improve seasonal yield.Ultimately, side-dressing will be of greater benefit in the early years, when the soil is still finding and balance.
After a decade of following these practices in stages one, two and three, your Permabed will be in great shape.
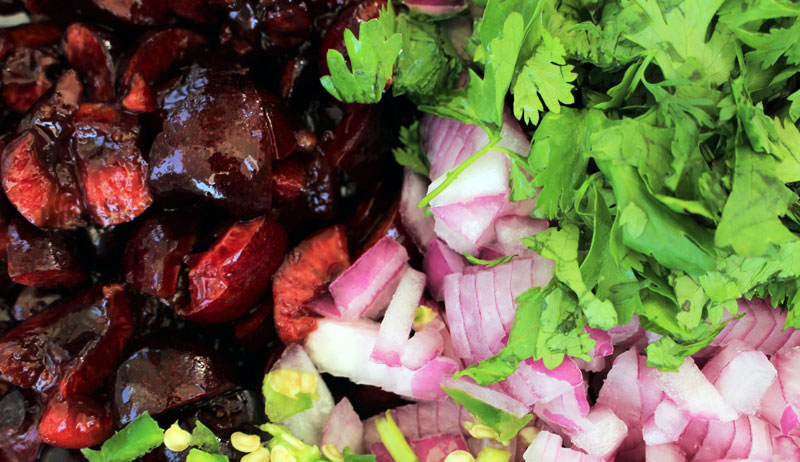
Take advantage of cherry season before it’s over and make yourself a batch of this scrumptious sweet and spicy cherry salsa. Enjoy this salsa with corn chips, or as a condiment to top your tacos, eggs or other proteins.
Mix prepared ingredients together and transfer to a clean quart canning jar. If you have a small fermentation jar weight, add it to the jar to hold down the produce.
Wipe off the rim of the jar with a clean dampened towel. Add the canning jar lid and tightly screw on the ring.
This is a very short ferment, with the duration being between 12-48 hours. The salsa is delicious after it’s mixed together, but as it ferments, the flavors grow and meld together.
Ferment at room temperature, ideally between 60 to 75 degrees F (15 to 23 degrees C), and keep out of direct sunlight.
Taste test after 12 hours to determine if the fresh flavors have transformed enough to your liking. If not, let it go another day or day and a half and taste test again.
Once fermentation is complete, transfer the jar to the refrigerator. This ferment is best enjoyed within 2 weeks.
If you don’t want spice in your cherry salsa, remove the seeds and membranes from the jalapeños, or omit them all together. If you want a spicier salsa, substitute the jalapeño for a habanero or other spicy pepper.
You may substitute fine sea salt instead of coarse kosher salt if you prefer. Tthe measurement will remain the same for this recipe.
When Laura Cox looks back on her childhood, she remembers her family always having a garden. “My mom wouldn’t let me have any animals, so I always knew when I grew up I wanted to get into homesteading and farming,” says Cox, who now runs the Cox Homestead in Kodak, Tennessee.
Along with selling produce and flowers from a bespoke farm stand, Cox Homestead has also become renowned for its do-it-yourself elderberry syrup kits, which Cox formulated after using elderberries to beat a bout of the flu.
We spoke to Cox about the rewards of growing your own produce and the best ways to use elderberry syrup. We also got the scoop on Cox Homestead’s resident feline on the prowl.
When it comes to running a homestead and farm stand, Cox admits that it’s “hard work” that needs taking care of “even when it’s hot and rainy or whatever the weather is.” To stay motivated, Cox finds a sense of fulfillment in seeing the process through to completion.
“It’s easy to compare, like I can can tomatoes or I can buy them in a store for a dollar rather than spend however many hours it takes,” she explains. “But just knowing that I grew it and I made it myself keeps me motivated.”
Cox has successfully set up a farm stand to sell the Cox Homestead’s produce and flowers.
“Last year was my first year doing it, and I thought it did well. But this year’s been even better,” she says. “I think building an online platform and presence has really helped to get the word out about it too.”
Complimenting the farm stand, Cox also offers do-it-yourself elderberry syrup kits through her Etsy store.
“When I had my first son, I caught the flu for the very first time ever. He was 6 weeks old, and I was a brand new mom and sick as can be,” Cox recalls. “I went to the doctor and he gave me a prescription and told me I couldn’t nurse my son.
“I was so confused by all of it and it wasn’t long after that I learned about elderberries and how they’re so good to cut off the flu and help the immune system.”
Eventually, Cox began to sell her own elderberry syrup, which in turn paved the way for the creation of dried kits. “I used to sell syrup until the business grew and I couldn’t handle it. So I switched to the dried kits,” she says. “It lessens the workload for me, but it also allows people to have a part in making it themselves.”
When it comes to Cox’s recommended use for elderberry syrup, she likes adding it to berry teas as a flavor enhancer and sweetener. She adds that her kids love to use elderberry syrup in homemade popsicles, too.
If you take a look through the Cox Homestead’s Instagram account, you’ll notice frequent cameos from a dashing feline. It turns out he’s called Mr. Honey.
“He is one happy cat—this is his jungle!” says Cox. “He’s always finding things to capture. He also gets along with the rabbits too, but I don’t leave them unsupervised. They’re actually playmates at times!”
My soil contains an astounding amount of clay. As I dig new vegetable patches or perennial flower beds, it’s usually cause for much grumbling. But, lately, I’ve seen my clay-heavy soil in a new light. As it happens, harvesting and processing natural clay is actually pretty fun.
Whether you have your own kids—or you’re just a big kid yourself—you might want to give it a try. Just don’t expect to end up with a perfect set of dinner plates or other finished, food-grade wares.
My natural clay isn’t fancy, and I haven’t fired it in a proper kiln. It is, however, perfect for kneading, modeling and just playing around.
Unearthing Real Clay
The clay from my garden looks reddish-brown, but, depending on its origins, yours may range in color from a darker red to whitish-gray. You can find natural veins of clay along streams or riverbeds—or areas where these once existed.
If you have slow-draining, heavy soil, odds are you’ll find clay in your own backyard.
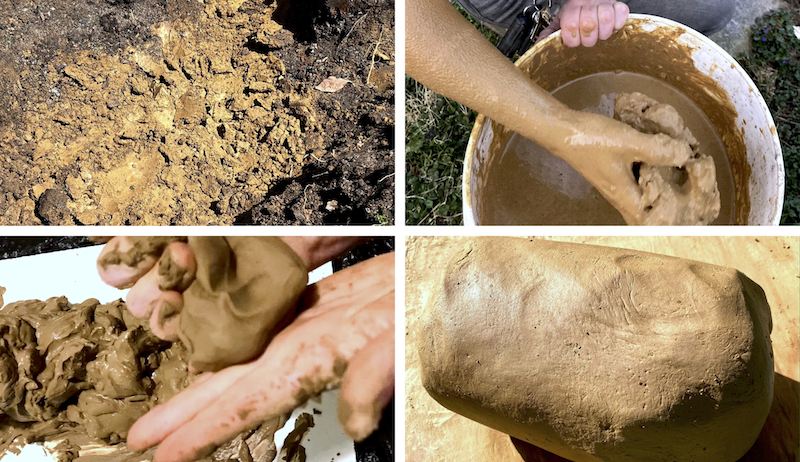
In my case, I only had to dig a foot or two down to find the motherlode. I could plainly see orangey striations of clay set into darker, more crumbly soil.
To make sure it was clay, I pinched off a chunk and rolled it into a ball. It held its shape well.
Next, I added a little bit of water and shaped it into a snake. Again, it behaved like clay should—remaining relatively smooth and pliable as I manipulated it. This is just what you’re after.
To wet process clay, you’ll need the following supplies:
two clean, five-gallon buckets
a large stirring stick
an old window screen or screen material
old pillowcase and bit of rope (optional)
piece(s) of scrap wood
Think you’ve found a good vein of clay? Dig some out and place it in the bottom of one of your five-gallon buckets. Separate and remove any obvious rocks, sticks and similar debris as you go.
Now, fill the bucket with water and mix well. Initially, I used the stirring stick. Later, I used my hands to break up any thick clumps of clay. (This part is every bit as messy as it sounds, so wear old clothes!)
You should be left with a thick clay slurry.
Next, top the second five-gallon bucket with the window screen or screen material. Slowly and carefully pour the clay slurry through the screen and into the bucket. The screen should catch any small stones, twigs, or other impurities.
The Waiting Game
For the next couple of days, allow the bucket of strained clay slurry to sit undisturbed. (I topped mine with a loose-fitting cover to keep mosquitoes, falling leaves and any other debris out.) Eventually, you should notice the clay has fallen out of suspension.
That means you’ll see a layer of clear water floating on top.
Carefully pour off this clear water. Then, let the contents of the bucket settle and separate once again. Pour off more clear water, if you are able.
Finally, you can either wait for most of the remaining moisture to evaporate on its own or pour the contents of the bucket into an old pillowcase. If you go with the pillowcase, use a bit of rope to securely tie it shut.
Next, hang it somewhere warm and dry. In time, the excess liquid will drip off of the bottom of the pillowcase. You’ll be left with a thick, sticky mass of clay.
To help evaporate a little more moisture out of the clay, I spread it out on a few long, flat pieces of scrap wood. I checked on it every few hours to make sure it wasn’t drying out too much.
As soon as the clay seemed workable, I gathered a few handfuls of the stuff and combined them into a ball. Then, I slowly shaped and kneaded it until its moisture content and consistency were just right.
Once you get your clay to this stage, you can store it in an airtight, plastic bag. (If it begins to dry out too much, add just a touch of water to make it workable again.)
Depending on your clay’s degree of purity, you might be able to successfully glaze and fire your own clay creations in a kiln. But finding a commercial kiln you can use on a temporary basis isn’t easy.
And if you do find one? You’d need to create and test fire some clay tile samples to determine your optimal glaze type and firing temperatures first.
Feeling extra-experimental? You could always try pit-firing your finished pieces instead.
On a brisk November day more than 170 years ago, hundreds of breeds of poultry were all gathered at the Public Garden in Boston, Massachusetts. Carriages passed by on the streets, and electricity was in its infancy. A booming city that was a pillar in establishing the United States of America was also the home of the first identified poultry show.
At least 10,000 people attended, and 1,423 birds were shown. Another show was held in 1860 drawing in even more people and nearly 12,000 birds. Commonly known breeds were grouped together, but lesser known breeds were exhibited indiscriminately.
There were so many people that judging the birds was difficult, and organizers decided not to judge the poultry. The poultry show ultimately failed in exhibition. But it certainly harbored the public’s interest.
Judging birds fell to the opinions of the persons established to judge. This led to confusion and tension among poultry enthusiasts. In 1867, a copy of the English Poultry Club Standards was printed, and modifications were made.
As judges proceeded with the Modified English Standard, judging became fairer. Poultry fanciers increased in number.
Seeing a need for a governing body, in 1873, William Churchman of Delaware helped to establish a committee, and the American Poultry Association was born. One of the first things that the APA accomplished after being organized was establish an American Standard of Excellence. This blended attributes from the English Poultry Club Standards and characteristics from the birds available in the U.S.
The Standard of Excellence was later changed to the Standard of Perfection (SOP). These standards then became what judges based their pointing systems off of and what poultry fanciers strived for with strenuous breeding practices.
While the SOP still exists, it has been revised numerous times to reflect changes in breeds over time. The most recent SOP is currently in its 44th version.
The very first thing you need as an exhibitor is a copy of the most recent standard. This will let you know all the characteristics the judges look for when judging your bird and eligible breeds accepted by the APA.
If you already have the poultry you wish to show at the exhibition, compare it to them. If you don’t have your beginning stock yet, look for birds that match the SOP as closely as possible. You can start with chicks, but look at what confirmation and body type both of their parents had.
Finding a breeder who is already established with the APA and is an active exhibitor is good practice. I have learned so much just by buying stock from APA members. Usually, they happily pass on their knowledge to you regarding the breed they are selling.
The age of the fowl you plan on showing will also play a role. Poultry under a year old are in a different exhibition category than those over a year old.
A female younger than one year is referred to as a pullet, and a male is referred to as a cockerel. Hens and cocks are birds older than one year are judged differently from younger birds.
Paul Wishart/Shutterstock
Getting Ready
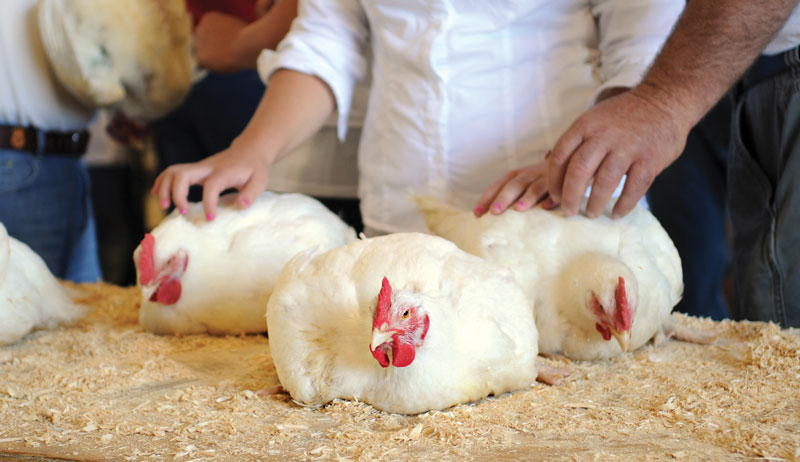
Whether you begin with grown hens and roosters or chicks, get your birds used to handling. Judges have to handle each bird. Having a calm bird during this time helps the judges see the bird’s conformation and attributes easily.
Also work with your birds so they feel comfortable being in a small place for a period of time. This is referred to as coop training.
Birds who have no experience with this are more prone to causing a large disturbance the first time they are in one. Your birds need to be calm and know that they won’t be hurt because they’re in a small area.
You can easily do this with a travel cage or a small to medium dog kennel.
Seek out Shows
Once you believe that you and your flock are ready, start looking for shows. Join local poultry clubs, look online and check out the APA’s website to find an exhibition. There are also youth shows available.
Most times, agricultural fairs will also have a club hosting a show. Each poultry exhibition may have a different way to register.
Check your SOP to see what category and/or variety your bird is included in. Do you have a bantam or large fowl? What color is your fowl? These are just two out of very many questions that you will answer on your entry form for the show.
Practicing good biosecurity will also help expedite your way into the show. Some shows will have a veterinarian on site to test your bird for certain transmissible diseases, but others won’t. You will have to show that your bird has been tested and is in good health within a certain amount of time before the poultry exhibition.
When the organization that’s hosting the show announces the poultry exhibition, many times they’ll have other articles of information that will relay all of this information to you.
The first day of the show may or may not be open to the public. It may be just a drop-off day. When you first arrive, you’ll most likely need to go to a check-in desk. The organization will already have assigned you a pen area where you can drop off your bird(s).
Arrive early to the poultry exhibition. Almost all shows that span over one day provide the bedding, water and feed while you’re at the show. Some shows also have representatives to ensure the food and water cups stay full.
A one-day show may not offer this. With waterfowl, they may or may not be provided a large container of water but a small cup. Take a larger container with you just in case.
The day of the poultry exhibition, I carry a small bag full of items to touch up my birds before a judge comes through. I keep petroleum jelly for their legs, wattles and combs. Cotton swabs and water are handy for nails and earlobes if they get dusty while penned. I also clean their nostrils with a cotton swab before they are judged.
A clean cloth and a toothbrush are useful if birds get their legs dirty. For fancy breeds such as the Silky, a toothbrush can help brush out any shavings or debris they get in their feathers. Some exhibitors use silk cloths to add sheen to their birds feathering.
You can also use baby oil in place of petroleum jelly.
Once your birds are all set up and comfortable, explore! Many shows have vendors and educational booths available. With your first show, nerves will be on edge, but try and enjoy it.
Make some contacts, talk to club representatives and volunteer.
Don’t miss your birds being judged. Watching your bird being judged is a great way to learn. If you can catch the judge afterward, ask him or her how they think you could improve.
glenda/Shutterstock
Everyone’s a Winner
After your bird is judged, the pen they are in will have a card on it. You may see some abbreviations on it. Besides the variety and breed of your bird, these abbreviations could be for the club.
But they also set the space for awards.
Just a few of the abbreviations are:
BB (Best of Breed)
BV (Best of Variety)
RB (Reserve of Breed, aka 2nd place)
RV (Reserve of Variety)
DQ (Disqualified)
Cham. (Champion)
Res. (Reserve, aka runner up)
After the show is over, you’ll see these abbreviations on your coop card. If the show has a ceremony, stick around to claim your awards.
Even after the show is over, you need to take some precautions. When you get home, inspect your bird. Ensure that they don’t have external parasites present. You’ll also need to quarantine your bird for 14 days after the show.
Watch for any signs of illness before you return them to their regular pen. While birds are tested, shows don’t test for all illnesses, and maintaining biosecurity is important.
With that, all that is left is a hearty congratulations!
Sidebar: Rub-a-dub-dub
About three to seven days before your show, you’ll need to wash your bird(s). This will help bring out their true feather colors and make them nice and neat for judging.
The first time you bathe your fowl, be patient. After their first few, most birds come to enjoy it. (Or they’ll tolerate it, at least.)
You’ll need to shampoo, rinse and allow them to dry. I have known some exhibitors to blow-dry their birds to speed that process up and give extra volume to the feather base. Other exhibitors just let their bird air-dry.
After they are dry, your bird will preen and restore its feathers to their natural shape. You can also add a little petroleum jelly to their wattles, combs and legs afterward.
This will help those areas shine and not look so dry when they are judged.
Keep them separated from the flock and in a very clean cage from this point until your show. With waterfowl, letting them bathe in clean water will suffice.
I often get the question about shampoos. Some exhibitors use Natural Enzymes chicken shampoo, others use Johnson’s baby soap (I don’t recommend this). I, personally, use Messy Mildred’s chicken shampoo.
Sidebar: COVID-19 Impacts
The pandemic shut down many poultry shows. Some do remain standing, with mask mandates and social-distancing precautions. COVID-19 hasn’t, however, negatively impacted poultry enthusiasm. If anything, it has driven poultry enthusiasm to a new record high.
Once the shows open back up, many new members will be joining the world of poultry exhibition. And to that I say, “Welcome!”
This article originally appeared in the July/August 2021 issue of Chickens magazine.