Categories
Beginning Farmers Crops & Gardening Farm & Garden

Trellis Your Garden Plants To Grow More In Less Space

The first question when you start to grow your goods up is: Why trellis garden plants in the first place? Well, there are four reasons.

1. Space

Trellising garden plants lets you grow horizontally and vertically, allowing you to grow far more food in far less space. 

2. Synergy

The well-known “three sisters” planting practice of Native Americans—combining corn, beans and squash—was a trellised system. The beans climb the corn. This lets the plants work together to each other’s benefit.

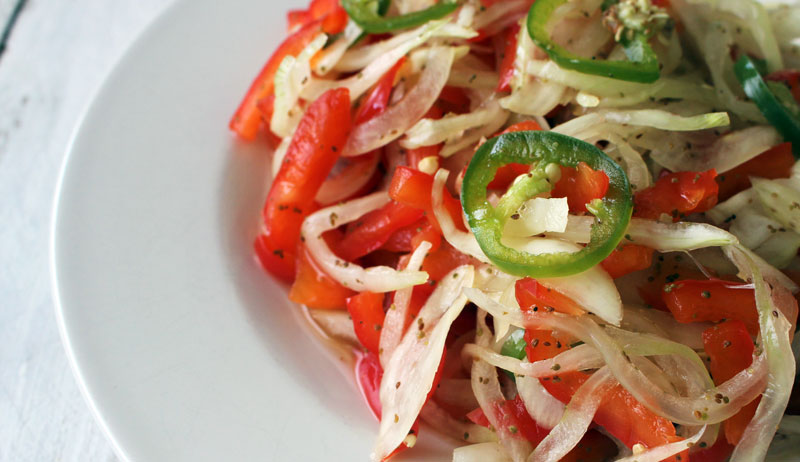
Trellising allows you to then take advantage of the space below trellised crops to sneak in additional stuff that will enjoy the shade created by the trellis crop.

Our trellis garden plants almost never occur alone. And we often get two or three other plantings below and around these slower, taller, longer growing plants.

3. Reduced Strain

Let’s face it. None of us are getting any younger! But bending down and over and getting on our hands and knees isn’t something that can easily be avoided.

However, if you are growing a great deal of food, it isn’t bad to reduce. Trellising moves plants up closer to where you naturally are, and cuts back on some farmer or gardener wear and tear.

4. Sickness

Moving plants off the ground reduces issues with pests and disease. The lack of direct ground contact with the soil for almost all the plant means soil-borne pathogens can only access the plant through the root system, greatly reducing exposure.

Ground-based pests also now have only one access point to attack the plant. 

trellis garden plants
John Moody

You Have Trellising Options

Trellising is scale-specific. What works well on a smaller scale—say a dozen or so plants—may not be appropriate or sensible for many dozens to hundreds. 

Cages were our first trellising system. It’s one that even some midsized farmers we are friends with used for many years. You can make your own cages out a number of materials, such as welded wire, concrete reinforcing wire (CRW) and many other materials. 

No matter what size wire you go with, make sure the holes are large enough to easily harvest the crop through! Nothing will annoy you more than realizing your peppers or tomatoes (or hands) are too large for the spacing the wire creates to access what is inside the cage. 

When we made our cages, we used CRW. We made most of them self-staking by cutting off the bottom rim, while leaving all the vertical wire points. This created roughly 6-inch-long stakes along the bottom (every 6 inches) for securing the cage. 

These stakes provided the significant support that light- and medium-weight plants—such as cucumbers, beans, peas, etc—usually require.

For larger, really leafy plants, it helped but was insufficient alone. This included tomatoes and peppers. 


Read more: Try the Florida weave trellising system for healthy tomatoes! This video shows you how.


Cages Work Fine

Cages often still require some additional support, at the ground and for the plant inside the cage. The looser your soil is, the windier your area is. And the heavier the rains are, the more you’ll want to reinforce or stake. 

There are a number of ways to do this. You can purchase premade stakes or make your own by bending spare wire, rebar or similar material. How big and deep your stakes should be depends on how loose your soil is and how large and heavy your plants are.

Looser soil and larger, heavier plants require more, deeper and larger stakes. 

You’ll still need clips or twine to train your plants to the cage (or to keep them centered and anchored) for peppers and other larger plants. 

How to Run Your Lines

One of the most common methods of trellising in the garden, especially for raspberries and similar plants, is horizontal lines between posts and end posts. You can also use this method for other plants (outside berry crops), such as tomatoes. 

For plants that grow a single main stock, single leader (vertical) lines suspended from above on pipes or supports can work well.

We like this method for peppers in our high tunnel, where wind isn’t an issue. But such an approach was a bust in the field. The peppers needed more protection and support because of strong winds or storms passing through our area. 

trellis garden plants
John Moody

Why You Should Try Horticultural Netting

This past year, as we have continued to expand the amount we grow, we decided to skip making more cages and try horticultural netting. For vining crops, especially cucumbers and cherry tomatoes, this stuff impresses.

Relatively easy to set up and work with, along with fairly durable, it made harvest easy, plants healthy and my son quite successful in his cherry tomato business. 

We used 8-foot T-posts with PVC Ts to hold the crossbars (extra purlins I had ordered to go with our tunnel or EMT conduit). The netting we hung by threading the pipe through it. We also provided additional support by using reusable zip ties to further secure the netting every few feet to the pipe. 

I had hoped to reuse the zip ties, but we learned that the immense heat they were exposed to in the tunnel on the metal pipes turned them into one-season wonders. You could also use good rope or twine to secure the netting to the cross bars instead.

Make Sure Your Spacing Is Right

Whatever you do, just be sure that your T-post spacing, pipe and ties are sufficient for the weight of the crops they’ll need to support. Once a crop is established, it’s difficult to add more support. 

Our T-posts were on 12-foot centers for the purlins and 8 for the conduit. This was the length of the purlins, and their strength was sufficient for that space.

The setup did well for cherry tomatoes, even with my son’s neglect of sufficient pruning. The netting did snag, but the pipes and setup otherwise performed superbly all season long under the growing weight. 

If you are using weaker pipe, you’ll need to use more T-posts spaced closer together. Another option in a high tunnel or similar structure is to provide additional support from above. Anchor the crossbars to purlins or other parts of the tunnel’s superstructure using rope to distribute the weight. 


Read more: You can grow pumpkins vertically, too! Here are some tips.


How to Trellis Those Nontraditional Garden Plants

If you’re really short on space, you can trellis certain garden plants that you may have never considered as candidates for such an approach. For instance, we have trellised sweet potatoes vertically up as well as vertically down.

We’ve gone over the sides of balconies, porches and similar landscape features.

This let us grow triple the number of plants in the same amount of space with about a 20 percent loss in yield per plant. So overall, we saw a net gain. It creates extra work, sure. But if you’re really tight on space, it’s something you may want to consider.

Melons and winter squash are usually not trellised but can be. You want to make sure you are working with smaller and, thus, lighter varieties. 

Also, if space isn’t a consideration, a few labor intensive trellising crops, such as cucumbers, don’t have to climb to the sky! We know a number of growers who mulch cucumber beds with straw or similar material, transplant and let them sprawl along the bed.

This saves big on labor. And the mulch reduces ground contact for reducing disease. It works just fine—even if it takes more space. 


Sidebar: Use Cattle Panels!

Cattle panels are just one of those oh-so-useful items to always have around. They make for a great trellis for garden plants such as pole beans, snow peas, tomatoes, peppers in rows (with panels on both sides or on a single side) and more.

You can use them for vertical trellis or bend the panels into arches or similar structures. This creates a lovely microclimate under the arch once the trellised crop is established.

Lettuce, spinach and other greens that can do well with dappled sunlight and cooler temperatures work well under the arch. 

Categories
Animals Crops & Gardening Farm & Garden Homesteading

You Can (& Should) Eat Those Hostas In Your Garden

Hostas are a favorite perennial plant for many gardeners because they thrive in shade. They also have many varieties of colorful, big, pleated leaves to choose from:

  • green
  • yellow
  • blue
  • variegated leaves with yellow or white stripes

Blue hostas stand up to drought better, and deer like to eat them less because the blue color comes from a thin coating of wax. At the height of summer, hostas (Hosta sp.) are crowned with white or violet flowers, some of which are fragrant and all of which are edible. 

Why Do Deer Like Hostas? (And Would I, Too?)

Deer inspired my first taste of hosta. I heard so many complaints from gardeners about deer eating their hostas that I wondered what the attraction was. So, when no one was watching, I took a bite of a mature leaf. 

After expecting some amazing deer-friendly flavor, I was a bit disappointed that it tasted not unlike spinach. I took two lessons from this experiment.

First, deer like mild flavors. (They avoid culinary herbs.) Second, people might enjoy eating hostas.


Read more: Ready to ditch the grass and garden your front yard?


Eat Your Hostas!

From Ellen Zachos, forager and writer of Backyard Foraging, I learned that farmers in Korea grow Hosta montana (a common plant in American gardens). The young leaves are an edible crop, like spinach or collards. 

In mid-spring, harvest the hosta shoots before the leaves unfurl. Snip off these tight rolls of young leaves just above the soil line. The shoots will look like a chiffonade of greens.

Chop them, stir-fry and serve as a side dish or over pasta or rice. Or get primitive. Slather the shoots with oil, salt and pepper. Then roll them around on the grill until they are slightly charred.

We all need a little more carbon in our diets, right?

You can also eat the mature leaves of hostas. They just need to be boiled for 15 to 20 minutes first. Japanese farmers also enhance the edibility of their plants by covering the new shoots to blanch them (lack of light makes the leaves white) and make them even more tender. 

If deer cause problems, harvest about a third of the shoots from each plant for yourself then spray with a deer repellent from an organic company called I Must Garden to keep the deer at bay.

In winter, dig, divide and replant your biggest hostas so there will be enough for everyone to eat. 

Categories
Beginning Farmers Equipment Farm & Garden Farm Management Urban Farming

10 Tips For Mowing Your Lawn The Right Way

Lawn mowing comes naturally to some people, while others just can’t cut it. You don’t need a green thumb to have the perfect lawn, but you do need to know the proper mowing techniques. 

1. Choose the Best Mower for Your Yard Size

Lawn mowers come in a “grass” of their own. Riding mowers are best for larger yards, but they don’t come cheap. Consumer Reports prices the average riding mower at $2,000 to $5,000. That’s not exactly chicken feed.

If you have more than an acre to mow, however, it’s well worth the cost and you’ll be saving a lot of time. 

Push mowers are actually the better choice for smaller lawns. They’re easier to turn and maneuver around trees and corners. If your yard is sloped or has a number of tight spaces, a smaller push mower is the way to go.

Push mowers will also save you a lot of green. The average one costs about $420. 

If you want to work off some pounds, an old-fashioned push reel mower only costs about $75. A Harvard University study estimates the average person burns about 350 calories an hour using a reel mower.

A gas or electric push mower only burns about 280 calories an hour. 

2. Mower Maintenance Is Critical

Before you start your engine, make sure your mower is in good shape. Dull mower blades can harm your lawn by tearing the grass blades and leaving it vulnerable to disease and fungi. 

“You’ll know your mower blade is dull within two days after mowing your lawn,” says University of Illinois extension agent Richard Hentschel. “Shredded grass turns brown and strawlike. The shredded blades can’t heal, inviting disease to invade the plants.”

A clean cut is better for the lawn and encourages the grass to grow back thicker and healthier. Hentschel points out that sharper blades speed up the mowing and are better for the mower engine.

You can buy a mower blade sharpening kit for about $10 or take your mower to a maintenance shop where they can clean it, sharpen your blades and change the spark plugs.

Proper mower maintenance should be done every year.


Read more: Does your lawn mower need new blades? Here’s how to check (and what to do).


3. Check the Lawn for Dangerous Items Before Mowing

Now that you’ve got your mower in tip-top shape, the last thing you want to do is run over a large stick or rocks. More than 6,000 people are injured every year in lawn mower accidents. More than half of those injuries are due to flying projectiles.

Those flying rocks and toys can also break your windows and damage your mower blades. 

lawn mowing mower
mwesselsphotography/Shutterstock

4. Where to Start Mowing Your Lawn

It’s best to start by mowing around the perimeter of your yard. Take two passes around the edges, which will make the job go faster. 

Next, hit the slopes. The uneven parts of your yard are the toughest, so it’s best to tackle them first. If using a riding mower, you want to position the mower horizontally to avoid tipping over. It’s best to position a push mower parallel to the contour of the slope. 

Avoid mowing too close to trees, flowerbeds and playground equipment. You can always go back with a line trimmer later. 

5. Don’t Cut Too Short!

Yes, cutting your lawn short means you can cut it less often. But you don’t want to give your lawn a mow-hawk.

The rule of thumb is to only remove one-third of your grass in one mow. Even if you’ve neglected your lawn and let it grow too long, taking any more than one-third off the top at a time will stress the blades.

The exact best height of your grass depends on the grass type. 

lawn mowing mower

6. Leave the Leaves &
Grass Clippings

Don’t waste your time raking and bagging those leaves and grass clippings. Today’s mowers will mulch the leaves and clippings, which is better for your lawn. The nutrients from the clippings return nitrogen to the soil and help control weeds naturally. 

You’ll save yourself some work. And you’ll save the environment by keeping the yard waste out of the landfill and not having to use fertilizer. 

7. Get the Creative Juices Growing

Nothing says you have to mow in a straight line. By attaching a lawn roller, you can stripe or mow a checkerboard pattern into your lawn. Give your yard an athletic-field look or fancy design by letting the grass grow a little bit longer and use the turf as your canvas. 

Even if you’re not looking to create an artistic masterpiece, vary the direction with each mow. That way, you don’t wear grooves in your yard, and you force the blades to reach up toward the sun instead of bending. 


Read more: Not into lawn mowing? Here’s how you can ditch the grass and plant a garden instead.


8. When Is Best Time to Mow?

You want to avoid the heat of the day, without annoying your neighbors. Mowing after 10 a.m. ensures the dew on the grass will have evaporated.

Mowing too early while the ground is wet could tear the grass blades. And mowing when it’s too hot could stress the grass. 

lawn mowing mower
Courtesy Grasshopper

9. Safety Matters

Lawn mowing is not child’s play. You’re working with a powerful piece of machinery with sharp blades. More than half the injuries we talked about earlier involve young children, so keep kids and pets inside while you mow.

Also, make sure you’re wearing close-toed shoes.

10. Consider Alternatives (Like Goats!)

Don’t mow yourself in a corner. You don’t have to use a machine to trim your lawn.

Consider “hiring” a four-legged team to nosh on your grass. A herd of goats can get the job done slowly. Spanish goats make excellent foragers. Sheep can also help you control weeds. You just have to be careful the animals don’t have access to toxic weeds. 

This article originally appeared in the May/June 2021 issue of Hobby Farms magazine.

Categories
Crops & Gardening Equipment

A DIY Farm Tool For Measuring Seed Planting Depth

Sometimes, the best tool for a job isn’t the one the buying guides recommend. It’s the one you create yourself, A DIY farm tool crafted to serve your exact needs and requirements.

I’ve spent the spring planting raised garden beds filled with watermelons, pumpkins and corn. As any gardener knows, the planting requirements of different seeds can vary widely.

How far apart should they be planted? Should they be planted in rows, or mounds? And—perhaps most importantly—what’s the correct seed planting depth for each seed?


Read more: Here’s an accurate way to calculate your soil needs for a raised bed.


Planting Depth Really Does Matter

Carefully measuring the seed planting depth is important if you want to give your seeds the best chance to succeed. Plant seeds at the wrong depth, and they might fail to germinate. Or they could grow poorly once they do.

So how do you measure planting depth? Well, you could prepare holes and measure them one by one with a small tape measure or ruler. But this is slow and unwieldy if you’re planting a lot of seeds.

Instead, I recommend following the example set by my mother. She constructed a specific, DIY farm tool that simultaneously prepares the holes and measures them to the correct seed planting depth.

How Does The Tool Work?

How does it work? It’s remarkably simple.

Many years ago, my mother took a straight bamboo pole approximately 6 feet long and 1/2 an inch in diameter. She reasoned this could be inserted into the ground to push down soil and create holes for seeds.

At the bottom of the pole, she attached a clothespin. Its exact placement depended on the depth of the hole to she needed to prepare.

If the hole needs to be 1 inch deep, the clothespin is attached 1 inch from the bottom. Thus, all you have to do is insert the bamboo pole until the clothespin contacts the ground. You then know the resulting hole is exactly one inch deep.

My mother has used this bamboo pole planter for years. It does the job well and offers a couple of other advantages, too.

For one, you can prepare holes while standing, which saves some wear and tear on your back and knees. For another, the pole can be used to push seeds straight into the ground when preparing holes is tricky.

If your soil is crumbly and the holes want to backfill as soon as you remove the bamboo pole, you can drop the seeds into the semi-filled holes and push them down to the correct depth with the bamboo pole. Or, you can simply place the seeds on top of the soil and push them down with the pole, creating the hole and planting the seed at the same time.


Read more: Take the DIY challenge and craft your own farm tools from what nature provides.


You Can Use What You Have

A bamboo pole and a clothespin aren’t the only items you can use to create this simple DIY farm tool. While bamboo poles are ideal for their straight and lightweight nature, any stick of the correct height, diameter and shape can be used.

And in place of the clothespin, any readily adjustable seed planting depth indicator can be called into service.

As I write this, I’m happy to report my pumpkin, watermelon and corn plants are growing happily. Clearly, their seeds have responded kindly to being planted at the correct depth.

This I owe entirely to my mother’s invention of the bamboo pole planter.

Categories
Animals Large Animals

Hereford Hogs Are An Exceptional Heritage Breed

Mahogany red Hereford Hogs exhibit a white head, ears, legs and oftentimes belly. And the breed enjoys a great reputation for its exceptional meat quality.

The History of Hereford Hogs

This heritage breed’s historic roots go deep in the U.S.

R.U. Webber of Missouri is said to have initiated the first strain during the 19th century, but little was shared on his exact mating. Then, around 1920, breeder John C. Schulte from Iowa developed a strain to match his Polled Hereford Cattle. A group of breeders in Iowa and Nebraska then joined in a cooperative effort to establish the Hereford Hog breed.

They each brought definite goals as to the type, color, conformation and other favorable characteristics in breeding stock. They started by using Duroc and Poland China bloodlines to a considerable extent. Then, through crossing, interbreeding and line-breeding, Hereford Hogs emerged.

In 1934, 100 animals were selected as foundation stock for the newly established National Hereford Hog Association. Today, the association registers about 5,000 head per year, with pigs reported in all 50 states and even abroad.


Read more: Trying to choose the right pig for your farm? We’re here to help!


Hereford Hogs Are Gentle, Hardy Animals

Hereford Hogs possess a gentle disposition and are easy to handle. Their mild temperament makes them great show animals. Hogs reach 200 to 250 pounds by 5 to 6 months of age, and sows mature at about 600 pounds.

Mothers generally produce big litters.  

Hereford hogs, hardy animals, do well on pasture and adapt to a variety of climates. Though they gain slower than other hybrid breeds, Hereford genetics offer many advantages to meat quality. Specifically, their pork boasts exceptional marbling and a neutral pH, which produces a darker red meat.

Meat quality combined with the uniqueness of the breed make Herefords an easy choice for making direct-to-consumer sales.

To learn more, contact Certified Pedigree Swine at 309-691-0151 or cpspeoria@mindspring.com. Or visit www.cpsswine.com for registration forms and a list of shows and sales. 

Categories
Animals Large Animals

Normal Livestock Hoof Anatomy & Basic Maintenance

Many people know the saying “No hoof, no horse.” That axiom, it turns out, does in fact hold water. An average horse weighs one-thousand pounds and spends the majority of its time standing and moving. So foot integrity is vital to a horse’s well being.

The same could also be said for our other hooved livestock species, like cattle, sheep and goats. Let’s take some time to explore the hidden world of livestock feet. We’ll start with normal anatomy and function, and later delve into what can go wrong in a three-part series.

About Livestock Hoof Structure

For starters, the hoof is just the name of the outside capsule. This hard structure is made of keratin, which is the same compound that makes up our hair and nails. And like our hair and nails, the hoof itself doesn’t have nerves and can’t feel pain.

Although the hoof is rigid, it can respond to outside forces. It will expand and contract with environmental moisture and acts as a shock absorber during movement.

Hooves grow from the top, from sensitive tissue called the coronet band. It is also connected to tissue on the inside.

The hoof itself is a hollow structure. Inside is a bone that is suspended by an intricate mesh of Velcro-like tissue called laminae. This laminae not only connects the bone of the hoof to the inside of the hoof wall, but also provides the bone nourishment via numerous tiny capillaries.

In horses, the hoof bone is called the coffin bone or pedal (pronounced “pee-dal”) bone. Anatomically, it is the distal or third phalanx, often shortened as P3. It is the equivalent of the tip of our middle finger.


Read more: Need tips for trimming goat hooves? Check these out!


How Does A Livestock Hoof Grow?

Of course ruminants have two hooves on each leg. And perhaps because of their slightly curved shape, the hooves individually are referred to as “claws”, such as the “lateral claw” or “medial claw” when talking about the outside or inside hoof, respectively, on a leg.

These are equivalent to the tips of our third and fourth fingers.

A healthy adult horse grows new hoof at the rate of between 1/4 to 1/2 inch per month. This means a horse will regrow its entire hoof wall over the course of about a year. Bovine hooves grow a bit slower, at a rate of approximately 2 inches a year. But, then again, a cow’s hoof isn’t as tall as a horse’s hoof.


Read more: When it comes to keeping sheep, you need a first-aid kit. But avoid using it with basic preventatives.


Some Species Need Trimming

Hoof wear and tear does occur as the livestock animal moves around in the field. But some species and classes within species tend to require regular hoof trimming.

Farriers are individuals skilled in trimming and shoeing horse feet. Specialized trimmers, on the other hand, frequently are asked to trim the hooves of dairy cows. Many beef cattle do not require as much hoof maintenance as they are typically kept on large pastures as compared to many dairy breeds that are kept in barns.

Regular foot trims are also recommended for sheep and goats. With these species, as well as with llamas and alpacas, you can typically do this yourself with proper hoof trimmers.

Like with cutting your own fingernails, there is danger of cutting the hoof too close to sensitive tissue and causing pain. A good rule of thumb is to nip away the overgrown hoof that has folded over the sole. Then, clean the foot and nip until you see bright white sole.

Stop once you reach this point.

Stay tuned for next month, as we look deeper into what can go wrong with a hoof and how to prevent common hoof issues.

Categories
Crops & Gardening Farm & Garden

Air & Water Are Critical To Garden Soil Fertility Management

When it comes to soil fertility management for gardens and market gardens, I like to divide it into three groupings.  These three groupings follow the stages of preparing land for garden using tools, two-wheel tractors or 4-wheel tractors. 

  • In essence, the primary land preparation is when we first turn field or lawn into new plots.
  • Secondary land preparation, then, occurs when we form and finish new garden beds.
  • Finally, we subsequently refinish as we seasonally recreate gardens for succession planting. 

In this article and the following two, we will explore the types of fertility that can be used at different stages. We’ll also look at why and how to apply them.

We will also look in more detail at the final stage, as this is the steady-state land management phase. At this point, the garden is finished and we are in mode of operation, planting and maintaining garden space over many years.  In this stage, the management of fertility is much more linked to the crops we grow in rotation.

This is opposed to what we in the first two stages, when fertility management is more greatly linked to the initial formation of garden soil (stage one) and the fine-tuning of quality top soil (stage two).


Read more: What is soil, and how does it actually grow plants?


How Does Soil Work?

Before we get into the discussion of the stages of soil fertility management, let’s review how soil works. This is, after all, the foundation of fertility management. 

It is important to understand soil holistically, as it is a mixed composition of:

  • 45 percent mineral material (sand, silt and clay particles)
  • Approximately 5 percent organic material (rotten, decomposed plant and animal residue and manure)
  • 25 percent air
  • 25 percent water  

When we look closely at a pie chart of soil with these percentages, we can see an interesting fact. Soil is about 50 percent pore space! 

That 25 percent air and 25 percent water require 50 percent of the soil to possess a porosity that it can fill. Water mostly fills what is termed “macro pores”, and air in what is termed “micro pores.” 

The significance of soil porosity to hold air and water is best understood from the point of view of the fifth component of soil, which has no percentage for it moves freely through all the element of the pedosphere. 

What’s this fifth component? Soil life!

Air & Water Feed & Sustain Beneficial Microorganisms

Air and water are consumed by living organisms. They act as a transport network them as well. 

Air and water are essential ingredients into the decomposition process that soil creatures contribute to, as well. This is true for larger arthropods that help shred leaf litter and vegetable plant debris. It’s also true for nitrogen-fixing bacteria that bring nitrogen into the soil to help balance with carbon and to micro-compost below the surface. 

Air allows aerobic (oxygen-requiring) organisms to survive. That’s important, because many of these organisms are essential for healthy soil to function. 

Water, in turn, moves nutrients around so they can be taken up by plants.  Indeed, plants receive nutrients not in their solid mineral form, but rather as part of a soil water solution where the nutrients are dissolved. (Think about salt in a cup of warm water.) 

As such, the soil is in a constant dance. Microorganisms build new pore space through tunneling. They contribute to decomposition rates. And they fix, cycle, store and release nutrients to the plants above. 

As such, the quality of the soil is as much a factor of a welcoming habitat for soil life as a product of a healthy soil ecosystem.  


Read more: Build your soil naturally with probiotic farming. Here’s how to start.


Making Good Soil Means Building Soil Life

What this all comes down to is a a pair of simple statements.

  1. When we start to build new gardens (in the primary and secondary stages), we want to initially improve soil so it can be actively colonized by soil life.
  2. And then, in the third stage, we want to keep feeding the soil so the soil ecosystem can actively maintain quality soil for our garden plants. 

The goal is to create good aggregation in the soil. This way, the soil has a healthy composition of mineral, organic matter, air and water.

Well-balanced soil serves as a good home for arthropods, bacteria, fungi and other beneficials.

Grow on,

Zach

Categories
Food Recipes

Recipe: Fermented Onion Pepper Relish

This fermented onion pepper relish is a welcome condiment at any grill out. It’s great on sandwiches and burgers, mixed into tuna, stirred into pasta salad, or topped over tacos. 

Yield: 1 wide mouth quart jar 

Ingredients  

  • 3 cups onions, thinly sliced (I prefer yellow onions, but you can use white or red) 
  • 2 cups red bell peppers, thinly sliced 
  • 1/4 cup jalapeño peppers, thinly sliced 
  • 1/2 tsp. celery seed 
  • 2 cloves fresh garlic, minced 
  • 2 tsp. kosher salt 

Read more: Check out this recipe for simple fermented table radishes!


Process

Clean and chop ingredients, and mix them together with celery seeds. Sprinkle salt over the mixture and stir well 

Pack clean quart canning jar with prepared ingredients, leaving 1 1/2 inches of headspace (room from the top of the veggie mixture to the rim of the jar. A brine will naturally be created as the salt pulls liquid from the produce.

Use the back of a spoon or your clean fist to pack the ingredients tightly into the jar. If you have a small fermentation jar weight, add it to the jar to hold down the produce under the brine.

Wipe off the rim of the jar with a clean dampened towel. Add the Mason jar canning lid and tightly screw on the ring. 

fermented onion pepper relish
Stephanie Thurow

Fermentation

This relish recipe is a four-to-five-day ferment. Ferment at room temperature, ideally between 60-75 degrees F (15-23 degrees C) and keep out of direct sunlight.  

Check on the ferment daily to make sure the brine is covering all the produce. If the produce has floated above the brine level, use a clean utensil to push it back below the brine or scoop it out and discard.  

Burp the jar daily. Unscrew the lid briefly and tighten it back on to allow any built-up gas to release (and avoid possible jar breakage or the ferment from overflowing). 

Once fermentation is complete, transfer the jar into the refrigerator, with the brine and all. 

Fermentation does not stop once the ferment is transferred to the refrigerator, however it does slow the process way down. The taste and texture will continue to change, therefore this ferment is best enjoyed within six months. 


Read more: Want more like this in your inbox? Sign up for our email newsletter!


Side Notes 

If you do not have a glass jar weight, you can improvise by using an easily removable small food-grade glass dish that fits inside the jar. Or, if you have a smaller glass canning jar that can fit into the mouth of the jar you are fermenting with, you can use that to keep the produce pushed under the brine. 

If you are unsure if your water is safe for fermentation, you can boil it and allow it to cool to room temperature before stirring in the salt to make your brine. 

You may substitute fine sea salt instead of coarse kosher salt if you prefer. The measurement will remain the same for this fermented onion pepper relish recipe. 

This recipe has been adapted from Can It & Ferment It (expanded 2020 edition) with permission from Skyhorse Publishing, Inc. 

Categories
Beginning Farmers Crops & Gardening Farm & Garden

An Upcycled Roadside Flower Cart Holds Pride Of Place At Peace Garden Farm

“One winter while planning for our planting season, the idea of a roadside flower cart came into my head,” says Chantal Alexy, who runs Peace Garden Farm. Situated on the edge of the Catskill Mountains region in New York, the flower-focused venture’s name was inspired by the original 1969 Woodstock festival, which took place in the nearby town of Bethel.

Since initially starting out growing a garden, Alexy and her husband have built up Peace Garden Farm. Here, visitors and customers delight in picking seasonal blooms and bouquets from their upcycled roadside flower cart.

We spoke to Alexy about her gardening roots and the joy of summer blooms. We also touched on the bliss of sunset moments in the garden.

Getting into Homesteading


View this post on Instagram


A post shared by Chantal (@peace_garden_farm)

“Growing up, my parents always had a huge vegetable garden where they grew most of their own produce,” recalls Alexy of her interest in gardening and homesteading. “My mother was an avid flower gardener. So growing things has always been in my blood.”

Alexy adds that her family’s hobby fam has evolved naturally over time. And one of her children being diagnosed with severe food allergies served as partial insipration.

“Feeling unable to trust the industrial food system, we planted our first vegetable garden so we had a little control over the safety of the food we were eating,” she explains. “It just grew from there!”


Read more: Check out these garden tips and tricks for each season.


Focusing on Flowers


View this post on Instagram


A post shared by Chantal (@peace_garden_farm)

Flowers play a central role at Peace Garden Farm, which includes a roadside flower cart that displays the current blooms. Alexy says the roots of the flower focus came after her husband planted “a massive amount of sunflowers” which he’d cut and sell at weekend farmers markets and local small businesses.

“Meanwhile, I was growing lots of other flowers in my gardens and saw the potential of selling mixed bouquets,” she explains. “Every year we increased our planting to sell more.”

After Alexy had the idea of starting a roadside flower cart, she says “I knew it was something we had to try” due to the fact “there wasn’t anything like that in our area.”

Spotlighting Sunflowers & Zinnias


View this post on Instagram


A post shared by Chantal (@peace_garden_farm)

When it comes to customer favorite flowers, Alexy says that cheerful “summer blooms like sunflowers and zinnias” are always a hit. “They are arranged to put smiles on peoples’ faces with a variety of bright colors,” she adds.


Read more: Grow these old-fashioned flowers for something new in the garden.


Seeking Sunset Serenity


View this post on Instagram


A post shared by Chantal (@peace_garden_farm)

“Every year there are struggles like bugs, weather or crop issues,” says Alexy of running Peace Garden Farm. “It’s a lot of hard, back-breaking work. But it is so very satisfying and I can’t imagine doing anything else.”

To balance out the work, you’ll find Alexy spending evenings walking through the flower field and garden. “It’s how I relax, where I find peace in the chaos of this world and stay connected in my faith,” she says. “Just being around the plants that are growing—especially at sunset—can turn a bad mood around.”

A Homesteading Life


View this post on Instagram


A post shared by Chantal (@peace_garden_farm)

“Homesteading, for us, is just what we do,” says Alexy, summing up the most rewarding part of her family’s lifestyle. She says they find joy in winter days spent planning and preparing the rest of the year’s food plans.

“There’s the orchard we planted and the many berry bushes,” she explains. “We have our own fresh eggs from the chickens and enjoy the bug control and entertainment we get from our flock of Guinea hens. We really can’t imagine living any different way.”

Follow Peace Garden Farm on Instagram.

Categories
Beginning Farmers Crops & Gardening Farm & Garden

Weed Suppression Methods To Build Better Soil

Whether they’re establishing new perennial beds or planting row crops, plenty of gardeners have come to rely on rolls of specially manufactured weed barrier fabric to minimize the need for weed pulling and to keep the garden looking tidy.

Typically woven from polypropylene, some of these products contain recycled content. And they certainly are convenient.

However, in the long run, they’re not doing the soil much good. Fortunately, there are many other ways to manage the weeds. These ways not only improve soil quality but also keep harmful greenhouse gases on lockdown.

Letting the Soil Breathe

“Weed barrier isn’t cheap. It can actually add up quite quickly,” says Acadia Tucker, a climate activist and the author of Growing Good Food: A Citizen’s Guide to Backyard Carbon Farming. She also operates a 10-acre farm and swears by good old-fashioned cardboard. 

“The reason I like cardboard so much is because it does decompose. And it actually feeds the soil organisms, which help to increase the carbon content and sequestration ability of the soil,” she says. “It’s also free!”

She hits up supermarkets and hardware stores for the resource. “I get cardboard that isn’t glossy and that doesn’t have any labels or tape on it,” she says. “Oftentimes, they invite you to take as much cardboard as you need, because they have to pay to dispose of it. I use that to my advantage.”

Most landscaping fabric allows some moisture—but little oxygen or light—to penetrate it. It’s also designed to remain intact for multiple seasons. Cardboard, on the other hand, gradually breaks down and doesn’t inhibit microbial activity. 

 “The key thing for me is the addition of organic matter—whatever that organic matter is,” Tucker says. When she’s not using cardboard to keep weeds down, she relies on an extra-thick layer of mulch to block sunlight. She also applies compost at least twice per year.

“Feeding the soil makes it better at its job of sequestering carbon,” she says. “The more organic matter in the soil, the more soil organisms it’s going to support, and the more carbon it’s going to sequester.”

weed suppression control natural alternative
Acadia Tucker

Try the Wine Caps

Tavis Lynch also sees utility in cardboard—only he’s taken his weed suppression game to the next level. The field mycologist and author of Mushroom Cultivation: An Illustrated Guide to Growing Your Own Mushrooms at Home pairs cardboard, mushroom spawn and wood chips or straw to grow wine caps.

“I prefer to use cardboard that doesn’t have a lot of ink on it, because some of that may not get broken down by the enzymes present in the Stropharia mushroom,” he says.

The edible mushroom, Stropharia rugosoannulata, has an asparagus-like taste and texture. At 30-percent soluble protein by weight, it’s also a respectable meat substitute.

“The advantage of the wine cap is multifold: weed suppression [and] soil quality improvement [and it’s] easy to grow,” Lynch says. “Gardening with wine cap mushrooms increases soil aeration, improves soil structure and water penetration. And we’ve got a protein source and a beautiful mushroom.

“If nothing else, they’re really fun to look at.”


Read more: Did you know you can grow mushrooms on compost? Here’s how to get started.


The Process

Lynch usually introduces wine cap mushroom spawn in the spring within his perennial flowerbeds. To start, he cuts out sections of the cardboard to permit his established perennials to pass through. 

“The cardboard is blocking all sunlight from the ground. And then I just loosely cover it with [spawn-inoculated] wood chips or straw,” he says. “All the weeds are being completely killed underneath that. But at the same time, the cardboard is being broken down.”

He keeps the mushroom spawn moist through the spring and summer and then? “The weeds aren’t going to start growing in the fall. But your mushrooms will, and your cardboard is gone,” Lynch says.

Weed suppression aside, wine caps are also handy for garden cleanup. “If you have old straw that you want to clean up, I have seen a small bag of wine cap mushroom spawn turn a 50-square-foot-by-1-foot-thick heap of straw into 18 inches of usable, black dirt in one season,” he recalls. “And all they had to do was keep it wet.”

Cover Up

Of course, there are even greener weed suppression methods available. Planting sections of the garden in traditional cover crops can be a great way to outcompete weeds, boost soil fertility and improve soil structure. Leguminous cover crops such as field peas, crimson clover and hairy vetch naturally boost soil nutrients by taking nitrogen from the air and fixing it in their roots.

Once the plants die back, their roots eventually make that extra nitrogen available in the soil. Cover crops also aerate the soil and support myriad beneficial bacteria, fungi and other deep soil dwellers. 

According to Ashley Louise Miller Helm­holdt, soil that is planted with cover crops “has an increase in slow-release nutrient reserves, and it can hold more water.” Miller Helmholdt serves as adult program leader for the Cornell Garden-based Learning Program, Cornell Cooperative Extension.

In fact, that ability to retain moisture can even help to protect area watersheds. 

“Large precipitation events leach fertilizers and nutrients from our soils. These run into our storm drains, go down to our local bodies of water and contribute to things like harmful algal blooms,” Miller Helmholdt says. “[Overwintering cover crops] take up nutrients at the end of the growing season that would otherwise be lost to leaching.”

The Trouble with Tilling

Still, when it comes to cover crops, Tucker has one caveat. “One of the ways people deal with cover crops is they just rototill them into the soil. But if you’re going to have to rely on a rototiller, you’re kind of taking one step forward and two steps back,” she says. “We want to focus on a no-till or reduced-till frame of mind.”

Tilling spent cover crops into the soil disrupts its root zone and the beneficial ecosystem flourishing within it. “When the plant does die and the roots are left in the ground, that injects organic matter into the soil deeper than if you were to just top-dress it with compost. So it helps to sustain the natural cycle of things,” Tucker says.

“Some cover crops, if you cut them or mow them enough, they’ll kind of run out of energy. That’s a way to keep the tillage to a minimum,” she adds. For small areas, regular, aggressive trims with a weed wacker can be sufficient to keep cover crops from setting seed.


Read more: Organic no-till growing is good for you and your land.


Beyond the Usual Suspects

Actually, as long as the soil is adequately covered, nearly any kind of plant can help with weed suppression. “You can plant different things at different times in order for there never to be bare soil,” Miller Helmholdt says. 

Just why shouldn’t soil be bare? “Having plant roots holding soil in place will help prevent that really rich topsoil that you work so hard to build from getting washed away with heavy rains or blown away by the wind,” Tucker says.

“And, as soon as that soil is washed away, all of that carbon is exposed to the air. It just becomes CO2 again.”

“In the realm of home gardening, there needs to be more experimentation,” Tucker says. That could mean planting loads of radishes, kale or even dwarf marigolds between crop rows and in other weedy spots. For her part, Miller Helmholdt sometimes controls weeds and protects her garden soil with succession plantings of lettuce. 

“If you’ve got that spare patch of soil, plant a bunch of annual cutting flowers that year. Then next year it’ll be ready for your lettuce or something like that,” Tucker says. “Try to tie function in with the cover crop.”

“You also can underseed,” Miller Helmholdt says. In other words, rather than wait to remove a spent crop before planting your subsequent weed suppression material of choice, direct-sow seeds all around the old crops.

“[The new seedlings] will provide that slow-growing green mulch underneath your … crops until you are ready to take them out.”

Seeing with New Eyes

Provided they aren’t noxious, invasive or crowding out cultivated plants, it also can’t hurt to leave some weeds well enough alone. Particularly, look for those that flower in very early spring or late fall, since they offer pollinators much-needed sources of nectar and pollen when there’s little else to be had. 

“You can kind of select for the weeds that you find useful, too,” Tucker says. “It’s hard to find the value in, say, a California thistle. But then you have purslane, which is a common weed all over the place. And it’s edible.

“Once you find a good use for weeds, then you start to look at them as if they were any other kind of vegetable in your garden. And, if you can prevent your weeds from going to seed, then having them as a green mulch really isn’t a problem.”  

This article originally appeared in the May/June 2021 issue of Hobby Farms magazine.