“The most important lesson learned from the farm is patience,” says Rhonda Kaiser, a certified Texas Master Gardener who runs Southern Home and Farm. “Farming and gardening are definitely trial and error. Every gardening zone is different, so you have to find what works best for you in your area.”
Pointing to her rural roots, Kaiser says that gardening has always been one of her passions. These days, she finds “peace of mind knowing how [my] crops and vegetables have been grown,” along with the accomplishment of nurturing seeds and watching them “blossom into thriving productive plants.”
“Gardening is my escape,” she adds. “It makes the world a more beautiful place!”
We spoke to Kaiser about repurposing vintage objects in the garden and the importance of thinking vertically when using your outdoor space. We also got the scoop on growing vine candy.
Originally, Kaiser says she was inspired to build on her love of gardening and follow in the footsteps of her husband’s grandmother, who owned a flower store in Bishop, Texas.
“Those paths led to a love of landscaping, which culminated in a Texas Master Gardener certification and landscape design classes through my alma mater, Texas A&M University,” she explains. “Someone recently asked me how I knew so much about gardening and I realized it was the development of years of schooling, in both experience and academia.”
When asked about early lessons for beginner farmers, Kaiser says that learning to appreciate the importance of patience is key. It’s also crucial to realize that your approach to working with the land will evolve over time.
“Follow experts in your area and never be afraid to ask questions,” she says. “That is how I learned some of my best techniques.”
If your own gardening plans often seem constrained by a lack of space, Kaiser recommends starting to think vertically.
“Use items such as bean towers, A-frames, obelisks or trellises to optimize space,” she says. “You can even use arches to grow crops such as squash or cucumber. You don’t need to spend a lot of money—simple cattle panels formed into an arch shape [and] secured with garden stakes will do the trick.”
Kaiser also suggests embracing raised beds and pots. “The key to raised bed gardening is nutrient-rich soil,” she explains. “Plants will never thrive without a solid foundation. Think of the old gardening adage: Never put a $10 plant in a $2 hole.”
“Regarding repurposing, I have used items such as vintage toolboxes, grain buckets, pottery jars and even an old pair of my father’s cowboy boots as containers,” says Kaiser when asked about some of the objects featured on her Instagram feed.
“I have also used antique bed frames for flower and herb beds,” she continues. “Other vintage items that make for unique planters include farmhouse sinks, vintage bed springs mounted vertically to hold a variety of small pots and small chicken coops. Vintage metal items, such as chairs or antique bicycles, can be used as climbing surfaces.
“Chicken wire can also be fashioned into any shape for a climbing surface as well.”
When it comes to favorite crops, Kaiser points to tomatoes first, followed by asparagus.
“We grow multiple tomato varieties,” she says. “I love to use them in sandwiches, soups and stews. My favorite variety is Sweet 100 cherry tomatoes. They produce many tomato clusters and are known as vine candy for their sweet, sugary flavor. They best way to eat those is straight off the vine!”
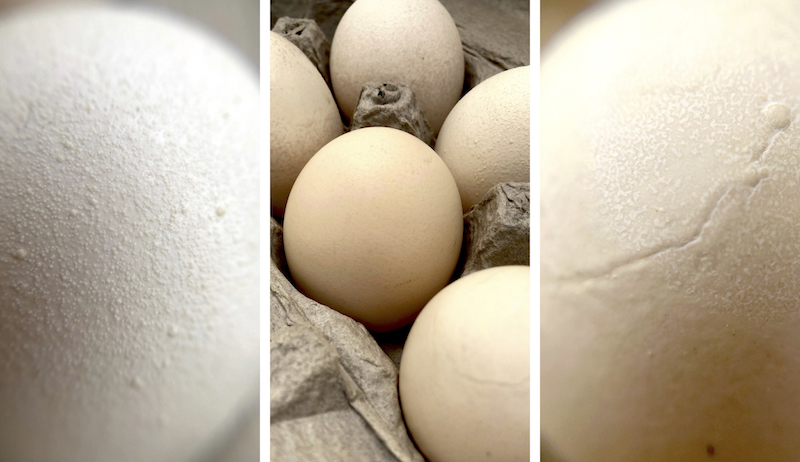
Over the years, most of my hens have laid perfectly respectable eggs, complete with smooth, hard shells. But a couple of them have produced eggs with oddly textured surfaces. In the case of one particular hen, every egg she lays includes the same pronounced ridge. And, once in a great while I’ve found egg-like “water balloons”—eggs missing their shells entirely.
Of course, it takes time and a lot of energy to make a proper egg. Plenty of things can go wrong along the way. While some eggshell anomalies are no big deal, others may indicate a problem with your hens’ health, diet or environment.
After a hen releases a yolk from her ovary, she adds the egg white in a portion of her oviduct called the magnum. Next, it enters the isthmus. This is where the inner and outer shell membranes are placed around the yolk.
The egg’s last stop is the uterus or shell gland.
“This is where she spends about 20 to 23 hours putting on the outer shell,” Butcher says. “So, if you ever see an egg that’s laid without a shell, you’ll see these two membranes around it. They’ll be rubbery or leathery with no shell.
“That means the hen released her egg at this stage before she could put the shell on.”
According to Butcher’s work “Concepts of Eggshell Quality,” eggshells typically contain a little over two grams of calcium, and most laying hens need at least four grams of calcium each day.
Eggshells are also made up of phosphorus, magnesium and trace amounts of sodium, potassium, zinc, manganese, iron and copper. A lack of essential nutrients—especially calcium—is one of the most common causes of missing or flawed eggshells.
“A lot of people kill their chickens with kindness, so to speak,” Butcher explains. “People may have bags of commercial layer feed, but they’ll also throw in all kinds of treats. And, just like any little kid, if you give the kid a choice of eating a good, nutritional plate of food or put a bunch of treats around, he’s going to eat all of the treats.”
Offering goodies like cracked corn and mealworms occasionally is great—just don’t let your chickens overindulge. “If they fill up on these, then they’ll be nutrient-deficient,” he continues. “This leads to problems with eggshells, egg size and things like that.”
Summer Heat
Chickens’ appetites also may wane during hot summer days. This, in turn, can affect their overall egg production and their eggshells.
“If they really cut back on how much they eat and they’re not getting what they need, you’re going to pretty quickly see eggshell weaknesses,” Butcher says. “You’re also going to see egg size get smaller, because they’re not getting the protein, which makes [eggs] bigger. And they’re not getting the calcium, which makes the shell better.”
Rough Shells
I have one beloved, ancient hen who still lays eggs—many of which are rough-shelled. “She’s in the process of putting on the shell, she doesn’t finish it, and she releases it too early,” Butcher says. “So, the eggshell is thin, and it isn’t smoothed over.”
(If the old gal kept her egg in the shell gland for another six to eight hours, it would probably come out looking just fine.)
As for younger hens laying eggs with rough or bumpy shells, make sure they’re getting complete nutrition. You should also supplement their calcium as needed.
If an entire flock’s eggshells look rough? That’s cause for extra concern. Check them for infectious bronchitis, Newcastle disease or other serious health issues.
What about eggshells with distinct lines or ridges? Not to worry. Odds are these eggs were damaged—and subsequently repaired—during shell formation.
“We call that a ‘body check,’” Butcher says. “When the hen is forming the shells inside of her uterus, the eggshell may get a fracture in it. Then she basically continues to produce shell around it and covers over that crack.”
He adds, “If the hen is laying an egg every day with the same mark on it, a second possibility would be that she has a scar. This was an injury in the uterus where she healed over it with a scar. So, where that egg is in contact with that scar, the shell is not being put on it, like other places.”
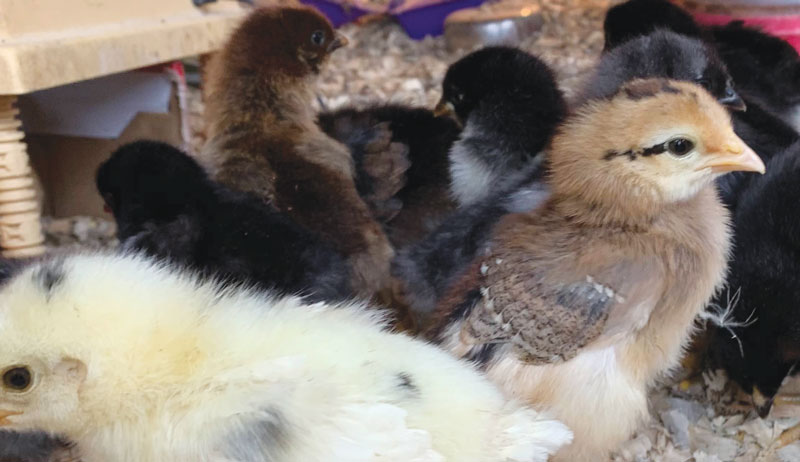
“I’ll just keep one or two chickens,” said no farmer ever! The process of doubling your flock from the one or two hens you thought you wanted to 20 or 30 or more birds is known as chicken math. It’s a phenomenon that affects most chicken enthusiasts at one time or another.
It hits suddenly, most often when you’re standing in the middle of the feed-supply store, staring down at the little chicks popping up and down under the red warming light.
“I’ll just bring home 10 more,” you think. Once you take that step, you’re well on your way to owning the one tool that can double or triple your flock in as little as 21 days: an incubator. This unique tool lets you hatch your own eggs, gives you more control over the success of your hatch rates, and comes in a variety of types to suit every budget.
Nature’s Incubator
Most experienced chicken-keepers will tell you a broody hen is the best way to up the numbers of your flock. She’ll fuss over her eggs, fluff herself up if you or anyone else dares to come near her clutch, and protect her new babies as they grow.
The downside to a broody hen is that, if you’re really counting on her to deliver your next generation of chicks, you’ll have to trust her to do her job.
Some broody hens will lose interest in their eggs half way through the process. Others will lose interest in their babies after they hatch. It can become a watch-and-see situation, and that’s why many farmers opt for incubators.
The first consideration you’ll make when choosing an incubator is size.
Mini-Incubators
A mini-incubator is the smallest kind of incubator you can choose. Some minis are nothing more than an insulated container and warming light. Others are more deluxe and have digital screens for temperature and humidity and automatic egg-turning.
Shelly Wutke
Mini incubators are generally the least expensive of all types of incubator, and this is the type someone new to egg hatching would choose to learn about hatching eggs.
Because they are small in size and have limited capacity, most models will only hatch anywhere from two to 10 eggs at once. The size makes them perfect for hatching chicken eggs.
Tabletop Incubators
A tabletop incubator is a mid-range incubator. It’s larger than a mini-incubator and has a square or rectangle shape.
You can hatch anywhere from a dozen to 60 or more eggs at one time in a tabletop incubator. And some models let you stack additional units together so you can expand if you need to. You’ll be able to hatch eggs of all types including turkey and goose eggs.
This is the type of incubator that most often features automatic functions including digital temperature display, humidity control, automatic egg turning and a countdown to hatch day.
Cabinet Incubators
If you’ve ever seen a commercial bread-oven with rotating trays, you can imagine what a cabinet incubator looks like. From entry-level to high-end, a large cabinet incubator can incubate 500 or more chicken eggs at one time. They are considered the most expensive type of incubator and are generally for farmers who want to rapidly expand their flock.
An all-in-one hatching unit, you can choose models with full control panels that accurately monitor your rotation, temperature and humidity levels.
Once you’ve decided on size, you’ll need to consider how DIY you’d like your egg-hatching process to be.
Still-Air Incubator
For a completely DIY experience, you can choose a still-air incubator. Still-air incubators are often found in mini-incubator types. It’s called a still-air incubator because most models don’t have an internal fan to circulate warm air.
They have a water reservoir that sits below the mat the eggs rest on. You fill it up on a regular basis to provide the required humidity.
Many new chicken farmers will choose this type of incubator because it’s the least expensive way to hatch eggs, and they are fairly reliable if you use them as directed.
On the other hand, this might not a good choice for someone who is extremely busy or who works outside of the home. You have to stay on top of what’s happening inside the incubator.
With no fan you’ll need to ensure the temperature is consistent throughout, and in the first weeks you’ll need to manually rotate the eggs several times per day. You’ll also have to monitor the internal humidity because too much or too little humidity can affect your success rate.
Shelly Wutke
Circulated-Air Incubator
A circulated-air incubator, also known as a forced-air incubator, has an internal fan to circulate warm air for even air distribution. It ensures your eggs stay at the same temperature throughout the internal chamber. Circulated-air incubators also offer a few more features to make it easy to hatch eggs.
Automatic Temperature Regulation
Many incubators offer automatic temperature regulation and have a digital control panel that lets you adjust the internal temperature. The temperature range for hatching chicken eggs is between 99 to 102 degrees Fahrenheit, with the optimal temperature being 100.5 degrees.
Incubators with automatic temperature settings will allow you to set the temperature to 100.5 degrees and maintain it for you. Some models will have an alarm that sounds if the temperature drops or increases by one degree or more.
Automatic Humidity Regulation
To successfully hatch eggs, the humidity inside the incubator must be consistent throughout the 21-day process. When you choose an incubator with automatic humidity regulation you’ll need to add water to an internal chamber on the incubator, adding more as needed during the 21 days.
The incubator will maintain your desired humidity levels. Some models will sound an alarm if the levels drop below or above what you’ve set.
You’ll find specific instructions for humidity levels in the documentation that comes with your incubator, but most guidelines state that the humidity levels should maintained at 40 to 50 percent for the first 17 days of incubation. For days 18 to 21, you should raise the humidity inside the incubator to 65 to 70 percent.
If you’re using a still-air incubator without a digital humidity readout, you can still keep an eye on humidity using a hygrometer. A hygrometer is an instrument that measures the amount of water in a confined space.
One of the most important parts of the egg-hatching process is egg rotation. A broody hen will rotate her eggs several times a day, and so must you if you’ve decided to hatch your own eggs.
The easiest way to manage this process is to have an incubator with automatic egg rotation.
Most models of incubator will have spots for you to place your eggs. At set intervals throughout the day, the eggs will be shifted back and forth. Eggs will be automatically rotated until Day 18. At that point, you’ll move them from the egg holders and place them in one spot on the mat until they hatch.
If you plan on managing your own egg rotation, there is an easy way to remember which side your eggs should be on. Mark all of your eggs on one side with a symbol or letter, ensuring they are all facing down at the same time.
When hatching eggs, I’ve drawn a small happy face on one side of my eggs so I can put them face up or face down at any given time. You’ll need to turn them over at least three times a day, alternating the direction they are in as much as possible.
Hatching Tips
You’ve picked an incubator, and you’re ready to hatch eggs. Before you get started, here are a few tips to help you avoid any potential issues you may have during the hatching process.
Set Up
Before you add your eggs, set up the incubator. Turn it on, and get it ready at least 24 hours before you place eggs inside. An incubator that’s dirty can introduce bacteria into the environment your chicks will be growing in, so you want to make sure everything is spotless before you set your eggs.
Ensure it’s clean by wiping it down the interior with soap and water and drying it.
You’ll also want to make sure you’ve added water for humidity and that the temperature and humidity levels stay constant for a least 24 hours or longer before you add your eggs.
Egg Check
To hatch eggs at home, you’ll need access to fertilized eggs. If you have a rooster in your chicken coop, your eggs are most likely fertilized. But if you want to add a little diversity or color to your flock, you can ask a local farmer for hatching eggs.
Size & Shape
Make sure the eggs you pick are uniform. They also need to be clean, but you shouldn’t rinse or wash them before putting them in your incubator.
Washing them will remove the coating on the egg, known as the bloom. The bloom keeps bacteria out and water and oxygen in. Your new chicks need that protection for a successful hatch.
Watch Your Watch
Choose your hatching times wisely. If it’s been raining outside and your hens are stepping all over their eggs with muddy feet, it might not be the greatest time to pick eggs for hatching.
Be Gentle
Avoid jostling your eggs before you place them in your incubator. If you have to store them for a day or two before you begin your hatch, place them with the large side of the egg facing up in an egg carton.
Temperature Check
Make sure they are stored in a safe place that’s not too cold and not too warm, and you should move them into a new position every day until you place them in an incubator.
Hatchability should last for around seven days before they begin to lose viability. Your odds of a successful hatch will continue to drop every day after.
There is nothing like watching a chick pip out of its shell for the first time, knowing you’ve brought them to life. With an incubator at your disposal, you’ll have a tool that lets you enjoy the hatching process for years to come.
This article originally appeared in the May/June 2021 issue of Chickens magazine.
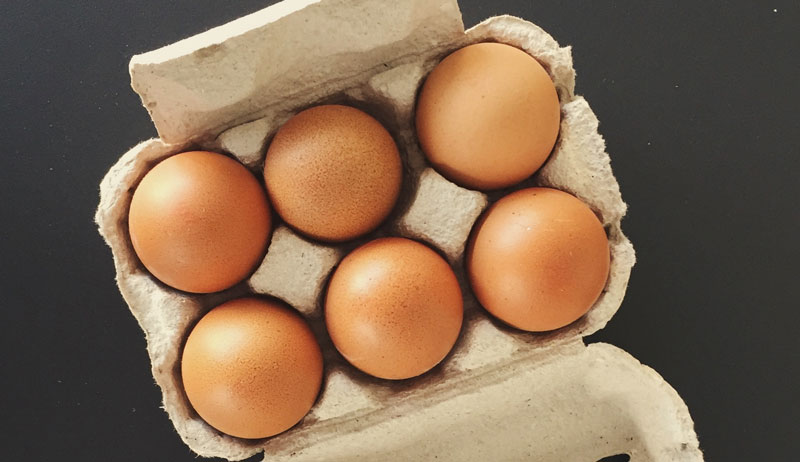
We’re raised to not judge a book by its cover. But let’s face it: What we see guides what we buy, whether it’s clothing, cars or crullers. The same holds true for eggs … or would, if we lived in a country where eggs are sold in open flats and we could pick whichever eggs capture our attention.
Instead, egg choices often depend on first impressions. And, in the U.S., that means the humble egg carton.
Supermarkets, farmers’ markets and quite possibly your neighbors may be competing for egg-buying customers. So your choice of egg carton can create either a lasting impression or a quickly forgotten side note in the minds—and wallets—of your customers.
Here are four things to consider when selecting your egg business’ cartons.
Material
Not all egg cartons are actually made of carton. Stroll through the dairy aisle of your supermarket and you’ll see egg cartons made of plastic and foam alongside the ones made of molded paper pulp.
Which material is better for protecting eggs? While many opinions—and middle-school science experiments—revolve around this question, no clear answer exists.
A better question, perhaps, is which material is better for the environment. Paper-pulp egg cartons can be composted and, if clean, recycled. Clean PET plastic egg cartons can also be recycled.
Very few municipal recycling centers process foam egg cartons, however. These end up in landfills, where they take an estimated 500 years or longer to break down. If you live in an environmentally conscious community or are environmentally conscious yourself, you’ll want to use paper-pulp or PET plastic egg cartons.
As for which material best insulates eggs, not too long ago I got into a discussion about this very subject. A few Southern friends claimed foam cartons keep eggs cooler than other packaging materials.
My belief is that most people go straight home after buying eggs rather than driving around with them for hours. So for the brief trip between your home and your customers’ refrigerators, any carton material should suffice.
The traditional egg carton consists of two rows of six egg cups. This is what customers expect, but why not surprise them with something different?
When we first started offering shell eggs, we chose a carton design consisting of three rows of four egg cups. There was a practical reason for this choice: We needed the visual reminder during egg packing time to help us differentiate which eggs were for eating and which eggs were for hatching.
Ana Hotaling
Our customers loved these 3×4 cartons! They were new and different. They stacked easily inside a refrigerator, and they made us stand out.
Other design options include:
half-dozen carton, featuring two rows of three egg cups
18-egg carton, featuring three rows of six egg cups
circular egg carton, in which a half-dozen eggs are arranged in a ring.
Color
Standard grey may be the most common paper-pulp carton color, but that doesn’t mean you have to go with the flow. Stand out by using colored cartons!
Your customers will get a kick out of seeing their eggs packed in sky blue, sea green, sunny yellow, lavender or petal pink. And your dozens will definitely be more memorable encased in color.
Change carton color according to the season, use them for special holidays, or keep your buyers curious as to which color will be up next. Foam cartons also come in a variety of colors.
Colored egg cartons cost slightly more than the standard grey but are worth their weight in customer smiles and word of mouth.
A personalized egg-carton label offers a touch of whimsy your customers will appreciate. These aren’t the labels required (and standardized in wording) by your state Department of Agriculture. These labels identify your egg-business, provide your contact information, and reflect your personality.
You can print these at home, send the art file to a local print shop, or have your labels specifically designed for you online.
Our labels featured photos of our layers with the phrase “Laid Fresh for You by” and the name of one of our girls. It was a way for our customers to better understand where their eggs came from and allowed them to build a connection with our laying flock.
We eventually replaced those with labels featuring our farm’s logo. But I do miss seeing our girls on our cartons.
Buying Options
Ready to stock up on cartons? Your best bet is to buy them in bulk versus paying premium rates at your local feed shop or farm-supply store. Contact your local store’s manager to see if they can help you place a bulk order for specialty egg cartons.
Most states prohibit the re-use of egg cartons due to the risk of salmonella. So always keep a supply of new, clean egg cartons on hand to keep your customers safe and to keep your eggs packed and ready to sell.
Spring is here! And if you’re like many gardeners, you’re eager to get out into your garden and start clearing out those dead leaves and plants and downed wood. Tidying up the garden is important for many reasons, and it’s so satisfying to finally get those seeds and starts in the ground.
But stay your hand. Beneficial insects are beginning to emerge, and they aren’t ready to give up their houses yet. Here is a short list of beneficial insects to look out for.
Praying Mantis/Mantids
These striking insects with their bowed legs, triangular heads and an unsettling way of turning their heads to look at you will eat anything, beneficial or not. They aren’t picky—whatever insect happens to wander into its territory, the Mantis will happily consume it.
Daina Krumins/Pixabay
The eggs overwinter in a misshapen sticky brown egg case, called an ootheca, that clings to branches or sticks. Look for them as you rake out your garden or prune your trees and bushes. They hatch out as tiny versions (up to 100 eggs) of their adult selves in shades of brown or green.
Note: Mantid egg cases can be found for sale in shops to release into your garden. Make sure the cases are native to your area and not the Chinese species, which will eat beneficial vertebrates like hummingbirds.
These tiny, elegantly named bugs are actually fierce predators with spiked mouthparts and legs that can hang on to prey. They will snack on aphids, thrips, spider mites, insect eggs and caterpillars.
The pill-shaped, cream-colored eggs are found in plant tissue, which will then hatch into flightless nymphs before developing into adults. As eggs and adults, Damsel bugs overwinter in crop fields, pastures, long grasses near gardens, hiding under litter or mulch.
Damsel bugs are found in shades of golden, brown, grey or black.
When cleaning the edges of gardens, fields and other cropping areas in the fall, leave the debris until late spring for these beneficial insects.
Ladybug/Lady Beetle
Often the subject of nursery rhymes and picture books, the little round ladybug may appear ladylike. But she’s happy to devour as many aphids or scales as she can get her mandibles on.
The ladybug’s yellow eggs are found grouped together on leaves and stems near prey habitat. Larvae resemble alligators, with tube shaped “scaled” bodies.
In the summer, adult lady bugs shelter in tall stands of grass. Groups of ladybugs overwinter in dead leaves, rock crevices and in roof eaves. Some species (particularly non-native species) overwinter inside houses.
They are brightly colored, in shades of beige to red to orange to black. Some are solid where others are polka-dotted or striped in black or reds.
After cutting ornamental grasses in the spring, stack the bunches near a wooded area near your mulch pile or untilled part of your garden. This allows ladybugs to get a head start.
Note: Not all ladybugs are beneficial insects. There are non-native species that were introduced to the U.S. for bug control. Now these interlopers, such as the seven-spotted and Asian lady beetles, are taking over native species.
Green & Brown Lacewings
The aptly named lacewing has delicate translucent wings. But the insect is anything but delicate. Its mouthparts are shaped for stabbing prey, and it can travel over 100 feet to hunt.
artsehn/Pixabay
The cunning green lacewing will wear a costume of leaves, moss and other forest debris to camouflage itself from prey and predators. Lacewings live in orchards or in the fringes of wooded areas. They lay their rice-like eggs, which hang on long threads, on foliage near prey in order to provide nearby food for hatchlings.
Lacewings prefer soft-bodied prey and will also feed on pollen and nectar.
As you tidy your garden, look for lacewings overwintering in cocoons wrapped in silken threads stuck to leaves or adults in sheltered areas. You’ll find then in shades of green and brown.
Everyone’s favorite (even insect haters), fireflies never fail to charm people. As entertaining as they are, adult fireflies only consume nectar and pollen from open-faced flowers, or nothing at all. It’s the larvae that are beneficial.
Voracious predators, the larvae prefer soft-bodied insects, snails, slugs and worms. Like the ladybug, larvae have the same alligator-like bodies.
In the summer adults live in tall grass. Larvae live in soil and swampy areas, and larvae overwinter under fallen bark or in the soil. When cleaning out aquatic areas, leave the debris to the side for a day or two to allow insects to return to their habitat.
How You Can Help
To protect beneficial insects, avoid being too tidy in late autumn and early spring. Provide mulch and leaf piles, and stack brush and sticks in piles. When cleaning out ponds, leave the debris out to allow aquatic insects to return to the water.
You can also purchase hibernation structures to help insects overwinter safely, such as mason bee, ladybug and butterfly houses.
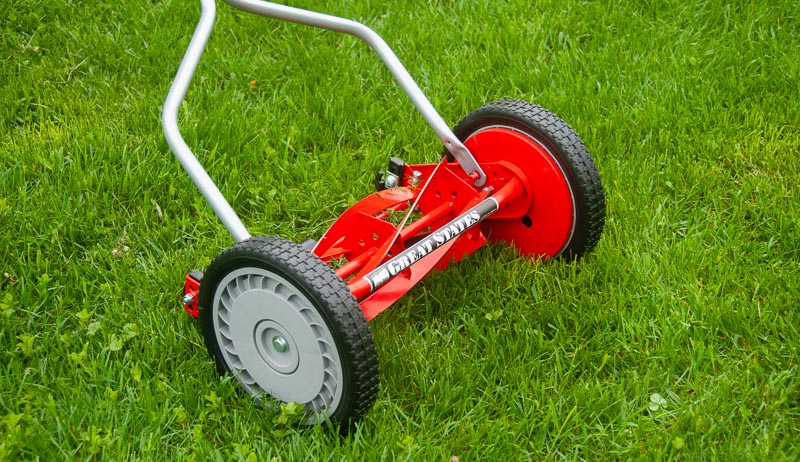
A farmer can never have too many lawn mowers. In addition to keeping things looking tidy, they’re important for maintaining yards, fields and pastures in optimum condition. String trimmers, riding mowers, brush hogs … they all have their places and purposes.
But what about a good old-fashioned manual reel mower? Sure, they might seem outdated. But manual mowers actually offer a variety of advantages over their motorized counterparts.
Consider the following:
Reel mowers require less maintenance. Since they don’t have engines, they don’t require refueling or oil changes.
Reel mowers are easier to use. As soon as you start pushing, they’re mowing—no engine startup required.
Reel mowers are quiet. No engine, no noise; just the subtle sound of the blades slicing away.
Reel mowers are good for the environment, and they don’t produce smelly engine exhaust.
Reel mowers cut vertically in scissor-like fashion, producing cleaner, healthier cuts compared to rotary mowers like string trimmers, riding mowers and brush hogs.
Reel mowers can often cut grass to shorter heights than other types of mowers.
Reel mowers are good exercise. Pushing the mower around your yard definitely burns more calories than steering the wheel of a riding mower.
Reel mowers can be maneuvered into small and tight places where larger mowers can’t reach.
I recently purchased a reel mower and have put it to good use this spring. It’s a straightforward, no-nonsense machine that’s easy and convenient to use. It’s a good fit for the garden, where it can travel between garden beds and keep things tidy without bringing in a string trimmer mower.
If you’re convinced you need to add a reel mower to your toolshed, I won’t disagree! But before you buy the first model that catches your eye, here are a handful of key questions to keep in mind when shopping:
What is the width of the reel mower?
The width of the mower will impact how quickly you can mow a given area. A reel mower with a cutting width of 18 inches will cut 50 percent more grass per swath than a 12-inch mower. This saves you a lot of time.
But it might not save you effort, since the larger mower may be heavier and less nimble than the smaller model.
Is the cutting height adjustable?
Some reel mowers allow you to vary the cutting height for optimum results under varying conditions. Consider how tall you would like your grass to be, and look for a mower offering the range you need.
If you have your heart set on trimming your grass down to half an inch tall, but the mower you’re considering has a minimum cutting height of one inch, you’ll want to seek a different model.
How many blades?
Does the reel mower have four blades? Five? Seven? 10? Depending on the grass you’re cutting, more isn’t always better.
As a general rule, the number of blades should increase as your desired cutting height diminishes. If you’re cutting tall grass, and leaving it a couple of inches high, fewer blades might do a better job.
Of course, a reel mower won’t be ideal for every mowing job on your farm. They’re most effective when used to mow small areas on a regular basis. They can struggle with grass more than a few inches tall, and you’ll struggle if you attempt to mow whole fields with a reel mower.
But this goes back to our opening point—a farmer can never have too many mowers. It’s all about finding the right tool for the right job. When put to use under ideal conditions, a reel mower can be a quiet, effective and useful addition to your toolshed.
Angora goats originated in the area between the Black and Mediterranean seas known nowadays as Turkey. The first importations of Angoras to the U.S. occurred in 1849. James Davis of Columbia, South Carolina, brought seven does and two bucks back with him following a trip to Turkey.
In 1900, the American Angora Goat Breeders’ Association was formed in Rocksprings, Texas. Around that time, one could find the majority of the breed’s total population concentrated in the Southwest.
Angora goats reached their all-time peak numbers in the mid-1960s, with an estimated 4 1⁄2 million in the U.S. In all, these goats produced almost 30 million pounds of mohair.
Today, an estimated 125,000 head of Angoras remain in the U.S. You’ll find the majority located in the Edwards Plateau region of southwestern Texas.
During the peak production years from 1940 to 1970, many producers ran very large herds of goats. In fact, some herds even reached sizes as large as 10,000 to 20,000 head. Those large herds, however, no longer exist.
The majority of Angora goat herds now consist of small farm flocks consisting of 20 to 30 head. Many of these small producers shear their own animals and also process the mohair themselves for use in the hand-spinning industry.
In the 1990s, a group of breeders began selecting and breeding naturally colored Angoras. In 2002, they officially came together to form the American Colored Angora Goat registry.
Today, the fine, naturally colored fleeces are highly sought after by hand spinners and fiber artists throughout the country.
— Dawn Rudasill, AAGBA, and Lisa Edmiston, TAGRA Secretary/Treasurer
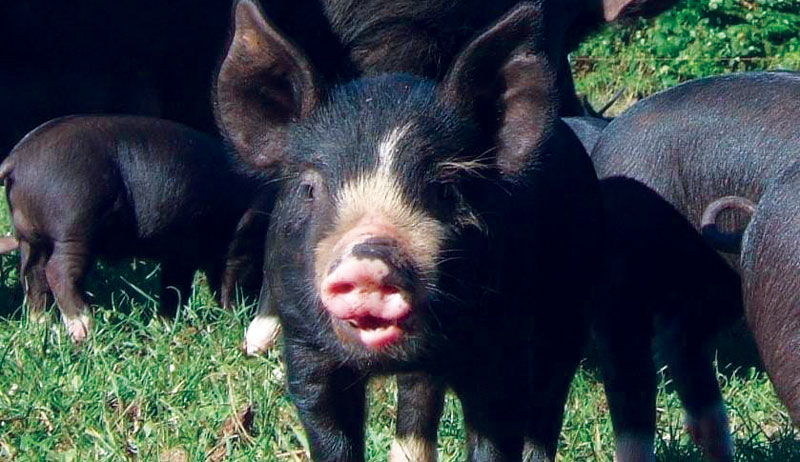
Many farmers call Berkshire pigs their favorite hogs for the breed’s distinctive, high-quality meat and ease of keeping. As such, they are a common sight on small and hobby farms.
Bershires also boast winning personalities and striking black-and-white looks. So it’s not hard to see why people like keeping them!
A Very Fine Pork
Three hundred years ago—so legend has it—Oliver Cromwell’s army discovered the Berkshire pig while in winter quarters at Reading, the county seat of the shire of Berks in England.
After the campaign, veterans carried the news of the wonderful hogs of Berks to the outside world. They reported the pigs were larger than any other swine of that time and producing hams and bacon of rare quality and flavor.
This is said to have been the beginning of the fame of the Reading Fair as a marketplace for pork products.
The excellent carcass quality of the Berkshire pig made it a favorite with the upper class of English farmers. The pork is whole, well marbled, consistently sweet, tender, juicy and palatable.
For years, the royal family kept a large Berkshire pig herd at Windsor Castle.
According to the best available records, the first Berkshires arrived in the U.S. in 1823. They were quickly absorbed into the general hog population because of the marked improvement they created when crossed with common stock.
In 1875, a group of U.S. Berkshire pig breeders and importers met in Springfield, Illinois. Their goal? To establish a way of keeping the Berkshire breed pure.
They felt the Berkshire pig should stay pure for improvement of swine already present in the U.S. The breeders didn’t want to see the breed reduced to only a portion of the common hogs of the day.
Feb. 25 of the same year marked the founding of the American Berkshire Association, the world’s first swine registry, heralded by breeders in this country and in England.
In fact, none other than Queen Victoria bred the first hog ever recorded, a boar named Ace of Spades.
Today, Berkshires remain a popular choice for farmers seeking a high-quality heritage pig. They do great on pasture, too!
There are few things better in this world than a day spent fishing. And for those lucky enough to possess a pond on their property, it’s just a matter of tossing some cold drinks in the cooler and heading out back. But if you’ve recently added a pond, have suffered a fish kill or prefer species that aren’t self-sustaining, you’ll need to stock that pond.
And that’s not as easy as just dumping a bag of young fish into the water.
Fish Decisions
First, you’ll need to decide which species of fish you want to stock your pond with. That’s determined, in part, by your geographic region and the properties of your pond. Your local extension agency can help you figure out which fish are best for your situation.
Also, consider which species you like to fish. You don’t want want a pond full of fish you don’t enjoy catching!
You can place your order with a fishery. In my case, that meant pre-ordering the fish I wanted, then heading to the parking lot of the local hardware store to pick up oxygenated bags of our chosen fish.
To ensure maximum survival of my fish and encourage development of a sustainable aquatic population, I took some extra steps when stocking.
In the video, you’ll see an artificial structure I built and installed into the pond before it filled with water. Because the pond is an ecosystem comprised of predator fish and prey fish, it’s important to give new residents a helping hand in survival.
So this collection of tubes provides hiding places for the prey fish, ensuring the large-mouthed bass, for example, don’t eat all the newly introduced bluegills and minnows.
Stocking the Pond
There are a few important steps to keep in mind when you’re stocking a fishing pond.
Acclimate Fish
Fish are sensitive to the environment around them, and just dumping them in their new water could cause thermal shock. So take a few minutes to get them used to the pond’s temperature. You can see what I do in the video above.
Mix the Water
Moving day is quite an ordeal for your new fish. And when you move them from their travel bags to the pond, they experience yet another significant change.
So just add some pond water to the bags first to help them adjust to their final environmental change.
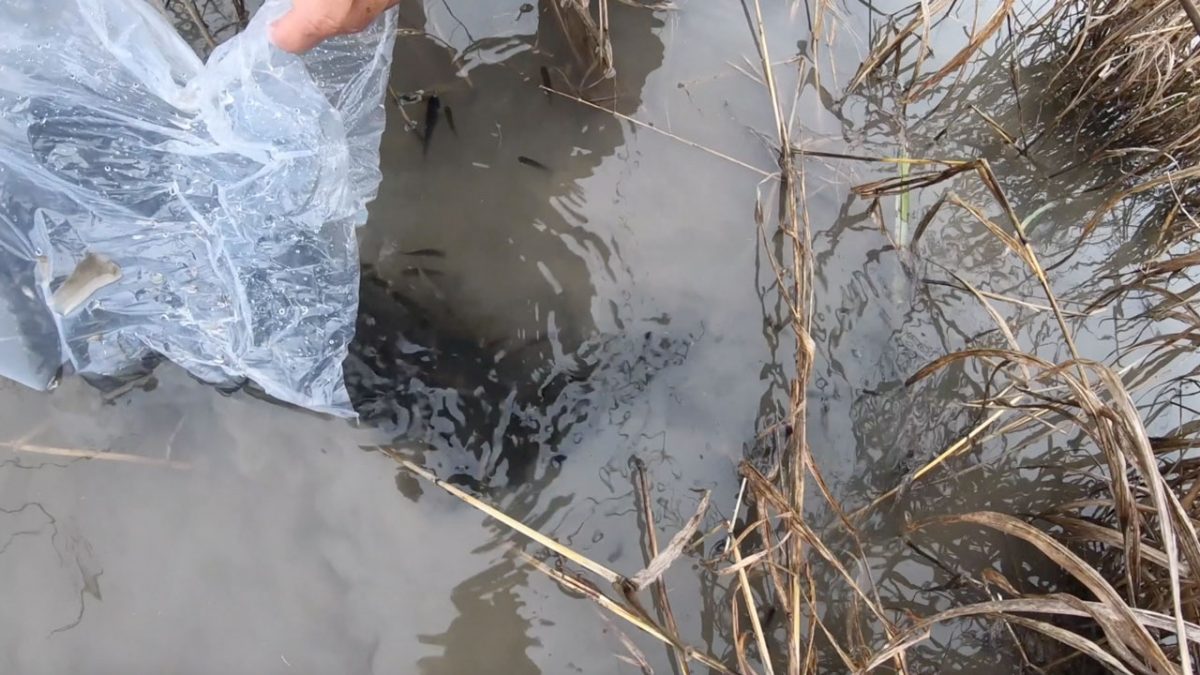
Let Them Swim (Slowly)
As new water enters the bag, your fish will slowly make their way out of the bag. You can help them a bit, but don’t rush their exit. Let the fish find the open water.
Over time, your fish will feed, grow and reproduce to populate their new home. You’ll still need to manage the pond, of course. But soon enough, you’ll be able to grab the poles and head out for a relaxing day of fishing at your very own pond.
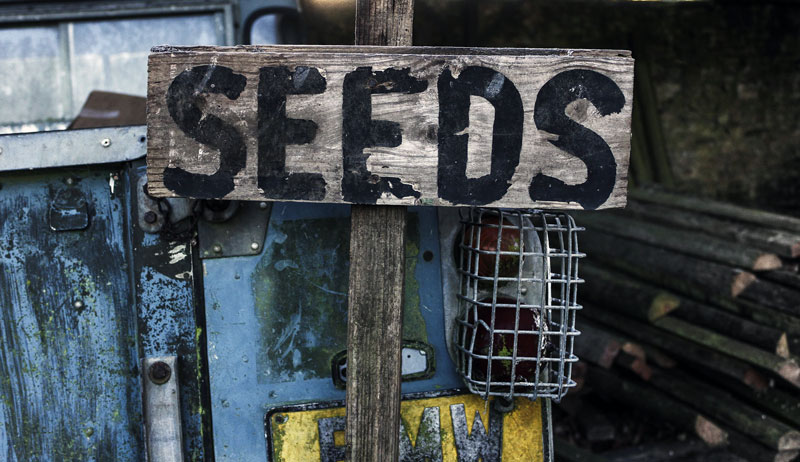
In recent years, more growers have started saving their own seeds, or even selling seeds on a commercial scale. Here’s how to think about whether saving seeds for sale could be a good fit for your farm.
Why Sell Seeds?
Selling seed can be quite lucrative and further diversify your farm’s income streams. There are also other advantages.
If you have enough of them, you can use the seeds you’ve saved to grow your vegetable crops. This allows you to adapt important varieties to your own unique growing conditions and methods.
It also makes your farm a bit more self-sufficient. At the beginning of the pandemic, for instance, seeds were hard to come by, even for professional growers.
Seed saving is a complex science, so if you’re not an experienced seed-saver, begin by familiarizing yourself with the best-practices.
There are many good seed-saving guides on the market, but few of them deal with the scale or equipment needed to save seeds on a commercial scale. One of the best resources for would-be professional growers is The Organic Seed Grower by John Navazio.
But even seed-saving guides geared towards home-gardeners will provide you with a solid understanding of the fundamentals, so don’t pass them by entirely.
Select a Market
Before deciding which crops to grow, figure out how you plan to sell your seed crop. Is there a small seed company nearby already selling some local varieties? If so, a good first step might be reaching out to see if they’re looking for any contract growers.
A common arrangement in the seed-saving world is for larger sellers to contract with growers, each of whom grows a few different seed crops.
Alternatively, you can sell your seeds yourself. If you already have customers coming by your farm to pick up CSAs or frequent a farmstand, consider creating and selling your own seed packets.
You could also reach out to some local businesses to see if they might be willing to let you set up a rack of seeds by their register. Hardware stores and nurseries are a good place to start. If you do decide to sell your seeds yourself, make sure your seed packets advertise that the seeds were grown locally.
Selecting which seed crops to grow requires consideration of several variables, so take your time making the decision. Some of the key variables to consider include:
Space Requirements
How much space would it take to grow out a profitable seed crop from a certain vegetable? Some vegetables need to be grown a certain distance away from other varieties or crops in the same family to prevent cross-pollination, so research this in advance.
Market Interest
Are there specific seeds that might be of particular interest in your community? Many people might be drawn to regional, heirloom varieties, for instance.
Special Equipment
Some seed crops require special equipment for harvesting or processing, so make sure to research any requirements like this up front.
Money
As with anything else, some seeds are worth more than others, so research which ones you might be most profitable for your farm.
Selling seeds on a small scale can be a great way to diversify your farm’s sales and can benefit your operation in other ways as well.