“For us, farming meant food,” says Austin Graf. He looks back on growing up on a small farm with a kitchen garden and some beef cows. “Farming was our way of helping make ends meet.” Those early roots helped pave the way for Graf’s journey to running Buzzed Blooms, a sustainable and seasonally-focused flower farm in Manchester, Tennessee.
He says that he’s always felt “the connection to the land and wholesome food” that comes with farming. However, he never really saw it as a viable career—until serendipitous circumstances ushered him into the field of flower farming.
We spoke to Graf about the sustainable dynamics of micro-farming and accepting the calling of a flower farmer. We also touched on the nourishing nature of blooms.
When Graf pinpoints where his interest in farming began, he credits the role of what he calls “patchy cows” in the story.
While accompanying his dad to meet livestock brokers, Graf recalls how they’d “give my dad a hard time. The whole county had black Angus beef cows. But our farm always had the most colorful patchy cows around.”
He adds, “My dad did that for me. I felt bad for all the other cows that nobody seemed to like.”
Graf continued to take his early farming steps, and his interests transformed.
“As I got older, patchy cows turned into spotted Nubian dairy goats that I hand-milked morning and night throughout high school,” he says. “I learned to make homemade cheese and soap. I got chickens for fresh eggs. And I continued gardening.
“Then I started discovering livestock preservation and adding rare breeds to our farm to preserve them from extinction,” he continues. “At one point we had a full dozen Tennessee fainting goats. It was just what I loved.”
These days Graf runs a flower farm. The career choice, he admits, came “by pure chance.”
After graduating college and taking a gig in marketing, Graf found himself growing restless. He missed the farm life.
Graf persuaded his brother to let him use a 10 by 20 foot garden. He then “threw some dahlia tubers in there. They were on clearance at the grocery store, so I thought why not?”
When everything else but the dahlias in Graf’s garden perished, he did a little research and “stumbled across flower farming.” Graf discovered that cut flower production was actually the second most profitable crop per acre in his state. This, he thought, could develop into a lucrative avenue.
“Suddenly everything I’d ever known about farming changed,” he explains.
After starting with a packet of zinnias, Graf received an offer for what seemed likes a “dream job” that would require giving up the garden. “I chased the dream,” he says. “And guess what? That dream sucked. I was miserable.”
Thankfully, Graf’s parents cared for the nascent flower garden. The garden finally allowed him to return to his calling as a flower farmer.
“This is my second season full-time,” he explains. “It’s been the hardest two years of my life, but it’s also been the very best.”
“The very idea of flower farming on a local level is sustainable,” says Graf. He adds that early on in the career that eventually led to Buzzed Blooms, he found himself “shocked by the volume of flowers the United States consumes. I became even more shocked when I found the percentage of those flowers that are imported.”
Committing to producing flowers without a high reliance on fossil fuels, Graf honed in on biodiversity.
“For me, true sustainability in agriculture is dependent on that biodiversity,” he explains. “My gardens come to life with butterflies and mantis. Pests are controlled by a healthy balance of nature, not a ridiculous amount of pesticides.”
This sort of approach definitely requires more labor. But Graf is convinced that “the future is more farmers producing a larger variety of goods on smaller plots instead of one farmer farming 3,000 acres.”
Reflecting on the joys of flower farming at Buzzed Blooms, Graf says that the most rewarding part of his role comes from witnessing reactions when people receive flowers.
“When you’re growing food, you’re nourishing people,” he reasons. “There is that clear distinctive feeling of pride when someone is eating your produce.
“And it’s the same with flowers. Flowers nourish the soul.”
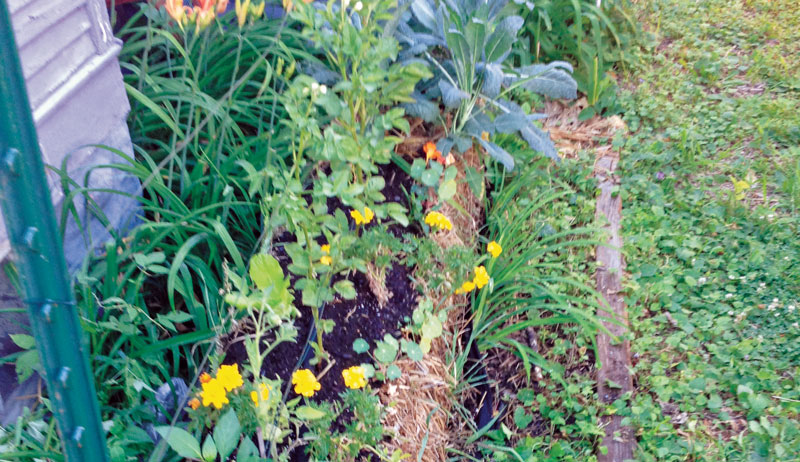
To cut down on mowing—and make my land more biodiverse—I’ve been converting sections of my lawn into extra perennial flower beds, vegetable plots, and even mushroom gardens. One area now includes oyster mushroom logs and lion’s mane totems.
And I recently inoculated my old potato patch with woodland blewit mushroom spawn. (Check out the video for the whole process. You’ll also get an update on the mushroom garden surrounding my decorative pond.)
Known as Clitocybe nuda or Lepista nuda, woodland blewits are choice edible mushrooms. They naturally occur in moist, shady conditions and can thrive on many types of organic matter.
To set up my blewit patch, I first cut back the weeds and turned over and broke up the soil. Next, I added pine needles and leaves from last season. Then I crumbled up my blewit spawn and sprinkled it over the planting bed.
After that, I added a layer of finished compost, straw and less finished compost. I topped this with another layer of blewit spawn and more mulch, straw and spawn.
Although we were about to get a good rain, I watered the planting bed by hand. I followed up with one more thin layer of finished compost. Finally, I topped the whole thing with plastic sheeting to help lock in moisture.
I’ll keep this in place for a couple of months, peeking beneath it periodically to make sure my blewit patch isn’t too dry.
Now, if I’m lucky, I might have my first harvest as soon as this fall. Still, it can take up to 18 months before blewit spawn begins to fruit. “Blewits are a lot less predictable [than other mushroom types],” Lynch says. “But, when you do get blewits, you’re not just going to get four or five. You’re going to get 400 or 500.”
When I start to see what I think are blewits, I’ll need to make sure they are, indeed, blewits. Before cooking up my haul, I’ll consult some of my mushroom guidebooks and make a mushroom spore print. (A woodland blewit spore print should come out a pinkish-buff color.)
Purchasing spring chicks from a hatchery has important advantages, such as fewer people handling the birds, lessening the chance for cross contamination in established flocks. Customers also have more options of birds to choose from to best suit their needs.
Whether you are a veteran producer or are brand-new to raising chickens, follow these five tips and you’ll be well on your way to making the experience as positive as possible.
Establish General Goals
Before you even start shopping for breeds, you need to review your chicken-keeping goals. For starters, decide if you’re looking for meat or egg production, or both. You’ll also want to decide if your ambitions include simply contributing to your family’s food supply or if you want to sell what your produce and on what scale.
Before he shopped, Greg Nance, a producer and pastor, decided on what type of breed-specific bird he wanted. Nance has raised chickens off and on since childhood. For the past five years, he has lived on his Sweet Grace Farm, a small plot located on Signal Mountain in Tennessee, where he keeps a flock of about 100 birds that he raises for meat and eggs.
While the birds provide for his family, he also sells to community and church members. Nance put in a considerable amount of research before he clicked “submit” on that first purchase of spring chicks.
“I went through as many hatcheries as I could find to see what pricing was, he says. “My first objective was to find a good source of birds at a good price.” Over the years, Nance has experimented with a variety of different hatcheries, breeds and other venues, such as online classifieds, for his birds.
Another producer, John Kolenda of KC Farms in Crossville, Tennessee, had a similar strategy. “We went in with a plan,” he says. “We wanted to get some eggs that were different. Everybody in the country has chickens. It seems like they all lay a brown egg. So, we went in and we wanted to get eggs that were different-looking than everyone else’s.”
Kolenda sells the eggs and meat produced on his small farm. Like Nance, he’s raised chickens for most of his life.
Over the years, Nance has raised a variety of different breeds of chickens from spring chicks. “For eggs, we’ve used Rhode Island Reds and Black and Red Sex-Links,” he says. RIRs and Sex-Links also make good dual-purpose birds for those seeking to produce meat and eggs from the same bird.
For meat, specifically, Nance has considered “ranger” chickens. “They take a little bit longer to grow, but they are kind of the rage right now because they can get around and sort of free-range better,” he says. However, he prefers the industry-standard Cornish-Cross because they grow so fast—from hatching to processing to freezing is about a nine-week time period.
“By nine weeks, we’ll end up with some birds that are almost8 pounds,” he says.“You just can’t beat that.”
Another meat breed Nance is working with is the heritage Jersey Giant. “They are gentle, and they grow to be almost 15 pounds,” he says. “They were bred as a replacement for turkeys and take about seven months to get full size. So, it’s a lot more time.”
One downside that Nance has noticed with the Jersey Giant is its susceptibility to predators. His original order consisted of 36 straight-run spring chicks, but he’s now down to just six hens and 20 roosters. While he’s employed a variety of tactics to help mitigate the loss, he’s been disappointed with the number he’s faced.
Kolenda started with Ameraucanas and Welsummers, but he is also a fan of the Cornish Cross. Another favorite of his is the Bielefelder breed. Murray McMurray Hatchery, in Webster City, Iowa, states that this fairly new breed is making a huge splash in the poultry world.
“These gentle giants are extremely docile, beautiful and easy to raise … these robust birds have large, round bodies that put Orpingtons to shame.”
“We’ve found the Cornish Cross do well out on grass and in the sun, and in eight weeks, we have a full-size bird,” he says. “The main reason I went with Bielefelders is because they are supposed to be a larger dual-purpose chicken … males get up to 10 to 12 pounds. They also have an amazing egg.”
Due to the COVID-19 pandemic, Kolenda was concerned about the availability of spring chicks and made the decision to go with this dual-purpose bird in the event no meat birds were obtainable.
Ryan Kelsey has operated his Valley Farms Hatchery in Muscle Shoals, Alabama, for the past eight years and offers a similar perspective. One breed Kelsey sells is the Cornish Cross.
“They grow out at around 51⁄2 or so in just about six or eight weeks,” he says. “And so, a lot of people get those specifically for meat production. We sell quite a few of those and we have people that place regular orders every week or every other week.”
Kelsey also sells red broilers, a slower growing, dual-purpose bird comparable to the freedom or red ranger variety.
“A lot of people that don’t want the Cornish Cross because they often have leg or heart problems choose the red broilers,” he says. “They grow a little bit slower but still fast enough to grow out to about 51⁄2 pounds at 12 weeks. If their feed is restricted, they actually lay eggs pretty well. We have a lot of people who order a straight-run batch. They keep the males for their meat and the females for their eggs.”
Kelsey also offers Novogen brown and white chickens, which are commercial layers of brown and white eggs. “They start laying earlier than your regular heritage breeds,” he says. “They also lay more and eat less feed.”
Jeff Smith is the director of sales and marketing at Cackle Hatchery in Lebanon, Missouri. His grandfather, Clifford Smith, started the business in 1936, and Jeff has been involved for two decades. He recommends Barred Rocks and Rhode Island Reds as they are dual-purpose and relatively calm. “They are durable and are going to be one of the easier breeds to raise,” he says.
Hope Ellis-Ashburn
Beyond White & Brown
For those seeking to raise colored eggs, Easter Eggers are good, inexpensive birds that lay green- and blue-tinted eggshell colors. On the more expensive, specialty bird end, the Ameraucana breed comes in several colors: blue, splash, lavender, black and white.
“They are more of a show-type chicken,” Smith says. “They are not really an egg-production chicken, but they’re going to lay a decent amount of eggs throughout the year.”
In addition, for colored eggs, consider Cream Legbars, Olive Eggers and Speckled Eggers. Cream Legbars lay a blue egg and are slightly less expensive. “Olive Eggers are really popular,” Smith says. As the name implies, their eggs are shades of green. Speckled Eggers lay a deep chocolate-colored egg with dark spots. “It’s really interesting for buyers to have an eggshell pigment color like that,” he says.
Producers also have options when it comes to the best age of chicken to purchase. Nance and Kolenda have always gone with day-old chicks. For most situations, this is the age that Kelsey and Smith recommend as well.
Today, most hatcheries ship year-round. But the best times to buy and have chicks shipped is still in spring to early summer and fall. “It’s the perfect temperature,” Kelsey says of the cooler months. “It can get a little too hot in summer [and too cold in the winter]. Sometimes, we have a little more shipping loss during the summer and winter.”
He recommends ordering as soon as you are sure that you’re ready to move forward. Most chicks purchased in the spring will be laying by fall.
Ordering day-old chicks has its advantages. “When you’re raising them, you can tame them to your particulars,” Smith says. Older birds have prelearning they may need to overcome. It’s a little easier if you start out with a baby chicks.
The big issue with buying older birds is bringing disease into your flock.
“If you can just bring in baby chicks, you’re going to have about a 90 percent effective method of trying to keep your farm from getting a chicken disease on it,” he says. Older birds, while more expensive, do have the advantage of requiring a slightly smaller investment of feed, time and money before they reach production age.
Hatching Eggs
There is a third option available: hatching eggs. “We offer fertilized hatching eggs,” Smith says. “They’re the same eggs we put in our incubators.” While hatching eggs offer many obvious rewards, it does come with the added expense of purchasing an incubator. In addition, hatching eggs aren’t, other than arriving unbroken, guaranteed.
Hatcheries put a lot of money and time getting them packed correctly. But they’re at the total mercy of how the eggs are handled during shipping. Dropped eggs or eggs exposed to extreme heat and cold are unlikely to hatch.
“But, if they have the proper incubator, they should have about as good of luck as we do when we put the same eggs in our machines,” Smith says.
Courtesy of Cackle Hatchery
By the Numbers
Many hatcheries offer price breaks for purchasing in bulk. Minimum orders can be as small as just three chicks. But you can often get price breaks on orders of 25, 50, 100 and more. For smaller producers, orders of 25 chicks are common.
In order to get the best price, shop sales such as bargain and weekly specials—and seek discounts.
Some hatcheries also offer other specials that allow producers to purchase a combination of spring chicks that are individually suited for meat and egg production. Valley Farm, for example, offers four different sizes of this particular special to meet the needs of different size families.
Even with price breaks for larger orders, it doesn’t make sense to purchase more birds than you can reasonably accommodate. Even factoring in bird loss, 25 can be a large number of birds if you aren’t equipped to handle them.
But, in the right situation, price breaks and specials can make purchasing chickens in bulk very affordable and allow you to get just what you need.
Sidebar: Plan Before Proceeding
Evaluate your goals prior to placing your order. Decide ahead of time if you wish to produce meat or eggs for just you and your family or if you plan to sell what your produce. Selling your produce can be something on as small a scale as covering your feed costs by selling to community members. On a larger scale, you might do something like sell at a local farmers market.
While knowing your goals can help you to select the type of bird that best fits your goals, it can also help you to select the number of birds you will need. If possible, evaluate the facilities beforehand to make certain they can support your proposed operation.
This article originally appeared in the March/April 2021 issue of Hobby Farms magazine.
Now that your flock is laying, you may have found yourself enjoying eggs with increasing frequency. In fact, you may have gone through every recipe for quiche and custard you could find. You’ve also discovered a fun new pastime: repeatedly rearranging your refrigerator to allow you to store as many eggs as possible.
It’s time to accept an undeniable fact. Your girls are giving you more eggs than you expected and know how to handle.
The answer to this dilemma may seem obvious: give eggs away to your family, to your friends, to your mail carrier and UPS driver. You’ve already done this? Then it’s time to take the next step. You should provide eggs to the general public.
The thought of selling something you produce at home to perfect strangers can be terrifying, especially from a legal standpoint. This trio of law details will help you ensure your fledgling egg business stays legit.
The first and most important question any poultry keeper must ask is, “Are egg sales allowed?” While chicken ownership has become increasingly accepted throughout the country, many locales still impose prohibitions. And egg sales is a common restriction.
Even if your town allows you to sell eggs, your home owner association may not. Be sure to check with both your HOA board and your local ordinance officer before setting out your eggs-for-sale sign. And check if these signs are allowed as well.
If you discover you live in a no-sales zone, don’t despair. You still have an option available to you: eggs by donation. Instead of setting a fixed price for a dozen eggs, clearly state that your eggs are free but donations are welcome to cover the cost of chicken feed, egg cartons and other costs of poultry ownership.
You may find that your supporters generously donate more than what you would have charged per dozen.
Cottage Food Laws
Selling eggs may seem like an easy enough task. But there’s much more involved than simply selecting the perfect carton.
Each state has what are called “cottage food laws,” which allow people to earn extra income by making/selling specific foods in their home. Cottage foods—and the home kitchens in which they are prepared and packed—are not subject to the strict inspections and licensing that commercial food producers experience. But they are still subject to regulations.
Some states may require eggs to be washed and stored at a certain temperature. Other states may require eggs to be sold unwashed and at room temperature.
Cottage food laws may cover collection methods, egg age, egg carton reuse, required labeling and how much you can earn yearly.
Find out what cottage food laws apply to you by searching the internet for “cottage food laws” and the name of your state. You caa also visit your state’s Department of Agriculture web site and search for shell (eating) eggs or cottage food laws.
If you’ve set your sights on selling your eggs to an eatery, market, bakery, or co-op, cottage food laws will no longer apply to you. Instead of selling your eggs directly to consumers, your egg sales will be to another party who, in turn, will resell them to consumers in some form or another.
If these are your plans, you will need to follow your state’s regulations regarding shell eggs. You can find these rules online by visiting your state’s Department of Agriculture web site.
Most state regulations govern:
the cleaning, handling and storing of eggs
the use of a dedicated facility where you clean, pack and store your eggs
undergoing regular inspections by a state agent
grading your eggs according to state or federal guidelines
Failure to adhere to these guidelines may result in very stiff fines. So if you choose to take this route be prepared to follow your state regulations to a tee.
You can grow vegetables anywhere,earlier and without weeding. How? Create a straw bale garden!
These steps, excerpted from author Joel Karsten‘s Straw Bale Gardens Complete: Updated Edition, will help you make your own.
Step 1
Place bales on any surface—driveways, rooftops, anywhere. Treat bales with high-nitrogen fertilizer (organic or conventional) to accelerate decomposition of straw inside bale. Water heavily for 12 to 18 days.
Plant seedlings and seeds directly in the bales. Seeds require a bed of potting soil to hold moisture atop the bale until germination. Heat generated by decomposing straw allows you to plant two to four weeks earlier than if you are planting in the ground. Continue watering.
Harvest. After the season, bales have turned into beautiful, clean compost for use in your other gardens. Next spring, repeat the process with fresh bales. Underground vegetables such as potatoes may be planted in second-year bales in some cases.
This article is excerpted from the book Straw Bale Gardens Complete: Updated Edition. Used with permission by Cool Springs Press.
This year, as part of my spring machinery maintenance checklist, I decided to replace the lawn mower blades on my garden tractor. What should have been a straightforward task turned out to be a bit more complicated and time-consuming than I expected. But this was only because I failed to realize I didn’t have the right tool on hand.
Removing the mower deck wasn’t an issue. Following the instructions in the manual, I lowered the deck and removed the key from the engine. I released the mower drive belt and unhooked the deck from the tractor. Then I raised the hydraulic arms and pulled the deck out from under the tractor.
Then I flipped over the mower deck and approached the bolts holding the blades in place. Suddenly, things began to get tricky.
The instruction manual was a bit vague on how to change the blades. It simply told me to remove the bolts, providing an exploded-view diagram to illustrate how the bolts held each blade in position with a washer.
There weren’t any special instructions about the direction to turn the bolts. So I correctly assumed they needed be turned counterclockwise. But I was also left to guess the size of the bolts.
And this is where I went wrong.
Try, Try Again
Grabbing a ratchet and socket set, I tried a couple of sizes before determining the 3/4-inch socket was the only one that fit. I attempted to loosen one of the bolts, but I met incredible resistance.
The bolt wouldn’t begin to budge. When I applied more strength, the socket repeatedly slipped loose off the bolt.
Assuming the bolts were rusty, I grabbed a rust removal spray and applied it to all three bolts. After letting the spray work for a little while, I resumed my efforts to undo the bolts.
Unfortunately, my luck was no better. I tried a crescent wrench. But I couldn’t get it tight enough around the stubborn bolts—it kept slipping, to the point where I was starting to put dents in the crescent wrench.
Clearly, the bolts were installed tightly. And clearly, I wasn’t making any progress in removing them.
I seriously considered giving up and taking the deck to a professional, but first, I called on my father to see if he had any ideas. My father has an even larger collection of tools than I do, so he brought over a toolbox stuffed full of sockets and wrenches.
Together, we tackled the bolts one more time.
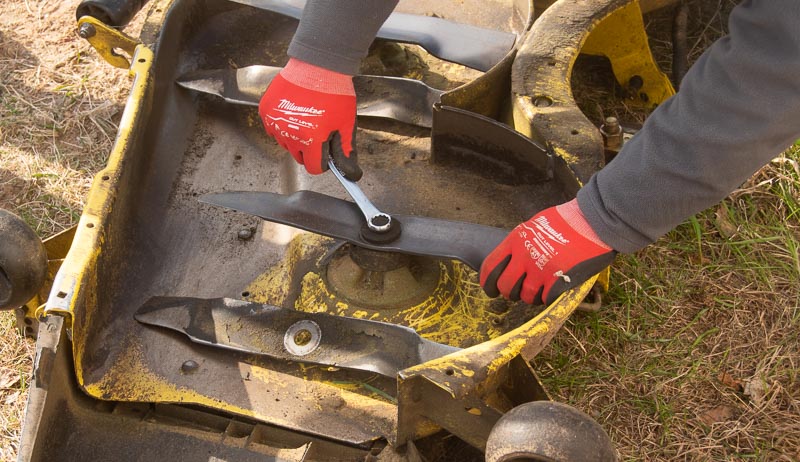
My father tried a 3/4-inch socket and likewise found that it slipped when he applied too much pressure. But whereas I had gotten stumped at this point, my father realized we were working with metric bolts.
Rooting through his toolbox, he came up with an 18mm wrench. It was slightly smaller than the 3/4-inch socket, which measures 19.05mm.
The 18mm wrench was a perfect fit. It didn’t slip at all. When my father tapped on the end of the wrench with a hammer, he was able to loosen all the bolts.
From that point on, the job was easy. We replaced all three blades and reinstalled the bolts with the 18mm wrench. We followed the instruction manual to reattach the deck to the tractor, and congratulated ourselves on a job well done.
My garden tractor is now ready for a busy spring of mowing with fresh, sharp blades.
The takeaway? Make sure you have the right tool for any job, even if it’s as simple as making sure you using metric wrenches for metric bolts. As this story vividly illustrates, a single millimeter can make all the difference between failure and success.
One of my favorite recipes, this wonderful vegetable chowder is warm, filling and comforting while remaining fresh at the same time. And it’s easy to put together.
Making the roux for the creamy sauce isn’t difficult. A roux is a mixture of fat and flour, typically in a 1:1 ratio. I like to use butter for this recipe. It adds another layer of flavor to the chowder.
I often have broccoli and cauliflower from my garden stashed away in the freezer. I love using that if I don’t have access to fresh. But you can use fresh or frozen broccoli and cauliflower here. I’ve used both, and it turns out beautifully either way.
In a medium saucepan over medium heat, melt the butter. Add the flour. Stir until well combined.
Cook the mixture for 1 to 2 minutes, then add the vegetable broth, salt and pepper. Whisk the flour and broth mixture until it’s well combined.
Remove from the heat.
Add the broth mixture, corn, carrots, celery, onion, potatoes, broccoli, cauliflower and parsley to the slow cooker. Stir until everything is combined.
Cook on high for 4 hours or low for 6 hours.
Add the heavy cream, half-and-half, chives and thyme. Stir until well combined. Cook the chowder for an additional 30 minutes, up to 1 hour on low heat. Garnish vegetable chowder with cheese.
This recipe, excerpted fromRustic Farmhouse Slow Cooker, originally appeared in the March/April 2021 issue of Hobby Farms magazine.
Welcome to a two-part series where we take a look at the teeth inside your animals’ mouths. This month, we’ll explore normal (and different) anatomy you will find in various species. Next month we’ll tackle some common abnormal dental issues.
Horses
Horses are similar to us in that they have two sets of teeth: a baby set (called deciduous or milk teeth) and an adult set. Adult teeth in horses come in gradually and a horse usually has all his adult teeth by the age of five. This does, however, vary by individual and, interestingly, sometimes by breed.
Horses have 24 baby teeth, which then are replaced by 36 to 40 in the adult set.
Many horses will have an extra premolar at the start of the line. This is called a wolf tooth and is considered a vestigial premolar. It is usually very small and serves no purpose. In some cases it interferes with the bit and can cause pain when the horse wears a bridle.
For this reason, wolf teeth are often removed.
Ruminants
Cattle, sheep, goats, llamas and alpacas have a major difference in their dentition as compared to horses. These species do not have incisors on the top, only on the bottom. Instead, on the top they have what is called a dental pad, which is a thick, hard gum line where the animal can pinch blades of grass, nipping the forage off with the bottom incisors.
All farm species still have top and bottom molars for grinding in the back of the mouth.
Calves have a set of 20 deciduous (baby) teeth, all of which come in by the age of two weeks. Then, starting at about a year of age, the permanent adult teeth start erupting.
Over the bovine’s next few years, a total of 32 adult teeth will emerge. The outer incisors take the longest to erupt, between 36 and 48 months of age. This provides an estimator of age for animals under 4 years.
All told, an adult cow, bull or steer will have six incisors along the bottom front of the jaw, one canine on each side following the outer incisor, then three premolars and three molars in each cheek quadrant.
Sheep/Goats
Like cattle, sheep and goats have 20 deciduous teeth and 32 adult teeth, all in the same places as their larger bovine counterparts. As ruminants and small ruminants age, their incisors begin to space apart and become worn, creating gaps between the teeth.
At ages beyond five years, incisors begin to fall out occasionally and the animal has what is referred to as a “broken mouth.” That’s a slightly harsh term, though, as they can do just fine with a few missing front teeth.
Alpaca and llama dental care is very different from both horses and ruminants. While camelids have an upper dental pad instead of top incisors (just like ruminants), their lower incisors continually grow longer throughout the animal’s life. They can sometimes protrude beyond the upper lips and interfere with grazing.
For this reason, many camelids need their lower incisors trimmed. A veterinarian usually does this easily with a drill. Just shaving the tops off the incisors is usually all that’s needed on a yearly basis.
Male camelids also have canine teeth. These are often referred to as “fighting teeth” and for very good reason. Males use them for fighting other males in the herd to establish dominance. These fighting teeth are razor sharp, and males can inflict serious damage on each other.
For safety reasons, we often remove the fighting teeth in males (see video below). Females can have them too, but they often barely break the gum surface and are very small—nowhere near the daggers of the males. Removal of fighting teeth is fairly simple, often involving only a wire to saw through the tooth at the gum line.
Most males don’t get their fighting teeth until they reach 2 to 3 years of age. Some late bloomers may get them at 6 or 7 years. And the real kicker? There are two canines on each side of the upper jaw, one on each side of the lower jaw.
That’s a total of six fighting teeth. Sometimes it’s like opening a shark’s mouth!
Next month, let’s take a peek at some of the things that can go wrong in a farm animal’s mouth.
In my last post, we looked at scale—the scale of your growing and scale of available equipment, and how the two intersect. But what scale of equipment do you need for your growing operation?
This question requires a holistic consideration. Let’s start with property size.
Property Size
The amount of acreage you manage is not necessarily a comprehensive way of determining the scale of your equipment needs.
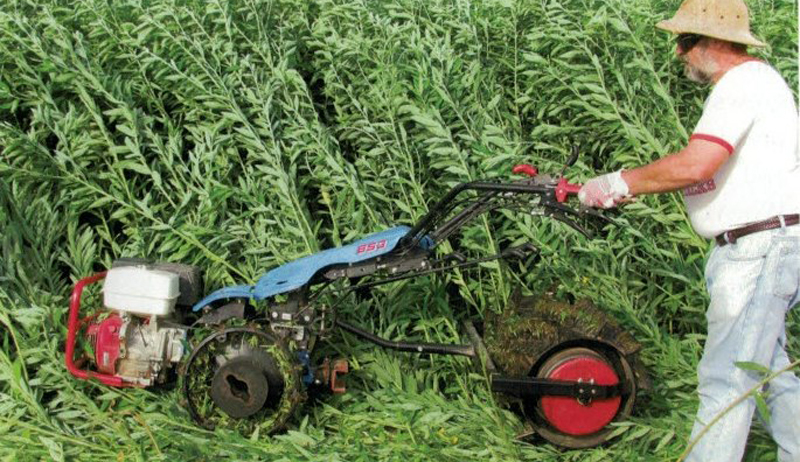
Let’s say you own 300 acres, but 275 of these are forested. You are primarily interested in starting a small market garden on just 2 acres. Well, for any operation under 5 acres, a walking tractor or sub-compact is the way to go.
At 2 acres of vegetable gardening, you could certainly do justice with just a walking tractor and a mix of implements.However, if you wanted to do comprehensive work in the forest, you might consider a 4-wheel tractor.
Additionally, if you had a very long laneway to snow blow, you may want a 4-wheel tractor. At the same time, the 4-wheel tractor would be helpful for moving supplies and compost to your garden plots.
That being said, the fast and efficient operation of a 2-wheel tractor and its maneuverability may still be desirable for the market garden. So perhaps a pairing of equipment would be best.
Another individual, however, might approach the same property and decide that all they want to do in the forest is cut some fire wood with a chain saw, split it with a log splitter (which you can operate with a two-wheel tractor), and haul it home in a pickup truck.
So again, property size is relative. Although the general rule suggests larger property might require larger equipment, we often find that actual equipment requirements are really relative to what you want to do on your property and how you meet your needs with a compliment of equipment.
On the other hand, if the scale of my entire property was just 3 acres, I would definitely recommend maximizing the space for smaller equipment. That way, I could increase the overall yield of the land by scaling operations to a 2-wheel tractor setup.
Remember, larger tractors need space to move around. And that space often is unproductive laneways.
On the other hand, if you are growing 15 acres of fruit, a small 4-wheel tractor would be much more efficient for many operations, from mowing to harvest. And you can justify the extra space for turning at the end of the rows.
Again, consider your whole property in the equation. If you have 5, 10, 15, 25, 50 or more acres, it is very likely you might have multiple needs for a 4-wheel tractor, if only for its bucket. (I don’t say this lightly. My bucket has paid for itself over many years of farming and homesteading.)
Hands-on
Every grower uses hand tools, no matter the scale. But can you run your entire operation and garden with just hand tools?
Indeed, you can grow a good deal of food (with no more wheels than are on your garden cart) with tools like a shovel, broad fork, garden rake, electric tilther and push seeder! When you compliment these with an electric chain saw, powered weeder and a few other power tools, your equipment set is complete.
For urban and suburban properties between 1/16 and 1 acre, this may be all you need.Large properties could also use just hand tools by increasing the quantity of tools available and the humans available to use them.
With the extra tools and human power, timely activities are performed efficiently and effectively when needed.
In addition to questions of property size, you have the question of budget.
Hand tools will cost the least ($), then walking tractors ($$). Subcompact tractors ($$$) follow, then agricultural scale tractors ($$$$$). At certain scales the increase in cost is justified because of the work you can do and the yield (profit) you can achieve.
Say I am growing 12 Permabeds that are 4 feet wide by 25 feet long. I can feasibly build all these by hand with human muscle and hand tools. I can prepare them easily each spring, plant them, weed, water and harvest in a similar fashion using specialized garden tools.
On the other hand, if I had 12 Permabeds at 300 feet long, I may consider a walking tractor and a few implements. This would make the bed building process easier and the spring preparation quicker. Also, I can then get a snow blower so I don’t have to pay my neighbor to blow my driveway!
You Get What You Pay For
Can you manage a 1/3 acre garden with hand tools? Yes! Can you also justify a 2-wheel tractor? Also yes!Because if you want to manage the land for increased bed turnover and multiple crops per year, you effectively crop the ground three times!
This means you are managing more like 1 acre of garden.
A walking tractor will help you quickly mow vegetable debris and re-prepare the bed with a power harrow.In addition, you may have another 1/4 acre in lawn, with some edible landscaping and a driveway.
So now you can blow snow, mow your lawn and even do initial bed prep for your fruit and berry landscaping.The question of expense is ultimately one of utility and equipment versatility.
If you can find a way to use your hand tools, two-wheel tractor or four-wheel tractor in more ways and through more seasons, you will more easily pay for it. And that, my friends, is a good investment.
Be wary of buying equipment you see only seldom use for. Instead, hire these jobs out. We will look more at compliment of equipment in our next article.
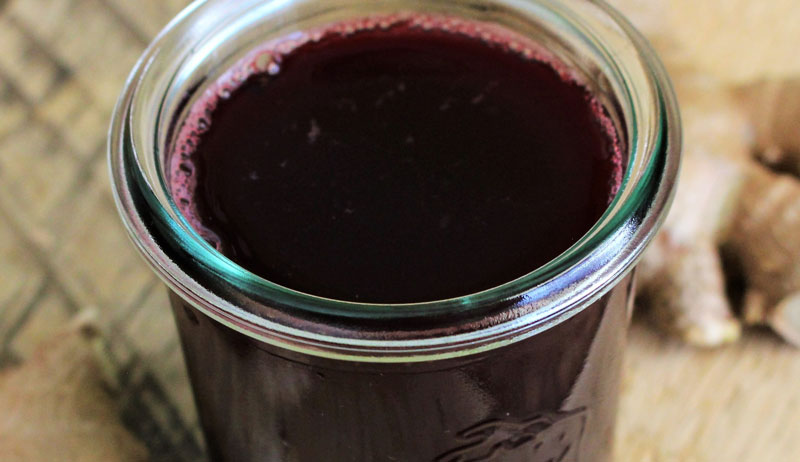
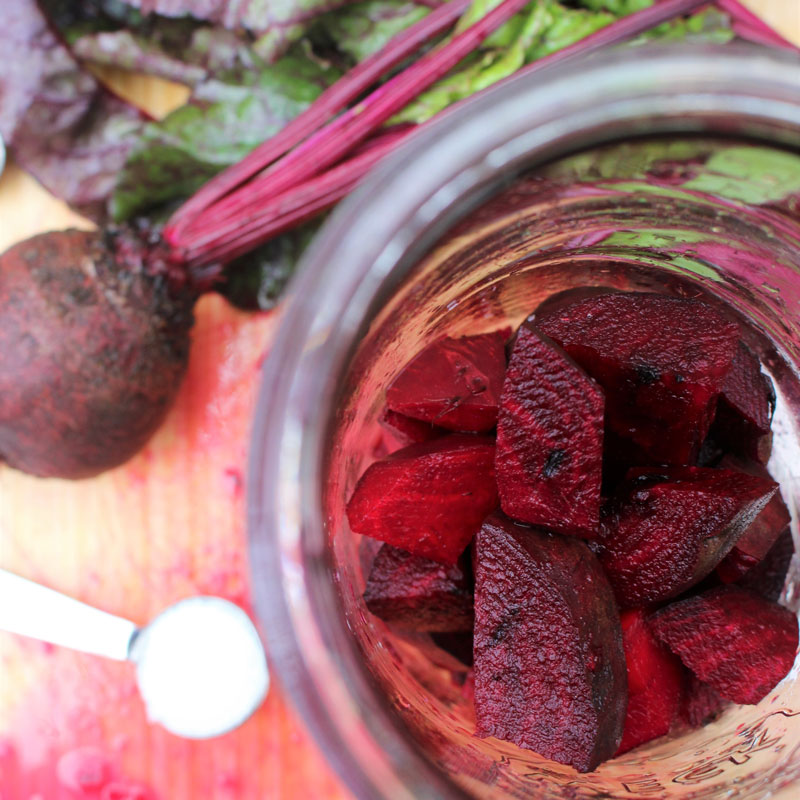
Kvass is best known as being a traditional Russian drink that is made with rye bread. But kvass roots (so the belief goes) date back to Ancient Egyptian times. Beet kvass is a twist on the traditional rye bread beverage, and, with the addition of ginger, it is even more belly-friendly.
Beets are rich in antioxidants, they are known to lower cholesterol levels, and they act as a natural detoxifier. You’ll want to incorporate this easy probiotic drink into your food preservation regimen!
Yield: 1 quart jar
Ingredients
Three to four small tender beets, cut into 1- to 2-inch chunks, leave skin on
2-inch chunk of fresh ginger root (or more for more a potent flavor), skin on, coined
1 tsp. coarse kosher salt
water, as needed
Wash beets, scrub well and trim off ends and greens. Cut into uniform chunks, about 1 to 2-inch square.
Scrub ginger well, cut into coins about 1/2 inches thick. Fill a clean quart jar with beets, ginger and salt (at least half full.)
Fill with cold water, leaving 1 to 2 inches of headspace (top of the water level to the rim of the jar). Stir well.
If you have a small fermentation jar weight, add it to the jar to keep the ingredients completely submerged under the brine. Remove any small pieces of produce that float up to the top of the brine, as produce above the brine will increase the risk of the ferment spoiling.
Wipe off the rim of the jar with a clean, dampened towel. Add the canning jar lid, and tightly screw on the ring.
This is a four- to six-day ferment. Ferment at room temperature, ideally between 60-75 degrees F (15-23 degrees C), and keep out of direct sunlight.
Check on the ferment daily to make sure the brine is covering all the produce. If the produce has floated above the brine level, use a clean utensil to push it back below the brine or scoop it out.
Stephanie Thurow
Burp the jar daily. Just unscrew the lid briefly and tighten it back on to allow any built-up gas to release. (You’ll avoid possible jar breakage or the ferment from overflowing).
This is an active ferment. Foam-like bubbling after a day or two of fermentation is totally normal and a sign that things are fermenting along just as they should be.
Ferment until the liquid turns to a deep purple. Taste test to determine completion (the flavor should be tangy and earthy). Once done to your liking, transfer to the refrigerator and enjoy within three weeks.
Kvass is best chilled. Drink a small glass between meals, to aid in digestion.
Side notes
If you do not have a glass jar weight, you can improvise by using a small, easily removable, food-grade glass dish that fits inside the jar. Or, if you have a smaller glass canning jar that can fit into the mouth of the jar you are fermenting with, you can use that to keep the produce pushed under the brine.
Don’t like ginger? Leave it out.
If you are unsure if your water is safe for fermentation, you can boil it. Allow water to fully cool to room temperature before adding it to the jar.
After you drink all the kvass, eat leftover beet chunks as-is, blend into a smoothie, or juice or compost them.
This recipe has been adapted from WECK Small-Batch Preserving (2018) with permission from Skyhorse Publishing, Inc.