Categories
Animals

Winter Livestock Management: Assessing Condition

Winter livestock management is crucial for keeping animals healthy, maintaining proper body weight, and preparing for spring births. Midwinter is the ideal time to evaluate the condition of your herd or flock, identify animals that may be underweight, and adjust feeding or care as needed. One of the most reliable ways to do this without scales is body condition scoring (BCS)—a hands-on method that assesses fat coverage and muscle tone in horses, cattle, goats, sheep, and even backyard poultry. Regularly checking winter livestock helps ensure each animal is thriving and ready for the season ahead. Let’s go through a few to take a closer look.

Assessing Body Condition in Horses

Horse owners should use the Henneke Horse Body Condition Score, which utilizes a range of 1 to 9, with 1 being extremely emaciated and 9 being extremely obese. This score emphasizes evaluating a horse’s neck, withers, tailhead and ribs, as these are common places for fat deposits.

Given that many horses grow thick winter coats, in order to best determine a horse’s BCS, get your hands on your horse and see how easily you can feel ribs or how rounded the crest of the neck really is. Keep in mind that there isn’t one perfect score for all horses. Lanky, athletic thoroughbreds are frequently at a score of 4, while chunkier ponies tend to sit about a 6.

The importance of using this system is to monitor changes in an individual animal over time. If your horse started as a 5 in the fall but now is a 4 or a 3, this indicates the animal is not consuming enough calories to maintain body weight, and some management changes are needed. Likewise, if your horse started as a 6 but is now an 8, maybe you’ve given that animal too much time off for Christmas vacation.

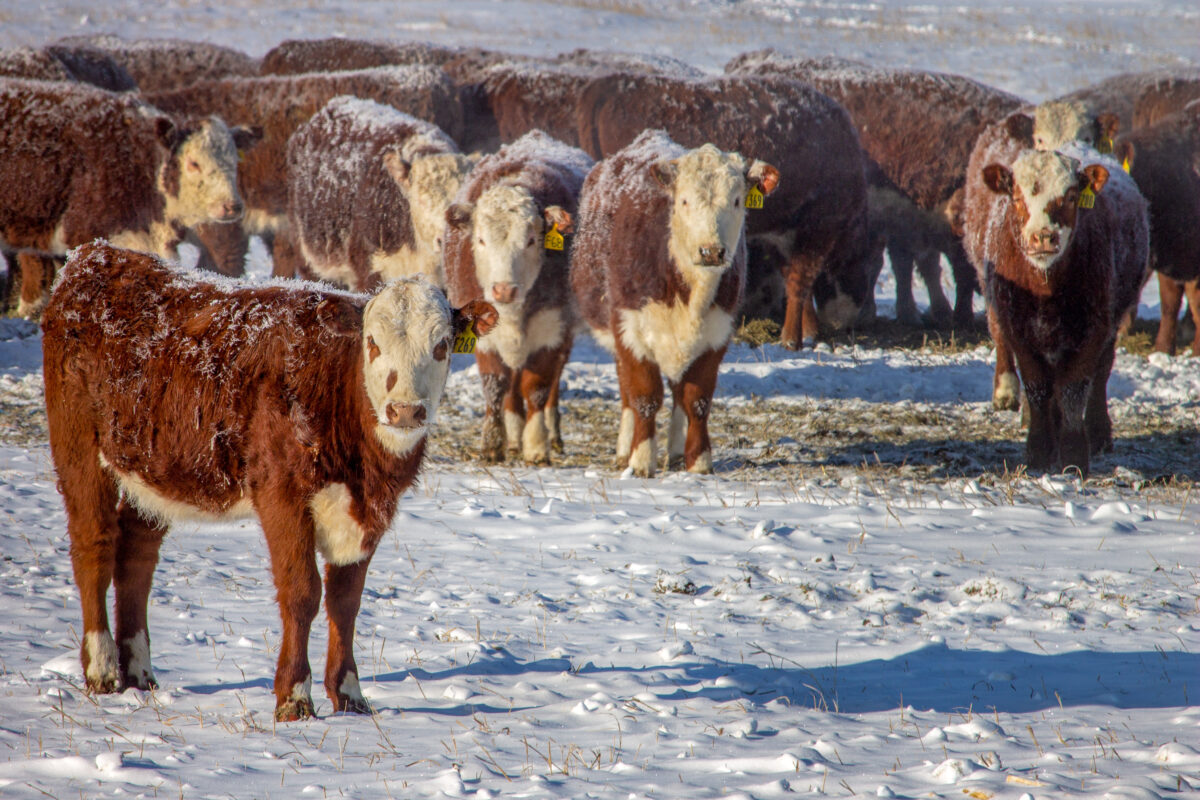
Evaluating Winter Livestock: Cattle Condition

Beef cattle have a 9-point scale like horses, but the anatomical landmarks are a little different. Instead of looking at a cow’s neck like you would a horse, a major emphasis is on the cow’s pelvis—namely, how prominent are her “hook” and “pin” bones. With cattle, it’s ideal to evaluate the animal from the side and behind to get the best sense of the depth of bony prominences.

Dairy cattle use a different scale that ranges from 1 to 5, typically including increments of 0.5. Anatomical locations are the same as for beef cattle. Most dairy herds should aim for scores ranging from 2.5 to 4.0, but notice that individual body conditions within a herd will normally vary over the course of a year based on where a particular animal is in her lactation cycle. For example, in the period after freshening (calving), a dairy cow might be a 2.5 while a dry (non-lactating) cow might be a 3.5 or 4.

Checking Goats and Sheep

Dairy goats are evaluated using the same scale as dairy cows; however, goat evaluation involves more hands-on assessment. Placing your hand along her spine, hips, and sternum allows a good sense of the fatty tissue present. If desired, the same scoring system can be used for meat goats.

Although a bit arbitrary, sheep scoring uses a scale of 1 to 5, without the 0.5 increments. Most ewes should be kept between a 2 and a 4, depending on her life stage.

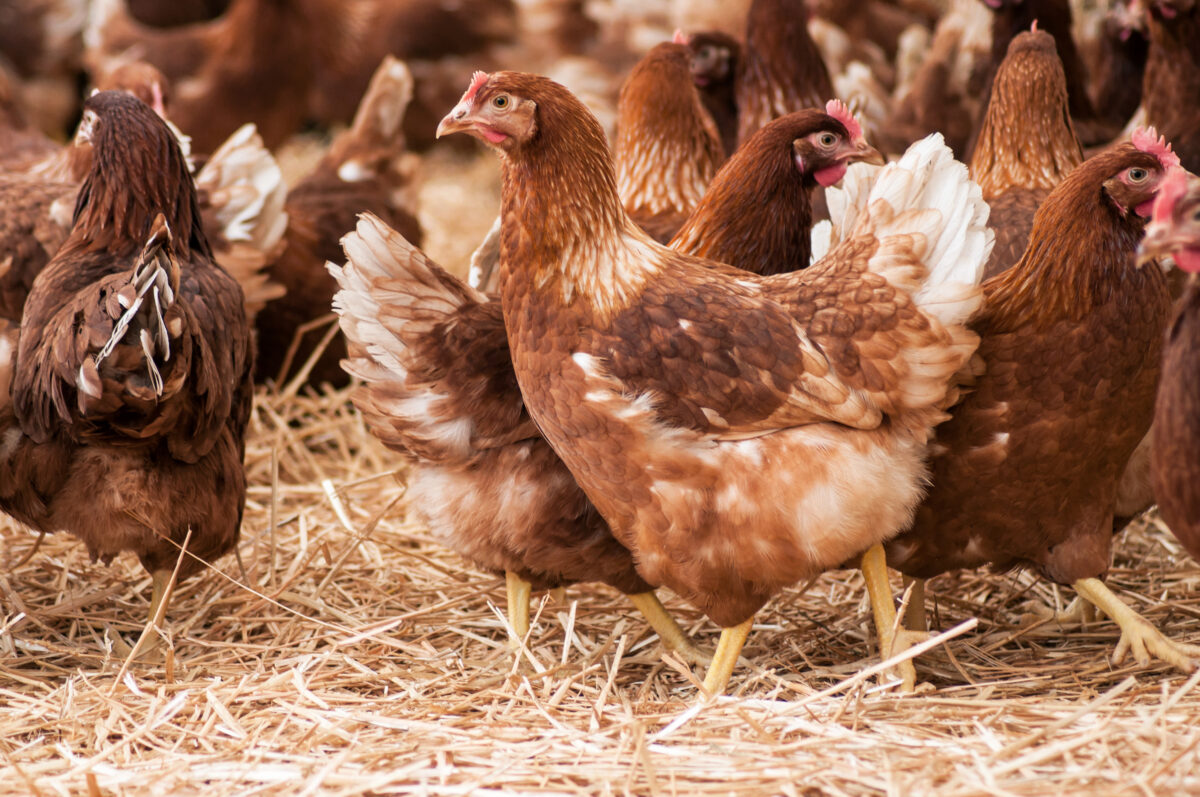
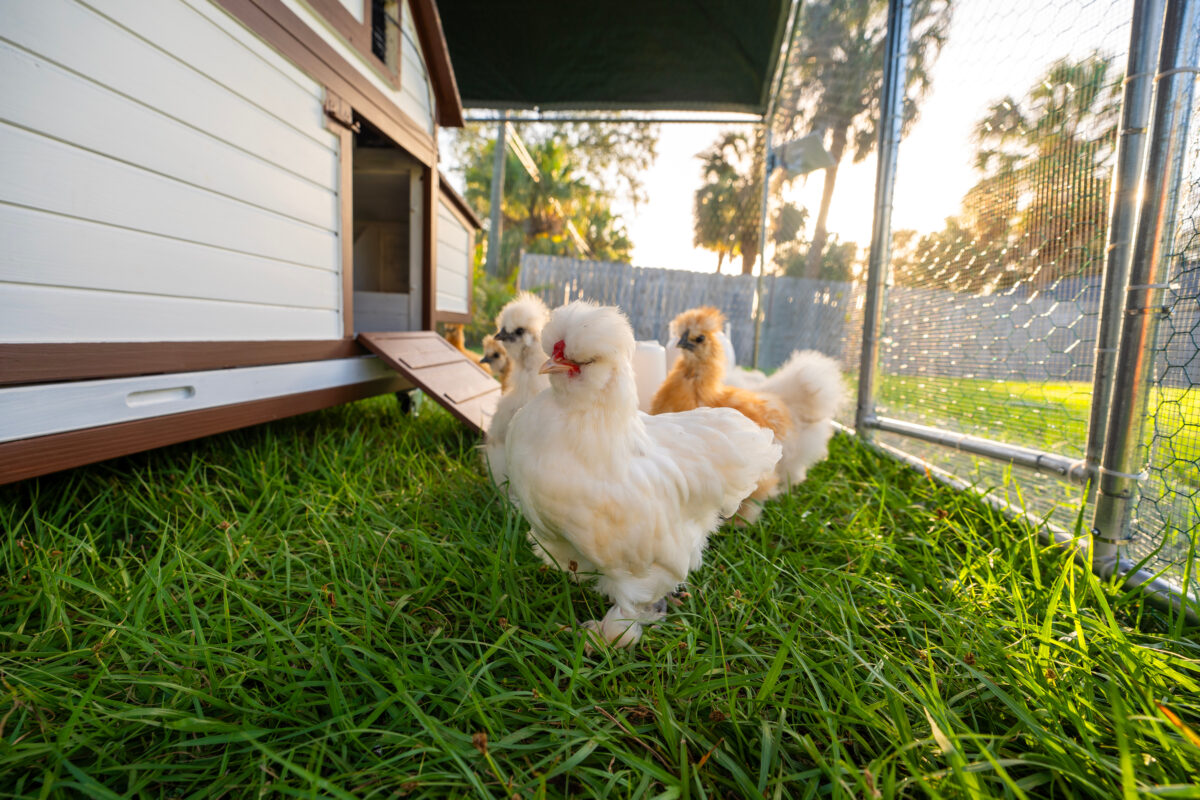
Body Condition Tips for Backyard Poultry

Interestingly, a fully accepted body condition score for chickens hasn’t been developed yet. A 2010 paper from New Zealand suggested a 0 to 3 scale, which farmers might consider. Like the other scales, it involves evaluating the prominent bones of the animal, and in this case, the keel of the bird is used.

Practical Tips for Accurate Scoring

If you have a hard time determining whether an animal is a 4 or a 5 on a scale, particularly on a 9-point scale, take a step back. First, train your eye on any obviously thin or fat animals in the group. Identifying those outliers can clue you in to the more subtle changes between animals that are closer to where they should be.

Winter Livestock: FAQ

Q: What is body condition scoring (BCS)?
A: Body condition scoring is a hands-on method to evaluate an animal’s fat coverage and muscle tone. It helps you determine if livestock are underweight, overweight, or in ideal condition.

Q: How often should I check winter livestock condition?
A: For most herds or flocks, midwinter is an ideal checkpoint. High-risk or pregnant animals may need more frequent monitoring to ensure proper nutrition.

Q: Can I assess livestock condition without scales?
A: Yes. BCS relies on visual and tactile evaluation of key areas like the ribs, spine, and pelvis, making it effective without a scale.

Q: Does a winter coat affect body condition scoring?
A: Thick winter coats can make it harder to see fat deposits. Use your hands to feel areas like the neck, ribs, and tailhead for an accurate score.

Q: What should I do if an animal is underweight?
A: Separate thinner animals if needed and adjust feeding plans. Monitoring condition now helps ensure they are in optimal health by spring.

Q: How do I body condition score chickens?
A: While there isn’t a fully standardized scale for chickens, you can check the keel (breastbone) and overall muscle/fat coverage. Feel along the breastbone—too prominent indicates underweight, while hard-to-feel bones may indicate overweight.

Q: Can I use the same BCS scale for goats and sheep?
A: Dairy goats can use the same 1–5 scale as dairy sheep or cows, but meat goats may need slightly adjusted interpretation. Focus on the spine, hips, and sternum to judge the condition.

Q: How can small-scale farmers track livestock condition effectively?
A: Keep a simple chart or notebook with each animal’s BCS at regular intervals. This helps spot trends over time and quickly identify animals needing extra attention.

Q: Are winter feeding adjustments different for mixed-species small farms?
A: Yes. Each species has unique energy needs. Monitor body condition closely and adjust feed amounts or quality to ensure all animals maintain a healthy score through winter.

Q: What’s the easiest way for backyard farmers to notice underweight animals?
A: Compare individuals within the group. Animals that look noticeably thinner or feel bony compared to their peers are likely underweight and should be prioritized for feeding adjustments.

This article about winter livestock management was written for Hobby Farms magazine. Click here to subscribe.

Categories
Poultry

6 Types Of Poultry to Consider For Your Farm

The types of poultry to consider raising on a farm are considerable. Each variety brings unique needs and benefits, and you might find room for all of them or discover that only one type will really fit your lifestyle.

People might think chickens are the only option for farm-fresh eggs, but that is not the case. Most farmyard poultry lay eggs, all the species are prized for their meat, and some have other special skills to offer the homestead.

1. Chickens: The Classic Farmyard Bird

As the best-known backyard farm bird, chickens are valued because they are easy keepers and quite useful. They’ve been part of farmyards for about 5,000 years, since first being domesticated in Asia from a wild bird known as the Red Junglefowl. These spangled birds are still found on islands across the South Pacific today.

The appeal of chickens in ancient societies and our modern world is their incredible versatility as a domesticated animal. Chickens do it all: They lay delicious eggs, they provide meat, they eat bugs, they can have beautiful spangled feathers, they can be great pets, they give you organic manure, and they are cheap and easy to keep.


Also Read: 5 Tips For Effective Poultry Showmanship


An adult hen lays four to six eggs a week, which means three or four chickens are enough to keep a family well supplied. They do not need a rooster to lay. Raised for meat, a chicken can feed a family for several days, providing lunch meat, salads and soups. Chickens require about 4 square feet per bird and a small run. They eat approximately 1/4 pound of feed a day, and it’s quite easy to grow your own chicken feed. Many farmers will fund their chicken feed purchases directly with the sales of their farm-fresh eggs.

2. Friendly Geese for Eggs and Meat

The earliest domesticated poultry, geese can be friendly and useful additions to the farmyard. They take marginally more work than a flock of hens, but they are still easy keepers and can bring you a variety of rewards.

Geese can lay 20 tp 40 eggs a year, and a goose egg is large enough to make a full omelet on its own. Geese are prized for their delicious dark meat, and when slaughtered their fluffy under feathers make the down that stuffs our pillows and comforters.

These large birds also have some unexpected uses. They are used for weeding several broad-leafed crops, such as keeping the growth around plants like strawberries under control while leaving the sweet fruits behind. They also make excellent guard animals, honking loudly at the sign of any intruders or changes. While geese have a reputation of being aggressive, hand-reared ones are usually docile and friendly, all honk and no bite.

Geese do need more space, about 10 square feet per bird. They need access to water in order to swallow their food, but they don’t need a full pond to bathe in. As long as water is deep enough for them to immerse their beaks, they should be fine, and geese kept on pasture in summer need little if any grain to supplement their grazing. Geese kept on grain eat about 1/2 a pound a day.

3. Ducks: Water-Loving Poultry

Ducks have been farmed for thousands of years, and wild ducks were hunted and their eggs scavenged even before that.

There are far more different types of ducks in domestication than you might guess. There are upright, skinny varieties known as runners; the meaty-faced, unique Muscovies; and also plumper, swimming breeds that descend from wild Mallards. Each type has its own needs, but like geese, ducks do not need a pond to be happy. Ducks use water to bathe and eat—they also cannot swallow without immersing their beaks.

Ducks need approximately 4 square feet per bird. Geese and ducks sleep on the ground, unlike chickens, who prefer being able to roost at night. Adult ducks will eat about 1/4 pound of feed a day, and love special treats. Ducks are omnivores and enjoy tadpoles, lizards, and mice as much as lettuce, tomatoes, and bread.

One thing to keep in mind with ducks, especially breeds such as Mallards and Pekins, is that they are much messier than other poultry. Waterfowl are intrinsically dirty, as part of their daily toilette includes splashing in water that will cover the area they are kept in, and if there’s mud anywhere on your farm, it is guaranteed they’ll find it and play in it.

4. Guinea Fowl: Low-Maintenance Foragers

Guinea fowl are African birds most similar in appearance to turkeys, with bald blue heads and speckled bodies. Originally hunted and eventually domesticated, these birds are very low-maintenance, but most remain at least somewhat wild.

Many farmers keep guineas without any shelter at all, as they can fly high enough into the trees for night roosting to be safe from predators. If kept in captivity, they need 2 to 3 square feet per bird for a shelter. Additionally, guineas eat almost no feed during the summer months, when they are expertly foraging. They lay eggs seasonally, in the spring and summer, usually about 30 a year. Plump birds, they make good eating and are said to be more flavorful than chicken.


Also Read: Find Your Poultry Purpose Before Building A Flock


Apart from eggs and meat, many farmers keep guineas to protect flocks of smaller birds, such as chickens, and to reduce pests such as ticks and snakes on the farm. Guineas are active foragers and love little insects like ticks, and they are fearless hunters when confronted with snakes. They won’t shrink from mice or rats, either.

Guineas are very loud birds and they wander far when left to free range. They’re not on the ideal types of poultry list if you’re looking for a pet, but they are excellent low-maintenance fowl if you want pest control and fresh eggs.

5. Tiny Quail for Small Spaces

Another bird whose behavior usually hovers on the edge of domestication is the quail. Quail are similar to pheasants, another of the types of poultry one might find on the modern homestead. Pheasants are often larger, and they usually have brighter plumage and louder calls.

Quail are great birds to keep on a small farm because they themselves are diminutive and need only one square foot per bird in a shelter. They don’t roost and don’t require nesting boxes, preferring to lay their eggs in private corners. Skittish by nature, they love having plenty of places to hide in their run.

Quail are productive layers, averaging more than 200 eggs in a year. These eggs are tiny and speckled, and they are considered a delicacy. Quail meat is also prized; however, the breed yields very little per bird. They are very active and must be kept amused in their run or allowed to free range. This also makes them highly entertaining to watch forage and play, and adult quail eat only about 15g of feed a day.

Being so tiny—adults are about 1/4 of a pound—quail are always at risk to larger predators. They must be kept away from large house pets such as dogs and cats, and they need a secure shelter from even smaller predators such as rats and skunks.

6. Turkeys: Showy and Social Birds

Turkeys make striking additions to the barnyard, the males always happy to show off their plumage and bright blue heads. First domesticated about 2,000 years ago, turkeys originate from Mexico and Central America. Turkeys are raised primarily for their meat but are becoming more popular as pets.

While you are probably familiar with turkey meat from the Thanksgiving tradition, these birds also lay two or three eggs per week that can be scrambled or fried just like chicken eggs. Turkeys are great fliers and can be kept without a run, as they will roost out of reach of predators at night. They eat about 1/2 pound of feed a day but can consume less if they are actively foraging.

Turkey owners describe the birds as surprisingly affectionate, allowing themselves to be carried around and choosing to hang out with their human companions instead of shying away. Weighing around 20 pounds each, adult turkeys can also effectively guard a flock of smaller birds. They are notoriously curious, which might lead to their fearlessness of people.

Unique Birds to Consider for Your Flock

There are plenty of other types of poultry you can keep on your farm. Emus, the flightless birds from Australia, have become prized for their meat and large, speckled eggs. Because of their size, they require more space than the average poultry. Peacocks are kept on farms for their beautiful feathers and amusing personalities, despite their very loud calls. Swans, pheasants, partridges, and pigeons are all raised by farmers for various reasons and are well worth considering on your homestead.

FAQ: Farm Poultry Essentials

Q: What types of poultry are best for beginners?
Chickens are the easiest for new farmers due to their hardiness, versatility, and moderate space needs. Ducks and quail can also be beginner-friendly, depending on available space and interest.

Q: Do I need a rooster for hens to lay eggs?
No, hens will lay eggs without a rooster. Roosters are only necessary if you want fertilized eggs for hatching chicks.

Q: How much space does each type of poultry need?

  • Chickens: ~4 sq. ft. per bird

  • Ducks: ~4 sq. ft. per bird

  • Geese: ~10 sq. ft. per bird

  • Guinea fowl: 2–3 sq. ft. in a shelter

  • Quail: 1 sq. ft. per bird

  • Turkeys: ~10 sq. ft. per bird for roosting

Q: Can poultry live without a pond or water source?
Most poultry need water to drink, but only waterfowl (ducks and geese) require water deep enough to immerse their beaks for eating and bathing.

Q: Which types of poultry are best for meat production?
Chickens, turkeys, ducks, and geese are commonly raised for meat. Quail also provide a small but prized meat source.

Q: Are all poultry noisy or difficult to manage?
Noise and maintenance vary: geese and guinea fowl can be loud, while quail are quiet. Ducks tend to be messy, and chickens are generally easy to manage.

Q: Can poultry help with pest control?
Yes. Chickens, guinea fowl, and ducks actively forage for insects, ticks, and small pests, helping reduce unwanted bugs in your garden or yard.

Q: How many eggs can I expect from each type of poultry?

  • Chickens: 4–6 eggs per week per hen

  • Geese: 20–40 eggs per year

  • Ducks: Varies by breed; generally 100–300 per year

  • Guinea fowl: ~30 eggs per year

  • Quail: 200+ eggs per year

  • Turkeys: 2–3 eggs per week

While raising every type of poultry isn’t always practical, adding a few unique birds to your flock can be rewarding if you have the space and time. These less common fowl can bring unexpected benefits, from pest control to egg production, and add extra charm to your farmyard.

This article about six types of poultry for a farm was written for Hobby Farms and Chickens magazines. Click here to subscribe. 

Categories
Poultry

10 Chicken-Keeping Resolutions to Improve Your Flock

Many of us start a new year thinking about personal goals, from eating better to exercising more. But for chicken keepers, the new year can also be a time to set goals for our flocks. Whether you’re raising a handful of hens or managing a larger backyard flock, there’s always room to improve their care, comfort, and health. Here are some practical and inspiring chicken-keeping resolutions that can help make this year your best for flock-keeping yet.

1. Feed Your Flock Better

A popular resolution among backyard flock keepers is to switch their birds to a more wholesome feed. “I’m tired of fillers in their food,” noted Cammy G. “I want everything my birds eat to be good for them.” Looking to offer your flock more nutritious eats? Check with your local feed mill or farmers co-op for suggestions; some feed mills can formulate feed to specifically suit your flock’s nutritional needs. 

2. Keep Runs Dry and Safe

Frequent rains can leave many a chicken run soupy, marshy and muddy. Putting down shavings, straw, sand and other absorbent materials to sop up the excess run moisture is common and can help prevent adverse effects, such as bumblefoot and parasites. It also helps so your chickens don’t look like they just fought in World War II trenches. 

3. Decide on Flock Size

Many chicken owners plan to expand their flocks in the spring, and many plan to purchase chicks locally or from online hatcheries come March or April. Some are looking to trim down their flock to a more manageable number. Either way, make sure to match the number of chickens in your flock to your available space, budget and available time to care for your flock.

4. Upgrade Coop Comfort

Many chicken keepers have a poultry resolution to improve their hens’ housing with a brand-new coop. “I’ve added a few more hens over the years than I bargained for,” Rick K. explained. “It’s time I gave my girls a home they can actually spread their wings in.” For some poultry owners, a new coop is more about human convenience than chicken comfort. “I’m planning for storage shelves for feed sacks and spare equipment,” Hoon H. shared, “and human access so I can actually stand inside.”

5. Limit Unplanned Rooster Guests

Sometimes, chicken keepers can be overly hospitable when it comes to giving homeless birds a place to call their own. “My New Year’s resolution is to stop my husband from ‘finding’ roosters to bring home,” asserted Cristy R. “By the way, does anyone need one (or two)?”

6. Share Kitchen Scraps Wisely

Providing extra treats is a common poultry resolution, much to the delight of numerous chickens throughout the country. A quick tip to make this happen is to, instead of throwing away or composting kitchen scraps, offer them to your flock. “I was composting vegetable butts and meat trimmings after Thanksgiving when I looked out the window and realized my chickens could be eating these,” said Angela D. “I got caught up in Christmas prep and didn’t start doing that yet, but I will once all the holidays are over.”

7. Hatch Your Own Chicks

Those lucky enough to receive an incubator as a holiday gift have a very specific resolution to hatch their own chicks. From mini-machines that carefully coddle six eggs to cabinets that can contain hundreds, the holidays were happy ones for those with peeps in their plans.

8. Maintain a Clean Coop

Probably for all chicken owners, a perennial resolution is to keep a cleaner coop. “Work, kids, clashing schedules … I can barely keep my own house clean,” Melissa C. commented. “This year, I’m going to keep on top of keeping the waterers and feeders clean.” Some ways to do this include changing coop litter more frequently, scrubbing out the coops themselves, and ensuring no insects, mice, or parasites set up shop inside.

9. Prioritize Flock Health

Among the universal chicken-keeping resolutions is improving the health of your flock, whether it means getting birds tested yearly for pullorum, fowl typhoid and avian influenza; checking birds regularly for frostbite and bumblefoot during the colder months; and inspecting for mites, worms and other parasites on a regular basis. “They’re my feathered babies … it’s time I took care of them like my own kids,” declared Carmen M.

10. Welcome New Chicken Keepers

To those for whom getting new chickens is your chief New Year’s resolution, we all welcome you to the world of chicken keeping!

This article about chicken-keeping resolutions was written for Hobby Farms and Chickens magazines. Click here to subscribe.

Categories
Farm & Garden

What to Do With Poinsettias After Christmas

What to do with poinsettias after Christmas is a question many plant lovers ask once the holidays are over and the decorations come down. Often treated as disposable, poinsettias are actually tropical perennials that can thrive year-round with the right care. Rather than tossing your plant once the bracts fade, you can keep it healthy through dormancy, encourage lush summer growth, and even bring it back into color for next holiday season.

Poinsettias are among the most popular holiday plants, but they’re often treated as a “throw-away” plant. Unfortunately, as soon as the New Year arrives, most of them make their way to the garbage dump or compost pile. Rather than disposing of these lovely plants, they should be grown as a house-and-garden plant all year long. Even when not in flower, poinsettia’s dark green, tropical foliage is quite striking.

Poinsettia Care After Christmas

After the holidays pass, continue to keep your poinsettia in a bright window, but out of direct sunlight. With proper care, it will stay in flower for many weeks. Place your poinsettia in a room with a daytime temperature between 65 and 75°F. Nights can be a bit cooler, but the temperature shouldn’t dip below 55. Be sure to keep your poinsettia away from cold drafts. These tropical plants resent cold temperatures. Also, avoid hot drafts, such as those from appliances and forced-air heating ducts.

How to Water and Fertilize a Poinsettia Indoors

Water the poinsettia whenever the soil is dry to the touch. Do not allow it to completely dry out. To water, put the pot in the sink and flush tepid tap water through the pot until the potting soil is saturated. Allow the container to fully drain before putting the plant back on display.

Some of the leaves and bracts (the colored “leaves”) may drop off over the coming weeks. This is normal. While the plant is still in bloom, fertilize every three weeks with an organic, water-soluble liquid fertilizer. Allow the plant to continue to grow until all the bracts naturally drop in late winter. As soon as all the bracts drop, discontinue fertilization and reduce watering to once every 10 to 14 days.

Managing Dormancy and Winter Rest

From now until spring, the plant will be resting; perhaps entering a completely dormant state if all of the leaves drop off. As long as the stems remain flexible, the plant is still alive.

When and How to Prune a Poinsettia

In early March, cut the plant back by a third. By removing the terminal portion of all the stems, branching is encouraged, and the plant will stay compact and well-shaped.

Moving Poinsettias Outdoors for Summer Growth

In late April, begin to put the plant outdoors in a shady site only for a few hours during the day, and only if temperatures remain in the 50s or 60s. Bring it back indoors at night. The plant will slowly become acclimated to outdoor growing conditions and will begin to produce new leaves. Once the danger of frost has passed, repot the plant into a slightly larger container using new potting soil or plant it directly into the ground. Position it in full to partial shade. Keep it out of direct sunlight during midday.

Continue to water your poinsettia throughout the summer months and fertilize every two weeks with an organic, water-soluble fertilizer. In early July, prune the plant again, removing about a third of the plant’s height. This encourages further branching.

How to Get Poinsettias to Rebloom

Once early September arrives, move the plant back indoors. You must do this before the nighttime temperatures drop below 50°F. Starting Oct. 1, get the plant to re-bloom by keeping it in complete darkness for 14 hours each day. This period of darkness cannot be interrupted by any amount of light, natural or artificial. Many people put the plant into a dark closet until the 14 hours have passed. Doing so means that every day at 5 p.m. the plant goes into the closet, and every morning at 7 am it comes out, religiously and without fail. Poinsettias are so sensitive that if you miss a night or the room is not completely dark, the plant might not turn colors at all. You can also put the plant into a large, black plastic trash bag sealed with a twist tie for 14 hours each day.

Once the poinsettia begins to show color, about eight weeks later, you can discontinue the process and enjoy your beautiful blooms for another holiday season.

What to Do With Poinsettias After Christmas: FAQ

Do poinsettias come back after Christmas?
Yes. Poinsettias are tropical perennials and can live for many years with proper care. Even if the leaves drop and the plant appears dormant, it can regrow and rebloom the following season.

When should I cut back my poinsettia?
Prune poinsettias in early March by cutting the plant back by about one-third. This encourages branching and helps maintain a compact, attractive shape.

Can poinsettias go outside in the summer?
Yes. Once the danger of frost has passed and nighttime temperatures stay above 50°F, poinsettias can be moved outdoors. Place them in full to partial shade and gradually acclimate them to outdoor conditions.

How do I get my poinsettia to turn red again?
Starting October 1, poinsettias need 14 hours of uninterrupted darkness each night for about eight weeks. This strict light schedule triggers the bracts to change color in time for the holidays.

Instead of tossing your poinsettia once the holidays are over, a little patience and care can keep it thriving year after year. By understanding its natural growth cycle—from winter rest to summer growth and fall reblooming—you can enjoy this classic holiday plant long after Christmas has passed, turning a seasonal decoration into a long-lasting houseplant.

This article about what to do with poinsettias after Christmas was written for Hobby Farms magazine. Click here to subscribe.

Categories
Poultry

Reusing Egg Cartons: Can You Do It Safely?

A lot of people ask me about reusing egg cartons. I was reminded of this recently when I returned home to find a plastic bag hanging from the knob of my front door. Alarm bells went off in my head: it wasn’t a mail delivery, and I wasn’t expecting anything. I told the kids to stay back, approached carefully, and unhooked the bag. Inside were about a dozen colorful egg cartons, neatly stacked and clearly saved with good intentions.

Some generous soul had gone out of their way to collect these cartons and deliver them to our farm. As someone who composts and recycles diligently, I appreciated the gesture—and then promptly put the entire stack into the compost bin.

Despite their good intentions, many people don’t realize that egg cartons are considered one-time-use packaging. Reusing them can pose food-safety risks and, in some cases, violate state egg-labeling laws. Knowing when egg cartons can be reused—and when they shouldn’t be—is key to handling them safely and responsibly.

Why Reusing Egg Cartons for Eggs Is Unsafe

Few members of the egg-consuming public understand that, once used, an egg carton should not be reused and should be discarded. According to the U.S. Department of Agriculture’s Food Safety and Inspection Service, egg cartons are considered one-time-use packaging, similar to foam meat trays and plastic wrap. Reusing this type of packaging can cause cross-contamination with whatever foods they next contain. This is especially true with farm-fresh eggs, which are not pasteurized, often remain unwashed to preserve their natural bloom and can become contaminated with Salmonella before their shells even develop. The bacteria on and within eggs can pass into a paper-pulp egg carton and, from there, onto the next set of eggs placed inside.

Cartons and State Labeling Laws

Aside from health factors, egg cartons are also subject to state laws. The Michigan Egg Law Act, for instance, requires that all egg cartons be labeled with the name and address of the egg farmer, the egg size, the last date of sale for the eggs and the USDA’s safe handling label. And that’s the minimum. Furthermore, false or misleading labeling is prohibited. Egg cartons from supermarkets are usually billboards for egg producers. Covering all the print and designs on each carton would be time-consuming and ultimately not worth the effort, especially not when a brand-new carton costs around 50 cents. Egg-packing laws probably differ by state, so be sure to contact your state’s agriculture department to learn what applies to you.

Safe Ways to Reuse Egg Cartons

Personalized Cartons

Your customers probably won’t know that egg cartons cannot be reused. They might bring you a stack of cartons—some not necessarily yours—pleased that they’re being environmentally friendly. Smile, thank them, and by all means don’t lecture them about USDA egg-carton regulations (unless they’re your siblings or lifelong buddies). You can ask whether they would like these cartons to be designated as their cartons, for their specific use only. Most customers like the idea of having designated egg cartons. Use a permanent marker right there to mark the carton with the customer’s name. The person will probably be so excited about going green with the personalized carton as to request an on-the-spot refill.

Cartons as Compost Fill

Paper-pulp egg cartons are 100 percent compostable as brown/dry matter. You can put the cartons directly into your compost bin or heap, or take a few moments to tear, shred or otherwise render them into smaller pieces. Please note that polystyrene (styrofoam) egg cartons are not compostable and should be discarded.

Using Egg Cartons as Seed Starters

Their compostable nature and tidy dividers make paper-fiber egg cartons ideal for starting seeds. Poke a couple of small holes into the bottom of each egg cup, then fill 3/4 of each cup with potting soil. Plant your choice of seeds, and keep the egg carton watered and in a sunny, safe spot. When your seedlings are ready for transplanting, cut the egg cups apart, then place the seedling, egg cup and all, in your prepared garden bed.

Unsafe Uses When Reusing Egg Cartons

Unfortunately, many potential uses for old egg cartons are just bad ideas. Some of them are below.

  • Christmas-ornament organizers
  • Jewelry holders for earrings, rings, cuff links and charms
  • Desk organizers for paper clips, rubber bands and so on
  • Sewing organizers for needles, thread and buttons
  • Loose-coin sorters

Most importantly, never donate them to schools, preschools and adult-care centers for use in arts and crafts. Young children and the elderly are especially susceptible to Salmonella and should not handle used egg cartons. This threat is so serious that the Israel Health Ministry banned the donation of them at nursery schools, kindergartens and elementary schools.  Consider donating brand-new, clean cartons for their artistic enjoyment instead.

FAQ

Can egg cartons be reused for fresh eggs?
No. According to USDA food-safety guidance, egg cartons are considered one-time-use packaging. Reusing them can spread bacteria such as Salmonella from one batch of eggs to the next, especially when eggs are unwashed and retain their natural bloom.

Are all egg cartons compostable?
Paper-pulp egg cartons are fully compostable and make excellent brown material for compost piles. Polystyrene (styrofoam) cartons, however, are not compostable and should be discarded according to local waste guidelines.

Is it safe to reuse egg cartons for crafts or storage?
Used egg cartons should not be reused for crafts, storage, or donation to schools or care facilities. Children and older adults are especially vulnerable to foodborne illness. Only new, unused cartons should be used for these purposes.

Can egg cartons be used for starting seeds?
Yes. Clean, paper-fiber egg cartons work well as biodegradable seed starters. Once seedlings are ready to transplant, the individual cups can be planted directly into the garden.

Although egg cartons may look sturdy enough for repeated use, they aren’t designed for it. Food-safety concerns, cross-contamination risks, and labeling laws all point to the same conclusion: used egg cartons should not be reused for eggs. Fortunately, paper-pulp cartons still have value when composted or repurposed for gardening, allowing you to handle them responsibly without putting people—or poultry—at risk.

This article about reusing egg cartons was written for Hobby Farms and Chickens magazines. Click here to subscribe.

Categories
Crops & Gardening

How to Start a Christmas Tree Farm for Profit

How to start a Christmas tree farm is a question many small-scale and hobby farmers ask when looking for a profitable use for underutilized land. Every year, people across the nation purchase Christmas trees for their holiday celebrations, and while artificial trees are popular, there is always strong demand for real trees that provide the scent, ambiance and one-of-a-kind appearance that artificial options simply can’t match. While large-scale Christmas tree farms satisfy some of this demand, smaller farms can often fill an important local niche.

Before you dig in, though, the obvious question remains: Can Christmas-tree farming be a profitable endeavor for a small-scale hobby farm with little space to spare? Let’s explore what’s involved and find out.

How Long It Takes to Grow a Christmas Tree Farm

Christmas trees—unlike most crops—take much longer than a single season to reach maturity. “Christmas trees can take eight to 10 years from planting until harvest,” says Tom Harbinson, facilities & hospitality manager of the Jones Family Farms and Winery in Shelton, Conn. “That is a long-term commitment to the crop that a farmer should be aware of going into it.”

Historically, farmers often chose imperfect fields for growing Christmas trees, but if you want to give your trees the best start in life, choose a field with well-drained soil. Christmas trees won’t grow well in wet conditions. And though it’s easy to think that the trees will simply grow themselves without any maintenance, that isn’t the case.

“It is a crop that does still need care, such as pruning and shaping—making sure a single leader points upward to eventually hold a star or angel for a family’s tradition—as well as being aware of diseases that can attack and diminish a tree,” Harbinson says. Each tree must be sheared every summer once they have reached 3 years of age and roughly 5 feet in height to ensure that the branches grow thickly and form a beautiful Christmas tree shape.

It can also be tricky to establish the trees during the early years of their life, when they are vulnerable and require careful watering and weeding care. “There can be challenges in the early seedling stages regarding irrigation of the crop, particularly with drought that many areas of the country are facing,” Harbinson says.

There’s a very small window of time when the harvest of Christmas trees can be profitable, and farmers should keep this in mind. “Nobody is buying Christmas trees in July, so beware that although the activity of caring for the crop can be year-round, the harvest is obviously a seasonal one and return of revenue for your input creates craters and valleys over a span of time,” Harbinson says.

Best Tree Species for a Christmas Tree Farm

Obviously, not every tree will work as a Christmas tree. There’s a reason why broad-leafed deciduous trees aren’t used for Christmas celebrations: They drop their leaves in the fall and dry out quickly when cut. Even a tree cut on Christmas Eve might be shriveled and brown by Christmas morning.

As a result, the needle-leaved coniferous trees—which hold their beautiful appearance for much longer after being cut—are the ideal choice for Christmas trees, though some members of this family are more popular than others. Fir trees are among the most desirable species to use as Christmas trees, with Douglas fir being particularly ideal for beginners to grow. Spruce trees, such as blue spruce and white spruce, are also common. For a completely different look, pines such as Scotch pine or white pine can be grown, although you might find that there isn’t as much demand for these less traditional types of Christmas trees.

Can a Christmas Tree Farm Be Profitable?

Of course, the biggest question for a hobby farmer is whether growing Christmas trees on a small scale can be profitable these days. To put it simply, the answer is: Yes!

As with any crop, there will be expenses involved—depending on the size of your Christmas tree plantation, you might need equipment for planting, pruning and harvesting. Spraying for pests and hiring people to help with the harvest are other possible expenses. But according to the Penn State Cooperative Extension’s sample Douglas fir budget, even a single acre of Christmas trees can yield a sizable profit (in excess of $10,000) when properly managed. In addition, growing Christmas trees can potentially offer tax benefits; be sure to research the potential savings and requirements with an accountant before diving into Christmas tree farming.

But beyond the financial possibilities, there’s another reason to consider growing Christmas trees. Unlike many crops, growing Christmas trees allows you to be part of something bigger and more meaningful than simply growing a crop.

“Christmas celebrations are about traditions—the special foods and recipes created, the times together in family celebrations,” Harbinson says. “The activity of scouting for, selecting, harvesting and decorating a freshly cut Christmas tree to enhance your home for weeks on end is a special gift. The crop the farmer grows will become the centerpiece for a family’s traditions. That is a special gift.”

Selling Trees From a Small Christmas Tree Farm

With many kinds of crops, worrying about selling them isn’t a concern; if you’ve grown a small crop of potatoes in the corner of your farm, you might find it more enjoyable to eat them yourself than attempt to sell them. Obviously, this doesn’t work as well with Christmas trees, because unless you are planning a massive Christmas celebration involving dozens or hundreds of trees, the only way to get the benefits of the crop is to sell them.

There are a few different ways to sell your Christmas trees, depending on personal preference and how many are ready to harvest. One option is to let individuals come to your property and pick out the tree they would like; this works well if your inventory is small and if you want to charge a high price for your tree—selling directly to the end user cuts out the middleman—but if you have hundreds of trees, the logistics of selling each tree individually might not be feasible. Also, be sure to obtain appropriate liability insurance before opening your farm to consumers; the policies and options vary from state to state.

Another option is to sell your trees in bunches to larger businesses that can resell them individually; you might not get as high a price for each tree, but the reduced hassle of selling your trees in large groups can make it worthwhile. You can also blend the two approaches, cutting down your own trees and selling them at a predetermined time and location; this can save you from having people stop by your farm at random times to pick out a Christmas tree.

Because these trees are small and have many branches, they don’t make quality lumber, unfortunately, and they’re not well-suited for firewood either, so leftover Christmas trees will likely have to become mulch if you want to gain back some of your investment.

When preparing to invest in a Christmas tree crop, do some research in your area to determine what trees and sale methods might be popular. If harvested trees are widely available in your region but no one is offering a U-pick option, you might be able to fill a niche. Also, you might find that some types of trees are in higher demand than others; if you can identify the species and styles that are most desirable, you’ll have a head start on your way to success.

Expanding With Holly and Other Holiday Crops

If you’re looking to expand on your farm’s new Christmas theme, try growing holly, as well. This beautiful shrub grows attractive red berries and has long been a part of Christmas celebrations, with the branches being used as decorations. Because only the branches and not the entire plant are desirable, hollies can produce a steady supply of branches for years and years, making them a worthwhile addition to your Christmas tree farm. Perhaps you won’t grow enough to make a huge profit, but selling holly branches alongside your trees might help you encourage customers to keep coming back for your unique, home-grown offerings. Be careful , though: If your farm is also home to pets and livestock, holly’s leaves, fruits and seeds can be toxic to some animals.

How to Start a Christmas Tree Farm: FAQ

How much land do you need to start a Christmas tree farm?
You don’t need a large acreage to get started. Even one to two well-drained acres can support a small Christmas tree farm, making it a good option for hobby farmers with limited or uneven land.

How long does it take to grow Christmas trees for harvest?
Most Christmas trees take eight to 10 years from planting to reach marketable size, so growers should be prepared for a long-term investment before seeing returns.

What is the most profitable Christmas tree to grow?
Fir trees—especially Douglas fir—are among the most popular and beginner-friendly options due to their appearance, needle retention and strong consumer demand.

Can a small Christmas tree farm really make money?
Yes. While there are upfront costs and ongoing labor, a well-managed small-scale Christmas tree farm can be profitable, particularly when selling directly to customers or filling a local market niche.

For small-scale and hobby farmers, learning how to start a Christmas tree farm is as much about patience as it is planning. With the right land, thoughtful tree selection and a clear marketing approach, even a modest planting can grow into a profitable seasonal business. Beyond the financial return, Christmas tree farming offers something rare in agriculture: the opportunity to contribute to family traditions and holiday celebrations year after year.

This article about how to start a Christmas tree farm was written for Hobby Farms magazine. Click here to subscribe.

Categories
Recipes

Egg Yolk Cookies: A Festive Spiced Cookie Recipe


Egg yolk cookies are a delicious way to use up extra yolks from your holiday baking. Whether you’re making meringues, whipping up egg-white omelets or simply want to avoid waste, these cookies turn leftover yolks into something special. Tender inside with a lightly crisp exterior, they’re packed with warm seasonal spices and a splash of orange liqueur for brightness. (If you prefer, substitute fresh orange juice for the liqueur.) Just plan ahead—this dough needs a 30-minute chill before baking.

Yield:  30 to 32 cookies

Ingredients for Spiced Egg Yolk Cookies

  • 1 cup unsalted butter, softened
  •  1 1/2 cups sugar
  • 6 large egg yolks
  • 1 tablespoon orange liqueur, such as Cointreau
  • 1 tablespoon orange zest
  • 1/2 teaspoon fresh orange juice
  • 1 teaspoon baking soda
  • 1 teaspoon fine sea salt
  • 1 teaspoon ground cinnamon
  • 1/2 teaspoon ground nutmeg
  • 1/4 teaspoon ground allspice
  • 1/4 teaspoon ground cloves
  • 2 1/2 cups all-purpose flour
  • 1/2 cup turbinado or raw sugar, for rolling

Read more: Need to clean your eggs before using them? Here are 4 ways to scrub away dirt.


How to Prepare the Cookies

Preheat the oven to 350°F. 

To the bowl of an electric mixer, add the butter and sugar. Mix on medium for 30 seconds until the ingredients start to come together. Then turn to medium-high and mix for five minutes. Stop to scrape the sides a couple of times.

The butter and sugar should be fully creamed (like thick whipped cream) and pale yellow. 

Mix in the egg yolks just until incorporated, about 30 seconds. Then mix in the orange liqueur (if using), orange zest and orange juice.

Next, mix in the baking soda, salt, cinnamon, nutmeg, allspice and cloves until the spices are evenly distributed throughout the dough. 

With the mixer on medium-low, add the flour a little at a time. Turn the mixer to medium and mix just until incorporated, about 30 seconds. Use a rubber spatula to stir in any flour that may not be fully mixed in. Place the bowl with the dough in the refrigerator for 30 minutes. 

Put the raw sugar in a shallow bowl. Roll the dough into walnut-size balls, then roll them in the sugar to coat each ball completely.

Arrange on a nonstick baking sheet or a baking sheet covered in parchment paper. The cookies will spread. If you prefer perfectly round cookies without the chance of edges reaching each other, bake nine cookies at a time on a standard cookie sheet, versus 12. 

Bake the egg yolk cookies for 12 minutes, until the edges are very slightly browned and the cookies puff a bit. They will flatten and settle as they cool.

Cool for five minutes before transferring from the cookie sheet to a cooling rack. Store in an airtight container for up to three days. 

Egg Yolk Cookies: FAQ

Do egg yolk cookies taste different from regular sugar cookies?
Yes. Egg yolk cookies are richer and more tender thanks to the added yolks, and the spices give them a warm, holiday flavor.

Can I make egg yolk cookies without orange liqueur?
Absolutely. Simply replace the liqueur with the same amount of fresh orange juice. The cookies will still have a bright citrus note.

Why does the dough need to chill before baking?
Chilling helps the dough firm up, which improves the texture and prevents the cookies from spreading too much while they bake.

Can I freeze egg yolk cookies?
Yes. Freeze the baked cookies in an airtight container for up to three months, or freeze the dough balls and bake them straight from the freezer, adding a minute or two to the baking time.

How should I store egg yolk cookies?
Keep them in an airtight container at room temperature. They’ll stay fresh for about three days.

Egg yolk cookies are a smart, delicious way to make sure nothing goes to waste in your holiday kitchen. With their tender centers, spiced flavor and hint of orange, they’re a standout treat for gifting, entertaining or enjoying with a cup of cocoa. Once you try them, you may find yourself looking for excuses to save extra yolks just to bake another batch.

This article about egg yolk cookies was written for Chickens magazine. Click here to subscribe.

Categories
Recipes

Christmas Brunch Recipes: Three Festive Egg Dishes

Christmas brunch recipes are a highlight of the holiday season, especially when they feature farm-fresh eggs. For chicken keepers, it’s a yearly chance to showcase the bounty from your hens in delicious, celebratory dishes the whole family will enjoy. Here are three egg-centered recipes perfect for your festive table.

Cheese Soufflé: A Classic Holiday Favorite

Cheese soufflé is one of many Christmas brunch recipes that are delicious and something everyone craves.

Ingredients
  • 1 tablespoon butter, softened
  • 1/4 cup shredded Swiss cheese
  • 3 tablespoons butter
  • 3 tablespoons flour
  • 3/4 cup milk, heated
  • 1/2 teaspoon salt
  • 1/2 teaspoon black pepper
  • 1/8 teaspoon cayenne
  • 3 large eggs, at room temperature
  • 3 large egg whites, at room temperature
  • pinch of salt
  • pinch cream of tartar
  • 1 1/2 cups shredded Swiss cheese
Preparation

Preheat the oven to 350 degrees. Generously butter the bottom and sides of a 2-quart baking or soufflé dish with the softened butter.

Sprinkle 1/4 cup of shredded Swiss cheese into the soufflé dish so that it sticks to the buttered bottom and sides, creating a layer of Swiss cheese. If necessary, use more butter and Swiss cheese.

Melt 3 tablespoons of butter in a saucepan over medium heat. Gently stir in the flour, stirring continuously for two minutes until the mixture resembles a paste. Reduce the flame to low, then whisk in the heated milk, creating a roux.

Cook for one minute, whisking continuously. Remove from heat, then season with salt, black pepper and cayenne pepper.

Separate the eggs into two bowls: the yolks into a small bowl and the whites into a large bowl. Add yolks to the roux, continually whisking until the yolks are fully incorporated. Set aside.

Add the three egg whites to the bowl with the separated egg whites. Beat the egg whites until they hold soft, foamy peaks. Add the salt and cream of tartar, then continue to beat the egg whites until stiff peaks form.

Using a rubber spatula, gently fold one quarter of the egg whites into the roux. Next, fold the Swiss cheese into the egg white/roux mixture.

Finally, fold the rest of the egg whites into the mixture, turning the mixture until the cheese and the white/roux mixture have been gently incorporated. Do not beat, whisk or stir until blended. These actions will deflate the egg whites.

Scoop the mixture into your prepared soufflé dish, making sure that the mixture does not fill more than two-thirds of the dish. Set the souffle dish into a shallow baking dish, then carefully pour hot water into this outer dish so that the water level reaches halfway up your souffle dish.

Make sure no water gets into the soufflé dish.

Bake for 1 1/2 hours or until the soufflé has risen at least a half inch over the lip of the soufflé dish and is golden brown on top. Serve immediately.

Baked Eggs: A Simple and Elegant Christmas Brunch Recipe

One dish—baked eggs in ramekins—was one of my mother’s most successful Christmas brunch recipes. She served it on special occasions. These days, I make it part of Christmas brunch whenever she visits for the holidays.

Ingredients
  • 3 tablespoons butter, softened
  • 6 large eggs
  • 6 tablespoons butter, chilled
  • 3/4 cup heavy cream
  • salt
  • black pepper
  • fresh parsley, minced
Preparation

Preheat the oven to 375 degrees. Generously butter six individual ramekins. Set the ramekins in a large baking dish, then add enough water to reach halfway up the ramekins.

Cut each tablespoon of chilled butter into quarters. Place four quarters of butter into each ramekin dish.

Top the butter with 1 tablespoon of heavy cream, then break an egg into each of the ramekins. Bake on a low oven rack for approximately 10 minutes or until the egg white starts to thicken in the ramekins. Top each egg with four additional quarters of butter and one tablespoon of heavy cream.

Sprinkle each ramekin with minced parsley. Return to the oven and bake for an additional eight to 10 minutes or until the eggs are set but jiggle slightly when the ramekins are gently shaken.

Sprinkle with salt and pepper and serve with toast triangles.


Read more: Have an overabundance of eggs? Try this recipe for spiced egg yolk cookies!


Crustless Christmas Quiche with Spinach and Tomato

My Christmas quiche is crustless, because who has time to perfect pastry amongst the stress and commotion of the holidays? Spinach and tomato add the colors of the season.

Ingredients
  • 2 tablespoons butter, softened
  • 2 cups shredded cheese of your choice (my sons love Gouda, cheddar, and Havarti)
  • 6 large eggs
  • 3 cups whole milk
  • 1 teaspoon salt
  • 1/4 teaspoon black pepper
  • 1/4 teaspoon nutmeg
  • 4 tablespoons butter, chilled and chopped
  • 1/4 cup sun-dried tomatoes, finely chopped
  • 1/4 cup fresh spinach, chiffonaded (sliced into thin strips)
Preparation

Preheat oven to 375 degrees. Generously butter two 8-inch pie pans (use glass pie pans if possible). Sprinkle one-half cup of cheese into each pie pan to cover the bottom of the pan.

In a bowl, whisk together the eggs, milk, salt, pepper and nutmeg until well blended. Add the sun-dried tomatoes and spinach, blending well to thoroughly incorporate and distribute the vegetables.

Fill each pie pan with the egg mixture to within 1/4 inch of the top. Sprinkle the remaining cheese onto each pie pan, then top with dots of butter. Bake for 30 minutes or until golden and the top of the quiche springs back when touched.

FAQ: Christmas Brunch Recipes

Q: Can I make these recipes ahead of time?
A: Cheese soufflé is best served immediately, while baked eggs and quiche can be prepared a few hours ahead and gently reheated. Quiche can also be served at room temperature.

Q: Can I substitute the cheese in these recipes?
A: Absolutely! Swiss, cheddar, gouda, or Havarti all work well. Choose a cheese that melts nicely and complements your other ingredients.

Q: Can I use store-bought eggs instead of farm-fresh?
A: Yes, these recipes will work with any high-quality eggs, but fresh eggs from your own hens add richer flavor and a more vibrant color.

Q: Can these dishes be made gluten-free?
A: Yes! Both baked eggs and crustless quiche are naturally gluten-free. For the cheese soufflé, ensure your roux uses gluten-free flour or cornstarch.

Q: How can I add more veggies or flavors?
A: Spinach, tomatoes, bell peppers, mushrooms, or fresh herbs can be added to the quiche or baked eggs. For soufflé, experiment with mild cheeses or finely chopped vegetables.

Eggs can take center stage at your holiday table, transforming a simple brunch into a festive family celebration. These three Christmas brunch recipes—cheese soufflé, baked eggs, and crustless quiche—are approachable, flavorful, and perfect for showing off the bounty from your own hens. Whether you’re cooking for family, friends, or both, these dishes are sure to make your holiday morning memorable.

This article about Christmas brunch recipes was written for Chickens magazine. Click here to subscribe.

Categories
Recipes

Homemade Eggnog: Classic Recipe for the Holidays

Homemade eggnog is a holiday classic that brings rich, creamy flavor to festive gatherings. While store-bought versions are convenient, making your own eggnog at home is surprisingly easy—and the results are far more flavorful. This classic recipe serves 8 and is perfect for holiday parties, cozy nights by the fire, or as a special treat for friends and family.

Ingredients for Homemade Eggnog

This homemade eggnog recipe is a creamy, spiced variation on the classic holiday favorite. With a blend of rich milk and cream, warming cinnamon and nutmeg, and the optional kick of bourbon, it’s perfect for serving at festive gatherings. The recipe yields 8 generous servings, making it ideal for sharing with family and friends.

Ingredients

  • 1 vanilla bean, split lengthwise and scraped
  • 3 cups organic whole milk
  • 1 cup organic heavy cream
  • 3 cinnamon sticks, about 2 inches long
  • 1⁄2 teaspoon freshly grated nutmeg
  • 5 free-run eggs, separated
  • 2⁄3 cup maple syrup
  • 3⁄4 cup bourbon
  • 1 tablespoon superfine sugar
  • Whipped cream, for garnish (optional)
  • Maple sugar or maple flakes, for garnish (optional)

How to Make Homemade Eggnog

Instructions

  1. Infuse the milk and cream: In a deep, heavy-bottomed saucepan, add the vanilla bean seeds and pod, milk, cream, cinnamon sticks, and freshly grated nutmeg. Over medium heat, whisk gently to combine. Heat the mixture until it reaches a gentle boil (about 5–10 minutes), then remove from heat. Let the flavors infuse for 10 minutes, then discard the cinnamon sticks and vanilla pod.

  2. Temper the egg yolks: In a large bowl or the bowl of a stand mixer, beat the egg yolks with maple syrup until smooth and creamy. Slowly add the warm milk-and-cream mixture a little at a time, whisking constantly so the yolks don’t scramble.

  3. Add the bourbon: Stir in the bourbon until fully incorporated.

  4. Whip the egg whites: Wipe a clean bowl with a tiny drop of vinegar, then add the egg whites and sugar. Using a stand mixer or hand beaters, whip until stiff peaks form. Gently fold the egg whites into the milk and yolk mixture for a light, frothy texture.

  5. Chill and serve: Transfer the eggnog to an airtight container and refrigerate for at least 3 hours until well-chilled. When ready to serve, pour into small glasses. Top with whipped cream and a sprinkle of maple sugar or flakes, and add an extra splash of bourbon if desired.

How to Serve Homemade Eggnog

Serving homemade eggnog is a treat in itself. Pour or ladle it into small glasses—this rich, creamy beverage is best enjoyed in moderation. For an extra festive touch, top each serving with a dollop of whipped cream and a sprinkle of maple sugar or maple flakes. Feeling particularly indulgent? Add a splash more bourbon or rye to taste. Keep any leftovers in an airtight container in the fridge for up to 3 days—mason jars work beautifully for storage.

Homemade Eggnog FAQs

1. What is eggnog?
Eggnog is a traditional holiday drink made from milk, cream, sugar, and eggs, often flavored with spices such as nutmeg and cinnamon. Alcoholic versions typically include rum, bourbon, or brandy.

2. Can I make eggnog without alcohol?
Yes! Simply omit the bourbon or other spirits. You can still enjoy a creamy, spiced eggnog that’s perfect for all ages.

3. How long does homemade eggnog last?
Homemade eggnog should be stored in an airtight container in the refrigerator and consumed within 3 days for best flavor and safety.

4. Can I use a different sweetener instead of maple syrup?
Absolutely. Honey, agave, or simple syrup can be used as alternatives, though maple syrup adds a warm, festive flavor unique to this recipe.

5. Is it safe to use raw eggs in eggnog?
Yes, but using fresh, high-quality eggs reduces risk. You can also use pasteurized eggs for extra safety, especially if serving to children or older adults.

This homemade eggnog recipe originally appeared in Chickens magazine. Click here to subscribe.

Categories
Farm & Garden

How to Make a Grapevine Wreath: A Simple DIY Guide

There’s something magical about turning materials from nature into a beautiful decoration for your home. In this guide, you’ll learn how to make a grapevine wreath using vines you can forage from your backyard or local forest.

Why Grapevines Are Perfect for Crafting

Living close to nature gives you access to materials that can inspire creativity—and grapevines are a perfect example. While wild grapes are native in many regions, they can sometimes overwhelm young trees. Cutting them back can help your trees thrive, and the vines themselves become an ideal craft material.

Grapevine wreaths are versatile: they can become door decorations, dreamcatcher bases, or even DIY chandeliers. You can make them small or large, simple or elaborate—the shape and size are limited only by the vines you collect and your imagination.

Step 1: Prepare Your Grapevines

soaking grapevines
Rachael Dupree

If your grapevines are brittle, soaking them in warm water for an hour or more will make them pliable. If the season has been rainy, vines may be soft enough to work with straight from the forest. Use a bathtub, bucket, or trough—whatever fits your vine collection.

Step 2: Form the Wreath Foundation

form grapevine into a hoop
Rachael Dupree
foundation of grapevine wreath
Rachael Dupree

Pick a vine length suitable for the size of the wreath you want. A 3-foot vine is ideal for beginners and small wreaths. Hold it with both hands to identify its natural curve. Cross the ends like tying a shoelace and wrap any extra around the hoop you’ve formed—this is the base of your wreath.

Step 3: Build Up Your Wreath

add additional vines to wreath
Rachael Dupree

For a fuller wreath, wrap additional grapevine lengths around the base. Tuck ends into the wreath, or secure them with floral wire if needed. This step lets you create a thicker, more textured look.

Step 4: Trim for Style

trim awkward pieces of vine
Rachael Dupree

Trim any protruding vines if you prefer a neat look, or leave curls intact for a wild, rustic aesthetic. The beauty of a grapevine wreath is that imperfections add character.

Step 5: Dry the Wreath

hang grapevine wreath to dry
Rachael Dupree

Hang your wreath in a well-ventilated spot for several days to a week until it’s completely dry. This helps it hold its shape and ensures longevity.

Step 6: Add Decorative Touches

add decorations to wreath
Rachael Dupree

Now comes the fun part! Attach adornments using thin vines, floral wire, or ribbon. Pinecones, feathers, evergreen sprigs, and even small bird nests can make your wreath truly one-of-a-kind. Let nature inspire your design.

Beyond the Basic Wreath

Once you’ve mastered the basic wreath, let your imagination soar. Grapevines can form hearts, stars, baskets, or even three-dimensional decorations. Large grapevines can be used indoors as rustic plant hangers or wall art. The possibilities are endless when working with this versatile natural material.

FAQ: How to Make a Grapevine Wreath

Q: Do I need special tools to make a grapevine wreath?
A: No, basic items like floral wire, scissors, and a bucket for soaking vines are enough. Optional decorations can be added with ribbon or hot glue.

Q: How long should I soak the vines?
A: Soak brittle vines in warm water for at least one hour to make them flexible. Rain-softened vines may not need soaking.

Q: Can I make different shapes besides a circle?
A: Yes! Grapevines are versatile—you can create hearts, stars, baskets, or even three-dimensional designs once you’re comfortable with the basics.

Q: How do I make my wreath last longer?
A: Hang it in a dry, well-ventilated space until fully dried, and avoid direct sunlight or moisture to maintain its shape.

Q: Can I use artificial decorations?
A: Absolutely! Dried flowers, faux berries, and ribbons all work well with grapevine wreaths.

This article about how to make a grapevine wreath was written for Hobby Farms magazine. Click here to subscribe.