Categories
Podcast

Episode 5: Kenya Abraham

Show host Lisa Munniksma talks with SLAK Market Farm’s Kenya Abraham, who just happens to be Lisa’s raw milk herdshare owner in Lexington, Kentucky. Listen in to hear about the journey that took Kenya from urban entrepreneur in Ohio to farmer in Kentucky. Hear about her creative land lease and land sharing arrangements, the ins and outs of a raw milk and halal meat herdshare, how everyone in the family plays a role on the farm, and the community at the heart of the work Kenya does. Kenya also talks about how she connects kids with the land through her Stack a Story Bookshop storybook writing and farmstay nonprofit. Be sure to listen to the end to hear about how Kenya looks to her animals to destress and why she gets up at 4 or 5 am. (Spoiler alert: It isn’t to milk the cows.)

Links:

SLAK Market Farm


Categories
Beginning Farmers Farm & Garden Homesteading

Naughty Cattle & French Bulldogs Are Part Of Frenchie Farm’s History

“Frenchie Farm started with our two French Bulldogs who were having a lot of health issues at the time,” says farm founder and homesteader Colleen Hinds. “So we made a big lifestyle shift for our dogs and for ourselves to achieve more of a healthy lifestyle.”

After founding Frenchie Farm in the suburbs of Chicago, Hinds noticed a significant improvement in the health of her dogs. And since then Hinds and her family have embraced a more holistic lifestyle through practicing regenerative farming methods.

“Ultimately we wanted to be able to produce as much of our own food as possible,” she explains.

Taking a moment out from homestead duties and teaching farm classes for the community’s kids, we spoke to Hinds about embracing sustainable practices and restoring a farmhouse from the 1800s. We also got the scoop on a couple of escape artist cattle.

Moving to a Farming Lifestyle

A large part of the reason Hinds and her husband founded Frenchie Farm was to provide their children opportunities to benefit from a farming lifestyle.

“It’s been a wonderful experience to see our kids grow up on a farm and to see them go out and be able to grow their own food, harvest their own food and collect eggs,” says Hinds.

Beyond her immediate family, Hinds also teaches farm classes to children from the local community. As many as 100 kids attend classes each week.


Read more: Make art with your kids using leaves from around the farm!


Renovating the Farmhouse

The 1800s farmhouse is a key hub at Frenchie Farms. “We are still very much in the midst of renovating it!” says Hinds. “My husband is a contractor and specializes in restoring old historic homes. So it’s been a perfect fit for us.”

Honoring a Sense of History

Talking about the farmhouse at Frenchie Farm, Hinds says the couple’s approach to renovation involves respecting the past while moving forwards.

“We’re really proud of being able to keep the historic features and historic charm of the house,” she says. “We always want to maintain the integrity of the house, while being able to update it to feel like it’s our home.”

Meet the Escaping Cattle

Harry and Larry, a Highland cattle pair, are two of the animal residents at Frenchie Farm. And Hinds describes the duo as “extremely naughty.”

She recalls how back in November, they managed to escape in the middle of the night. The pair proceeded to embark on a joy run through the neighborhood.

“It was very terrifying and very funny at the same time,” she says. “They are very cute and very naughty and slowly becoming a bit more personable as well.”


Read more: Meet the Scottish Highland cattle of Little Tail Farms!


Keeping Things Sustainable

Along with being able to provide healthier homegrown food for her family, Hinds says that endorsing sustainable farming practices is an important part of running her homestead.

“We’re a regenerative farm. So we know we’re making a good impact on the environment,” she says.

Follow Frenchie Farm at Instagram.

Categories
Crops & Gardening Farm & Garden Homesteading

Forage Wild Thistle For An Unexpected Treat

There are few farm or garden weeds more hated than bull thistles (Cirsium vulgare) and for good reason. The leaves are very prickly. The roots run deep making them hard to pull.

The seeds float like dandelion fluff and will launch their next generation into every downwind plant bed. It’s so hated that it’s considered an indicator of a poorly managed farm. 

But I now love them and not just for the edible roots and midribs. For me, the best part is the stalk. At its prime, you may enjoy the sweet taste and juicy texture of honeydew melon. Sam Thayer’s book The Forager’s Harvest offers the best treatment on thistles. 


Read more: Sunchoke is a delicious, wild-growing tuber that’s worth finding.


This’ll Taste Like Thistle

Catch a bull—or most any—Cirsium in mid-spring, after some good rain when the stalk is still young and the flowers have not yet formed or only just started opening. Find a nonprickly spot on the stalk to hold with thumb and forefinger.

(Those living a callous-free lifestyle may want to don leather gloves.) 

With your pocketknife, cut the stalk off at the base and slice off each of the leaves and flower buds where they meet the stalk. Some prefer to hold the stalk upside down for this.

You’ll be left with a 1- to 2-foot-long stalk that’s an inch or so in diameter. 

With your knife, peel off the fibrous, outer skin of the stalk. Yes, I know it sounds like a lot of work so far, but I wouldn’t be telling you about this one if it weren’t well worth it.  

With the leaves, flower buds and outer skin gone, you’ll be left with a bright green, moist, hollow tube of edible vegetable. I’ve sliced them lengthwise, slathered on cream cheese and eaten them raw at their prime with great joy. If you catch them a little late or when the season is dry, they might have the less-sweet flavor of a cucumber.

Depending on where your thistle harvest lands on the spectrum of maturity, it may warrant a sauté in butter to enhance flavor and texture. Either way, after your first good meal of thistle stalks, you’ll want to befriend all those bad farmers.


Read more: Want more stories like this delivered to your inbox? Sign up for our newsletter!


Sidebar: In Season

Other wild edibles found in mid-spring:

  • ramps
  • smilax vine tips
  • black locust flowers
  • stinging nettles
  • trout lilies
  • dandelions
  • wild onions
  • prickly pear pads
  • basswood leaves
  • poke weed shoots
  • knotweed shoots
  • giant Solomon’s seal shoots
  • mayapple fruits
  • oyster mushrooms
  • Dryad’s saddle mushrooms

This article originally appeared in the March/April 2021 issue of Hobby Farms magazine.

Categories
Animals Poultry

Dual-Purpose Chicken Breeds Bring Flexibility To The Coop

You’ve heard the story of a child who prays for a pony, right? Well, shortly after my parents relocated their young family to a country residence back in the 1990s, I had a prayer of my own, and it wasn’t nearly so ambitious. I prayed for chickens!

You may laugh, but after reading Chickens in Your Backyard: A Beginner’s Guide by Rick and Gail Luttman (Rodale Books, 1976) at the ripe old age of 11, I was fascinated by the feathered creatures. And I still love raising poultry to this day.

The early morning crow of a rooster at sunrise is a welcome alarm to my satisfied senses. It’s a sort-of siren call for the miracle of life. 

Back to the 90s. Out of the blue, my parents received a surprise call from a local hobby farmer of their acquaintance. He told them that some 3-year-old White Leghorns were going cheap from a commercial egg facility.

I was ecstatic! At the unbelievable price of $1.25 each, we “liberated” 25 of those debeaked factory prisoners. The rest of their lives were lived in peaceful retirement, with green grass and room to scratch.

They churned out dozens of eggs in gratitude. And we’ve raised chickens more or less ever since. 

I think back fondly on those early days. The wonder of watching an egg laid for the first time, the tears when a hatch of chicks from my Styrofoam incubator died, the exasperation of seeing those leghorns eat their own eggs and wondering, “What in the world?”

All of these were valuable experiences for a youngster. They taught lifelong lessons about nature and mortality. 


Read more: Check out these tips for buying your first flock of chickens!


Dual Definition

Dual-purpose means a chicken that produces meat and eggs in a reasonably efficient manner. (Technically, any chicken could serve as a dual-purpose chicken. Leghorns could be harvested for meat, or a Jumbo Cornish could lay eggs. They’re just not efficient at it.) 

For a point of contrast, let me give a brief explanation on non-dual-purpose chickens: 

Egg-layers are bred for a light frame with little (or zero) instinct to brood (set eggs and raise their own young). Leghorns, Rhode Island Reds and Hybrid Red Stars, for example, consume light feed for body maintenance and tend to have few interruptions in egg production.

These birds could still be harvested for meat. But their slight frames and skimpy meat-to-bone ratio don’t seem suited for much beyond bone broth. 

Meat birds are bred for bulk (sometimes to the detriment of natural functions). The hybrid Jumbo Cornish/Rock cross (the most popular meat breed in America) dresses out in six to eight weeks. The large size, rapid weight gain and clunky build make the birds inefficient as barnyard fowl, as they consume huge quantities of feed, are prone to heart attacks and can have difficulty breeding. 

For the backyard hobby farmer or the new homesteader, it seems that a middle-of-the-road version would be the best flock foundation. Something that can hatch out fresh replacement layers each spring and supply extra cocks for the dinner table. We’ll discuss some of these lovely dual-purpose chicken breed options later. 

However, if you’re new to chickens, order a few mail-order hatchery catalogs (or browse their websites) for baby poultry. Pick out all the birds you like and read the full descriptions to learn more about them.

My personal favorite tends to be “surprise me!” by ordering assortments. 

dual-purpose chicken chickens breed breeds
Jacey Dean

Breeds for Both

Some of my go-to favorite dual-purpose chicken breeds are: 

Buff Orpingtons

These golden beauties lay beautiful brown eggs and have a solid meat yield. Their golden feathers help to maintain an attractive plucked table carcass, and roughly 10 to 30 percent of an Orpington flock seems to go broody.

That’s a good ratio if you want chicks and eggs. The percentage of brooding-prone hens will depend greatly on the hatchery’s breeding program.

Black Australorps

Our ancient Black Australorp hen is the best broody we’ve ever had. She’s hatched sets of chicks, a duckling and guinea fowl.

dual-purpose chicken chickens breed breeds
caseyjadew/Shutterstock

I hope she makes it another year. I may let her set turkey eggs next!

Australorps are a similar size to Orpingtons and perhaps a tad more docile. The black feathers require slightly more attention when plucking the carcass, but it’s worth the effort.

Black Australorps cross very well with Buff Orpingtons. And the resulting chicks are sex-linked for easy identification. 


Read more: Here’s more information about Black Australorps, a favorite for many keepers.


Wyandottes

I’ve raised Silver-Laced Wyandottes that had zero interest in brooding, and Columbian Wyandottes that dependably set twice a year. They lay lovely light brown eggs and have a good body weight.

They cross well with Orpingtons or Australorps for maintaining diverse genetics in your backyard flock. I’ve also crossed Columbian Wyandotte hens with a Columbian Brahma rooster with excellent results. 

For the past four years, I haven’t needed to purchase chickens. My Columbian-cross girls faithfully hatched out chicks. I harvested the roosters each fall and picked a new cock for the coming spring.

I introduced a heavy Ameraucauna hen influence, which resulted in light-green or pink eggs. Over the years, I lost some birds to old age, some to predators and sold a few here and there. Last fall, my thriving free-range flock attracted the attention of an eagle-eyed bird of prey.

One by one, my chickens disappeared. Now, I’m starting over again. 

Still, there are two seasoned broodies left to start afresh next spring. At the time of this writing, the barnyard is full of feather-footed varieties, Orpingtons, Rocks, New Hampshire Reds, Silver Leghorns and a few oddballs. I love the colors and variety of this new set, despite my sadness at the loss of my old flock.

Such is life on the farm. Through thick and thin, the life cycle must go on.


Sidebar: A Note on Broodies 

dual-purpose chicken chickens breed breeds
Michael Gancharuk/Shutterstock

A dependable broody is valuable if you wish to raise chicks the old-fashioned way. When testing dependability of a first-time broody, a small clutch of six eggs works well. If she quits after a week, you know not to give her eggs again.

A dependable broody will continue to set beyond 21 days, if eggs haven’t yet hatched. (Some will set up to six weeks.) On average, a full-sized hen can incubate a dozen eggs. You should select premium eggs for incubation. 

This article originally appeared in the March/April 2021 issue of Chickens magazine.

Categories
Animals Poultry

Getting Started: When Pullets Reach Point Of Lay

Congratulations! Your pullet just laid her first egg. It’s a day worthy of celebration. All these weeks of care and supervision have finally paid off with the ultimate prize.

As much as you’d like to have it bronzed, relax. There will be plenty more where that came from.

Now that your flock has reached point of lay, you undoubtedly have a few questions bouncing around your head. Here are answers to five of the questions those new to the egg business typically ask.

When will she lay next? And what’s with the weird eggs?

A pullet at point of lay may now be a layer, but by no way is she an adult hen just yet. Her reproductive system is still developing and will not reach maturity until she is approximately 12 months old.

During this time, her egg productivity will fluctuate. She may:

  • not lay again for another week
  • lay more than once a day
  • produce overly large eggs
  • lay doll-sized, yolkless “wind eggs”
  • produce double-yolk eggs
  • lay perfectly round eggs or long, torpedo-shaped eggs

Every day and every egg is a surprise with a newly laying chicken. But, as she gets older, her reproductive system will regulate and she’ll soon produce eggs regularly.

Why is she laying on the coop floor instead of in the next box?

Point of lay can be a confusing time for a pullet. All her young life, she’s minded her own business and now, suddenly, she feels an unfamiliar urge come on and out pops this … thing.

Because her reproductive systems is in flux—and will be for at least another few weeks—your pullet will simply drop an egg when she feels that urge. This might occur when she’s in her run or out foraging, while she’s at the feeder or waterer, or even when she’s asleep on her perch.

In a flock with older hens, your pullet would observe what her elder coopmates do and simply follow their example. In a new flock, your pullet will need some guidance.

Make sure your next box is accessible and lined with clean straw, shavings or a premade nest pad. Entice her and your other young layers by placing ceramic or wooden eggs—available at your farm-supply store—in the nest to show them where they should be laying.

A little encouragement may be all your pullet needs.


Read more: Got a broody hen? Here’s what that means—and which breeds are most likely to brood.


How do I know if her eggs are fertilized?

The easy answer to this is: if you own only hens, you will never have to worry about fertilized eggs. It takes a rooster to fertilize an egg, so you’re in the clear if you specifically keep a laying flock.

If you do have one or more roosters, it’s a safe bet to simply assume that all of your eggs are fertilized. Unfortunately, the only way to be absolutely sure is to crack open the suspect egg and look for the tiny disk-shaped indentation—the germinal disk, which will develop into an embryo—situated over the yolk.

Fertilized eggs taste exactly the same as unfertilized eggs, so as long as you collect your eggs frequently and store them correctly, you shouldn’t have any worries.

Why did my pullet lay a shell-less egg?

Nothing can quite compare to the first time you reach into a nest box and wrap your fingers around a squishy, gelatinous oval instead of a hard-shelled egg. I remember my first time. I squealed, immediately dropped the egg, and backed away as if I’d just awakened a dragon.

That kind of sensory memory is near impossible to forget.

When you encounter your first shell-less egg—and that’s when, not if—don’t panic too much. Consider a shell-less egg your bird’s body letting you know it needs more calcium, the mineral essential for building strong eggshells and stronger bones.

If your flock is still eating grower rations, switch to a layer ration fortified with calcium. You can also offer your girls crushed oyster shell, which is rich in calcium carbonate, one of the Earth’s building-block minerals.


Read more: Learn more about calcium-rich crushed oyster shell!


Why is she sitting on her eggs and growling at me?

It looks like congratulations are in order again: You’ve got a broody! Broodiness can occur at any age in a hen, but it typically begins shortly after a pullet reaches point of lay.

Some breeds, including  Silkies, Orpingtons, Cochins, and Sussex, are more susceptible to broodiness than others. They make great mothers for their own eggs and anyone else’s, too.

While it’s adorable to watch a little hen huddle protectively over a nest full of eggs (or rocks, golf balls or anything remotely resembling eggs), being broody means she isn’t laying any herself. She might also inspire her coopmates to go broody as well.

Prolonged broodiness is also taxing on a hen’s body. If you are not planning to raise chicks—and if the eggs your broody is setting are not fertilized—you will want to break her brood gently but swiftly.

Categories
Crops & Gardening Farm & Garden

Protect Your Garden From Frost & Freeze

There are many challenges to growing your own food: Caring for your soil; dealing with pests and diseases; starting finicky seeds and plants; etc. Few, however, are as problematic—especially for mid- to larger gardeners and food growers—as dramatic early and late temperature plunges. 

This past spring, a large swath of the United States encountered one of the most unexpected and epic weather events. (What else would we expect in 2020?!)

A solid two weeks after most place’s last spring frost date, a hard freeze fell upon a quarter or so of the country. For many, it was catastrophic—total to near-total losses of hundreds to thousands of plants.

It was fairly stressful for almost everyone—especially if you weren’t prepared to handle it. 

For my family, it was a bit of an inconvenience but little more. Over the years, we’ve learned how to deal with early and late cold. You just need to know what does and what doesn’t work to protect your garden from a freeze. 

Row Cover Campaign

There is no way to protect plants unless you have a way to enclose them—to make a microclimate. There isn’t really anything I know of on the market that beats floating row cover. It comes in a variety of weights and sizes and can be double (and even triple!) layered as needed. 

I really only see two drawbacks to the stuff:

  • It’s a pain to deal with in windy conditions.
  • If it gets torn, you can’t mend it.

You’ll need to make sure areas where you use it are clear of hazards that could cause tears and other damage. 

You also need to have a good way to secure the fabric in place. Sand bags and similar soft materials are best—not rocks, blocks or boards as many, including us, have tried with unhappy results. Put more smaller weights along the fabric (instead of fewer larger ones) to keep it in place. This reduces risk of tearing and creates a tighter seal around the enclosed plants. 

My second floating row cover tip? Keep it from directly touching the plants. Any place it touches plants in your garden is a place that plants may suffer significant freeze damage. An added bonus is that floating row covers offer great protection from some early season pests, such as flea beetles.

So you’ll already be set up for your first spring pest cycle.

Many people have asked us if they can use blankets, sleeping bags, buckets, boxes or similar improvised protection for plants. My answer? Yes, you can. It’s really only viable on a small scale, though. 

We once helped a neighbor use boxes and buckets with a layer of old blankets and tarps placed on top to protect his small garden. It worked OK, but the labor was high, unlike with floating row covers. 


Read more: Make microclimates to maximize your garden’s growth!


Bring in Reinforcements

Now you have your first line of defense: the ability to create a miniature, protected climate underneath. So what’s next?

We took our most aggressive planting approach ever this past spring and had thousands of plants already in our high tunnel, including large numbers of exclusively warm-season crops such as peppers, tomatoes, cucumbers, zucchini and more. Many of these were 12 inches in size.

We’d also planted large amounts of things outdoors as well, though exclusively of a cooler season crop selection.

We put single or double row covers over the plants. But we knew many warmer season plants wouldn’t survive, even with that extra protection. They needed thermal mass. 

Thermal mass is just “stuff”—water, rock, soil, etc.—that holds its temperature and helps stabilize the temperature of things around it. You can create thermal mass many ways.

It’s best, however, to bank thermal mass ahead of time. This is especially true if it’s suddenly dropping in temperature but otherwise warm heading into the weather change.

Three to four days before the front was slated to move in, we filled darkly colored barrels and totes. These we placed between plants and at the ends of rows. This gave time for the water in the totes—which is usually about 50 degrees F coming out of our well—to get up into the mid-60s.

That is a significant amount of additional cold buffer! 

Moisture Matters

Also, don’t neglect to ensure your soil has sufficient moisture. Dry garden soil will get cold fast during a freeze. (This is why desert regions are so hot in the day and often frigid at night!)

In the days leading up the cold front, we irrigated late morning to allow that water/soil to bank as much daytime heat as possible. We would also irrigate in small runs, letting the tripled-up lengths of hose preheat the very cold well water a bit before putting it into the soil. 

On the night of the front’s entry, we filled about 20 5-gallon buckets with warm (100-degree or so) water from our house. There were no showers for anyone that night as we drained the hot water heater. But for our most valuable and sensitive plants—peppers and tomatoes—it was a small price to pay. 

All this thermal mass followed by row covers (one to two layers) paid off. Plants just 6 to 8 inches from protection paid the price and died back right to the ground with no hope of rebound. Not a single garden plant under cover suffered any freeze damage at all, except a few fennel whose fronds were in contact with the floating row cover. 

Cover Crop Defense

In many places in our tunnel and outdoors, we have heavy cover crops—usually clovers. Underneath these are a plethora of plants—basils, cherry tomatoes, zinnias and a host of other “volunteers” that we encourage and transplant to appropriate places at the right time or pot up and sell. 

One interesting thing we discovered was that plants under the clover, even very cold-sensitive garden plants such as basil and various flowers, were completely unharmed by the freeze. The cover crop was more than sufficient to blanket and protect the baby plants below. 

Wind Breaks 

One other thing that has consistently helped our main growing space over the past decade is establishing wind breaks on the western and northern side. This protects our garden space against cold fronts and strong winds/storm fronts. It provides some relief and protection to the plants in our main growing space. 

We use elderberry. What else would you expect me, the author of The Elderberry Book: Forage, Cultivate, Prepare, Preserve to plant!? But many perennials are appropriate to help protect your annuals. 


Read more: Check out these tips for using trees as windbreaks on a farm.


Battle of the Bulbs 

Another option that also has worked well to protect the garden against a freeze is putting a few light bulbs underneath the row cover. In our experience, lower wattage bulbs, spread out more often, work better than just a couple higher wattage ones. This reduces the risk for fire and plant damage. 

You can combine light bulbs with a timer to cycle them on and off, too, for safety. It’s the same as what you might do in a well house that isn’t sufficiently insulated.

Absolutely make sure the bulbs are well away from the floating row cover (fire risk!) and a good distance from the plants. This strategy requires cords and other equipment and is really only suitable on a small scale. But it works well for water and for plants.

Lost Rounds

We were short on row covers because of how aggressively we had planted in the spring. So we erected a few low tunnels over our potato beds.

We planted the potatoes in three staggered plantings, so they varied in height from just popping up to a solid almost-a-foot tall. For all the plants, we heavily mulched as much as reasonable to provide additional protection and then made the low tunnels over the beds. 

It didn’t help at all. And all the taller potato plants suffered significant damage.

The shorter, mulched plants all did fine, with minimal damage to foliage tips right near the mulch surface. Perhaps row covers would have done better than the low tunnels for the potatoes. In previous years, we saw better results with such an approach. 

Lesson learned: Keep more floating row covers on hand than you think you may need. Because when you need it, you need it. And may not be able to get it.  


Sidebar: Stagger Seed Starting

Some weather events, such as hail and wind, can’t be stopped. For those instances, we always have some spare plants in reserve just in case earlier plantings are taken out by bad weather.

Proptek trays make having large numbers of plants in a small space easy and cost effective. Two trays can cover 200 or more plants and take up just a few square feet of space. 

Since some plants are quick growers and we were running short on row cover and totes and buckets to use for mass, we let a few quick-growing plants to their chances, such as cucumbers. All of these, even in our tunnel, suffered swift death.

 This article originally appeared in the March/April 2021 issue of Hobby Farms magazine.

Categories
Equipment Farm & Garden

Early Spring Weather Requires Farmers to Stay Flexible

As a general rule, I’m always game for an early spring. Up here in northern Wisconsin, it’s possible for snowdrifts to hang around into May. March and April can be a tossup as far as temperatures go.

Sometimes, a mild March gets your hopes up for an early spring. Then April (snow) showers delay any thoughts of May flowers.

But even I will admit it’s possible for spring to come too early. And when spring hits unexpectedly soon, you have to be ready to adapt to the conditions and change your plans every time the weather throws you a curveball.

One for the Books

Up here on my farm, the spring of 2021 has been one of the most unusual I can remember. It actually started with an abnormally mild winter. Aside from one short cold spell, temperatures stayed warmer than usual, and relatively little snow accumulated.

In many places, it never got more than a foot deep. This made it easy to maintain paths, trails and driveways all over the farm.

Then March brought warm temperatures to the fold, and all the snow melted in the blink of an eye. It melted so fast, it seemed to evaporate rather than turn to meltwater. Ground conditions, in turn, were remarkably dry for the time of year.

“Perfect,” I said to myself. “I’ll fire up my garden tractor, hook up a wagon, and start cleaning up branches and debris from winter!”


Read more: Tree debris? Check out these 5 tips for dealing with the brush.


April Showers …

It was a good plan … in theory. But early April brought heavy rain to the fold.

I suppose I should be grateful it wasn’t snow. Around here, it’s not uncommon for April to interrupt spring by dumping one or two feet of snow in a single storm. But since the temperatures were far too warm for snow, the precipitation fell as inches of rain instead, sogging up the ground until I didn’t dare drive the garden tractor for fear of rutting up the fields and/or getting stuck in the mud.

“No problem,” I told myself. “I should prune my young fruit trees while they’re still dormant.”

I put on rubber boots, slogged through the soaking-wet fields, and marched up to the high ground of my orchard. There, I discovered that the sustained above-freezing temperatures had prompted my trees to throw caution to the wind. They adopted an “early bird catches the worm” mentality.

All the buds were swelling, and leafing out seemed inevitable. So I quietly canceled my pruning plans.

Eventually, the ground began to dry out again, but by this time the grass was growing so ambitiously it really needed to be mowed. Mowing grass in April is practically unheard of around here. But I tried (once again) to go with the flow and fire up my garden tractor for the season.


Read more: Be careful where you store your farm equipment over the winter!


Machine Woes

In the past, I have explained the importance of parking machinery in suitable locations during the fall, so they’re easily accessible come spring. But even best-laid plans can go awry on occasion.

The garden tractor was parked in a garage bay, blocked by an aging farm truck. Unfortunately, the farm truck’s battery was too weak to start the engine, and that’s when I discovered that my battery charger had (for no apparent reason) stopped working.

Thus, truck and tractor both stayed put until I could purchase a new battery charger, and the grass remained untouched.

At this point, I could have changed gears and used a utility tractor (like my trusty John Deere Model 40) to pull a wagon around and get some tree branches cleaned up. But no sooner had I shifted my focus from the garden tractor than temperatures plunged and a snowstorm blew through. It dampened the ground again, slowing the growth of grass and tree buds alike.

May Flowers?

As I sit writing this, I have to chuckle at the unpredictable nature of early spring weather. I’ve actually made a lot of progress in many directions. I’ve done a lot of garden work, prepping raised beds for spring planting. I’ve weeded and trimmed trees around the farm.

And I even got the garden tractor going, after the new battery charger brought the farm truck back to life.

But I haven’t actually used the garden tractor yet. Because five days ago, there was a light snowstorm. And three days ago, freezing rain left the ground covered in ice for nearly 24 hours.

Yesterday was bright and sunny, true. But today it rained heavily, and there’s a lot of standing water in the fields.

That’s the nature of an early spring. The grass might be growing, the trees might be leafing out, and we might be getting a lot of spring work done. But March and April like to tease us, mixing their promises of warm temperatures with the cold reality that it’s still too early to count on consistent conditions.

Unless you stay flexible, you’ll drive yourself crazy trying to outwit the wild weather.

In the end, I’m still happy spring came early. But I’ve definitely seen enough of these April showers. Bring on the May flowers!

Categories
Farm & Garden Food Homesteading

You Can Make Cultured Butter & Sour Cream At Home

One of the greatest joys of a small hobby farm is discovering new products to create out of your homegrown bounty. Homemade spaghetti sauce, fresh jams and jellies, and fresh-from-the-field salads are some of the best.

However, two of the simplest products to master are homemade butter and sour cream. And you don’t even need any special equipment.

Select a Milk

Raw milk, or milk that hasn’t been pasteurized or homogenized, produces the best results. However, you can still make great-tasting dairy products at home with pasteurized milk or cream.

If purchasing commercial milk, only use the types that say “pasteurized” rather than “ultra-pasteurized,” as ultra-pasteurized milk often won’t work. 

Regardless of which milk you choose, the recipes that follow are adaptable, requiring no specific amount of milk or cream. So even if you only have a quart of whole milk or a single cup of cream to spare, you can easily make one of these products to get a feel for what you like.


Read more: Ready for more cultured-milk challenges? Here are some more products you can make at home!


Butter Types 

Cultured butter is the butter your great-grandparents likely enjoyed and is produced with cream that has fermented, or soured. Its flavor is distinct, ranging from slightly tangy to profoundly sour.

The intensity depends on how ripe the cream is, and it does require a bit of familiarity with your specific cream’s characteristics since various creams ferment at different rates.

When obtaining cream for cultured butter, use only raw cream. Pasteurized cream has lost the ability to ferment and must have cultures added in order to ripen safely (which isn’t covered here). 

Sweet butter, on the other hand, has a more modern flavor and can be produced with raw and pasteurized heavy whipping cream. (Again, avoid ultra-pasteurized cream.) Raw cream tends to produce a richer, more vibrant yellow butter than pasteurized and has a much sweeter taste.

However, pasteurized works just fine, resulting in a milder flavor much like store-bought varieties.

cultured cream sour butter
Kristi Cook

Butter-Making 101

Yes, you can still buy a butter churn, but it really isn’t necessary unless you plan to make a lot of butter at one time. Simpler is often better, so opt for a single, quart-sized mason jar for your first go at making butter.

The only other equipment needed is cheesecloth, a clean flour sack towel or a jelly-strainer bag. 

  1. For cultured butter, allow raw cream to sour naturally in the refrigerator. (This may take a week or longer.) Or pour cream into a loosely covered mason jar—no more than 3⁄4 full—and leave in a warm location until it smells slightly soured. As a general rule, the more soured the cream is, the more soured, or tangy, the finished butter will be.
    If making sweet butter, whether with raw or pasteurized cream, place the lightly covered jar on a countertop and allow cream to come close to room temperature. Keep in mind that if the cream is left out past the “almost warm” stage, it will begin to sour if the cream is raw or go rancid if using pasteurized cream. 
  2. Place jar lid and band onto jar. Briskly shake, “slamming” cream against the walls. You will notice a change in the cream’s movement as it thickens within 5 to 15 minutes.
  3. Once you notice clumps of butter forming and the mixture begins to leave the walls, reduce shaking to a moderate level. 
  4. When almost no liquid remains and the jar walls are clear, pour contents into cheesecloth, towel, etc. to drain. Catch the liquid buttermilk in a glass container for later use.
  5. Using a spoon, move the curds around, pressing out as much buttermilk as possible. Gently rinse with cool water until water remains clear.
  6. Place in a bowl, and add salt/seasonings—such as garlic powder, oregano, mint or thyme, 1⁄4 teaspoon at a time, to taste—if desired. Store covered in the refrigerator, or freeze for later use. 
  7. Store buttermilk in a glass container in the refrigerator for later use.

Read more: Check out this recipe for a simple goat milk butter.


Simple Sour Cream

Recipes for milk products vary about as much as the individuals making them. This is certainly true for sour cream. My favorite version readily adapts to the quantity of cream I have on hand and doesn’t require the purchase of a starter culture. 

  1. Place 1 cup or more of fresh, raw cream or pasteurized cream in a sterilized pint jar. 
  2. Add 2 tablespoons cultured sour cream for every 1 cup of cream. Gently stir to combine. The cultured sour cream you use as a starter can be store-bought sour cream as long as the ingredients list only “cultured cream” with no fillers or from a previous homemade batch of sour cream. 
  3. Leave cream at room temperature for 12 to 24 hours. (The added cultured sour cream allows pasteurized cream to ferment safely.)
  4. Taste periodically after 12 hours until the cream reaches your desired tanginess. Refrigerate for up to a week.  

Sidebar: Buttermilk Extras

Buttermilk is the liquid byproduct of churning cream into butter. With just a little creativity, you can easily incorporate this buttermilk into several types of recipes from pancakes to biscuits to your morning beverage.

  • Blend with fruit juices for a tangy twist
  • Add to smoothies. 
  • Use as a dipping liquid for fried chickened and other battered meats.
  • Use in place of milk for fluffy pancakes, waffles and biscuits.
  • Make treats for hogs, chickens and dogs to feed in small quantities.
  • Add to the compost pile. 

This article originally appeared in the March/April 2021 issue of Hobby Farms magazine.

Categories
Beginning Farmers Crops & Gardening Farm & Garden Urban Farming

Maximize Garden Growth By Making Microclimates

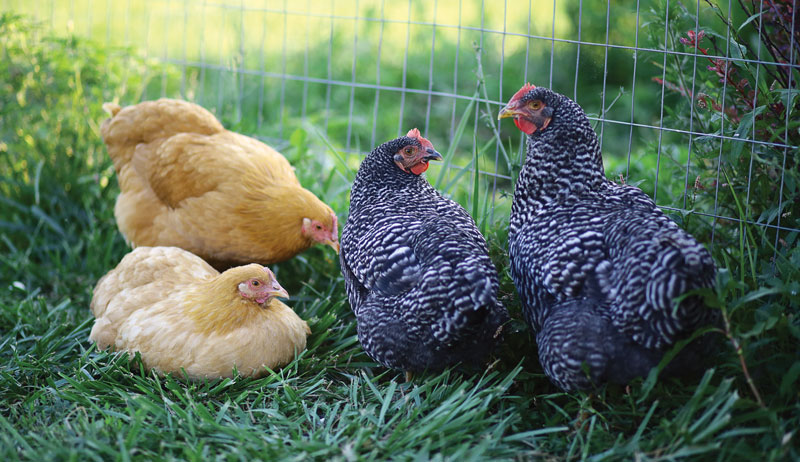
With more frequent storms, greater temperature extremes and myriad other changes taking place, gardening isn’t quite as straightforward as it used to be. Just ask Charlie Nardozzi, a gardening expert and author. He’s been tending fruits, flowers and veggies for more than 30 years. 

“Heat is definitely an issue. And it’s not just something for people in the Southwest or in the South where you get really extreme, hot days in the summer and lots of them,” Nardozzi says. “Even in northern places, like in Vermont this year, for example, the temperatures did not get below 80 degrees for I don’t know how many weeks in a row, which is unheard of for us. We are seeing a lot more extremes on both the hot side and the cold side, too.”

[Note: July 2020 was the warmest month on record for Burlington, Vermont’s most populous city. — Ed.]

From the 1950s to the 2000s, there were certain extremes that gardeners would complain about—an insect or certain disease or something, according to Nardozzi.

“But it was never so extreme that it would just wipe us out,” he says. “We’re really getting more of that kind of weather now where, in one fell swoop, you could have a wind storm that blows things over or a drought that just kills everything.”

Gardeners may not be able to control the weather, in general. But we certainly can be more prepared for it and much more intentional about protecting everything we hope to grow. That means assessing our individual microclimates and making the necessary landscape changes to give our plants a leg up.

Micro Meaning

Odds are you’re already aware of certain spots in your garden that stay soggy, get buffeted by high winds or remain super shady. Features specific to your land—such as elevation, topography and the number and size of trees you have—all influence your hyperlocal growing conditions.

These are microclimates. And as the name suggests, they can apply to very small areas.

For instance, the land along the south side of a low wall or the south side of a house or outbuilding may be slightly warmer than other areas. These southern exposures soak up the sun’s rays. Any associated hardscaping such as pavement, brick or stone will also act as a heat sink.

They also serve to block winds that cool and dry out the soil. 

Depending on their needs and the time of year they’re started, plants positioned in these warmer microclimates could struggle or thrive. Do you want to get a lettuce crop growing as early as possible? Because they’re slightly hotter and they radiate heat, warm microclimate areas such as these are well-suited for early plantings.

However, that same lettuce crop might bolt earlier in the warm microclimate area once the growing season progresses and overall temperatures rise.


Read more: Check out these 6 tips for getting lettuce through the hot months without bolting.


Taking Stock 

Other factors can also determine microclimates, including:

  • The amount of wind you get
  • Your total tree cover
  • The slope of your land

“If you have a dip in the land, the cold air settles there,” Nardozzi says. “If you have some slopes on your land where you have a low spot, those are the places where you are going to get the late spring frosts or the early frost in the fall that will kill things. You have to be aware of that, if you are growing things that are frost-sensitive. Maybe you don’t put them in those areas.”

Watch Your Yard

To get a sense of your own microclimate, Nardozzi recommends observing your yard during different times of the year. Then, make notes accordingly. Gardeners living in areas that get snow should pay attention to its melting patterns.

“Every spring, I know where it is going to be snow-free for the first time in our yard,” he says. “There’s a certain area that is kind of protected. It has a southern exposure. The snow melts really quickly there. So, that’s an indication that is a microclimate spot….

“And, going the other way, where is the snow still there in April and May even after you’ve had some warm days? It may be a little shadier there or protected from the sun.”

Windy days are also helpful in assessing garden microclimates. “Say I know the winds are coming in from the north and maybe a cold front is coming through, but [I notice it’s] not so windy over here,” Nardozzi says. “You can do that again, if you know there’s a storm coming in from the south. You’re just kind of getting a sense of where the calmer spots are in your yard and where the really windy spots are.”

The same goes for shade. Find those places in your yard that provide a little respite from the heat—especially from the afternoon sun. If you find cooler areas that afford morning sunlight and afternoon shade, earmark these for plants most susceptible to sunscald.


Read more: It’s time to take a new look at old hardiness zones.


Made in the Shade

Once you’ve identified the various microclimate spots in your garden, you’ll be better equipped to mitigate them. This is particularly important in the face of climate change.

If you have some areas that are extra susceptible to heat, you can modify the growing environment. Plants you install in these hot spots will be less likely to wither and die.

“It is all about creating microclimates—not just [identifying] the ones that are already around your house,” Nardozzi says. “You can create microclimates in the garden itself by using things like shade cloth.”

About Shade Cloth

Similar to a floating row cover, which is used as a barrier against insects and frost, shade cloth also comes in various protective weights. “You can get shade cloth that will block off certain percentages of light, depending on the thickness of it,” Nardozzi says. “A lot of it will depend on how hot it is, how much shade you need and how much shade the plants you are growing can tolerate.”

“You are starting to see a lot of people looking more and more at shade cloth, which is another thing that we in a northern climate like Vermont never used to think about,” he says. “We are always trying to get as much sun as possible. But because of the heat in the summer, we may need to put shade cloth over our plants during some periods.”

Many commercial growers in the sun-drenched southern and western parts of the United States are already familiar with shade cloth. But gardeners coast to coast may increasingly turn to it to create microclimates and help beat back the heat.

Available in a range of percentages, most gardening shade cloth is made to diffuse the sun’s rays by between 30 and 75 percent. Depending on the percentage of shade afforded, the shade cloth can also cut the temperature around shielded plants by as much as 20 degrees or more.

Windbreaks & Stormy Weather

Very windy microclimate areas can make winter weather feel even more wintry, potentially killing frost-sensitive plants in the process. To modify these conditions, use other plants as protection.

“You can create hedge rows that will block the wind or block the sun, if that is an issue,” Nardozzi says. “Sheltering that spot can make it much warmer.”

So can building windbreaks from stone, brick or even wood. Each of these will absorb and subsequently release varying degrees of heat. They may also protect crops from severe storms.

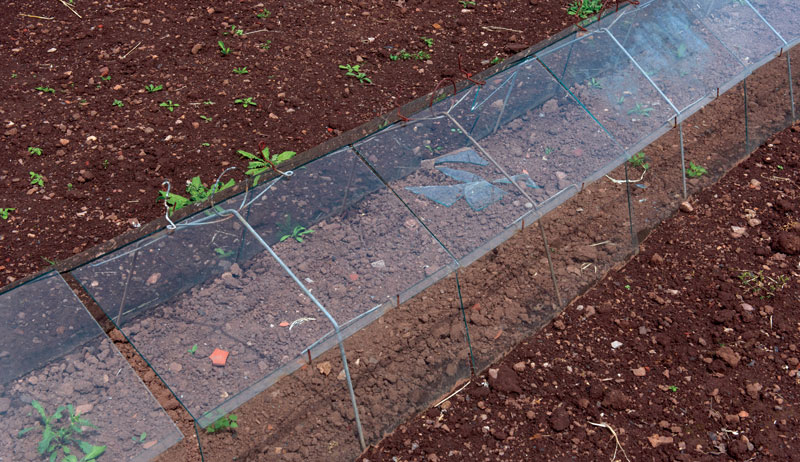
Some gardeners also incorporate removable covers on their raised garden beds.

“They are built into the raised bed itself,” Nardozzi says. “They make sense, because with these extreme weather events, if you have a cover over those plants, then they are not going to get so much rain dumping on the plants or, like, a hail storm hitting the plants and destroying them.”

The Best Protection

No matter what kinds of microclimates you notice in your garden, building resiliency into your soil can help you hedge against too much heat, wet feet, extreme cold and even very dry conditions.

Amending the soil with rich, well-aged compost and mulching with organic materials can help to moderate soil temperatures and promote drainage and aeration. In lieu of leaving bare ground exposed, planting living ground covers helps, too. They can take up excess water during big deluges.

“The best way to mitigate any kind of extremes is to have soil that is healthy and well-draining, so that when you do get a lot of moisture coming down, it can be absorbed and moved away from the plant roots,” Nardozzi says. “But, on the other extreme, too, when it really dries out and you have a drought, there’s enough organic matter in that soil that it will retain that moisture.

“We just have to be much more proactive in thinking about our landscapes, how our plants are growing in the landscapes and how we can take care of them with some of the smaller fixes like shade cloth and floating row covers … during these tough times.” 

This article originally appeared in the March/April 2021 issue of Hobby Farms magazine.

Categories
Crops & Gardening Farm & Garden

What Kind Of Potting Mix Does Your Farm Need?

Most experienced vegetable farmers will tell you that one of the secrets to growing healthy plants is to start with healthy seedlings.  And, one of the key ingredients to growing healthy seedlings is choosing the right potting mix.

Here’s a quick overview of some of things to consider when you’re selecting a potting mix for your farm or homestead.

What Is Potting Mix?

Beginning with the basics, what exactly is a potting mix? Basically, potting mixes are growing mixtures designed to help young plants become as healthy as possible.

Though some people call it “potting soil,” most potting mixes don’t contain “soil” at all. Rather, most mixes contain a variety of ingredients that are designed to create a lightweight mixture that will promote airflow and drainage.  Sphagnum moss, coir, perlite and vermiculite are common ingredients that give potting mixes their airy texture.

Additionally, many mixes contain amendments to provide the seedlings with nutrition. One of my favorite mixes, for instance, contains a manure compost, gypsum, blood meal, bone meal and kelp. Not all potting mixes are organic, however, so make sure to check the label and ingredient list.


Read more: Soil blocks help you give your plants the best start possible.


What Kind of Mix Do You Need?

Next, think about the basic type of mix that you need. Do you want your mix to be organic, for instance?

Also consider the amount of time that your plants will be growing in the mix.  Will you just be starting seedlings in the mix for a few weeks at a time?  Or, will you be using the mix for potted herbs that will be growing in it all season? 

As a general rule, the longer plants will be growing in the medium, the more nutrients it should contain. 

Homemade or Store Bought?

The next question is whether to buy your potting mix or make it yourself. In order to make this decision, start by considering your scale. 

For the average commercial grower using several tons of potting mix a year, it’s probably most efficient to buy in the mix (and in bulk). If, on the other hand, you’re a homesteader or small-scale market-gardener, making your mix may be more cost-effective.

If you’re interested in making your own mix, do a quick cost-benefit analysis to finalize your decision. Begin by calculating how much potting soil you anticipate needing, and what it would cost to buy that amount from your local supplier. Then, decide on a potting soil recipe that fits your needs and price out what it would cost to buy all of the ingredients separately. 

Make sure to factor in the time it will take to make the mix, as well as any additional equipment you’ll need to buy.  Many growers end up purchasing a small, 1/4 horsepower cement mixer for the job.

There are numerous great resources through Hobby Farms on how to make your own potting mix, including a general overview of some common ingredients to consider, as well as some specific recipes.


Read more: These recipes will get you making your own potting mix!


A Middle Ground 

Although some hardware and home improvement stores carry good potting mixes, many growers buy their mixes from local farms or compost operations. If, however, you can’t find a quality potting mix in your area, you can also supplement what’s available to you by adding in individual ingredients as you use the mix. 

But make sure you know the ingredients of the potting mix that you’re adding too. You don’t want to overload a mix by adding a nutrient that the mix already has enough of.

Given how important potting soil is to the health of your starts, it’s worth taking the time to make sure that your mix is serving you as well as it could be. You’ll be sure to notice a difference.