For as far back as Vanessa Takmazian can remember, she always wanted to start her own farm. Growing up in a farming community, she quickly developed an admiration for the work effort involved in the lifestyle.
“I knew I’d want that in my life one day. Since then it’s been decision after decision to get me there,” says Takmazian. She now runs May Blooms Acreage, an organic poultry-focused farm situated in British Columbia.
“This is it for me.”
We spoke to Takmazian about the appeal of Black Copper Marans and purple speckled eggs. We also got into how regenerative farming methods work their way into May Blooms Acreage.
Originally, May Blooms Acreage began as a way to provide farm fresh eggs for Takmazian’s family and friends.
“I [bought] local eggs and felt a connection to wanting to take that on myself,” she explains. “Then the rainbow began, and eggs would never be the same.” Then she started thinking about the meat she and her family enjoyed.
“I realized I had to focus on both eggs and meat. Providing both for my family was something that quickly became a passion. It has grown and evolved from there.”
The Black Copper Maran breed of chicken has become the star attraction at May Blooms Acreage. “Truly, they are the breed I most adore. And it is all because of how gentle they are, specifically the roosters,” says Takmazian. She describes their personality as being gentle, docile and loyal.
“The chocolate egg was what made me purchase them,” she adds. “But the roosters are what made me want to breed them and showcase them.”
When it comes to the vibrant array of egg colors that you’ll find being produced at May Blooms Acreage, Takmazian says that her personal favorites change all the time.
“Some days it’s a pure white egg that will make me marvel. Other days it’s a rich, dark olive with purple speckles,” she explains. “Sometimes a calcium-speckled galaxy egg, a thick pink bloom on a chocolate base. It’s endless!”
Takmazian adds that when it comes to customer preference, olive-colored eggs rule.
“Every day, I am conscious of how what I do today will benefit my land in the future,” says Takmazian, addressing how May Blooms Acreage incorporates regenerative practices into the farm. “From mulching around trees to replanting new seedlings to replace rotten old growth.”
Takmazian says that this year she’s focusing on compost and bringing pollinators back to her land.
“I want this to be a destination and home for all of nature’s creatures,” she says. “It’s been a blessing seeing robins landing on branches in our new orchard, ducklings fertilizing grasses as they graze [and] pastured chickens roaming and scratching and spreading seeds, giving back to the land as they go.”
Takmazian sums up the rewarding nature of running May Blooms Acreage by taking full ownership of “every choice, good or bad,” and finding appreciation in this.
“It’s a blessing to do what I do everyday,” she says, noting that “Mother Nature is a brilliant teacher—and I’m humbled to be a forever student.”
When I bought my home, I inherited an overgrown burn pit. Turns out the previous occupants had tossed—and torched—everything from dead batteries and engine parts to scrap wood, plastic and glass. (Incidentally, such open burning produces harmful dioxins, hexachlorobenzene, carbon monoxide and other nasty pollutants!)
To remediate the potentially toxic lump of land, I decided to remove as much of the trash as I could. In its place? I installed a decorative water feature—a great way to attract and support area birds and other wildlife. (Check out the video to see the transformation for yourself.)
Together, a friend and I dug out the pit, and I used a homemade sifting box to sort through and remove the really big hunks of debris. We leveled the spot the pond would occupy, lined it with sand, and then carefully positioned the 125-gallon liner.
As for the soil we removed? Rather than transfer it to some other location, we used it to form a few berms around the pond. During heavy rains, these will help to direct excess water. And on dry days, they just might make a nice place to sit.
I’ve begun planting the berms with mostly natives that should be able to withstand the very poor soil conditions. Some of these include wild stonecrop (Sedum ternatum), sweet Susan (Rudbeckia subtomentosa), purple coneflower (Echinacea purpurea) and yellow wood poppies (Stylophorum diphyllum). I also plan to add Joe-Pye weed (Eupatorium purpureum) and prairie dropseed (Sporobolus heterolepis) to further shade the pond.
To keep everything in place while my plants become established, we covered the berms with burlap. I added some cages to protect certain plants from hungry deer, too. And there’s also a broken, inverted flowerpot to provide toads and other creatures with additional cover.
Finally, once the weather warms a bit more, I’ll mulch the berms with a mixture of wine cap mushroom spawn, straw and wood chips. Although the mushrooms this will generate are edible, I won’t be eating any that emerge from the burn pit soil. Instead, I’m using them to help clean up toxins that may yet remain.
Inside the pond? I’ve added water plants, some feeder goldfish and a small, solar-powered fountain. The fountain keeps the water’s surface moving, but I’m looking into some more robust ways to aerate my pond.
It’s all still very much a work in progress. But, compared to the “before,” it’s definitely an improvement.
Every activity comes with risks. Chicken keeping, unfortunately, is no exception.
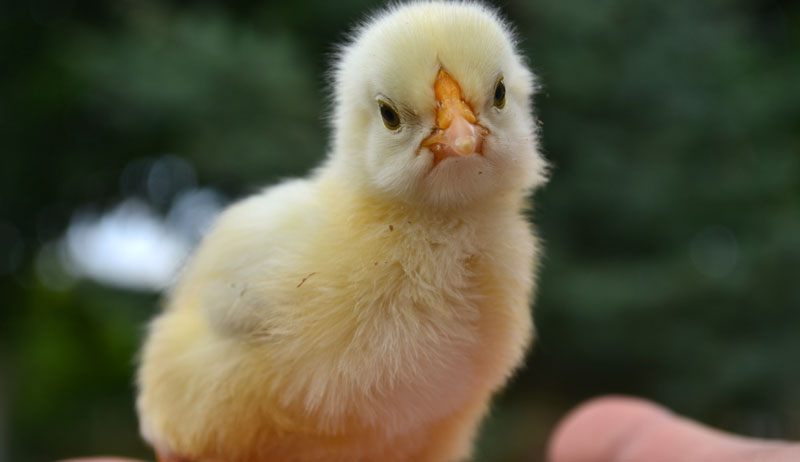
While most of the crises that occur in flocks happen after a hen attains adulthood, conditions do exist that afflict the youngest of birds. And they can downright unnerve those new to poultry ownership.
Rather than panic, prepare yourself by learning to recognize these four chick issues that can affect your birds.
Why Is My Chick Doing the Splits?
As your peeps become more active and start exploring their brooder, you may notice that one of your little guys is having trouble getting around. His legs splay out in different directions instead of staying directly beneath him.
Even if he’s just standing still, his legs start slipping out like a rag doll.
This condition, one of the more common chick issues, is called spraddle or splayed leg. Because it prevents a chick from reaching food and water, spraddle leg must be treated immediately and before the chick completely loses his mobility.
Treating spraddle leg in its early stages is relatively simple and can be accomplished with common household items. Scientists believe spraddle leg is caused by improper incubation conditions, which inhibit the proper development of leg muscles. Slippery floor surfaces during the first few weeks of life can contribute to spraddle leg. So be sure to offer newly hatched chicks a floor surface with traction, such as paper towels, ribbed shelf liner or burlap.
It’s that chick again, the one you find yourself rescuing from issues over and over again. You always find him flat on his back, unable to right himself. This time, as you stand him back on his feet, you notice him craning his head skyward, as if looking for constellations.
Within seconds, the weight of his head tips him over and he’s on his back once again, unable to move. This poor chick is suffering from torticollis, also called wry neck or stargazing.
A chick with torticollis tilts his head upward or, in severe cases, backwards or twisted to the side. Multiple factors can cause torticollis, including:
improper incubation conditions
genetics
Marek’s disease
vitamin deficiency
If your chick is in the early stages of torticollis—not yet tipping onto his back—you can treat him by adding Vitamin E and selenium supplements to his feed.
You will need to hand feed him, since affected chicks cannot eat or drink for themselves. Isolating him is vital, since the chick’s brooder mates might trample him.
Keep a stuffed toy with him for company. Continue the supplements for several weeks to ensure the condition does not recur.
Why Is My Chick Curling Its Toes?
As your chicks start to run around, you may notice one baby tottering with a slight limp. This chick may also have trouble scratching, an activity his brooder mates have already mastered.
When you examine him, you notice that one or more toes are curled under or to the side, causing the difficulties this particular peep experiences. This condition, called curled or crooked toe syndrome, occurs when a brooder floor is too slick or kept at the wrong temperature. Vitamin deficiencies, improper incubator conditions and genetics may also be to blame.
The degree of crookedness varies from a gentle side bend (similar to a banana) to acute and completely curled under. Crooked toe can manifest as early as 1 week of age. Approximately 3 to 5 percent of baby chicks suffer from this condition.
Fortunately, crooked toe is one of the more easily treated chick issues. You can craft custom “chick booties” from materials readily found at home. The earlier in a chick’s life crooked toe is treated, the better. Toe joints can stiffen, causing the toes to be permanently curled in older juveniles.
Although he seemed perfectly fine for the first couple of weeks of life, one of your chicks now exhibits a distinct facial deformity: his lower beak no longer fits neatly into his upper beak.
Instead, it has shifted laterally. The poor peep’s mouth now resembles the blades of a stubby pair of scissors. The baby can still eat and drink. But, because of the overlapping position of his beak, he is unable to take in the same amount of food as his brooder mates. As a result, they have started to outpace him in growth.
This condition, called scissor or crossed beak, is defined by a sideways deviation of the upper or lower beak. Scissor beak may be caused by genetics or improper incubation conditions. If detected in its early stages, scissor beak can be corrected by applying gentle but firm counter pressure on the misaligned beak for approximately five minutes, two to four times per day.
If left untreated, scissor beak can lead to malnutrition, abnormal organ development and death. However, some affected birds do learn to compensate by feeding and drinking with a scooping technique.
To celebrate Hobby Farms’ 20th anniversary, we’ve picked 20 of the best chicken breeds in 20 different categories to fulfill your every small-farm need. From the best layers to the best meat breeds, from the most docile to the most ornamental, plenty of different birds exist from which to choose.
Best Layer, White Eggs (Modern)
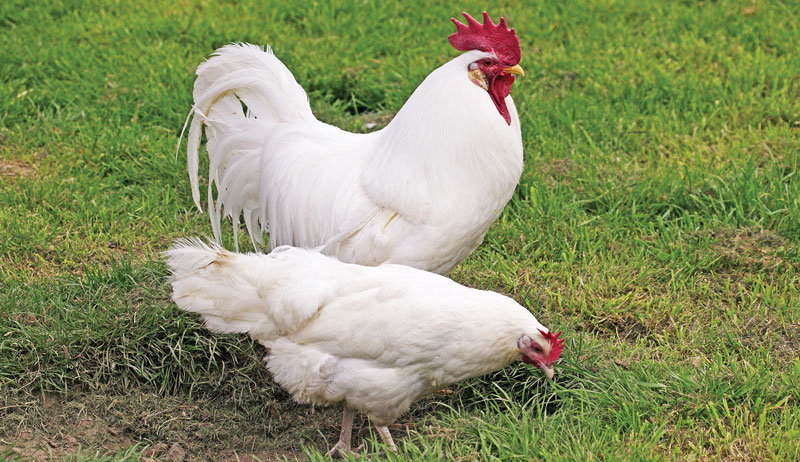
California White
This hybrid was developed in California by breeding White Leghorn hens to California Grey roosters. They are mostly white with a few black specks.
California Whites are fast-maturing, hardy, long-lived and prolific, with hens laying roughly 300 large to extra-large white eggs per year, right through the winter months. Hens weigh about 5 1⁄2 pounds, while roosters weigh roughly 7.
These quiet and docile birds tolerate confinement extremely well and make excellent foragers.
Best Layer, White Eggs (Heritage)
Leghorn (Nonindustrial)
Spritely and active, Leghorns lay 250 to 300 or more medium-to-large white eggs per year. Originating in Northern Italy in ancient times, they’ve been a favorite American layer since they arrived on our shores in 1852.
Hens are nonsetters that lay well year-round. They’re lithe and lean—roosters weighing around 6 pounds; hens, 4 1/2—so they’re strictly layers, not dual-purpose (providing good meat and eggs) birds.
They come in an array of colors—American Poultry Association-approved Black, Buff, Dark Brown, Light Brown, Silver and White—and bantam and large-fowl sizes.
Leghorns are ultrafertile, vigorous, hardy and heat-tolerant. While they tolerate confinement very well, they’re noisy, flighty and strong fliers, so they don’t do well in urban situations.
Best Layer, Brown Eggs (Modern)
Red Star
Also known as Golden Comets and ISA Browns, these sex-linked hybrids are produced by breeding Rhode Island Red or New Hampshire roosters with White Plymouth Rock, Rhode Island White, Silver Laced Wyandotte or Delaware hens.
Newly hatched pullets are red, and cockerels are white. Roosters remain white while hens grow white-flecked, reddish brown plumage.
Roosters weigh about 8 pounds; hens, 6. Pullets begin laying at about 22 weeks of age and lay roughly 300 brown eggs per year.
Most Red Stars are active but docile. Some strains tend to be flighty.
Best Layer, Brown Eggs (Heritage)
Australorp
Australian poultry fanciers developed Black Australorps in the late 1800s using Black Orpingtons from Britain as the foundation stock. A typical Australorp hen lays about 250 large, light brown eggs per year.
Ton Bangkeaw/Shutterstock
Australorps come only in black. They’re hardy, moderately early maturing, and some hens become broody.
Roosters weigh around 8 1/2 pounds; hens, 6 1/2, so they’re meaty enough to qualify as dual-purpose birds. Bantam versions are available, too.
Easter Eggers aren’t an American Poultry Association-recognized breed of chicken. They descended from Araucanas and Ameraucanas and come in an array of colors, comb types, and with or without muffs, beards and ear tufts.
The Easter Egger’s claim to fame is its sweet, docile nature and the fact that it lays blue-, green-or olive-colored eggs. This medium-sized, healthy, quiet, heat- and cold-hardy, friendly breed tolerates confinement well, making it an ideal urban chicken.
Hens seldom become broody, and they lay in the neighborhood of 200 to 250 eggs per year.
Best Winter Layer
New Hampshire
New England chicken breeders developed this breed using Rhode Island Red foundation stock, selecting for fast-feathering, early maturity, hardiness and winter-laying ability. New Hampshires have deep, broad bodies and are medium-to-light red.
Hens weigh about 6 1/2 pounds; roosters, 8 1⁄2, so they make fine meat chickens, too. A bantam version exists as well.
New Hampshire hens lay about 200 light-to-medium brown eggs per year, especially during the coldest winter months when other breeds tend to stop laying. These calm, friendly birds do well in confinement, too.
Best Meat (Heritage)
Orpington
William Cook, a coachman living near the town of Orpington in Kent, England, developed this breed in the late 1800s by crossing Minorca roosters with Black Plymouth Rock hens, then breeding their offspring to the Langshan chicken. His goal: Create a large, plump, fast-growing, winter-hardy meat bird with fine eating qualities.
Today’s Orpingtons are just that.
Hens are also reasonable layers of large, brown eggs at 175 to 200 per year. Roosters weigh a hefty 10 pounds; hens, 8. Calm and friendly chickens, Orpingtons adapt equally well to free-range or confinement situations.
The APA recognizes Black, Blue, Buff and White in large-fowl and bantam versions.
The Cornish X, also known as the Cornish Cross Rock and Cornish Giant, is America’s quintessential fast-maturing hybrid meat chicken. Cornish Xs are white with yellow skin, producing broad breasts and plump thighs with superb eating quality.
Incredibly fast growing, they can weigh 6 pounds at 6 to 8 weeks of age, or they can be grown out to 8- to 10-pound broiler size. Due to their heavy weight and rapid growth, stress-broken legs, heatstroke and heart failure are fairly common.
Cornish Xs aren’t very active and are docile in nature, making them easy to house and handle.
Known as Serai Taook in their native Turkey, Sultans have more unique characteristics than any other breed of chicken, including a V-shaped comb, crest, beard, large nostrils, low-carried wings and erect bearing, feathered legs and toes, and five toes on each foot.
Sultans are white with blue shanks and toes. Roosters weigh 6 pounds; hens, 4. They are active but friendly. Hens lay 150 to 200 small, white eggs per year.
Brought to America in 1867, the APA included Sultans in the organization’s first Standard of Excellence (an annual publication describing recognized breeds) in 1874. The Livestock Conservancy, an American farm organization with a mission “to protect endangered livestock and poultry breeds from extinction,”classifies the Sultan chicken breed status as “Critical,” meaning there are fewer than 500 breeding birds in the U.S., with five or fewer primary breeding flocks (50 birds or more), and an estimated global population of less than 1,000.
Best Beginner’s Bird
Plymouth Rock
The Plymouth Rock is an all-American, dual-purpose chicken developed in New England during the 1800s. Its exceptionally calm and friendly demeanor, hardiness, and fine laying and table qualities make it a great bird for first-time chicken-keepers.
MVolodymyr/Shutterstock
Plymouth Rocks come in a number of colors: Barred, Black, Blue, Buff, Columbian, Partridge, Silver Penciled and White. Roosters weigh about 9 1/2 pounds; hens, 7 1/2. Bantams exist as well.
Hens lay about 200 large, light-to-medium brown eggs per year, and they tend to be fine broodies. They make excellent foragers that adapt well to confinement.
Best Ancient Breed
Aseel
Developed in Pakistan and India as fighting chickens, the Aseel is now celebrated for its unique appearance and friendly demeanor toward humans. America’s first Aseels came from India in the late 1800s.
Their muscular bodies are held in a distinct, upright manner. Aseels have broad skulls, menacing eyes and strong, curved beaks. Hens are poor layers of small, brown eggs but are superlative broodies that fiercely guard their chicks.
Aseels tend to fight with other chickens but are docile and friendly toward people. Roosters weigh about 6 pounds; hens, 5.
Best Broody (Large Fowl)
Cochin
An old Chinese breed that came to America in the 1800s, the Cochin chicken is so broody that even roosters occasionally set eggs, including the eggs of ducks, turkeys and geese.
They are huge—roosters weigh 10 to 12 pounds and hens weigh as much as 9—and they’re profusely feathered with fluffy plumage, including their legs. Smaller bantam versions are available, too.
Hens lay up to 140 medium-to-large tinted eggs per year. Cochins are slow growers but make a lot of meat; they’re best harvested at 15 to 16 months of age as 12-pound capons. They’re nonflyers and one of the quietest, gentlest breeds, making them excellent pets as well.
Originating in Belgium in the late 1800s, the Belgian Bearded D’Uccle (pronounced dew-clay) has a beard and muffs that extends around its head as well as feathered legs, giving it an owl-like appearance. The APA recognizes Black, Golden Neck, Mille Fleur, Mottled, Porcelain, Self Blue and White colors.
They are true bantams. Roosters weigh about 26 ounces; hens, 22.
Hens are moderate layers, producing about 150 tiny, white or tinted eggs per year. But they’re peerless broodies and sometimes used to hatch quail and pheasant eggs.
Friendly and calm, Belgian d’Uccles make wonderful pets. Roosters are rarely aggressive.
Best for Southern Climates
Catalana
One of several Mediterranean dual-purpose breeds that produce well in hot, humid climates, this chicken originated in Spain, and the APA recognized the breed in 1949.
Catalanas come in one color: buff with a black tail.
Roosters weigh about 8 pounds; hens, 6. Catalanas mature early. The Livestock Conservancy states that “the cockerels and cull layers are noted for having very good carcasses and succulent meat … Cockerels are also used in the production of quality capon in Spain.”
Hens lay about 200 medium-size, white or tinted eggs per year and seldom become broody. Active and somewhat flighty, they forage well but don’t adapt the best to close confinement.
Best Gentle Rooster
Faverolles
If you’d like to add a rooster to your flock but don’t want one that will chase you around the yard, try a Faverolle. These cute, fluffy chickens have beards, muffs, feathered legs and five toes on each foot.
Maryna Pugachova/Shutterstock
Exceptionally docile and friendly, they love attention.
Developed near the French village of Faverolle, they came to America in the early 1900s. Hens lay 180 to 200 medium-to-large tinted-to-light-brown eggs per year. Roosters weigh 8 to 10 pounds and hens, 7 1/2 to 9 pounds, so this chicken makes a meaty, dual-purpose breed.
Best for Conservators
Holland
The Livestock Conservancy states that Hollands are the rarest living breed of American chicken. That, along with their stellar dispositions and fine laying and meat qualities, makes them the perfect bird for anyone who’d like to help preserve critically endangered poultry.
Developed during the 1930s in New York, Hollands originally came in Barred and White, but the White variety appears to be extinct. Hens lay 200 to 250 large white eggs per year. Roosters weigh around 8 1⁄2 pounds; hens, 6 1⁄2. Bantams are available, too.
Hollands are calm, friendly and cold-hardy, and hens make good brooders. They free-range with ease and forage most of their own feed during the summer. But they do well in confinement, too.
Best Dual-Purpose (Heritage)
Rhode Island Red (Nonindustrial)
Developed in Massachusetts and Rhode Island in the late 1800s, this chicken might be America’s best-known breed. Early breeders wanted a bird that could lay 200 to 300 large, medium-to-dark-brown eggs each year through the cold winter. They also dress out nicely as a table bird.
RIRs are rich red with black accents. Old-style roosters weigh about 8 pounds; hens, 6 1/2. Bantam sizes are available.
Commercial Rhode Island Reds are smaller and lighter colored and don’t go broody—a specialty of the old-fashioned, nonindustrial strains.
Best Dual-Purpose (Modern)
Cinnamon Queen
Breeding RIR roosters to Rhode Island White hens produced the Cinnamon Queen hybrid. Hens lay at an earlier age than most other hen, producing 250 to 300 extra-large brown eggs per year.
These big, meaty birds—roosters, 9 pounds; hens, 7—mature quickly making them a royal table bird, too. Roosters are white; hens are brownish red.
Hardy, docile and easy-to-raise, they accept confinement with ease.
Best Pet
Silkie
When you think pet chickens, think cute, compact, friendly bantam Silkies. This ancient breed, developed in the Far East (most likely China), comes in an array of colors in bearded and beardless varieties. All have fluffy, furlike plumage, compact walnut combs, turquoise earlobes, black skin and bones, feathered legs, and five toes on each foot.
Olga Salt/Shutterstock
Roosters weigh about 4 pounds; hens, 3. Silkie hens lay only a few tiny, tinted eggs per week in season, but they make fantastic broodies, hatching chicken, quail, pheasant and waterfowl eggs with ease.
Best for Northern Climates
Chantecler
Monks at the Cistercian Abbey in Oka, Quebec, Canada, developed the White Chantecler in the early 1900s, selecting for good temperament, vigor and the ability to produce well during harsh Canadian winters.
Later, in the 1930s, an Alberta poultry breeder developed a partridge-colored version.
Chanteclers are extremely cold hardy, and hens lay about 200 large brown eggs, even in the height of winter. Calm and friendly, they love to forage and do well in confinement.
Chanteclers are meaty, with large breasts. Roosters weigh about 8 1/2 pounds; hens, 6 1/2. Bantam versions are available, as well. In 1999, Quebec officially recognized the Chantecler as a native Quebec breed.
There are more than 400 breeds and varieties of poultry recognized by the APA and the American Bantam Association, be it large and small bantam chickens, ducks, geese, turkeys and guinea fowl.
No matter what you’re looking for in a chicken, there’s something exactly right for you. These are just a few of the best!
This article originally appeared in the March/April 2021 issue of Hobby Farms magazine.
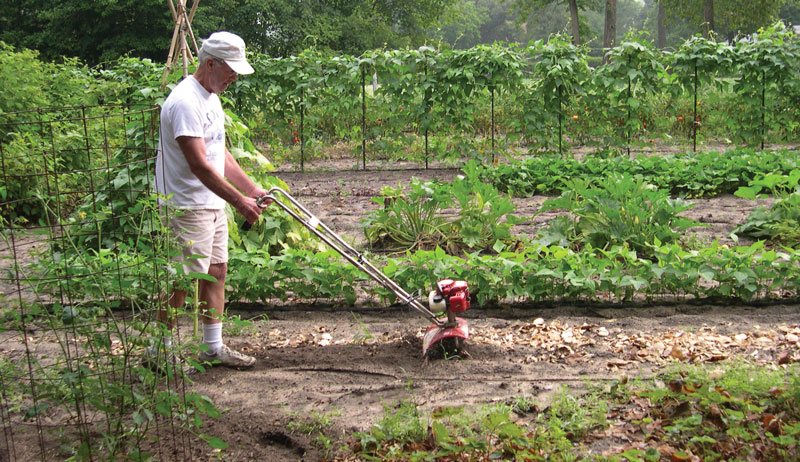
You don’t always have to turn the earth to grow on your farm, but an indispensable tool such as a rototiller has the power to break up thick clumps of soil and turn it into workable, growable space. Rototillers aerate and work organic matter into topsoil so plants thrive, and they loosen the grip of weeds so a garden is ready to grow for another year.
Not all rototillers are created equal, and there are many varieties. From small, manual and inexpensive to 40-inch tow-behinds that attach to a tractor, tillers offer many ways to turn soil around.
Let’s Talk Tines
Tines—the sharp blades that dig into dirt—dislodge weeds and other plant roots and break up soil. Three main kinds of tines exist on cultivators or rototillers.
Bolo Tines
Bolo tines are the most common and are best used for tilling garden beds and soil that’s already been worked. If the area you’re tilling has a lot of rocks or roots, consider another type.
You’ll also find that long grasses may wrap themselves around a bolo tine. You’ll need to stop and remove these on occasion.
Slasher Tines
Slasher tines are great for cutting through dense areas, and roots are generally no problem for these sharp blades. Unlike the standard L-shape of a bolo tine, slasher tines are sharp and jagged to stop plant life from wrapping around the tines.
Pick & Chisel Tines
Pick and chisel tines are curved tines used to break up sections of extremely hard and rocky ground.
The direction your tines move in will also affect how your tiller works. Forward rotating tines move in the same direction as the cultivator or rototiller. Counter-rotating tines move in the opposite direction.
Forward rotating tines work well in gardens or plots of land that have already been tilled. Counter-rotating tines can break up thick clumps of dirt in areas that have never been worked.
If you’d like a tool that lets you put your back into it, a hand cultivator is for you. With a shovel-style handle and long, sharp tines, all you need to do is twist the tool into the dirt to loosen it.
You can also find electric handheld cultivators. This tool looks like a handheld cultivator, but it plugs into a power source and has motorized tines to loosen your dirt.
The best part of a handheld cultivator is that it’s as quick to use as your rake or shovel and just as inexpensive. How deep you till will depend on how much effort you put in.
You’ll just want to keep in mind that, when using in a large area, hand tilling can give you a strenuous workout. Using a tool such as this means you have many hours of manual labor ahead of you, and they aren’t the best choice for hard, rocky soil.
Garden Cultivators
Mini-tillers are small, light, motorized garden cultivators with cutting tines. They’re small enough to fit between garden rows, light enough to easily lift and store, and inexpensive when compared to full-sized rototillers. They also can blend in compost without disturbing the roots of your existing plants.
The tines on a cultivator are adjustable and should be able to reach anywhere between 4 to 10 inches depth and till rows of land with a width range of 6 to 18 inches. Available as gas or electric-powered, cultivators have a drivetrain that propels the tines forward. What it lacks in size it makes up for in strength.
Electric models are lighter, but they’re powerful enough to remove weeds and loosen soil for planting. Heavier gas-powered models can till the soil in larger spaces or dig into denser weedy areas.
A cultivator is a great addition to a farm where storage is at a premium, as they take up less space than a full-size rototiller. This tool is good for small spaces of around 500 square feet or less.
If you need a tool for tiling hard clay or extremely rocky fields, take a look at a rototiller.
Rototillers
While a cultivator can loosen your soil, a rototiller has the power to dig deep and break up chunks and clumps. They are larger in scale, have more powerful engines than a mini-tiller and can tackle larger spaces.
They range in size from small to large. Depending on the size, they can be one of the pricier pieces of farm equipment you own.
However, if you have a garden or field size ranging from 5,000 to 10,000 square feet, you’ll be grateful to have one.
WayneThume/Flickr
Front-tine
Front-tine rototillers are the most common type you’ll find in big-box stores. They’re the most affordable option for someone who would like a light-duty rototiller to turn hard chunks of earth. They can reach a tilling depth up to 8 inches and till rows up to 24 inches depending on the model.
This type of tiller is considered light-duty. When you run one for the first time, you’ll realize why.
Guiding a front-tine tiller over hard or rocky dirt can feel a lot like you just did an arm day at your local gym. It can take a lot of energy and strength to run one for a long period of time.
Mid-tine
Mid-tine rototillers are similar to front-tine rototillers. But with this type, your tines are placed in the middle of the machine.
With the tines placed under the engine, you’ll have a distribution of weight that makes digging into impacted soil easier on your back and arms. A mid-tine rototiller can till depths up to 8 inches in hard soil and can work through rows up to 24 inches wide.
Rear-tine
Rear-tine rototillers have blades in the back, and the set of front wheels are propelled by the engine. They are large and heavy, and guiding them will still give you a good workout. But they’re easier to run than front-tine tillers.
The tines on a rear-tine rototiller can reach depths up to 10 inches. Some models can work through swaths of land up to 36 inches wide at one pass. If you’re tilling through areas with deep roots, hard clay or rocky ground, a rear-tine tiller is a good choice.
Choose a garden-sized rototiller if you have a small to mid-size area you’d like to till. While front-tine and mid-tine rototillers are great for a large garden or to till up thick, heavy soil, they can be tiring to use. A rear-tine rototiller is often the implement of choice for someone who doesn’t quite need a tractor but needs a machine that can handle rocky or hard soil in a larger space.
A rototiller is heavy and can be tiring to operate. To offset the toll of running one for long periods, look for rototillers that have features like one-hand operation to stabilize the machine while it runs or easy electric starters so you don’t have to struggle to start it.
If you own a tractor and have several acres you’d like to till, a rotary tiller is your best choice for aerating your land, turning the soil before planting crops, or tilling unused areas and turning them into usable space. Rotary tillers attach to the back of your tractor, and how you choose one depends on a few factors.
Rotary tillers can work via forward-rotation or reverse rotation. If the majority of your soil has already been worked or is aerated, a forward-rotation tiller is a good choice. This type of rotary tiller will till in the same direction as your tractor.
A reverse-rotation tiller tills in the opposite direction of the tractor, digging deep into the soil. It can work better on hard, impacted soil or very dry soil.
Just like cultivators and rototillers, tines are one of the most important features of a rotary tiller. You can choose from four-tine and six-tine rotary tillers.
While it’s tempting to get the largest rotary tiller available, you’ll want to keep in mind that the more tines you have, the more horsepower your tractor will need to pull it effectively.
Shelly Wutke
Other Considerations
Other considerations you’ll need to make before purchasing a rotary tiller include:
whether or not you’d like a chain- or gear-driven tiller
whether you are trying to work extremely rocky soil
how wide a path you are tilling
how fast your tiller can work when you’re pulling it
Your local implement dealer should be able to make an appropriate recommendation on which rotary tiller is right for you and your farm.
If you have a tractor and several acres you need to till every year, a rotary tiller is a time-saver. You can hitch one up to your tractor and pull it without much effort on your part. And they work in wider sections than a rototiller or cultivator.
While this type of tiller will quickly work your soil, a breakdown can be costly. You’ll want to explore what your warranty will cover and keep up with any maintenance issues.
Aerate the soil. Easily remove weeds.Turn unused land into a bountiful area where grass, plants or vegetables grow. A rototiller, whether you choose big or small, will be one of your most-used tools on the farm.
Sidebar: What about Walk-Behinds?
If you feel you need more than a mid-size rototiller but don’t want to commit to the purchase of a full-size tractor, a walk-behind tractor with a rotary tiller attachment could be right for your farm. The main difference between a walk-behind and a wheeled tractor is that the walk-behind has handlebars instead of a steering wheel.
While it’s smaller, a walk-behind tractor can pull a rotary tiller in much the same way a four-wheel tractor does. With a power takeoff flange, integrated driveshaft and quick-coupling system, implements such as tillers, mulchers and mowers can be switched out in less than a minute.
This article originally appeared in the March/April 2021 issue of Hobby Farms magazine.
Generally speaking, I’m not the type to replace tools and equipment too soon. I’ll patch up leaky hoses and use beat-up yard carts until they’re falling apart. If a little effort and/or a quick repair job can extend their useful life, I’m all for it!
Why be wasteful and discard them prematurely?
But eventually, even I have to acknowledge all the life has been squeezed out of a given item. I’m afraid I’ve reached this point with my latest pair of safety glasses.
I don’t remember when I got them—it was quite a while ago. But wear and tear has definitely caught up with them. They’re badly scratched up (riding around in my pocket probably hasn’t helped). They’ve also become permanently fogged in places, so it’s difficult to see through them clearly.
I’m starting to shop for a new pair of safety goggles (no farmer should be without eye protection!), and while I don’t want to overthink an inexpensive purchase, another part of me wants to compare features and find the absolute best choice. Because truth be told, safety goggles offer a surprising number of features!
Here are some of the factors I’m considering while shopping for safety goggles.
Glasses or Goggles?
While it seems these terms are somewhat interchangeable, it’s helpful to think of glasses as lenses that don’t fit tightly around your face (like regular eyeglasses). Goggles as tight-fitting lenses designed to conform to your face and provide a perfect seal for greater protection.
Glasses and goggles both have their strengths and weaknesses. I’ve traditionally favored glasses, but I’m tempted to choose a goggles type this time around. I often find myself sawing down tree branches from points above my head. You’d be surprised how often sawdust particles can float down, sneak behind loose-fitting lenses, and find their way into my eyes.
Some safety glasses are designed like typical eyeglasses, with a pair of folding arms that ride over your ears to hold the lenses in place. But others forego the folding arms in favor of an elastic band that wraps around the back of your head, similar to a face mask.
I’ll be happy with either, so long as I find the other features I’m after.
Anti-fog Coating
There are probably things more annoying than safety glasses fogging up so badly you can’t see your work. But I’m not sure what they would be!
I frequently wear safety glasses and a face mask at the same time. This combination tends to send my breath right up behind my glasses, causing moisture to condensate and fog my vision.
Fortunately, many safety glasses boast an anti-fog coating to alleviate this issue. If my current glasses ever had such a coating, it’s long since worn off. This, then, is one of the main features I’m shopping for.
Tight-fitting goggles can get even more advanced, with dual-pane lenses and direct or indirect air vents to further reduce fogging.
Safety glasses inevitably take a bit of a beating, even if it’s just from riding around in your pocket with other tools and items.
Scratched-up lenses can eventually blur your vision as badly as fog. So, a scratch-resistant design is another key feature I’m looking for.
Do They Fit over Your Eyeglasses?
Some safety goggles are designed with extra clearance between the lenses and your face, allowing you to wear prescription eyeglasses behind the safety goggles.
This feature isn’t as important to me. For some folks, though, it could be a dealbreaker.
UV Protection
Many safety glasses offer UV protection. Since the whole goal is to protect my eyes, I might as well get a pair that guards against the sun, right?
I haven’t made a purchase yet, but I had best hurry up and come to a decision soon. Because even I must admit that pulling off my scratched-up safety glasses every few minutes to wipe away condensation isn’t the most productive way to work!
Home-produced milk, eggs and bacon are wonderful things. But when you total up the feed bills at the end of the month, are you ever discouraged at the cost of keeping livestock?
Sacks of feed—especially organic—and bales of hay come with a price tag that can make “living the simple life” pretty expensive. But traditional garden crops can reduce or eliminate your dependence on purchased livestock feed. Many are easy to grow and store as well.
Money-Savers, Not Time-Wasters
But wait, you think. If growing crops to feed animals means a whole lot more work, haven’t we just traded one problem for another? Well, the heirloom crops profiled in this article have all the traits to make them fit right into your busy homestead schedule:
They’re easy to grow, because they don’t require a lot of TLC. And as heirlooms, they’re resistant to most pests and diseases.
They really produce!—like literally tons of vegetable mass in a medium-sized plot.
They can all be stored passively in the cellar, shed or porch, or just in the garden.
In addition to all this, the crops you don’t feed to the livestock, you can eat yourself. And many of these crops fit into spaces in the garden plot or planting calendar where you don’t already have a crop. So they don’t require a lot of dedicated garden space.
Returning to Our Roots: Mangel-Wurzel
The name may sound unbelievable, but the mangel-wurzel—also called “mangel-beet” or “fodder beet”—is an extra-large beet. It can weigh up to 20 pounds, under favorable conditions, and has been grown in England since at least the 16th century.
Its lovely, dark-green leaves touched with red and its enormous size make this plant a real eye-catcher. Like other beets, it makes terrific food for your own plate (and is the basis for some great beer and wine). But the mangel crops really came into their own in the 18th century when farmers began to cultivate the beet on a large scale for livestock.
It’s a first-class, all-around animal feed for weight gain and milk production. In addition, it readily produces 500 pounds or more in just a 100-foot row!
How to Grow
And as we promised, mangels are one of the easiest crops to grow. This long-season crop does require a dedicated space in the garden. But the big tap root punctures subsoil, breaking up hardpan and improving tilth.
And its large leaf-canopy shades out most weeds. It keeps the soil cool and biologically active even in high summer. Mangels are really an extra-duty crop: food, feed and soil improvement all in one!
Despite what you might think, this very large root is easy to harvest. Because it grows mostly above the soil, pulling it is simple: Just rock and lift. Cut off the tops leaving a couple of inches of stem, and stow the roots in the root cellar or cool basement.
Don’t let them freeze, though.
Any class of livestock will relish the leaves, or, as with many crops, you and your family can eat them yourselves! Mangels will keep well into the next spring. Even when they begin to soften, they’re still acceptable food in the pigpen.
How to Feed
Feeding couldn’t be simpler. Give raw roots whole to chickens and adult pigs, or chop for piglets, cows and sheep. Mangels’ high sugar content makes them great energy food. And the generous vitamin and fiber content ensures balanced micro-nutrients and healthy guts.
Cooking can even increase the available food value. Use the water from boiled mangels as a sovereign remedy for scours in calves.
(Note: While a few mangels can be offered as a treat at any time, tradition tells us to wait until January to offer the roots in large quantity. Too early feeding has been associated with scours.)
Meet tromboncino, our favorite heritage squash. These big boys often reach over 4 feet long! Sometimes known as “crookneck pumpkin,” this vining moschata is resistant to all the troubles that take out other cucurbitae, such as squash vine borers, squash bugs and even bacterial wilt and powdery mildew. So it’s really easy to grow.
Tromboncino likes to climb, so you can minimize the space it occupies in the garden by growing it along fences, trellises or hedges. Give it lots of room because it will keep growing all summer long!
Corri Seizinger/Shutterstock
The young green fruits are delicious steamed, sautéed or in a salad. Mature, this is a long-storing winter squash often compared to butternut. In a cool, dry cellar, it can store all winter. We’ve had it last into the next June.
Best of all, a single plant can produce as many as 50 or more fruits, many weighing 5 pounds or more. Now that’s real productivity!
How to Grow
Tromboncino is easy to cultivate, too. It can be started indoors before the last frost date or direct-sown in the garden, which is our preferred method. To get tromboncino going on a good footing, put down some rough compost, mound dirt over it and push in three or four seeds, points down. Then water and wait for it to pop up!
As soon as the plants appear, mulch around them to hold moisture and control weeds.
Give tromboncino something to climb, and that’s all there is to it! Pick any young fruits you want for summer cooking, and let the rest mature. You’ll be amazed at the harvest!
How to Feed
And this squash couldn’t be easier to feed out. Cut in large chunks for pigs and ruminants (cows, sheep, goats). For chickens, split the fat, round body of the squash and let the birds peck the high-protein, vitamin-rich seeds right out of the cavity.
They’ll eat it down to the rind—seeds, flesh and all.
All Hail the King: Kale
As if we needed another reason to grow kale, here’s a new benefit: It’s terrific animal food! All the qualities that make kale a superfood for humans make it a great animal feed crop as well.
With off-the-charts vitamin and mineral content, kale is a prime source of calcium and magnesium—minerals especially important in winter, which is just when it’s most available. Like mangels, kale boosts milk production in dairy animals and mother pigs, too.
Its dark-green leaves provide lots of beta-carotene, for rich orange egg-yolks and butterfat, even in winter. Your livestock will love you!
How to Grow
Kale is one of the easiest crops to grow. Plant it to fill garden spaces that come available as you harvest other crops. It can grow unprotected all winter long, and you can harvest as needed.
A cool-season crop, kale nevertheless germinates readily for us even in the heat. So as your summer crops play out, replace them with kale. We direct sow 8 inches apart in rows. When the plants are a few inches tall, we thin to 16 inches between plants and make salad of the thinnings.
How to Feed
Kale is a crop that requires exactly no processing for feeding out. It’s ready to go, straight from the garden. Harvest leaves as you need them, or just cut the whole plant.
Chickens like kale chopped fine, but if you hang a plant in the hen house, they’ll tear it up themselves and get some exercise in the bargain. Larger animals will happily chow down on the whole plant, stem and all.
Don’t overlook the mighty potato! One of the easier-to-grow crops, this vegetable also makes a great livestock feed. When planning your garden this year, leave plenty of space for your potato crop—after all, a root cellar full of potatoes is terrific food security! Reserve the surplus, damaged and undersized tubers for the animals.
Packed with vitamins, minerals and energy, potatoes are the real staff of life in many countries.
Masha Dougherty
How to Grow
Potatoes are also one of the easiest crops to grow and—pound for pound—also one of the most productive! Well-composted soil ensures a good start, while mulching keeps roots cool—the best deterrents we know for potato bugs.
In prolonged dry spells, it can be worth watering your potato patch. This is a crop you’re really going to depend upon.
How to Feed
Potatoes can be fed to hogs and ruminants as a significant part of their energy allotment. Smaller tubers can be fed whole, while large roots may be roughly chopped to avoid choking hazard. Or put a pot of potatoes on the wood-burning stove and get double-duty out of your firewood!
Cooked potatoes are a mainstay in hen and hog rations. Mixed with a protein supplement such as sunflower seeds or skim milk, potatoes make a complete feed ration.
The Superb Sunflower
A long row of sunflowers dresses up any garden. Not only that, as a vertical crop, it produces enormous amounts of vegetable mass for the space it occupies.
The seeds are a favorite with chickens, of course, and provide big boosts of protein and beneficial fats. Grazing animals love the whole plant. Cows, goats and sheep will happily eat the leaves after the heads have been harvested, and pigs enjoy even the stems.
Doris Oberfrank-List/Shutterstock
Tall varieties are the best sources of seed and produce the greatest volume of plant material as well. Even poor soil will grow sunflowers, but some rough compost will really boost production. Make your first planting in spring, after average last frost date.
Because sunflowers are a warm-season crop, they’ll sprout even in hot weather, making them a good crop to fill in as you clear the garden of other plants. Once sunflowers are up, they aren’t much bothered by weeds, but some mulch around the base of the plant will keep the roots moist and maximize growth.
Sunflowers are easy to harvest. Seed heads are ready when the disk flowers—the tiny blooms that cover the center of the flower head—begin to dry up and fall off. Cut mature heads, leaving about 12 inches of stem attached, and tie in small bunches for hanging.
An enclosed porch, shed or summer kitchen is a good place to store sunflowers. Stringing a length of chain, clothes-line fashion, lets you hang your harvest out of reach of wild birds and rodents. That’s all there is to it!
Offer shucked seeds or whole seed heads to poultry, ruminants and pigs as a protein booster and mineral supplement. Don’t waste the stem and leaves. Your pigs and ruminants will devour them.
You’ll reap benefits in the form of eggs, milk and bacon!
Homesteaders can find a lot of the feed they need straight from their own land. From the start of the growing season, right through the winter, your garden can feed the animals with minimal work on your part. And when you grow it yourself, you know exactly what your animals are getting and not getting.
Home-produced livestock feed means crops with no pesticides, artificial fertilizers or GMOs. And homegrown feed makes your hobby farm independent of unforeseen interruptions in availability or delivery.
So declare your homestead independent of purchased feeds! Your animals, your soil and your wallet will be glad you did.
Sidebar: Cultivation
No one wants to spend a lot of time growing crops for livestock, but the feed crops mentioned in this article are vigorous and require relatively little time and energy. And they won’t be your show garden, so don’t worry too much about weeds.
Here are easy steps for growing your own feed crops:
Till first to eliminate weeds and make a receptive seed bed.
Use the push planter to drill small seeds. Compress the soil over the seeds for good seed-to-soil contact and to mark your line.
As soon as weeds germinate, cultivate between the rows.
When your crop seeds show true leaves, thin to desired spacing.
Make a second pass with the wheel hoe when new weeds germinate, using an ordinary hoe to draw soil over the weeds in the rows.
That’s it! This isn’t your show garden—when the crop plants are tall enough to compete with weeds, ‘‘lay it by” as the old-
timers say, and let it grow!
Sidebar: Staying in Balance
How do we make sure our homegrown crops provide our livestock with a good, balanced diet? Well, variety is the spice of life, and it’s also the key to a balanced diet.
Commercially compounded animal feeds are usually a total mixed ration (TMR) intended to supply all the necessary nutrients. But in nature, no single plant or animal food supplies everything. So, when growing and feeding homegrown crops, balance the diet of your livestock like you balance your own—with variety!
Just like humans, animals need:
carbohydrates, such as potatoes and mangels, for energy
proteins & fats, readily available from seed crops such as sunflowers and tromboncinos
fiber, present in all these vegetable crops and in pasture plants
micronutrients—vitamins and minerals
This article originally appeared in the March/April 2021 issue of Hobby Farms magazine.
In the book The Fields of Home, author Ralph Moody describes how his grandfather recaptured a lost colony of bees on their Maine farm around 100 years ago. He used nothing but a smoker, a net, a ladder and some old-fashioned American ingenuity.
But Grandfather was an expert beekeeper.
If you’re just getting into beekeeping and you lack a mentor who can provide you with an already thriving hive, you’ll need to obtain your colonies on your own from an outside source. Or maybe you’re looking to expand your current beekeeping operation by experimenting with a new bee breed.
While the idea of rambling through the Maine woods to capture a swarm might seem picturesque, it’s not quite practical for the beginner today.
A simpler—and safer!—method is to purchase bees from a reputable source. You’ll need to supply the hive supers and other essential beekeeping gear. But in some cases the bees themselves can be shipped directly to your doorstep.
Let’s take a closer look at how this is done and help you determine the right method for your situation.
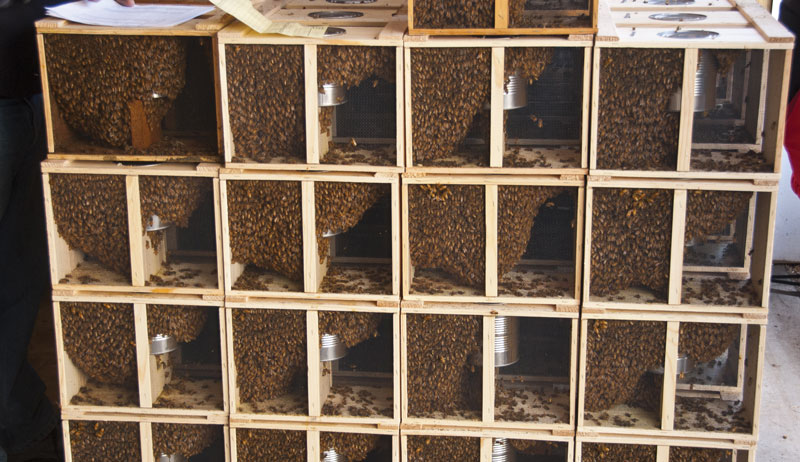
Option No. 1: Bee Packages
A package is the simplest and least expensive method to purchase bees for your home. A package is a nifty little screened box, about 8 inches high, 16 inches long and 6 inches wide. It contains:
nearly 10,000 adult worker bees (weighing about 2 to 4 pounds altogether)
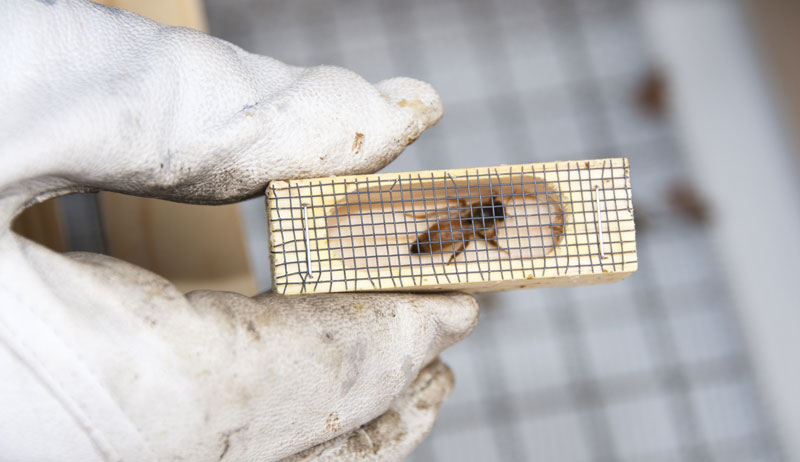
a single queen housed in a separate small enclosure
possibly a can of sugar syrup to provide food to the bees while on their travels
There’s a good chance that the queen in these cases is a queen that hasn’t previously been introduced to these workers. So she is kept in the separated screen cage to prevent the rest of the colony from rejecting her. Over the course of several days, the scent of the new queen will become the new normal for the workers. Then they’ll be ready to accept her as the hive leader.
Paulette Johnson
There’s an advantageous reason to purchase a package of bees. You can ship them through the U.S. mail or even a private carrier such as UPS.
Upon delivery, you “install” the bees into an empty hive where they take up residence. This is done by temporarily removing a few frames from a standard hive and essentially pouring the bees out of the package and into the belly of the super. Then you replace the frames and close up the hive.
The queen’s cage is temporarily hung inside the hive. Typically, the queen’s entrance is blocked by a piece of candy or marshmallow (something sugary) that will take the workers a few days to chew through. By then, they should be acclimated to the new queen.
(Be sure to check in a few days to make sure the queen was freed!)
Another alternative for obtaining your bees is to purchase a “nuc” (or nucleus) container. Rather than the bare-bones “box of bees” you get with a package, a nuc is essentially a miniature hive with a young colony already working together.
Nucs are wooden or cardboard boxes, somewhat larger than a package, that contain about five hive frames identical to what you would use in a standard Langstroth hive. The colony of nuc bees—again about 10,000 workers and a queen—have already been working together. The queen has already laid eggs and may in fact be the mother of some of the mature workers.
Significantly, the bees will have been working nectar sources prior to shipment. Therefore, some of the five frames may already be partially drawn out and loaded up with honey and pollen. This makes a fully-functioning, albeit small, hive.
When it comes time to install a nuc, the beekeeper simply exchanges the frames inside the nuc with those from an empty super in a permanent hive. Ideally, the majority of the bees will ride along on the frames.
Daniel Johnson
Inevitably, some will remain inside the box. You’ll want to leave this shipping container near the hive entrance for a time until those remaining bees pick up the homing pheromones from the other bees.
Be sure to purchase a nuc of bees with frames that are the same dimensions as your supers!
So, how do you choose which option will work best for you? Let’s examine some of the concerns.
Cost
There’s no question here: Packages are the less expensive way to purchase bees. Admittedly, beekeeping isn’t an altogether inexpensive pursuit. If costs are a concern, then packages represent the least expensive way to get into the game.
Nucs tend to be more expensive because of the additional effort put into them by the bee breeder.
Time
When a package is installed into an empty hive, the bees are at something of a disadvantage. They are almost starting from scratch.
Sure, the 10,000 workers are mature and ready to go, but the hive has no infrastructure yet. Depending on when you’re installing the package, you may need to feed the hive until the bees have gathered enough nectar to put in honey and pollen reserves of their own.
The result of all this is that the entire colony is going to probably lose a few weeks of time that might otherwise have been used to store honey.
Nucs, on the other hand, have plenty of workers ready to head to the fields and also brood in various stages of growth—eggs, larva, pupa. The hive is much more up to speed.
Also, as mentioned, nucs come with honey and pollen already collected and stored on the frames. The installation process doesn’t rob the bees of their work. So nucs can definitely save the beekeeper some time.
Remember, the queen inside a package didn’t produce those workers. She’s just a fresh queen chosen and placed in the box, not unlike what would happen if you lost a queen and ordered a replacement.
Daniel Johnson
As a result, she’s somewhat of an unknown.
The queen in a nuc, however, is a proven layer. There’s extra value here because you know for sure that the queen is productive.
Shipping vs. Pickup
Shipping living things (plants or critters!) can be a challenge. Bees in a package aren’t protected from heat or cold. It’s critical, then, to time your spring shipment for after the danger of real cold has passed. You also want to time it for before excessive heat sets in.
You also may want to consider paying for expedited shipping. However, shipping a package is simple compared to shipping a nuc, which weighs considerably more.
Instead, many bee breeders offer a pickup option for nucs (and complete established hives, for that matter). You can also arrange for pickup of packages. The downside to pickup, of course, is that you must make a honeybee road trip if you do not have a local bee breeder.
It’s possible that a local bee club might arrange for a bulk pickup for all of its members. There may also be very specific times of the day when the bee breeder will allow pickup arrangements.
Mornings and evenings are usually the preference in order to avoid middays when the bees are out in the fields working.
Pickup puts you in charge of the bees’ well-being during the trip home. But if you live far from any bee breeders, you might stick with packages simply for ease of transportation.
So, in the end, which solution is best for you? It’s going to depend somewhat on
your budget
your location
how much you value the individual components such as a proven queen, established brood, etc.
Really, either option is viable. Beekeepers make both of them work quite well every year. There is no wrong answer at all.
You could even try raising both a package and a nuc. See which one has a better success rate!
Give Bees a Chance!
You’ll find a great deal of satisfaction getting your new hive up and running, filled with new bees that soon get to work on the coming spring flowers.
And while you might not have climbed a ladder in the woods to retrieve those bees out of a hollow tree like Grandfather, you did your fair share of the work installing them. Good luck!
Sidebar: Bee Calm
Watch out for rapid nuc growth! Because nuc colonies are further along in their work and have a more robust start on their groundwork, the hive population has the potential to really take off quickly.
Watch carefully at the beginning, and add supers to the hive as necessary. It would be a shame to come this far only to accidentally induce the bees into swarming!
This article originally appeared in the March/April 2021 issue of Hobby Farms magazine.
When deciding on equipment and tools for a farm, it is important to understand the scale of your property size and size of production area, your landscape and topography, and the type of operation.
As a general rule, the smaller the property size, then the smaller the equipment scale needed. Additionally, properties with more slope or tight spaces may benefit from smaller equipment types.
On the other hand, larger properties and those with more open layouts will benefit from larger-sized equipment. And properties that have more intensive operations may want to increase the scale of their equipment relative to the property size.
Different operations will always have some equipment that are more suitable to farm and garden tasks, often regardless of size.
Let’s look at these considerations, relative to three common equipment scales, in more detail .
Three Primary Scales of Grower Equipment
For the purposes of a discussion about equipment scale, we can break things down to three core equipment scales for growers. They are:
First, we have the familiar array of hand tools: shovels, rakes, hoes, etc. But you can also find a wider array of specialized hand tools available for growers who want to produce more (or maybe just make gardening easier) in their garden space. Many of these are light years ahead in their utility and offer numerous benefits to a serious grower operating on a small scale.
Whether you’re working in a single backyard garden bed or many acres of production, handheld garden tools are indispensable!And for many—especially smaller growers—they get the job done without requiring larger equipment.
Two-Wheeled Tractors
But for those needing powered assistance in their growing pursuits, two-wheeled, walk-behind tractors are very suitable for home growers, homesteaders and commercial operations on smaller acreages.
courtesy of Zack Loeks
In many cases even larger farms will still make use of two-wheeled tractors. They do a great job in specialized situations that require maneuverability, such as intensive hoop house or greenhouse management.
Finally, we come to the largest-scaled piece of farm equipment, the four-wheeled tractor.
This last category is very broad. Machines in this bucket range from subcompact tractors, which are essentially a beefed-up riding lawn mower with a three-point hitch and a bucket, to large machines boasting 150 hp.
Subcompact
For most of us, though, a subcompact tractor will easily handle most (if not all) of the work we throw at it. Subcompact tractors are great to facilitate medium acreage operations, or to work alongside larger tractor for specialized work.
Again, you may enjoy using a subcompact tractor in a large greenhouse to bring in compost and do land preparation.
Medium to Large
And while a subcompact tractor is the tractor of choice for many hobby or small farmers, some may find their operations require a more-powerful tractor.
You can work your way up to a medium-sized, 75 hp tractor, which puts you officially in the agricultural category. Beyond that, you’ll find the 100-plus hp tractors used on larger farming operations.
So we’ve broken down farm equipment into three basic categories based on scale. But what does this mean for you and your growing operation? Next, we’ll look at some common scenarios to determine what you and your crops really need.
We love to cook with Jamaican jerk seasoning in our household. Jerk seasoning is great on chicken, pork, ribs, fish and even tofu. Chutney is one condiment that greatly complements spicy food, and this recipe, made with strawberry, is a perfect choice.
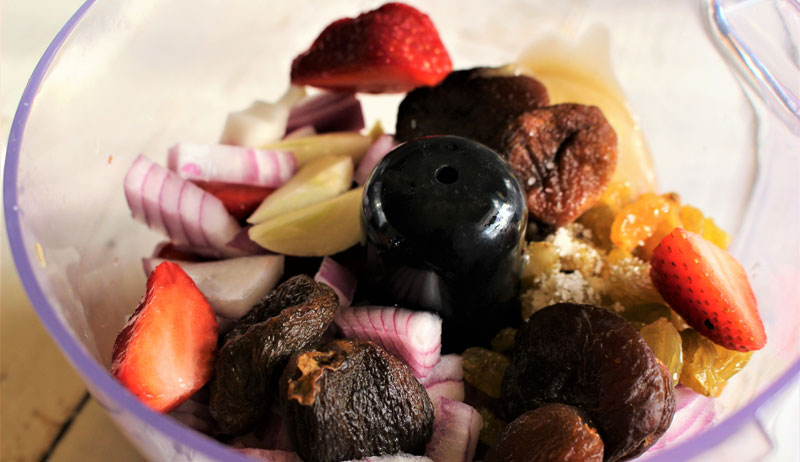
This sweet and savory strawberry chutney is the not only ideal for spicy proteins but is also delicious topped on soft, spreadable cheeses with crackers.
Prep all ingredients and add them to a food processor. Pulse until the mixture reaches the consistency you desire. I personally like the raisins and apricots to retain chunkiness.
Transfer mixture into a clean canning pint jar. The chutney is full of flavor immediately, but as it ferments, the intensity of the onion will fade and the flavors meld together into a delicious condiment.
Wipe the rim of the jar with a clean, dampened towel, so that no food is left on the rim. Place a clean canning lid on the jar and tightly screw on the ring.
Stephanie Thurow
Fermentation
Ferment your strawberry chutney at room temperature, ideally between 60-75 degrees F (15-23 degrees C) and keep out of direct sunlight or wrap a dishtowel around the jar to keep light out. Burp the jar daily—to do this, remove the lid, stir the mixture, and push down the chutney evenly. Replace the lid and screw the ring on tightly.
Burping the ferment allows any built-up gasses to release.
Ferment three to four days. I recommend taste testing it daily to see how the flavor changes during the fermentation process. Once fermentation is complete, store in an airtight glass jar and refrigerate for up to two weeks.