The best barn brooms for cleaning your barn fall into three categories. But first, remember that technique is often more important than the tool, and in the case of barn brooms, daily sweeping is the key. Hay, dust, and dirt accumulate rapidly in the barn. If you sweep the barn every day—even on busy days—the job is never hard, and the barn is basically always clean, tidy and a joy to work in. If you can do that, the choice of the brooms themselves is easy. So if your current barn broom is a decade old and missing bristles, consider replacing it with something fresh:
1. Push Broom
For the barn aisles and other large, flat areas, you probably already know that a push broom is best. But don’t settle for just any push broom. First, select a broom that is a comfortable weight for the user. Some push brooms are built like tanks, and while that’s great for durability, it makes the broom pretty heavy. The wider the broom’s head, the more real estate it cleans in a single sweep. But super-wide brooms also add weight. And if a push broom is just too heavy to use comfortably, you’ll be less likely to put it to daily use. So select the most durable push broom you can, but one that is still light enough that you’ll easily grab it each day. That said, some push brooms are very low-quality, with a handle that constantly unravels from the base. Better push brooms have a handle that locks in nicely and won’t twist while the broom’s in use.
2. Lobby Broom
A basic straw-bristled lobby broom—the kind that looks like it belongs on Auntie Em’s porch—is also helpful. You can use it in place of a push broom for sweeping any open areas, but it also does a great job along the edges of the wall or in places too confined for the push broom. It’s also a plus for any stairways. You can use natural or synthetic bristles—both work great.
3. Angle Broom
Even though it’s just a barn, a bit of finesse can make your aisles look sharper than you’d expect, and it’s not much work at all. A small-angle broom can be used to precisely remove dust from corners and edges with better results than either of the other types of broom. This is maybe a job you do weekly rather than daily.
4. Ceiling Broom
One extra task for a very small, lightweight angle broom: cleaning cobwebs off the walls, doors, windows, and the ceiling. Spiders absolutely love to inhabit barns and make webs for the flies attracted to the animals, so cobwebs can quickly build up and get loaded with dust. Not only unsightly, but they’re also flammable and can pose a fire hazard. A lightweight angle broom can rapidly sweep away the bulk of these cobwebs without tiring your arms. It isn’t something you’re going to need to do daily, but every few weeks. A Shop-Vac-type vacuum can do an even more thorough job on the ceilings and cobwebs when needed.
This article about the best barn brooms for cleaning was written for Hobby Farms and Chickens magazines. Click here to subscribe.
Among the many wonderful reasons we love “life out here” are the sounds: happy chickens and goats, birds singing, bees buzzing, and the sound of a pick-up truck driving down a big, beautiful gravel driveway. And it’s reassuring to know that gravel driveways are so cheap that you don’t have to worry about maintaining them. Wait…what?
Nope, gravel driveways aren’t cheap, and maintenance is crucial. Heavy vehicles and weather can leave canyon-deep ruts in your gravel, and weeds will destroy it. Tractors are a must, and we can’t control the weather. But we can control the weeds. Pulling them by hand lets you feel the satisfaction lets you hear that “pop.” But if you don’t get the entire root, you just make it angry. Instead of making them angry, make them dead with Barrier® Year-Long Vegetation Control Concentrate.
Barrier features 5 active ingredients to deliver unbeatable non-selective control that lasts up to a year. It controls listed grasses, vines, brush, and trees down to the roots, and Barrier kills broadleaf weeds fast. It’s ideal for driveways, patios, sidewalks – almost any location where you don’t want any vegetation to grow.
New tractor tires waiting for installation. (Daniel Johnson)
How to choose tires for your tractor? Settling on the best option isn’t always easy. There are many different types available, with varying pros and cons. Selecting the perfect tractor tires requires a careful analysis of your needs.
We’re here to help with five tips on how to choose tires:
1. Consider tire treads: R1, R3 or R4
While there are exceptions (such as for some small, non-powered front wheels), tractor tires generally fall into three categories, designated R1, R3, and R4.
R1 tires, also known as “agricultural tires,” have large, widely spaced lugs designed to maximize traction for fieldwork. R3 tires are wide “turf tires” with shallow treads and closely spaced lugs, ideal for spreading the weight of a tractor across a larger area and minimizing lawn damage during operation. R4 “industrial tires” fall in between R1 and R3 tires, while adding excellent weight-carrying ability, making them ideal for working with a front-end loader.
2. Radials are awesome, but bias tires have advantages too
The physical construction of a tire determines whether it’s a bias tire or a radial tire. Radials are generally considered superior; they’re more flexible, so they offer greater traction, superior fuel economy, and a smoother ride compared to bias tires.
But bias tires aren’t without benefits. They’re tough and less likely to suffer damage negotiating rough terrain with rocks and tree stumps. They’re also less expensive than radials and can be superior for negotiating sloping ground.
Not all radial tires are created equal. Increased flexion (IF) radials can carry 20% more weight than regular radial tires, or the same weight with 20% less air pressure. Very high flexion (VF) radials push those improvements to 40%.
The added weight-carrying ability is obviously appealing, but the ability to carry standard loads with less air pressure shouldn’t be underestimated. Lowering the air pressure can reduce soil compaction while improving traction and fuel economy.
4. Liquid tire ballast can offer big performance boosts
In some cases, what you put into your tires is as important as the tires themselves. Liquid tire ballast can make a huge difference compared to filling your tractor tires with air.
There are many different types of liquid tire ballast you can use; you can view a list of possibilities here. Whatever you choose, the goal is to increase the weight of your tires to lower your tractor’s center of gravity, improve traction, and counterbalance heavy loads. For example, liquid ballast in your rear tires can improve performance with a front-end loader.
5. Sidewalls reveal the secrets of tire sizes
If you’re purchasing a brand-new tractor and have the option to choose the type(s) of tires preinstalled, you won’t have to worry about purchasing the right tire size(s). But if you’re purchasing new tires for an old tractor, you’ll want to check the tire sidewalls. Here you’ll find numbers that denote the size of each tire, so you can ensure your new purchases are a perfect fit for your tractor. For more details, check out our guide to buying new tires for old tractors.
By analyzing your own needs and comparing them against the pros and cons of various tire types, you’ll know exactly how to choose tires that are perfect for your tractor.
This article about how to choose tires for your tractor was written for Hobby Farms magazine. Click here to subscribe.
In Santa Barbara County, California, land management isn’t easy. The terrain is steep, and while fire risk is already high, fast-spreading invasive plants are making the problem worse by fueling fast-growing underbrush. Many parts of the landscape are too rugged for traditional fencing or livestock rotation, leaving valuable acreage underused and vulnerable.
One local rancher is taking a new approach to the challenges facing Santa Barbara County. Stephanie Mathis found a forward-thinking solution on her family’s 14,000-acre ranch, incorporating goats for regenerative grazing. Using Nofence’s virtual fencing, she was able to breathe new life into land once considered unmanageable.
Stephanie’s system supports both ecological health and wildfire prevention: her goats’ grazing removes invasive weeds and fire-prone undergrowth, while managed rotation improves soil structure and plant diversity. Moreover, goats are able to navigate steep or uneven ground, allowing them to access and improve areas that are often off-limits to machinery or larger livestock.
The benefits were clear to Stephanie, but turning it into reality wasn’t easy. “For years, I dreamed of using goats to transform our land, but the challenges of fencing this terrain seemed insurmountable,” Stephanie explains. “With Nofence, we’ve made it happen.”
From wildfire risk to regenerative grazing
Dense vegetation and rugged ridgelines once made large portions of Stephanie’s land difficult to access. But with her goats now grazing targeted areas, the story is starting to change.
“Our forests were at high risk of burning. Now my goats are clearing fire hazards and rehabilitating land we couldn’t use before,” Stephanie explains.
Rather than relying on physical fences, she uses Nofence collars to guide her herd across the overgrown landscape. This allows her to rotate grazing areas more easily, protect sensitive vegetation, and address wildfire fuel loads—all without installing a single post. Moreover, Nofence technology has lowered costs for Stephanie, from reducing labor costs and feeding to widening grazing seasons.
Reimagining the ranch: A new system for goats and cattle
Stephanie doesn’t see the use of Nofence’s virtual fencing as a one-time project for just her goats—she sees it as the future of her ranch. While her husband runs the cattle side of their operation, she’s focused on building a grazing system that combines goats and cattle in a coordinated cycle.
Her long-term vision? A synergistic, multi-species grazing system where goats and cattle work in tandem. “Goats are perfect for clearing brush and opening up land, and cattle can come in afterward to graze the grass. Together, they’re a powerful team for land restoration,” she says.
With virtual fencing, she believes it’s possible to tailor grazing patterns more precisely and efficiently across the ranch. The technology can help achieve her goal in improving pasture health, reducing overgrazing, and making better use of every acre. Nofence technology can enhance animal welfare and help with early issue health detection.
“The idea of managing both goats and cattle with virtual fencing is exciting. It opens up new ways to protect the land while improving productivity,” she adds.
Tech that’s surprisingly simple
Virtual fencing works with just a collar and an app—no wires, no digging, no hassle. Stephanie says the ease of Nofence’s product is what makes it a game-changer. “I’m not very tech-savvy, but the Nofence app is so intuitive. It makes managing my goats simple, even on steep hillsides and dense brush,” she says. “With just a few taps on my phone, I can set up pastures and monitor my goats anywhere.”
Nofence technology delivers flexibility and efficiency in livestock management, using GPS that communicates with the Nofence app through cellular networks—which does not require the installation of a base station. With the touch of a fingertip, users can give their animals access to new pastures and track the real-time movements of their herd. With collars reporting new data to the app every 15 minutes, farmers using Nofence say the app gives them peace of mind, providing real-time updates about an animal’s location around the clock.
What started as her personal project has turned into a family effort thanks to its simplicity. Her teenage sons and husband are now part of the effort, and the app makes it easy for everyone to stay involved. It’s a practical, hands-on solution that works for full-time ranchers and part-time hobby farmers alike.
Looking ahead: Agritourism and community
Stephanie is taking her virtual fencing experience beyond just grazing. She’s planning to expand her herd and use her operation as a platform for education and agritourism. That means welcoming visitors to the ranch, offering school programs, and showing firsthand how grazing animals and smart technology can help restore the land.
“I want to grow my herd and show how sustainable grazing can protect our land and communities,” she says.
She’s also exploring partnerships with high-end restaurants to market sustainably raised goat meat, creating an added revenue stream that supports both her business and her mission.
“This is the future of farming,” she says. “Nofence is helping us innovate and adapt in ways I never thought possible.”
Want to see what virtual fencing can do for your land? Visit Nofence.no/us for more information on Nofence’s virtual fencing product, to read Stephanie’s full story, and to explore how land managers are turning tough terrain into productive pasture.
Can chickens eat cilantro? If you want to expand your flock’s garden to more than tomatoes, squash, and lettuce, here are eight plants for your chickens to enjoy.
1. Cilantro
Can chickens eat cilantro? Yes! Not only can chickens eat cilantro, but it benefits their health and vision.
Cilantro is high in vitamin A, helping to keep chickens’ eyes in tip-top condition. With clear vision, chickens can spot a tasty bug in the grass or a hungry hawk in the sky. This essential vitamin also supports a healthy reproductive system.
Erin Snyder
Cilantro contains antioxidants, improves immune system health, and reduces pathogens in the digestive tract, working to keep the intestinal tract healthy. Due to its remarkable ability to remove these pathogens from the digestive tract, cilantro is one of the best herbs to feed laying hens and baby chicks.
2. Nasturtium
Nasturtiums are among my flock’s favorite flowers despite their slight pepper taste. Both the leaves and flowers are edible for chickens and humans. High in vitamin C and antioxidants, these pretty flowers are also believed to be antibacterial, anti-inflammatory, and natural dewormers and are thought to prevent cancer.
Erin Snyder
Nasturtiums are extremely hardy plants and can even hold up to chickens scratching.
3. French Marigold
While only the flowers are edible, this shouldn’t stop you from growing these for your flock. French marigold flowers are a great immune booster, insect and snake repellent, and they help increase eggshell strength. French Marigolds are also considered to be antiviral and antifungal.
Your chickens will not be the only thing benefiting from French Marigolds. Planting French Marigolds throughout your garden will help deter bugs from destroying your other plants as they are a trap crop.
Erin Snyder
Feeding French Marigolds to your laying hens helps brighten feet and leg color and produces those bright orange yolks that many backyard chicken keepers love.
French Marigolds should not be confused with African Marigolds, as the two varieties vary greatly. Only feed French Marigolds to chickens.
4. Peas
Peas are a fun treat to grow and feed your flock. Not only is this vegetable one of my flock’s favorite treats but it is also filled with nutrients.
An excellent source of protein, calcium, iron, magnesium, potassium, zinc, and vitamins A, B6, C, E and K. These essential vitamins and minerals keep chickens’ bodies in tip-top condition and help prevent disease.
The peas and pods are edible, and your flock will be tripping over themselves to eat this tasty snack.
When feeding peas to chicks, break them into tiny pieces to avoid choking.
5. Rose
Now that we have answered the question, can chickens eat cilantro? Can they eat roses? Yes, chickens can eat roses, and they love them, too. If my chickens were to pick a favorite flower, it would be the Virginia Roses growing in my backyard. These fragrant flowers are high in vitamins C and A and are full of antioxidants and flavonoids that support a healthy immune system.
Erin Snyder
Rose petals are also phytonutrients, a substance believed to prevent cancer cell formation.
Never feed roses that have been sprayed with chemicals, pesticides, or insecticides to chickens. Rose petals are edible for adult chickens and chicks. Adult chickens can also eat the ripened rose hips.
6. Lovage
Lovage is a vital health tonic for laying hens and roosters. One of the few culinary herbs to promote kidney health, lovage cleanses the kidneys without removing electrolytes from the body. Kidney health is crucial in backyard flocks, as the high calcium levels required for layers may result in kidney damage, especially in roosters.
Lovage is packed with nutrients and contains high amounts of B vitamins and vitamin C.
Never feed lovage to baby chicks. Lovage can cause kidney failure if fed in large quantities. To ere on the side of caution, I only feed a small handful of lovage to my flock once a week.
7. Yarrow
Safe to feed to baby chicks and chickens, yarrow is one of my flock’s all-time favorites and is a popular choice for many backyard flock raisers. The leaves and flowers are both edible, although my flock seems to favor the taste of the leaves.
Erin Snyder
Yarrow helps to alleviate digestive issues and improve blood circulation and flow. It is also an anti-inflammatory.
This beneficial plant benefits the garden, as its delicate flowers attract many pollinators and beneficial bugs.
8. Lavender
The smell of lavender can help soothe and relax your chickens during stressful times, such as when introducing new flock members or when your hen is broody. Even if your chickens aren’t stressed, lavender can help them feel more relaxed and safe.
A natural bug and rodent repellent, hanging lavender above your perch or sprinkling some lavender around the perimeter of your coop and run may help deter mites, lice, and other pests from visiting your henhouse.
Erin Snyder
Lavender is also believed to help prevent respiratory problems, keeping airways clean and healthy.
There are so many delicious vegetables, flowers, and herbs to feed chickens, so why stick to the basics? Before feeding new plants to your flock, check with your local extension office to see if they are safe to consume.
This article about can chickens eat cilantro was written for Chickens magazine. Click here to subscribe.
Cattle corral designs are important for safety and efficiency for the animals and humans that use them. Here is an easy-to-construct facility for five to 10 cows.
I have designed 11 new working facility layouts that can be easily constructed from portable panels and other pre-manufactured components. All the designs take advantage of the behavioral principles of animals wanting to go back to where they came from.
The entrance to the single-file race or double-file race can be equipped with either a sliding entrance gate or one-way backstop gates. Animals usually move more easily through a facility if they don’t’ have to push up one-way backstops and go through them. A common mistake is to install too many backstops or make the pivot points too low for tall animals.
Some commercially available one-way backstop gates are designed so that they can be opened easily and then held open. This type is strongly recommended. Some backstops are hinged on the side of the single-file chute.
Backstops that are hinged on the top are preferable because they are usually easier to hold open and then close after cattle or sheep pass through. A backstop that pivots on the top can be easily rigged with a remote control rope. This enables a person who is located in the crowd pen area to hold the gate open for the animals.
Sliding gates are more expensive than backstops, but cattle often will pass through them more easily.
Some other points to consider:
The best chute and corral designs use the behavioral principle of cattle, sheep and other livestock wanting to go back to where they came from.
Round tub systems take advantage of the natural tendency of cattle to circle around the stockperson.
Bud box systems are simple and economical, and they work well for cattle.
Simple, efficient designs for sheep and goats utilize full- or half-circle round tubs.
Jason Houston
Adjusting the Chute Size
Many commercially available single-file or double-file chutes are designed so that they can be adjusted for different-sized cattle. When shopping for chute sections, look for ones that are easy to adjust. Straight sections are often easier to adjust than curved sections. Another option is to have two chutes with stationary sides, one for adult cows and another for calves or sheep.
There have been many discussions about straight chutes versus V-shaped, single-file chutes. A stationary, V-shaped chute can handle a variety of cattle sizes with no adjustment. The disadvantage is that large cows from breeds that have really wide bodies may have difficulty walking through them. V-shaped chutes work well for younger cattle handled in feedlots.
A Simple Cattle Corral
This easy-to-construct facility is for five to 10 cows. The dotted line shows the pathway of the cattle through the facility. The pasture entrance is positioned to take advantage of the natural behavior of cattle to return to where they came from.
The handler works the animal’s flight zone and point of balance along the fences of the inside area. The outer fences are covered if there are distractions outside the facility such as vehicles and people walking by.
A handler working in the inner area takes advantage of the animal’s tendency to circle around him or her. To load stock trailers, the trailer is backed up to the entrance of the holding alley. All catwalks are eliminated, and the inner fences are open on the top so that the handler can remain on the ground. This layout can be easily built from portable fence panels.
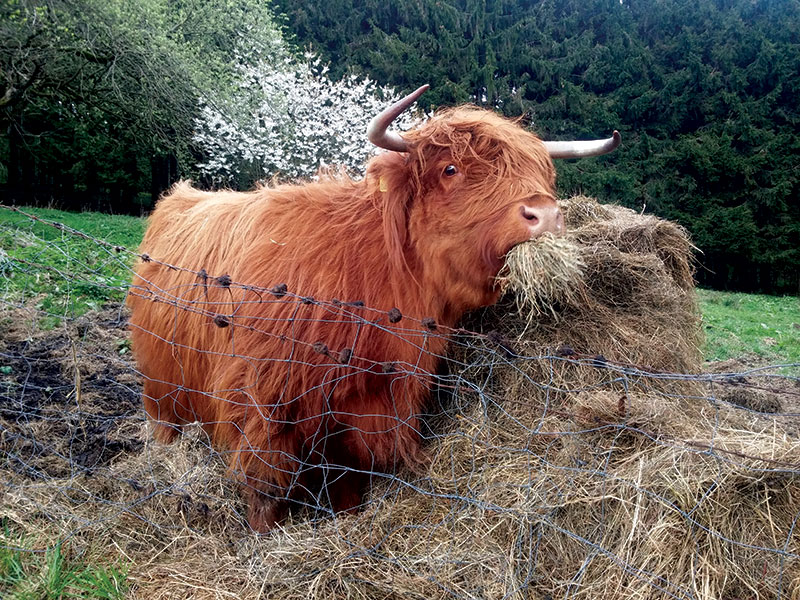
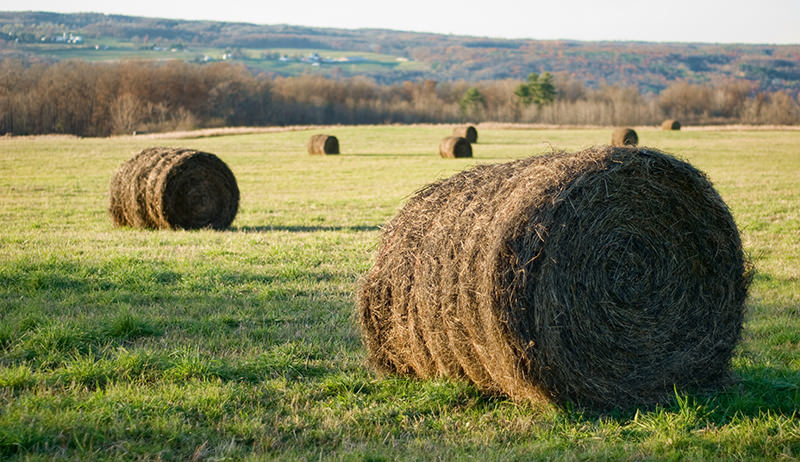
Knowing the different types of hay is important. Next to pasture, good quality hay is the ideal feed. However, there are significant differences in the variety, quality and availability of hay, which can make feeding your livestock a time-consuming chore.
But with some planning, feeding hay during the winter months can be a simple and efficient alternative while waiting the return of spring’s lush pastures.
Types of hay fall into several categories: grass, legume, mixed (grass and legume) and cereal grain straw (such as oat hay). Some of the more common grass hays include timothy, brome, orchard grass and bluegrass. In some parts of the country fescue, reed canary grass, ryegrass and Sudan grass are common.
In northern parts of the United States, timothy is widely grown because it tolerates cold weather and grows early in spring. It does not do well in hot climates, however. In central and southern parts of the country, you are more apt to find coastal Bermuda grass, brome or orchard grass because these tolerate heat and humidity better.
Cereal grain crops (especially oats) can make good hay when cut while still green and growing, rather than waiting for the seed heads to mature for grain. There is always some risk of nitrate poisoning, however, if cereal grain hays are harvested after a spurt of growth following a drought period. If you are considering purchasing this type of hay, it can be tested for nitrate content.
Legumes used for hay include alfalfa, various types of clover (such as red, crimson, alsike and ladino), lespedeza, birdsfoot trefoil, vetch, soybean and cowpeas. Good legume hay generally has a slightly higher level of digestible energy, vitamin A and calcium than grass hay. Alfalfa may have twice the protein and three times the level of calcium than grass hay. Thus alfalfa is often fed to animals that need more protein and minerals.
Nutritional Value of Hay
The nutritional value of hay is related to leaf content. The leaves of grass hay have more nutrients and are more digestible when the plant is immature and growing, and more fiber when the plant has reached full growth. Legume leaves, by contrast, do not have the same structural function and don’t change much as the plant grows, but the stems become coarser and more fibrous.
Alfalfa stems, for example, are woody, serving as structural support for the plant. Leaf-to-stem ratio is the most important criterion in judging nutrient quality in an alfalfa plant. The digestibility, palatability and nutrient values are highest when the plant is young—with more leaves and less stems.
About 2¼ of the energy and 3¼ of the protein and other nutrients are in the leaves of a forage plant (whether grass or legume). Coarse, thick-stemmed hay (overly mature) has more fiber and less nutrition than immature, leafy hay with finer stems.
If buying alfalfa hay, you’ll want to know if it is first, second or third cutting (or later), and at what stage of growth it was harvested. Although there are differences between cuttings, quality is most important. First-cut alfalfa can be stemmy, but only if it is too mature when harvested. However, weeds tend to appear in first-cut alfalfa hay. Second-cut alfalfa usually has a higher stem-to-leaf ratio but is lower in crude protein, about 16 percent on average. Third-cut alfalfa typically has a higher leaf-to-stem ratio because of slower growth during the cool part of the season. If buying grass hay, maturity at harvest will also make a difference in its nutrient quality.
Early bloom alfalfa (cut before the blossoms open) has about 18 percent crude protein, compared with 9.8 percent for early bloom timothy (before seed heads fill), 11.4 percent for early bloom orchard grass, and lower levels for most other grasses. Alfalfa cut at full bloom drops to 15.5 percent crude protein, compared to 6.9 percent for late bloom timothy and 7.6 percent for late bloom orchard grass. Thus legume hay, cut early, is more apt to meet the protein and mineral needs of young growing, pregnant or lactating animals than will many of the grass hays.
Animal Feeding Tips
When changing an animal’s diet, do it gradually, especially when changing from a grass to a legume. Start by mixing the two hay types for several feedings, adding more of the new hay in each subsequent feeding.
The animals’ digestive tracts must adjust to the different types of feed.
Changing to a legume hay suddenly can make an animal sick, or cause a ruminant animal to bloat. Changing from grass hay to alfalfa all at once can change the environment in the rumen of cattle, sheep and goats and in the cecum of a horse (because of the shift in pH—the acid/base balance).
This can disrupt the microbes that help the animals digest their feed.
Types Hay for Horses
Horses can do well on grass or alfalfa (or other legume) hay. Important factors to keep in mind for horse hay are the nutritional needs of the animals (mature horses will not need high protein or calcium levels unless they are mares nursing foals), and the way the hay was harvested. If it was rained on after it was cut, baled too green or too wet or too dry, it may not be safe to feed. Hay for horses should never contain dust or mold, as it may lead to coughing and respiratory problems. Some types of mold may cause colic or can cause a pregnant mare to abort.
Whether you feed grass or legume types of hay will depend primarily on what is available in your area and your horse’s particular nutritional needs. Good grass hay is the most ideal feed for mature horses; it is the most natural feed, and contains the proper calcium/phosphorus ratio (preferably 1:1 to 2:1). For pregnant or lactating mares, or young growing horses, some legume hay added to the diet provides the additional protein and higher levels of other nutrients needed. A mix of grass and legume hay often works well.
In some regions, it is hard to find good grass types of hay. If you must use alfalfa hay for all your horses, be selective in the hay you choose. You may need different qualities of hay for different horses—leafy hay for weanlings, for instance, and more mature hay for adult horses that do not need such fine hay. Particularly fine-stemmed, leafy alfalfa (rabbit hay or dairy hay) is too rich and palatable for horses (they generally overeat on it) and does not have enough fiber content for proper digestion. It is also the most costly alfalfa. At the other extreme, overly stemmy alfalfa that is well past the bloom stage may be too coarse for horses.
In many geographic regions that get only two or three cuttings of alfalfa per season, first-cutting alfalfa might be the preferred hay for horses. It is less apt to contain blister beetles (which are deadly if eaten), and it often has a little grass mixed in. It also tends to have relatively coarse stems (supplying the fiber a horse needs for proper digestion) since it grows the fastest.
Later cuttings tend to grow more slowly, and the stems are finer and softer. These cuttings are too rich (too many nutrients per pound, with very little fiber) for most horses, unless you are just adding a little bit of it to the diet of a young orphan foal or an older horse that has poor teeth and cannot chew stemmy hay.
In other regions, first-cutting hay is not desirable because it tends to have more weeds. If there is a long growing season, the second and third cuttings will be coarser because they are growing the fastest, during the hottest weather. The later cuttings will have the finest stems, growing more slowly during the cooler fall season. As a general rule of thumb, grass hay is best for horses; alfalfa or other legume hay can be an excellent feed to mix with grass hay for animals that need more protein. Alfalfa is also a good winter feed because heat is created by the digestion of protein, so a horse can keep warmer on a cold night.
Shutterstock
Types of Hay for Cattle
Cattle can generally tolerate dustier types of hay than horses can, and can even eat a little mold without problems. However, some types of mold may cause abortion in pregnant cows. The quality of the hay you feed will also depend on whether you are feeding mature beef cattle, young calves or dairy cows. Mature beef cattle can get by on rather plain types of hay, but lactating cows will need adequate protein. Good palatable grass hay, cut while still green and growing, can be very adequate. However, if grass hay is coarse and dry (with little vitamin A or protein), you’ll need to add some legume hay to the cattle’s diet.
Young calves have tender mouths and cannot chew coarse types of hay very well, whether grass or alfalfa. They do best with fine, soft types of hay that’s cut before the bloom stage; it not only contains more nutrients, but is also much easier to eat.
Dairy cows need the best types of hay, with the most nutrients per pound, since they are producing more milk than a beef cow. Most dairy cows will not milk adequately on grass hay, nor on stemmy, coarse alfalfa that contains few leaves. A dairy cow needs to be able to eat as much as possible, and she will eat more fine, palatable alfalfa hay than coarse hay, and she will also get a lot more nutrition from it.
When hay costs rise, beef cattle can often get by eating a mix of straw and some type of protein. Straw (byproduct from the harvest of oats, barley or wheat) provides energy, created by fermentation breakdown in the rumen. A small amount of alfalfa, or a commercial protein supplement, can provide the needed protein, minerals and vitamins. Always select good-quality, clean straw when buying it for feed. Oat straw is the most palatable; cattle like it quite well. Barley straw is not quite as well-liked, and wheat straw is the least desirable as feed. If feeding cereal grain hay (cut while still green and growing, rather than at maturity, as straw), have it checked for nitrate levels to avoid nitrate poisoning. (Contact your local extension agent about testing.)
In cold weather, horses generate more body heat from the digestion of extra protein, but cattle do better if fed extra roughage (grass hay or straw) since they have a larger “fermentation vat” (rumen). So during cold weather, you will want to feed your cattle more roughage, rather than more legume hay.
Robotika/Flickr
Types of Hay for Goats
Legume hays such as alfalfa, clover, vetch, soybean or lespedeza work very well for kids, as well as pregnant and lactating does. Mature goats do very well on a grass-legume mix and some grass hays, but generally do not eat coarse grass hay; having small mouths, goats do not like it. Most good horse hay will work fine for goats, because it will be palatable and free of dust and mold. If goats are fed coarse hay, they may eat the leaves but not the stems.
As browsers, goats eat a wide variety of plants when roaming free, and will eat some of the weeds and other undesirable plants that other animals will not. Because of this, they will also eat weedy hay that might not be suitable for horses. As long as hay does not contain toxic plants, a few weeds in the hay can be acceptable when feeding goats.
Shutterstock
Types of Hay for Sheep
Sheep, like goats, prefer fine, leafy hay and will not eat coarse hay. Immature grass hay or leafy alfalfa is usually the best feed for sheep. Mature sheep can get by on good-quality grass hay, but lambs do better with a legume harvested while still growing so that it has finer stems.
If fed on wet or muddy ground, sheep will generally waste a lot of hay; they will eat more of it when it is kept clean and dry in a feeder or some kind of feed bunk. When fed on dry, well-sodded, snow-covered or frozen ground, however, sheep will clean up fine hay better than cattle because of their smaller mouths and ability to pick up the leaves. Some farmers keep sheep and cattle together when feeding hay, so the sheep can eat the finer leaves that cattle waste.
Caring for Your Pastures
Check your pasture regularly for poisonous plants and unwanted weeds. Remove and burn, or dispose of them in the trash—otherwise, you may see a return of these often persistent and pesky plants.
Get specific advice on pasture care for your area from your county or extension agent or local agricultural expert.
Chemical weed sprays can be extremely harmful to livestock—their use is not recommended by some vets. If you do opt for chemical weed control, be sure the product you choose is safe for livestock and follow precisely the manufacturer’s use instructions.
Just because your animals live outdoors doesn’t mean you’re off the hook for manure removal. Either pick it up or drag the pasture to spread the manure so it will decompose more quickly. Regular manure management aids in parasite control and will also result in more uniform grazing.
Peter Roome/Flickr
Selecting Types of Hay for Feed
Hay quality can vary greatly, depending on growing conditions and stage of maturity, weather and moisture conditions at harvest. Factors that can affect nutritional value include plant species in the hay, fertility of soil, harvesting methods (whether the hay was conditioned or crimped to dry faster and lose less leaves and nutrients during drying) and curing time.
One way to assess the maturity of alfalfa hay is the snap test. If a handful of hay bends easily in your hand, its fiber content is relatively low and it will be more digestible than if the stems snap like twigs.
The best way to check the types of hay you are considering is to open a few bales and inspect them closely. Look at texture, maturity, color and leafiness. Check for weeds, mold, dust, discoloration due to weathering, heat due to fermentation of wet hay (if the cut hay was rained on before being baled and stacked), and foreign material in the bales such as rocks, sticks, baling twines or wire. If ingested, wire can cause “hardware” disease in cattle by perforating the gut and causing fatal peritonitis because they do not sort out foreign materials before eating.
Types of hay that have to be redried due to rain will be dull in color, yellow or brown, rather than bright green. But all hay tends to weather because the sun bleaches the outside of the bales. You often cannot tell the quality of the hay by just looking at the outside of a bale. Even if the outer edge of a bale has faded from sun exposure and rain, the inside should still be green.
Use your nose as well as your eyes. The smell of hay will give a clue to quality. It should smell good, not musty, sour or moldy. The flakes should separate easily from the bale and not be stuck together. Moldy hay, or hay that heated excessively after being baled, will usually be heavy, stuck together and dusty. Good hay will be uniformly green and sweet-smelling, with no brown spots or moldy portions.
Unless you are buying directly out of the field after baling, try to buy the types of hay that have been protected from weather by a tarp or hay shed. Rain can ruin baled hay by causing mold. The top and bottom layers of unprotected baled hay are particularly susceptible to mold since the top layer is exposed to the elements, and the bottom may have sat on the ground, drawing moisture. Wet hay not only weighs more, adding to the cost, but will likely be moldy.
J. Keeler Johnson
Storing Hay for Feed
Storing hay is not a problem if you are buying only a few weeks’ worth at a time and can put a tarp over it, but storage over several months requires more protection to avoid spoilage. Regardless of storage time, you will need a way to keep it from getting wet or drawing moisture from the ground. A hay shed is ideal because you can build up the floor with gravel for good drainage so the entire haystack is kept dry.
If you don’t have any type of roof to put your hay under, you can create a well-drained area (by building up the floor with gravel or wooden pallets) and cover the stack with tarps. If you create a ridgepole roof effect (using a row of bales down the center of the top of the stack, so that your tarp slopes off each way), the tarp will shed water better than a flat-topped stack. Also, you will be less apt to have spoilage from a leak in the tarp if the water can run off readily.
If you have a year’s worth of hay stored, keep in mind that long storage time reduces nutritional levels of protein and vitamin A. Make sure the types of hay that you are purchasing were harvested under good conditions, then keep it dry and out of the sunlight so it will keep better. Always stack it so that the oldest bales will be used first.
This article about types of hay was written for Hobby Farms and Chickens magazines. Click here to subscribe.
What are silos used for? For millennia, agricultural civilizations have realized that the ability to store excess grain produced by bumper crops provides a safety buffer against lean years, or even just a long winter. The most famous ancient account of this idea is probably the biblical story in Genesis 41, in which Joseph advises Egypt to stockpile grain so that it may survive the seven years of predicted famine.
Indeed, remains of ancient Egyptian storehouses are still in existence today. The same is true of those from ancient Greece, the Middle East, and North and South America.
Roman records indicate that pits stored grain in northern Africa. And the word “silo” actually comes from the Greek word “siros,” meaning “a pit to hold grain.”
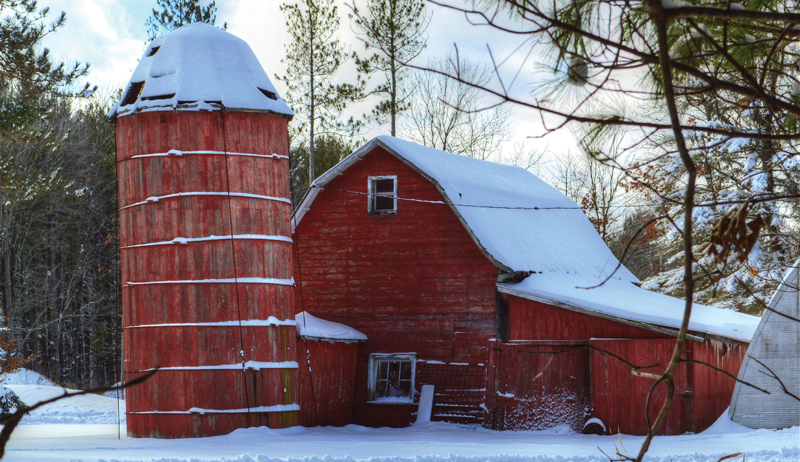
What are Silos Used For? An Important Innovation
What are silos used for? They do much more than just hold dry grain or seed. They’re also responsible for one of the more important inventions in the history of modern agriculture: silage.
Developed through experiments in the 1800s, silage is essentially a foliage crop—perhaps an entire corn stalk, perhaps an entire alfalfa plant, perhaps something else—that has been finely chopped and then stored while the moisture content is still high, somewhere near 60 percent.
Because of the moisture content, silage maintains a higher energy and protein level than dried forage (hay). This fact has made it possible for dairy farmers to keep cows in reliable milk production even during the winter.
But one caveat exists. You need a way to keep the silage from spoiling.
When farmers make hay, the key to preservation is to ensure low moisture content and to keep the hay dry. But farmers put silage up fresh, so the key to long-term silage storage involves keeping oxygen levels to a minimum.
The silo is the key to this process. In essence, silage is pickled.
Storing the silage in the low-oxygen environment of the silo encourages anaerobic microbes to ferment the forage product, but in a way that ruminants—including sheep, goats and, significantly, cattle—can still digest.
In theory, the fermentation process and the silo will protect the silage from rot. Silage is an excellent invention. Over the years, there have been a number of different solutions to the silage storage unit: the modern silo.
Let’s take a field guide approach and examine some of the modern (post-1900) silo types you might discover while exploring rural America.
Paulette Johnson
Tower Silos
Farmers experimented with silage for a few decades in the 1800s, mostly using pits or square structures constructed inside existing barns. It wasn’t until the late 1880s that John Steele, a member of the Wisconsin legislature, constructed the first round tower silo, dubbed the “Steele Silo.”
Agricultural scientist Franklin Hiram King of the Wisconsin Experimental Station furthered the innovation with his “King Silo” in 1891.
The round tower silo is what most people have in mind when they think of a silo. Like lighthouses dotting a shoreline, tower silos have something of a charming appeal.
Even people who don’t know their use instantly recognize them. Plus, they’re iconic symbols of country life.
Round silos are beneficial for several reasons. For one thing, a circle is strong, especially when reinforced by steel bands the way most silos are.
All the weight of the grain in the silo (think of it as a form of pressure) pushes outward on the sides and tries to spill in all directions. A circle helps to prevent that. Also, the contents of early square silos suffered from extensive spoilage in the corners.
But round tower silos aren’t without their downsides. The very fermentation process that preserves silage can create gases that are unhealthy and hazardous to humans.
Some silos, particularly glass/steel silos, are very effective at keeping oxygen levels to a minimum. This can present a danger to anyone entering the silo for maintenance or inspection. Silage can also be a fire danger.
But this hasn’t prevented tower silos from achieving widespread use.
You can fins tower silos built using many different construction methods, some of which went in and out of style over the years.
Wood silos were popular up until around 1900, when they began to be replaced by other materials that were more resistant to deterioration from silage seepage.
Sometimes, they’re more octagonal or polygon-shaped than round. That’s likely because such shapes are easier to construct out of wood.
The wooden silos that still exist look quite beautiful and interesting—fascinating pieces of a moment in rural history that quickly disappeared.
William Garrett/Flickr
Masonry
You might also see vintage silos of masonry construction, such as stone or brick. Some of these are quite attractive and unique.
These are often historical in nature, constructed during the experimental age of silos, when farmers sought alternatives to wood, but before concrete and glass/steel silos became the norm.
The cost of constructing a stone or brick silo was influenced by the need to hire masons for the work. But if the region was rich in stones, the material was readily available.
Concrete
Concrete was soon found to be an excellent construction material. And many classic tower silos are constructed of concrete walls with metal roofs. You’ll discover a few subvarieties here:
Stave concrete silos. With these silos, individual blocks of interlocking concrete called staves are used to build the structure. These blocks are generally fairly thin, only about 3 inches thick, and steel bands reinforce the entire structure. Stave concrete silos are very common and still in use on some farms today.
Poured concrete silos. These are different. Here, the entire silo is constructed from a single monolithic piece, and the walls are thicker, about 6 inches. Poured concrete silos require large forms to construct, whereas staves can be made from a small mold.
Concrete block silos. Some older silos are made of concrete blocks that are much thicker than staves.
Starting around the 1950s, silos constructed of glass-lined steel plates increased in popularity. Steel sheets bolted together and effectively encased in porcelain comprise the walls.
Silage is loaded into these distinctive silos from the top and removed from below by use of an unloader. Glass silos like these are known as low-oxygen silos, since they are very well sealed and contain plastic air bladders to further protect the silage from oxygen exposure.
The bladders allow the air pressure inside the silo to match that of the outdoors.
While still in use on some farms, glass silos haven’t maintained their former popularity, due possibly to competition from bunker silos. Also, the unloading mechanisms prove difficult and expensive to repair.
Rectangular/Square Silos
The square silo design predates the round tower silo. But, as noted, the design led to spoilage in the corners.
Eventually, farmers abandoned the concept of the square silo design. Today’s farmers, however, find merit in square silos once again.
With new innovations to prevent spoilage, modern square silos allow farmers to maximize their storage space. (Square silos hold about 25 precent more than round silos.)
These silos can contain different compartments, allowing storage of more than one product in the same silo. Also, they assemble much more easily.
Daniel Johnson
Horizontal Silos
As iconic as tower silos have been for the last 100-plus years, and as useful as they may be for housing silage, times do change. And with them, technology changes, too.
Today—in a kind of return to the past—horizontal silos take the place of tower silos, especially for large agricultural operations.
While perhaps lacking the pastoral charm of a majestic tower silo, horizontal silos have proven their worth time and again in recent years for their functionality and effectiveness at storing large amounts of silage and keeping it safe.
Horizontal silos are also faster to unload—a critical factor that makes them more desirable on many of today’s farms.
Silage Bunkers
Silage bunkers typically have two long, parallel concrete or wooden walls. You could find crops packed in and then sealed with plastic along a third wall on one end.
In an effort to squeeze additional oxygen out of the crop, farmers utilize large-wheeled tractors to drive back and forth across the silage bunkers during and after the filling process to help press oxygen out of the forage. Once filled, large plastic sheeting covers the bunker to seal against the air as much as possible.
Finally, the plastic is weighed down, often with tire walls, but occasionally by other means such as sandbags. This weight functions to secure the plastic from wind and applies pressure to the silage, forcing out additional oxygen.
Properly loading and maintaining a silage bunker requires quite a bit of skill and research. Massive amounts of spoilage and dangerous avalanching of the silage can occur if incorrect procedures are used. But when constructed and filled properly, these structures allow safe storage and faster removal for feeding of huge quantities of feed.
It’s no wonder they’re so popular in larger agricultural settings.
Trench silos utilize essentially the same concept, except the bunker is dug into the ground instead of using walls built on top of it.
Another option similar to the silage bunker is a silage pile, sometimes known as a drive-over pile. This is sometimes used as backup solution during a bumper crop, when there is an excess of silage that won’t fit in the silo or bunker.
Some farms even use silage piles as primary silage storage. They provide permanent housing for the crop using nothing but a large concrete slab and adequate plastic covering.
As with silage bunkers, the pile is compressed by large-wheeled tractors in order to aid in oxygen removal. But without the concrete walls of a bunker, it’s more challenging to achieve the proper amount of compression.
Again, people often use tire walls to pin down the plastic covering.
Restoring an Old Silo
It’s always nice to see vintage farm buildings restored. And if you own property with an older silo, you may be considering restoration.
But with silos, you must remember to take extra care and caution—preferably with the help of a silo expert. This is especially true if the silo is intended to be put back into use.
But even if the goal is simply to stabilize the structure, be sure to get an inspection and advice on any cracks, foundational issues, and corrosion that may have formed from years and years of silage acid on metal supports.
Restoration companies may fix leaning silos, apply acid-resistant coating, and do whatever else it takes to make the structure safe and functional again.
This article about what are silos used for originally appeared in Hobby Farms magazine. Click here to subscribe.
Transplanting blackberries so they get the best start is important since blackberry plants are beloved additions to gardens and landscapes, offering delicious fruits and vibrant foliage. Sometimes relocating these plants becomes necessary. Whether you’re moving to a new home or seeking to optimize your garden layout, transplanting blackberry plants requires careful consideration and proper techniques to ensure their successful adaptation.
Here’s our guide through the process of relocating blackberry plants, ensuring a seamless transition and continued growth for these delightful additions to your garden.
Choose the Right Time for Transplanting Blackberries
Timing is crucial when it comes to transplanting blackberries. The ideal time for transplanting is during the dormant season, which typically occurs in late winter or early spring before new growth begins.
This ensures minimal stress on the plants and allows them to establish roots before the onset of summer heat.
Prepare the New Location
Before transplanting blackberries, it’s essential to prepare the new location for your plants. Select a site that offers well-drained soil, receives ample sunlight, and has sufficient space for the plants to grow.
Clear the area of any weeds or debris, and enrich the soil with organic matter to provide a nutrient-rich environment.
Prune & Dig
To facilitate ransplanting blackberries, prune your plants by cutting back the canes to a manageable height of about 12 to 18 inches. This helps reduce stress on the plants and encourages vigorous regrowth.
Next, dig a generous planting hole in the new location, ensuring it is wide and deep enough to accommodate the plant’s root system.
Transplanting Blackberries with Care
Gently lift the blackberry plant from its current location, taking care not to damage the roots. Place it in the prepared hole, making sure the crown is level with the soil surface. Backfill the hole with soil, firmly tamping it down to eliminate air pockets.
Water the transplanted blackberries thoroughly to settle the soil and provide essential hydration.
Post-Transplant Care
After transplanting, it’s crucial to provide proper care and attention to help the blackberry plants establish themselves in their new location. Water the plants regularly, ensuring the soil remains moist but not waterlogged. Apply a layer of organic mulch around the base of the plants to conserve moisture and suppress weed growth.
Monitor the plants for any signs of stress or nutrient deficiencies, and address them promptly.
Relocating blackberry plants can be a rewarding endeavor if done with care and attention. By choosing the right time, preparing the new location, pruning appropriately, and transplanting with care, you can ensure the successful adaptation of your blackberry plants.
Remember after transplanting blackberries, to provide post-transplant care and monitor their progress. Soon enough, you’ll be enjoying the delightful fruits and lush foliage of your thriving blackberry plants in their new home.
This article about transplanting blackberries with care was written for Hobby Farms magazine. Click here to subscribe.
A basement root cellar is something many of us dream of having – the ideal root cellar where we can venture into its chilly depths and gather fresh fruits and vegetables held over from the summer season. The reality is that it isn’t a possibility for most of us. But even if you don’t have the means or the space to build a model of perfect cold storage, the good news is you can create a highly functional system right in your home.
What You Need for a Basement Root Cellar
The magical combination of temperature and humidity for proper basement root cellar storage depends on the particular type of fruit or vegetable you wish to keep in long-term storage. For example, root crops, such as potatoes and carrots, do exceedingly well when kept in an area roughly 32 degrees F with a 90- to 95-percent humidity level. Under these conditions, you can feasibly keep them until the following late spring or early summer. Squashes, including pumpkins, with their durable outer skins, need a slightly warmer temperature ranging between 50 to 55 degrees F and relatively dry conditions at 50- to 60-percent humidity. Given this environment, you can enjoy them well into the winter and sometimes into the spring. Once you know what produce you want to store, you can determine how to go about creating an environment where they’ll keep well.
Identifying Your Storage Area
iStock/Thinkstock
Begin by looking at the setup of your basement to determine the best location to create a basement root cellar with a small cold-storage room or storage area. You’ll want a place that’s cool and properly ventilated. Be mindful to keep away from heat sources, such as the furnace or hot-water tank. Having a wood-burning or pellet stove in the basement can present a few challenges, though it doesn’t preclude you from successfully storing fruits and vegetables for the long term.
Ventilation is important in a basement root cellar because it allows fresh air to enter the room, as well as letting ethylene, a naturally occurring gas expelled by the fruits and vegetables during the ripening process, to escape. Without proper ventilation, your produce will break down at a faster rate. If you’re able to locate an area with a window, this is ideal. The window can be covered to block out light and opened on occasion for passive ventilation. You can also install a PVC ventilation pipe through the window opening to allow for consistent passive ventilation, or use a small fan (like you would in a greenhouse) attached to the PVC pipe to pull gases out of the cold storage. If the best storage area in your basement isn’t near a window, the other option is to drill a hole through the wall and insert a ventilation tube.
Building the Cold-Storage Room
Once you’ve determined your location and ventilation options, your next considerations are the walls and insulation. Concrete blocks with rigid foam insulation can create a snug storage space, though you might find it easier to build the walls out of 2×4 lumber with 3½-inch fiberglass insulation sandwiched in between. Use faced insulation—the kind with the foil paper on one side—if possible; otherwise, add plastic sheeting as a vapor barrier. It’s not necessary to put insulation on the exterior wall (aka the basement wall), but you will want to put it on the ceiling and along the walls dividing the basement root cellar from the rest of the basement.
Regulating your temperature and humidity can be as easy as opening a window or the vent. Many people take advantage of the cool fall nights to allow cold air to pour into the room, ultimately bringing down the temperature to the desired range. Humidity, which is a challenge in drier regions of the country, can be bolstered by setting a pan of water in the room.
The ideal temperature and humidity you want to maintain depends on what you want to store. If you’re storing several items, consider what you have the largest amounts of and make that your baseline gauge. Below is a chart of commonly stored fruits and vegetables, their ideal storage conditions, and how long they keep. Use this as a reference point when making your basement root cellar decisions.
Containing Your Produce
Build shelves to hold burlap bags of produce, or create bins to keep everything in place. Here are some additional tips to keep in mind when working with specific produce in a basement root cellar.
Potatoes do best when placed in burlap bags, in order to prevent light from reaching them and turning the skin green, and either stacked in bins or set upon shelves.
Onions can also be stored in bags, but because they require more air circulation, avoid stacking them upon one another.
Sweet peppers will often keep very well in cold storage. Place them in a single row in a shallow box or container and cover with a plastic bag to retain humidity. Check them frequently, and use them before they show spots or softening. They will often keep for two to three weeks or longer.
Tomatoes, particularly green ones, can also hold up well in a similar storage system for months. Place them in a single row in boxes and cover with a plastic bag or towel. Use them as they ripen, and if many of them are already mature, simply be vigilant to use them before they rot.
Squashes will store well in a similar environment to tomatoes, where the temperature is closer to 50 or 60 degrees F. Simply set them on shelves and check them periodically to use any that show signs of degradation.
Other Storage Options
If you don’t have the means to build a separate cold-storage room as a basement root cellar, don’t feel that you can’t store produce throughout the winter. Many people make the best of what they have with perfectly acceptable results. As you’re looking for a place to keep fruits and vegetables, keep your mind focused on staying as close to the standard storage requirements (listed above) as possible. It doesn’t have to be perfect, but the closer you can get, the better the outcome will be.
Lauren Dixon of Creston, Mont., hopes to build a root cellar someday, but for the time being, she’s had impressive success simply segregating a bedroom in her 900-square-foot log cabin for produce storage.
“I turn that into a cold room,” she says. “I let it stay just above freezing.”
The interior walls of Dixon’s home are very well insulated, allowing her to open the window in the bedroom to cool it down after insulating the door with wool blankets. The room stays cold without kicking her furnace into overdrive. She uses easily stackable dairy crates as storage bins for potatoes and other root crops because they provide ample ventilation, and shelves are available to keep other foods organized.
“It works really well,” Dixon says. “Usually things start to turn on me around April, which is not that bad. I’ve had seed potatoes make it all through to spring planting.”
If a separate unheated room isn’t available, some people store produce in the space underneath a staircase because it’s usually dark and out of the way.
Although many of us love the idea of having an in-ground root cellar where we can keep the season’s bounty well into the winter months, knowing that we can successfully store many of these same fruits and vegetables in a basement root cellar offers equal satisfaction.
This article about how to build a basement root cellar was written for Hobby Farms magazine. Click here to subscribe.