I am a city girl who never grew up with chickens. The thought of cleaning up chicken poo wasn’t pleasant to me. However, I have to admit that the hens and chicken coop our good friends have down the road had intrigued me for some time.
They made taking care of them look so easy!
When the pandemic hit, it seemed as though my husband and I went through a midlife crisis! The eLearning was driving us all insane! We needed something to do that provided some joy, taught responsibility to our children and kept them from being bored.
It just so happens that my husband, Blaine, is extremely gifted with woodworking, and I love to decorate! He had already remodeled our backyard shed to be a “she shed,” complete with cedar walls and vinyl flooring. He turned our backyard into an oasis, including a koi pond!
No joke, it’s amazing!
Angie Wendricks Photography
I introduced him to my harebrained idea by coming home with five baby chicks. Isn’t that how all “chicken ladies” do it? To my surprise (and after his initial shock), he had no problem building a chicken coop for them and knew just where to put it!
Our side yard was empty and provided a blank canvas for my husband and me to dream. The area was made for a chicken coop!
While I wanted a small coop for the five birds, Blaine had bigger plans.
(He was way ahead of me on the chicken math thing!)
Angie Wendricks Photography
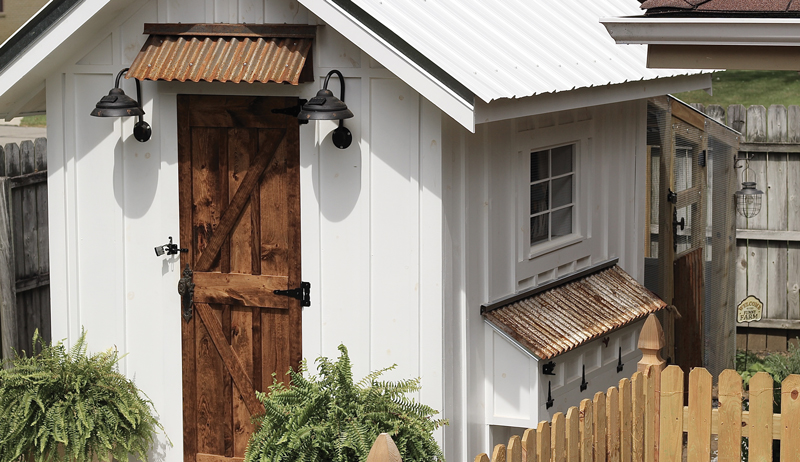
A month and a half later, he finished building our amazing 8-by-6-foot chicken coop and 8-by-10-foot run for our little chickens.
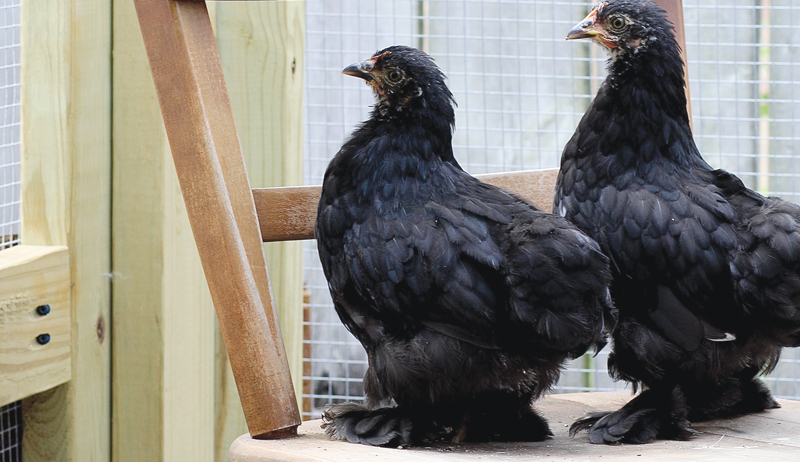
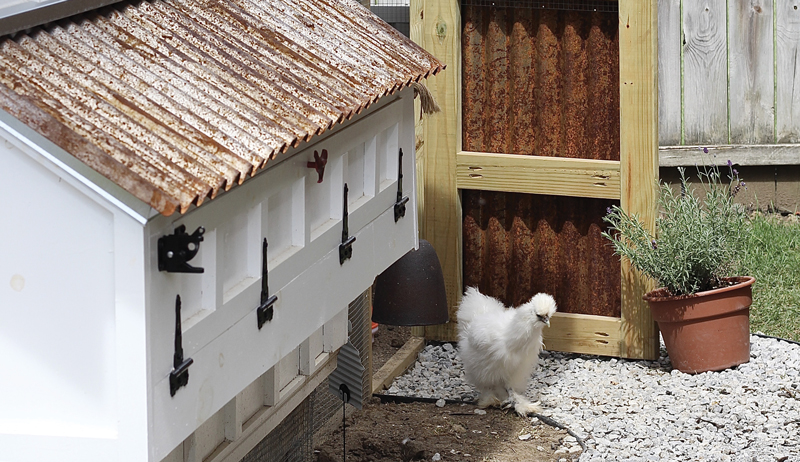
He built it by hand, out of pine, corten (or weathering) steel and galvanized metal. With insulation donated by a friend, it’s ready for our cold Indiana winters. We currently have one rooster and seven hens and plan on adding a few more to the flock next year.
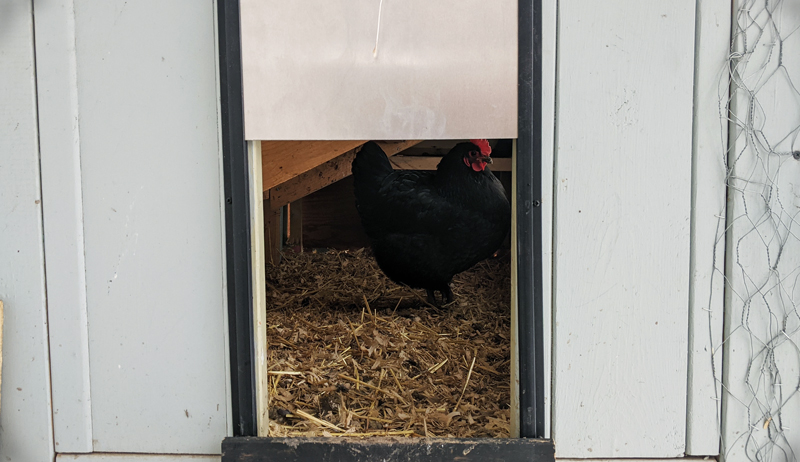
We keep Cochins and Silkies. They immediately made themselves at home and have been living happily in their palace ever since.
This coop has been a great addition to our backyard and has brought lots of laughter and smiles to our four children. Now if only the gals would start laying eggs, but that’s another story. For now, they are freeloaders through and through!
Mendi and Blaine Godbey live in Anderson, Indiana, with their four children. Mendi works as a behavior therapist for individuals with intellectual and developmental disabilities.
During the winter heating season, the closet right next to my furnace is particularly toasty. Mostly that’s because the ductwork in my old house leaves a lot to be desired. Nevertheless, I’ve been able to put that extra-warm spot to good use.
Turns out, it’s perfect for growing sweet potato slips. (Slips are baby plants which grow off of sweet potato tubers, and warmth really spurs their development.)
Now, if you grew your own sweet potatoes last season and still have some decent tubers left, you might want to try starting some slips for yourself. (Alternatively, you might also have success with store-bought, organic sweet potatoes that haven’t been treated with a growth inhibitor.)
Just one sweet potato can net you at least 20 slips—and often many more than that.
You should pick only the healthiest-looking sweet potatoes to propagate. That means rejecting sweet potatoes with blemishes, cuts and obvious signs of disease.
Sickly potatoes can result in sickly slips. If the slips you grow are compromised, your new sweet potato crop likely will be, too.
You should also choose sweet potatoes that are your preferred size and shape, since the slips typically take after the “mother” tuber from which they grew. Aside from your mother sweet potatoes, you’ll also need growing containers, soil and a seedling heat mat.
When growing slips, cleanliness is paramount. To help guard against disease, I soak my pots in a mild bleach solution, rinse well, then follow up with a scrub in hot, soapy water and a final rinse. I also use sterile potting mix, rather than garden soil which, itself, can harbor disease, fungal gnat larvae and other potential troublemakers.
When to Start?
How do you know when to start your slips? Sweet potatoes thrive in hot soil. So, in part, when you start your slips will depend on the number of hot days that the varieties you’re growing ultimately require to mature. Some “early” sweet potato types can develop respectable tubers much sooner than their late-season counterparts.
Let’s say you live in the Deep South with its long, hot summers. You could easily grow long-season sweet potatoes like Sandhill Preservation Center‘s Jersey Orange and Stoker Red. And you can plant your slips out in the garden much sooner than I can, since my Indiana growing season has comparatively fewer hot days.
As a result, I grow early heirlooms such as Ivis White Cream and Ginseng Red. And I don’t put them out in my garden until my soil is consistently warm. (To be safe, I wait a couple of weeks after my average last frost date and I also use plastic sheeting to help warm up my planting areas ahead of time.)
Incidentally, if you have enough space indoors, you can always start new sets of slips every couple of weeks and then successively plant them out in the garden. Keep notes about the performance of each of these waves of slips. Then you’ll be able to use this information as you decide when to start your slips next year.
When you are ready to plant, fill your containers a little less than halfway with potting mix. Next, lay your potatoes horizontally on top of the soil, pressing them down slightly so that they make good contact. Finally, surround them with just enough additional soil mix that about half of each sweet potato is still plainly visible above the soil line.
Water them in, and keep the soil relatively moist.
Ideally, the soil temperature should be about 70 to 75 degrees F. That means, if you don’t have a really warm spot already, you’re going to want to use a seedling heat mat. And, unless you have a very sunny room, you might also need to use supplemental garden lighting.
Complete with leaves and bright, white roots, little clumps of slips will appear on the outside of your semi-planted tubers. When my slips are about 4 or 5 inches tall, I gently pull them off of their mother potato and separate them from one another.
If I’ve timed things right, I can plant them out in the garden right away. But if I haven’t? I’ll transplant individual slips into newspaper or peat pots, and keep them warm and watered until I can plant them outside.
When it is time to get them in the ground, I carefully tear open the bottom of each pot, so that plant roots can more easily penetrate the soil—and generate a bumper crop of sweet potatoes along the way.
For Lauren Dahl, the journey to homesteading and beekeeping started in college, when she began eating organic food and quickly realized how expensive it could be. “I’d always loved nature and being outside so I started to try and grow my own food,” she recalls. “I failed epically the first couple of years, but I fell in love with it.”
Persisting with the goal of homesteading and growing her own food, Dahl kept steadily increasing the size of her garden. “It’s been a 15-year journey of slowing adding new things to homesteading each year,” says Dahl, who now presides over an organic farm just outside of Austin, Texas, and runs the popular The Living Home Instagram account.
We spoke to Dahl about the benefits of beekeeping and striving to run a zero-waste homestead. We also got into farming as a respite from too much screen time.
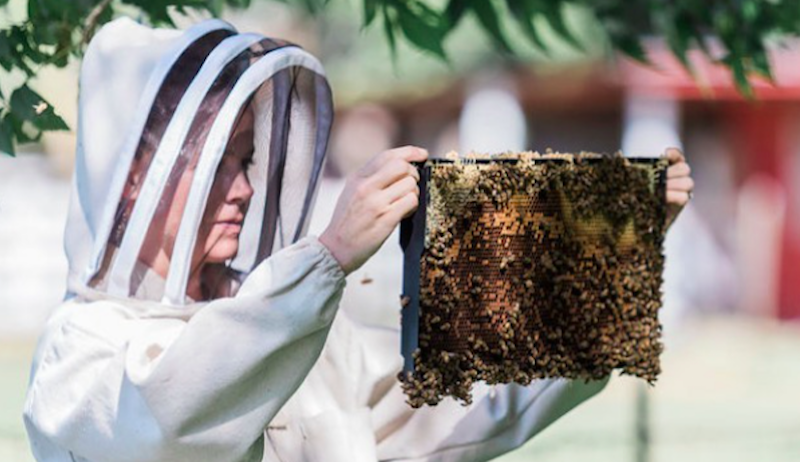
Dahl’s adventures in beekeeping began when she was living in the Santa Monica Mountains region of California. “Three ladies went in with me and bought a milk cow. We’d all talked about wanting to get bees, and one day one of the ladies told us she’d ordered us eight bee hives,” she recalls.
Dahl’s initial dalliance with bees didn’t work out. But as soon as she and her husband moved to Texas in December 2019, she added two hives to her land. “I did a lot more reading and research, and I’ve been at that now about a year,” she says.
When it comes to looking after bee hives, Dahl estimates that “from about March to November, it’s probably an hour every other week” in terms of work load.
“I’ll occasionally walk by them when coming from the barn and have a look. But it’s very low maintenance,” she adds.
Along with producing honey and being “amazing pollinators,” Dahl says one of the biggest joys of keeping bees is the educational element.
“My kids get in the hives with me, and it’s by far the most fascinating part of homesteading,” she explains. “The horses and the milk cow are my favorite, but I could spend hours looking at the bee hives every time I open it up. It’s just amazing.”
If you’ve been considering getting into beekeeping, Dahl recommends starting out by checking to see if your local ordinances allow it and then securing two hives.
“That might sound overwhelming. But often if one hive is going downhill you can kinda take resources from the stronger hive,” she explains.
Taking steps to ensure her farm is a toxic-free environment that strives towards zero-waste practices is important for Dahl. As a case in point, she identified the issue of feed coming in bags.
“I found a local feed mill and I bought the big plastic drum barrels and they’ll fill them up for me,” she says. “So I’ve eliminated waste from feed bags.”
“To me it’s the connection to nature,” says Dahl when asked what she enjoys and appreciates most about running a homestead and farming.
“So much of our normal life nowadays is computers and screens. I work on the computer in the mornings, then I go outside and do poop work or milk the cow. I feel like it keeps me grounded and connected to real life.”
Believe it or not, egg production is not the only reason people raise chickens. For some flock owners, fresh eggs are just a tasty — and profitable—bonus. If you are positive you want to keep chickens but are not sure why, perhaps one or more of the following reasons is right for you.
Conservation
Several pure breeds are endangered—some of them critically. The Livestock Conservancy keeps careful track of poultry and other domesticated animals whose numbers have dwindled to precariously low levels.
The organization publishes a yearly Conservation Priority List, outlining the status of the most threatened breeds and classifying them into five categories:
Study: breeds that are of genetic interest but either lack definition or lack genetic or historical documentation
Recovering: breeds that were once listed in another category and have exceeded Watch category numbers but still need monitoring
Watch: fewer than 2,500 annual registrations in the U.S. and estimated global population less than 10,000. Also included—breeds with a limited geographic distribution
Threatened: fewer than 1,000 annual registrations in the U.S. and estimated global population less than 5,000
Critical: fewer than 200 annual registrations in the U.S. and estimated global population less than 2,000
When my husband, Jae, and I started our poultry farm, conservation was our key motivator. We didn’t want to just keep chickens. We also wanted to help make a difference by raising breeds in danger of dying out.
With a scant handful of exceptions, most of the heritage breeds we have reared over the years were among those classified as Critical or Threatened. It’s given us great satisfaction to watch several of our breeds improve in status, with Orpingtons even completely graduating from the list!
Currently, 11 heritage breeds—including the Crevecoeur, Modern Game, Spanish and Sultan—comprise the Critical list. Eleven others—including the Faverolle, Icelandic, Old English Game, and Sebright—make up the Threatened list.
More than two dozen other breeds round out the other categories. Consider raising chickens from the Critical Priority List. This way, you’re not just keeping a flock. You’re helping a cause.
Ana Hotaling
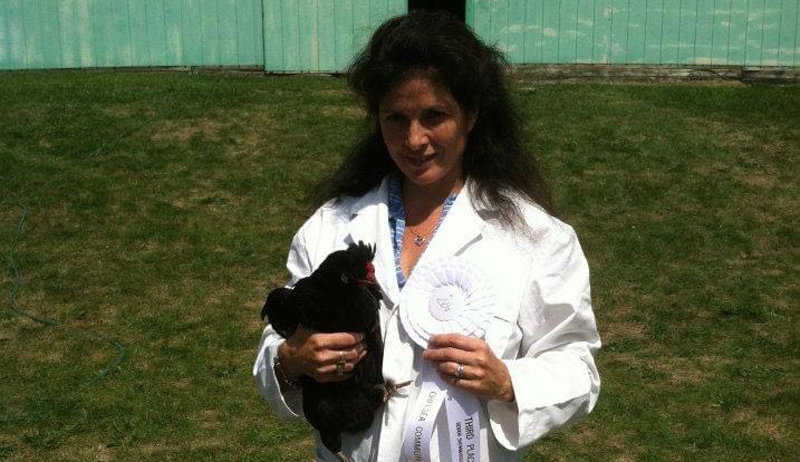
Competition
If you thrive on striving for the best, raising an exhibition flock may be the way to go. Exhibition or show birds are the cream of the poultry crop, the chickens that most closely match the American Poultry Association’s Standards of Perfection (SOP) for their particular breeds.
At an exhibition, certified poultry judges closely examine your bird, looking for notable deviations from the SOP. The birds that most closely match the traits and characteristics outlined for their breed typically win the Best in Breed and Best in Show awards.
Because perfection is the goal, those who raise exhibition chickens—especially those that compete on the national circuit—are highly dedicated and demanding. They reject and cull birds with even the slightest imperfection.
However, at the local level, such as at community and county fairs, competition is much less cutthroat and much more fun. Exhibitors range from serious breeders to young kids entering their pet chickens.
Check with your local fair for their poultry exhibition guidelines. These will help you determine whether raising competitive chickens belongs in your list of reasons for poultry keeping.
Kids aren’t the only ones who keep chickens as pets. Many adults also can’t help but fall in love with these feathered fluffs and their whimsical ways.
Chickens’ insatiable curiosity, their social interactions and their comedic antics will provide you with nonstop entertainment … just pull up a chair and watch Chicken TV, nature’s best show. However, if you select breeds known for their affectionate, docile dispositions—Orpingtons and Cochins come to mind—you might very well be joined on your chair by a chicken looking for cuddles.
We have had birds who follow us around like puppies. And our son Jaeson was practically inseparable from his Silkie, Altaria, who frequently joined us for Easter and other family events.
Over the years, I’ve come to know dozens of poultry owners. The vast majority of them keep chickens solely for the pure pleasure they bring. So if you find that companionship is top among your reasons for owning a flock of chickens, you’re in excellent company.
There are a lot of things I enjoy about keeping chickens. The eggs, of course, are a major benefit. I like sitting outside and watching their antics, too—I call them my “co-workers” when I perch on the patio with a laptop. And the opportunities to mend, upgrade and clean their living areas are appreciated when I’m feeling anxious or bored.
But I do not care for my chickens’ sleeping schedule. They’re hardcore diurnal creatures, up at the break of dawn every morning. I, on the other hand, am more night owl than early bird.
During the workweek, I can drag myself to the coop to release the ladies from the secured coop easily enough. By then, my alarm has already bore the brunt of my disgust. But when Saturday rolls around, my inclination to rise with the sun is somewhere bewteen nil and zero.
My hens have no concept of “weekend,” though, and that puts us at odds when dawn breaks and they decide it’s time to get outside and do their chicken things.
Hens at Dawn
For the better part of a decade, my family has just done what we had to when keeping chickens. We awoke early, emerging grumbling into the early-morning sun to release whatever birds lived with us in a given moment. (As backyard chicken-keepers turned small-scale poultry farmers who reverted to a backyard flock, we’ve known a lot of beaks.)
Then, a few years ago, we moved away from the daily activities at the family farm. Weekend mornings felt like a joyful gift we’d somehow gifted ourselves. But then, of course, the pandemic hit and we, like so many people, ended up with a box of chicks in the basement, a coop out back and a creeping realization.
The chickens would, once again, take over weekend mornings.
What I’ve always wanted, though, is an automatic coop door opener. These gadgets were once cumbersome affairs, requiring wires and outlets and plug-in timers and who knows what else to spare the keeper the chore of turning a coop-door latch to free fussy hens.
But in recent years, these automatic coop door openers have gotten mighty slick. Many run at low power on batteries, so you no longer need extension cords and dangerous wires. They’ve got light sensors and/or timers, so the door just opens right up when the sun pops up (and the keeper stays happily supine).
And many take tight spaces into consideration, with multi-paneled doors that cut the required overhead space dramatically.
Gotta Get One
During the interminable (or seemingly) COVID-19 pandemic, when my family sat at home all day, every day for most of 2020, chicken-keeping has been pretty easy. But with talk turning to vaccines and something called “normal life,” our family dinner conversations have recently turned to dream vacations.
But, then, what would we do with the chickens?
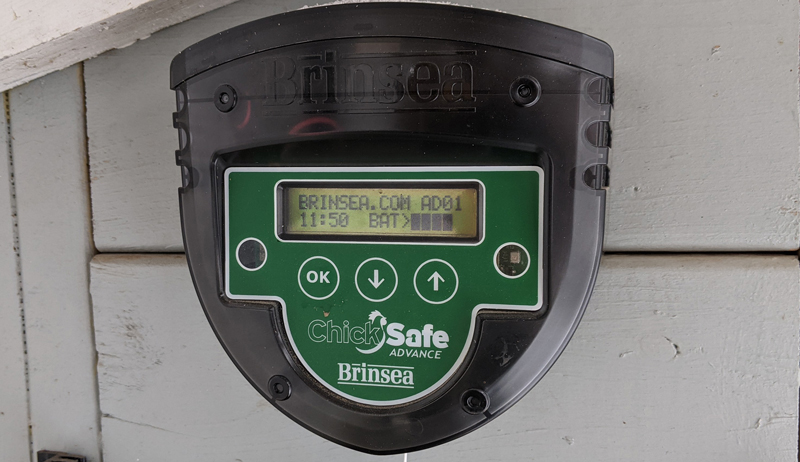
The answer, of course, was obvious. It was time to break down and get that automatic coop door opener I’ve dreamed about since that first quartet of production red pullets came into our life.
Why this I want this one, rather than the standard ChickSafe? The Advance model features a backup timer in addition to the built-in light sensor. This pairs well with my control issues.
I was going to make a video of the installation but, to be frank, I don’t want you to follow my lead. I’m terrible about not following directions and usually end of having to redo stuff. And that prompts me to curse a lot, which I also don’t want to subject you to.
The good news, though, is that installation is easy and directions clear. Essentially, you just install two uPVC rails along each side of your coop-door opening, spaced the width of the included weatherproof aluminum panels.
Three screws in each secure the rails in place.
The actual automatic coop door opener is a small device—about the size of a paperback Stephen King novel—that hangs via two keyhole slots in the back of the unit.
Just attach two screws to the coop itself (you might want to make a rough template for this, which I did but not exact enough, prompting a redo and a few curse words), then pop the unit on. Slide it down like you would a picture frame, and you’re good to go.
Tie One (Door) On
Next, you slide the doors into the rails and put them in their permanent “open” position (I used a clamp to hold them in place) and tie the string dangling from the unit to the lower panel. (As the bottom panel is pulled up by the string, it lifts the top panel by two protruding bolts, which I think is pretty clever.)
Then, honestly, your hardware is installed. You can test everything out manually—the door will (very slowly) lower itself, stopping when it hits the bottom of the door frame.
Programming the Automatic Coop Door Unit
After that (and not before—the instructions stress this a few times), pop in four AA batteries to get the automatic coop door opener ready to use.
You’ll need the directions to program the unit, though it’s not hard—just specific. You can set the primary open function to light level sensing, with a backup programmable timer. Or you can just set the automatic coop door to close via the timer.
(Note: The unit runs on a 24-hour clock time, so mind your evening hours when setting the time, which is the first thing you do.)
Did I make mistakes while doing this? Yes, a few. I absolutely set the time to a 12-hour clock at first. And, despite the unit being very clear that it was in manual mode, I still stood puzzled when the door didn’t close of its own accord at dusk.
But a quick return to the directions set me straight, and I was quickly able to rectify things.
The next morning, I squealed (yes, it was a squeal—you can ask my wife) in glee when I looked out the bedroom window to see our hens running around in their enclosed coop. They were confused, wondering where the ape was with their food, but they seemed happy to run free in the morning light.
Rodney Wilson
A Week’s Wisdom
We’ve now spent exactly one week with this automatic coop door opener, and after a single weekend of sleeping in, I’m not sure how I ever got along without one. Seriously.
I’ve made a few notes in this week of usage, though, that I’m happy to share.
Read the installation directions.
I may have gotten away with, say, not ensuring my rails are perfectly level. (My coop’s settled, and I make do.) But, as that is one of the directions, I can only consider myself lucky that the door actually functions.
Make sure there’s a something for the door to bump against when it reaches the bottom.
This “bump” causes a bit of slack in the string that tells the unit to stop letting out string. I cut a simple rabbet cleat in a piece of scrap wood and attached it to the coop, which both stops it and gives the door something to slide behind.
This cleat is currently causing me a bit of grief, though.
It catches some bedding when the birds kick things around, which could theoretically impede the door from closing all the way. (The unit senses blockages so the door won’t close on a slow-moving chicken.) Also, I worry a piece of dirt will make its way into the track on one of the rails, stopping the door a little higher than I like it.
Nothing about this is cause for alarm, as I just knock the dirt away when I gather eggs. (And morning function is way more important to me than evening.) Plus, that cleat, at about an inch tall, offers forgiving space against potential gaps.
But when we eventually do leave the house, I’d like to have this figured out so I can know my hens are secure at night without a routine double-check.
I’m not in the habit of leaving my chicken feed out overnight, as I don’t like vermin (and vermin love chicken feed).
But, because it’s in an enclosed run and hung at beak-level to the birds, I don’t mind leaving it out occasionally. So, for weekends or days off, I just fill up the feeder the night before so they can enjoy breakfast while I’m snoozing.
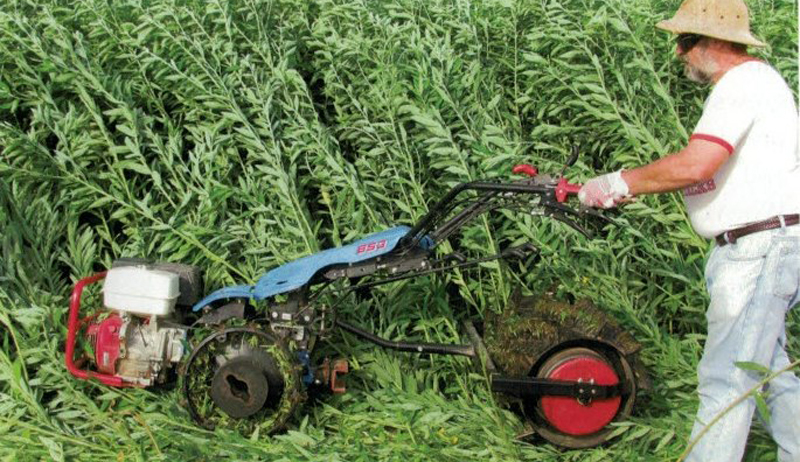
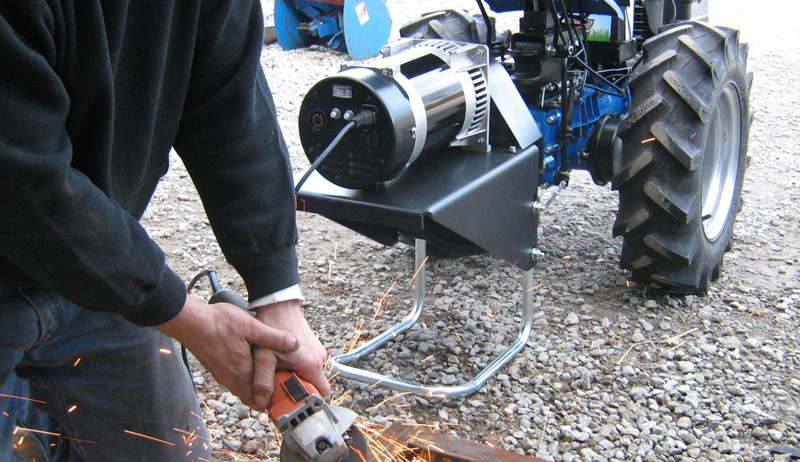
As you’re most likely aware, one of the most popular tools in small-scale farming is the BCS walk-behind tractor. The BCS was popularized by farmers like JM Fortier about a decade ago, and it has since become a mainstay in market-gardening and homesteading communities.
In the past 10 years, more and more implements to fit BCS tractors have found their way to market. According to Joel Dufour of Earth Tools (the largest dealer of walk-behind tractors and implements in the U.S.), in 2000 BCS America sold eight implements to fit their walk-behind tractors.
Today, Earth Tools offers over fifty compatible walk-behind tractor implements sourced from BCS America and third-party developers. Some are even designed in-house.
With all of the implements now on the market, here’s a quick guide to new and exciting products bound to help you out on your farm or homestead.
Earth Tookls
The Best-Sellers
So, for those who have newly acquired a BCS walk-behind tractor (or are thinking about doing so), which implements should you invest in? Unsurprisingly, the answer depends on what you’ll be using your tractor for. As Joel reports, Earth Tools’ top-selling implements are the:
Rotary plow: used for primary tillage, as well as assisting in the shaping of permanent raised beds
Rear-tine tiller: used for primary tillage and opening up new ground
Power harrow: horizontally stirs the soil rather than mixing it vertically like a rear-tine tiller
Flail mower: vertically spinning blades finely chop material
Sickle-bar mower: commonly used in small-holdings of hay or straw to cut organic material at its base
Given the rising popularity of no-till practices, many of Earth Tools’ best-selling walk-behind tractor implements work well in a low-till system. The rotary plow, power harrow and flail mower, for instance, are all especially well-suited to no-till vegetable production.
There are also other implements on the market that serve valuable functions in a low-till system. The crimper-roller, for instance, terminates cover crops in place, thereby creating a mulch layer to plant into.
Similarly, as top-dressing beds with compost becomes increasingly popular, a front-mount power barrow can make things much easier than doing all that spreading by hand. And who couldn’t use a power-barrow generally around the farm or homestead?
Earth Tools
For the Homesteaders
There are plenty of new implements on the market for the homesteader as well. A BCS-mounted log-splitter, stump grinder and snow-blower all have the potential to make your chores that much easier.
Earth Tools also produces a generator implement, allowing you to use your BCS as a portable generator to power projects all around your farm or homestead.
For the new or prospective BCS owner, the near-endless options for implements can be intimidating. Thankfully, the basics of the BCS haven’t changed.
The tractor remains a powerful, versatile and reliable machine that will make your life around the farm or homestead easier.
You just need to decide what you’ll use the machine for most frequently.
Don’t be afraid to purchase implements over time, either. Maybe you only need a rotary plow and a flail mower to start. You can always purchase additional attachments in the future.
Finally, once you’ve found a local seller to work with, ask them questions about which implements they’d recommend.
The beauty of the BCS is its versatility. A tiller can become a generator in a matter of moments. And with more and more implements now on the market, that versatility only is only set to expand.
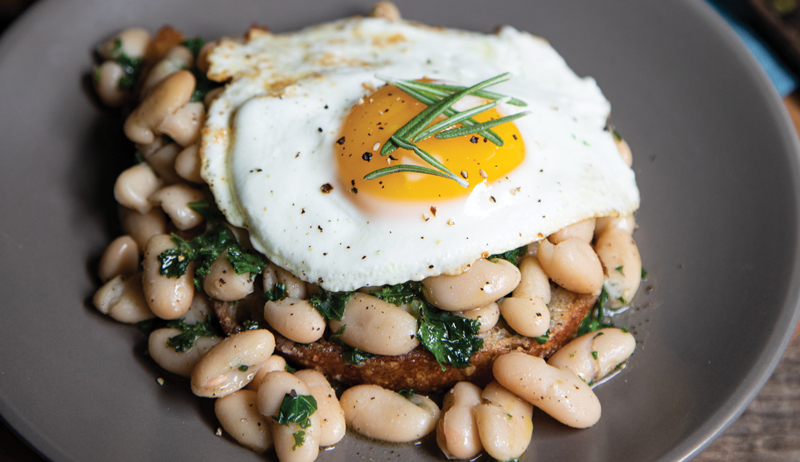
White beans take on the aromatic, earthy flavor of fresh rosemary in this recipe for seasonal comfort food. A combination of tangy sourdough with the white beans and a fried-egg make it a meal that can be served at breakfast, lunch or dinner.
Servings: 4
Ingredients
1 tablespoon extra virgin olive oil
1, 2-inch sprig rosemary
2 to 3 kale leaves, stems removed and leaves chopped fine
Add the olive oil to a medium skillet. Place the rosemary sprig in the oil. Heat over medium-low, gently moving the rosemary around in the oil. If it begins to sizzle, reduce the heat to low.
Cook for 5 minutes.
Add the kale, and swirl the pan or stir just until the kale wilts, about 1 minute. Pour in the white beans. Increase the heat to medium, and cook 2 to 3 minutes, just until the beans are heated through. Stir in the pepper and salt. Remove the rosemary stem and discard.
For each serving, place a piece of toast on the plate. Top with 1⁄4 of the white beans. Then top with a fried egg. Garnish with rosemary, and sprinkle with course pepper.
Sidebar: A Sourdough Sidebar
Sourdough is slow-fermented bread that doesn’t require
commercial yeast in order to rise. Instead, bakers make it with a live fermented culture, a sourdough starter, which acts as a natural leavening agent.
Its tangy flavor, chewy texture and crisp, crackly crust make sourdough great for this recipe.
This recipe originally appeared in the January/February 2021 issue of Chickens magazine. Want more “egg-cellent” recipes to put those backyard beauties to use? Check out back issues of Chickens—each issue contains a delectable recipe you can find in the “In the Kitchen” column. And if you need something good to make today, head over to our Recipes section for more delicious dinner (or breakfast, lunch or even snack time) options! Let’s get cracking!
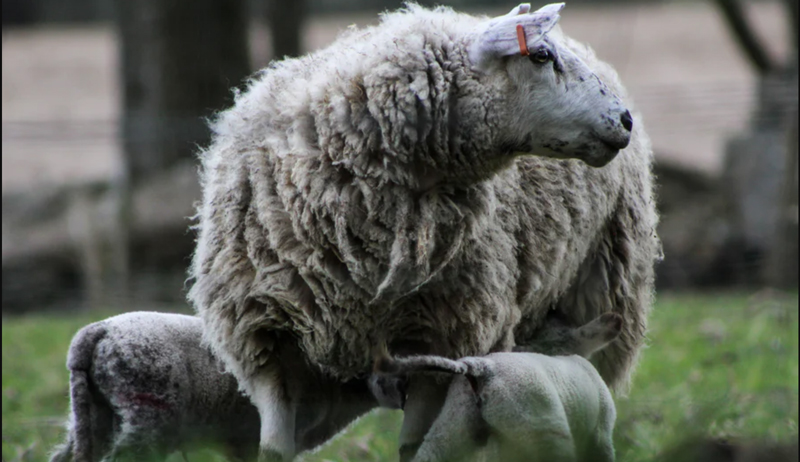
There are all kinds of cliches that ring true—an apple a day keeps the doctor away, an ounce of prevention is worth a pound of cure … you know them. But when it comes to keeping your herd of sheep healthy, the cliches really ring true. And even if you have your first-aid kit already to go, it’s just far easier to maintain a healthy sheep or lamb than it is to bring one back to health.
Good Nutrition Is Key
It’s simply vital to feed your sheep and lambs the best possible hay and grain that you can afford. Lambs especially need fine-stemmed grass and legumes like alfalfa. Adult sheep also prefer finer stemmed grass but will eat the coarser stems if that is all there is.
Lambs also need a quality feed with a coccidiostat in it (or they need to be served it). This prevents coccidiosis, a parasitic disease that strikes young lambs between one and six months.
But one study in the U.K. found that lambs in the 2 to 4-month age group are the most susceptible. Lambs that won’t eat and have dirty tails (indicating diarrhea) need to be considered for having coccidiosis. If not treated with additional, stronger doses of a coccidiostat, the lamb may start having bloody diarrhea, severe dehydration and finally, death.
The lambs nursing mothers also need a high-quality hay and grass mixed with alfalfa, as well as a constant source of clean water.
Pregnant ewes need very high-quality food and alfalfa hay because there simply is not much room in their digestive system.
To keep your sheep in tip-top shape, you need to offered them a trace mineral and salt mixture whenever they feel the need to eat it.
It’s really, really important to make sure what you offer them is specifically made for sheep. Feed for other livestock can contain copper, and copper is very toxic to sheep.
Check out this website to read more about what copper toxicity is and what it does to sheep.
Don’t Forget Your Vaccines
I know that by now you all have baking soda in your first-aid kit for digestive problems like bloat. And of course, you have needles and syringes.
So don’t forget your CDT vaccine for your older sheep and your lambs!
A refresher: CDT vaccination helps to protect healthy sheep and lambs against Clostridium perfringens type C and D (overeating disease) and Clostridium tetani (tetanus).
Pregnant ewes should get a CDT vaccine about one month before giving birth. This gives their lambs some protection after they are born. Then, lambs get boosters at 4 and 8 weeks.
A Few Final Things to Keep Your First-Aid Kit on the Shelf
One of the best bits of advice I was given years ago with my poultry was to keep the coop clean and dry to avoid the worst diseases. I’ve tried to apply that to my sheep as well.
One thing to keep in mind is that sheep pick up worms pretty easily from the ground, so try to have a feeder that is at least tail-height to the sheep. That way, you won’t have to deal with poop in the feeder, which can spread worms fairly quickly.
Also keeping the shelter or barn floor clean and dry is a good practice to get into. It’s harder in winter, I know, but worth aiming for!
Finally, check your sheep’s hooves at least a couple of times a year. Remember, you have those great hoof trimmers in your first-aid kit. It’s a good idea to head off any hoof issues by trimming back what you can see. Treat anything early on that looks like it might be trouble for the hoof.
I don’t have a footbath for my sheep, but I do always keep some Hoof ‘n Heel in my first-aid kit. So far, with decent trimming and vigilance in keeping an eye on the hooves, I’ve had pretty decent luck with my sheep hooves.
So good luck not using that first-aid kit for your sheep! But I bet you’ll be darned glad you have it when the need arises.
We are going to work our way up from the ground to discover key principles of planting a tree properly.
Principle # 1
Perennials are long-lived plants that need good quality soil to help them establish and survive their first summer and winter. They also need the soil to be prepared for long-term health and vigor.
Proper preparation of the soil at the beginning, before you plant, is really important. It is much much easier to do before your plants are in the ground.
If the soil is not the right pH or too wet; if the climate is too cold; or it is too shady or sunny, then your perennial won’t survive. Your local hardiness zone and the quality of your soil pH are harder to change.
It is easier to find ways to improve soil drainage and relative sun availability.
Bare root trees are always better. The only reason a potted tree will be better is if a bare root tree is improperly planted.
Potted trees are almost always “root bound” and their roots are strangling each other. They’re typically overgrown, with decay beginning in places. Overall, you can expect a confused plant root system.
Bare root trees, on the other hand, have open root systems ready to be layered and planted.
Principle #4
Small plants are more affordable and easier to plant. However, healthy large bare root trees will also yield sooner.
That being said, most small (3- to 5-foot) bare root “whips” will catch up with any 8-foot tree in a few years, as they have less transplant shock! So, plant either really affordable 12-inch trees and wait for them to grow because they were so affordable, or spend a bit more for 3- to 4-foot whips.
But don’t waste your money on huge trees that are expensive and costly to transport or ship.
Principle # 5
When planting your tree, make sure it has room to grow.
Not all trees need the same space. But all trees grow to occupy the space they do need, which is specific to the variety. Know your tree’s full size at maturity, and plan to plant it so it can grow to its full size.
Principle #6
Dig your hole 6 inches wider than the widest width of the bare roots and 6 inches deeper than the deepest root. Then crack the sides of the hole with your shovel blade in several places to make very distinct breaks in the hole’s sides. This will allow and encourage your roots to explore outside your hole.
You don’t want your hole to be another circular pot for the roots to travel around and around in.
Always spread out the roots and rootlets into their natural layering when planting a tree.
If you look at a bare root transplant, you can see there is often a central stem or many fibrous roots. Either way, if you lay it out you will see the roots have natural depths they would have reached growing in the nursery field plots.
Plant the roots this natural way by opening up the roots in the hole, then back fill some soil. Pull up any little roots that should be at a higher level in the hole and back fill more soil.
Now assess which roots are pinned down by soil and should be higher in the hole at their natural level. Pull these up and finish filling the hole.
You have planted an open and layered root system for your tree
Principle #8
Always infill with a mix of local soil and your compost mix when planting a tree.
If you fill the hole with only a “better” soil mix and none of the native (local) soil, it will create a trap for your tree roots, which will first occupy this loose and rich material before venturing out and down into the native soil.
You want your tree roots to explore and establish in that native soil. This establishment is what makes your tree more hardy to the cold winter, build relationships with local soil life, and hold it firm against winds. And, overall, you’ll build vigorous and healthy growth.
Principle #9
Many trees benefit from a little support early on.
A wooden stake or a t-bar can support the tree. Just pound it into the ground about 6 inches away and use a piece of fencing wire and cut-off house piece to protect the tree bark.
Every tree needs a rodent guard. Mice and voles love your fruit trees’ young and tender bark, and they will eat it. So put on a rodent guard.
Rodent guards should be as tall as your highest snow level in winter—that’s a minimum 24-inch guard for a nice fruit tree. If the tree is smaller, these plastic guards can be cut to size and more added over the years.
Eventually you can take them off.
Principle #11
Get a metal name tag or identification number tag! The most amazing thing about planting perennials is that they last for years and years and years.
The most disappointing thing about perennials? We seldom remember exactly what we planted years later. And the next generation may not know the property and, as a result, never know which tree is which.
If the plant is successful, we want to know what it was so we can get more, or encourage others to plant this great variety. Metal, laser-etched tags do the trick. Other tags won’t last more then a few months to a few years.
Principle #12
Mulch around a tree when planting. All trees want to have the benefit of mulch.
You can use a hardwood chip mulch, or a straw or leaf mulch. You can even use softwood chips.
The benefits of mulch include:
suppress weeds that might compete with young tree roots
hold moisture to prevent roots from desiccation
stabilize the soil
Mulch will also encourage soil life to colonize the area and build relationships with your tree. In many soils, cracks can open in unmulched clay and expose your deepest tree roots to cold, heat and desiccation!
Principle #13
And, of course, trees love companion plants! Every tree wants companions that will help create an ecosystem design with diversified form, function and potential.
If you can, try to include plants that protect the soil (like ground covers), plants that host pollinators (such as flowering plants) and plants that fix nitrogen (like clovers).
This mildly spicy cauliflower, garlic and turmeric ferment is a must have. The pickles are delicious, and the fermented cauliflower maintains a nice crunch, even after it is fermented.
These fermented cauliflower pickles make a great condiment. Enjoy as a quick and flavorful snack between meals, or an easy and healthy side dish.
Yield: 1 quart jar
Fermented Cauliflower Ingredients
3 1/2 cups cauliflower florets (about one small head of cauliflower)
Wash cauliflower and cut florets into uniform-sized pieces so that it ferments evenly. Pack ingredients into a clean quart jar, beginning with the peppercorns (optional), garlic, then jalapenos and cauliflower.
Mix the brine ingredients together and pour the brine over the produce until everything is completely submerged. Be sure to leave 1-2 inches of headspace from the brine level to the rim of the jar.
If you have a small fermentation jar weight, add it to the jar to keep the ingredients completely submerged under the brine. Remove any small pieces of cauliflower that float up to the top of the brine.
Add the Mason jar canning lid and ring. Tightly screw it onto the jar.
This is a 6-day ferment. Ferment at room temperature, ideally between 60-75 degrees F (15-23 degrees C), and keep out of direct sunlight.
Check on the fermented cauliflower daily to make sure the brine stays over the produce. This is a crucial step in all vegetable fermentation, as any produce above the brine is prone to mold.
If the produce is above the brine, use a clean utensil to push the produce back down below the brine. Burp the jar daily—unscrew the lid briefly and tighten it back on to allow any built-up gas to release (and avoid jar breakage).
This is an active ferment. Foam-like bubbling after a day or two is totally normal and a sign that things are fermenting along, just as they should be.
After 6 days, taste test the fermented cauliflower to determine if they are fermented enough and that the flavor is ideal. If the cauliflower tastes as it does in the raw form, you will want to ferment a day or two longer and taste test again.
Once the cauliflower pickles are sour and flavor packed, transfer the jar into the refrigerator, with the brine and all.
The ferment will last nearly indefinitely, however the texture and flavor will continue to change. Fermentation does not stop once refrigerated, it just slows way down.
This ferment tastes best when enjoyed within 6 months.
Side Notes
If you do not have a glass jar weight, you can improvise by using an easily removable small food-grade glass dish that fits inside the jar. Or, if you have a smaller glass canning jar that can fit into the mouth of the jar you are fermenting with, you can use that to keep the produce pushed under the brine
If you are unsure if your water is safe for fermentation, you can boil it and allow it to cool to room temperature before adding in the salt to make your brine.
You may use fine sea salt instead of coarse kosher salt if you prefer. Just adjust the fermented cauliflower recipe to 1 1/4 tbsp. fine sea salt.
This recipe has been adapted from Can It & Ferment It (2017) with permission from Skyhorse Publishing, Inc.