Categories
Animals Beginning Farmers Homesteading Waterfowl

Meet The Honking Geese Running Free At Hoof And Feather

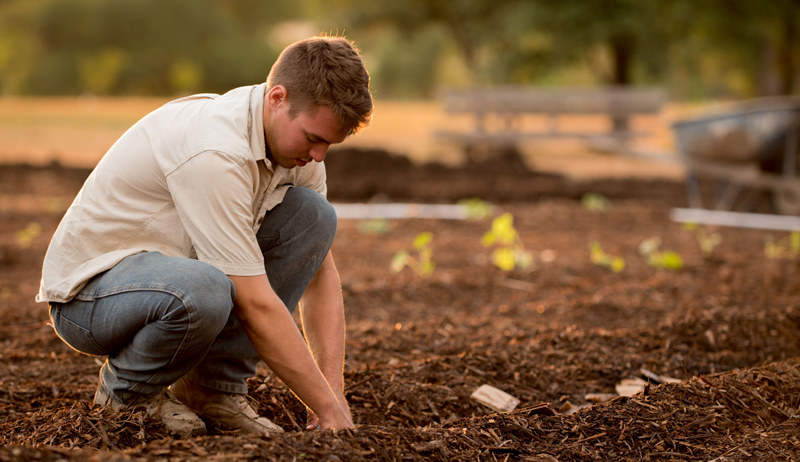
When MJ Smith and her husband, Sean, moved to rural Southwest Colorado, she says it was mainly “to escape the congestion of the city rather than a specific interest in farming.”

Then they fell in love with the property they eventually purchased and saw its homesteading potential.

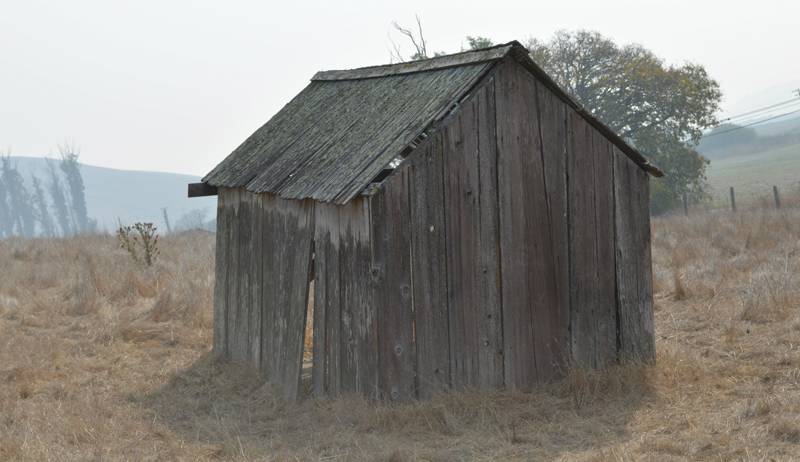
“It has everything you could want packed into a manageable five acres,” explains Smith. “There’s an almost 100-year-old apple orchard [plus] apricot, plum and cherry trees; a quarter acre pond; a large red barn; a modest remodeled white farm house; irrigation water to keep lush pastures spring through fall; and a dry-land cliff overlooking it all.”

Once the Smiths had taken the decision to start Hoof And Feather, they added geese, ducks and deer to the property and dedicated their full efforts to managing the venture.

We spoke to Smith about raising geese and the responsibility of maintaining a vintage homestead. We also touched on the noise potential of a large flock.

How Geese Help the Orchard Prosper

Smith says that originally the focus of the farm was its orchard—and that they added geese to the homestead in order to help maintain the orchard.

“Geese are excellent for keeping the grass mown and the weeds down,” she explains. “We later discovered they love apples too, so they help us keep the orchard clean by eating any fallen fruit.”

Smith adds that geese droppings are also an excellent fertilizer for the orchard’s trees.


Read more: Geese and ducks are great livestock for the permaculture farm!


Living the Free Range Lifestyle

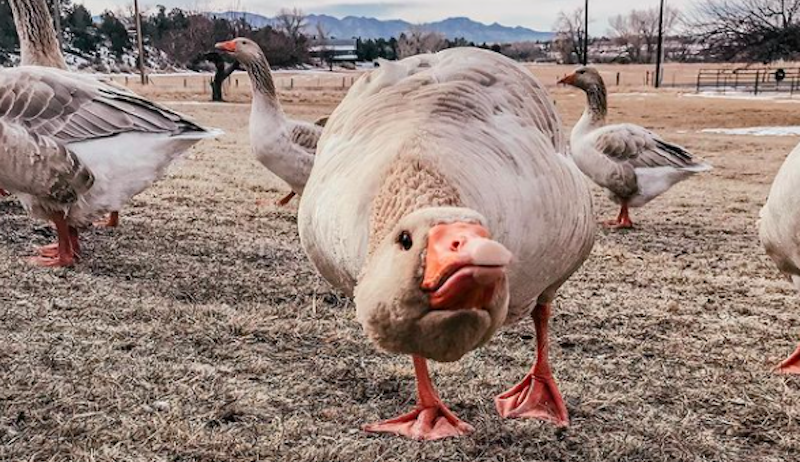
The resident geese at Hoof And Feather are allowed to roam free. Smith characterizes geese as “easy keepers” when it comes to farm animals.

“They are large enough that they don’t have many predators,” she says. “We have not lost any geese to predation in the nearly three years we’ve had them. As their flock size grew, they were able to sleep outside on the pond.

“Spring to fall, when everything is growing and green and we have plenty of water, they don’t need much, if any, supplementation for food. They forage on orchard grasses, aquatic plants in the pond and dandelions, as well as dropped fruit from our numerous trees.”

Defining the Goose

“Geese are bossy and hilariously curious,” says Smith when asked to sum up their personality. “Everything new is something suspicious to be investigated.

“Many people are apprehensive of geese. And I think the curious nature of the goose, combined with their need to nibble everything, can give people the wrong impression that they are being attacked,” she continues. “Our geese nibble my shoes, pull at the zipper on my coat and try to eat my phone when I want to get a close-up. But they are not attacking—they are curious.”

Smith adds that she considers geese to be similar to a 10-month-old child. “Everything must go in the mouth to be discovered, sorted and judged.
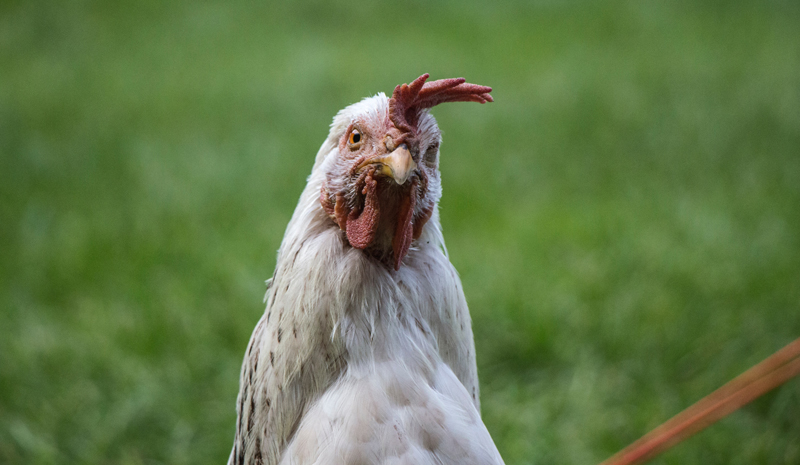
A Honking Noise!

Asked what geese are like to live around on a day to day basis, Smith says, “Loud!” She advises against adding geese to your homestead if you have neighbors who will be sensitive to the noise.

“Of course, they don’t talk all the time,” she says. “But when they do—and especially when you have a large flock—it is an astounding racket.”


Read more: Need quiet in the coop? These chicken breeds help to keep the peace.


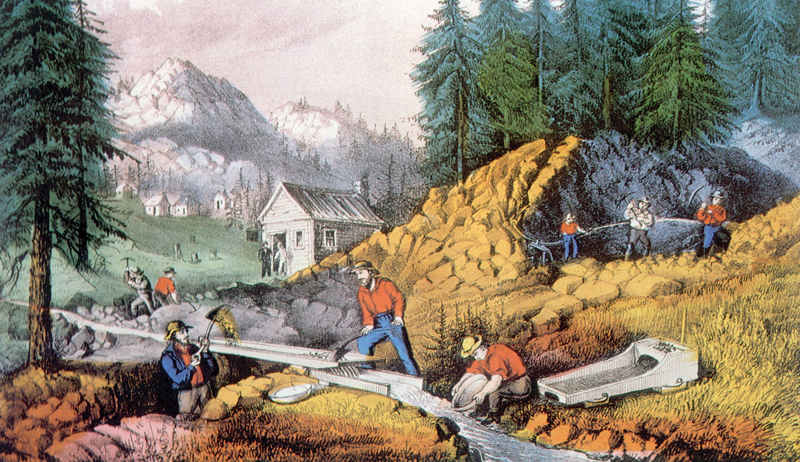
Learning the History of the Land

“The most rewarding part of this homestead experience has been sharing this unique and special place with our son, Mason,” says Smith as she conveys the joys of homesteading.

“We have always loved that we are maintaining and restoring this very special and unique property that has been a homestead for 100 years. Long before that, the Puebloans cultivated the land. It is a wonderful responsibility to care for land with such a deep history.”

Follow Hoof And Feather at Instagram.

Categories
Animals Beekeeping Beginning Farmers Crops & Gardening Farm & Garden Farm Management Food Large Animals News Poultry Uncategorized Urban Farm Urban Farming

New Regenerative Farm Certification In The Works

Regenerative agriculture isn’t exactly new. But it is gaining momentum with many growers and the customers they serve.

What is it, though?

“To define ‘regenerative’ simplistically, it is a series of farming techniques that leave the soil and water and animals in a better space than when you found them,” Andrew Gunther explains.

Gunther is executive director of A Greener World. The Oregon-based nonprofit is piloting a new Certified Regenerative farming program with 50 farms.

Established in 2014, A Greener World maintains a few different certification labeling programs. These include Certified Animal Welfare Approved, Certified Grass Fed, Certified Non-GMO and Salmon Welfare Certified.

According to a recent news release, the group’s forthcoming Certified Regenerative label will offer “a whole-farm assurance of sustainability, measuring benefits for soil, water, air, biodiversity, infrastructure, animal welfare and social responsibility.”


Read more: Regenerative farming is better for the soil. Here’s why.


A Shift in Thinking

Still, to reap those benefits will take real effort, patience and a shift in thinking.

“There’s a saying, ‘Live like you’re going to die tomorrow, but farm like you’re going to live forever,'” Gunther says. “You want to make that your mantra…. You want your land to be there for 1,000 years in really good spirit.”

He continues, “[Regenerative farming] is about saying, ‘What practices can I use on my farm that will at least protect the water, but, preferably, [will] improve the water? What practices can I use on my farm that will improve my soil biodiversity?’

“Those are some of the things that regenerative agriculture needs to address.”

Multiple Choices

It’s worth noting that A Greener World isn’t the only group with a Certified Regenerative farm program. “There are perhaps a half dozen others,” Gunther says.

One such is the Rodale Institute’s Regenerative Organic Certified (ROC) label. Introduced in 2018, ROC builds upon the USDA Certified Organic standard and is managed by the non-profit Regenerative Organic Alliance.

The Rodale program’s three main pillars for regenerative certification include soil health, animal welfare and social fairness.


Read more: At this regenerative farm, animals work to improve the land.


Empowering Farmers

For its part, A Greener World’s option is highly individualized and flexible. In other words? Every farm is different, with its own specific challenges. That means a one-size-fits-all approach simply doesn’t apply.

“You have to farm for where you are, but you must leave it in a better condition than how you found it,” Gunther says. “It’s about sitting down and thinking about your practices…. The approach we are taking is that you as the farmer will decide what to tackle and how.”

To start, farmers work with a team of experts to prepare a risk assessment tailored to their specific needs. For example, Gunther notes, “If you find your risk to water [quality] is zero, then you don’t have to do anything about that.”

But if you routinely apply herbicides and pesticides or rely on carbon-derived fertilizers?

“You would need to stop doing that, and we would look at other sources of organic matter,” Gunther says. “The methodology used by the farmer is relevant for the farm that they live on. They’ve got to show that actually the practices they’re doing at their location will have the prescribed outcome.”

Achieving those outcomes could take from five to 10 years or longer, depending on the kinds of efforts required. (“It’s not for the faint-hearted,” Gunther admits.)

Initially, participating farmers and experts work together to set goals and develop long-term plans for the regenerative management of soil, water, air, cropping systems, livestock and more. Then, A Greener World’s auditors make annual, in-person visits to each farm to check on progress and compliance.

Pilot Participants

From smaller fruit producers to at-scale growers supplying large retailers, the kinds of farms included in A Greener World’s Certified Regenerative farm pilot program run the gamut. With participating farms in Australia, Namibia, South Africa, the United Kingdom, Canada and the U.S., they span the globe, too.

“We wanted to have as diverse a group of people in [the pilot] as possible to garner as much contradictory and conflicting information from these farms as we could,” Gunther says. “And we are still filling the odd slot in our playbook to make sure we have as broad a spectrum of farms in the program as is possible to have.”

Some of the pilot farms could achieve full Certified Regenerative farm status within the coming year. Curious to take part? To learn more—and possibly be added to the pilot program—contact regenerative@agreenerworld.org.

Categories
Animals Poultry

Petaluma Was A Poultry Town: California’s Egg Rush

As one year comes to an end and another begins, many of us look back and reflect on the year. I think we are all happy to be done with 2020!

Nevertheless, my little flock of laying hens and my small herd of sheep provide daily leisurely joy and a degree of entertainment.

Both keep me busy. But it’s a busy we surely all enjoy.

As I’ve been reflecting, I began to think back over the years and ponder why it is that I became involved with keeping animals in the first place. It seems to have always been in my blood.

I have been on this planet for a few decades now, and I have been keeping chickens for a big part of that time, actually since I was just a young boy growing up in California’s Sonoma County, just north of San Francisco.

I grew up, for at least part of the time, with the rest of the family on my grandparent’s chicken ranch.

My grandfather kept around 20,000 laying leghorns on the home ranch and two additional rented properties. While that may sound like a lot, most of the properties around us had similar operations.

Sonoma has now switched to dairy and wine country, with only a few of the original poultry operations still in business. Still, make no mistake, it was chickens that put my hometown of Petaluma on the map and set me on my life path.

Sonoma Petaluma poultry chickens hens
Bill Graves

Panning for Food

It all started for California because of the discovery of gold in the Sierra Nevada Mountains east of Sacramento. The discovery was early in 1848 and precipitated the Gold Rush of 1849.

California became a state the following year in 1850, and the boom was on. Thousands of immigrants moved to California with the idea of striking it rich. Very few did.

A gold pan that cost 20 cents before 1849 could be sold for $8 after gold was found. A single egg might cost a miner $2 in a mining camp. Adjusted for inflation that would be a $50 egg and a $200 gold pan!

The prospectors that were finding gold and had good claims could actually afford those kinds of prices. But the vast majority had to move on as the gold fields and streams became less reliable.

Most moved to Sacramento, San Francisco and California’s Central Valley to make a living as farmers. Some that had the capital opened hardware stores or sold tack, provisions and/or clothing. Those early entrepreneurs were the ones that eventually became wealthy.

Primed for Poultry

As you consider the previous framework of events, let us take a look at how food crops, the livestock industry and the poultry industry, in particular, evolved to meet the needs of all the new inhabitants.

With an infusion of well over 100,000 new immigrant settlers, it’s pretty obvious that the food supply would be lagging far behind. With demand high and supply low, prices always skyrocket. Thus, the shortage of food actually became an opportunity for those capable of production.

San Francisco is just south of the Golden Gate Strait, and the Sacramento River runs beside Sacramento. Both cities are accessible by water and boats. But the Golden Gate Bridge wasn’t in service until 1937.

In the early days, red meat, poultry and eggs were shipped up the rivers to points inland. The situation became so perilous that eggs from nesting shore birds were actually robbed from the cliffs on the Farallon Islands about 20 miles off the San Francisco coast.

Settlers that had land to the north, near a little town called Petaluma, started raising crops, beef cattle, sheep and chickens so that products could travel via steamboat down the Petaluma River in Sonoma County.

Even so, the farmers and ranchers 18 miles up the river from San Francisco Bay couldn’t keep up with demand. Production had to find a way to meet demand, because even well after the gold rush, California’s population continued to soar.


Read more: Odd eggs? Here are a few unconventional yolks you might find in the nesting box!


Golden Eggs

It seems that whenever there is a huge need, someone steps forward to solve the problem. So it was in 1879 that an immigrant from Ontario, Canada, who was living in Petaluma, invented the first successful incubator.

Lyman Byce was one of 10 children. He invented a redwood box incubator that utilized a coal oil lamp as the heat source. The eggs
had to be rotated by hand three times per day for 21 days. But thanks to Byce, the little towns of Petaluma and Two Rock (to the west) soon became known as the “Egg Basket of the World.”

The early Byce incubator was not as efficient as a modern electric incubator. But hatcheries began to spring up and produce large numbers of laying hens to help meet California’s demands. Byce’s incubator could hatch 400 eggs with a 95 percent success rate.

The electric incubator, invented later in Ohio, didn’t hit the poultry scene until 1922. By that time, the little river town of Petaluma was one of the wealthiest towns in California. Thanks to the poultry industry, Petaluma even survived rather handily during the Great Depression.

During the height of the poultry boom in Petaluma, hundreds of producers such as my grandfather existed. Petaluma had dozens
of hatcheries selling day-old sexed chicks hatched from old redwood incubators and, in the heyday, from electric units.

Dozens of producers also specialized in selling 2-month-old started pullets

There were a half-dozen feed-milling companies, numerous feed stores and even an oyster shell company selling crushed oyster shells from the nearby coastal oyster beds. At one point, Petaluma even had a poultry pharmacy! The pharmacy is listed in Ripley’s Believe It or Not and sold as many as 50,000 poultry medications in pill form in a single day.

Those early feed mills began expanding and making feed products for the dairy industry. My late father went to work for a cheese factory and eventually to the construction trades.

The chicken culture slowly gave way to dairy and wine.

Sonoma Petaluma poultry chickens hens
Photos Courtesy Sonoma County Library

Staying Alive

To be sure, Petaluma’s agricultural past has never died. Most family-owned mills live on, in some form or another.

Names such as Golden Eagle Milling, McNear, Vonsen, Epping, Lewis and Ash have stayed in business but have shifted gears and successfully modernized.

Some of them merged and moved away. Some have stayed but have changed their company names.

George P. McNear and Golden Eagle Milling are long gone, but the brick and mortar structures can still be found along the river where they once loaded steamboats. The buildings that have survived have been converted to walk-in specialty stores. They are great historical spots to visit.

I am pretty sure there are no hatcheries still operating in the little river town. However, there are a couple of creameries bottling milk nearby.

Still Clucking

To this day, Petaluma celebrates Butter & Eggs Days each spring with a huge celebration and parade. Just 40 miles north of San Francisco on Highway 101, Petaluma has a farmers market to die for. No vacation to the San Francisco Bay area is complete without a quick stop in Petaluma.

I am very proud of my birthplace and the impact it has had on our country’s agriculture. I am even happier to see all the small operators and enthusiasts all over our country raising chickens, sheep and other farm animals in open pastures.

It makes me feel like the past is still alive.

A few years back, I built my own henhouse with the idea of copying the little colony houses my grandfather had freestanding in his pastures.

My henhouse adds just a bit of nostalgia to my backyard. My chickens can access their run and my 12-acre almond orchard out the back door. Obviously, the designs that worked for laying hens more than 100 years ago still work well for the hens of today.


Read more: Want more stories like this delivered to your inbox? Sign up for our newsletters!


Sidebar: Free-Range Futures

It saddens me to think of how today’s commercial producers keep laying hens in confinement with minimal space. In 2008, California passed Proposition 2 with the intent of improving confinement conditions.

Indeed, tight quarters for laying hens have improved across the U.S., but in the early days (when I was a youngster), chickens were kept in high-fence pastures and often with sheep or other livestock. The hens had rows of small colony houses that provided roosting boards and nest boxes.

Chickens spent most of the day outside in the pasture.

The colony houses were starting to disappear when I was a boy, because gathering hundreds of eggs from each little 10-by-12- foot house was time-consuming. Sometimes hens would simply lay eggs in the pasture.

Later, we built long redwood henhouses that housed many more hens. The long houses that everyone began to use had wood floors and long but narrow adjoining rooms with as many as 500 leghorn hens per room.

For feeding and egg gathering, the longer houses reduced labor. All the hens still had access to the outside during the day.

As a schoolboy, I rode the bus home in early afternoon and helped with feeding and gathering eggs. My grandfather had a large commercial egg-washing and sorting machine. The washed and dried eggs were put in flats that held 2 1⁄2 dozen eggs.

Everything was done by hand.

All the hens were of the Leghorn breed and all the eggs were typical of the white-shelled eggs you see in grocery stores today. It might sound funny, but I was about 12 years old before I ever saw a brown egg. I didn’t even know they existed!

This article originally appeared in the January/February 2021 issue of Chickens magazine.

Categories
Poultry

Do Your Local Regulations Allow Backyard Chickens?

Around the world, people are preparing to celebrate the Lunar New Year on February 12. For those of you whose resolutions didn’t get off to the hoped-for start in January, here is your chance to revisit those goals and try again.

According to Chinese astrology, 2021 is the Year of the Metal Ox—a time for traditions, hard work and thrift. In other words, it’s the ideal time for you to make 2021 the Year of the Chicken!

Raising chickens has become more popular than ever, thanks to extended time at home paired with the desire to produce safe, healthful food.

It seems remarkably simple: get some hens, build or buy a little coop, collect fresh eggs. Like any project, however, keeping a flock entails a lot more research and preparation than is apparent.

For those of you who plan on starting your own microflock this spring, my next few columns will focus on the very basics of chicken keeping … and by basic, I mean geared towards anyone who wants to raise hens but has never even seen one in person, other than in a bucket or as a nugget.

And now, let’s get started getting started!

Step One: Check Your Local Laws

All the hours you spent online, researching the prettiest and most abundant egg layers around, mean nothing if you cannot legally keep chickens where you reside.

Before you draw up a list of breeds, research different feeds, and calculate your future flock’s needs, reach out to your local ordinance officer. This government official enforces local regulations regarding poultry-keeping as well as other ordinances affecting property within your community’s borders.

If your local government maintains a web site, all the information you need regarding poultry ordinances may already be available to you online. If not, call your city hall and request the ordinance officer’s email address. This way, their answers to your questions will be documented and easy to reference whenever necessary versus trying to recall what was said over the phone.

The three key questions to ask your ordinance officer are:

  • Am I allowed to keep chickens on my property?
  • How many chickens may I keep on my property?
  • Am I allowed to keep roosters or only hens?

Read more: These quiet breeds of chickens are great for keeping peace with neighborhood hens.


Can I Keep Chickens, Please Please Please?

Believe it or not, this question does not necessarily have a cut-and-dry, yes-or-no response.

Yes, there are communities that straight-out do not allow chickens. If you live in one of these, I’m afraid you are out of luck.

The answer, however, may be “maybe.” Whether you can keep a flock may depend on where your home is located within your town.

Most communities are divided into different zones: residential, agricultural, rural, commercial, etc. Your town may only allow keeping chickens in rural and agricultural zones. Or your town may allow chickens across the board.

Your ordinance officer will be able to look up what zone you live in and whether you can keep chickens there.

How Many Chickens Can I Keep?

Once you’ve determined that you can indeed keep chickens where you live, you need to find out how many you can keep.

Towns typically determine this by the size of your property. Home owners with less than two acres may be limited to, say, 12 chickens. Those with more than five acres, however, may be allowed to keep an unlimited number of birds.

Another factor affecting the size of your flock is the type of community you live in. If you live in a large city like New York City and Los Angeles, you may find yourself restricted to four or fewer birds. If you call suburbia home, your local ordinances may allow you to keep four to six chickens.

Be prepared, however, should your town’s ordinances be obsolete or downright odd. One rural township near our farm allows for only one chicken per acre. Last I heard, residents were mounting a challenge to that gem of a law.


Read more: Should you get a rooster? There are pros and cons.


Can I Keep Roosters?

If you plan for your flock to be self renewing, you will want to keep at least one rooster to be the daddy to future chicks. You may need to put those plans on hold, however, if ordinances prohibit owning a rooster.

This is a common regulation, especially in urban and suburban settings. Neighbors don’t want to be bothered with crowing around the clock. (And yes, roosters crow all day long.)

Your ordinance officer can probably answer this question off the top of their head. If you can keep a rooster, ask whether there are any regulations related to the noise a rooster makes.

You may, for instance, need permission from your neighbors to keep a rooster along with your hens. And you may have to part company with your rooster if a neighbor lodges a complaint.

Other Considerations

In addition to these three key poultry points, many towns maintain ordinances that regulate other aspects of chicken-keeping.

The city just south of us, for instance, allows residents to keep hens but prohibits the sale of eggs. The town to our east strictly regulates how to dispose of chicken waste and dead birds, while the village to our north prohibits ownership unless the flock is fenced in.

Our township regulates:

  • how large a coop can be without requiring a construction permit
  • where a coop can be placed with regards to property lines
  • how many coops can be built

Many communities also reflect their state’s Department of Agriculture recommendations in their local ordinances. So it may be worth your while to visit your state’s ag department’s web site, if simply to see if the information there answers questions you may not know you had.

With these details in hand, you can begin to build the foundation to flock management. You know how many birds you can keep, whether you can keep roosters, how big a coop you’re allowed, where on your property you can situate your coop, and whether your neighbors can affect your chicken keeping.

Next week, we’ll discuss the next step: determining what exactly you want from your future flock.

Categories
Animals Equipment Poultry

How To Build A DIY Chicken Tractor

An easily adaptable mobile pen, this A-frame chicken tractor works well for a smaller flock of birds. This design includes handles, so you’ll have to recruit a helper to move it. But you could add wheels if you wanted to.

As with the enclosed pen, remember to include all of the essentials, such as waterers and feeders, when you put your pen to use. We’ve included instructions for an easy-to-make portable nesting box for this design.

Tools & Materials for Your Chicken Tractor

  • (2) sheets of 1⁄2-inch construction-grade plywood, 48-by-96 inches
  • (8) 96-inch lengths of 2-by-4 pine
  • (1) 48-inch length of 1-by-2 pine
  • ~100 galvanized 2-inch deck screws
  • ~12 galvanized 3-inch deck screws
  • tape measure
  • pencil
  • electric screwdriver

Step 1: Frame the Plywood

You’re going to first frame your plywood with 2-by-4s. Measure, mark and cut two of the 96-inch 2-by-4s into four pieces that measure 41 inches each.

Lay two of the plywood sheets on the ground and screw 2-by-4s (long side down) around the edges of each sheet, with the 41-inch pieces inside the four remaining 96-inch pieces. Place a screw at each end and then every 6 inches or so.

These frames will strengthen the plywood and give you a way to screw the sheets together.


Read more: These 50 tips will help any poultry-keeper with their feathered flocks!


Step 2: Make the A-Frame

Using a helper if needed, carefully lift the two framed plywood boards until they meet at an angle to establish the frame of your chicken tractor. They should resemble a capital letter “A” and meet on the inside so that they’re flush at the top.

Secure the boards together at the A’s apex using screws drilled in at both ends and roughly every 6 inches in between.

Step 3: Add the Base

On one side, temporarily brace the boards with a piece of 1-by-2 that’s 48 inches long. Screw the 1-by-2 horizontally across the opening of the A-frame about halfway between the apex and the ground.

Next, place a 2-by-4 across the bottom of the A-frame’s opening and mark the cuts needed for that 2-by-4 to fit inside the frame. Do this for both sides.

Position the 2-by-4s in place on each end and screw them in so that they’re flush with the plywood sheets. Remove the 1-by-2.

DIY mobile chicken coop plans

Step 4: Create Skylights

A few inches in from one side of the A-frame, measure and mark off a square that’s 36 inches per side. Drill a series of holes at one corner of the square so that you have a starting point for your handsaw.

Using a handsaw, cut out the marked area. Repeat these steps on the other side.

Cover the squares by stapling a 42-by-42-inch square of mesh over each opening. Place a staple at each corner and roughly every 2 inches in between, making sure no jagged edges are poking out.

These skylights aid in circulation and give the hens some sunshine while inside the chicken tractor.

Step 5: Cover One End

Working on the end of the A-frame nearest your skylights, cover the open end with mesh by measuring the triangle. Adding 6 inches to each of the three sides for overlap, and staple the piece to the structure.

Place a staple at each point, and then every 2 inches or so in between, trimming away any jagged edges using your wire cutters.

Step 6: Create a Hatch

Now you’ll build the access door for the other end of your A-frame chicken tractor. Measure the opening and cut a piece of plywood to fit the space. Attach the hinges to the base of the door and the structure’s 2-by-4 with screws, and then attach the hook-and-eye latches at the top, approximately 6 inches down from the A-frame’s apex, one on each side.

The door should open from the top, giving you access to the nest box you’ll put inside.


Read more: Make sure you keep these 8 things out of the chicken coop!


Step 7: Add Handles

Placing screws roughly every 6 inches, attach the two 144-inch lengths of 2-by-4 pine to each long side of the structure’s base. Leave 2 feet hanging out on each end for handles.

Step 8: Make a Portable Nest Box

This removable nest box will simply sit on the ground inside your A-frame chicken tractor.

First, cut four 12-inch lengths of 1-by-4 and screw them together, short side down (this creates the “walls” of your box), into a square. Then cut a piece of plywood to fit the bottom of your nest-box frame and screw it into the 1-by-4s, placing a screw at each corner and several in between.

This article originally appeared in the January/February 2021 issue of Chickens magazine.

Categories
Animals Poultry

Coronaviruses In Chickens: What To Know

Just like we go through our flu season in late fall through late winter, chickens also go through their version of flu season. Poultry respiratory viruses such as avian influenza, infectious laryngotracheitis and infectious bronchitis (one of the coronaviruses you may see in chickens) are more common in the winter than the summer.

Among other factors, cold and damp conditions seem to help respiratory viruses persist and spread.

This column provides relevant information about infectious bronchitis for your backyard chickens. But it’s also meant to clarify any misconceptions anyone may have about coronaviruses and chickens.

Coronavirus Background

Coronaviruses are ubiquitous in animals (including chickens), and they’re typically associated with mild respiratory signs. While ubiquitous, they typically “stick” to their species.

In other words, chicken coronaviruses stick to chickens, dog coronaviruses stick to dogs, etc. Very rarely do we have transmission of a virus from one species to another.

Unfortunately, we are currently dealing with a rare situation where a virus (COVID-19) has “jumped the species barrier” to humans from bats and/or pangolins (insect-eating mammals covered in overlapping scales, aka scaly anteaters).


Read more: Another coronavirus? Yes, but it’s a common poultry condition.


Infectious Bronchitis Virus

When chickens get their version of a coronavirus (aka infectious bronchitis), they get many of the same clinical signs of respiratory disease, listed in the sidebar “Respiratory Red Flags” below. They may additionally have a “puffed up” appearance and be reluctant to move.

Furthermore, if hens are in lay, they’ll often have reduced egg production. The shells will look and feel wrinkled, too.

Multiple versions of infectious bronchitis virus are typically identified with names such as “Delaware,” “California variant 99” and “Arkansas type.” This reflects the slightly different genetics of each strain.

Interestingly in the world of chickens, different vaccines exist for the different serotypes of coronaviruses, which reflect these differences. (While COVID-19 has mutated like all living organisms, still one version exists with respect to its serotype.)

It will be interesting to see if eventually COVID-19 mutates enough over time to require multiple vaccine types in humans.

Chickens get infectious bronchitis following inhalation or direct contact with contaminated poultry litter equipment or fomites (nonliving material that can transmit disease). We should also note that the virus can spread between and within poultry flocks as well as by wild birds.

It’s highly contagious and has a very short incubation time. In 24 to 48 hours, infected chickens begin to show the clinical signs mentioned previously.

Care & Concern

So what do you do when your birds get sick? First, you need to confirm what your chickens have. Unfortunately, this is done via a necropsy (aka an animal autopsy).

You can work with your veterinarian or state animal diagnostic lab to get this done. In many cases, you can have this done for free or for a nominal cost. (For example, in California where I live, the cost is $20.)

Unfortunately, there are no treatments for infectious bronchitis. This is why prevention is so important.

To reduce the risk of your chickens contracting infectious bronchitis and other infectious diseases, you must practice good biosecurity. While there are vaccine options for infectious bronchitis, in general, they don’t work great for reasons beyond the scope of this article.

For this reason and many others, focus on biosecurity.

Make small incremental improvements in fencing, equipment, feed storage. In this way, you can do your part to reduce exposure.

Philosophically, don’t make “perfect the enemy of good.” In other words, do the best you can with the resources and husbandry style you have. When in doubt, reach out to your veterinarian and/or friendly cooperative extension specialist regarding any biosecurity questions you may have.

Once infected—even if part of your flock recovers—your chickens may still be carriers and hence transmit disease to naive chickens. Therefore, if your flock receives a diagnosis for infectious bronchitis, you’ll need to keep your flock quarantined for the remainder of its life.


Read more: Biosecurity will keep your chicken flock healthy.


Human vs. Poultry

Multiple global studies show that chickens and other domestic poultry aren’t susceptible to COVID-19. Transmission of coronaviruses (of which COVID-19 is one of many types) from poultry to humans or vice versa hasn’t been demonstrated.

Poultry-based foods, including eggs and poultry meat, are safe to eat. Regardless, always handle poultry products and all food with good food-safety practices.

Keep in mind that coronaviruses are respiratory viruses transmitted from person to person primarily via the respiratory route. No documented cases exist of virus transmission via an oral inoculation from a contaminated product. (Think of the virus deposited on food by an infected individual.)

This is primarily because coronaviruses are what we call “enveloped viruses.” Enveloped viruses are “wimpy” when exposed to UV sunlight, heat and disinfectants versus nonenveloped viruses, which are much more difficult to inactivate.

Note: You can’t kill a virus because most biologists don’t consider viruses to be alive or even organisms. As the French biologist and Nobel laureate André Lwoff said in 1962: “Whether or not viruses should be regarded as organisms is a matter of taste.”

Based on our historic and emerging knowledge of coronaviruses, the primary route of infection is airborne. Practice good hygiene, husbandry and biosecurity with your poultry. It’s the same in a “COVID world” as in a “non-COVID world.”

When it comes to poultry, let’s keep our “eyes on the ball.” Focus on the greater risks with respect to food safety, such as salmonella and campylobacter.


Sidebar: Respiratory Red Flags

Keep an eye on your chickens for these common signs of coronaviruses or other respiratory disease:

  • gentle rattle coming from the trachea
  • sniffling
  • snuffling
  • hawking
  • reverse sneeze
  • sometimes (although more rare) a cough or two

You also might see some irritation and inflammation around the mucus membranes of the eyes. If you think you hear something, pick up the chicken and hold its breast up against your ear. Feel or listen for any abnormal breathing such as rattling.

It’s also a great idea to do this when you don’t hear anything so you know what normal sounds like. Differentiating normal from abnormal is one of the most essential skills to acquire when diagnosing problems. It’s not hard but it does take practice and attention to detail.

This article originally appeared in the January/February 2021 issue of Chickens magazine.


Categories
Farm & Garden Farm Management

Video: Digital Tools Can Really Help With Farm Planning

For many of us, dreaming about having a farm is an exciting first step toward eventually pursuing country life. And when we finally get some land of our own—leased, bought or borrowed—it’s natural to start planning the farm out.

“Put the chicken coop here. Pigs can run here. Oh, this would make a nice cow pasture. And this area would be perfect for some hay!”

Farm planning is as fun as it is critical. But it’s important to consider your land’s natural capabilities when making plans.

As Russell Graves of Hackberry Farm (Texas) shows us in this video, though, modern, digital tools can provide deep insight into the lay of your land, soil capabilities and more. And even something as simple as Google Maps will provide new insight into your farm’s greatest potential.

So dream on—but don’t be afraid to get technical when planning for your farm property.

Want to watch more videos from Hobby Farms contributors? Check out our video page! You can also subscribe to our YouTube channel for classic videos, video stories and more!

Categories
Beginning Farmers Crops & Gardening Farm & Garden

Plant Hardiness Zones: Know Where You Grow!

The first official hardiness zone map was released by the United States Department of Agriculture (USDA) in 1960. It has been adapted to varying degrees by other countries, including Canada and Mexico.

Hardiness zones vary from 0 to 13. The range tells us what the average winter extreme low is. This relates to plant survival and the potential edible diversity for a property or farm.

Understanding the limits of what will (and won’t) grow well in an area can help a grower fine-tune production plans

Perennial Preferences

The importance of hardiness zones increases as you move up. As you go farther north in latitude or mount higher in elevation, the climates grow colder on average and will have a lower average winter extreme.

When we talk about perennial plants, we talk about those that survive the winter—plants that keep growing and adding layers of new branches each year. Some may die back partially or go dormant into the roots. But they return each year from the same tissue material (not from new seed).

Many important perennials exist for home growers, homesteads and farms. These include the notorious apple, well-loved strawberry, famed grape, fragrant lavender, early rhubarb and many more.

A big part of their survival and continued growth is that the variety is grown in a climate conducive to the plant’s health, vigor and ultimately survival.

Other factors that will influence perennial planting success include:

  • average precipitation
  • air flow and other weather phenomena
  • local soils
  • the quality of the plants you put in (whether they are infected with a disease, for instance)

Read more: As our climate changes, so will the hardiness zones. Here’s what you need to know.


Consider the Winter

However, these all pale in comparison to whether or not a plant can survive the winter. It doesn’t matter how good the soil is, or the health of the initial transplant, if the variety just cannot handle your -20 degree F winter.

Yes, healthy plants are better prepared to handle colder temperatures. But, regardless, your winter average wind temperature is the ultimate deal-breaker. It will determine what you can (and can’t) grow outside in a garden, orchard or edible ecosystem.

Hardiness zones in North America range from the very coldest zone 0a in the Arctic region of Canada to Zone 13b in Puerto Rico. (Hardiness zones go from 0 to 13, but they are also sub-grouped by a and b, with a being the colder category.)

Grade the Gradient

It is also important to see how the gradient of hardiness zones changes not just from south to north, but also in mountainous regions.

For example, where I live now in the Ottawa Valley, we have hardiness zones of 4a and 4b at a latitude of about 45 degrees north. However, we can also see hardiness zones of 4a to 5b in much of northern New Mexico, where I grew up, even though it is only at 35 degree North Latitude.

That’s because cities like Santa Fe are over 7,000 feet above sea level.

Micro-Climates

Within a region, you can usually define the hardiness zone as 4a or maybe 4b. Part of what makes the difference on your landscape scale is the micro-climate effect.

Micro-climates occur at different scales. Certainly, larger geographic features such as lakes, oceans and rivers (as well as mountains, valleys and flood plains) will influence your regional hardiness zone.

Indeed, this is why you find similar hardiness zones in Boston Massachusetts and Rochester New York (with lows around -5 to -10 F. It is considerably colder in Albany and central New York state (-10 to -20), even though they are all on a similar line of latitude.

This is why all areas north, south, east and west of the Great Lakes have milder climates than anywhere else around them. Drive away from the Great Lakes in any direction—it gets colder and the hardiness zones drop.

Michigan, squeezed between the Great Lakes, is the last state heading West with any significant landscape in zones 6a and 6b. Then you enter the great expanse of colder zones in Wisconsin, Minnesota, Wyoming and Idaho. Some respite finally shows up around Boise, Idaho, with a return to more moderate hardiness zones and easier winter survival for many perennials.


Read more: What’s a Permabed? And what does it have to do with micro-climates?


Looking Local

Yet, you can better understand micro-climates by looking at your local community and property.

Consider the differences in climate on a sunny side of a ridge versus the sheltered side of a tree windbreak. There could be the difference of a half a zone between these two examples.

On my own farm,a glacial moraine ridge runs down the center. On the sunny south side of the ridge, the land absorbs warmth during the day.

But what is more, this same sunny side of the ridge is actually a gentle plateau. It eventually and quite quickly drops down to the river in my neighbor’s property. This means that not only is the sunny southern side of my ridge warmer from its exposure to the south and its protection from the prevailing winds, but it also has great cold air drainage.

Cold air tends to settle in low-lying areas. And since my warmer sunny plateau eventually drops down to a river, the cold air that might cause a frost on early spring blossoms or kill off my fall tomatoes is more likely to settle lower down by the river and leave my trees and vegetables safe.

On this warmer side of my ridge, in the shelter of a building I have there, I can successfully grow the most tender of perennials, which otherwise would die on my farm. For instance, pawpaw trees (considered zone 5) tree would surely die on the other side of the ridge. But I can keep them growing on the sheltered and warm side.

Trying to find a new agricultural niche in your region? Building food security as homesteader? Collecting different edible plants for the garden?

Regardless, you must understand your climate, your hardiness zone and the opportunities for micro-climates!

Grow On,

Zach

Categories
Food Recipes

Start Fermenting With This Simple Onion Pickles Recipe

Through the process of fermentation, vegetables become partially broken down. This makes it easier for your body to digest, as well as making the vitamins and nutrients more readily available for your body to absorb.

Plus, fermented veggies offer beneficial bacteria called probiotics. The probiotics that are found in fermented vegetables are the same ones found naturally occurring in your gut biome.

Eating a variety of good-belly bacteria is especially important for your gut health and strengthens your immune system.

Not only are fermented vegetables good for you, but they are also delicious. They have a sour and tangy flavor that cannot be obtained any way other than through the process of fermentation.

Making your own fermented foods allows you to tailor recipes to your liking. Add more of what you like and less of what you do not. Making your own ferments is also much more affordable than buying them premade.

Here is a delicious and simple recipe for pickled onions that is perfect for a beginner. You’ll find endless ways to use up this flavor-packed condiment.


Read more: Check out these 10 tips for getting started with fermentation.


Simple Fermented Pickled Onions

These fermented onion pickles are excellent on sandwiches (especially pulled pork or burgers) or served over fish. They are great on tacos and delicious mixed into salads.

Yield: 1 quart jar

Ingredients

  • 3.5 cups red onions, (1-2 large red onions), peeled, sliced 1/4 to 1/8 inches thick
  • 1/2 tsp. whole black peppercorns
  • 2 cloves garlic, crushed
  • 1 bay leaf
  • 1 tbsp. coarse kosher salt, dissolved in 2 cups water (for the brine)

Prep all ingredients and pack them into a clean quart jar. Add the garlic and peppercorns first, then onion slices, with the bay leaf gently tucked into the side of the jar.

Mix the brine ingredients together and pour the brine over the onions until they are completely submerged. Make sure to leave 1 to 2 inches of headspace from the brine level to the rim of the jar.

If you have a small fermentation jar weight, add it to the jar to keep the ingredients completely submerged under the brine.

Add the Mason jar canning lid and ring, and tightly screw it onto the jar.

Fermentation

This is a 7-day ferment. Ferment at room temperature, ideally between 60 to 75 degrees F (15 to 23 degrees C), and keep out of direct sunlight. Check on the ferment daily to make sure the brine stays over the produce. This is a crucial step in all vegetable fermentation, as any produce above the brine level is prone to mold.

If the produce sticks above the brine, use a clean utensil to push the produce back below the brine. Burp the jar daily—unscrew the lid briefly and tighten it back on to allow any built-up gas to release (and avoid jar breakage).

After one week, taste test the onion pickles and determine if the flavor is ideal. If so, transfer the jar into the refrigerator, with brine and all.

If the onions still taste too raw, allow them to ferment on the counter another day or two. This ferment will last nearly indefinitely, though the texture and flavors continue to change. Fermentation does not stop once refrigerated—it just slows way down.


Read more: Fall in love with garden-grown bunching onions!


A Few Side Notes

If you do not have a glass jar weight, you can improvise by using an easily removable small glass dish that fits inside the jar. Or, if you have a smaller glass jar that can fit into the mouth of the jar you are fermenting with, you can fill it with water, add a lid and use it to keep the onion slices submerged under the brine.

Just don’t submerge the entire jar within the ferment. You don’t want the brine to touch the metal ring.

If you are unsure if your water is safe for fermentation, you can boil it and allow it to cool to room temperature before adding in the salt to make your brine.

You may use fine sea salt instead of coarse kosher salt if you prefer. Just adjust the onion pickles recipe to 1 1/4 tbsp. fine sea salt.

This recipe has been adapted from WECK Small-Batch Preserving (2018) with permission from Skyhorse Publishing, Inc.

Categories
Animals

Goats Become Magical Healers At Sugar Sweet Farm

Elizabeth Sugarman has been a hobby farmer for 16 years. These days, she runs Sugar Sweet Farm in Encinitas, California. There, goat yoga classes perk up her daily farming duties.

“The goats are pure joy. I am constantly in conversation with them as I work around the farm,” says Sugarman. “They always want to be right in my business! They are spontaneous, kind, curious and affectionate and can instantly put a smile on your face.

“Goats are absolutely magical healers.”

Taking time out from tending to her goats, we spoke to Sugarman about the roots of her hobby farming adventure and the benefits of goat yoga. We also got the scoop on dressing up goats in fancy outfits.

Creating a Magical Childhood Environment

Sugarman pinpoints her decision to embrace the hobby farming lifestyle back to the day she left her law practice to become a full-time mother.

“I wanted to create a magical childhood environment where my children and I would work and learn together doing real, purposeful work with our hands,” she reflects. “Our little farm became our living classroom. And our daily lessons provided instruction in compassion, empathy, problem solving, self discipline and independence along with an infinite amount of practical skills, far beyond what most children enjoy.”

Sugarman’s children are now in college. But they still return home to help out on the farm from time to time.


Read more: Goat yoga is just one of many great reasons to keep goats!


Raising Oberhasli Goats

Goats are an integral part of Sugar Sweet Farm. And it turns out Sugarman’s daughter, Sissy, was a factor in the decision to focus on ruminants.

“Sissy wanted to raise dairy goats,” recalls Sugarman. “I gave her two Oberhasli goats for her tenth birthday. She bred, raised and showed them until she left for college this past year.

“Oberhaslis are an endangered breed of dairy goat from Switzerland,” Sugarman adds. “Sissy’s first goat, Heidi, is still the matriarch of our herd. All of her daughters and granddaughters join us for goat yoga class while Heidi stays behind in the barnyard.

“Even though we’ve had sold out classes for three years here at Sugar Sweet Farm, we still can’t convince Heidi that goat yoga is a thing.”

The Magic of Goat Yoga

Speaking of goat yoga, Sugarman characterizes the sessions at Sugar Sweet Farm as being an “animal lover’s nirvana.” She adds that the whole herd of gentle goats, plus three llamas, all like to take part and “mill about the classroom and everyone smiles and laughs.”

Sugarman says that there’s also a healing element to the goat yoga classes that comes from “connecting with a baby goat or a goat that comes and cuddles up on your yoga mat, choosing your energy to share.”

She adds, “Guests leave here often remarking this was the best day of their lives. And I feel so privileged to be a part of that.”


Read more: Want more stories delivered to your inbox? Sign up for our newsletters today!


Spotlight on Baby Zeus

One of the biggest personalities at Sugar Sweet Farm is a goat named Baby Zeus that Sugarman describes as being “pure love.” She says he’s “an exceptionally gifted jumper with advanced balancing and agility skills” but is also happy to turn into “a cuddly marshmallow in an instant.”

Sugarman adds that Zeus “loves giving sweet kisses” and that “you can get absolutely lost in his gorgeous eyes when he comes in for a close-up—goat kisses are the best!”

Dress You up in Goat Love

If you dig into the Sugar Sweet Farm’s Instagram account, you’ll notice a number of pictures starring goats dressed up in dapper outfits. Sugarman says that her team is always conscious about “keeping all of our animal interactions positive for the animals” and makes sure that none of the clothing ever inhibits a goat’s movement.

“We deftly slip on bandanas as the goats nibble treats so it just feels like it’s part of a cuddle session,” she explains. “There are a few wethers with big personalities who really enjoy sporting a complicated costume and showing off, while most of the does find costumes beyond a scarf annoying.

“Our team is so sensitive to each goats’ personality that they just follow their lead on how much fashion fuss they’ll tolerate.”

Follow Sugar Sweet Farm at Instagram.