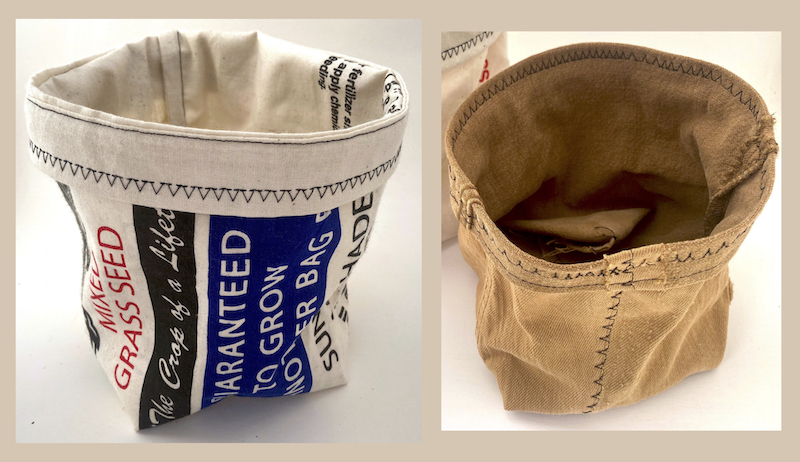
With an avalanche of seed catalogs on the way, you may be itching to get back to the garden. But, if it’s still too cold where you live, why not whip up some planting containers for the coming spring?
Made of heavy cloth like canvas, denim or felt, fabric pots hold their own just as well as plastic or clay pots. And when it comes to storage, they’re much more compact.
You can even throw them in the washing machine or sanitize in a bucket of bleach solution between growing seasons.
Other Benefits
Fabric pots benefit the plants they contain in some specific ways, too. For instance, once your plants are well-established, you can plant them—fabric pot and all—directly in your garden bed. In time, plant roots will grow through natural fabrics like cotton and into the soil.
This is particularly helpful for plants with long tap roots and those that don’t tolerate transplanting well.
Of course, you can always keep your fabric pots above ground to use again and again. You just might notice that plants growing in fabric pots fare better than those growing in plastic or even clay. Because oxygen can penetrate the walls of cloth pots, plant root systems are “air pruned.”
As a result, rather than becoming root-bound, plant roots exhibit healthy, branching growth.
Cloth pots also work well for indoor plants, and they can make attractive additions to your décor. Furthermore, when you make your own, you can tailor their size and shape for specific houseplants.
To make a cloth pot that’s about five inches tall and four or five inches wide, you’ll need a 10-by-15-inch scrap of fabric that’s fairly stiff. Think heavy denim, canvas, landscape fabric, or felt. (I’ve even made collapsible pots from woven plastic chicken feed and birdseed bags. Just keep in mind that these don’t allow for air pruning like their fabric counterparts do.)
You’ll also need a measuring tape, scissors, marker, iron, and a sewing machine fitted with a heavy-gauge needle and heavy-duty thread. (I use a #14 gauge needle and upholstery thread.)
Step by Step
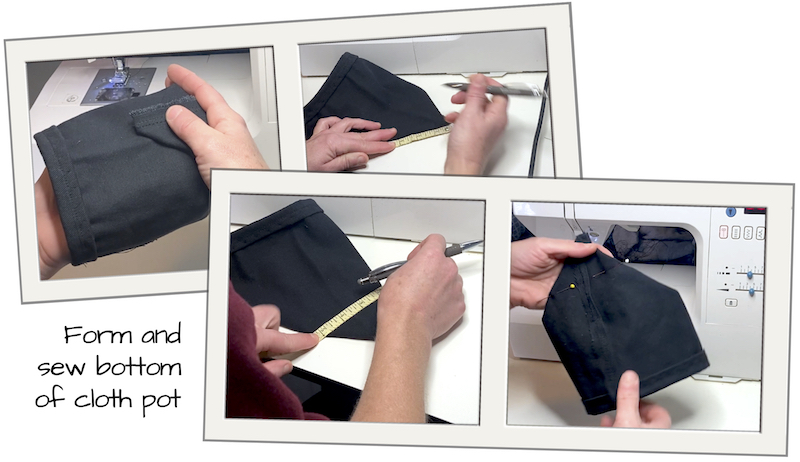
So that the top of your pot has a nice, finished edge, make a quarter-inch fold along one of the long edges. Iron flat or pin and then straight-stitch. Fold over once more, iron or pin, and then zig-zag stitch across.
Next, lay out cloth so that the finished edge you just made is pointed up and the wrong side of the fabric faces away from you. (You’ll be sewing on the wrong side of the fabric and, eventually, you’ll turn the whole thing inside-out, so that the fabric’s right-side shows.) Fold fabric in half, so that its right sides touch one another. Pin and straight-stitch a seam along the edge. At this point, you should have a fabric tube. Iron open the seam you just sewed and then zig-zag stitch to strengthen the opened seam.
Now, straight-stitch across what will be the bottom of the pot. To strengthen this area, go back over it with a zig-zag stitch. To finish forming the bottom of the pot, pinch one corner of this new bottom seam between your thumb and index finger and fold it up toward the lip of the pot.
(The tip of the corner should line up with the center of the side of your fabric pots. See below.)
Susan Brackney
During this step, experiment with the amount of material that you pull upward, as this will determine your pot’s depth. For my part, I measured up three inches from the tip of the corner along both the right and left diagonal edges and marked these points accordingly. Then, I connected these points with a straight line, pinned the area, and straight-stitched across.
You’ll follow a similar process for both of your corners. And, as you sew across each corner, make sure the seam at the bottom of your pot is folded in the same direction. To add stiffness, reinforce corners with a zig-zag stitch.
Susan Brackney
Finishing Touches
For the last step, turn your pot inside-out, so that the right side of the cloth faces out. Use your fingers to poke along the bottom edges of the pot. Its base will be slightly squared, and you may have to manipulate it a bit to get it to stand up straight.
Susan Brackney
Finally, fold the top edge of the pot down once or twice to add a decorative touch and extra structure to your container. Come planting time, you can use these fabric pots just as you would plastic or clay.
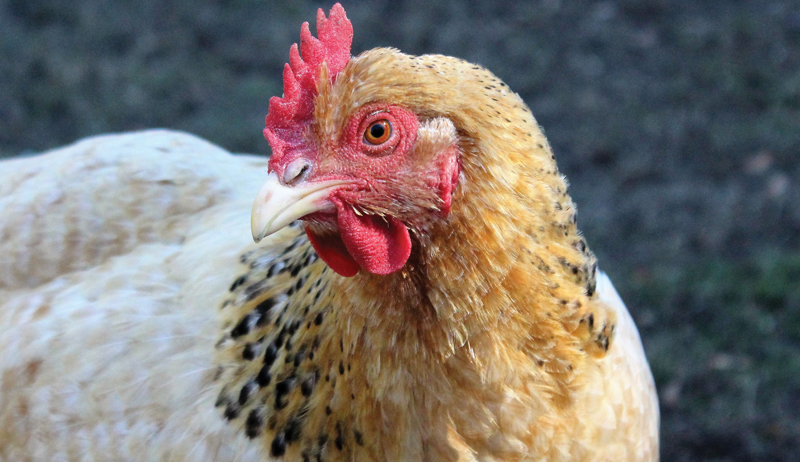
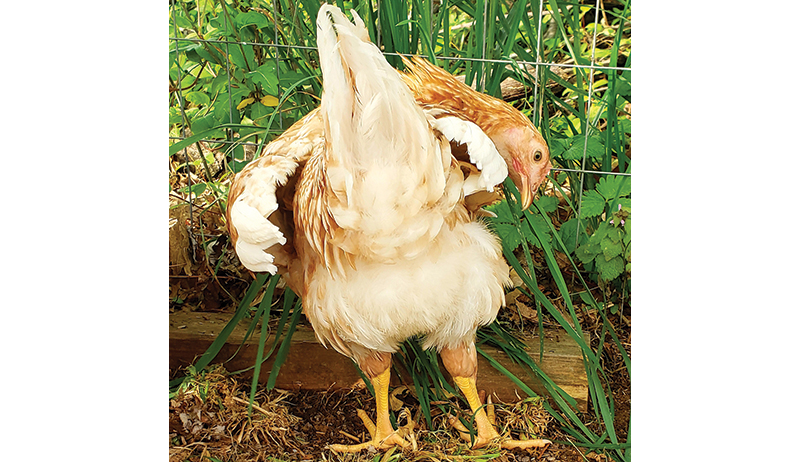
Many people have heard about the benefits of therapy dogs, cats and even horses, but what about chickens? Can this common backyard animal bring comfort to people?
Wholeheartedly, I believe they can!
Chickens are able to feel a range of emotions, whether it be their own or that of the flock around them. They are extremely intelligent animals, each created with their own distinct personality.
Chickens are able to feel positive and negative emotions and can act according to how they feel.
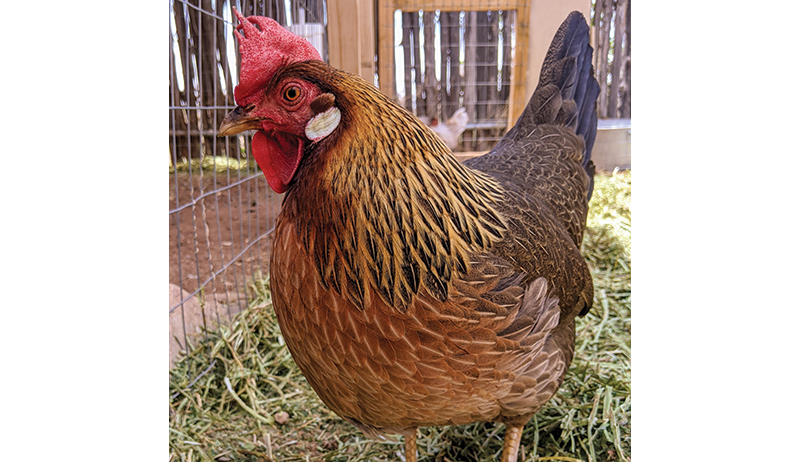
Chickens have complex negative and positive emotions, as well as a shared psychology with humans and other ethologically complex animals. They exhibit emotional contagion and some evidence for empathy.
Chickens have distinct personalities, just like all animals who are cognitively, emotionally and behaviorally complex individuals.
Many chicken owners know that when their chickens are feeling sad or lonely, it can affect their personality. I myself have borne the brunt of a rooster’s cold shoulder upon returning from a holiday away from the flock!
Because they are very social creatures, being in a flock is extremely beneficial for chickens. If they aren’t able to experience that connection with other chickens, they can become extremely lonely and stressed.
Their caretakers can also offer companionship to them.
When my rooster Otie passed away, for example, my hen Rosie was the last member of the flock left. Before I was able to get more chicks to keep her company, I sat with her in the coop every day for at least an hour. I
would talk about my day, and she would give quiet coos or clucks to let me know she was listening. Sometimes I would even bring her into the house to sneak some treats.
So if people can give companionship and comfort to chickens, why can’t chickens give that to people? The relationship between the caretaker and the flock is a special one indeed.
As chickens are social, they love to be around other people, especially those that care for them! Your arrival at the coop will always be met with much fanfare.
Whether you visit once or 10 times a day, your birds will excitedly flap their wings and run to welcome you back! This brings great joy as well as a sense of comfort and belonging.
Chickens are wonderful companions, which translates to great therapy animals! People who struggle with loneliness, anxiety, stress or depression would benefit richly from the addition of a small backyard flock.
Feeling Funny
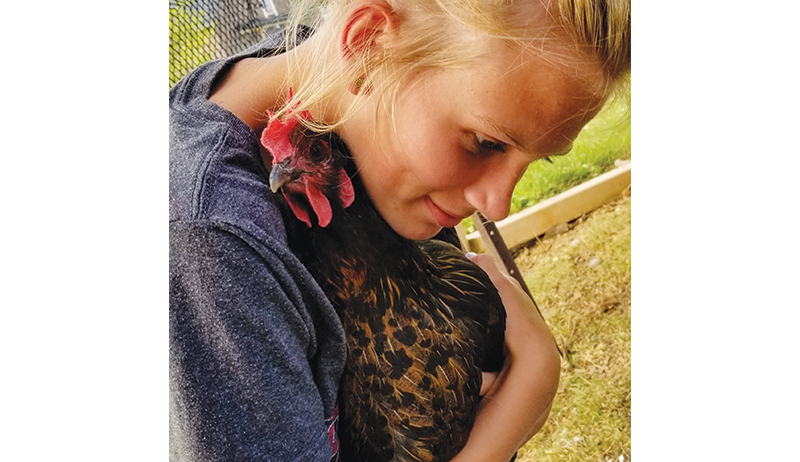
Chickens are also extremely empathetic. By tuning in to the emotions of their caretaker, they can adjust their own behaviors to give comfort.
For example, if my hen Rosie senses that I am stressed or upset, she will cuddle with me on my lap, instead of playing outside with the rest of the flock. When she knows I am more at ease and settled, she will nuzzle into my neck one last time before hopping off my lap.
Humor also plays a role in healing. And a chicken is just the animal to fit the bill!
A flock of hens will provide you with endless hours of laughter and entertainment. From the ritual of a dust bath to pecking wildly at treats and watching them chase crickets, I can promise that your mood will be lightened!
It’s easy to spend hours just watching them go about their day and learning their habits. Their different noises, such as clucks and crows, can offer entertainment as well.
One of my favorite sounds is my rooster’s morning crow, and his afternoon crow as soon as I come home from school.
Having backyard chickens can also offer a sense of routine and calmness. Going out to take care of the chickens two or three times a day can give the day structure and provides a great reason to maintain responsibility for something.
Seeing my chickens in the morning before school gives me a great start to the day, as seeing all their faces brings much joy.
There are many benefits of having chickens as therapy animals. From their nurturing nature to their social personalities, it’s easy to see why chickens are a good choice for those struggling with loneliness, anxiety or depression.
I have personally experienced and benefited from the therapeutic nature of chickens.
So if you’re on the fence about getting chickens (or know someone who is), there are day-old chicks peeping and chirping, just waiting to add peace and comfort therapy to your days!
This article originally appeared in the May/June 2020 issue of Chickens magazine. The author, A.A., is a 17-year-old student currently attending a Christian high school in Canada. She looks forward to graduating and beginning her studies in Child Health at a university next fall. She enjoys spending time with her family and friends and has been raising and loving chickens for many years. A.A. has recently added three alpacas into the mix!
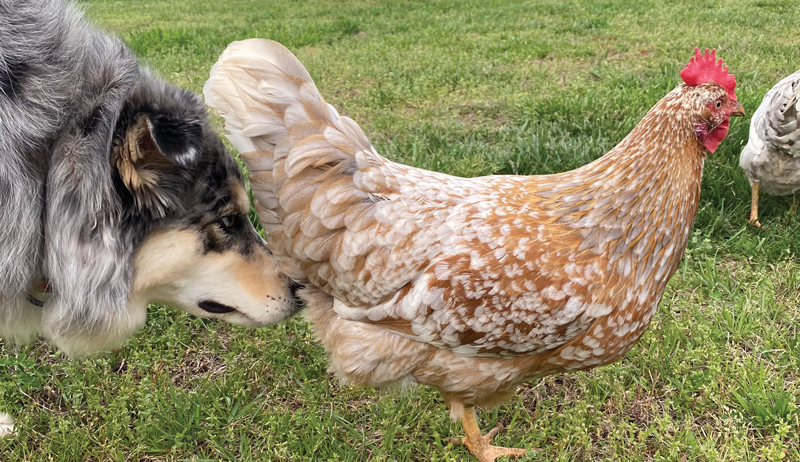
In the photo above, straight from the pages of Chickens magazine, we see a dog saying “Hello” as only a dog can do! (Or maybe, like so many of us chicken-keepers in winter, this curious pooch is wondering what happened to all those beautiful eggs.)
Runners Up
Though the sniffy pooch took the prize for this contest (see more below for prize information, as well as how you can enter), we received numerous Shutterclucks entries this month. And they were all great!
Here are the runners up for the November/December 2020 photo contest.
Email us an image of your chicken(s) to chickens@chickensmagazine.com with the subject line Shutterclucks, and include your name and mailing address.
We’ll send one winner a ChickSafe Eco Coop Opener, from Brinsea, which automatically opens your coop door in the morning and closes it at night. With just one moving part, no mechanical switches and no calibration required, it’s designed for ease of use, long life and weather resistance, making it the tough, convenient and low-cost solution to keeping your hens safe from predators at night.
No Purchase Necessary to Enter
The Shutterclucks contest is open to legal residents of the 50 United States or District of Columbia, age 21 or older. Entries must be received between 12:00:01 a.m. PT on 10/25/2020 and 11:59:59 p.m. PT on 12/25/2020.
See further rules in the November/December 2020 issue of Hobby Farms magazine. Void where prohibited by law.
Sponsor: EG Media Investments LLC
This article originally appeared in the November/December 2020 issue of Chickens magazine.
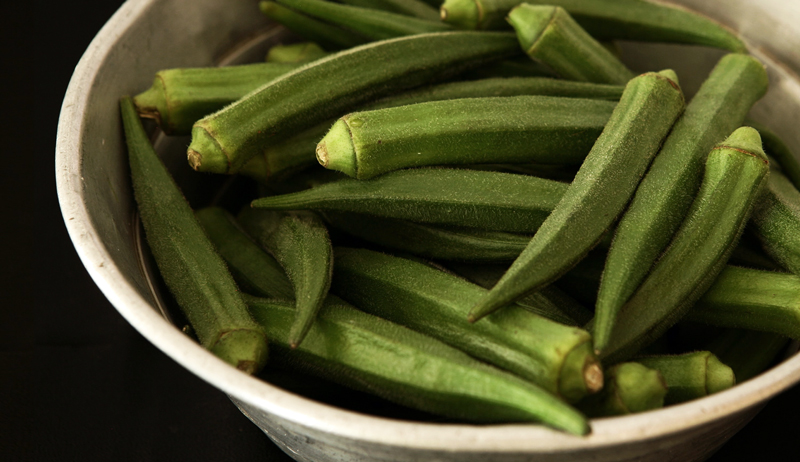
In 2006, at the tender age of 26 (not yet woody), I experienced okra for the first time. I was at a roadside greasy spoon somewhere east of Clayton, Georgia. It was my first time in the United States, visiting an old friend, Snowy, from Wales. Snowy had been living and working in Greenville, South Carolina, for about five years. Practically a local, he pushed a bowl of fried okra toward me.
“It’s a southern delicacy,” he said. Smiling.
Snowy was having a joke. The grease from the okra saturated the greaseproof paper. The little round lumps looked like sections of wooden dowel, rolled in sawdust and deep-fried. The way Snowy was stifling a laugh; the way he wouldn’t take the first bite . . .
Okra was not being taken seriously.
It was slimy, greasy and tasteless and only good for playing tricks on tourists. I didn’t understand the slime at all. Undercooked egg whites, perhaps. Slug slime or the saliva from the mouth of an alien. The grease I knew well from back home. This was grease that had been used over and over. This was fast-food grease, cheap and nasty. And the taste? I remember none.
That was my first experience with okra, and I understand why some people never give it a second chance. Some people never give it a first one, such is its reputation. I can’t tell you how many people responded to the knowledge that I was writing a book on okra with, “Yuck! Okra,” or “Ewww, slimy.” In an episode of Good Eats dubbed “Okraphobia,” celebrity chef Alton Brown said, “If you don’t find a way to push past this slime business, you’re going to regret it.”
You are going to regret it! Not embracing okra because it’s slimy is like not visiting the Alps because you’re scared of heights. You’re missing out on so much because of one small, manageable aversion.
A Second First Impression
In 2012, six years after my first encounter, I experienced okra for the second time. I was back in the U.S., this time engaged to Belle Crawford. Yes, it is true. I married someone from South Carolina called Belle, which technically makes okra the second southern thing I fell in love with. Belle’s family is from a long line of southerners, but they are inclined to break with southern social conventions from time to time. That’s how I found myself invited (obligated) to Belle’s bridal shower, helping her take part in the awkward ritual of receiving and opening presents in front of a crowd of women I didn’t really know.
One present bestowed on us that day changed my life. The gifter was Linda Lee, an old school friend of Belle’s who worked as a botanist in Georgia. The gift was a shoebox full of Indian-inspired spices. Being from England, where the national dish is chicken tikka masala, and having traveled to India, I found the spices exciting enough. But hidden within that shoebox was an enigma: a single, dried okra pod.
India is the leading producer of okra, where it is called bhindi and eaten widely. So there is a chance I may have eaten okra, hidden in the depths of a curry, sometime in my past and unknowingly. But it was at the wedding shower that I really acknowledged the existence of okra for the first time. Linda explained that the pod, which was filled with okra seed, had come from seed she had bought and grown from a roadside farm stand in Rosman, North Carolina. The okra had been grown by the farmer’s family and saved by the farmer’s family, and I now owned a piece of that heritage. This little pod weighed heavy with responsibility and possibility; it was a new feeling. This was before I started working for Sow True Seed, a small seed company in Asheville. Before I had a garden to call my own. Those okra seeds had a history and, if I chose, a future. This was nothing like the throwaway ooze from Clayton, Georgia. This was serious. I was compelled to grow it, and so I did.
I now remember my wedding anniversary by how many years I’ve been growing that okra (six years); I decided to call it Rosman Wedding. That single pod inspired me to dive deep into the world of okra, perhaps deeper than any British person has ever gone. I admit I am an unlikely champion of okra. Garden writer and humorist Felder Rushing has begun calling me the Okra King of America; it’s a funny joke, but I don’t lay claim to that title. Nor do I take the enormity of okra’s history, or its presence in America, lightly.
In West Africa, where okra is widely grown, where people were stolen and enslaved, the Akan people have a concept of a three-part destiny: okra, mogya and sunsum. One’s okra is somewhat similar to one’s soul, and among the Akan it is believed that a person’s okra receives their destiny at birth, along with certain attributes to aid in that destiny. 1
It seems that my okra was destined to write a book on okra, and that all the events of my life have led me to this point. As a white British guy, I am fully aware that okra is not a part of my culture or heritage. I have, however, fallen in love with okra and have tried to approach my book with integrity, and a deep appreciation of people and food. While okra is grown and enjoyed around the globe, my experiences with it are in the American South, and so I must always remember and honor all the terrible things that happened to allow okra’s presence and my eventual connection with it. I must remember and honor the incredible influence of African Americans on our food culture, and okra is just a small part of it.
I am not King Okra; I am okra’s humble servant, and as the stars align, I find myself stumbling upon discovery after discovery, story after story, variety after variety, use after use, of this completely amazing crop called okra, gumbo, bhindi, lady’s fingers and ochro. But still, I sometimes wonder why am I so excited about okra when the average response is closer to Stephen King’s, “Nooo, I don’t want okra. No okra. No.” 2
I know there are a lot of other okra fans, fanatics even, out there. And for many okra is ingrained as part of their history and culture. The first time I gave a presentation titled “In Defense of Okra,” the random outbursts of okra enthusiasm from the audience surprised, distracted and delighted me. This book is for all those fans, to vindicate your joy in okra and inspire you to take it to the next level. But this book is also for okra doubters and haters; in many ways this book is written in defense of okra. Chef Virginia Willis tells us, “Folks love okra or they hate it. No one — veritably no one — is in the middle.”
References
1 Molefi Kete Asante and Ama Mazama, eds., Encyclopedia of African Religion (Thousand Oaks, CA: Sage Publications, 2008). 2 Roy Blount Jr., “Mad About Okra,” Garden & Gun, October — November 2012.
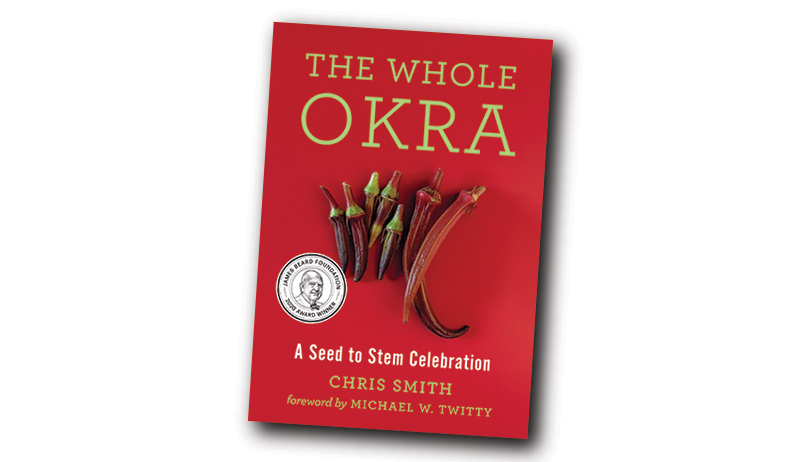
This excerpt originally appeared in the November/December 2020 issue of Hobby Farms magazine. Chris Smith is the executive director of The Utopian Seed Project and the James Beard Award-winning author of The Whole Okra: A Seed to Stem Celebration (Chelsea Green Publishing, 2019). Follow him on Instagram @blueandyellowmakes.
Wheelbarrows rank among the most useful, yet underrated pieces of equipment on a productive hobby farm. They’re not as flashy as tractors or ATVs, but they get a lot of mileage because they’re easy to use and convenient for shifting supplies and materials around the farm.
Dirt, rocks, manure—you name it, and wheelbarrows probably carry it.
Whether your wheelbarrow has one wheel or two (and there are pros and cons to each design), simplicity is a big selling point. Wheelbarrows run on the power of your muscles, so there’s no need to fuss with annual engine maintenance. Plus, they’re small enough (and light enough) to access places that tractors and trailers can’t reach.
Wheelbarrows are particularly useful for gardening and can be put to use in a wide variety of garden-related tasks. Here are just six of the many gardening tasks wheelbarrows can accomplish.
I keep many of my garden tools under cover (inside a garage or shed) so they won’t get rusty from sitting out in the elements.
If you’ve got a big day of prepping or planting ahead, it’s helpful to gather up all your tools, toss them in the wheelbarrow, and wheel them out to the garden all at once. It saves a lot of trips!
Moving Compost
Good soil is one of the secrets to a productive garden. And compost is often the secret to good soil.
Buying compost from an outside provider? Producing it on your own farm? Either way, a wheelbarrow is a convenient way to move the compost to your garden and dump it straight into your garden beds.
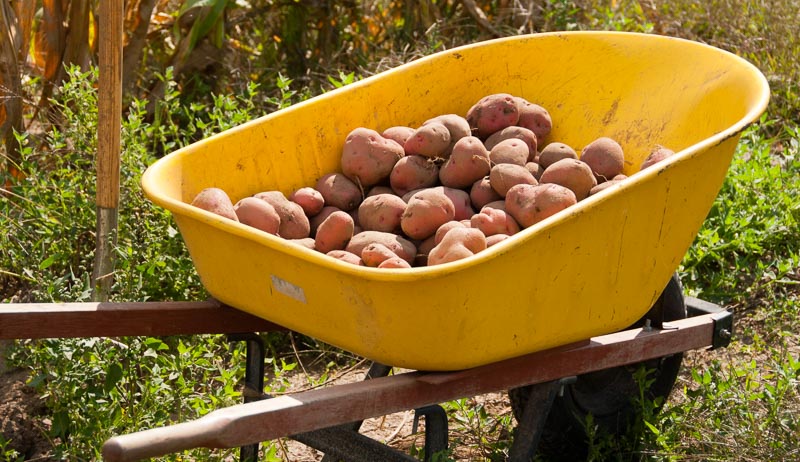
Harvesting crops
When harvesting certain crops (potatoes, onions, etc.), a wheelbarrow comes in handy.
You can maneuver the wheelbarrow into the garden and harvest directly into the bucket. Then, you just wheel the harvest back to your house/root cellar/etc. for storing or processing.
A worn-out wheelbarrow with a broken handle or cracked bucket can be repurposed as a portable garden planter! Drill a few holes in the bottom of the bucket for drainage, then fill it with dirt and plant a pretty collection of flowers.
Your attractive planter-on-wheels will be easy to move around the yard if you want to shake things up.
Gathering Mulch
Are you in need of mulch to surround a young fruit tree? Never fear!
Whether you’re stealing a bit of gravel from your driveway or gathering leaves/grass clippings from your yard, a wheelbarrow is perfect for gathering the mulch materials and transporting them exactly where you need them.
We’ve all seen how quickly wheelbarrows can fill with water during a heavy rainstorm. So why not take advantage?
It’s not hard to reroute the downspout of a gutter to direct rainwater off the roof of a building directly into a wheelbarrow, turning it into a portable rain barrel. A large wheelbarrow can hold dozens of gallons of water, which can then be used for watering your garden during dry spells.
How do you put wheelbarrows to use in your garden?
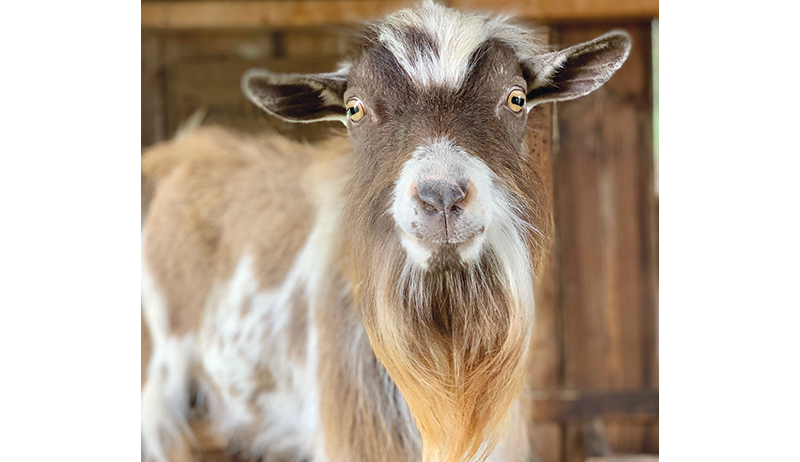
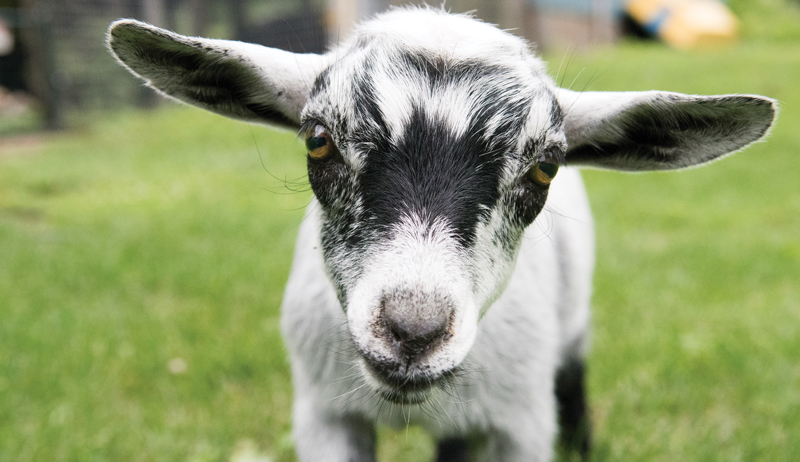
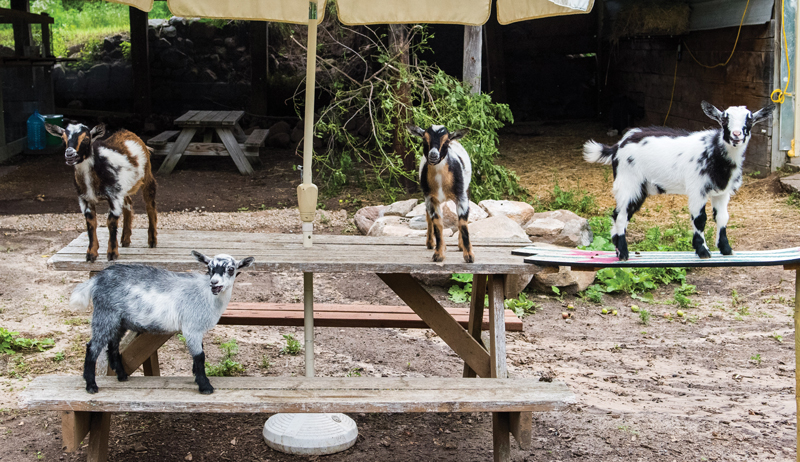
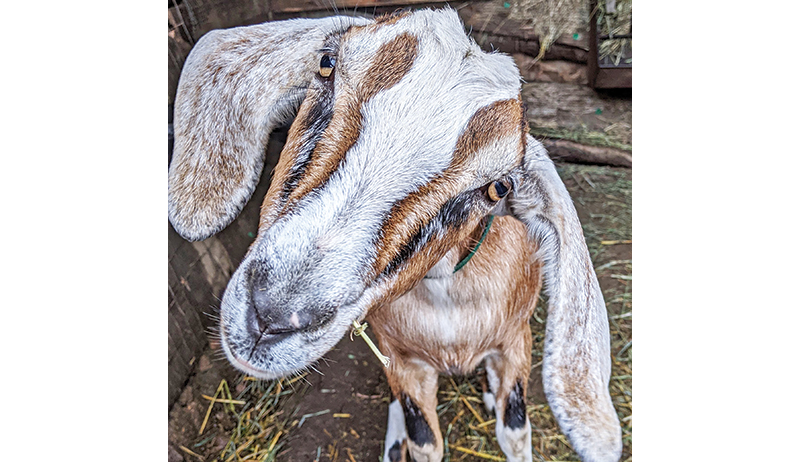
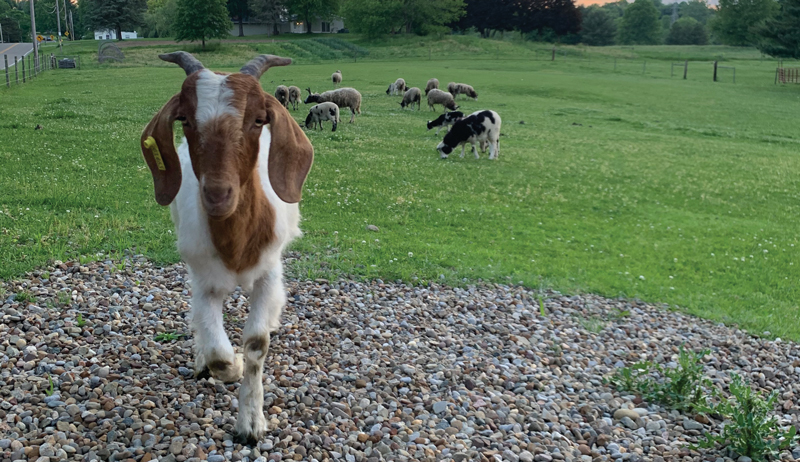
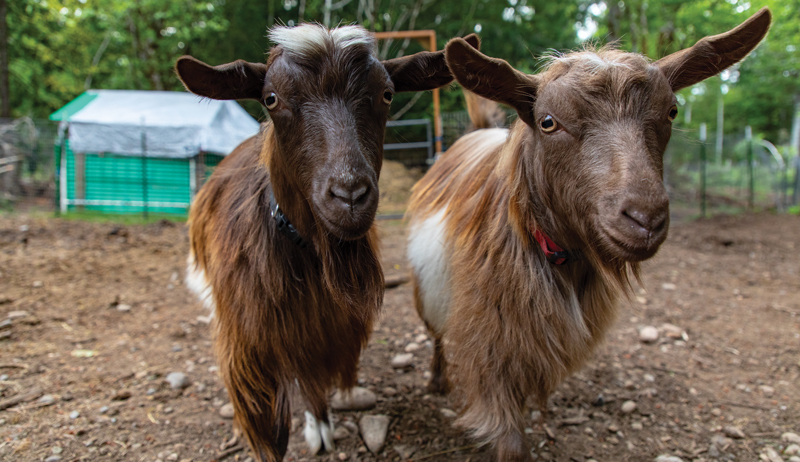
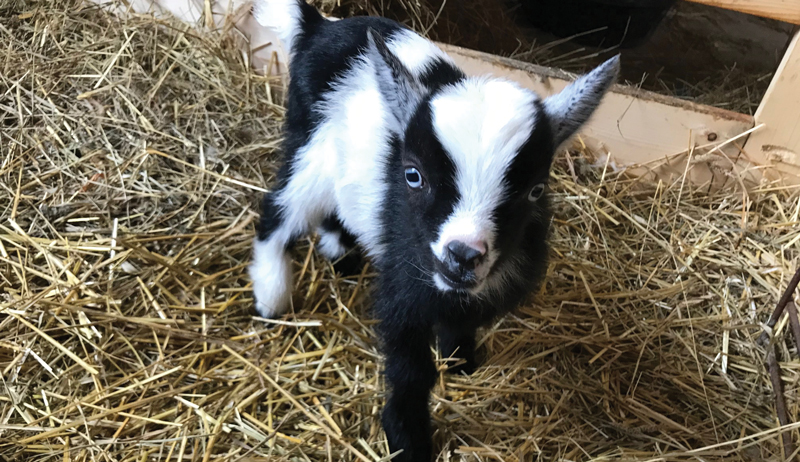
Last year, we asked folks to send in pictures of their caprine pals for Hobby Farms magazine’s 2020 I Love My Goat photo contest.
Readers herded photos into our inbox in droves. We gleefully grazed though the pictures of smiling kids, dams and boars to choose the most delightful ruminants in the open pastures of our inboxes.
And, boy, did we like what we saw! We loved your I Love My Goat submissions, which ran in the November/December 2020 issue of the print magazine. (You can pick up your copy here, if you missed it.)
Scroll down to check out the winner of the I Love My Goat contest, as well as additional submissions that got our goat!
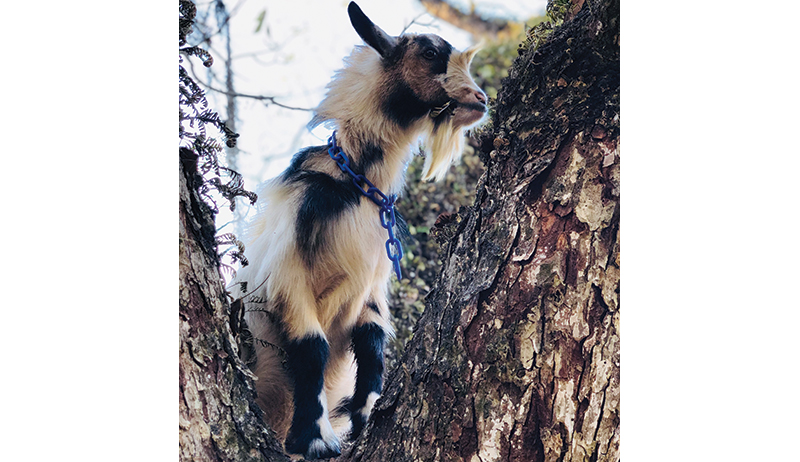
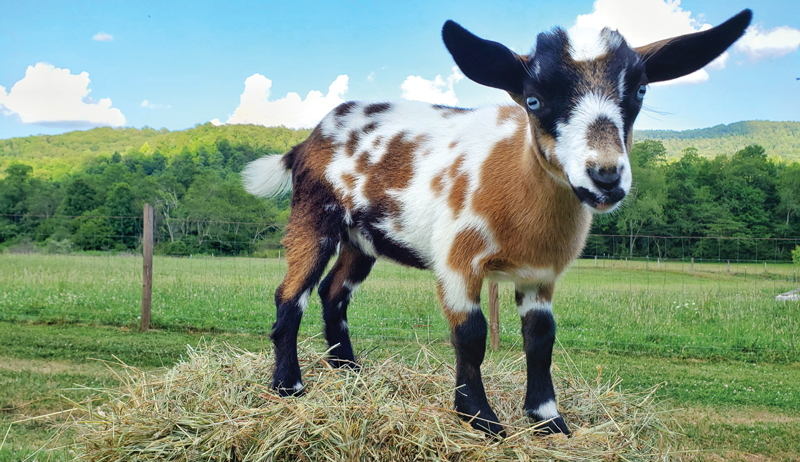
The Winner
The winning photographer, Jami Speiser from Mark Center, Ohio, will receive a copy of Goats 101 and a $150 gift card from Caprine Supply (800-646-7736;), “The World Leader in Goat Equipment and Supplies.”
Check out equipment, supplies and other products for goats, cows, sheep, llamas and other livestock. They have in-stock products for kidding, animal health, milking (including a full line of milking machines), grooming, cheesemaking and soapmaking, gift items, products for working and fiber goats, and books for breeders, homesteaders and hobbyists.
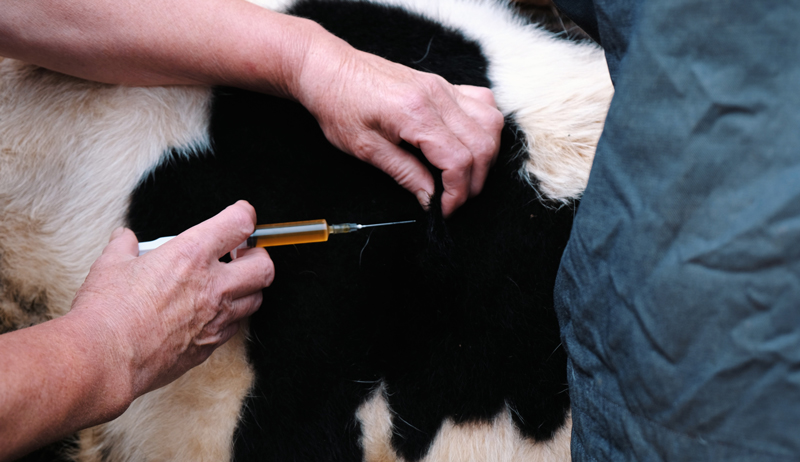
This is the first of a three-part series covering basic safety tips for administering common medications to your livestock. This month we’ll cover injectable products.
Those new to hobby farming might be surprised to learn that there are in fact many different injectable products you can give your animals without a veterinarian. A few injectable products available over the counter at your local feed store include:
Vaccines (like tetanus)
Antibiotics (like penicillin)
Some vitamin/mineral supplements
This accessibility is ideal for short-term and simple health issues. But the first step in making sure a drug works to the best of its ability is to ensure that it is administered properly.
Proper Storage
First, let’s consider proper drug storage.
Many injectable products require refrigeration between uses; some also need protection from light. Check the label for exact storage requirements and expiration date.
You can rely on the general rule of thumb that any vaccine needs refrigeration. This goes for penicillin, too.
A mini-fridge is a great asset in the barn for this purpose, but make sure it’s in good working order. Discard any injectable drug that becomes accidentally frozen.
Administration
Now let’s talk about “giving a shot.”
There are two primary routes of administration for likely animal injections:
under the skin (subcutaneously, or sometimes “SQ” or “SC” for shorthand)
within the muscle (intramuscularly, or “IM”)
You absolutely need to know the required route for a product you plan to give. With some drugs, incorrect administration may result in severe tissue damage and/or abscess formation and infection. The correct method of administration will be on the label.
If you’re unsure, always check with your veterinarian.
Next, what about needle size? In general, the larger the animal, the thicker the skin and the larger bore needle you will need. This is called the needle’s gauge, sometimes abbreviated “G”. The smaller the bore, the larger the gauge number.
A 25 gauge needle is very fine and used for kittens and puppies. A 16 gauge needle, however, is much larger and suitable for large steers and cows. 18 gauge needles are commonly used for calves and small ruminants.
Needles come in different lengths as well.
And what about syringes? I recommend purchasing specific “Luer-lock” syringes. These syringes screw into the hub of the needle instead of just popping on. The secure lock of the screw ensures that the needle doesn’t “jump” off the syringe when you try to inject a particularly thick liquid or inject something quickly.
Luer-lock syringes cost a bit more than normal syringes but are worth it. They can prevent potential drug wastage and mis-dosing, as well as prevent caustic products from getting splashed backward into your face and eyes.
Location, Location
Injection location is also very important. For cattle, most injections are recommended in the side of the neck, but for swine, behind the ear is the best place.
On animals that will eventually go to slaughter, injection location is especially important, as you never want to inject a substance in a large piece of muscle destined for human consumption. Damage to this tissue can lead to condemnation and considerable edible tissue loss at slaughter.
Make a practice of not sharing needles between animals (often done for cost purposes). Sharing a dulled needle already used to poke through thick and sometimes dirty skin can easily cause abscesses or other tissue reactions. Farmers who use clean, sterile needles for each animal and appropriate size and administration methods see far fewer abscesses and tissue reactions that those who do not practice good aseptic technique.
Injecting into clean, dry hides is best practice, too.
Stay Safe!
Lastly, what about your own safety? Some hobby farmers are simply uncomfortable giving shots. They prefer a veterinarian or other experienced individual do so instead, which is perfectly fine.
However, if you gain experience and grow comfortable in your technique, you should also consider that needles on the farm present a health hazard to you and anyone else. If you use injectable products on the farm, always keep a needle-proof container to place used needles. You can use a specific container from a medical supply store or, more cheaply, a thick plastic or metal container with a screw-on lid. Once full, cap it tightly and dispose of it.
Keep all unused needles and syringes in a dry, clean location. Keep drugs according to their label conditions and stay aware of expiration dates.
Some drugs also have limits on the number of needle punctures the stopper can withstand. These products have a place on the label to mark how many punctures have occurred.
A calculator at the barn is also handy for calculating doses. Same regarding a quick reference chart for those pesky conversions between pounds and kilograms.
With these tips you can make giving injections safer (and less painful) for your animals. Next month: oral and topical medication safety.
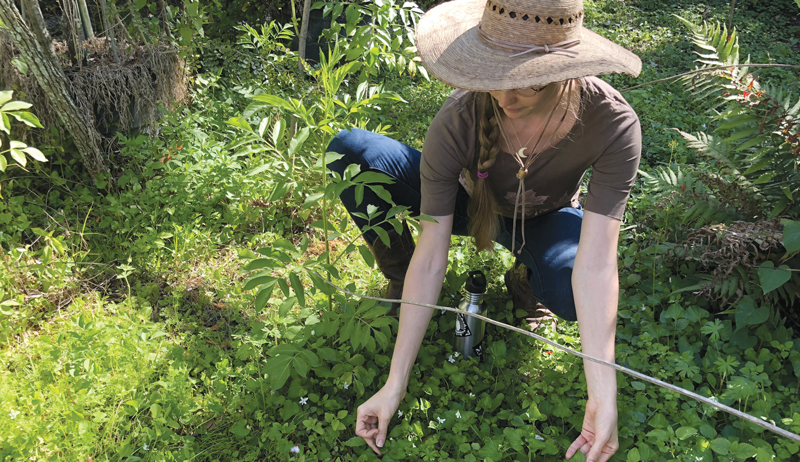
Herbs have always been in Caitlin McMullen’s life. The Sarasota, Florida, community herbalist says that when she was a child, her parents would make chamomile and peppermint tea. It wasn’t until college, though, that she would use herbs to care for herself.
“I started to learn more about herbs and how we can work with them daily to support health,” she says. “For years, this mostly meant working with dried herbs for tea. It wasn’t until later that I began working with fresh herbs, wild herbs and different preparations.”
McMullen spent much of her childhood playing outside, often in wild spaces. Herbalism has continued to return her to that place of connection and presence with her environment in a poignant and profoundly fulfilling way.
She explains that in our globalized economy, herbs don’t have to be used seasonally. And some herbs are useful throughout the year.
“If you think about how we tend to want warm, cooked food like soups and well-cooked vegetables during the winter and cool, light foods like salads and fresh fruit during the summer, we can see how our needs shift seasonally,” she says.
Winter weather may warrant warming, spicy, pungent herbs such as ginger, garlic, rosemary and horseradish. In the summer, we favor cooling herbs such as iced hibiscus or peppermint teas.
Tea Time
One of McMullen’s favorite things in the winter is a variety of spiced tea with bitter roots.
“I decoct, or simmer, herbs like dandelion root, burdock root, cinnamon and reishi mushroom together,” she says. “Sometimes I just enjoy it like this, and sometimes add a bit of honey or maple syrup and milk to make an especially comforting hot tea for supporting digestion and liver health, both of which can get a little sluggish in the winter when we’re not getting as much fresh produce in our diets.”
In the summer, she prefers simple iced teas of hibiscus, peppermint or pine needles. “These are all yummy and fresh-tasting, all deliver vitamins and minerals and help us to stay hydrated,” she says.
According to McMullen, there is a huge body of evidence for the efficacy of herbal remedies.
“Some folks like to rely more on traditional knowledge. And there is some wisdom to this, since humans have found ways to keep themselves healthy and address illness and imbalance in the body for the entire history of humanity,” she says, adding that the modern scientific community is catching up to some of this traditional knowledge, with countless studies proving the efficacy of different plants to address disease.
“Many of our pharmaceuticals come from isolating and sometimes altering compounds found in plants,” she says. “Sometimes, herbs take a long period of consistent use before a person can feel that they are having a beneficial effect on them.
“But sometimes, you can feel the effect instantly. If you’ve ever eaten too much hot sauce or wasabi, you know how they work. Hot peppers make you feel hot and sweaty by moving circulation to the periphery of the body. Wasabi opens the sinuses in a very powerful way.
“Have you ever inhaled the steam from a hot cup of peppermint tea? Then you know how it feels as if it is opening and clearing to the mind. Engaging with herbs through our senses and our felt experience is one of the best ways to understand that they do have real, immediate and profound impacts on our bodies.”
Kenny Coogan
Herbal CSA
A CSA partnership exists between grower and consumer for everything today. Herbalism should be no different. It’s a great niche market to expand into.
People love the convenience of receiving a box monthly or quarterly of items they can’t grow. McMullen dabbled in an herbal CSA program for a while and has advice for herbal entrepreneurs.
She only advertised on social media as she didn’t want to grow too big too quickly. She needed to balance business with family and included five products in each seasonal box:
a tincture
a topical preparation, such as an infused oil
a salve, a facial cleansing mask or a bath blend
a food item, such as an infused vinegar, herbal honey, soup mix, seasoning mix or culinary infused oil
a bulk tea blend
an emotional/spiritual support item, such as a bundle of herbs for burning, a flower essence or a tincture blend meant for emotional support
McMullen also sent out a multi-page newsletter with an introductory message about things happening seasonally in her garden, her personal life and the larger cultural experience; about each preparation; and the main herbs included in them.
“Balance long-term planning and preparation with improvising based on what happens seasonally with the herbs you’re working with,” she says. She also advises that because tinctures take four to six weeks, plan far in advance. And grow more than you think you’ll need.
Plus, make sure that the products you’re making are ones you’d be happy to find in your mailbox. Think about how the different elements you include in your box fit together. Include information on how and why to use the items.
Finally, if you’re a beginning herbalist and thinking of starting your own CSA, don’t get too complicated. Work with simple, or single herbs, rather than blends.
Check out the Healing Herbs annual from Hobby Farms for more great herbal information!
Bioregionalism
Bioregionalism is the practice of knowing and working with the organisms in your bioregion. For herbalism that means knowing local plants, native and invasive, and those easily cultivated.
Studying a plant that you cultivate in a garden gives you a fuller understanding of it. And so does witnessing wild plants growing in their natural habitat.
Watch plants move across a yard or field over several seasons. Notice which growing conditions different plants thrive in. Eventually, you’ll begin to develop a greater connection and relationship with the plants and local ecosystem.
“It is increasingly important to remember and tend our connection to place and to the other beings living near us,” McMullen says. “Wouldn’t it be wonderful if we didn’t only find our friends and communities through our devices, but if we could walk outside and be greeted by our dear friends growing out of the ground?”
I, like McMullen, live in subtropical Florida. Bioregional herbalism brings awareness of how prolific different plant communities are. McMullen says those who live in regions where well-known plants in Western herbalism—chamomile, dandelion, chickweed, nettle, burdock, Echinacea, etc.—don’t grow wild shouldn’t fret. We all have unique herbs that we can’t find at grocery chains.
Recommendations
Although she equated choosing a favorite wild herb like asking librarians what their favorite books are, she was able to come up with a few. Her list included:
Spanish needle (Bidens alba)
plantain
wild violet
pine
usnea (a lichen)
reishi (a fungus)
Florida betony
goldenrod
pine
“Just as many people feel called to grow some of their own food or to support local farms, growing or tending wild local plants and supporting local herb growers and herbalists shortens the supply chain into something much more sustainable,” McMullen says.
“In this age of instant online purchases and of separation from and ignorance of how our material goods—including food and medicine—are made or grown, remembering how to find, grow and sustain deeper relationships with the food and herbs we consume and the people who help us source them is increasingly crucial.”
Kenny Coogan
Life Learning
McMullen also teaches herbal classes. She hopes that students walk away with a renewed enthusiasm for working with herbs and have an openness to develop their own personal relationships with the herbs.
“We often have the impulse to ‘master’ things, to learn as much as we can, to not feel like a beginner,” she says. “When learning about herbs, this often looks like buying or growing a ton of different herbs and using them all at once, without the time and space and attention to really learn about how each one interacts with our individual bodies.”
McMullen advises to lower your expectations. Grow one new herb each year, and spend that growing season really focusing on its development. Work with it fresh, dried or as a tincture.
“Spend a much longer time than you think you need to focusing on that one new herb,” she says. “Be humble. Let the plants and your own experience guide you. But also don’t neglect to find resources about the herbs in books and respected herbal teachers as well as scientific literature, if available.”
Finding a teacher that is knowledgeable in local herbs is also a great resource. McMullen says those teaching from experience will share better, well-rounded and responsible offerings than those who regurgitate information available online.
The tropical and subtropical plants that grow in southwest Florida where McMullen lives are particularly well suited to supporting health. But even more than this, she feels that if we can build up our home herbal apothecaries with local plants that we have relationships with, we can rely less on large-scale cultivation and wildcrafting efforts from far flung places, where practices are difficult to learn about.
We’ll also reduce the amount of fossil fuels expended to ship our herbs to us.
With COVID-19 freshly in our minds, Caitlin’s next statement is particularly comforting. “I don’t feel isolated and disconnected when my human relations are absent,” she says, “because I always have a larger community of plants, animals and fungi around me that I know and have relationships with.”
Sidebar: Say What?
What’s the difference between a tincture, an infused herbal oil and an essential oil?
A tincture is a concentrated liquid extract of an herb, usually done in alcohol. Other liquids can be used, such as apple cider vinegar and vegetable glycerin.
An infused herbal oil is like a tincture but made with vegetable oils, such as olive or sweet almond oil.
Essential oils are the volatile aromatic compounds from plant material. They are extremely concentrated and need to be properly diluted for safe use.
Sidebar: Infuse Your Own
If you’re overloaded with frozen and dried herbs, try creating some infused oils. These can be used to create salves, lip balms and soaps.
Fill a jar one-quarter to one-half full with dried herbs, then pour in sunflower or olive oil almost to the top of the jar. Cover and store in a sunny spot for about four weeks, shaking occasionally.
Strain and rebottle in a clean, sterile jar. This infused oil will stay fresh for approximately nine months to a year, depending on the quality and freshness of oil used.
Use It
Salve
To make a salve, pour 1⁄2 cup infused oil into a heat-proof container, such as a Mason jar or recycled tin can. Add about 2 tablespoons of beeswax, and set the container down into a saucepan containing a few inches of water.
Place the pan on medium-low heat until the beeswax melts, and remove from heat. Add about 10 to 20 drops of essential oil if desired, then pour into tins or a small glass jar.
Herbal oils that make great salves include:
lavender (soothes skin and relaxes before bedtime);
mint (rub on temples and neck for headache and muscle tension)
calendula (all-purpose skin softener, useful for scrapes and bug bites; can be used on a dog’s hot spots and chafed nose)
cayenne (for sore muscles, arthritis and nerve pain).
Lip Balm
Lip balm is made similarly to a salve, but only uses 3 tablespoons oil to 1 tablespoon beeswax. For flavor, add eight to 10 drops of an essential oil, such as peppermint or spearmint.
Herbal oils that work well in lip balm include:
lemon balm (which helps fight cold sores)
calendula
violet leaves (smooth chapped, dry lips)
Soap
You can replace the olive oil in any soap recipe with your favorite infused oil. Calendula, plantain, lavender, lemon balm, chamomile and violet leaf infused oils make lovely additions to soap. — Jan Berry
This article originally appeared in the November/December 2020 issue of Hobby Farms magazine.
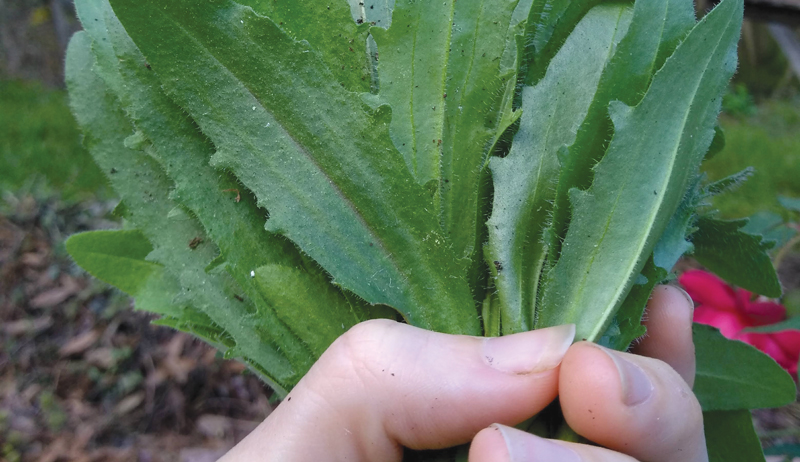
In the depths of winter, when freshly harvested herbs may be less available (especially from our own garden)s, we can turn to our spice cabinets to find unique flavors and healing medicines.
Before we continue, let’s take a moment to discuss the differences between herbs and spices. For simplicity’s sake, we’ll approach this topic from a culinary standpoint. The botanical science behind the differentiation can get a bit complicated.
Simply put, we call the aromatic leaves harvested from an herbaceous plant herbs. This means a plant that commonly lacks a wooden stem. (Though some exceptions to this—such as bay leaf, a woody plant—do exist.)
On the other hand, the seeds, bark, flowers, fruits and roots of aromatic plants (dried and are typically crushed before use) bear the name spices. Examples of spices include cinnamon, turmeric, cardamom and coriander.
A Very Old Herb
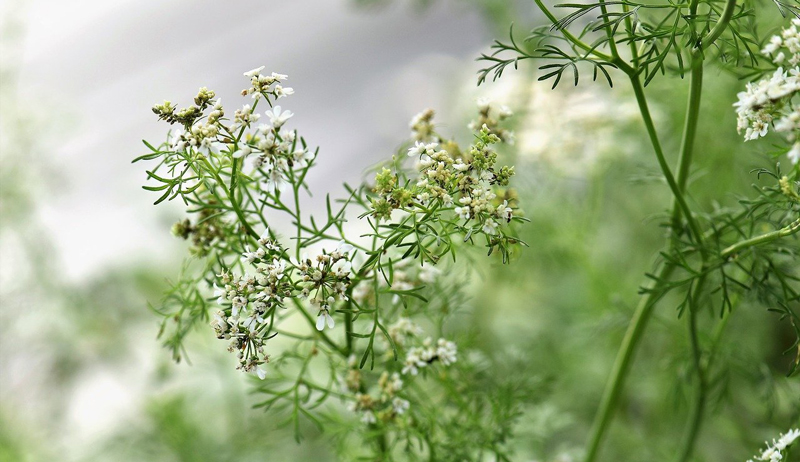
Coriander is the seed of Coriandrum sativum, an annual herb from the parsley family, Apiaceae. Native to Southern Europe, Northern Africa and Southwest Asia, coriander is thought to be one of the oldest spices on record. It was mentioned in the Bible and also discovered in ruins dated back to 5000 BCE.
Remains of coriander seeds were found in the tomb of King Tutankhamen. This led scholars to believe this pungent spice saw cultivation throughout ancient Egypt.
In North America, the leaves of C. sativum are commonly known as cilantro, while the word coriander is used to refer to the seeds. It’s interesting to note that ‘cilantro’ is simply the Spanish word for coriander. In most places of the world, the latter term is used exclusively, regardless of which portion of the plant is being discussed.
The leaves of coriander have a tart, almost citric flavor, yet many people find the plant unpalatable, describing the taste as “soapy” and offensive. This is due to a genetic trait found in approximately 25 percent of people that allows them to be more aware of the aldehydes found in the leaves. Commercial soapmakers use the compound to add scent to many soaps and detergents.
The distinct flavor of coriander seeds is tart, earthy and sweet. A common ingredient in Indian, Middle Eastern and Asian cuisines, they bring a bright, strong flavor to curries and baked goods.
People also use whole seeds in pickling.
Toasting coriander seeds before use deepens their flavor. Ideally, you should grind seeds fresh, as they will keep their flavor and store better when kept whole.
Cilantro, the leaves and stems of the coriander plant, see wide use as a garnish in soups and salsas. In the U.S., cilantro commonly appears in pico de gallo, a fresh salsa traditionally made from chopped tomato, onion and serrano peppers with salt, lime juice and cilantro.
Coriander in the Apothecary
As one of the oldest documented spices, coriander has a long history of use for health and wellness. Primarily, however, it disguised unpleasant-tasting medicine because of the aromatic taste and characteristic odor.
Just including coriander as regular part of the diet is thought to lower blood sugar and promote heart, skin and digestive health. The seeds are carminative, and a tea brewed from coriander will improve digestion and boost metabolism.
You can make coriander seeds and leaves into an ointment to relieve tired and sore muscles as well as the pain associated with arthritis and inflammation.
Coriander is antibacterial and antifungal, so you can include it in formulations to prevent topical infections and to aid in the healing of wounds.
Learn more about herbs in the Healing Herbs annual from Hobby Farms magazine!
Growing Coriander
Coriander is very easy to grow, even for gardeners with limited space. The first step is to decide if you are growing coriander as an herb, for its leaves, or to harvest the seeds later as a spice.
A number of varieties have been developed that are slow-bolting with heavy foliage. Others will quickly flower to then produce large, flavorful seeds.
You can enjoy the best of both worlds by regularly harvesting the cilantro throughout the season, before the heat of summer naturally causes your plants to bolt.
Regardless of which type of coriander you choose, they all prefer full sun to partial shade and well-drained, fertile soil. If you’re hoping to have an extended harvest of tasty leaves, consider growing your plants in an area with partial shade.
Trimming back flowers as they develop will also extend your harvest.
Direct sow your seeds about 1/4 inch deep in late spring or early summer, and thin seedlings to around 6 to 8 inches apart. Remember to keep your plants well-watered, as an extended dry spell will trigger your coriander to flower.
Try planting cilantro in the early fall for a late harvest of the delicious leaves!
Growing for Seeds
If you are growing coriander for its seeds, you’ll need to allow plants to flower. Bees love the white or light pink umbels of coriander flowers. And the honey crafted from these little flowers is reportedly delightful!
Allow the flowers to mature and die back before harvesting stems. You’ll see the small green fruits where the flowers once stood. Place the stems upside down in a paper bag. Tie it all together into a bunch, and hang somewhere cool and dry.
Be sure to label the bag!
After three to four weeks, the seeds will have matured and dried down. Then simply shake the bag vigorously to release them from the stems.
Store seeds in a jar in a cool, dry place. Enjoy your harvest of coriander seeds in the kitchen or save to sow again in next year’s garden.
Coriander is a flavorful, if sometimes controversial, herb. This amazing plant brings joy to gardeners, chefs, herbalists and pollinators around the world.
Try growing these ancient seeds in your garden next spring!
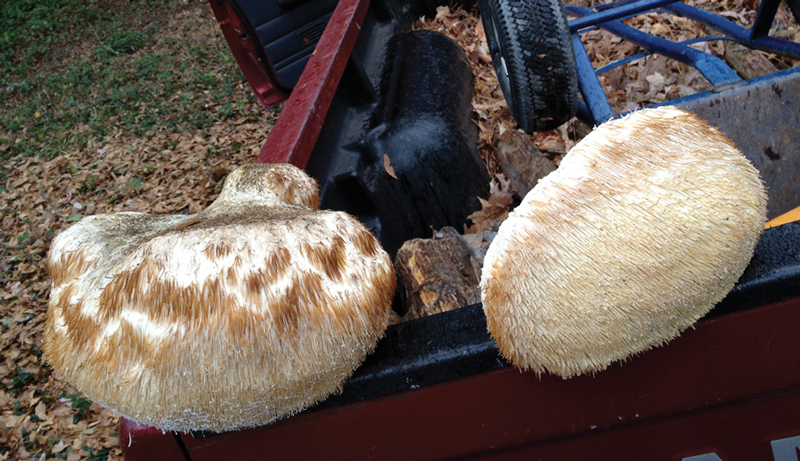
For most edible mushrooms, the only tool that you’ll need will be a pocketknife to cut the stalk. For the round, white tufts of a lion’s mane, however, you’ll want to add a ladder or a pole pruner.
Because while money doesn’t grow on trees, these gourmet mushrooms do. And sometimes you’ll have to crane your neck to see them.
For one 33-pound lion’s mane mushroom (the record is 100 pounds), I had to carry my 8-foot stepladder through the woods. I only kept 4 pounds of that mushroom and sold the rest to five downtown chefs.
I made $351 in less than two hours.
Mane Reasons
Lion’s mane mushrooms (Hericium erinaceous) can’t penetrate bark, so they grow from damaged areas on oak trees: broken limbs, hollows, lightning scars, cutoff stumps.
Rarely, I’ve harvested them at chest-height or even ankle-height. And they sometimes grow on city trees.
One year, before speaking on foraging at a downtown organic farming conference, I strolled outside to psyche myself up. In the outdoor dining area of a restaurant, I found a 3-pound lion’s mane just out of reach on an oak tree. Ignoring the raised eyebrows of wait staff and diners, I borrowed a chair to stand on so I could wrench that mushroom from its hollow.
I passed it around at my presentation just a few minutes later.
Another year, I harvested a 6-pounder. I really wished I’d had that tall ladder with me then, as I had to make do with a borrowed 4-foot stepladder stacked on two borrowed plastic tote boxes full of Christmas decorations. And even on top of that leaning tower,
I could only pop that lion’s mane off the tree by spearing it with a pitchfork.
That’s foraging.
Frank Hyman
Worth the Hassle
But once the succulent, white flesh had been hand-shredded and fried up as a blue crab meat substitute in a crab cake recipe served to my wife and friends, all the airborne acrobatics were well worth it.
In the North, if it’s cool enough, lion’s mane can be found in summer and fall. But in the South, it’s most often found in winter—a good reason to adopt my preferred name for it: Santa’s beard.
It’s one of the best-tasting mushrooms. And one of the most medicinal.
These distinct mushrooms don’t have any poisonous lookalikes. They are bright white and completely covered with tender, white spines as long as almonds and as dense as fur. Hence, they get a lot of common names: bear’s head, goat’s beard, deer tail and pom poms.
Older ones may have a tawny tinge that doesn’t affect the flavor. The interior should be bright white, though. Any discoloration means it’s too old.
If the weather has been dry, your lion’s mane may also be very dry and tough. In that case, let it soak in some water for 5 to 20 minutes, checking it with a squeeze until it has rehydrated to a palatable texture before cooking as described later.
If it’s been rainy, it may be so saturated that water will run down your arms when you harvest it. In that case, before cooking it, twist the mushroom like a sponge over a bowl to release the excess moisture until it’s tender but not soggy.
An amazing amount of water will come out, yet the mushroom will return to its original shape—like a sponge.
Save the liquid for cooking rice or starting a soup. Shave off the spines with a sharp knife, and cook them in butter or bacon fat for a few minutes and serve as a miniature pasta appetizer. Then, hand-shred the bulk of the mushroom to prepare for cooking.
You can add it to soups, sauces and stews. Or you can use it as a substitute for crabmeat. (It looks very similar when hand-shredded.)
You can even season and sauté it until browned as a stand-alone substitute for a meat dish.
After the leaning-tower-of-Christmas-decorations experience, I decided to carry my folding ladder in the bed of my pickup during lion’s mane season. I’ve used it twice. But I’m thinking that maybe a simple pole pruner would be lighter and perhaps safer.
This article originally appeared in the November/December 2020 issue of Hobby Farms magazine.