Brandelyn Tafoya and her family purchased a farm in the Pacific Northwest 15 years ago—but it was when the COVID-19 pandemic hit the state of Washington last February that she really stepped up and embraced the idea of utilizing the land to “take some control back in an uncontrollable situation.”
“It started when I tried getting new chicks from the feed store as I would normally do each spring and there was a three-week waitlist,” recalls Tafoya. “Immediately the entrepreneur in me kicked in, and I filled both of my incubators with eggs and started hatching chicks.”
By the end of summer, Tafoya’s Pivot Farm had successfully hatched and sold over 700 chicks. She also added goats, turkeys and pheasants to the venture, along with revamping her garden area to maximize fruit and vegetable crops.
We spoke to Tafoya about preserving produce and sprucing up old barns. We also got the scoop on her love of growing squash.
Tafoya says that she and her husband chose the name Pivot Farm for their homesteading adventure to represent their ability to stay adaptable.
“I am an entrepreneur, and my husband [Joe Tafoya] also became one after he retired from playing NFL football for eight years,” she explains. “Together we have started many businesses. Some of them have been failures and some wildly successful. We have gone through a lot on our journey together, but we have learned to embrace the ability to pivot.”
She adds, “The word pivot has become very meaningful for us. So it was only fitting that we name our farm using it.”
Food projects play a key part in the running of Pivot Farm, especially during the colder months. Tafoya says that canning and preserving the harvest is one of her favorite tasks.
“I learned to make and preserve apple sauce, pumpkin puree, pickled cucumbers, jalapeños, beans, asparagus, strawberry and blackberry jam,” she says.
“But the upcoming project I am most excited about is tapping our maple trees to make maple syrup! January is prime start time for that, and I got all the supplies for Christmas.”
“Our pumpkin and squash patch has been pretty epic for the last five years,” says Tafoya, spotlighting one of Pivot Farm’s essential crops.
“It all grows from our manure and compost pile. We affectionately refer to it as our Poo Pile Pumpkin Patch. Each fall we would toss all of our rotten pumpkins out there, and then they come back the next year! I literally do nothing but cover them with more compost from cleaning the barn.”
When it comes to utilizing the pumpkin haul, Tafoya says she’s a fan of using the gourds to decorate the farm, along with making and freezing puree for future pie and muffin batches.
Pivot Farm includes a barn that Tafoya has turned into an eye-pleasing centerpiece of the property.
“The one thing I have learned is that a fresh coat of paint changes everything,” she says when asked about tips to fancy up an old barn. “Our farm has white paint that has single-handedly turned my house and barn into my dream!
“I got some funny looks when I told people I wanted to change everything from dark grey and green to all white. But now everyone that comes over says it’s unrecognizable in a good way. And it’s actually easier to keep looking nice, because if it gets dirty you can just slap some more white on it without worrying about matching colors!”
Tafoya also suggests new lighting and “a pretty chandelier never hurt” when it comes to barn renovation.
The COVID-19 pandemic pushed home to Tafoya the importance of being able to provide directly for her family. That’s a life lesson she wants to pass on to her kids.
“The amount of things I have learned how to do this year alone are innumerable, and I have no intention of stopping,” she says as she casts an eye back over 2020. “I want my kids to grow up with all of this knowledge as second nature so that they have this same sense of security for their families someday as I do.”
There is no set recipe when it comes to agricultural success. For many producers, the initial direction requires a change in course as market conditions and the growing climate evolves.
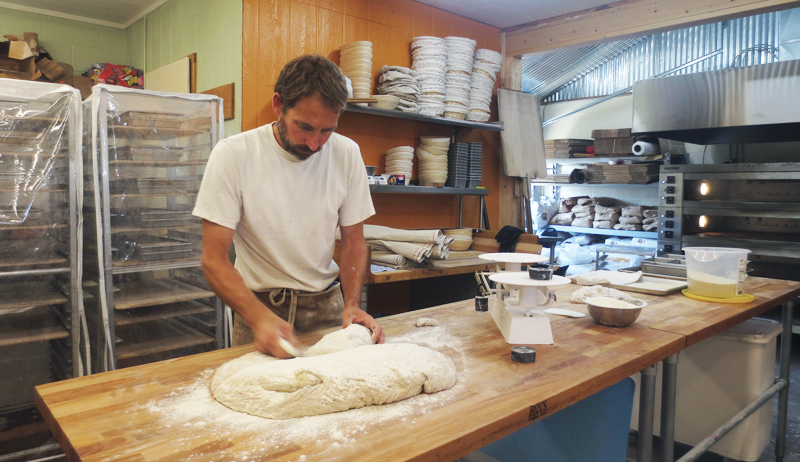
For Jacob and Courtney Cowgill’s beginning of Prairie Heritage Farm and now Blue Truck Bread in Power, Montana, what begins in the fields has a scrumptious finish in the oven.
Knead to Know
Jacob began working for two seasons with Bob Quinn, the founder of Kamut International, on his organic farm in Big Sandy. Quinn became a key influence in the way Jacob viewed agriculture.
Constantly experimenting with seeds and growing techniques, Quinn raises fruit and vegetables without irrigation in an area where months without measurable rain is common. And he grows other crops, such as safflower and hemp, to diversify beyond the typical monoculture model.
“I knew I wanted to start a small vegetable farm but didn’t consider raising wheat,” says Jacob, who wasn’t raised on a farm. “You just don’t start wheat farming.”
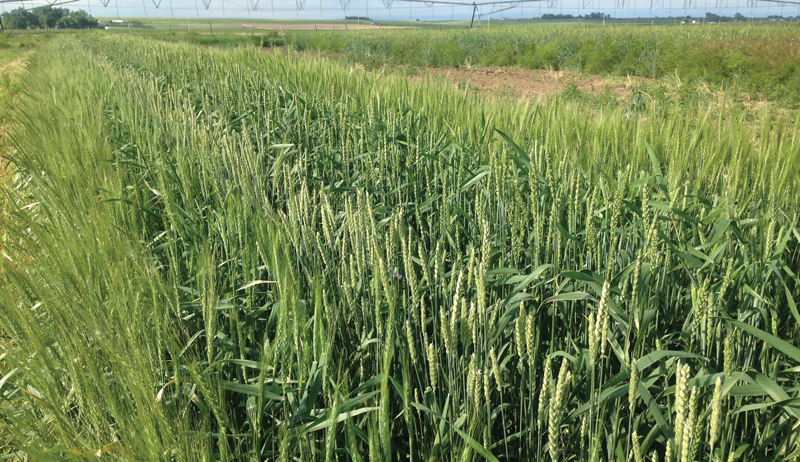
This region of Montana is called the “Golden Triangle” because its optimum conditions result in some of the highest quality grains in the world. But to delve into this agricultural realm, it usually requires hundreds, if not thousands, of acres to make the effort worthwhile.
Yet, the viability of growing ancient or heritage grains was consistently in the back of Jacob’s mind.
Both types of wheat were born before the green revolution. But in the era shortly after World War II, when modern breeding and agricultural practices left older varieties behind, ancient (or heirloom) grains were the first ones grown.
Blue Truck Bread
Varieties such as farro, Kamut Khorasan wheat, spelt and einkorn have been around since the dawn of civilization. From many of these ancient grains, heritage types developed throughout the world. Today, they retain their unique characteristics, escaping modernization.
Getting Into Grains
When the Cowgills launched Prairie Heritage Farm in 2009 on leased land, they primarily grew vegetables for their CSA program, as well as for their spot in the Great Falls Farmers Market. Jacob also planted a few acres of wheat, including 200 varieties an ounce at a time, to determine which ones grew the best.
After they purchased their current property approximately a half hour south, the Cowgills expanded the grain growing. They refined what thrived and what customers wanted.
The trick, however, was marketing it. For a time, they offered a grain share, and people could also buy it at the farmers market. But there needed to be a new step to make the experiment viable.
“Since I was growing wheat, I wanted to bake with it,” Jacob says.
While selling vegetables at the farmers market, they brought a few loves of sourdough bread, which sold immediately. The next week, they brought more. The trend condition continued, and they even started offering a bread CSA for a while.
Deciding what works in any business is a difficult decision, particularly in the farmer-to-customer scenario. In the beginning, the Cowgills focused on their CSA program and the farmers market. But after a few years they discovered it really wasn’t working well for them or their customers.
Jacob felt that the CSA model was beneficial in the beginning because it introduced them to the community. But as those managing a CSA know, it involves significant customer service responsibilities.
Coordinating pickup times and ensuring there is more than kale in the basket requires a balancing act and a blessing from Mother Nature.
“The CSA model was kind of waning nationally,” Jacob says. With peoples’ lives truly busier, and an increase in national fresh-food baskets, he believes customers were looking for different options. Then the situation all natural farmers dread sealed their decision.
Decided by Drift
“That year we got drifted by herbicide,” Jacob says. “Thankfully, we didn’t have CSA members to reimburse.”
While nothing died outright, when they noticed deformed leaves, they knew something was amiss. After a confirmation through lab tests, they knew that was the end of their vegetable season. There wasn’t even anything untouched they felt comfortable to eat.
“At that time the bakery was taking off,” Jacob says. “The next year, we tried vegetables again and got drifted again.” This was the proverbial nail in the CSA program.
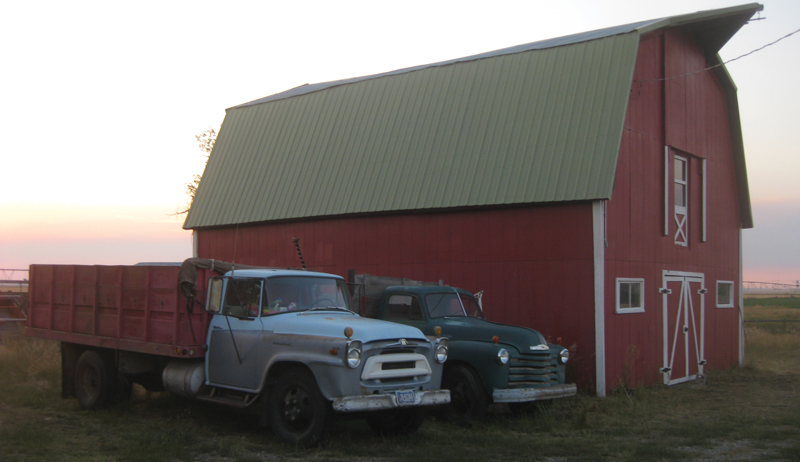
Jacob Cowgill
He focused on baking bread as Blue Truck Bread, the colorful moniker inspired by the “new” 1963 GMC pickup he received as a Father’s Day gift in 2015. With no vegetables to sell, he increased his selection of sourdough bread to the farmers market.
While the sourdough bread was a hit, once again, their sales plan shifted.
“We always thought of (the farmers market) as a living business card,” Jacob says. There, they were able to introduce products to the community and learn what people wanted the most. But when a local restaurant approached them to bake all of their sourdough bread for their specialty sandwiches, they were able to step away from the farmers market completely.
Blue Truck Bread was born.
“It just worked out,” he says. “We had the best season of our life. We went hiking and camping and spent time with the kids.”
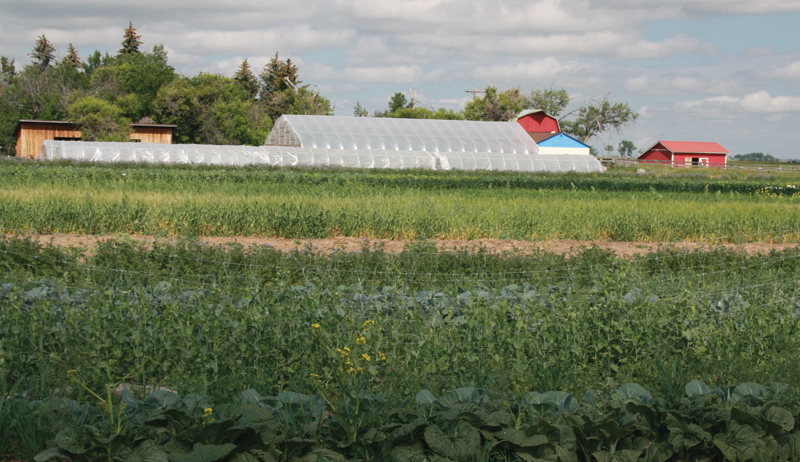
The farm was set up for agricultural, but Jacob had to find a place to bake on a larger scale. An old butcher shop that they used during the seasons when they raised turkeys—and was afterward converted to a vegetable processing space—seemed to be ideal.
After adding racks, multiple commercial mixers and deck ovens, roughly half of the 1900-square feet area is now their bakery. No longer found at the farmers market, Blue Truck Bread is now sold in local grocery stores and restaurants.
“Probably the most popular bread is the honey sourdough,” says Jacob. He keeps the bread local through and through by using honey from the family-owned Smoot Honey Co., a neighbor of theirs north of Great Falls.
According to Jacob, customers truly enjoy the Seedy Bread that uses lentil flour, as well as sesame, flax and sunflower seeds. Montana is one of the top pulse crop producers in the country, and even though they don’t grow the lentils on their farm, they are all Montana-produced.
Wheat for It
For years, Jacob grew and tested a variety of heritage grains to determine which ones he likes the best. “I’ve always experimented with growing different varieties,” he says. “The issue with experimentation is growing them to see what grows well here, then bulking up to grow enough to mill and bake with.”
Currently, he enjoys working with Turkey Red hard winter wheat. Brought to the Kansas area in the 1870s by Russian immigrants from the Ukrainian region, Turkey Red adapted readily to the region, producing an excellent quality wheat that has a smaller head (than modern wheat) with dark kernels.
“It’s a wheaty wheat,” Jacob says. “It has a high-protein content and strong flavor. I also like baking with Sonora wheat. It’s really light.”
Amy Grisak
He has long grown the Sonora wheat, another hardy winter wheat that grows well even in semi-arid conditions. It’s popular in the Southwest as it makes excellent flour for tortillas but also creates light, delicious bread.
When it comes to milling, Jacob set aside the bicycle-
powered grinder he used to demonstrate grinding grain years ago. In the initial baking days, he used a Magic Mill, the kind he remembered from his childhood. And while he still uses it to mill the lentils into flour for the Seedy Bread, he increased production with a 12-inch Meadows Mill, a type of stone mill.
The Beauty of Baking
Baking bread has a distinctly different rhythm than the typical agricultural season, yet working with sourdough fits well into everything he has to do.
“That’s the beauty of sourdough,” he says. “It takes longer than the yeast breads, but you have control of your schedule.”
Lately, he usually bakes two to three days a week, spending the rest of the time packing, slicing and delivering. Instead of depending on employees, Blue Truck Bread is a family affair.
“I like the way it is now,” he says.
Blue Truck Bread’s newest addition is frozen pizza dough sold through preorders or in local stores. To strengthen the farm-to-table connection, they are planning to build a fire oven where they can invite the local community out to the farm to soak in the beautiful Montana landscape while savoring homemade pizza made with homegrown grain crust among friends.
Farming requires growth in more ways than one. Jacob might have started along a traditional route, connecting people with homegrown food, yet his background and interest in growing grains sprouted a brand new direction for his family.
This ingenuity, turning heritage grains into delicious sourdough bread, created a unique niche where his thrilled customers enjoy a taste of place.
Sidebar: Bread Bites
We asked Jacob Cowgill of Prairie Heritage Farm and Blue Truck Bread for some breadmaking tips.
You don’t need to knead. After mixing all your ingredients together, let time do most of the fermentation and gluten strengthening. All you need to do is gently fold the bread in on itself from each of its four sides every half hour throughout the primary fermentation.
Flour matters and good flour makes good, nutritious, flavorful bread (i.e., good wheat, good farming practices). Buy the freshest ground and most local flour you can. I realize this is a pretty big challenge for most, though.
Use a pizza stone or unglazed quarry tile in your oven. It acts as a heat sink and helps to stabilize the oven temperature.
Generate steam when you first put the loaf in the oven. You can do this by putting the loaf in a Dutch oven with its lid on that has been preheated with the oven. (The bread creates its own steam.) Or you can set a small cast-iron pan on the bottom shelf to preheat with the oven. When you slide the bread in, pour a cup of hot water in the pan.
Sidebar: Giving Back
During the initial stages of the COVID–19 pandemic in the U.S., Jacob and Courtney Cowgill worked with a food provider’s network funded by the Alternative Energy Resources Organization to help supply food to those who needed it the most.
The program provided the white flour, and the Cowgills used whole wheat from the grain that they grow for Blue Truck Bread to send loaves of sandwich bread to the Montana Food Bank Network.
This article originally appeared in the November/December 2020 issue of Hobby Farms magazine.
There are hundreds of chicken breeds in the world—a staggering number when you think of their humble beginnings as the Red Junglefowl. Around 90 breeds are accessible to the backyard owner, but if you throw in other types of poultry such as geese, ducks and turkeys, the choice is almost endless.
The common first reaction is to pick the breed that catches your eye. And who can blame you? A coop full of Seabrights or Polish would make a pretty picture, as would a pond full of ducks.
But beauty aside, are those birds really the right choices for your farm? The best way to find out is to break them down by use and choose poultry based on your needs.
Dual-Purpose Group
The dual-purpose chicken is an egg and meat bird. They are attractive birds and tend to be friendly and easy to keep. They lay a good amount, and some of the eggs are interesting, such as the multi-colored eggs of the Ameraucana.
But dual-purpose breeds lay fewer eggs than the egg-laying breeds.
Dual-purpose breeds make nice tasting broilers but they develop slowly and have less breast meat. Also, since you’ll have the bird longer than a meat bird, you or your family might bond with the animal and have a hard time letting it go or even eating it.
Dual-purpose breeds include the Jersey Giant, Brahma, Buckeye and Orpington.
The ornamental breeds are the beauty queens of the poultry world, so choose them if you’re looking for fancy. They are specifically bred for their fancy features, such as elaborate combs (like the Redcap), unusual looks (like the Seabright bantam) or unique plumage (like the Silkie).
If you want them to keep their looks, ornamental breeds will require pampering, special housing that’s impeccably clean and fully out of the weather.
Eggs are usually smaller and less plentiful than those of other breeds. Some of the ornamental breeds (such as the Silkie and Showgirl bantams), with their fluffy plumage and agreeable natures, make wonderful pets, especially for children.
Meat
Generally speaking, meat chickens (usually called broilers) are hybrids bred for large breast-meat yields and their astounding conversion of feed to meat. The Cornish hen is the foundation for meat breeds.
Meat birds come to market at 6 to 8 weeks old, and you aren’t doing them a favor by letting them continue any longer than that. Their ability to grow quickly comes with problems such as leg disorders, breast blisters and a fatal heart-attack condition called flip-over.
Meat birds do not perch and so they need special bedding, such as sawdust, to keep their skin healthy. Because they don’t move around easily, meat birds need feeders and water founts within easy reach.
Despite all of this, you want to choose broilers for meat poultry. Because they come to market quickly, there’s less chance to become emotionally attached.
Hybrid meat “breeds” include the Freedom Ranger and Cornish Cross.
If you want lots of chicken eggs, look no further than the egg-laying group. Their origins come from the Mediterranean class, and they usually have smaller bodies with little meat because they use nutrients to make eggs.
Egg laying breeds tend to be flighty and aloof. They also tend to be more aggressive towards breeds in the other categories. They are very difficult to catch and aren’t easily tamed.
Egg-layers include the industrial Leghorn, White Leghorn, Welsummer and Production Red.
Game Birds
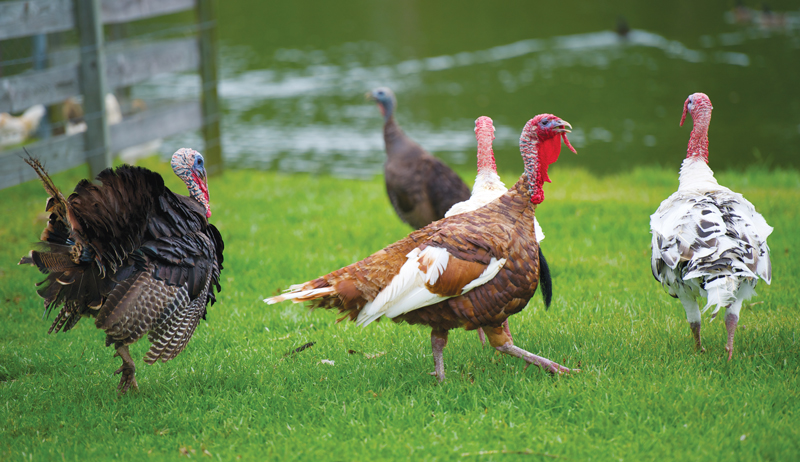
Game birds are traditionally used for hunting purposes, but nowadays they have extra purposes. These birds include Guinea fowl, turkey, quail and waterfowl, such as geese and ducks.
There are also ornamental game birds such as the Ornamental Pheasant.
Game birds can be used for tick control (guinea fowl), weeding (geese and ducks), mosquito control (Muscovy duck), guarding/alarm (geese), gundog training, shooting and, of course, for meat and/or eggs (geese, ducks, turkeys, quail, pheasant).
Game birds can be touchy and difficult to handle. Geese, for instance, can be downright fierce during breeding season. They make good guard animals but aren’t fun to be around.
Guinea fowl are difficult to house. They are known for leaving the farm altogether for greener pastures.
Each game bird type will need specific housing and care, so make sure to carefully research the one you’re considering before purchase.
Sidebar: All Together?
Keeping all your birds together under one roof might seem convenient, but it can set you up for headaches.
Birds of a feather do tend to flock together. If you have one red chicken and several white chickens, the red chicken will be the odd bird out, left to fend for itself.
Less ornamental breeds might curiously peck at the feathery hat of the Polish or the decorative comb of the Redcap. And slow meat birds will be pushed away from food and water.
Some birds cannot be kept together for health reasons, such as chickens and turkeys. Others have different needs, such as turkeys that don’t roost, and geese that need buckets of water for bathing and straw beds for sleeping.
Therefore, all types should have their own housing. If your farm doesn’t have the room, choose one type of poultry and stick to it.
Owning a few acres in a rural setting is a dream come true for many modern homesteaders. With a bit of land, you can run livestock, grow crops or just enjoy the view.
But that piece of heaven comes with myriad responsibilities, one of which is keeping the property boundaries straight.
Are you unsure of your own land limits? If so, then it’s time to be proactive and have a property survey done to avoid potential problems.
Acres?
In a perfect world, all land parcels would be squares with equal sides. But in reality, land boundaries can be as twisted as coil springs and downright exasperating.
In the original surveys of 150 to 200 years ago, the lots were neatly divided with 100 acres being the most common. Over time, all these carefully measured acres were broken up or added to multiple times.
And just what is an acre? You’ll often encounter this term, but few people know it measures 66 by 660 feet, or 43,560 square feet. Another way of thinking is that an acre is roughly the size of a professional football field, more or less.
Before a survey, you’ll need the deed to the parcel of land, which outlines the property boundaries.
If yours isn’t handy, you aren’t alone. Most folks can find their tractor manuals, the fridge warranty and their firstborn’s first-grade report card but not their land deeds.
Lorain Ebbett-Rideout
If your deed isn’t where it should be, check the last tax bill you received for the property ID number and lot number. Every piece of ground has an identity number for the county to record who owns it. With this number, you can obtain a copy of the deed at the register of deeds office located at the county seat, which records all land transactions.
This information will be on computer files and can be quickly accessed for a fee. Be sure to follow all the regulations in your area when dealing with any land issues, as laws can vary. Do your homework.
Land deeds may have any number of clauses such as right-of-ways and easements. An easement is an agreement dealing with something that came with the property before you owned it. The deed should should contain a thorough explanation.
Easements can be tricky surprises lying around for decades, then suddenly appearing.
A right-of-way might be access at a predetermined point permitting another party to reach a piece of adjacent property. Underground utility lines, old government highway allowances or forest service access roads run all over the countryside.
All too often landowners won’t even know about any of these potential problems.
Rods & Chains
Older land deeds can be difficult to interpret, as they are sprinkled with archaic industry terms. A licensed surveyor can quickly decipher and explain this jargon, which can still be found occasionally on today’s deeds.
I have a copy of the original survey of my land from the late 1850s. It speaks of rods (16 1⁄2 feet) and chains (66 feet) and minute of angle for the year.
Rods and chains were lengths of measurement used by early surveyors. The chain was a real chain of 100 links. People pulled chains tight along a compass line to lay out millions of acres.
This weathered document also indicates roads long since gone, along with the favorite of everyone who has any experience with old deeds: the classic “large tree” as a corner marker.
Next, you need to hire a professional land surveyor. Someone local is a good choice as they will have plenty of experience in the district. Ask around, and don’t be shy about references.
A complete surveyor will:
thoroughly investigate the property for any hidden clauses
check it has no legal issues
survey, then install line markers
draw up a new deed
Lorain Ebbett-Rideout
These days, we are a little jumpy about strangers hotfooting it across the turnips. So let your neighbors know what’s happening.
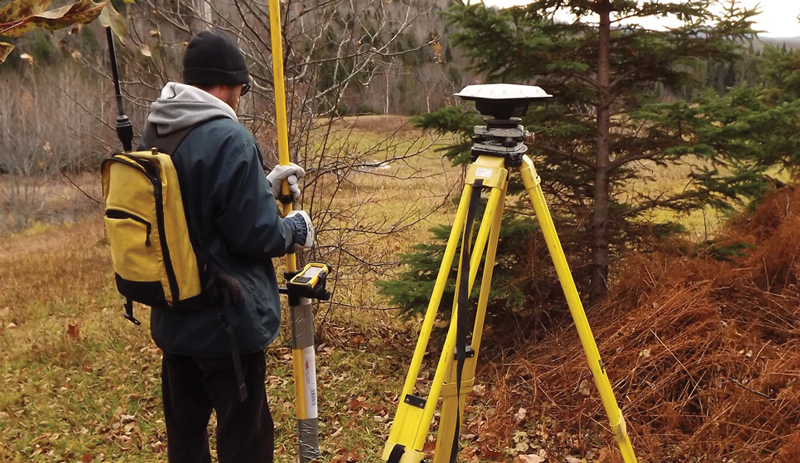
The science of land surveying has been around ever since humankind began divvying up territory. Today, the work of surveyors continues, although the tools have changed vastly.
A modern surveyor uses many disciplines, from geometry to physics and the law. By using GPS satellites with a field computer, they can reach pinpoint accuracy.
Despite the advances, though, foot work is still required.
Before the surveyor arrives, examine your deed and make notes of any items you wish to have explained. Carefully walk your ground, noting any indications of boundary line or corner markers.
A surveyor will have collected all available data prior to showing up and bring a copy of your deed. But—believe it or not—surveyors also welcome your views, area folklore or older relatives recollections.
Accompany the surveyor around the property, pointing out what you see as the boundaries, and be honest. Offer to assistant the surveyor with his or her work. There’s plenty of equipment and tools to carry, so help is generally welcome.
Once the land survey for your farm is completed, the surveyor will draft a new deed, which you’ll have an opportunity to examine. If you are unsatisfied, a second land survey for your farm may be in order. Disputes do happen, and the final results might not be what you were expecting.
It’s better to clear up any misunderstandings now and not later.
After you are satisfied, a formal land deed will be drawn up and registered with the county office. This should be done as soon as possible because, like any document, a property deed is only useful if registered. So get it done!
Ownership, be it tractors or teacups, requires maintenance. Land is no different.
Along with keeping the weeds back and the goats corralled, you need to understand clearly just where your property stops and your neighbors’ begins. A modern land survey can clear up any issues with your farm. Once everything is in order, you can get back to farming, confident that all your corners are squared!
Sidebar: More or Less
A troublesome land deed term that crops up occasionally is the unsettling “more or less.” Old surveys are famous for this, and it means that the amount of land may be over or under the acreage stated.
As surveys were done, some land features were allowed for, resulting in a 100-acre parcel that could really be 110 acres.
Sometimes the survey ran out land for a particular area, resulting in under the amount stated. This is why a survey nowadays is needed so you accurately know the true amount of land you own on your farm.
It’s like an old neighbor once told me about those long-ago surveys: “One feller wins, and one feller loses.” Those are some true words!
Sidebar: Odd Markers
Just about everything from iron bars to a well-placed pine tree has kept two landowners separated. Even today, countless random objects sit silently guarding the boundaries. Rock cairns were a common marker, but plenty of rusty machinery has been pressed into service.
Lorain Ebbett-Rideout
One odd marker that I encountered is an old horse-powered hay rake that sits at the angle of a corner. Who unhooked and dropped it so precisely?
A surveyor once told me he had a job where it turned out a moss-covered pile of logs marked the corner angle square and true. He drove a metal bar into the corner and left the rotten logs, saying they were still performing their job so why bother them?
Old rock walls were the boundary for early pioneers, as were those lovely split-rail fences. Surveyors today still use these as accurate reference points, a testament to those who carefully ran the property lines so long ago.
This article originally appeared in the November/December 2020 issue of Hobby Farms magazine.
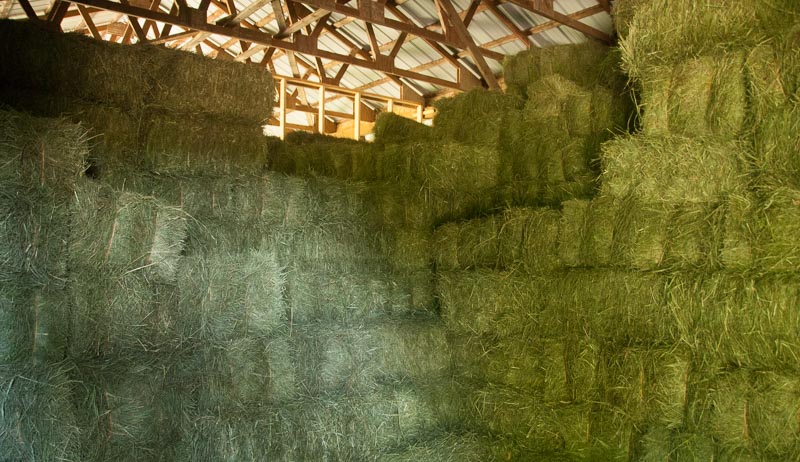
Stacking square hay bales is more than just a skill—it’s practically an art form. If you try to research the best way to stack square bales, you’ll run into a lot of conflicting approaches and ideas.
There are many different ways to stack square bales. One way isn’t necessarily better than another. The different approaches offer varying strengths and weaknesses, just like different styles of art.
I won’t claim to be a Rembrandt or a Picasso in the art of stacking square bales. But having handled tens of thousands of bales through the years, I do have a handful of tips for how to stack your square hay bales.
Bale layers should be stacked in alternating, interlocking fashion.
If there’s one thing virtually all farmers agree on, it’s that each successive layer of bales should be placed perpendicular to the layer underneath, forming an interlocking grid.
Suppose the bottom layer is arranged so the long side of each bale is parallel with a north-south line. The next layer up in the stack would turn the bales 90 degrees so the long sides are parallel to an east-west line.
This interlocking approach ties stacks of bales together in larger, more stable groups. This decreases the chance the stack will lean (or topple) as it grows taller.
The bottommost bales should be stacked on their sides.
To increase airflow, it’s recommended that at least the bottommost layer of bales should be stacked on their cut sides, in such a way that the baling twine does not touch the floor. All subsequent layers can then be stacked flat with the baling twine facing up.
Another option is to maintain the side-stacked orientation throughout the entire stack. In addition to promoting airflow, some folks say this approach reduces issues with rodents chewing through baling twine.
But I find it difficult to walk on side-stacked bales (particularly if they’re baled loose and fluffy). Walking across bales is a necessity when stacking more than five or six layers high. So I favor the flat-stacked approach for the firmer footing it provides.
The length of each bale will affect your stack.
Why is bale length important? Well, if each bale is 18 inches wide by 36 inches long, they’ll fit together snugly when stacked in alternating, interlocking fashion. Two of the 18-inch short ends, stacked side-by-side, will match the 36-inch long end of bales in adjacent layers.
But maybe you don’t want your stack super-snug. To promote airflow, a slightly more open stack can be beneficial.
If your bales are 18 inches wide by 38 inches long, you’ll have to leave two-inch gaps between adjacent bales in each layer to keep the stack square. For very large stacks, this approach could potentially decrease stability.
But for shorter stacks, I haven’t found it to be an issue. And the benefits gained from improved airflow are certainly worth pursuing.
Building a square stack is the key to maintaining stability as the height increases. But this is easier said than done.
Adding one whole layer at a time can help, especially if you construct the outer perimeter of the layer first. That way, everything meshes together securely at the corners.
Hay bales aren’t always consistent in terms of size or shape, though. This is particularly true if you’re baling them loose and fluffy. As your stack grows, it can become difficult to keep everything square, level and secure.
For these reasons, it can be helpful to stack hay in an area enclosed on at least three sides—even if some of the sides are just temporary wooden studs reaching from floor to ceiling, partitioning off part of a larger space.
By stacking right up against these straight and rigid support walls, you’ll give the entire haystack something solid to lean on. This buys more margin for error if your bales refuse to stack neatly.
You should still seek to stack securely. But adding support walls to the mix can simplify the process and increase safety, too.
On a related note, the height of a haystack should not exceed its width by more than 50 percent. If the base of your stack measures 20 feet long by 20 feet wide, the height should be limited to 30 feet or less.
If you construct a tall stack on top of a narrow base, you’re asking for the stack to lean or fall in one direction or another.
Let us know who you prefer to stack your square hay bales!
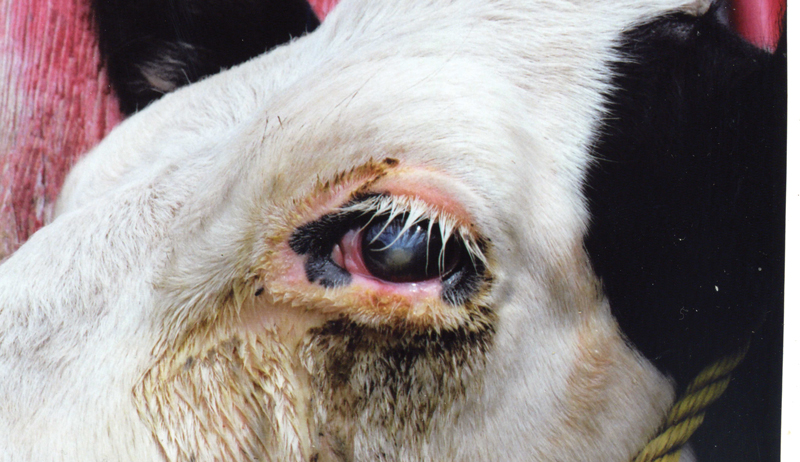
Pinkeye (infectious bovine keratoconjunctivitis) in cattle results in reduced appetite because of pain, lower weight gains in affected animals and drop in milk production.
Severe cases permanently damage the eye or rupture it, causing blindness.
Causes
Bacteria (Moraxella bovis and sometimes Moraxella bovicoli) commonly causes pinkeye. Any breed can suffer from pinkeye, but cattle with white around their eyes are more at risk because the light color reflects more ultraviolet rays into the eyes.
Pinkeye is contagious. It can be transmitted by nose-to-nose contact, fluid from the eye or rubbing the face on another animal.
Face flies carry it from animal to animal and also irritate the eyes, making the animal more vulnerable. These flies have sharp microscopic “teeth” on the end of their tongue to scrape the eye, making it water. Then they can feed on the protein-rich eye secretions.
Pinkeye bacteria gain access to the eye via the tiny wounds in the cornea caused by the face fly.
This is why pinkeye is more common when flies are present or when grass is tall (rough forage or seed heads brushing the eyeball), conditions are dusty or there is more sunlight to create corneal inflammation.
The first thing you might notice is squinting, sensitivity to sunlight and excessive tears. If you catch it at that stage, treatment is very effective. The infection clears quickly, and you avoid damage to the eye.
The next signs—after the eye has been sensitive and watering a few days—include haziness or cloudiness of the eye. There may also be a hole/ulcer in the surface of the eyeball.
If left untreated, the ulcer may become larger and deeper. Tissue may protrude from that hole. The bulging area may grow red.
The end stage is when the eyeball—if the ulcer goes completely through the tissue, but most often it ruptures due to trauma. The animals can’t see and may run into something, or another animal hits them.
The eyeball is weak at that spot and may rupture when bumped.
Treatment
Some cases resolve without treatment, before they get to the point of deep ulceration. After healing, the eyeball clears (if it was blue/cloudy) but may have a white spot of scar tissue where the ulcer was located.
Scars on the cornea may become smaller over time and go away. Or they may remain for the rest of the cow’s life.
Heather Thomas
Systemic Antibiotics
Systemic antibiotics resolve this disease quickly if given in early stages. There are several injectable antibiotics labeled for pinkeye, but some are sold by prescription only by a veterinarian. Any of these work well, especially in early stages when the eye is simply irritated and watering—without much damage yet to the eyeball.
Injectable antibiotics reach high levels in the tears when given systemically (into the muscle or under the skin), and the tears bathe the eyeball with antibiotics. This is more effective than topical medications (squirted into the eye) that are quickly washed out by the tears. An eye affected by pinkeye produces a lot more tears because of the pain and irritation than a normal, healthy eye.
Old treatments such as antibiotic powders do more harm than good. They cause a lot of irritation and are also quickly washed out of the eye. There are also some home remedies that may be counterproductive.
An antibiotic ointment for eye infections would work, but to be effective, it needs to be applied four times a day. Some veterinarians inject medication into the inner surface of the eyelid.
Penicillin is commonly used, sometimes mixed with a steroid to help reduce pain and inflammation. Injected medication under the inner surface of the eyelid keeps leaking out, bathing the eyeball with antibiotic.
Best Course
Treating the animal systemically with antibiotics is probably easiest. It doesn’t matter which method you use, as long as you treat the animal before serious damage occurs.
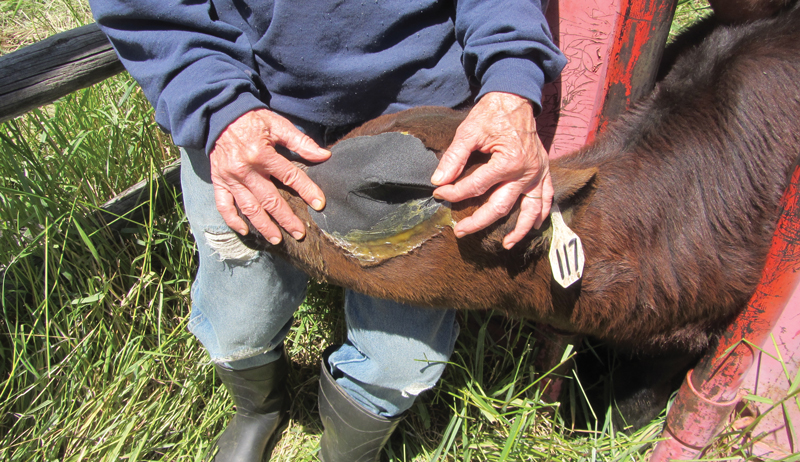
If the eyeball ruptures, the eye can’t be saved. But eyes with deep ulcerations can eventually heal, especially if you are protecting the eye.
Some veterinarians suture the eyelids together, to keep the eye closed/protected. Others pull the third eyelid across the eyeball and suture it there. Either method can happen on the farm, with the cow restrained in a chute, to protect the eyeball from trauma and injury, sunlight, dust, etc.
Glue-on eye patches may help if they don’t come off.
Prevention
Try to limit things that make cattle vulnerable to pinkeye, such as tall weeds, flies and dust. If cattle are in a corral during dry and dusty conditions, sprinkling the corral to eliminate dust can help.
Fly control with insecticide ear tags can often reduce face flies. Mowing tall portions of a pasture can help prevent irritation from rough seed heads and tall weeds.
Vaccines for pinkeye are not very effective. There are different strains of Moraxella bovis, and the one in your herd may not be the one in the vaccine. To have any efficacy, vaccines must be given before summer, and require two doses.
Some people try an autogenous pinkeye vaccine, created from samples taken from infected eyes of cattle in their herd. This would logically be most effective. But by the time you are having cases, it’s likely too late to create the vaccine to protect the rest of the herd.
This article originally appeared in the November/December 2020 issue of Hobby Farms magazine.
As an animal nutritionist and small-farm consultant, one of the biggest issues I see on small farms is the lack of attention paid to nutrition. The mindset is often one of complacency toward nutrition, thinking that because high production isn’t an end goal, it’s OK to feed whatever you want. If your animals seem outwardly fine, the belief goes, all is well.
Certain misconceptions about animal nutrition can often be critically dangerous to your animals’ health. Animal nutrition should be just as important to small farmers as farm hygiene and appropriate animal husbandry.
Small Farm Benefits
Usually when people think about animal nutrition, they’re using it as a tool to increase production.
This is a major way that nutritional information can be used.
But in many cases, I see this as a positive side effect for small farmers after they use nutrition to appropriately address a separate concern.
I see classified ads all the time for cows or nannies or ewes that all say the same thing: “selling because she doesn’t breed back.” Did you know this can be fixed via proper nutrition?
If you aren’t meeting your animals’ basic needs for maintaining their own bodies, there is no way they’re going to catch. Before selling, reevaluate your nutrition plan for your breeding stock.
mnapoli/Shutterstock
Increase Egg Production
Another common issue I run into is hens that aren’t laying. If all other farm conditions are right and the hen is healthy, nutrition is usually the answer.
Other Animal Benefits
Nutrition can also be a major factor in maintaining the overall health, thriftiness, condition and even temperament of an animal. Poor-tempered animals are sometimes like that due to underlying health issues. But some of these can be addressed with proper nutrition.
So, what is proper animal nutrition? I will go through some basics of animal nutrition and use examples for how it can be applied to your farm.
Because these topics go hand in hand, I’ll also address different labels for animal products and how you need to manage your animals’ nutrition appropriately, even if it isn’t in line with your personal beliefs about certain feedstuffs.
Feed a Balanced Diet
When you feed what nutritionists like to call a “balanced” diet, that means you’re meeting all the needs of your animals for the maintenance of their own body functions, plus whatever they’re producing (meat, milk, eggs, offspring, etc.).
A balanced diet is going to provide them with the appropriate amount of energy they need. They’ll inject all the macro- and micronutrients they require, too.
If you own a dairy cow, for example, its diet is going to change throughout its dry period, pregnancy and different stages of lactation. During the dry period, you need to manage energy and calcium intake carefully to prepare for calving.
A diet that is too energy- and calcium-rich is going to make the cow much more susceptible to milk fever and ketosis. Both of these conditions can be deadly.
As your cow freshens and enters early lactation, it may need more energy than it can take in. If you’re just feeding hay, even if it’s high quality, this probably isn’t going to provide energy. A full belly doesn’t equal enough energy.
You would adjust its diet again after freshening to include a higher energy feed source. That’s usually some kind of grain. As the cow continues on throughout lactation, its energy requirements will decrease. Then you’ll be able to transition it back down to a lower energy feed.
Now, I know what you’re going to say. “But Alli, I just turn my ol’ Bessy out on the pasture and she milks fine.”
Alright, that may be true if your cow isn’t naturally a huge producer. Its body doesn’t require as much energy after freshening.
Additionally, though your cow may seem fine, track its body condition to make sure it really is maintaining a healthy weight. Or test its blood levels for BHBA, an indicator of ketosis.
For the most part, livestock are tough and don’t complain much. But if you aren’t familiar with what can go wrong, you won’t know what to look for so you can prevent it.
Use extreme caution when mixing your own feeds for animals you’re using for production. I see this most commonly with laying hens.
The reason commercially available feeds often have more than three ingredients is because meeting a production animal’s needs requires many varied nutrients.
This is something that is possible to achieve on your own. But it’s going to be expensive and difficult to gauge success without getting your mix analyzed a few times. I always recommend reviewing homemade mixes with a professional nutritionist if that is a route you’d like to take.
JNix/Shutterstock
Pay Attention to Micronutrients
Another area of nutrition greatly ignored on the small farm is micronutrients—i.e., vitamins and minerals. But these are essential for health and production.
These won’t be cheap. And they aren’t going to be something you can just throw on top of some hay for animals to gobble up. But they are important enough that you should be willing to pay for them.
Vitamins and minerals can be difficult to feed because they often come in a powdered form—something that animals don’t readily want to lick up. So I like to mix them into a feed the animal enjoys and powder can stick to, such as sweet grain or some soaked alfalfa cubes.
I sometimes hear of people leaving out seven buckets of different powdered vitamins and minerals, thinking their animal will instinctively know what to eat. But…
First, no animal is going to want to go lick up bitter powder, no matter how badly they need nutrients.
Second, you’ll have so much waste. Buckets get knocked over, the powders soiled, and it will be a disaster.
Third, you won’t know how much your animal is eating. If you opt for powdered micronutrients, mix them into a feed you can monitor, saving yourself headache and money.
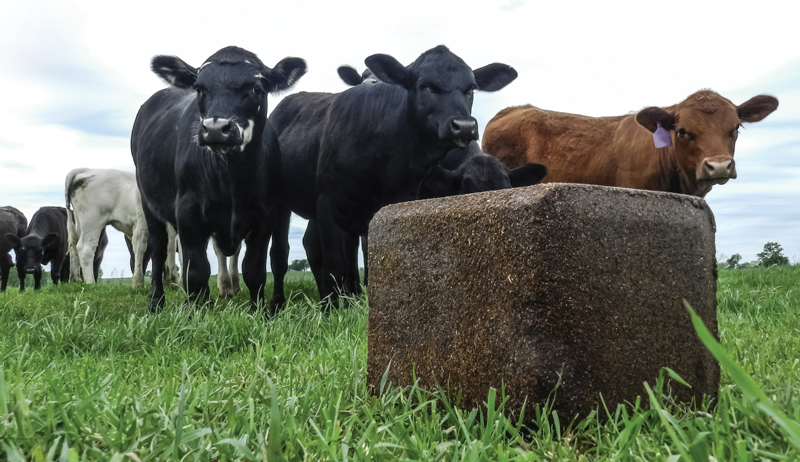
You can also purchase vitamin and mineral blocks. (Note: These are not the same as a salt block.)
They’re great because they’re usually more affordable and convenient, already properly balanced and taste good to animals. But remember, you still have no idea how much of the block your animals are actually eating.
If you do opt for blocks, avoid putting them in pastures with a lot of animals. This makes it even more difficult to tell what is being consumed. Also, the weather can degrade your block, leading to wasted money for you.
If you want your animals to be “grass-fed” or “grain-free” or any other type of label, that is totally fine. But you need to adjust your production goals and time frame accordingly.
Grass is a lower energy feed and will take longer to make any animal product (eggs, milk, meat).
Sometimes, longer isn’t better from a sustainability standpoint. Farming is looking at the big picture and what is going to work best for your land and animals on your farm. There is nothing wrong with feeding a high-energy feed source, such as corn or some other grain, according to your animals’ nutritional requirements.
For example, you could supplement grains only at critical times, such as during pregnancy or lactation. Contrary to all the misinformation out there, livestock (especially ruminants) are able to digest and eat a wide variety of feedstuffs. This is possible because the main way they digest their feed is via fermentation by microbes.
SEEphotos7171/Shutterstock
Make the Right Diet Decisions
I can’t tell you how many times I have seen good animals not make it because of poor nutrition management. It is completely heartbreaking. And most of the time, it is totally preventable.
Management is everything, so do it right and don’t mess around.
Different feedstuffs are simply vehicles for certain nutrients. If your animal needs certain nutrients, find an appropriate vehicle for those nutrients.
Sometimes this will be a feedstuff you don’t mind feeding. Other times it may be a feedstuff you’re not as comfortable with.
Your animals’ lives depend on your willingness to manage their nutrition appropriately. Please don’t bet your pride on them. At the end of they day, they don’t have the same needs, desires, and feelings we do—especially about feed.
Sidebar: Healthier Cattle Pastures
When a pasture or hay field becomes less productive than desired, renovation can help improve or renew the land. Here are a few things every farmer can do to maximize the nutrition of their pasture plants.
1. Test your soil.
After receiving the results of your soil test, apply amendments, such as lime and fertilizer, if necessary. Legumes need a higher soil pH and fertility level than grasses. However, avoid using nitrogen-based fertilizers if you have 25 percent or more legumes.
Added nitrogen stimulates grasses, which then compete with the legumes.
2. Reduce vegetative cover.
This is best achieved with heavy grazing in late fall and early winter. Removing excess grass cover will make it easier to help legume seed make contact with the soil.
3. Carefully select the legumes you use.
The legumes you choose to use in your pastures will depend on the soil and the planned use of the forage.
4. Use the right kind & amount of seed.
Select plant varieties that grow well in your area. Your local extension agent can point you to current research about appropriate varieties.
The only way to be sure of what you’re planting is to use certified seed. Also be sure to mix the appropriate high-quality inoculates with the seed just before planting, along with a sticking agent to ensure the inoculates adhere to the seed.
Most legume seed currently available is per-inoculated. Check the seed tag or inoculate bag for the “plant by” date.
Plant the seed so it makes good contact with the soil. A simple, effective method is to broadcast the legume seed on the soil surface in late winter. As the soil freezes and thaws, the seeds become covered, though this method does not work well with alfalfa.
Make sure the stand is grazed or cut closely so that most plant residue is removed and the seed hits the soil surface.
5. Control grass and weed competition.
After legumes start to grow, this step is one of the most critical. Many attempts to renovate pastures have failed simply because the grass was allowed to grow and reduce the light, nutrients and water available to the young legume plants.
The grass must be kept short via grazing or mowing until the new legume plants are 3 to 4 inches tall. Stop grazing if the cattle bite off the young legume leaves. After reaching 3 to 4 inches in height, grazing and mowing should stop for several weeks to allow the legumes to become well established.
After legumes are well established, the field should be mowed or grazed regularly to help maintain good condition. We highly recommend adopting a rotational grazing system to ensure optimal pasture management.
In addition to a rotational grazing system, a “rest-rotational” system could extend the usefulness and productivity of the pasture.
Depending on acreage involved, you might want to consider a mixed-species grazing system with cattle and meat goats or sheep. Holistic resource-management systems are outstanding forage harvesting systems with livestock, too.
— Garry D. Lacefield, a forage specialist at the University of Kentucky Research Education Center, and Ray Smith, a forage extension specialist, Department of Plant and Soil Sciences in the University of Kentucky’s College of Agriculture.
This article originally appeared in the November/December 2020 issue of Hobby Farms magazine.
In this, our final installment in the three-part exploration of root cellars, we’re going to look at keeping things cool. Specifically, I want to talk about how you can efficiently use ice to keep your root cellar cool when things warm up.
Ice Cold
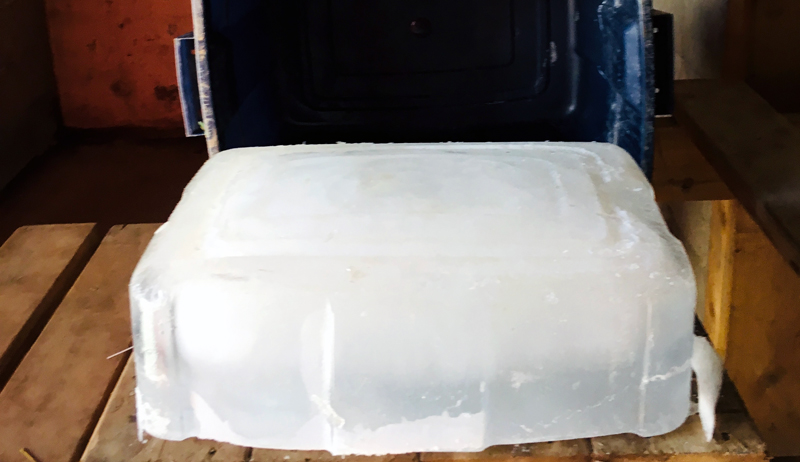
For my cellar, I also make ice. In January and February, I use Rubbermaid bins like a giant ice cube tray and open my frost-free hydrant and fill them to make ice.
This ice is like a cold battery, holding the temperatures of January and February into the summer heat.
Unlike the ice houses of old that would cut ice from lakes and rivers, my inland farm won’t allows this. So I turned toward a more organized and efficient model.
First, I fill many bins simultaneously using drip irrigation systems that would normally water potted peppers and tomatoes in a greenhouse with spaghetti tube-like emitters. Then I allow the bins to freeze for a few nights.
Once the bins are frozen, these can be slid into the cellar on a roller belt or other surface. Once they’re in, I pop the ice out of the bins and stack it at the back.
Zach Loeks
My cellar has a chamber at the back designed to hold the ice cubes with its own drain that collects the melt water.
Using this method, my cellar actually maintains around 37 degrees F right through June, July, August and September. One year I still had ice in the cellar on October 27th!
I mention this ice-making bit in this article because it is related to how I use my root cellar for both winter and summer cold-storage. It’s just space efficient to build a root cellar and cold-storage in one and to use the space needed for a winter’s worth of root vegetables in fall to double as an ice-chamber in summer to keep some veggies fresh.
Also, when I make the ice in January and February, it draws the temperature of the cellar down to 32 degrees F. It keeps this temperature right through the spring, giving me incredible root storage capability even as most root cellars would begin to “wake up” with spring and the roots would lose their dormancy.
A few caveats to this system.
First, this is a system for areas with cold winters. You need at least 5 degrees F to make quality ice. (Where I live in Canada, of course, this temperature is fairly common in winter.) Ideally, you would have several weeks in winter when these temperatures occurred. But you can get away with only one cold spell by having enough bins to make all this ice in one go.
Second, you need to like playing with ice and snow.
Other Cellar Facts
To close out our look at root cellars, here are a few other pointers and fun facts about cooling with homemade ice.
Approximately one-third of the volume of your cellar should be filled with ice. Please note, this space is available for the maximum amount of cellar vegetable storage needs because that occurs in October and November, when the storage carrots and beets need to be moved in and the ice has melted.
(This works out great as they move into a very cold cellar).
Most commercial vegetable operations have many bins and buckets that aren’t used in the wintertime. So they can serve to make ice. But other concepts such as barrels on pallets can make this system even more economical for larger operations.
All in all, the beauty of the root cellar and the ice-cooling system is they don’t rely on electricity. Over the long term, it will save money and build resilience!
“The hobby farm life is relatively new to me,” says Michelle Aguilera. She left what she calls a “mentally exhausting” lifestyle in Charleston, South Carolina, to found the Stone House Mini Donkeys farm in Oregon in 2015.
“I wanted a simpler life for my family,” Aguilera explains. “One that included being outside more and working alongside one another.”
Since embracing a farm-focused way of living, Aguilera has chosen to make miniature Mediterranean donkeys an integral part of her homestead. And her charming drove have subsequently become hits on the social media circuit.
We spoke to Aguilera about becoming smitten with miniature donkeys and their emotional needs. We also got into the benefits of a hardworking but slower-paced lifestyle.
Back in 2013, Aguilera chanced across a couple of miniature donkeys at a state fair. “I fell in love with them instantly,” she recalls. “I was drawn to their soulful eyes.”
After moving to Oregon in 2015, Aguilera set about adding miniature donkeys to her own land. She made the animals a focus of her family’s farm.
“Miniature donkeys will follow you everywhere and crave your affection but only after you have gained their trust,” says Aguilera when asked about the temperament of the animals.
She adds that to date she has owned and rescued 17 donkeys and noticed that “they have all required love, time and space in order to trust and feel safe.”
When it comes to the personality of her miniature donkeys, Aguilera says that “they easily let you know how they’re feeling and what they need.” She adds that her donkeys are “always excited to see you and will run to greet you.”
Just don’t forget the dinner schedule: “Donkeys are very mindful of feeding times and are quick to remind you with a bray or cute stare down if you are a few minutes late.”
On a day-to-day basis, Aguilera says that one of the challenges to raising miniature donkeys is “finding the time to give them the attention and affection they require in order to thrive.”
In Aguilera’s experience, it’s best to do this while cleaning the stalls, during feeding times or via a grooming session. Once you’ve made time to lavish the donkeys with affection, they’re likely to “return it tenfold.”
“Hobby farm life has meant more to my family than we could have ever imagined,” says Aguilera, reflecting on the benefits her lifestyle change has brought about.
“Yes, it is a lot of hard work, but it has slowed down life for us and I believe we are closer for it. We work with each other for the betterment of the donkeys and enjoy seeing them thrive on our farm. We have a sense of pride in what we have built and in giving them a home in which they can grow and be happy.
“I believe that donkeys are incredibly soulful and to have a relationship with one is simply amazing!”
Quality, tasty vegetables get their start from healthy soil. But if you plant the same vegetable group in the same place, year after year, soil can become depleted of nutrition, pests and diseases can gain a toehold, and your harvest yield will drop.
A couple of years ago I learned this the hard way. Because they looked pretty, I grew a variety of ornamental gourds over two trellises in my kitchen garden for three years running.
But I paid the price.
Squash beetles descended on my garden, making it nearly impossible for me to grow even the humblest zucchini. Squash beetles were able to thrive in four beds in my garden. And why not? I had provided the perfect environment for them. What I failed to do was rotate.
Rotation Basics
Each vegetable group has its own pests, soil-borne diseases and nutritional needs. Therefore, the practice of rotation helps to balance the environment of your garden and ensure a bountiful harvest in a natural way.
Vegetables are grouped into nine families:
Solanaceae/potato family (tomatoes, eggplants, peppers and potatoes)
Alliaceae/onion family (onions, garlic, shallots, chives, leeks)
Umbelliferae/carrot family (carrots, parsley, and parsnips, dill, celery,
Brassicaceae/cabbage family (cabbage, broccoli, kale, radish, turnip)
Leguminosae/pea and bean family (beans, alfalfa, clover, peas)
Poaceae/grass family (corn, maize)
Compositae/daisy family (lettuce, chicory, Jerusalem artichoke)
Amaranthaceae/beetroot family (beets, spinach, Swiss chard)
Cucurbitaceae/squash family (zucchini, squash, pumpkin, cucumber)
Keeping the families in mind, you’ll set up your garden bed rotation based on needs, with each group following the next in a logical way. For example, brassicas deplete rich soil, and since rich soil leads to leafy growth, root vegetables should follow brassicas. That way the plant will put its efforts into growing a better root and less top growth.
Legumes enrich the soil with nitrogen that solanaceae need. So you can look at your garden and get an idea of what nutrients remain in each bed after each plant group is harvested.
You should also leave a bed or area fallow every three or four years to allow it rest. Plant fallow beds with a green manure crop, such as buckwheat or field peas, which will be tilled back into the soil to provide nutrients and organic matter. Many seed companies sell packets of green manure seeds.
The easiest way to rotate is to divide your plant groups into four categories:
light feeders
heavy feeders
legumes
green manure
So in the rotation, light feeders follow heavy feeders and legumes follow light feeders. Green manure will follow legumes.
Light feeders include beets, carrots and garlic. Heavy feeders include potatoes, tomatoes, cabbage, corn, greens and cucumbers.
Another method is to split your groups into legumes, roots, leafy, fruiting and green manure.
Legumes are, of course, beans and peas.
Root vegetables include beets, carrots and parsnips.
Fruiting vegetables include cucumbers, squash and tomatoes.
Leaves include lettuce, greens and spinach.
In this rotation, legumes follow roots, root follows fruits, fruits follows leafs and green manure follows legumes.
Of course you can have as many beds as you want. Just keep the rotation principles in mind and make sure that a crop in the same family never follows another in a specific garden bed.
Space Considerations
Crop rotation is a little trickier when it comes to a smaller garden. You’ll have to get a little creative. Simply moving potatoes a few feet further down your patch is something, but it won’t give you many benefits.
Your garden doesn’t have to be confined neatly in one space. You can rotate outside your plot.
Think about putting vegetables in your ornamental garden in the front of your house. There are beautiful vegetables that can be the star of a flowerbed, such as bull’s blood beet and Bright Lights Swiss Chard.
You can set up a tripod or trellis in that space next season and run cucumbers up them, and plant peas and beans the next. Take heavy feeders out of the garden one season by planting potatoes and tomatoes in grow bags and setting them in sunny parts of your yard.
Another option for those with tight spaces is to rotate with a friend or neighbor. One year they’ll grow heavy feeders and you’ll grow light feeders, and you swap the next year.
There is a caveat with rotation. If a vegetable has been growing just fine in a certain spot in your garden, then by all means keep growing it there. Don’t change a method that’s working for you. But if you’re not getting your all from your garden, try rotation.
This year I learned from my gourd mistake. I didn’t plant a single squash in my garden, but I did plant pumpkins and winter squashes on an almost finished compost heap. The squash were wonderful and bug free.
I plan to keep squash out of my main garden for another year and then try again.