Categories
Farm Management

Roadside Farm Stand: 9 Tips for Starting Your Own

A roadside farm stand can be a great income earner for large and small farms. We’ve all seen the signs strewn along highways and byways announcing corn for sale, farm-fresh eggs, Halloween pumpkins and fall chrysanthemums.

Roadside farm stands have endured for so long because they don’t require a lot of capital to run. A little creative ingenuity and some produce to sell is all you really need.

To give us some guidance on how to set one up, we talked to five farmers and producers who have successful roadside farm stands.

1. Setting up a Roadside Farm Stand

A roadside farm stand can be as simple as a cart with a few bins of veggies or as elaborate as a small walk-in shop with a refrigerator.

“If you’re just beginning, start out really basic,” says Jesalyn Pettigrew of Mossy Gate Flower Farm in Mount Vernon, Washington. “Your neighbors will enjoy seeing your stand evolve, and it makes them part of the story.”

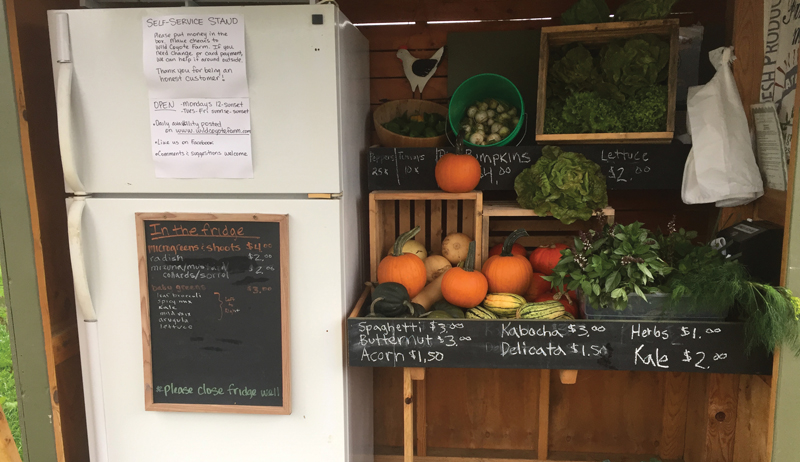
Paul Meulemans of Wild Coyote Farm in Berrien Springs, Michigan, sells vegetables, microgreens, cut flowers and herbs from a stand on his property. He suggests starting out with a movable stand or one you can disassemble because you might have to experiment with different locations before you find the one that works best.

“Make it a small footprint, too,” he says. “It doesn’t need to be super large. You can put a lot of stuff in a small stand, especially if you make it vertical instead of horizontal. A vertical one makes a good display.”

Mandy Bodie runs the Sweet Peach Roadside Stand in Ward, South Carolina, out of a 30-year-old peach stand that was given to her. She and her family remodeled it and painted it a bright sea-foam blue with artistic peach decals.

In addition to a large permanent roadside farm stand, Emily Kwilos of Kwilos Farms in Angola, New York, has a small self-service shed with an overhang to shelter customers from the weather. She also has a small outhouse-style shed to the side where she sells the farm’s maple syrup. Pettigrew’s flower stand is made from a charming old truck with flower containers in the truck’s bed.

roadside stand stands farm market
Mandy Bodie/Sweet Peach Roadside Stand

2. Manned or Self-service?

Your stand can be manned or self-service. A self-service stand with an honesty cash box is a good choice if you don’t have the ability to stay there. Kwilos says not to leave valuable products, such as maple syrup, unattended. You also have to accept that there will be theft from time to time.

You make more sales with a staffed stand by explaining the produce, helping with selection, and providing information about you and your farm, how the produce is grown and how you care for the land.

You’ll also be there to refill the bins and protect your goods from theft.

Whether you need a permit for a roadside farm stand depends on your state and county. There may be a size restriction on your booth, rules on the kind of produce you can sell or how much you can sell from other producers.


Is it time to start an honor system farm stand?


3. Roadside Farm Stand Placement

Your roadside farm stand can be located wherever you’d like, such as at the front of your farm, on a corner lot or off a busy road. (Make sure to check with your local laws first.)

Try to pick a spot near a popular place, such as near a tourist area. Pettigrew has her flower roadside farm stand near a public boat ramp. Bodie has her tree-ripened peach stand close to the local dam and swimming hole.

Kwilos’ stand is on a busy road that catches the eyes of people coming home from work in the nearby city. “They can pull right into our stand,” she says. “If we were on the other side of the road, they would have to cross traffic to get to us.”

Consider parking, too. Can a car or two safely park near your stand? Is there a lay-by, public parking space or a quiet street nearby?

If customers have to struggle to get to your stand, they will most likely drive on by.

4. Signs & Advertising

One of the benefits of a roadside farm stand is that its location is its own advertisement. However, having a little bit of advertisement can pay off.

Tamera Mark, who owns Iron Creek Farm in LaPorte, Indiana, says that people locate her place through farmers’ market websites, so if you’re a vendor at a market, check to see if you’re listed there.

She also recommends a website called Local Harvest. There, you can make a listing for your roadside farm stand and include information about yourself, your farm, your locations, hours of business and what products you offer.

Pettigrew recommends the Nextdoor app, too, which can help you draw in people from outer neighborhoods. Trail-blazing signs will point the way from the main road to your stand’s location, but you can also have a list of what’s in season, such as fresh corn, ripe strawberries and local blueberries.

Roadside farm stand signs don’t have to be fancy. Kwilos’ signs are made from a sheet of plywood cut into quarters. She pairs two pieces and hinges them at the top so they can be flipped around when the next product is in season. The paint should be fresh with appealing colors and design to catch the attention of passersby.

Kwilos sets her directional signs about a tenth of a mile up the road.

Don’t forget social media. Start a Facebook page where you can list comings and goings on the farm. Create an Instagram feed where you can show off pictures of your beautiful produce. Post every day, and remember to use hashtags such as #supportlocal, #localproduce, #localfreshflowers, etc.

Include your social media information on a sign on your roadside farm stand, and encourage people to tag you on their posts.


Check out these 4 keys to marketing your farm and products online.


5. Make Your Roadside Farm Stand Appealing

If your stand is staffed, have everyone wear matching aprons or t-shirts so that customers know who to talk to. A “uniform” also gives your stand a professional look.

“Fill the baskets all the way up to the top,” Bodie says. “We display our peach stems down because it looks more attractive. Remove any produce that looks damaged. And make sure to replace your produce as it sells. You want people to think you have a lot.”

Keep things up off the ground so that people don’t have to stoop to see what you have. Decorate your roadside farm stand to show off your personality. Kwilos puts a little ditty on her signs each year, such as: Three People, Two dogs, 400 Gallons of Syrup.

“Be your own walking Pinterest post,” she says. Include recipes and bundle produce together so customers can find the ingredients easily, such as dill with the cucumbers to make pickles.

6. Produce

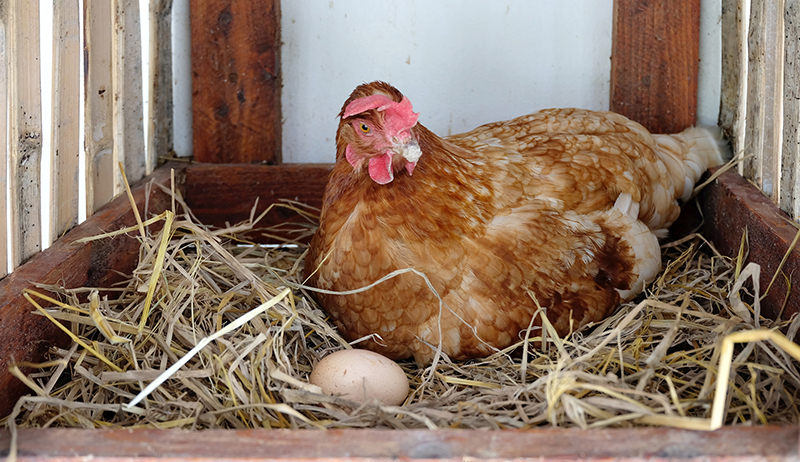
Depending on your state’s rules, there are various things you can sell on a roadside farm stand such as chicken eggs, baked goods, preserves, pickles, and even rabbit and poultry. One benefit of having a roadside farm stand is that you can sell things you’ve made in your own home, such as preserves and baked goods, that might require the use of an off-site kitchen if you’re selling to restaurants or stores.

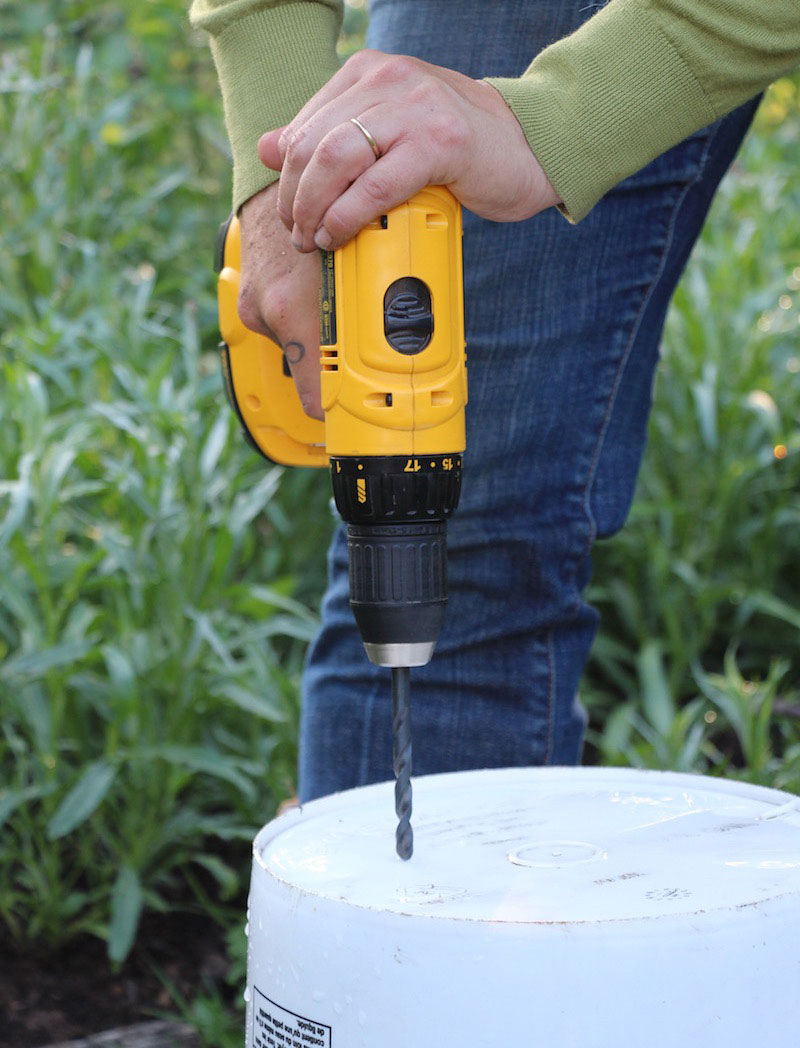
Think about how you’ll supply refrigeration if you’re going to sell things like greens that will wilt easily or eggs that by law must be kept at a certain temperature. A small refrigerator plugged into your house via a long extension cord can work well.

Bodie adds that your electricity company might be willing to set up a temporary power pole for you.

roadside stand stands farm market
Wild Coyote Farm (www.wildcoyotefarm.com)

7. Roadside Farm Stand Pricing & Money

Pricing the produce at your roadside farm stand can be a challenge. You don’t want to undercharge and you don’t want to overcharge. You certainly don’t want to sell at a loss. The Meulemans’ goal is to set their price so that it’s sustainable for them and fair for customers.

Paul Meulemans suggests checking wholesale prices on the USDA website and adding 30 percent. Also, keep in mind that you can sell your produce cheaper at a roadside farm stand than wholesale or at a farmers market because your overhead will be very little.

Bodie says that it’s important to keep prices simple so it won’t be confusing for workers or customers. Sell by dollar so it will be easy to make change without having to use coins. The prices should be clear so that customers won’t be confused or have to ask.

Weighing out produce with a digital scale on the stand can create a headache, and you may be subject to a visit by Weights and Measures. Therefore, preweigh and measure your produce to sell by the bunch, quart, pint, bushel, pint or amount.

To protect soft produce, purchase small reusable baskets. Fill the produce inside a prebagged basket. Instruct the customer to remove the bag and leave the basket. Bundle greens and secure them with a rubber band.


We pulled together some tips to help you price your produce for sale.


8. Grow to Sell

If you’re thinking of adding something new to your roadside farm stand, look at the item in your grocery store to see if it is worth growing. “The store might be selling the item so cheaply that people will be used to buying it for a low price,” says Shelli Meulemans.

For instance, sweet corn is often sold for pennies on the dollar when in season. If you do sell common produce, make sure to educate your customers on the difference, such as the benefits of fresh farm corn and the amount of care needed to grow flowers.

Some items will fetch higher prices at your stand, however. Greens, such as kale and chard, are good examples. Stores often sell small bunches at high dollar, if all.

“We’ll sell a large bunch of kale for $2 on the stand when we have a lot,” Meulemans says.

Heirloom vegetables with a backstory are also worth selling, such as the dried bean variety called the Mayflower, which is said to have come over on its eponymous ship. Include the story on a label or attached to the display.

roadside stand stands farm market
Joey & Emily Kwilos/ Kwilos Farms

9. Roadside Farm Stand: Money Makin’

Get creative about accepting money. Bikers and walkers might not have cash with them, so join “send and receive” money apps, such as Cash App, Venmo, Square and Paypal, and post the information inside your stand. This is also a good choice for self-service stands.

Kwilos keeps change in her apron pocket so she’s not tied down to standing by a money box or register.

Securely bolt your “honesty money box” to something sturdy so it can’t be stolen, and padlock the lid. Kwilos and Pettigrew, who have self-serve stands, say that sometimes the box will be short money and sometimes it will be over. And sometimes there will be an IOU.

You can also sell to people on supplemental nutrition programs. Apply through the USDA to become a SNAP (Supplemental Nutrition Assistance Program) retailer. To become a WIC (a supplemental nutrition program for Women, Infants and Children) retailer, contact your state’s Department of Health.

Just like most things on a farm, a roadside stand can be a lot of work, but it can also be a lot of fun. Family and friends can join in by decorating the stand and signs, refilling produce and manning the stand to answer questions.

Your kids might even want to grow or make their own products to sell. Bodie says that her 10-year-old daughter became inspired this year to grow her own tomatoes to sell them on the farm stand and make her own money.

Most of all, a roadside farm stand can give you a chance to join the produce retail market without a lot of investment.

This article about best tips for a roadside farm stand originally appeared in Hobby Farms magazine. Click here to subscribe.

Categories
Crops & Gardening

Lettuce Bolting? 5 Things You Can Do With It

Lettuce bolting is one of the biggest problems when growing this popular crop for home gardeners. It’s easy to grow, and there’s a plethora of gorgeous and tasty varieties to include in your veggie patch. That said, since lettuce is a cool-weather crop, once the warm temperatures and long days of summer arrive, lettuce plants go to flower and set seed. Most gardeners rip out their lettuce plants when they bolt. If you do this, you’re missing a great opportunity. Here are five things to do when lettuce bolting strikes.

1. Feed Bolted Lettuce to Your Flock or Donate It to an Animal Shelter

Bunnies, guinea pigs and many species of birds, including chickens, enjoy munching on lettuce leaves, even after the plants have gone to flower and are too bitter for human consumption. Lettuce can be a good source of vitamins and minerals and the entire plant, including leaves, stems and flowers, can be fed to chickens.

chickens and rabbits eating lettuce
Adobe Stock/Iker

2. Cut Bolting Lettuce Plants Back to the Ground; Let Them Resprout

This is my favorite thing to do with lettuce bolting in my garden. Instead of pulling the plants out by the roots, simply cut the tops off and leave the roots intact. The stump will resprout when temperatures cool later in the season and go on to produce a second crop of lettuce in the late summer or fall.

3. Let Bolted Lettuce Plants Flower for Beneficial Insects and Pollinators

Lettuce blossoms are very attractive to many species of parasitic wasps, syrphid flies and other beneficial insects that help gardeners control pests in the landscape. Some species of pollinators nectar on them as well. Lettuce bolting flowers will be buzzing with insect activity soon after they open, and they’ll continue to bloom for many weeks.

4. Collect the Seeds for Next Year’s Garden

bolted lettuce seeds
Jessica Walliser

Lettuce plants are largely self-pollinating, so if you save the seeds of open-pollinated, heirloom lettuce varieties, there’s a good chance the seeds will come true-to-type (meaning you’ll get the same variety when you plant those collected seeds into next year’s garden). I save seeds from all my heirloom lettuces because even if they don’t come true-to-type, the results are still delicious. Plus, I often end up with some very unique coloration and leaf forms.

5. Lettuce Bolting? Use it as a Trap Crop

Slugs, earwigs and pill bugs much prefer lettuce to most other garden crops. If you want to keep these leaf-marring insects off broccoli, cabbage and other productive crops, just allow your lettuce bolting plants to stay right where they are. Sprinkle an iron phosphate-based slug bait, such as Sluggo or Escar-Go, between the lettuce rows to get a grip on slug numbers.

If you’re not willing or able to do any of these, there’s always the compost pile. Bolted lettuce plants are a great nitrogen source for the compost bin, especially when they’re used in combination with carbon sources such as autumn leaves and straw.

This article about lettuce bolting was written for Hobby Farms and Chickens magazines. Click here to subscribe.

Categories
Crops & Gardening

Basil Varieties: 10 To Consider Growing

Choosing from the array of basil varieties to plant might be the most difficult part of growing this herb. It has minimal growing requirements—full sun (at least six hours a day), warm temperatures (above 50 degrees F) night and day and fertile soil with adequate moisture—but there are more than 40 known varieties (as well as many ways to market it to sell). Your local garden center probably offers a few varieties as seedlings, but to grow the most unusual basils, you’ll need to start from seed.

To help narrow your selection, determine how you will use it: to color in the landscape, as an ingredient in food or drinks, as a garnish, or to make a year’s supply of pesto (or any of our five creative uses). Below is a list of 10 basil varieties and their uses to help you make your decision.

1. Christmas Basil

christmas basil

With 2-inch, glossy green leaves and purple flowers, Christmas basil adds fruity flavor to salads and drinks, and the plants are gorgeous in the landscape. A beautiful border plant, it averages 16 to 20 inches tall.

2. Cinnamon Basil

cinnamon basil

This variety has a delightful fragrance and spicy flavor. A beautiful, 25- to 30-inch-tall plant with dark-purple stems and flowers accented with small, glossy leaves, it’s my favorite basil to use for fresh arrangements and in fruit salads and garnishes.

3. Dark Opal Basil

dark opal basil

A must-grow among the basil varieties in my garden, Dark Opal basil adds color to fresh summer floral displays and depth to dried arrangements and wreaths. Beautiful and spicy in a salad or garnish, it can also be made into pesto, which adds an unexpected color and flavor to your pasta or bruschetta. The plants are attractive in the herb garden, ranging from 14 to 20 inches in height with purple stems, flower and leaves.

4. Holy Basil

holly basil

A revered plant in the Hindu religion, Holy basil is also referred to as Sacred basil or Tulsi. Its leaves can be used to make tea for boosting your immune system. It is a beautiful plant in the garden with mottled green and purple leaves and grows to about 12 to 14 inches tall.

5. Lemon Basil

lemon basil

This variety can be added to salads and fish dishes with abandon. A sprig of Lemon basil in a glass of iced tea is particularly delightful on a hot summer day. The 20- to 24-inch plants are light green with white flowers and 2½-inch-long leaves.

6. Lime Basil

lime basil

With small green leaves on compact, 12- to 16-inch plants with white flowers, this basil variety’s lime scent and flavor make it great in fish and chicken dishes. A simple syrup infused with Lime basil is a delicious addition to tea and margaritas.

7. Spicy Bush Basil

spicy bush basil

Basil varieties in the garden include Spicy Bush basil, which has tiny leaves on small, mounded plants; perfect for pots or lining the garden in bonsai-like fashion. It only takes a few of this variety’s intensely flavored leaves to add a punch to a sauce or soup. The plants are a soft green and about 8 to 10 inches in height and width, with 1/2- to 1-inch-long leaves.

8. Purple Ruffles Basil

purple ruffles basil

A feathery variation of Dark Opal, Purple Ruffles adds another dimension to the landscape, floral arrangements or garnishes. It has the same flavor as Opal and can be used similarly. It is a 16- to 20-inch-tall plant with 2- to 3-inch-long leaves.

9. Sweet Basil

sweet basil

Of the basil varieties, this cultivar is the best choice for Italian sauces and soups and for making pesto. Varieties include Genovese, Napoletano, Italian Large Leaf and Lettuce Leaf. Plants range from 14 to 30 inches tall and are prolific in hot, sunny locations. Harvest the top four leaves often to keep the plant growing and sweetly flavored.

10. Sweet Thai Basil

sweet thai basil

An Asian variety with a distinct, spicy, anise-clove flavor, quite unlike common sweet basil, sweet Thai is a must-have addition to Asian cuisine and makes a nice addition to the basil varieties in an herb garden for fragrance and color. It has purple stems and blooms with green leaves reaching 12 to 16 inches tall.

This article about basil varieties was written for Hobby Farms magazine. Click here to subscribe.

Categories
Crops & Gardening

Bucket Garden: Use a 5-Gallon Bucket To Grow Veggies

This project uses recycled 5-gallon buckets to grow a great container garden. Five-gallon buckets make terrific containers for a huge number of vegetables. Not only do they hold just enough potting soil for roots to thrive, but they don’t take up a lot of room on a crowded patio or deck. Each bucket is home to one vegetable plant and perhaps two or three smaller herbs or annual flowers. Using 5-gallon buckets, you can grow as many different vegetables as you’d like. They’re easy to move around the deck or patio to maximize sunlight exposure, and come fall, the plants can readily be protected from early frosts by simply tossing a bed sheet over them. Here’s how to build a 5-gallon bucket garden.

Pick The Right Buckets

When selecting buckets for your 5-gallon-bucket garden, try to avoid any that were used to store questionable materials, such as pool chemicals, tar, asphalt, pesticides or herbicides. Instead, look for buckets that were used for food-grade materials or clay-based kitty litter, or ones that were simply used for odd jobs around the house.

Pick The Right Vegetables

After you have your collection of buckets, focus on selecting the correct vegetable varieties. Seek out smaller-statured vegetable varieties for your 5-gallon-bucket garden whenever possible. Determinate or genetically dwarf tomato varieties perform the best in these buckets, as do bush-type cucumbers and winter squash. For this project, I used a pickling cucumber, but other good veggie choices garden include eggplants, tomatillos, ground cherries (Physalis pruinosa), pole beans (as long as you use a trellis to support them), zucchini, cabbage, peppers, broccoli and chard. You can also grow a broad range of salad greens in 5-gallon buckets.

What You’ll Need:

  • 1 plastic, 5-gallon bucket for each plant
  • roll of burlap (if you’d like to cover the bucket)
  • jute or plastic twine
  • enough 50/50 potting soil/compost blend to fill all the buckets
  • 1 feature plant for each bucket
  • 2 to 3 “filler” plants for each bucket
  • cordless drill with 1/2-inch drill bit
  • scissors
  • eye protection (for drilling)

Step 1

drilling drainage holes in a bucket garden
Jessica Walliser

Flip over each of the buckets and use the drill with bit to create three to five drainage holes in the bottom of each bucket. Do not push too hard on the drill as it may crack the bucket. Let the bit and drill do the work.

Step 2

cutting burlap for a bucket garden
Jessica Walliser

If you’d like to cover your buckets with decorative burlap, this is best done before the containers are filled. To do it, cut a piece of burlap slightly wider and longer than the bucket’s exterior. Fold and wrap the burlap around the bucket, tucking in any loose edges to keep them from fraying. Use two pieces of jute or plastic twine to fasten the burlap around the bucket, one toward the top and one toward the bottom.

Step 3

filling a bucket garden with dirt
Jessica Walliser

Fill the bucket with the potting soil and compost blend to within 1 inch of the bucket’s upper rim.

Step 4

planting herbs in a bucket garden
Jessica Walliser

Plant one larger, feature plant in the bucket, then add two or three smaller plants. For this project, I used a pickling cucumber as my feature plant and a thyme plant and nasturtium as the fillers. Water them in well.

Step 5

Repeat the process for each of your 5-gallon buckets, and then arrange the planted buckets with the plants that will grow tallest toward the back of the collection and those with trailing or low plants toward the front to maximize sunlight exposure and air circulation.

cucumbers growing in a bucket garden
Jessica Walliser

If you’d like to add a splash of color to your 5-gallon bucket garden, you can also paint the buckets with funky patterns or flowers using a spray or liquid paint formulated specifically for use on plastics. Clean the exterior of the buckets with an ammonia-based cleaner before painting. To prevent damage to any plants, allow the paint to fully dry prior to planting the buckets.

This article about planting a bucket garden was written for Hobby Farms magazine. Click here to subscribe.

Categories
Poultry

Fertilized Chicken Egg: Easy Signs to Identify

Knowing how to spot a fertilized chicken egg when you have a rooster in your flock is a good skill. Here’s how to tell.

Can you make this assessment just by looking at an egg? The simple answer is that you cannot eyeball an egg to identify it as either fertilized or unfertilized. The eggshell is merely an armored casing, protecting what is inside. It does not grow harder, become rounder or change color if a chick is growing within. If you bought your eggs from a commercial farm or a supermarket, however, you can safely assume that your eggs are not fertilized.

eggs fertilized unfertilized egg
Shutterstock

“Eggs produced by commercial farms are never fertile because the hens are never with a male,” notes Dr. Richard Fulton, a diplomate of the American College of Poultry Veterinarians with more than 30 years of experience in poultry pathology and medicine.

Identifying a Fertilized Chicken Egg From the Inside

You can tell whether the farm egg you just cracked open for your breakfast is a fertilized chicken egg or not. Examine the egg for the germinal disc, a white spot floating above the surface of the yolk. The germinal disk of a sterile egg contains only the hen’s cells and is fully white in color. In a fertilized egg, the germinal disk contains the merged female and male cells. These will divide and multiply, leading to the development of a chick embryo. A fertilized germinal disk looks like a tiny white donut or bullseye—a white ring with a clear center.

fertilized egg eggs
Suchandsuchfarm.com

If you’re still not sure whether a collected egg contains a developing chick, candling the egg should solve the mystery. When candled, fertile egg at six or seven days’ incubation shows a fine network of blood vessels as well as a dark spot, the developing chick’s eye.

Other Ways to Identify a Fertilized Chicken Egg

Collecting eggs multiple times a day, every day, will ensure that the shell (eating) eggs you collect to sell don’t contain any special surprises for your customers. If your flock includes a broody hen or two, the mama wannabes might have been sitting on an egg. If your hen is setting with your knowledge, clearly mark the egg so that your kids, your spouse or any helpers don’t accidentally collect the incubated egg along with the freshly laid ones. I mark my girls’ clutch eggs with a fine-point permanent marker; markings made in pencil and watercolor marker are quickly worn off by the humidity of the broody hen’s body heat.

Of course, if you raise only pullets and hens on your farm, there is no need to worry about fertilized vs. non-fertile eggs, as there is no rooster present to fertilize the eggs. Your broody girls can sit on a clutch of eggs for days on end, and nothing will develop inside those eggs (aside from bacteria).

broody hen fertilized egg eggs
iStock/Thinkstock

Our farm, however, is a breeding farm, with at least one rooster in every coop. Our roosters are very active fellows, so this is a safe supposition. Can fertilized eggs develop into chicks? Only if they are properly incubated, either by a broody hen or in an incubator. Collected fresh from the nestbox, a fertilized chicken egg is just as safe and tasty to eat as a non-fertile egg.

This article about fertilized chicken eggs was written for Hobby Farms and Chickens magazines. Click here to subscribe.

Categories
Poultry

7 Goose Breeds To Consider For Your Farm

Goose breeds are plentiful and picking the right breed for your farm can make all the difference. Geese are entertaining and useful farmyard companions. Some goose breeds are great for guarding property or other livestock, while others will keep an orchard or vineyard closely weeded. And believe it or not, geese make amazing pets thanks to their dedicated “imprinting,” closely bonding with the people who raise them.

Here are a few goose breeds to consider if you are thinking about adding geese to your flock.

1. African Goose

Contrary to their geographical name, African geese probably originated in China or another Asian country. One of the largest goose breeds, Africans are distinguished by the prominent black knob at the top of their beaks, and they often have heavy bodies with pendulous dewlaps and full abdomens. They carry themselves very upright and can be loud and occasionally aggressive.

African geese have been kept for a variety of purposes, but because of their heavy weight they are often kept for meat. Adult male African geese can reach 20 pounds, and they also are reliable egg layers. While they are occasionally aggressive, most Africans raised by hand are friendly and calm.

2. Embden Goose

The Embden is a large white goose with orange feet and bill. They’re heavyweight and originated in Germany in the 1800s. Raised largely for meat, Embdens were popular in early American settlements where their versatility was prized.

The Embden gander can reach 28 pounds, making it a desirable meat bird among goose breeds. Embdens are laid back and not as loud as other goose varieties, making them a great pet for a hobby farm.

3. Roman Tufted Goose

The comparatively diminutive Roman Tufted goose is an ancient breed that once guarded the temples of Rome. Today, they guard chicken flocks and property and delight farmers with their beautiful white plumage and top hat of tufted white feathers.

Currently critically endangered and hard to find on American farms, Roman Tufted geese are good egg layers and mature at around 10 pounds. Their loud voices make them excellent guards, but most are docile around the people that they know.

4. Toulouse Goose

The French Toulouse is a classic farmyard icon, with its rumbled gray feathers and orange legs and bill. The heavier variety, known as the Dewlap Toulouse, is a behemoth of the farm and the largest breed of domesticated goose. Both goose breeds are plain gray birds, but the Dewlap Toulouse is massive with a large “dewlap” under its bill and heavy keel and abdomen.

The Dewlap Toulouse was developed specifically for the production of foie gras, and even without a special diet it will grow quickly into a mature 20- or 30-pound bird. French Toulouse are slimmer, but still solid animals that lay large white eggs through the spring and summer months. Both varieties are known for their calm, docile personalities so make great farm pets.

5. Sebastopol Goose

Perhaps the most distinctive of the goose breeds, the Sebastopol is easily recognized by its unkempt white feathers. Looking like a bird that was put through a washing machine, the Sebastopol is usually raised for show, maturing at a light 10 to 15 pounds.

Originally bred in Eastern Europe, Sebastopols were popular with poultry fanciers in the early part of the 20th century before becoming more unusual on today’s farms. They need a warm space for winter and plenty of clean swimming water to keep their feathers in order, but with those considerations you can keep a happy, talkative flock of these very friendly and curious birds.

6. American Buff Goose

The American Buff goose was developed from a similar breed in the UK. It boasts unusual apricot feathers. Medium weight, these birds are a versatile, making for good eating and producing a reliable number of eggs each year.

Buff geese are usually very friendly and they will fit in well on a family farm. Their lovely coloring makes them particularly striking in a large flock, gliding across a pond or enjoying the greens of a large field.

7. Chinese Goose

Perhaps the most versatile of goose breeds, the Chinese goose is loud and active, making it a perfect weeder or guardian. Most commonly a solid white, Chinese geese have a prominent knob on their bills just like African geese. They are much lighter weight than Africans, only about 10 pounds, and carry their heads high and their chests upright.

Because of their piercing voices, Chinese geese are not ideal for an urban farm. In the country, however, a flock of Chinese geese can sound an alarm at any intruder, and their foraging nature means they’ll keep a field closely mowed.

Whichever goose breed feels right for your farm, hopefully, you will enjoy the unusual personalities and charming nature of geese.

This article about goose breeds for your farm was written for Hobby Farms and Chickens magazines. Click here to subscribe.

Categories
Poultry

Poultry Lice: 7 Facts You Need To Know

Poultry lice are a different story from human lice. How much do you know about this poultry parasite? Learn seven important facts about nobody’s favorite farmyard pest.

1. What Kinds of Poultry Lice are There?

poultry lice images under a microscope
Amy Murillo / University of California, Riverside

Just as there are three types of human lice, there are multiple kinds of poultry lice. Menacanthus stramineus, the body louse, is the louse most likely to infest your backyard flock. The body louse thrives on the warmth and moisture of your chicken’s vent but also can be found on the breasts and thighs. Other kinds of poultry lice include:

  • Menopon gallinae (the feather-shaft louse)
  • Lipeurus caponis (the wing louse)
  • Cuclotogaster heterographus (the head louse)
  • Goniocotes gallinae (the fluff louse)
  • Goniodes gigas (the large chicken louse)
  • Goniodes dissimilis (the brown chicken louse)
  • Menacanthus cornutus (the “other” body louse)
  • Uchida pallidula (the small body louse)
  • Oxylipeurus dentatus (the toothed louse)

2. What Do Poultry Lice Look Like?

The poultry louse is a wingless, six-legged insect with a squashed appearance: It looks as though it has been flattened by a tiny steamroller. Depending on its species, a louse can range in length between four-hundredths of an inch (the fluff louse) to one-quarter of an inch (the large chicken louse). Most of that length is occupied by the louse’s disproportionately elongated abdomen. These lice range in color from clear yellow to golden straw to dull brown; their nits, or eggs, are laid in white clusters.

poultry lice nits
Brad Mullens / University of California, Riverside

3. How Long Do Poultry Lice Live?

Once laid, poultry lice nits hatch in about four to five days. Their life cycle is a very short one. The young spend approximately nine to 12 days as nymphs (the immature life stage), molting three times before they become full adults. An adult louse lives approximately 12 days, during which an adult female lays an average of one to two eggs per day. Poultry lice are ectoparasites—parasites that live on the surface of their host’s body; a louse will usually live its entire life on one host.

4. How Do Poultry Lice Spread?

Just like with human lice, poultry lice spread from bird to bird through close contact. Your hens might not be using each other’s hairbrushes, but if they perch side by side or share a favorite nest box, they’re close enough to allow the lice to transfer from one bird to another. These lice do not hop (human lice don’t, either). They crawl from one host to another, although they usually prefer to remain on one host for the entirety of their brief lives. Poultry lice can also be introduced to your flock via infested chicken crates or egg flats, by the addition of new birds, or by wild birds. To help prevent lice from spreading, never borrow poultry equipment from other farms, use only new egg flats and cartons, and always quarantine new birds for at least three to four weeks.

5. Can I Get Poultry Lice From My Flock?

Poultry lice cannot infest humans; unlike human lice, they feed on feathers and poultry skin, neither of which we have, so they will prefer your chickens to you, so you can rest a little more easily. But only a little! Poultry lice will bite you, leaving itchy red marks, so take extra precautions when handling infested birds. Wear gloves, a long-sleeve shirt, boots and trousers when inspecting your flock.

6. How Do Lice Affect My Flock?

chicken being treated for a parasite infestation
Shutterstock

At the very least, you’ll have an uncomfortable chicken who’ll be scratching and pecking at herself, seeking relief. If your girls seem to be preening themselves with more vigor than normal, it’s time to inspect them, especially around their vents, under their wings, on their breasts and down around the base of their feather shafts. Red, patchy areas and chewed-looking shafts are an indication of a lice infestation. Clusters of white eggs are another telltale giveaway. Other signs include feather loss; pale wattles and combs, indicating anemia; a drop in egg production; lack of weight gain in chicks and juveniles; and a fluffed-up, sick appearance.

7. How Do I Treat Poultry Lice?

chickens dust bathing
Shutterstock

The simplest way to suppress a lice infestation is to offer your birds a large, deep dust bath containing play sand and food-grade diatomaceous earth, or DE. Use a mixture of approximately six cups of DE to 25 pounds of play sand. The DE will desiccate any poultry lice it touches and help prevent infestations by mites and other ectoparasites. For more severe infestations, use a pyrethrin-based insecticide. Pyrethrin-based insecticides are available as sprays, solutions and dusts. You might need to apply several applications over the course of a month to control the lice infestation. Read the label of any insecticide for guidelines regarding its effect on eggs. Also, wear gloves, long sleeves and trousers to protect your own skin from the insecticide and from any lice that crawl onto you. Do not use shampoos or sprays formulated for use on humans; these have no effect on poultry and might be harmful to your birds.

There is no social stigma involved in a poultry-lice infestation. Living with birds—and bugs—is simply part of co-existing with nature. With these seven facts, however, you’ll be able to better handle any lice that nature throws your flock’s way.

This article was written for Hobby Farms and Chickens magazines. Click here to subscribe.

Categories
Crops & Gardening

Raised Garden Bed Measurements: Tips For Measuring & Spacing

Raised garden bed measurements are essential to laying out a raised garden bed. It’s not difficult to get the correct measurements.

Isn’t it just a matter of measuring out the sizes, squaring the corners, and going from there? Well, yes … and no. You want to arrange the beds in a logical manner that won’t challenge your productivity (and patience) for years to come. So you really need to put some time and thought into the measuring step.

After all, once raised garden beds are prepared, they’re not easy to move. It’s better to get them right the first time around and avoid regretting their layout at a later date. Keep the following considerations foremost in your mind when laying out raised garden beds.


Read more: These pointers will help you plan your raised beds once they’re installed.


What Raised Bed Garden Measurements Will Be Best for Each Bed?

In theory, raised garden bed measurements can be any size large enough to support the plant(s) you aim to grow. But some sizes are more suitable than others.

The width is the most important consideration. Three to 4 feet wide is considered optimal for the short side. Any wider, and you’ll find it difficult to reach the middle of the bed without climbing inside and compacting the soil.

And if any of your raised garden beds will be installed along a fence or building, you might want to make the width even more narrow. That way you can easily reach across the whole bed from the one accessible side.

You can also factor in required spacing of plants you intend to grow when figuring out your raised bed garden measurements.

Say you’re growing pumpkins on raised mounds spaced 8 feet apart. A bed measuring 8 feet long won’t provide enough space for more than one mound. But you might be able to squeeze two mounds into a 12-foot bed, if you don’t mind some vines creeping over the edges of the bed.

How Far Apart Should the Beds Be Spaced?

The amount of space between each bed is just as important to consider. An 18-inch walkway between each bed might seem like plenty when you’re laying out empty beds. But plants have a habit of encroaching on these narrow walkways until they’re impassible.

For example, I once planted tomatoes in adjacent beds separated by 18 inches or so. The tomatoes grew so vigorously that by the end of summer, the two beds had practically become one. It was hard to tell where one tomato plant ended and another began!

The path between the beds was nothing more than a hazy memory, If it had ever existed at all (maybe it was just a myth?), it was long gone by the peak of tomato season. I wish I would have considered the bed in my original raised garden bed measurements.


Read more: Do you compost? You should—here’s why and how to start.


Will You Use Machinery?

You should also consider whether you’ll need to bring machinery between the raised garden beds.

A walk-behind string trimmer mower is convenient for keeping the pathways between beds tidy. But it can’t serve its purpose if there isn’t enough room between beds to maneuver around.

Similarly, if you want to drive a garden tractor and wagon through your garden with loads of compost, you’ll need much wider spacing between at least some of the beds.

If you’re not concerned about tractors and want your beds spaced closer together, that’s fine too. But in this case, I do recommend that you install the beds one at a time.

Start at the back so you can pull trailer loads of compost right up alongside each bed, filling as you go. Then slowly work your way outward until all the beds are in place. That way, you won’t have to haul compost by the shovelful or wheelbarrow load, past dozens of beds, to fill the most inaccessible beds in the back.

Laying out garden beds for maximum satisfaction and productivity takes a bit of time and planning. But the troubles you’ll avoid in the long run make it all worthwhile.

This article about Raised Bed Garden Measurements was written for Hobby Farms magazine. Click here to subscribe.

Categories
Equipment

Rakes: Garden, Lawn or Specialty?

Rakes seem straightforward but not all are created equal. Rakes on the farm include garden, bow, landscape, level head, lawn types and more. Knowing which one to use takes a bit of knowledge.

Walking into a hardware store, it’s easy to be overwhelmed by the array of rake availability, and each is designed for a specific range of tasks. Knowing how to select the correct rakes for your needs will save time and make your physical labor more efficient.

Garden Rakes

The catch-all category of “garden rakes” or “steel rakes” (pictured above) encompasses a number of rake designs that rely on short sturdy tines for a wide range of cultivation and clearing tasks. There are three broad styles of garden rakes.

Bow

The bow rake is a common workhorse that features 14 to 16 vertical or curved tiånes arranged in a straight alignment that is offset from a long handle by a pair of curved bows extending from both sides of the head. Used for a number of garden tasks, the bow rake is especially good for spreading mulch, weed removal, tamping soil, breaking up compacted soil clods, and removing roots and rocks from cultivated beds. The bow design gives the rake efficient spring action.

Landscape

The landscape rake is a general term for a larger level head-type rake. These broad rake heads range in width from 20 to 36 inches, and because of their size, the heads and handles are often composed of lighter materials, such as aluminum. Rakes of this size are intended to be used to level wide areas of cultivated soil and to easily spread large volumes of sand or earth.

Level Head

Similar in appearance and function to the bow rake, level head (aka flathead) rakes feature a head with a row of straight or curved tines connected directly to the handle. Level head rakes can be used for similar tasks as the bow rake but are especially good at breaking up spaded soil and eliminating debris. After the soil is turned and cleared, the rake head can be flipped upside down and used to smooth or level earth. Unlike the relatively standardized bow rake, level head rakes can be found in different head sizes with various spacing and length of the rake teeth for different cultivation and bed preparation needs. For example, level head rakes with closely spaced teeth are designed for fine preplanting soil cultivation compared to rakes with wider spacing between their teeth which are used for rough initial clearing and large debris removal. Some ingenious manufactures have also designed rubber covers to be slipped on several rake teeth in order create deeper planting furrows at a set spacing.

Lawn Rakes

rakes lawn rake
Amazon

Lawn rakes are crucial tools for collecting organic litter from open space. While primarily used in manicured formal landscapes, lawn rakes are also essential for gathering leaves and grass to be used for homemade compost or mulches. There are two main styles of lawn rakes:

  • fan-shaped: made of plastic or bamboo
  • spring-type: made of flexible steel tines with a tension bar

Of the two, spring-type leaf rakes are the most durable and versatile, making them a good choice for most light cleanup work. If you have concerns about damage to underlying tender plants, bamboo or plastic rakes may be a better choice. There are also unique lawn rakes available with adjustable heads that can be narrowed for raking in tight spaces or scooping heads that can be used to pick up raked materials.

Lawn rakes are lightweight and feature a multitude of fine teeth which makes them ideal for quickly gathering large quantities of light organic debris. This task is unsuited for their garden-­rake cousins due to the inefficiency and clogging issues of the heavy tines.

Specialty Rakes

A number of very specialized single-task rakes are also available on the market, including thatch or scarifying rakes, rubber rakes and rock rakes.

Thatch

rakes thatch thatching rake
YouTube

Thatch varieties look unusual and feature a series of closely spaced large curved tines on an adjustable head. They are used to remove excess dead grass and other organics near the surface of the soil, known as thatch, which allows more air and moisture flow for healthier lawns.

Rubber

rubber version
Manufactum

With a head full of soft flexible tines, rubber versions are designed to safely remove leaves and debris from brick or stone surfaces that might be scratched or damaged by traditional lawn rakes.

Rock

tool for removing rocks.
Amazon

Finally, specialized rock tools are used to collect stones from rocky soils that have already been tilled. While designs for rock rakes vary, most have a curved U-shaped design that allows you to rake cultivated soils for rocks and then flip the head to winnow out any remaining soil before relocating the stones out of the garden.

Purchasing Advice

The quality of the tools sold in big-box hardware stores and even local hardware shops tends to be poor, consisting primarily of mass-produced tools made of low-grade materials. While these are often initially serviceable, they tend to last only a season or two before starting to break or fall apart. Take the time to find higher quality rakes and hand tools that feature sturdy materials and thoughtful ergonomic designs.

For traditional bow or level head rakes, look for forged steel heads rather than rake heads made of stamped, hardened or cast steel. Forging is the strongest and most labor-intensive of the steel-manufacturing processes and produces a denser end product, which holds a better edge. It also has slight flexibility that adds to the durability of the tools by helping prevent breakage.

Beyond the heads of the tools, consider the type of handle. Good hardwood handles (traditionally ash or hickory) are my preferred choice, though some may prefer fiberglass handles, as they’re lighter and require less cleaning and care. Whichever handle type you choose, be sure that it’s firmly connected to the head. Finally, be sure to select a tool with a long handle so it can be used by people of any height without back strain.

Expect to pay three or four times more for a well-crafted rake than you would for a low-grade hardware store rake. The upside to the high costs is that, when well-cared for, these tools truly are lasting and can even be passed down to the next generation of farmers and gardeners.

This article about rakes was written for Hobby Farms magazine. Click here to subscribe.

Categories
Farm Management

Fast-Growing Shade Trees: Try These 7 In Your Pasture

Fast-growing shade trees are a must when you want to add some summer relief to your farm animals, be it horses or livestock.

No matter what kind of animals hang out in your pastures, they’ll appreciate a nice shady place to escape from the heat of the sun. While you could build a shade shelter for this purpose, why not plant a tree that can also add beauty to your property, too? Here are eight fast-growing shade trees that can give that shade in short order.

7 Fast-Growing Shade Trees

1. Hackberry (Celtis occidentalis)

Hackberry (Celtis occidentalis) is a fast-growing shade tree suitable for many pastures.

Also referred to as a sugarberry, this relative of the elm tree makes for a hardy shade tree with its cylindrical, drooping branches. Native Americans used hackberry to treat sore throats. The leaves are a showy gold in the fall.

Zone: 2-9
Height: 60 feet
Width: 40-60 feet
Growth per year: 2-3 feet
Culture: With its deep root system, it can handle droughty uplands, but will grow faster and taller in moist bottomlands that receive part shade to full sun.
Spacing: 20-30 feet apart, especially if your soil stays moist
Lifespan: 150-200 years


Also Read: Tips On Selecting Trees For Your Livestock Pasture


2. Tulip Poplar (Liriodendron tulipifera)

Tulip Poplar (Liriodendron tulipifera)

When your talking about fast-growing shade trees, you must not forget the Tulip Popular. Also known as yellow poplar or Tulip Tree, this North American native is nicknamed for its yellow, tulip-like blooms. Related to magnolias, its lobed leaves are green in summer and turn gold in the fall. Some specimens in the upper mountainous areas of the Appalachians reach to 190 feet tall. Flowers might not appear for the first few years.

Zone: 5-9A
Height: 80-100 feet
Width: 30-50 feet, maintaining a fairly narrow, oval-shaped crown even at extreme heights
Growth per year: 3 feet
Culture: Tulip poplars enjoy full sun and deep, moist, slightly acidic soil. Their shallower root systems don’t cope well with dry, hot locations.
Spacing: 15-25 feet apart
Lifespan: 300 years

3. Weeping Willow (Salix babylonica: Salix x blanda and Salix x pendulina)

Weeping Willow (Salix babylonica: Salix x blanda and Salix x pendulina)

The Babylon weeping willow and the Wisconsin weeping willow are fast-growing shade trees that are so similar in habit and form that they’re usually treated interchangeably. Their drooping branches, thin twigs, small, linear leaves, and classic sweeping foliage make them great pasture trees for stock to browse beneath. They’re one of the first trees to leap out in the spring and turn gold in the fall. Be aware that their invasive roots wreak havoc with pipes and foundations, however.

Zone: 2-9A
Height: 50-70 feet
Width: 50-70 feet
Growth per year: 3-8 feet
Culture: Can handle drought or extensive flooding; partial to full sun; will grow in most soil types
Spacing: 30-50 feet
Lifespan: 50-70 years

4. Sweet Gum (Liquidambar styraciflua)

Sweet Gum (Liquidambar styraciflua)

This North American native, medium- to fast-growing shade tree has glossy, star-shaped green leaves in summer and sports brilliant colors in the fall, ranging from orange and purple to red to yellow. As with willows, its root systems are formidable, so things like pipes and structural foundations will likely lose any battles. The seed pods/fruits of the sweet gum can be messy, but remain clinging to bare branches well into the winter, looking a bit like tiny sputniks and attracting birds to feed on the seeds. If you wish to avoid the mess altogether, look for the Rotundiloba cultivar, which is fruitless.

Zone: 5A-10B
Height: 75 feet
Width: Narrow pyramid to 50 feet
Growth per year: 1-5 feet for the first decade; slower after that
Culture: Part shade to full sun; tolerates wet and dry conditions if rooted in deep soil
Spacing: 15-25 feet
Lifespan: 200-300 years

5. Green Ash (Fraxinus pennsyvanica): A Fast-Growing Shade Tree In Iowa

Green Ash (Fraxinus pennsyvanica) is a great fast-growing shade tree.

One of the most adaptable fast-growing shade trees is native to Iowa: The green ash has been planted extensively for windbreaks, riparian zones and pastures. Its fine-grained hard wood is strong and suitable for furniture, sports equipment and more. The subspecies, Arizona or velvet ash (Fraxinus velutina) grows well in the southwestern United States, though some areas of intense sun necessitate a stand of trees to protect them from sunscald. The green ash’s 2- to 4-inch leaves are a showy gold in the fall, and it has large surface roots.

Zone: 2-9
Height: 50-80 feet
Width: 50-70 feet
Growth per year: 2½-3 feet; in warmer moist zones, trees may grow 6-10 feet per season when young.
Culture: Prefer full sun and moist, well-drained soils, but tolerate a wide range of soil conditions.
Spacing: 25-35 feet apart
Lifespan: 120-175 years

6. White Pine (Pinus strobus)

White Pine (Pinus strobus)

One of the faster growing pines, this favorite has soft bluish-green needles, and are, of course, evergreen. Several white pines planted together can give shade and provide a windbreak along a fence line or in a pasture. White pines don’t tolerate air pollution well and are susceptible to the bark disease, white pine blister rust and the White Pine weevil.

Zone: 4-9
Height: 50-80 feet, though specimens have grown to 150-plus feet
Width: pyramidal, 20-40 feet
Growth per year: 1½-2 feet
Culture: Fertile, moist, well-drained soil and full sun
Spacing: 10-20 feet apart
Lifespan: 200-400 years; one specimen in New York is dated 458 years old

7. Magnolia (Magnolia grandiflora): A Fast-Growing Shade Tree for the South


Southern magnolia ( Magnolia grandiflora ) fruits. Magnoliaceae evergreen tree. The fruit consists of many follicles that come together to form an oval cluster. See LessBy
tamu/stock.adobe.com

There are eight magnolias native to the eastern U.S. M. grandiflora, also known as the southern magnolia, big bay, big laurel or large-flower magnolia, has creamy lemon-citronella scented blooms and grows throughout the South. These fast-growing shade trees are lovely evergreen deciduous trees, and they make wonderful stand-alone specimens. These trees sport blooms up to 12 inches across and have been known to grow to 120 feet. Their formidable root systems can be twice the width of their canopies, so don’t plant them too close together. Two of the fastest growing varieties are Margaret Davis and Smith Fogle.

Zone: 4-9 depending on the variety
Height: 60-80
Width: 30-50 feet
Growth per year: 2-plus feet
Culture: Moist, neutral to slightly acidic soil, sun to partial shade
Spacing: 25-35 feet apart
Lifespan: 80-120 years

This article about Fast-Growing Shade Trees was written for Hobby Farms magazine. Click here to subscribe.