I’ve always been fascinated by the seemingly arbitrary ways farmers measure quantities of hay—specifically, hay bales. A “load of hay” could be a fixed number of bales (100 small squares, for example), or it might reference a jam-packed hay wagon or trailer.
At first glance, measuring by the wagon might seem less precise than counting individual bales. But in some cases, I would argue the opposite is true. If “a bale of hay” were a fixed unit of measurement, then counting bales would certainly be an effective approach.
But since bales can vary significantly in size, counting them as though they’re all the same isn’t as precise as it seems.
Let’s crunch some numbers to demonstrate. Suppose you keep horses on your farm, and you know that filling a hay barn measuring 17.5 feet tall, 22.5 feet wide, and 30 feet long will provide enough hay to last for one year.
Now let’s imagine you’re baling small square bales measuring 14 inches tall, 18 inches wide, and 36 inches long. If you pack your hay barn to the brim, you’ll fit exactly 2,250 bales.
That’s a nice, tidy way to measure your farm’s annual hay consumption, right?
But what if you decide to start baling slightly smaller bales, measuring just 30 inches long? This seemingly subtle shift would add up quickly. All of a sudden, you would need 2,700 bales to fill the same hay barn.
As you can see, the size of each hay bale has a big impact on how many you’ll feed in a given year. This is important to keep in mind whether you’re baling your own hay or purchasing your supply from another farmer.
Small square bales are typically priced by the bale. But unless you know their size, it’s hard to directly compare prices.
A bale costing $4.50 is 12.5 percent more expensive than a bale costing $4.00. But if it’s 20 percent larger (36 inches long instead of 30 inches), it might actually be a better value.
I say “might” because the density of each bale is another factor to consider. A tightly-packed bale will contain more hay (and weigh considerably more) than a loose, fluffy bale of the same size.
Unfortunately, gauging the weight of a bale isn’t an infallible means to measure its value. A heavy bale might contain more hay, true … or it might simply contain more moisture.
And we all know a moldy hay bale isn’t worth much at all.
Over the last few years, I’ve experimented a lot with producing different bale sizes, trying to find the right density and length for easy handling with a small crew. For the 2020 hay season, we produced slightly smaller and fluffier bales to make stacking easier.
The results were satisfactory. But it was striking to see how we needed 2,400 bales to fill our hay barn instead of the usual 2,000.
It felt like we produced way more hay. And a strict interpretation of the bale count would have agreed with this belief, but measuring by volume (as gauged by the size of the hay barn) revealed a different story.
So to circle back to where we started, a “load of hay” measured in the form of a single hay wagon or trailer load can actually be more accurate than counting individual bales. Volume can cut through the confusion of varying bale sizes and provide a more accurate picture of how much hay you have (or need).
That’s always a benefit for farmers stocking up for the year.
In the late 1800s, imports of Jumna Pari and Zaraibi animals from the Nubian region of Egypt and India were crossed with British goats to create a distinct breed used for meat and milk. Originally called the Anglo-Nubian goat, that designation was dropped in the early 1900s to simply Nubian.
The first imports into the U.S. began in 1906. Today, Nubians are second only to Nigerian Dwarfs in popularity in the U.S. The American Dairy Goat Association registry held more than 14,000 examples of the breed as of 2018.
The Nubian’s swanlike neck, pendulous (floppy) ears and distinct convex (roman) nose distinguish it from all other dairy goat breeds.
One of the larger breeds, does stand 30 inches or more (measured at the withers). Does can weigh upward of 240 pounds.
Bucks are 35 inches tall at the base of the neck. They typically weigh more than 300 pounds at maturity.
The Nubian is a very social breed and has a reputation for being very talkative. This trait, however, normally only occurs during breeding season or feeding time.
Average production for a mature doe is 1,820 pounds of sweet, rich milk. This butterfat average is 4.9 percent, which is great for home milk use and cheese production.
The Nubian goat’s Middle Eastern roots give the breed an exceptional adaptability to a variety of climates. This allows for a prolonged breeding season, as well as year-round milk and meat production.
Nubian goats can be any color or combination of colors, is a fairly disease-resistant breed and has good mothering instincts.
This article, written by Cynthia Eslava (MagMar Farm) and Caroline Lawson (TLC Farms), originally appeared in the May/June 2020 issue of Hobby Farms magazine.
Most hobby farmers can agree that their animals, no matter what species, have their own unique personalities and quirks. This, even if many of our farm animals are known for their herd mentality.
But can cows make friends? Or, more malevolently, hold grudges? Can a cow really be comfy?
As it turns out, the answer to these questions is yes.
Over the past few decades, research into the behavior of cattle, especially dairy cattle, has shown bovines have a surprisingly complex social life. This social structure, or lack thereof, then has direct impact on physiologic responses to their environment.
Most of this research originates from the basic question many dairy farmers have: Are there things I can do on the farm to increase milk production? It has been demonstrated repeatedly that if cows are stressed, their milk production is negatively effected.
So can social change stress cows? Studies say yes.
Once in a herd, cows develop a social hierarchy. There are even what are called “boss cows” at the apex of this social ladder. These are the cows that push their way through to the feed bunk no matter who is in their way.
No one is getting seconds until these queens of the corral have had their fill.
As you might imagine, it takes time for the intricacies of the social ladder to be worked out within a herd. If cows are frequently moved from one barn, pasture or farm to another, this social stress can start to affect their well-being.
Re-establishing who’s who in a crowd can lead to the release of cortisol and other stress hormones. These appear to have detrimental effects on milk production.
Cow Comfort
If cows are allowed to choose where they rest in a free-stall barn, they will choose to rest near acquaintances, not strangers. (A free-stall barn is a common type of dairy barn that has many open stalls without doors. The cows themselves choose where to rest)
Boss cows will often rest near other boss cows. Mid-level and bottom-level animals more commonly associate with others of their “class.”
Types of bedding and stall structure can also heavily influence “cow comfort.”
As a prey species, cows are particular about where they lay down. And they do lie down quite a bit. This rest period is actually a vital part of a cow’s day.
This is when she regurgitates and chews her cud, an important part of her digestive process. Additionally, cows that are able to frequently lie down have fewer lameness issues.
The dimensions of a stall, type of bedding used, flooring material and drainage, as well as any slants in the foundation, all impact whether a cow feels comfortable enough to lay down in the barn. The more comfortable a cow is, the healthier she is. And therefore the higher her milk production.
One study identified three different social structures within a dairy herd: a milking order, a leadership-followership pattern and a dominance hierarchy. This suggests that the social dynamic isn’t just a social ladder, but rather a more complicated web.
Social dynamics affect:
the order cows enter the milking parlor twice a day
who follows whom in the field and around the barn
who gets pushed out of the way when push comes to shove
Studies have also shown that social dominance does not appear to influence milk production.
A boss cow is just as likely to produce the same amount of milk as a lower-ranked cow in the herd. Instead, milk production is influenced much more by genetics (milk production of the parents, grandparents, etc. and breed), health, type of diet and overall farm management.
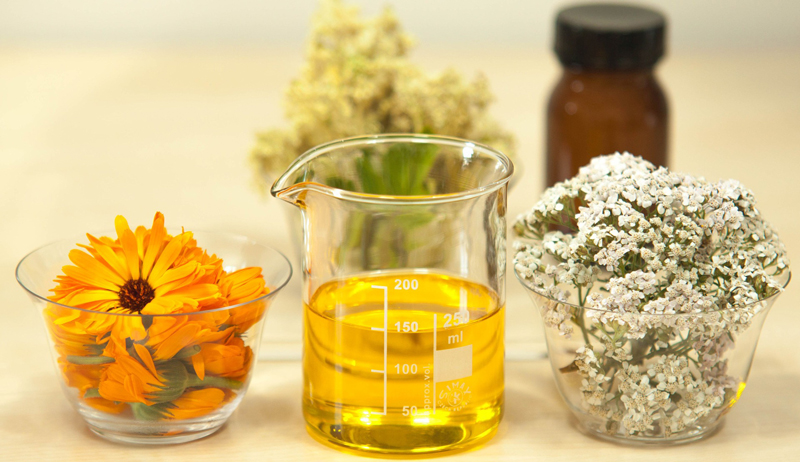
A growing number of people are inviting bacteria into their lives. Of course, we’re not referring to the type that causes infections, but just the opposite—the “friendly” or “good” bacteria.
Good bacteria can be found in the correct culturing and fermentation of foods such as milk. Cultured milk products such as yogurt, kefir, piima, cream cheese and buttermilk are used in many parts of the world. Some date back to ancient times.
As a hobby farmer, you may find cultured milk products an attractive source of food since the supply of milk is readily available. Also, they further your efforts toward self sufficiency. Whole milk, partially skimmed milk, skim milk or cream may be used from any milk-producing animal, including cows, goats and sheep.
Some enthusiasts of the bacterial process, treading on controversial ground, are taking it a step further, using raw milk and all of its enzymes and bacteria. For raw fluid to be used, it’s vital that it meet certain criteria, such as having a low bacteria count and being free from:
antibiotics
sanitizing chemicals
mastitis
colostrum
rancidity
contamination by bacteriophages
Probiotic Possibilities
So why the interest in beneficial bacteria? People today are becoming increasingly interested in natural ways to improve their health. Avoiding heavily processed foods and incorporating foods with some “life” are just two ways to do that.
There’s also a bit of pride in the independence and interdependence surrounding these foods. While bacterial and yeast cultures may be purchased, many are shared through family and friends.
Foods that use cultures are available on many farms. So people are not entirely dependent on external sources for nourishment.
Most of these good bacteria come in two basic groups: Lactobacillus and Bifidobacterium. Within those two groups, there are different species. Within the species are various strains.
If you’ve eaten yogurt, you’re probably familiar with one of these species: Lactobacillus acidophilus.
There is anecdotal evidence that supports the use of friendly bacteria, known as probiotics, or “for life.” Probiotics have even been defined by the United Nations Food and Agricultural Organization and the World Health Organization as “live microorganisms which, when administered in adequate amounts, confer a health benefit on the host.”
sebra/Shutterstock
Learn By Doing
Several instruction books are available to get you started. However, many people who make cultured milk products suggest taking a class to see, smell and taste how it is done correctly.
After all, you are dealing with bacteria. And while bacteria are all around us, you don’t want unfriendly bacteria—yeasts, fungi or parasites—interfering.
Fortunately, because of the public’s growing interest classes are easy to find. People who are well-versed in producing their own cultured milk products often don’t mind sharing their secrets.
While visiting the on-farm store of Grassway Organics in Wisconsin, I signed up for a cultured foods class being conducted by herbalist Linda Conroy. Kay Craig, co-owner of the farm with husband, Wayne, also offered to show me how she makes kefir and yogurt for her family in their farmhouse kitchen.
While Conroy and Craig believe in the benefits of raw milk, they assured me that pasteurized milk and cream work just as well for cultured milk products. I relished both opportunities to learn!
“People are so separated from food today, they don’t realize what they could do for themselves,” Conroy says. “It’s really fascinating when the light bulb goes on and they say: ‘Wow, I can make my own yogurt.’”
It was all that and more for me as I watched, measured, ladled, smelled, shook cultured cream into butter and tasted the foods.
Seeing the “life” in these cultured milk products reconnected me for an instant to my past. I remembered yeasty dough rising under dampened cotton cloths when my grandmother and mother made delicious, hearty breads.
My two instructors—Craig and Conroy — offer history, sample recipes and a bit of advice.
Yogurt
While many of us are familiar with today’s commercial, sweetened yogurts, this cultured food has been around for nearly 5,000 years.
It’s believed that the first yogurt happened by accident. Eurasian nomads carried milk in goatskin satchels; bacteria within the bag inoculated the milk, culturing it into yogurt.
From that time on, cultured-dairy foods have been popular in India, Asia and Europe.
Yogurt is created from bacterial fermentation of the milk sugar called lactose. The process releases lactic acid that thickens the milk, gives it a sour taste and hinders the growth of bad organisms.
a food thermometer marking temperatures of 0 to 200 degrees Fahrenheit
1 cup of plain, fresh, pasteurized commercial yogurt with “active” bacterial cultures, or a freeze-dried packet of yogurt culture
1 gallon of milk
an insulated cooler
a sterilized, 1-gallon glass jar or several smaller sterilized canning jars with rims and lids
a large glass or ceramic bowl
a spoon
Heat the milk to 185 degrees and then let it cool to about 115. Put the fresh yogurt culture in the bowl and slowly add the warm milk to it. The temperature of the combined ingredients needs to be about 110 degrees. (It’s a bit of a dance keeping the mix at the proper temperature.)
Once all of the milk has been added, stir gently with a clean, wooden spoon. Next, ladle the warm, cultured milk into either a gallon glass jar with a rim and lid, or several smaller canning jars with rims and lids.
Place the jar or jars in the appropriate-sized cooler and fill the cooler with warm (about 120 degrees) tap water. Since the cooler itself is cool, the temperature will drop to about 110 to 112 inside—just what yogurt likes, says Craig. Close the lid and set the cooler aside.
Let the bacteria do its thing for the next 10 to 16 hours.
The warm-water-bath method has worked consistently for both Craig and Conroy. Other options are to keep the cultured milk warm with a light in the oven or on a heating pad.
When the mixture has thickened, remove the jars from the cooler and pop them into the refrigerator. Be sure to pull a cupful of the yogurt to start your next batch.
About Homemade Yogurt
Homemade yogurt often is not as smooth or as thick as commercial yogurts. It does not have the added dry milk, sweeteners, stabilizers and natural or artificial flavors found in commercially prepared products. It will separate, even if it’s fresh.
The whey may pool, but it can be mixed back in or spooned off to use in other fermented foods.
Homemade yogurt also does not have the sweet taste many of us are used to. Instead, it tastes fresh and tangy.
“The bacteria are eating the milk sugars and making the product gradually more sour,” Conroy says. Eat yogurt fresh or, for those who like something sweeter, add fresh fruit or preserves.
MaraZe/Shutterstock
Yogurt Cream Cheese
For something extra special, use yogurt to make a spreadable cream cheese.
Put a strainer lined with cheesecloth in a large, glass bowl. Place the yogurt in the cheesecloth and tie the ends together. Let it drain overnight into a bowl or jar in the refrigerator.
Be sure to collect the whey for other uses. Remove the cream cheese from the cloth. Put it in a crock or covered bowl, add a little salt and some chives, and it’s ready to spread. Leftovers will keep in the refrigerator for about a week.
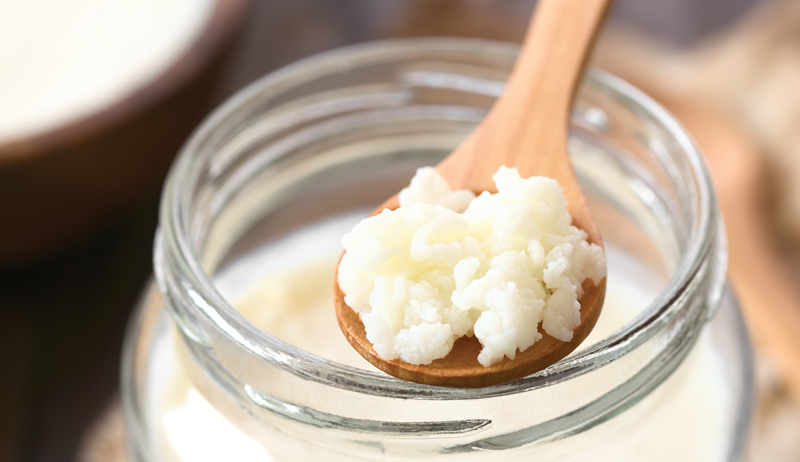
Kefir
Pronounced kuh-FEAR, this fermented milk drink originated in the Caucasus Mountains of Eurasia, where shepherds carried milk in leather pouches. Before long, the milk fermented into a fizzy, sour yogurt.
Making the drink today involves culturing milk with kefir “grains,” which aren’t really grains at all. Kefir grains are a gelatinous mix of bacteria, yeast, proteins, lipids and sugars that look like a cross between cottage cheese and cauliflower.
While yogurt is known for its handful of good bacteria, kefir has many more. True fans of kefir give this mother culture a revered status.
As the kefir grains increase in volume and number, they need to be thinned. This enables the kefir grains to be shared with friends for their own cultured milk products. It also allows the culture to grow in other kitchens.
Oksana Mizina/Shutterstock
How to Make Kefir
What you will need to make kefir:
a kefir mother culture, either purchased as a freeze-dried packet or 1 tablespoon live culture
1 gallon of fresh milk
a clean, gallon-sized glass jar with lid and rim
The “recipe” for kefir couldn’t be simpler. Those who prefer to use raw milk can simply place the kefir culture in the jar, pour in fresh milk and cover. Let the inoculated milk incubate at room temperature for about 24 hours. The lactose will ferment until the mixture has the consistency of thin yogurt.
When using freeze-dried cultures, follow package instructions. For example, one packet indicates heating pasteurized milk to 85 degrees before adding the culture. Other sources, such as the National Center for Home Food Preservation at the University of Georgia in Athens, have more stringent requirements.
After the milk has been cultured, pour the mix through a strainer and gently retrieve the kefir mother grains. Put those grains in another jar of fresh milk to repeat the process.
Pour the cultured milk into a jar. You can store the covered jar on a shelf at room temperature for a few days. This will ripen the flavor and increase the vitamin B content, but it will also increase the carbon dioxide and alcohol content.
Homemade kefir has a tangy, slightly alcoholic taste. Conroy tells me that kefir is considered the “champagne” of cultured milk products for just that yeasty reason. While many swear by it, you may need to acquire a taste for homemade kefir.
For me, the texture was not as appealing as commercial kefir, with its flavorings and smoother, thicker consistency.
Kefir Soda
Being a true kefir product, says Craig, kefir soda provides a refreshingly different probiotic. Plus, she notes, it’s what people drank before commercial sodas with artificial colors, preservatives and sugars became popular. To make kefir soda, you will need:
1 cup of fruit juice (Craig cooks grapes from her parents’ farm, adds sugar and strains them for a concentrated juice)
kefir grains that have been placed in a strainer and gently rinsed in water
1⁄2 cup lemon juice
1⁄4 cup sugar
water to fill remainder of a half-gallon or quart-sized glass jar
Put the ingredients in the glass jar, shake and leave on the kitchen counter for a few days to let the kefir grains work their magic. Remove grains. The juice, in the covered jar, should keep for a month or so in the refrigerator.
Kefir soda smells a bit like a wine cooler and has a tart-but-refreshing taste. I imagine it is a quite-satisfying summer drink, unlike cloyingly sweet commercial drinks.
Since the mixture gradually increases in tartness, Craig suggests adding a bit of maple syrup to sweeten the drink.
Marianne Danielsen/Shutterstock
Kefir Cheese
Make this cheese when you have extra kefir that has been refrigerated and has produced separated whey.
Pour off the whey (be sure to save it!) and put the solids in a cheesecloth hanging in a glass jar. The remaining liquid can drain as it sits in the refrigerator. When it has finished draining, peel the kefir from the cloth and use it like cream cheese.
Piima
Piima (pea-ma) is a culture based on the butterwort, a carnivorous plant, but its exact role is a bit unclear. Many sources of piima culture suggest that Scandinavian farmers noticed that milk curdled quickly when cows grazed on butterwort.
The culture was then isolated to become the piima culture.
However, there is also evidence that Scandinavian farmers were familiar with the small, carnivorous plant that grew in marshes and they discovered the lactic acid bacteria on its leaves would speed up the coagulation of milk. It became practice to pour fresh milk over the leaves of the butterwort before placing it in a warm area to acidify.
Either way, the culture is associated with the plant and is used by piima fanciers in the U.S. to make piima butter. The recipe is a simple one.
a few tablespoons of fresh piima culture in the form of cream
a sterilized, quart canning jar with lid and rim
a quart of pasteurized, heavy whipping cream
Put the culture in the jar, add the milk and stir. Screw on the lid. Put it in a corner of the kitchen where it can maintain a 70- to 75-degree temperature. On top of the refrigerator is a logical choice.
After about a day, when the mixture has thickened a bit, remove a few tablespoons as starter for your next batch and put it in the refrigerator. Then, either shake the jar for about 15 minutes or cool it down to about 50 to 55 degrees and whip it in a mixing bowl.
In my class we took turns shaking the bottle. At first it felt as if we were shaking a fairly liquid product. After several minutes, it seemed as though the mixture had thickened into sour cream.
Indeed, at this point you can stop and use the cultured cream as sour cream. We continued until it seemed as if we were again shaking a liquid. It was finished.
We opened the jar to find the yellow piima butter in the center, bathed in buttermilk.
Pour the buttermilk into a jar, and spoon the butter into a small-holed colander. Use a wooden spoon to softly press the butter (you don’t want it squeezing out the holes) to remove all the pockets of buttermilk, which can leave a sour taste.
With all of the liquid removed, gently rinse the butter in the colander with cold water to remove any last liquid. Put the butter in a crock and enjoy!
Drink the buttermilk or use it while baking.
Or, if you haven’t made butter, obtain a piima culture to add to pasteurized milk. Follow the directions on the culture pack to have buttermilk in no time.
This article appeared in Best of Hobby Farm Home, a 2020 specialty publication produced by the editors and writers of Hobby Farms magazine. You can purchase this volume, Hobby Farms back issues as well as special editions such asBest of Hobby Farms and Urban Farm by following this link.
As the last remnants of fall fade away, making room for the oncoming winter, we move into a quieter time of reflection and hibernation. In the kitchen, our menus also reflect the new season as we trade our salads and fresh fruits for more hearty soups and stews.
Adding winter savory to our recipes will help our bodies adapt to the heavy, rich foods that are typical of this time of year. Winter savory may not be as widely known as other aromatic herbs, such as oregano, rosemary and thyme. But this peppery little plant certainly deserves your consideration.
A member of the mint family, winter savory is native to Southern Europe, the Mediterranean and Northern Africa. It was very popular amongst the ancient Greeks and Romans who considered it a magical herb, symbolizing love and eternal health.
Savory’s botanical name, Satureja montana can tell us a bit about its history and use. The genus Satureja is derived from the Greek satyr, a half-man, half-goat woodland demi-god with an insatiable sexual appetite. According to legend, these mythological creatures lived in meadows laden with savory.
It was widely believed by the ancient Greek that savory itself was a powerful aphrodisiac. The herb’s specific epithet montana means ‘from the mountains’, which is winter savory’s natural habitat.
Winter savory’s closely related cousin, Satureja hortensis, commonly known as summer savory, has a similar, albeit more delicate, flavor profile. Unlike its hardy relative, summer savory grows as an annual and will need to replanted each spring.
I prefer the perennial herb for this particular reason.
S. montana is so cold tolerant, I’ve enjoyed the potent flavor of its fresh leaves in the middle of winter. I simply brush away the snow to find and harvest the new green growth of a thriving plant below!
Winter Savory in the Kitchen
With its peppery, pungent taste, winter savory can be enjoyed in the kitchen in many of the same ways you would use thyme.
Toss a few sprigs into soups and stews to add depth and warmth to the meal. The herb’s umami flavor lends itself well to meat dishes.
Certainly, the classic use for winter savory is in a pot of beans. In the Mediterranean region, savory is commonly referred to as “The Bean Herb” where it’s been included in various bean dishes for generations.
Not only does winter savory’s flavor compliment the meal, but the herb also acts as a digestive aid. It can dispel the wind that far too often follows a hearty meal of beans.
While Winter Savory is most commonly enjoyed as a culinary herb, it is certainly quite useful in the apothecary as well. A simple winter savory tea is a wonderful remedy for stomach upset, cramping and indigestion.
The leaves contain rosmarinic acid and thymol, making this herb both antiseptic and astringent. A poultice of the leaves works well to relieve the itching and swelling caused by insect bites.
Try savory tea, with a bit of honey, to ease a sore throat!
With leathery dark green leaves and delicate flowers ranging in color from white to pale-lavender and pink, this semi-evergreen plant is easy to grow and makes an excellent border plant for any herb garden.
This low-growing perennial is hardy to temperatures as low as 10F (-12C). If your winters typically reach temperatures lower than this for an extended period, consider mulching around the plants to insulate their roots.
Use 3-4 inches of woodchips, straw or shredded leaves. Then remove the mulch the following spring. This will allow the soil to warm up more quickly.
During dormancy, winter savory will drop many of its leaves, but resist the temptation to trim away the barren stems. When warm weather returns, new leaves will quickly regrow.
Early spring is also the best time to divide your older plants to give them a fresh start. Simply:
dig up a clump of winter savory
separate by hand, ensuring each new portion of plant has a good number of roots with it
replant wherever you’d like your new plants to have a home.
Add a small amount of bone meal to the hole to encourage vigorous root growth.
Savory prefers full sun but will do just fine in partial shade. This herb makes a wonderful companion plant in the veggie garden too!
Planted near beans, it is believed to discourage weevils. Savory is also said to make onions sweeter when growing nearby. Pollinators absolutely love winter savory, so consider tucking a few plants near your beehive if you keep one.
Give winter savory a try! It’s easy to grow and full of flavor. This spicy herb is sure to make your winter feel warmer.
“I started gardening when I was about 5 years old with my grandmother and great-grandmother,” says the Los Angeles-based Kenneth Sparks. Sparks, who grows everything from cucamelons to oranges, has become popularly known as The Farmer Ken.
Back then, Sparks was living in Ohio, where his family grew cabbage, collard greens, mustard greens, corn, tomatoes and peppers from May to November. But since moving to Los Angeles six years ago, Sparks has been able to grow all year round via a series of levels on his terrace, along with fruit trees planted on a hill.
Sparks has also recently launched a fundraiser with the aim of starting a community garden.
We spoke to Sparks about his cucamelons and his burgeoning food forest. We also talked about his new technique of preserving dried flowers in resin.
“This year I am most proud of my fruit trees as a whole,” says Sparks when asked which of his crops have become the stars of 2020. “I planted a lot of them last year and a portion of them started producing this year. So it’s great to see them thriving already.”
Sparks adds that his food forest is situated on a hill and contains over 70 trees. “It mimics an actual food forest where you have taller trees and shorter trees and vines and shrubs and everything intertwines.”
Cucamelons have become a resilient part of Sparks’s garden this year. “They’re basically like a grape-sized cucumber,” he explains of the dinky vegetables. “They’re actually doing better in the cooler weather than the intense heat of the latter part of summer. When it cooled down in the fall, they really took off growing.”
“I’m in the city of Los Angeles and I have various growing techniques that I’m using because my property is terraced,” says Sparks, detailing his setup. “I have six or seven levels and it’s mostly concrete so I have to use planters and pots and raised beds—so my garden is a combination of everything.”
If you scroll through Sparks’s Instagram account, you’ll inevitably come across some distinctive images of dried flowers inside various shaped blocks of resin.
“I was just experimenting and trying to preserve some flowers and one of my friends suggested resin so I went ahead and tried,” explains Sparks. “I harvested some flowers, I dried them out and went ahead and put them in some molds and poured resin over them.
Sparks says that a big part of the fulfilling nature of growing crops and plants comes from getting to witness the complete process unfold before your own eyes.
“The most rewarding part for me is watching something grow from seed,” he explains. “You take care of it and then you get a harvest.”
In a typical year, Britt Bunyard travels the world to seek out—and speak about—mushrooms of all kinds. The professional mycologist holds a doctorate in plant pathology from Pennsylvania State University and is the founder and editor-in-chief of the mycology journal Fungi. Bunyard—along with his co-author, Tavis Lynch—also has a new book on the way. Published by Quarry Books, The Beginner’s Guide to Mushrooms: Everything You Need to Know, from Foraging to Cultivating officially drops next week.
Despite all of the variation in the fungal world, The Beginner’s Guide to Mushrooms is organized so that budding mycologists across North America and Europe can use the resource.
“There are a lot of basic species that are common to all three areas,” Bunyard says. “In some cases, there is not the same species but something that is quite similar. I started playing around with the idea [to present mushrooms from multiple continents] and decided it could be done.”
Although you won’t find all of the common species of a single genus in The Beginner’s Guide to Mushrooms, you will get an overview of all of the different forms mushrooms can take, along with photos and descriptions.
There are also tips on mushroom preservation and cookery—including how and when to use different mushroom varieties in certain dishes and how to do so safely—as well as a brief section on mushroom cultivation.
For better or worse, guidebook authors like Bunyard and Lynch just might have to change the way they write about the natural ranges of flora and fauna in the coming years. More extreme temperatures and more frequent and extreme weather events are impacting populations of all kinds—including mushrooms.
“Climate change is already starting to affect fungi,” Bunyard says. “We’re seeing shifts in populations moving more northward in North America as well as in Europe.”
While gradual changes in range are common, some moves have happened much more rapidly than expected. For instance, after comparing the mushrooms he finds near his Midwestern home to the listings in some of the older mushroom books in his personal collection, Bunyard notes, “I am seeing things now that were known only from the Gulf Coast area or Texas…. And, when you talk to some older mycologist, they will say, ‘This book was not in error. Those mushrooms were not known a few decades ago in the Midwest, and now we’re seeing them all the time.'”
New Finds for Foragers
Mushrooms’ fruiting times also are starting to happen earlier and earlier each year.
“One example is a Sulfur Shelf or Chicken of the Woods mushroom, which typically comes out in the summertime or quite a bit after morels,” he says. “I’m starting to see them fruiting at the tail end of morel season now.
“And the Pheasant Back, or Dryad’s Saddle, which fruits during morel season, is starting to have two seasons as well. It has become very common that it will fruit again in the fall.”
The recent wildfires that have taken place are spurring mushrooms, too. “There is a morel that’s fire-loving and comes in after burns,” Bunyard says. “Whole mountainsides can be covered with them…. So, that’s becoming a lot more commonly picked out west.”
Some changes in mushrooms’ ranges and fruiting times could negatively affect foragers. “There are some things that are toxic that maybe you never had to watch out for before,” Bunyard warns.
Conversely, there are some new mushrooms popping up that you just might want to get your hands on. He continues, “There is this yellow oyster mushroom called Pleurotus citrinopileatus…. It’s been cultivated here for quite a while and it seems to have escaped.”
Thought to have gotten loose in Pennsylvania, the Golden Oyster has been spotted in Ohio, Illinois and beyond—and it’s headed west. “It’s very bright yellow, and it fruits in big clusters just like other oysters,” Bunyard says.
Its taste is similar to that of many native oyster mushrooms. Unfortunately, the interloper could eventually displace them.
“It’s so aggressive that I think it may be able to out-compete other things that rot fallen wood,” Bunyard explains.
For his part, Bunyard has personally seen Golden Oysters fruiting in the wild in both late summer and early fall. “It wouldn’t surprise me to start seeing these showing up in markets, because, if they’re in an area and fruiting, it’s usually in profusion. It’s not just one or two caps.”
There are lots of thoughts on the benefits of culinary herbs for backyard chickens. Some are based on folklore, some on science. And some is just based on what smells good to a chicken-keeper.
Some culinary herbs are added to feed, spread in the coop or used medicinally. I’m not going to address any of that in this column!
Rather, I’m going to fill you in on what you need to know to successfully grow many of the culinary herbs recommended for chickens.
Culinary Herbs
By culinary herbs, I mean:
bay laurel
rosemary
lavender
sage
thyme
oregano
marjoram
tarragon
parsley
cilantro
chervil
fennel
dill
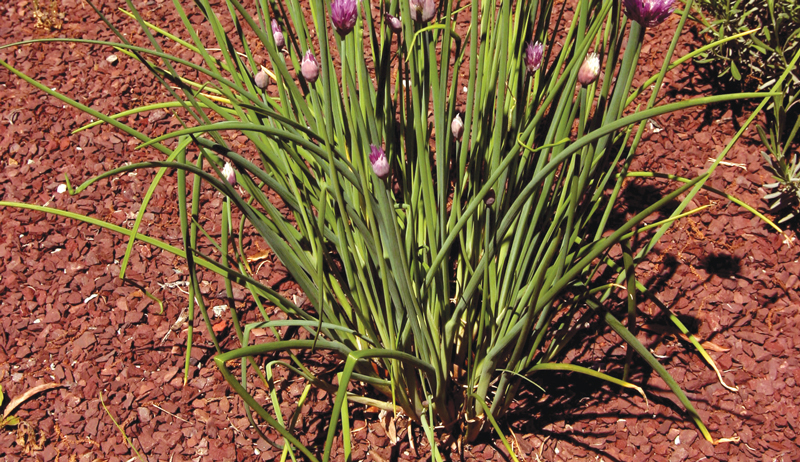
chives
Frank Hyman
The first two are woody shrubs.
The next six are subshrubs. (This will be important in the section on proper pruning of herbs so you don’t accidentally kill them.)
The next five are biennials. (This will matter in discussion of permanent mulches that save time and money and promote seeding-in).
And the last one is an herbaceous perennial bulb and the only one that can be reliably divided to create more plants. (Plus, you can eat the flowers!).
I won’t be addressing medicinal herbs because they grow in a variety of conditions. And I won’t be addressing herbs such as basil, which need the kind of rich soil found in vegetable gardens. I also won’t be addressing herbs such as the mints and lemon balm that tend to overflow their bounds.
One thing all the 14 culinary herbs listed previously have in common is that they are either native to, or adapted to, Mediterranean conditions. In an eggshell, those conditions are:
gravelly (or sandy), well-drained soil
an alkaline pH of about 8
low organic matter
low nitrogen level
high phosphorus level
full sun
So if you’re living in Central or Southern California, most likely you already have those conditions. That part of California is considered a mediterranean (lowercase ‘m’) region, as are the other parts of the world known for their wines: central Chile, coastal South Africa and southeastern Australia.
Those conditions listed favor wine grapes and culinary herbs. So if you want to do a bang-up job growing the best wine grapes or culinary herbs outside of those five mediterranean (lowercase ‘m’) regions, you’ll have to adjust your soil conditions, mulch choices and pruning practices a bit.
The Mediterranean soils in which our culinary herbs evolved have an alkaline pH of about 8. And they do best at that level in terms of fragrance, flavor and feistiness because that high pH gives them just the right amount of soil nutrients.
If you’re in the eastern half of the U.S. or the Pacific Northwest, your native soils probably have a pH of about 5. A pH of 8 doesn’t sound very far away, but the distance is exponential.
That means if it takes 1 pound of lime to raise your herb garden from 5 to 6, you’ll need 10 pounds to get it from 6 to 7. And 100 pounds to get it from 7 to 8.
Rainfall will dilute that lime by a third each year, so it’s not a one-time thing. But if you or a neighbor heat with wood, you can sustain a proper herb garden pH while safely disposing of your ash each year.
Wood ashes are like lime: They can make nutrients in an acidic soil more available to certain plants and boost microbe populations.
Wood ash has about half the alkaline strength as lime. So if your soil test says to use 10 pounds of lime, use about 20 pounds of wood ash for roughly the same effect. A 5-gallon bucket holds about 15 to 20 pounds of (cool) wood ashes.
It’s dusty and caustic stuff, so wear a bandanna and gloves while spreading it. Because your herb garden is a perennial bed, there is no need to till it in. Rain will dissolve and carry it into the root zone.
And don’t worry if you don’t have just the right amount of ash. It’s hard to overdo. As long as you keep above a pH of 7, herbs grown for chickens will do well.
Fine-tune the Fertility
These culinary herbs we’re growing for chickens evolved in dry conditions—not as dry as a desert but pretty close. In low-rainfall regions such as the Mediterranean, you’ll find much less organic matter and much less nitrogen in the soil than you will in high rainfall regions such as the Pacific Northwest and the eastern half of the U.S.
Why? Less rainfall equals less plant matter equals less nitrogen-heavy organic matter to decompose in the soil. And Mediterranean natives are adapted to that.
So my advice for prepping or maintaining culinary herb gardens: Don’t add nitrogen fertilizer, and don’t add organic matter. When I’ve done taste tests with chefs and other foodies, they could tell the difference.
Herbs grown fat and fast on rich soil have a diluted flavor and fragrance that will be less appealing to your chickens. Herbs grown more slowly on lean soil have a fervent flavor and fragrance.
So save the organic matter for your vegetable garden. And only add organic fertilizers to your new herb bed with little or no nitrogen such as bone meal and green sand for the best flavors.
Then don’t add anymore in the future. A good application up front will last decades.
If you already have well-drained soil that’s sandy and/or gravelly, skip this section. But if you have soil that’s loamy or especially if your soil is clay-based, listen-up.
Culinary herbs want soil that drains quickly and doesn’t hold moisture forever.
To get my clay-loam soils to drain faster, I till the herb bed up. This is a good time to also add organic phosphorus, potassium and lime or wood ash. Then I spread a 2-inch layer of inexpensive 3⁄8-inch driveway gravel over it.
With a good gravel rake, I quickly work that gravel into the top couple inches of soil, so that the top 4 inches of ground is roughly 50-50 soil and gravel. The gravel is a permanent soil amendment that allows rainwater to drain faster.
Frank Hyman
Pretty & Permanent
I know that when I mention gravel mulch, many people think of some bleak landscape of surly cactus and dirty white stones. Yes, that would be nasty, but that’s not what I have in mind.
In an effort to remake soil conditions that would somewhat resemble Mediterranean herbs’ native ground, I apply a 2-inch layer of a lovely purple-colored gravel as a permanent mulch. (One of my garden clients has advised me to say “merlot-colored” or “cabernet-colored gravel” instead!)
This strategy has paid off in several ways.
The gravel doesn’t absorb rainwater, so herbs get the dry-ish soil they prefer.
It doesn’t break down like organic mulch so the soil stays lean.
The gravel did cost more up front than organic mulch, but I and my clients have herb beds that are up to 15 or 20 years old and have not needed the annual expense of being re-mulched.
That’s also a great labor savings over a couple decades of not spreading mulch in herb beds.
A 2-inch layer of gravel does a much better job than organic mulch in keeping most (but not all) annual weeds of the eastern U.S. such as henbit, chickweed and crabgrass from germinating.
That layer of gravel also favors re-seeding by some Mediterranean herbs and perennial flowers that don’t re-seed into organic mulch.
The first thing gardeners notice is that like a dark carpet, the dark color hides any debris better than light-colored gravel would. And the purple—sorry—cabernet color offsets the green, gray and blue foliage of these Mediterranean natives in a magically beautiful way.
My theory is that perhaps the seeds of Mediterranean herbs need to fall down into that darkness between gravels to germinate. And conversely, the small, windblown annual weed seeds land on a 2-inch layer of gravel and flow down through the voids where they don’t get enough sunlight to germinate.
On an organic mulch of bark, the weed seeds land on the surface, get plenty of light and germinate enthusiastically.
But the key here is to apply the mulch at least 2 inches deep to get that benefit. Don’t skimp. I put a few 2-inch thick bricks in the bed as a temporary gauge while spreading the mulch.
For a 5-by-30-foot herb bed (150 square feet), you’ll need 1 cubic yard of pretty gravel for mulch (or cheap gravel for a soil amendment). One caveat: Only use gravel mulch in beds that don’t get covered with tree leaves in the fall. It’s very difficult to extract the leaves without making a mess of the gravel mulch.
At the stone yard, gravel often comes in two sizes: 3⁄4-inch or 3⁄8-inch. I favor the smaller 3⁄8-inch gravel, but the larger gravel will work.
You may not be able to buy cabernet-colored gravel locally, but any dark or medium-dark color will do. Anything light-colored will look good the first day and then look as dirty as a white carpet in a house full of dogs and boys after that.
Frank Hyman
Herbal ‘aircuts
Frank’s Pruning Rule No. 1 for Reducing Pruning Anxiety: Recognize that all plants evolved being grazed on. Each plant expects to be whacked back by aesthetically indifferent herbivores such as cows, horses or hippos.
After a few million years of grazing, plants are ready for us clumsy gardeners.
Growing herbs for your chickens helps you get over pruning anxiety. Unlike most evergreens, they provide immediate positive reinforcement: They smell good, and you can do something delightful with the clippings right away.
You sure can’t toss holly leaves into the soup with any success.
And herb trimmings have another use. I store clippings of six herbs—lavender, sage, rosemary, thyme, marjoram and oregano—in a container with a tight-fitting lid. The resins that give fragrance and flavor to these somewhat woody herbs also make them flammable when dry.
A small handful makes great kindling for fires in the winter.
These six herbs are actually called subshrubs. Their stems are woody at the base but herbaceous at the tips.
Don’t clip them all the way back to the base of the branches unless you want to kill them. Leave at least four or five nodes of foliage on the herbaceous part of the branch if you want them to leaf out.
If you want herbs grown for your chickens to look bushy and full, shear the foliage back only by half with hedge clippers or hand pruners. Otherwise, they’ll get leggy and open.
Spring and early summer pruning suit these six plants best. Like many culinary herbs, they evolved in the mild winters of the Mediterranean. They simply don’t know how to go dormant in cool weather.
Hard winter pruning that works well for most perennials only stimulates culinary herbs to make new growth on warmish winter days—new growth that can be killed by the next cold front. But cutting a few snips of herbs for the chickens or the kitchen (or both) in winter won’t hurt.
Other perennial herbs such as chives benefit more from division than from pruning. Biennial herbs such as parsley, cilantro, fennel and dill also don’t need pruning and can be allowed to go to seed to sow the next generation.
So hopefully the aromatherapy has reduced your pruning anxiety. But if not, I bet thoughts of a tasty dinner and happy chickens will.
This article originally appeared in the November/December 2020 issue of Chickens magazine.
“Use it up, wear it out, make it do, or do without.” Growing up, I’d heard this Great Depression-era slogan routinely from my grandma. That period left an indelible mark on her.
Thanks to her, it indirectly affected me, too.
Now I DIY many household products rather than buy them. This saves a surprising amount of money and reduces packaging waste. I also enjoy the creativity and control choosing my own ingredients affords.
Give some of these projects a try and you just might find a few of your own reasons to DIY!
Laundry Detergent
Fed up with the expense—not to mention lugging those heavy plastic bottles home—I began making my own laundry detergent years ago. The DIY version costs a fraction of what most commercially prepared laundry detergents do, and it works.
What’s more, you can choose to make an unscented version or you can play with all sorts of scents.
This recipe is based on “All-Purpose Laundry Soap” from Make Your Place: Affordable, Sustainable Nesting Skills. If you have a high-efficiency washing machine, check your owner’s manual to make sure you can safely use this powdered detergent.
Also, washing in warm or hot water will ensure that this DIY mix dissolves completely. If you want to wash in cold water, allow the washer to fill part way, add the detergent, then hand-agitate the mixture to help it dissolve.
Ingredients & Supplies
1 cup grated all-natural, vegetable oil-based bar soap. When my bath soaps become too small to use, I set them aside for a future batch of laundry soap. (If you do this, let them dry completely before trying to incorporate them into your laundry detergent.) To get started, you might need to buy a few new bars of plain castile soap.
1 cup baking soda
1⁄2 cup washing soda
1⁄2 cup borax
essential oils (optional)
cheese grater or food processor
1 or 2 large, airtight containers
protective gloves (optional)
Directions
Using a cheese grater or food processor, finely shred your bar soap until you have at least 1 cup. Because this is the most time-consuming step, grate more than you need and keep the shredded soap in an airtight container. That way, if you run out of laundry detergent, you can very quickly make a new batch.
Next, combine baking soda, washing soda and borax with your shredded soap. Mix well. (So that my ingredients are uniformly blended, I typically run the mixture back through a food processor.)
Once all ingredients are thoroughly mixed, add essential oils, if you wish. I like to combine 15 to 30 drops of rosemary with another 15 to 30 drops of lavender, but sometimes I also add peppermint.
Just be careful: Essential oils such as lemongrass can cause staining when used in large quantities. You can experiment with different scents and strengths with every new batch of laundry detergent you make.
After adding essential oils, I run all of the laundry detergent through my food processor one last time. Again, this blends everything together and ensures my essential oils are evenly distributed.
Store your laundry detergent in a large, airtight container
at room temperature. I use 1⁄2 cup of my DIY detergent per average-sized load of laundry, but I add more for really soiled clothing or large loads.
Susan Brackney
Hair Coloring Conditioner
As a graying brunette, I like to punch up my hair color occasionally. Hoping to avoid harsh chemicals, the expense of the salon and the extra trash that comes with store-bought color, I make a deep brown dye from fallen walnuts.
This DIY dye works best when applied semi-regularly via hair conditioner in a hot shower. (The heat of the shower helps to naturally open your hair’s cuticle, thereby allowing more of the color to stick.)
Ingredients & Supplies
20 to 30 black walnuts. I collect these in late fall or early winter after the walnuts’ thick, green husks have naturally thinned and turned dark brown.
heavy saucepan
canning jar or similarly heat-safe container
slotted spoon
strainer or cheesecloth
rubber gloves. Walnuts can stain your skin and clothing, so handle with care.
coconut oil or conditioner of your choice
airtight container with lid
Directions
Rinse walnuts to remove any worms, insects or debris.
Place walnuts in heavy saucepan, cover with water, and put on medium-to-high heat. Keep uncovered, stirring occasionally. Allow the walnut mixture to boil softly until the husks further deteriorate and about half of the water has evaporated.
With slotted spoon, remove any loose walnuts and set aside. (You can crack these open later as a snack or toss them back outside for the squirrels to enjoy.)
Pour walnut liquid through strainer or cheesecloth into canning jar or other heat-safe container. If you like, save what’s left of the husks and allow them to dry, then grind them into a powder which can later be reconstituted into dye.
Mix equal parts liquid dye with coconut oil or your favorite conditioner and store in an airtight container with lid.
This DIY homemade cleaner is good for kitchen sinks, countertops, floors, bathrooms—pretty much anything that isn’t wood or glass.
Ingredients & Supplies
1⁄4 cup grated all-natural, vegetable oil-based bar soap
2 to 3 cups boiling water
1⁄4 cup borax
1⁄8 cup white distilled vinegar
lemon, grapefruit or similarly citrus-y essential oils (optional)
cheese grater or food processor
protective gloves (optional)
spray bottle
Directions
Using a cheese grater or food processor, finely shred your bar soap. Dissolve the grated soap in 2 to 3 cups boiling water. Stir well.
Add borax and white distilled vinegar. Stir well, and allow to cool.
I add 10 to 15 drops of lemon and grapefruit essential oils, but you can experiment with different scents and strengths.
Shake well, and pour into a clearly labeled spray bottle.
Susan Brackney
Dog Biscuits
We don’t need artificial colors or preservatives in our diets, and neither do our pets. I like baking my dog’s treats because I know exactly what’s in them and I can make the DIY biscuits as soft or as crunchy as she’d like.
This recipe is adapted from The Organic Dog Biscuit Cookbook.
Ingredients & Supplies
1 cup dried mint
11⁄2 cups oat flour
11⁄2 cups brown rice flour
1 egg
1 teaspoon vanilla
1⁄2 to 3⁄4 cup water
ungreased cookie sheet
cookie cutter (optional)
Directions
Preheat oven to 350 degrees Fahrenheit.
Thoroughly combine flour and dried mint in large mixing bowl. Add egg, vanilla and 1⁄2 cup water. Mix well. Add remaining water as needed.
Continue to mix until all of the dry ingredients have been incorporated. Dough will be stiff but workable.
If you like, create specific shapes with cookie cutters or simply hand-form one-inch balls. As you place dough balls on the cookie sheet, flatten each slightly with your hand.
Bake for 30 to 35 minutes or until biscuit bottoms are golden brown. Allow to cool and then store in an airtight container.
I used to have an expensive bedtime tea habit, but eventually I realized I had a decent herbal sleep aid growing just outside. (Catnip causes some cats to hallucinate, but it’s mildly sedating for humans.)
Ingredients & Supplies
fresh catnip
tea ball or strainer
microwave oven
microwave-safe dish
dish towel
mortar and pestle (optional)
valerian, chamomile, mint or other herbs (optional)
Susan Brackney
Directions
Harvest a few stems of fresh catnip. A 1/2 cup of fresh leaves will yield enough dry material for some fairly strong catnip tea.
Remove leaves from stems, rinse well and pat to dry.
Arrange leaves on microwave-safe dish so that none overlap. Use timed defrost mode in 2-minute intervals to dry catnip leaves. After 2 minutes, I remove the dish, blot excess moisture with the dish towel, and return leaves for another 2-minute defrost period.
After about 6 minutes, your catnip should be dried.
Crush the dried catnip leaves with mortar and pestle or your fingers. Place in tea ball or strainer.
Pour boiling water over the catnip-filled tea ball. Place a saucer over the top of mug so catnip tea can steep. The longer the herb steeps, the stronger its action will be.
For an even stronger sedative effect, you can add dried valerian to the mix. To counteract valerian’s slightly bitter taste, consider blending with chamomile or mint.
Finally, whether you opt for catnip or a catnip-valerian mix, avoid driving after you’ve had these sleep-inducing brews.
Toothpaste
With countless tubes packed in shiny cardboard boxes—and sometimes even shrink-wrapped as well—toothpaste remains one of my least favorite items to buy.
Packaging aside, the product itself is filled with ingredients I can’t pronounce. So now I make my own, and my DIY toothpaste is not too shabby.
Heat the coconut oil via stovetop or microwave oven. Once the oil has liquefied, add the baking soda and stevia and stir well. If the consistency’s too runny, add a little more baking soda. If it’s too dry, add a small amount of extra coconut oil.
At this point, I’ll use my food processor to more finely blend the mixture. Next, add 20 drops of peppermint essential oil. Alternatively, you can use peppermint extract. Stir well by hand or food processor.
Pour toothpaste mixture into a clean, airtight container.
Pepper-Pine Syrup
I don’t want to have to run to the store at the first sign of a tickle in my throat. Instead? I like to have a cup of hot tea with a splash of pepper-pine syrup and a nice nap. Usually I start to feel better.
(Whether due to the syrup or the nap, I couldn’t say.)
Ingredients & Supplies
2 to 3 cups fresh, rinsed needles from a red, yellow or white pine tree
2 to 3 cups water
1⁄2 dried cinnamon stick
small handful of whole, dried cloves
1 dried hot pepper of your choice (optional)
1⁄4 cup honey
strainer or cheesecloth
canning jar or similarly heat-safe container with lid
Directions
Finely chop pine needles. Place in saucepan with two to three cups water.
Add the cinnamon stick, cloves and hot pepper. Briefly bring to a boil. Turn down the heat and allow to simmer.
Stir occasionally until about half of the water has evaporated.
Remove saucepan from heat, allow to cool slightly, and pour liquid into heat-safe container. Use cheesecloth or strainer to remove pine needles, cinnamon stick, cloves and hot pepper.
Add the honey to the liquid and mix well. Seal with lid and refrigerate.
This article appeared in Living Off the Grid, a 2020 specialty publication produced by the editors and writers of Hobby Farms magazine. Living Off the Grid includes stories on permaculture, growing plants without seeds and long-term produce storage. You can purchase this volume, Hobby Farms back issues as well as special editions such asBest of Hobby Farms and Urban Farm by following this link.
You would think changing the oil in a tractor or ATV would be a straightforward task. And generally speaking, it is. Assuming you have some basic experience working with engines, the trickiest part might be figuring out what type of oil to use.
The challenge stems from the fact not all oils are created equal. It all comes down to oil viscosity—the thickness of oil and how well it flows at various temperatures. Oil viscosity is designated by a series of numbers and letters (“SAE 30,” “15W-40,” etc.). And at first glance, they don’t necessarily mean much.
It’s possible to get along without ever knowing the meaning behind the designations. You can instead just trust equipment user manuals to guide you toward the right oil.
But don’t you really want to get the most out of your machinery? Then it pays to understand oil grades (or “weights”) and what all the numbers mean.
Oil grades are based on the SAE J300 standard, which allows various grades to be directly compared. For starters, you can divide oils into two broad categories—single-grade oils and multi-grade oils.
The single-grade category further subdivides into winter-grade oils (marked with a “W” and intended for use in cold temperature) and non-winter oils (intended for use in higher temperatures).
Since oils tend to thicken in cold weather, it can be difficult for engines to start unless they’re using winter-grade oil that will resist turning to sludge in sub-freezing weather. The number preceding the “W” in a winter-grade oil measures the minimum temperature the oil in question is suitable for. Lower numbers are superior for colder temperature.
A 0W or 5W oil will flow even if your engine is running in temperatures below 0 degrees F.
Standard oil grades measure viscosity in a different manner. At the high operating temperatures found in a running engine, oil might thin out too much for ideal performance, particularly if the air temperature is also hot.
Thus, standard oil grades like 30, 40 and 50 measure viscosity at 212 degrees F. Higher numbers indicate thicker oil.
Here’s the problem—the thin oils necessary for starting an engine in cold weather don’t provide as much protection from wear and tear as thicker oils designed for use at engine operating temperatures.
This is where multi-grade oils come into play.
Multi-Grade Oils
Additives allow the creation of multi-grade oils like 5W-30 that combine the best of both worlds. 5W-30 performs like 5W oil when it’s cold, but then shifts and acts like straight 30 when the engine temperature reaches 212 degrees F.
Of course, once you dig into the nitty-gritty details of single-grade oils vs. multi-grade oils, and the pros and cons of the multi-grade additives, and the merits of using thicker oil in old engines to improve oil pressure … it can all get very confusing. Which is why most folks turn to equipment user manuals and purchase whichever oil the manufacturer recommends.
But understanding the basics of oil grades, and what the numbers actually mean, is a useful steppingstone toward a greater understanding of engines in general.
Curious farmers who dig deeper can become capable mechanics in their own right, choosing just the right oil to keep their equipment running in tip-top shape no matter the temperature or age of the engine.