This delicious autumn treat, made rich and creamy with eggs, can be eaten as a custard pudding or made into a fun filling for seasonal pies, tarts and donuts.
The spices added here are simply suggestions. Substitute your favorites. If you don’t have whole spices, stir in some ground spices once you remove the custard from the heat.
Yield: 2 to 3 servings
Ingredients
Spice Pack
1 teaspoon each whole cardamom, clove and black peppercorn
Gather the spices, and secure in a stainless steel tea ball or make a pouch out of cheesecloth.
In a medium saucepan, stir the milks, cornstarch, sugar and pumpkin puree together. Use a whisk, if necessary, and stir until smooth. Place the spice pack in the saucepan.
Add the eggs to a medium bowl, and beat with a whisk until the yolks and whites are blended.
Set the saucepan over medium heat. Continue to stir and heat until scalded and the liquid around the edges just begins to bubble, about 5 minutes. It will thicken slightly. Remove from the heat.
Remove the spice pack.
Slowly add about 2 tablespoons of the hot contents from the saucepan to the bowl with the eggs, whisking constantly during the process. Continue to add a little at a time as you whisk, until all the contents of the saucepan have been added to the bowl. Whisk well.
Pour the contents of the bowl back into the saucepan.
Turn the heat to low and whisk constantly. Increase the heat slightly as you whisk and the custard thickens, about 2 minutes. Once the lines of the whisk moving through the custard no longer disappear with each stir, remove it from the heat. Whisk in the vanilla and salt.
Divide the custard between 3 or 4 serving bowls. Allow it to cool to room temperature or chill. Garnish with toasted coconut before serving.
This article originally appeared in the September/October 2020 issue of Chickens magazine.
Farming is among the top ten most dangerous occupations (and that includes hobby farming). It doesn’t matter if you’ve been farming since you were a child or if you’re a newbie—anyone can become injured when it’s least expected.
Below are scenarios to avoid and some farm safety tips.
In the Farm Kitchen
Canning and preserving fruit and veg is a given for the hobby farmer, but putting up your produce holds its own risks.
Vegetable slicers (also called mandolines) can create a nasty accident when used incorrectly. One slip is all it takes. Don’t rely on the hand-guard. It can be inadequate for certain veg sizes.
Use cut-proof gloves instead. These dishwasher safe gloves cost around $10—much cheaper than a trip to the ER!
When canning, make sure to use the correct tool for the job. A jar lifter is a must-have to insert and remove jars from the canner. These rubber-coated tongs are designed specifically for jars, clamping onto the tops safely and securely.
Never leave canners or cooking pots unattended.
Use heavy-duty oven gloves. Don’t use kitchen towels to handle hot pots and pans.
Wear shoes while cooking to protect your feet from hot spills or dropped knives. And keep pets out of the kitchen while you’re working. It’s not safe for them or for you. It’s easy to trip over a cat or dog or injure them with hot liquid or dropped equipment.
And if a flame-up occurs, don’t rely on water or other methods, such as flour, to extinguish a flame. Your safest bet is a kitchen fire extinguisher, which costs around $30. Have the extinguisher within reach of the stove and oven.
The fight or flight response is very strong in prey animals, so learn to understand an animal’s body language while working around them. That gentle giant of a draft horse is perfectly capable of kicking out, running over or crushing an unsuspecting person against a wall.
Geese defending a nest can give a nasty nip, and roosters happily employ their spurs when they feel threatened.
Don’t bend down between goats. Human heads don’t stand a chance against fighting and bunting goats.
Above all, always move quietly and confidently around your animals and give them space to move away from you if they feel threatened.
To protect your feet, wear closed-toed shoes or boots when around hoofed animals. It’s fine to wear sandals around poultry (though you may feel a peck or two).
Rollover Protection Structures (ROPS) and safe power takeoff shafts (PTO) are standard in new tractors, but might not be in older ones. An exposed PTO shaft is extremely dangerous and is one of the leading causes of serious injuries and fatalities on farms.
Clothing, hair and shoelaces can easily get caught in a spinning PTO shaft. Always turn off the tractor and stop the PTO before dismounting your tractor. Put a shield over all the components of the PTO, keep children away from the running tractor (that includes sitting on one or riding with the operator), and never step over or work around a rotating PTO shaft.
Fit a ROPS (the U-shaped bar behind the tractor seat) to your tractor. If that’s not possible, learn how to safely operate it. It’s important to know your tractor’s balancing limitations.
Use personal safety equipment, such as helmets, gloves, ear and eye protectors, and chainsaw pants. Avoid wearing shorts while using machinery, and always turn off equipment when not in use.
Bring your mobile phone with you at all times so you can call for help if you need it. And be sure to always tell someone where you’ll be working, what you’ll be doing and when you expect to be finished.
To avoid accidents, keep these farm safety basics in mind at all time:
Use safety equipment
Always concentrate on what you’re doing, whether you’re working in the kitchen, on the farm or around animals
Use the right tool for the job at hand
Never let yourself get complacent
Sidebar: Safety for Farm Kids
Most children brought up on hobby farms help with growing food and other chores, and it’s good for them to have that farm experience. But the farm can also be an especially hazardous place for kids.
Here are some tips to help little ones stay safe.
In the kitchen, make sure pot handles are facing toward the back of the stove and away from curious hands.
Know where the kids are at all times. Consider making age-appropriate no-go zones to keep youngsters away from hazardous places such as the stove, appliances/machinery in use and livestock areas. Consider posting signs in areas where children are not allowed to remind them to keep away.
Always supervise visiting children, especially those with little or no farm experience.
Store kid-friendly equipment in one area so children will know what’s OK to use and what’s not.
Make sure each chore is age-appropriate, especially when using heavy-duty equipment such as tractors, quad-bikes and chainsaws. Remove all keys when not in use and store them where children cannot get to them.
Consider enrolling your child in agricultural programs like 4-H and FFA.
And finally, always set a good example for your children by practicing farm safety yourself.
Michael Mazourek’s interest in seeds was sparked during his time as a biochemist PhD student at Cornell.
“My advisor, Molly Jahn, had started programs like the Public Seed Initiative and the Organic Seed Partnership to help create and deliver vegetable varieties to farmers that addressed unmet needs,” explains Mazourek.
“When she left Cornell to try to help in broader ways, her absence was felt in the seed community. And my farm roots led me to step up to continue the mission.”
Alongside chef Dan Barber and seedsman Matthew Goldfarb, Mazourek founded Row 7 Seeds. The venture specializes in bringing the most flavor-packed seeds to chefs and markets around the U.S.
We spoke to Mazourek about the appeal of Koginut squash and the rise of mini-Butternuts. We also got the scoop on the joys of Badger Flame beets.
Over the last few years, Mazourek says that he’s noticed miniature Butternut squashes becoming increasingly popular.
“In part because they are a convenient size for shopping and meals,” he says. “But also they got a name as a Honeynut-type squash. Like apples that are sold by variety name, this name association helped create a way for people to recognize these squash as different from other Butternuts.”
If you glance at Row 7’s Instagram account, you’ll notice eye-catching Badger Flame beets playing a starring role.
“I’m a very fidgety listener and was pulling some roots from the demo plots during Irwin Goldman’s field day presentation,” recalls Mazourek of how he came across the varietal. “I took out my pocket knife and scraped the dirt and peel away to reveal a vibrant orange with swirls of color.
“I took a bite and was so blown away I interrupted poor Irwin—who was in the middle of his presentation—and exclaimed, ‘Irwin, have you tasted these beets? They’re like a carrot but even better.’ Irwin was very gracious and noted that indeed he had tasted his beets and would talk about them next.”
Mazourek adds that “years later Row 7 Seeds was founded. And Irwin’s Badger Flame beet was one of the few varieties in our launch.”
Asked about the appeal of Koginut squash, Mazourek calls them “edible art.” He adds that Koginut squash also packs more flavor than a standard pumpkin. They also require fewer spices to pep them up when cooking fall and winter dishes.
When it comes to cooking with squash for the winter months, Mazourek says he likes to “keep it simple and toast it sliced lengthwise with butter.”
He adds that it’s important to roast your squash longer and at hotter temperatures than you might be used to.
“I roast covered for 45 minutes to an hour depending on the size of my slices, until the squash is hot and steaming. Then uncover, rub the slices with a frozen stick of butter like chapstick. Roast uncovered for about another 30 minutes until super soft but not too caramelized.
The idea of using a whole squash as a serving vessel has been trending on social media this fall season. If you’re looking to try out the technique at home, Mazourek advises to “use the round seed ends of your butternut squashes!” He says this part of the squash is thinner and cooks differently.
“Brown and drain some maple or herb sausage,” he recommends. “Mix with other fillings like apples for sweet maple or rice for savory herb. Then roast until the filling and mini squash bowls are done.”
I have a soft spot for chewy ginger root candies. They’re perfect for bouts of indigestion, a slightly scratchy throat or whenever you’d simply like a little something sweet.
Unfortunately, they often come wrapped in plastic and they’re usually shipped in from far away.
Those realities left a bad taste in my mouth. But I didn’t really want to forgo the little treats, so I started making my own instead. As it happens, I like them even better than the store-bought kind I used to swear by.
Special Spice
Ginger root chews are made with Zingiber officinale which contains scores of active chemical compounds such as gingerol, shogaols, zingerone, terpenes and assorted vitamins and minerals. Not to be confused with North American “wild ginger” (Asarum canadense), Zingiber officinale is thought to help alleviate nausea associated with pregnancy, chemotherapy, motion sickness and other conditions.
One great reason to make your own? You can tweak the amount of fresh ginger you use, resulting in candies that are as mild—or as strong—as you’d like. You can also switch up the kinds of sugars and syrups you use, in case you’d like to make your ginger chews vegan.
glass baking dish and parchment paper (or use silicone candy molds)
grater
strainer
candy thermometer
1/4 to 1/2 cup freshly grated whole ginger root
1/4 cup honey (or substitute agave nectar)
3/4 cup sugar (or raw cane sugar)
2 cups water
You can save a lot of time and trouble by testing your candy thermometer in advance. To make sure it will provide an accurate reading, place it in a pan of water and bring to a boil. In boiling water, the thermometer should read 212 degrees F.
If the measurement you get is under or over that number, you’ll need to add to or subtract from future readings to account for the discrepancy.
Susan Brackney
Next Steps
As you wait for the thermometer test water to boil, oil your glass baking dish or silicone candy molds. If you’re using a glass dish, line its newly oiled bottom with parchment paper and oil that, too.
(Don’t try to substitute wax paper or aluminum foil for the parchment. I tried both, and neither work nearly as well for this application.)
You can also use this time to grate the ginger root. The original recipe calls for 1/4 cup of shredded ginger root, but I prefer to use at least 1/2 cup of very tightly packed grated ginger.
Hot Stuff
Combine your grated ginger and 2 cups of water in a saucepan and simmer, uncovered, for about 30 minutes. At this point, roughly half of the water should have evaporated, leaving a dark, ginger-infused liquid behind.
Strain out the ginger solids and pour 1 cup of the ginger-infused liquid into a clean saucepan. To this, add 3/4 cup sugar and 1/4 cup honey. For the vegan version, substitute raw cane sugar (which has not been refined with bone char) and agave nectar.
Place the candy thermometer in the saucepan and bring the sugar-ginger mixture to a boil. Stir continuously and watch the thermometer carefully. Your target temperature is 260 degrees F, and accuracy with this really matters.
(If the mixture doesn’t get hot enough, it will remain too soft. But if you allow it to zoom past 260 degrees, you’ll end up with a hard candy instead.)
When the temperature reaches 260 degrees F, turn off the heat, and pour the liquid candy into the oiled, glass baking dish or silicone candy molds. Allow to cool for about 30 minutes.
Susan Brackney
The Big Reveal
If you used a glass baking dish, turn it upside-down to dislodge the ginger candy. Remove the parchment paper and cut ginger chews into individual squares.
With each pass through the candy, the knife will be very sticky. To keep it moving freely, you may need to rinse the knife well with hot water between cuts. (In the case of silicone molds, you should be able to use your fingers to pop out each candy from the back side.)
If you like, you can wrap individual ginger candies in small pieces of parchment paper or coat them lightly with sifted powdered sugar to help reduce the likelihood that they’ll get stuck to one another.
Place your ginger chews in an airtight container and they will keep for several weeks. Store them in the freezer or refrigerator, and they’ll keep even longer.
Some folks think that natural chicken-keeping means letting the birds fend for themselves, rustling up their own food and roosting at night in trees, because “that’s how they kept them in the old days.”
Except that it wasn’t.
Great-grandma and great-grandpa fed their flock on grain and goodies from the milk house and garden. They treated sick or injured birds with home remedies, and safely housed their chickens at night.
The hardy breeds they raised—we call them heritage breeds—produced luscious meat for Sunday dinners and eggs all through the week. We can raise our birds that way, too.
Starting Out
Because natural chicken-keepers don’t use antibiotics and chemical dewormers, it’s important to keep a natural flock in the pink rather than treating chickens once they’re sick. To that end, provide nourishing food, fresh water and a clean, roomy henhouse with a fenced-in chicken yard.
Also, handle your birds often to check for external parasites, body condition and injuries.
If possible, free-range your chickens to supplement their diets with nourishing wild things. You’ll also provide mental stimulation and relaxation, vital for good health and harmony in the henhouse.
Feeding Naturally
The best way to make sure chickens get the nutrients they require is to feed a commercially-produced ration formulated for their needs: starter, grower, layer and so on.
There are wonderful GMO-free, organic feeds on the market. But if you can’t afford them, feed a quality product that you can. Make sure your birds have grit, and oyster shell is a must for layers. These are the foundations of a healthy diet.
If you can’t free-range (and even if you do), consider weeds. Bring your birds nourishing plants they enjoy. Dandelions, for example, contain vitamins A, B, C, E and K, as well as manganese and calcium.
Other vitamin- and mineral-packed wild plants that chickens savor include
bee balm
bitter cress
chickweed
dead nettle
fat hen
henbit
nettles
miner’s lettuce
purslane
plantain
Queen Anne’s lace (wild carrot)
wild geranium
wild strawberry
violets
yarrow
wood sorrel
Avoid These Plants
Many cultivated plants, however, are toxic or poisonous. Don’t give them azaleas, daffodils, foxglove, holly, lily of the valley, lobelia, lupines, monkshood, mountain laurel, nightshade, poke, rhododendron, trumpet vine or wild mushrooms.
If in doubt about a plant, take a sample to your county extension agent for identification and advice.
More Options (and Cautions)
Chickens love bugs, and bugs are nourishing, too. Fat grubs and potato beetles from the garden, aphids, caterpillars, centipedes, cockroaches, crickets, grasshoppers, june bugs, millipedes, moths, slugs, spiders and termite larvae are all good choices.
Kitchen scraps, garden refuse and leftover milk can augment the natural diet you provide your chickens. If you’re raising organic birds, don’t give them nonorganic extras. Make certain scraps aren’t moldy or rotten, and don’t give them avocado, citrus, junk food, potatoes or potato vines, tomato leaves or vines, rhubarb, salty or sugary foods, sweets and uncooked beans, pasta or rice.
Grow produce specifically for your chickens. Pumpkins and squashes are easily grown in home gardens. Crack a pumpkin, and toss it in with your girls every few days for a couple of weeks in the fall. They’ll love it.
If that doesn’t work, choose one or more holistic complimentary medicine modalities to pursue. The key word is complimentary. These can also be used alongside standard remedies, if you choose.
Herbs are a good choice because they’re easy to grow, even in containers. And there’s a great deal of information about using them with chickens online.
Fresh or dried oregano is popular. It strengthens the immune system and has proven antibiotic properties effective against avian flu, coccidiosis, E. coli, infectious bronchitis and salmonella. Oregano oil is approved by the USDA for use on organic chicken farms.
Ground cinnamon is an antioxidant that has antibacterial properties and reduces inflammation. Parsley boosts egg-laying capacity and is rich in vitamins A, B, C, E and K.
Get Garlic
Garlic is another widely heralded herb for chickens raised the natural way. It, too, strengthens the immune system and, as a preventative, boosts respiratory health. It’s said that chickens that consume garlic are less bothered by mites, lice and other parasites than untreated birds.
Add fresh, crushed garlic to your flock’s water, or offer treats that include fresh garlic. Garlic seeps through the skin from the inside out. Because mites can’t tolerate it, they won’t want to make your flock their home
In The Chicken Health Handbook, 2nd edition, author and chicken-keeper Gail Damerow says to add garlic power to chicken feed “at the rate of 1 1/2 pounds per 50 pounds of ration,” as it “has been found to neutralize the odor of manure, but apparently it does not affect the flavor of eggs.
“Taste testers, in fact, preferred eggs from hens fed garlic, claiming they tasted milder. Researchers speculate that garlic somehow reduces the eggs’ sulfur content.”
Also, choose chickens that do well in your climate and with noted hardiness and foraging ability to raise the natural way.
Some of the hardy and productive heritage foragers that The Livestock Conservancy recommends include:
Flower essences are water-based and come in tiny bottles. Only a few drops are used at a time, either directly from the original bottle or in a further diluted form.
A 1/4-ounce bottle holds 175 drops, so at two to four drops per dose, it goes a long way.
Flower essences address emotional issues. Aspen calms fearful chickens, so it’s great for calming birds that panic when handled. Holly is the choice for mean biddies who peck your hand when you gather eggs or for roosters that terrorize your children.
There are 38 individual remedies in all.
To see if flower essences are right for you, try a bottle of Rescue Remedy, a combination of cherry plum, clematis, impatiens, rockrose and star-of-Bethlehem. It’s meant to be used to treat emergencies and crisis of all kinds, particularly shock or trauma.
Try it on yourself when you’re anxious about something. It works!
The telltale feathers scattered throughout our runs plainly announced that autumn molting season was once again upon us. Some birds, like Butters Orpington, dropped a few feathers each day, retaining a full, fluffy appearance throughout the past couple of months.
Others, like Fitzgirl Orpington … yeeesh. Poor Fitzgirl looked like she forgot to take off her Halloween porcupine costume. Her molt was so severe that my son Jaeson and I had to clean out the entire chicken coop, all three nestboxes, and the waterer, which was plastered with discarded black feathers.
Jaeson was disgusted. “Why’d she drop all her feathers when none of the other girls did?” he asked.
Why did Fitzgurl look like a horror-flick reject while her coopmates look like pageant queens? Unlike Butters, Selene, and the rest of her henhouse crew, who underwent a soft molt, Fitzgirl underwent a hard molt, losing all her feathers at the same time.
To a keeper new to chickens, a hard molt can be almost heart stopping. Over the years, I’ve received dozens of panicked messages from backyard flock owners, each of them freaked out that their hen might be sick and/or dying.
Nope! This annual feather purge happens every year once a hen reaches approximately 18 months of age. It’s the poultry way of saying out with the old, in with the new.
A girl discards her old, often bedraggled feathers in order to grow in healthy new plumage. It just so happens that some chickens, like Butters, do this in an almost imperceptible manner while others go full drama queen, like Fitzgirl.
Don’t misunderstand me … a chicken’s temperament has nothing to do with how she molts. Fitzgirl is actually quite shy. She’s the one hen in the Orpington retinue who will not take treats from my hand. She’ll hang back while everyone else crowds and leaps for stale bread, mealworms, etc.
If anyone in the group is a drama queen, it’s Selene Orpington, who “sings” quite loudly for five minutes before laying an egg and for 10 minutes after. Every. Single. Egg.
So why do some hens lose their plumes in a gentle manner, while others act like exhibitionists, dropping everything at once? It all has to do with what’s going on behind the scenes, so to speak. It’s not about a girl’s appearance but actually about her reproductive system.
A Matter of Hours and Months
A hen needs a minimum of 14 hours of daylight in order to lay. As autumn approaches and daylight begins to dwindle, a hen’s egg production begins to taper off and she begins to drop her feathers.
Instead of laying eggs, the hen concentrates her energy on growing new feathers.
The molting period not only allows a bird to discard her worn plumage; it gives her reproductive system a much-needed rest, allowing it to rejuvenate and recuperate from a season of continual egg laying. The molting process can take several months to complete, so by the time a hen has fully regrown her feathers, spring—and its longer daylight hours—will not be far away.
However, as evidenced by Fitzgirl and Butters, not all chickens molt the same way. Those who undergo soft molts—a gradual, almost imperceptible feather loss—tend to be the lazier layers in the bunch. After only a few months of egg laying, they gently begin their molt. As a result, they don’t produce eggs to their full potential … but look beautifully full feathered and fluffy, the ideal backyard hen.
Hard molters, however, lay more frequently and much longer into the season. By the time they begin to molt, these hens look worn and scraggly … and then they drop all their feathers and look even worse.
In other words, don’t judge a hen by its covering. Butters and Selene might look like the epitome of a beautiful backyard hen. But, more than likely, poor raggedy Fitzgirl is the better layer.
Jaeson was wrong, however. The scattered feathers throughout the Ameraucana coop indicate that our Ameraucana girls—who gave us our best blue-egg season to date—also had a hard molt. He’ll discover this soon enough.
Tomorrow, in fact, when he’ll spend the afternoon cleaning out their coop.
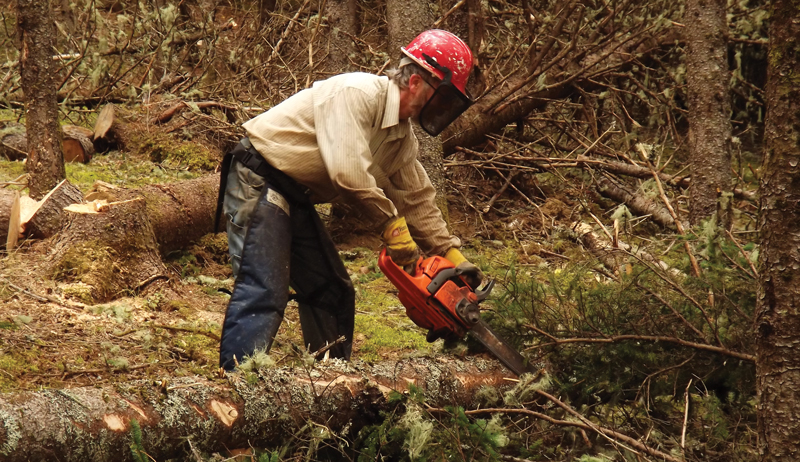
When you hear the word “lumberjack,” it probably conjures up images of a red-shirted ax-wielding fellow hard at work in the big woods. What you might not realize is that early homesteaders were equal parts farmer and logger.
Even today, countless rural land owners are still hard at work out among the pines, following woodlot management plans that preserve the forest while bringing in cash.
Planning Is Key to Cutting
Now it may seem a stretch to consider your woodlands a crop source. But is it really so different then oats or cattle?
Granted, the process takes years compared to months. But if done correctly, a section of woods will amply return all your work. Most country properties have some ground that is wooded, even if broken up into small sections.
So how does a would-be logger get started? Well, he or she gets started with a plan, of course.
For many landowners interested in a logging operation, the first thing in order is to look at what you want both now and down the road a decade or more.
Do you want enough income from the woods to keep the taxman at bay or a steady income? Do you intend to hire a professional crew or do you feel like getting in touch with your inner lumberjack or -jill?
If this is your first logging venture, it’s a good idea to have a woodlot management plan prepared. A professional forester can be contacted to perform a timber survey and draw up such a plan. Your local farm extension office, forest rangers or woodlot owners association will be able to steer you toward a competent person.
Once the forester completes his survey work, he will map out the woodlands into blocks, tally all marketable timber and outline access roads with any additional possible trails. Then each block will be assessed as to the amount of cutting available, possible improvements and any trouble spots.
The finished woodlot management plan will also guide you on how to keep the water table in good shape and improve conditions for wildlife. These woodlot management plans are very detailed.
For the average homestead logger, a woodlot management plan will certainly offer some good guidance.
One thing you need long before you begin cutting is a market for your production. This can sometimes present a challenge.
At one time, rural areas bristled with sawmills, and any farmer with logs had a ready market. However, these days it seems sawmills are getting scarcer, and making a haul of a couple hundred miles not out of the question.
Again, the woodlot owners association or forest ranger office can help locate a buyer.
Contacting a mill is crucial to harvesting timber. They will give dimensions such as length or top width and quality requirements, which you must adhere to closely. You can’t sell corn to a turnip buyer. So give the mills the correct logs and they will use you good.
Any load of logs is going to need hauling, and few farm woodlot owners can execute proper management of this. You will need a truck.
Local people in any farm area will truck logs for a fee and have the loading equipment as well. How many logs will you need? That’s a tough question, because regions vary. Here in the North Woods where I live, a two-tier semi-trailer will hold 220 to 300 logs (more or less), depending on the wood type.
These big trucks need good roads plus an adequate turn area and room to load.
I try to use existing farm roads and haul out to cut grain fields, cleaning up any mess once the logs are hauled. Try to schedule a dry week to haul and long before winter comes.
Believe me, trying to drag a fully loaded semi trail of logs with both my farm tractors taught me this lesson!
Lorain Ebbett-Rideout
Old and New
My cutting process is a mix of old and new, with the long game always in mind. Believe it or not, I have often cut trees left by my grandfather for “someone else.”
I, too, routinely leave trees for tomorrow, which means I’ll likely never touch them. But someone will.
Selective harvest methods work best on my small forest blocks. I never cut any trees less than 8 to 9 inches in width at the base. By following this simple rule, I can guarantee future cuts.
True, it may be 10 years or more before you can remove these trees. But they will provide much in the interim. Left to grow, they have seeded down the area with a desirable species, plus kept the surrounding forest in good condition.
Another method I use is to first look over any section slated for harvest for damaged tress, such as broken off tops, too many damaged limbs or signs of weakness or insect problems. Trees with poor root hold or too much lean or the ones with clumps of dense branches indicating poor prospects.
Get them down before it becomes a total loss. Also cut any undesirable species when you encounter them.
Lorain Ebbett-Rideout
Timber!
Unlike a mechanized clear-cut harvest, which is about speed and maximum production, I work slowly. And I stay careful to not destroy any other trees, if possible.
Once a block is selected for harvest and a good access trail brushed out, the tough stuff begins. I use a chainsaw with a 16-inch cutting bar and a 45 to 55-cc engine for cutting trees and logs. This is teamed up with a smaller 35-cc model, which is used for removing limbs or clearing trails.
A set of thick plastic felling wedges and a pry bar enable me to have control of the direction a tree falls or at least in theory anyway.
My tree harvest always begins at the farthest end of any selected block. This makes for shorter trips out as work proceeds.
From long experience I try to fall back into the forest rather than out over the trail. If possible, the tractor remains on the hauling trial and the logs are winched out. By this method, I keep the machinery tracks off the forest floor.
It takes little longer, but I’m always pleased with the results.
I strongly suggest mounting a logging winch on your tractor. These come in sizes for every tractor model and, for my money, are priceless in the advantages. They are a substantial investment of several thousand dollars, but you are miles ahead with one.
My 35-horsepower machine is a 4-by-4 model and with a winch can haul out a half dozen saw logs 16 feet long with ease. The logs come out slowly, slipping along between their standing neighbors and steered by adjusting tractor position. Best of all, winches allow you to keep the tractor on firm footing, avoiding backing down hills or into a bad spot.
Once delimbed, cut trees into logs right in the woods. I like this method because it makes for short, easy-to-pull logs. Even a casual tractor operator can quickly and confidently run this setup in no time.
When cutting I try to select trees that provide two 16-foot logs or a 16- and a 12-foot. Once hauled out to the yard, I pile logs up in separate areas according to species or length. Try to get things close to where the semi can easily load up.
At one time, most farm forest operations ran quite literally on horsepower. Oxen and mules have also done good service in the woods yarding out timber.
For the ultimate in low-impact logging, a horse is tops but a slower method.
Lorain Ebbett-Rideout
Also, any work with animals requires an experienced driver to work safely and humanly. I’ve logged with horses many times. The constant talk of the teamster with his co-workers is very enjoyable.
Any farm logging is very physical and safety is paramount. Personal logging equipment such as boots, helmet, eye/ear protection and cutting chaps keep you safe. All chainsaws should have a kickback device, and cutting or hauling always work at you own comfortable speed.
Good cutting practices are something to be honed and never allowed to dull.
Being a farm logger is part of your rural heritage and a country skill well worth maintaining. Performed to your satisfaction, a controlled log harvest is good stewardship of the land and insures future cutting potential rather than empty clear-cuts.
So if you have a stand of timber and a bit of Paul Bunyan inside, why not try logging the back 40 yourself? Who knows—you might even find yourself yelling, “Timber!”
Sidebar: Careful Cutting
Cutting is actually beneficial to the forest, and low-impact methods improve the health of the woodlot.
Understand that in nature, trees are removed constantly through fire, violent winds or winter storms. Insect damage can kill huge swaths of timber that falls into a dry, tangled mess. Heavy mature forests aren’t as wildfire-friendly as woodlands of various ages and species.
Any logging operation allows light to reach seedlings on the forest floor which spring up remarkably fast. Some land owners replant trees after a harvest, but if you temper your efforts with patience and follow a good woodlot management plan, the forest can regenerate itself after a moderate harvest.
Wildlife greatly benefits from careful log harvests. With new growth, berries, nuts and other grasses along with open places to wander. All wild neighbors from quail to deer are drawn to a fresh cut, and if you harvest wild game for the table a few strategic cuts will ensure a full deep freeze.
The forest soil is also stirred up in any cutting. While erosion is something to be constantly considered, good low-impact harvests can improve soil.
I have argued for years that a series of fresh logging trails are very useful to wildlife, quickly fill in with brush or seedlings and are part of the natural regeneration process.
If your garden tractor ready for winter? You might not need it for mowing your lawn, or hauling compost, but the value of a garden tractor doesn’t diminish with the arrival of winter.
When equipped with a snow plow or snow blower attachment, a garden tractor can transition into a lean, mean, snow-moving machine.
But preparing a garden tractor for winter isn’t as simple as slapping on an attachment and setting off down your driveway. Follow these five steps to help ensure your tractor handles snowy conditions without issue.
If your garden tractor has a mower deck attached, remove it before winter and store it in a safe location. This will give you a little extra clearance underneath the tractor and make it easier to negotiate challenging terrain.
You don’t want to be plowing snow with a mower deck jutting out from either side of your tractor, catching on snowdrifts and reducing maneuverability.
2. Change the Oil
Even if your garden tractor isn’t due for an oil change, you might still want to drain your summer season oil and replace it with low-viscosity oil (such as 5W-30) suitable for use in cold weather.
Using appropriate winter oil will make your tractor easier to start and help the engine run smoothly even when cold. Check your tractor’s manual for recommendations on seasonal oil changes.
Ideally, you should keep your garden tractor parked in a heated garage all winter long. This will keep the engine oil warm and the battery running strong, facilitating easy starting.
But if parking your garden tractor in a heated location isn’t an option, consider having a mechanic recommend a dipstick heater or magnetic engine block heater appropriate for use with your tractor. Also, consider bringing the battery indoors when not in use, since batteries suffer major performance hits in sub-freezing weather.
4. Install Snow Tires and/or Tire Chains
Check out the tires on your garden tractor—are they turf tires (known as “R3” tires) designed to minimize damage to your yard?
These tires feature shallow treads that can quickly get packed with snow, reducing traction until your tractor slips and slides. If you’re able to replace your turf tires with R1 (agriculture) or even R4 (industrial) tires, you’ll likely gain a performance boost.
Even better, consider installing tire chains to dramatically boost traction. Assuming they’re properly sized and tightly installed, you’ll be able to negotiate challenging terrain with much less risk of getting stuck.
5. Add Ballast and/or Wheel Weights
If your garden tractor is a lightweight model, you may have trouble gaining enough traction to traverse snowy conditions. Adding ballast (in the form of suitcase weights, a ballast box, etc.) or wheel weights (installed directly on the wheels) will help your tractor dig in and gain solid footing.
Once your garden tractor is properly prepped for winter, taking it for a spin in the snow will be much safer and more effective. Have fun!
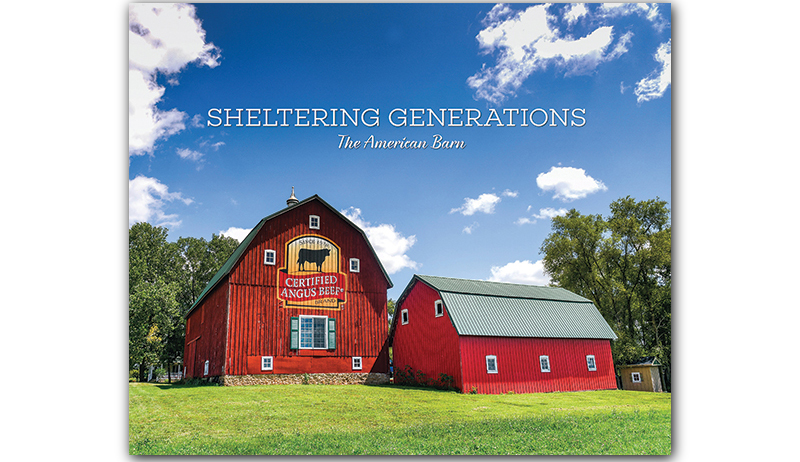
Sheltering Generations – The American Barn highlights 40 barns and farm families across the U.S. with images and stories documenting the role of this American farm icon.
In homage to the families whose stories are told in the book, 100 percent of proceeds from the book go to supporting farmers and ranchers in times of need. To learn more or to order a copy, visit certifiedangusbeef.com.
Here are two of the stories, excerpted from the book.
Olson Land & Cattle
Hereford, Texas
Most people don’t have Hereford, Texas, on their vacation bucket list. A feedyard town in West Texas, surrounded by wind turbines, it’s not a traditional tourist destination.
Yet many of the world’s most prominent chefs have made their way to an Angus ranch just outside Hereford city limits.
The cattle graze green grass (when the rain cooperates) and are tended by caring hands. What sets this place apart is the people who raise them think all should know where their beef comes from. That’s why Steve and Ginger Olson open their gates, their kitchen and barn door to curious minds.
“We’ve been blessed to have the opportunity to be a part of production agriculture, to live on the land, to raise our family, to take care of God’s resources, and to interact with other people and share with them what it’s like to be here and to do this,” Steve says.
No tour of Olson Land and Cattle is complete without a key stop. “This barn is the essence of what we do,” he says.
“It is the centerpiece—where we work cattle together as
a family.”
A newer addition to the ranch, it was built with care for the cattle and people. The pens, alleys and chute that flow in and out of the barn are crafted from the ideologies of leading animal welfare expert Temple Grandin. It keeps the elements of Texas weather outside when the animals need extra attention.
The place looks different from the land Steve’s ancestors cultivated, but as the third generation to tend the land his family homesteaded, he won’t be the last. What may appear as simple fencing upgrades and new water sprinklers and ponds fade into the normal scenery. However, each is placed with strategy, coordinating what is best for the land and will use the least amount of natural resources.
The seven Olson grandchildren can be found throughout the pastures doing chores (some with years enough to help, others just there to learn).
“Pa, are you going to have enough land for all seven of us?” Colter questions his grandfather. “I didn’t know that was my assignment!” Steve replies in jest.
But each investment in the livestock and land is mindful
of the future for his grandchildren and the environment.
“Sustainability is really about four segments in my mind, the first one being taking care of the animals that are on the ranch,” Steve says. “Their welfare as far as health, nutrition, and all of the elements they need to be comfortable.
“The second part is taking care of the land and natural resources that God gave us. Not overgrazing but continuing to nurture and conserve the water resources and utilize those products with good stewardship.
“The third is taking care of the people. People are family and how we treat each other and certainly the people that work for us, their time here needs to be one that’s good for them and also their financial wellbeing.
“The fourth part of that in my mind is it takes a profit to maintain all of these things and to keep it going, and the Certified Angus Beef brand has helped us to do that.”
His vision for a ranch that accomplishes all these tasks paints a picture of a destination all can put on our lists.
Yon Family Farms Barn
Ridge Spring, South Carolina
It was on a leisurely Sunday afternoon drive that Kevin and Lydia Yon had a fated encounter. From the backseat of the pickup, 3-year-old Drake complained they must stop for a potty break. Kevin was certain he just wanted a snack but chose not to risk the consequences of refusing the request. He pulled the truck into the gas station in Ridge Spring, South Carolina.
For years, they’d worked managing someone else’s herd, about 50 miles away, but recently that owner had decided to get out of the cattle business. Kevin was a young rancher with no land and no job, just a dream of raising cattle for a living.
He’d barely stepped out of the pickup when a familiar voice called out.
Small talk with a bull customer from the same town led to deeper discussion. Ironically, this customer mentioned that he had thought of them just a few days earlier. He had a 100-acre tract that he and his brother might be willing to sell, a few miles down the road, and the next day Kevin was back and the deal was made.
Decades later Yon Family Farms is both work and home for multiple generations. Kevin and Lydia started from scratch, building fence, cattle working facilities and slowly growing their herd.
Their barn is a piece that’s grown with their family, sitting on the original 100 acres they bought when they first moved to Ridge Spring. The front section acts as a feed and livestock supply store—serving both their ranch needs as well as neighbors. Its walls are festooned with vintage farm signs and art from bygone days.
It even features a mural of the farm, hand-painted by Kevin’s mother.
Walk through the swinging doors toward the back and it takes on a different mood. Twinkle lights dangle from the ceiling. Designed as their sale barn, it plays host to two cattle sales each year, but has also been the reception venue for two of their children’s weddings.
It’s 6:45 a.m. when Kevin, Lydia, Drake, Sally and Corbin Yon along with several other top hands gather to start the day in the barn. Farm tasks are divided up, then all the heads bow, a prayer is said and it’s off to work on the ranch.
What started as the dream of a young couple blossomed into a business that’s a family affair, day in and day out.
“I think of our farm as a rough piece of art,” Kevin says. “As we go along, we’re just working on our masterpiece.”
This excerpt originally appeared in the September/October 2020 issue of Hobby Farms magazine.
The calendar year is nearing its end. And that means it’s a great time to start thinking ahead to next year.
Why not wind down things down with plans to make your grazing spots healthier for next spring? There are some tips for pasture management in the fall.
Walk Your Pastures
Pick a day with decent weather so you’re not rushed. Walking your pastures with a critical eye allows you to get an overall appraisal of how they’ve been utilized over the past year.
Start by asking yourself the following questions:
How tall is the grass?
What is the grass-to-weed ratio?
What weeds are present?
Are certain areas over- or under-grazed, and can you tell why?
Are there low-lying areas with poor drainage? Tricky areas with rocks or dips? Signs of erosion? Gopher or sink holes or other dangers lurking underneath?
Depending on your acreage and the number and species of animals on your farm, you may have one or two large pastures or several smaller areas, or perhaps a combination of both.
Typically over the course of a year, animals are rotated from pasture to pasture to give the grass a break and re-grow. If this is your practice, how has it worked this year?
If grass is grazed below 3 inches, this is generally considered over-grazed. This is bad for a couple of reasons:
It exposes your animals to greater numbers of infective parasite larvae, as roundworm larvae like to hang out mostly in the lower parts of a blade of grass.
Second, overgrazing is damaging to the grass itself, robbing the leaves of essential nutrient reserves that the plant needs to grow back as healthy as it was before.
Winter, when you’re likely to be supplementing with hay, is a good time to plan new pasture rotation schedules if your pasture assessment indicates this is needed.
Mow
If you have pastures that are coming off a rest period and have considerable grow back, congratulations! Now might be the time to give it a mow down to 3 to 4 inches in height.
Test Your Soil
Here’s where the science geeks get excited. Most agricultural state universities have soil testing options. Contact your extension agent for sample requirements.
It is generally recommended to test your soil every two to three years for parameters such as pH and nutrient levels. Go over your results with your extension agent, as the results may indicate you need to fertilize, add lime or pursue other management options.
Doing so will ensure your pasture is providing the healthiest, most nutritious forage to your animals.
Fall is a good time to re-seed a pasture. However, this isn’t as easy as it sounds.
If you’ve determined a pasture needs re-seeding, be aware that animals really shouldn’t graze on it for about a year in order to give the new plants time to establish hearty roots.
If you can spare a pasture, great. Testing your soil before seeding is beneficial to see if it needs any fertilization, and talk with an extension agent on which type of forage will grow best for your area and the livestock you have.
If you can’t spare the pasture, consider blocking off a section to re-seed, if needed.
Don’t Drag
In the summer months on smaller lots, a common pasture management practice is to drag the pasture in order to break up manure piles. This exposes parasite eggs more efficiently to the hot summer sun, which dries them out and helps minimize the potential infection rate to your animals.
It also helps fertilize larger areas of the pasture.
However, as the months get cooler and wetter, dragging a pasture may actually contaminate the grass further as you spread out the manure and the parasite eggs along with it. So depending on your local geography, think closely about the time of year before dragging.
Even if you don’t take any action on your pasture this fall and winter, taking a closer look at where your animals spend the majority of their time can be illuminating from a health and safety point of view.