Categories
Animals Poultry

You Can Keep Chickens Comfy, No Matter The Weather

It’s safe to say we humans are fascinated by the weather. It’s discussed frequently in local and national newscasts. It’s most likely something you consider before leaving the house and or making plans. We cope with the weather by adding or subtracting clothes and using tools such as umbrellas and scarves. We can get in the air conditioning or central heating depending on the need.

But our chickens can’t do any of these things to deal with weather changes. 

Chickens use physical adaptations and behavioral adaptations to deal with whatever Mother Nature throws at them, and they’re pretty good at it, too. But we can help make things easier for them. Working in concert with our chickens, no matter the weather, makes for a happy and productive flock. 

Feeling Hot, Hot, Hot

Many chicken-keepers say the heat is more difficult to deal with than cold, and I agree. Heat stress is real, and it’s not always caused by temperature alone. Heat combined with humidity can be brutal.

Temperatures of 80 degrees Fahrenheit with high humidity can be just as hard on a chicken as temperatures in the 90s with little humidity. It’s about the temperature spikes, the longevity of the spikes and the bird’s ability to acclimate.

Think about acclimation in terms of human comfort. If we get a 60-degree early spring day after we’ve been living in the 30-to-40-degree range, then that day feels hot. In the middle of summer, after we’ve been living consistently with 80-degree days, then a 60-degree day feels cold. 

Chickens have a normal body temperature between 105 and 107 degrees. If a bird gradually acclimates to the weather, then its body can adjust. If heat and humidity happen quickly or for an extended time, the body has a harder time adjusting.

The harsh reality is that if a chicken’s body temperature reaches 115 degrees, it can die. 

chicken chickens hot cold weather
Pam Freeman

Adapted to Heat

Chickens don’t sweat to cool off in hot weather like humans. They have no sweat glands. Here are some ways they are adapted and they adapt their behaviors to cope with the heat and keep their body temperature in a safe range.

  • Sparse Feathering: Breeds from hot climates are genetically adapted to have reduced feathering to allow more body heat to escape. 
  • Spread Wings: Chickens will spread their wings to expose more body surface, and lift their feathers to let heat escape.
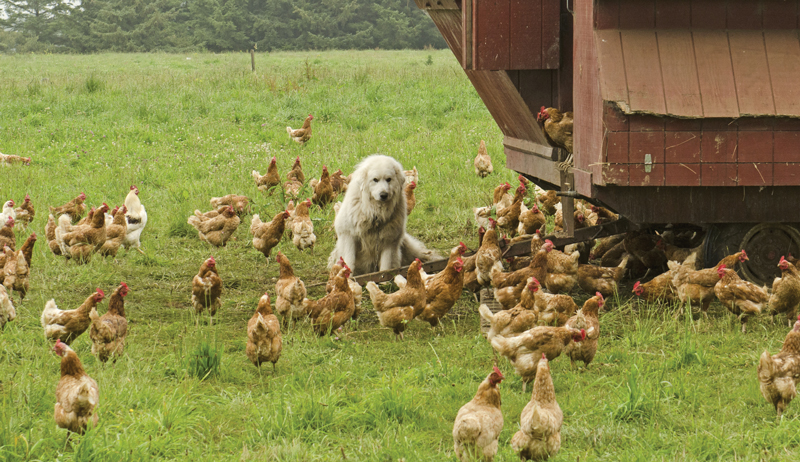
  • Social Distancing: You’re not going to see your chickens spending time close together when it’s hot whether outside while free-ranging or roosting at night.
  • Seek Out the Shade: On a hot day, you’ll find chickens under trees and shrubs and often in the shaded dust bath.
  • Get some ZZZZs: Resting takes less work than foraging, so chickens will stay still during hot afternoons.
  • Large Combs & Wattles: In hot weather, larger combs and wattles are a good thing. That’s why you see Mediterranean breeds that live in a hot region, such as Leghorns, with this adaptation. As blood travels through the comb and wattle, heat is released, cooling the body. Larger combs and wattles equal more space to release heat.
  • Watery Poop: Warm water is excreted from the body to enhance cooling.
  • Panting: Chickens pant around 85 degrees. Panting allows a chicken to bring cooler air into the body and get rid of excess heat as water vapor.
  • Gular Flutter: While panting is effective, sometimes it’s just not enough. During those times, chickens will rapidly vibrate their throat muscles increasing the rate of water evaporation.

Read more:Here are some tips for keeping chickens cool when the temperature rises.


Helping with Heat

Human help won’t take away hot weather, but it can provide ways for our chickens to lower their body temperature.

  • Do provide shade, whether it’s through your garden plantings or man-made structures such as decks, awnings or umbrellas. Give your birds a place to get out of the sun and rest.
  • Do provide fresh water frequently. You can put some ice in the water. Just be sure not to make it so cold that it’s a shock to the system.
  • Do provide some cool treats such as frozen blueberries or watermelon. Chilled food is a nice heat buster and also provides extra hydration.
  • Consider providing a shallow pool of water. Your chickens can stand in this and transfer some body heat through their feet.
  • Do not keep your chickens locked up in a hot coop where the heat can easily intensify to a dangerous level. Open the coop windows and door, if possible, and add a fan to increase air circulation.
  • Do check on your chickens often and be prepared for some of the side effects of heat stress such as  reduced appetite, reduced egg laying and eggs with thin shells. Encourage your birds to eat in the cool of the morning or the evening. 
  • You can also offer electrolytes in your bird’s drinking water to help counter the effects of heat stress. This can be as simple as adding a 1/4 cup of baking soda per gallon of water or purchasing premade electrolytes from the farm-supply store. Premade electrolytes usually come in small packets that look like the yeast packets of three that you get in the baking aisle. Follow the packet directions.
chicken chickens hot cold weather
Pam Freeman

Heat Stressed Out

If your chicken starts showing signs of severe heat stress—labored and rapid breathing, excessive drinking, weakness, unsteady walking or lying prostrate on the ground with eyes closed—stay calm and work to slowly decrease your bird’s temperature. You can do this by moving the bird to a cool location in the shade, dipping its feet in cool water and putting it near a fan.

The idea is to gradually decrease its body temperature, not shock it. Don’t move your bird into air conditioning, as that sudden cold can be a shock. As your bird recovers from heat stress, keep it cool and comfortable with water (and added electrolytes) and food.

Baby, It’s Cold Outside

Cold is a lot easier to deal with than heat. Along with your bird’s adaptations, human help can go a long way toward keeping your chickens comfortable when the temperature dips. Here are a few ways chickens help themselves during cold weather. 

Feathers

More feathers equals more warmth, so you’ll see cold-weather breeds such as Cochins and Brahmas with heavy feathering. Regardless of breed, adult chickens will molt annually in late summer/early fall.

During molt, chickens will shed old feathers and regrow new. With new feathers in tip-top shape, chickens have better protection from the elements. Chickens will fluff their feathers to trap body heat closer to the skin. They will also tuck their beak under their wing feathers to breathe in the warmth. 

Small Combs & Wattles

Less surface area means less chance of frostbite.

Feathered Legs & Feet

While feathered legs and feet can mean more warmth for a bird, they can be a detriment if they get wet and freeze. Make sure that birds have a place to stay dry during the winter, especially during snow and ice events.


Read more: Check out this guide to caring for chickens during cold weather for more tips.


Better Together

While summer weather equals social distancing, winter weather brings everyone together. Roosting close together and tucking feet and legs underneath their bodies creates warmth. If you see your birds standing in cold weather on one leg with the other tucked up into their feathers, this is a behavioral adaptation that halves the amount of heat lost from a chicken’s limbs.

Central Heating

Chickens have a specialized adaptation called “rete mirabile” which means “wonderful net” in Latin. This net of blood vessels acts as a countercurrent heat exchange. As warm blood flows from the heart to the extremities, it warms the cooled blood returning from the extremities, thus conserving heat from the body core.

Sunbathing

Grabbing the sun’s rays is an easy way for chickens to warm up without expending energy. Note that you will see chickens sunbathing during the hot summer months, too.

Sunbathing is a way for birds to control parasites. As they spread their wings and adjust their body stance, certain parts of the body are exposed to heat. Parasites don’t like the heat and move to other parts of the body that are easier for a chicken to reach and pick off the pests.

Sunlight also helps convert chemical compounds in a chicken’s preen oil (located in the uropygial gland where the tail meets the body) to vitamin D, which helps maintain good health. 

When is the weather too cold for chickens, and how can we humans help? There’s no right or wrong answer for exact temperatures. Chickens acclimate to cold weather just as they do to warm weather, so a heated coop is not necessary, but frostbite can set in quickly in a matter of minutes and have devastating effects.

On the less severe end of frostbite, roosters in cold climates can be seen with missing tips on their combs and wattles from frostbite. On the severe end, chickens can lose toes and even limbs. It’s not pretty, and it’s painful.

chicken chickens hot cold weather
Pam Freeman

Keep out the Cold

There are many easy ways we can help keep our chickens comfortable during winter.

  • Consider adding an extra layer of bedding for warmth and always keep your coop clean and dry. Excess moisture from waterers and droppings leads to frostbite, and the ammonia buildup can damage your chicken’s lungs. Ventilation, not drafty breeze, can help reduce ammonia buildup.
  • Always give your chickens a dry place to rest away from snow and ice. This can mean adding tarps to your run so it stays dry. It can also involve clearing snow and ice paths in the yard. If the snow is not predicted to be heavy, simply lay down a few pieces of sheet wood in the yard before it snows, then lift them once the precipitation is passed. 
  • Check on your chicken’s water often and change out icy water throughout the day. To help make this task easier, you can purchase heated livestock water bowls.
  • For comb and wattle protection, rub a thin layer of petroleum jelly into your chicken’s combs and wattles. This protection doesn’t last forever, so reapply as necessary.
  • Consider raising the height of your watering area so your rooster’s wattles don’t dangle in the water making them vulnerable to frostbite. 

No matter what the weather is, exercise common sense for you and your chickens. Sometimes, the weather just gets out of hand and extreme human intervention is necessary.

For instance, during a recent polar vortex, I decided to move my flock into the garage. This was for their safety as temperatures were dangerous and my flock was too small to keep warm in the coop. Plus, it was dangerous for me to be exposed outside.

The garage wasn’t heated, so the birds could remain acclimated to the cold. But access to electricity and running water did provide extra protection for my birds and me.

Categories
Poultry

5 Poultry Apps That Help With Flock Management

Regardless of whether we keep a backyard flock of four or a hobby-farm flock of 100, we can always use a helping hand when it comes to managing our chickens. Over the years, my husband Jae and I have used white boards, journals, ledgers and our own questionable brain cells to try to keep track of everything on our farm.

Several years ago, I decided to explore digital options and found a handful of poultry-related applications to help organize our birds. Since technology continually strides forward, I decided to investigate the latest innovations. Amidst the many chicken sounds, recipe, sticker and game apps, there were a few gems programmed to help poultry farmers.

Here’s a summary of five that particularly caught my eye.

birdBreeder

by Jason Fishbein

The app for serious breeders, birdBreeder allows you to conveniently record and input data while inspecting your pens, brooders and incubators.

Keep tabs on the health and production records of each hen. Monitor and analyze your hatching results. Create records of your sires, their descendants and the different species you raise. You can even customize data fields to record data specific to your operations.

Use birdBreeder for your chickens, ducks, turkeys and other species of bird you raise!


Read more: Here are some more smartphone apps that can help with gardening and more!


Chickens Magazine

by Beckett Media LLC

If you love Hobby Farms, then you’ll love our bimonthly sibling publication, Chickens! This app allows you to keep oodles of information about poultry breeds, predator prevention, coop maintenance and much more right at your fingertips.

No more searching the house for your latest issue.

The Chickens app downloads for free but requires in-app purchases to obtain the current issue as well as back issues. A subscription to the magazine can also be purchased within the application.

Count Your Eggs

by RoleModel Software, Inc.

If you’re just looking for an app to help you keep track of your flock’s egg production, look no further than Count Your Eggs. This intuitive application allows you to easily adjust the number of eggs your hens lay on a daily basis.

Its history function displays your layers’ weekly, monthly and yearly production data both in a graphic chart as well as in a chronological list. It may not feature bells and whistles, but it’s straightforward and simple to use.


Read more: Subscribe to our newsletter to have stories like this delivered to your inbox!


FlockPlenty

by George Lee

If you’ve ever wanted to keep a digital diary about your flock, FlockPlenty is the answer you’ve been waiting for!

Take notes on your chickens’ day-to-day behaviors, number of eggs collected and amount of feed given. Photograph and keep track of expenditures over the course of a day, week or month with FlockPlenty’s interactive reports.

Input important data in a matter of seconds with easy-to-use features that don’t take important time away from your chicken chores.

FlockPlenty allows you to go back and update existing entries as well as export your data for use elsewhere. It’s the perfect app for the serious poultry farmer.

Mother Hen

by Weston Bustraan

Created by a husband to take the place of the outdated app his wife had been using, Mother Hen features three functions.

  • It helps you track your daily egg count, so you can watch for how factors such as weather, temperature and daylight affect your flock’s production.
  • It allows you to record data on the individual members of your flock, including photos, and keep track of the different bloodlines in your yard should you breed your birds.
  • Finally, the finance function helps you keep track of your expenses as well as whatever income your chicken-keeping earns you.

So head to your phone’s app store and check out one (or all) of these apps to make your poultry tasks easier and more fun.

Categories
Equipment

Here’s The Real Dirt On Tillage Tools

If you own a compact tractor, you have many ways to loosen the dirt and prepare your land for a garden, lawn seed or wildflower plots. Tilling the soil is essential for numerous reasons including aeration, breaking up blocky soil to increase soil-to-seed contact and weed control. But which tillage tools are best for you?

I’ve tested them all and here is my rundown on how each tool works and the scenario in which it works best.

Field Cultivator

A field cultivator is a versatile tool that often has spring steel tines and replaceable and referable tips. The ability to reverse the tips on the straight-shanked cultivator tips extends the life of the tips. When one end begins to wear out, just flip the tip and use the other end.

Many models let you adjust the spacing of the tines for precise applications.

I use a field cultivator for several functions. You can set the spacing on the tines to skip the middle row while the rest of the tines plow between the rams for weed control. In addition, when breaking out ground that’s lain fallow for a while, I use the field cultivator for a quick once-over on the ground.

disk plow
Dwight Sipler/flickr

Disk Harrow

The disk harrow, often referred to as simply a disk plow, is probably the most common and most versatile tillage tool. Found in almost every compact tractor implement lot, the disk plow is used as a primary and finish tillage tool.

The tandem disk harrow has two gangs of disks that cut in opposite directions. They chop big blocks of soil into finer pieces that are perfect for planting.

Some disk harrows feature plain, round disks on front and rear gangs. Other models have notched disks on the front for aggressive digging and round disks on the back to create a smooth, fine seedbed.

I use the disk for medium-duty uses when I need to prolapse a seedbed quickly. Because it’s three-point mounted and a fairly compact piece of equipment, it works well for getting in tight, woodland spaces for prepping ground for wildlife food plots.

In addition, I’ll use the disk to lightly plow my yard when I need to overseed the lawn with new grass seed. Finally, the disk harrow is a great go-to tool for simply garden preparation.


Read more: Info overload? Here’s a quick primer for equipment names to keep you in the know.


Tiller

My tiller is probably my favorite piece of equipment. Because it runs on the tractor’s PTO, the tiller is a powerful tool for prepping seedbeds. It incorporates organic matter into the soil and serves myriad other uses.

Aside from seedbed prep, I use the tiller to till over ruts to smooth out roads or to smooth out fence lines to create a flat path in which to lay a fence. Each spring, after my kids’ show-pigs leave the farm, I use the tiller to help break up the compacted soil. I fill in the wallows and mix the pig manure back into the soil.

When I’m done, the soil is ultra-fine and ready for overseeding.

moldboard plow
Frankieleon/Flickr

Moldboard Plow

A moldboard plow is a primary tillage tool that’s often used for the first plowing of new ground. Deep-dished plows dig aggressively into the soil and turn over big chunks of soil in a single pass. It’s a great tool for breaking up hardpan soil and integrating heavy organic matter into the soil.

The moldboard, however, takes a lot of power. That’s why you can buy a one- or two-bottom moldboard plow.

The moldboard is designed for first-time tillage. So you need to run back over the plowed ground with a disk harrow to help break up the big clods and further prepare the soil for planting.


Read more: These 5 seasonal tractor maintenance tasks will keep your machine in tip-top shape.


Rippers

Rippers aren’t made so much for plowing as they are for conditioning over-plowed soil. The term “hardpan” refers to subsoil packed by multiple tillage passes over the same ground.

Hardpan reduces water infiltration and inhibits root growth. A good management plan is to use rippers or a moldboard every few seasons. (You can rip more often depending on the makeup of your top and subsoil.) This breaks up the hardpan to ensure healthy soil.

As with a moldboard, you can buy a one- or two-shank ripper that helps you manage your tractor’s horsepower more efficiently.

One last note: Rippers work great on the subsurface. But you still need to do some finish plowing on the top soil to prepare the beds for planting.

Categories
Crops & Gardening Equipment

Harvest Faster & Easier With An Advanced Fruit-Picking Bucket

Fall has arrived, and apple season is in full swing on my northern Wisconsin farm. As part of my ongoing orchard expansion plans, I’ve introduced a new tool to my apple harvesting toolset.

Joining my trusty apple pickers and bushel baskets is a new fruit-picking bucket manufactured by Wells and Wade.

You might be wondering how one bucket can be better than the next. But “bucket” really isn’t a thorough description of this particular item.

We’re not talking about a basic wooden basket. We’re talking about an advanced tool designed to make harvesting fruit easier, faster and more comfortable.


Read more: Which of these various apple-picker designs is right for your needs?


Advanced Design

The basic design is straightforward—it’s a bucked shaped like the letter “D,” thoroughly padded on the inside to reduce fruit bruising. But with the release of two ropes, the bottom of the bucket opens downward.

Then a canvas chute unfolds to facilitate the easy (and gentle) dumping of fruit into traditional baskets.

The easy dumping feature is convenient, since this fruit-picking bucket is designed to be worn, not carried. The bucket comes with a criss-crossing pair of shoulder straps, so the bucket can be worn almost like a backpack at waist level.

Except the bucket doesn’t have to ride behind you. It can be worn quite comfortably in front, placing it within easy reach while freeing up your hands to maneuver apple pickers and harvest fruit.


Read more: Growing orchard fruit is a a rewarding family gardening project.


Carry-along Comfort

At first, I assumed the bucket would be tiring to wear for extended periods of time. In actuality, however, this hasn’t been the case. I’ve found it very comfortable and convenient to carry. Though I suppose it might get a bit tiring if I filled it to the brim. (It holds about two-thirds of a bushel).

Due to a combination of late frost and a super-productive 2019 season, 2020 has been a slow year for fruit production on my farm. So my harvests on any given day haven’t been sufficient to fill my new bucket.

A full-capacity test will have to wait for another year.

But the carry-along nature of the bucket has made it simple for me to quickly walk from tree to tree in my orchard, harvesting a handful of apples at each location. It certainly beats lugging bushel baskets from one tree to the next!

I’m pretty adept at carrying a basket of apples and multiple apple pickers all at once, but the way the wearable bucket frees up my hands is arguably its greatest benefit.

All told, I’ve been happy with the initial test runs of my fruit-picking bucket. I’m anticipating a banner year of fruit production in 2021 as my young trees mature into a more consistent bearing age.

I’m already looking forward to giving my bucket a stiff workout one year from now.

Categories
Animals Large Animals

How To Choose A Livestock Guardian Animal

For hundreds of years, people who raise sheep and goats have used guardian animals to live with their livestock and deter predators. Dogs, burros, llamas and occasionally large-horned cows or steers have served this purpose.

Any large animal that the flock can bond with and feel safe with can work.

It’s difficult to guarantee protection of livestock from large predators such as wolves, bears or cougars, but guardian animals can discourage coyotes—the most common predator in every geographic region. Whether you choose guardian dogs, llamas or donkeys depends on your situation, livestock, terrain and the predators in the area.

Dogs

Guard dog breeds are generally large—more than 100 pounds—and unfriendly toward other dogs, keeping stray dogs away from the flock. They are bred as work animals, not pets; their focus is to detect and deter predators.

Most predators stay away from dog-protected flocks to avoid being confronted by the guard dog.

There are many guardian dog breeds, but the Great Pyrenees is the most widely used in North America. Originally bred by Basque shepherds in the mountains between Spain and France, this breed is probably the least aggressive toward people, but its thick coat makes it a poor choice for hot, humid regions.

If you have livestock in large pastures and a lot of predators, you might need a more aggressive breed. The Turkish Akbash is thought to be the most aggressive and protective, though it is a bit smaller than most other guardian dogs.

The Anatolian Shepherd is also from Turkey. This large, imposing breed is extremely devoted to the herd, but it might be unfriendly toward humans. Being shorthaired, these dogs can withstand hot weather.

The largest Anatolian-type dogs, often called Kangals, can fight wolves and big cats, being more athletic, faster and more vicious in a fight than other breeds. A large male Anatolian or Kangal weighs 150 to 175 pounds.

The Komondor from Hungary has long, heavy, felt-like cords of hair similar to dreadlocks; it protects against weather and bites from wolves. This thick coat requires a lot of care, and some people just clip it.

These dogs weigh 80 to 100 pounds and are as tall as 27 inches. They are very protective and territorial.


Read more: Check out these old-school methods of livestock protection.


Raising Guardian Dogs

Individual dogs vary, regardless of breed, and some work better than others. If you start with a puppy, put it with the flock when it’s about 2 months old, so it can start bonding with the animals it is supposed to protect.

These dogs must live with your livestock, not with you, in order to be guardian animals. They guard and protect the animals they imprint on as a pup. It usually takes 12 to 24 months for pups to become effective guardian dogs.

They intimidate predators by barking and aggressive behavior, and might attack a predator if it doesn’t leave. Some stay with the livestock all the time, while others prefer to roam the perimeter of the herd.

Guardian dogs require very little care, except more feed (and feed of higher fat/energy content) during cold weather. Some people provide self-feeders for the dogs. These dogs often choose to stay outdoors in all weather conditions, or they might use the same shelter as the sheep they protect.

livestock guardian animals donkey
EPPHOTOS/Shutterstock

Donkeys or Burros

A disadvantage to dogs is the feed expense. Large dogs eat a lot of dog food, whereas donkeys eat what the sheep or goats eat and are self-sufficient. Donkeys also live longer than dogs and with good management might provide 15 or more years of protection.

It usually costs less to purchase and maintain donkeys than guard dogs.

Avoid lush pasture or high-quality legume hay; donkeys have a low energy requirement and can get too fat or develop metabolic disorders and laminitis (an inflammation of the lamina inside the hoof, aka founder) or hyperlipaemia (too much fat in the blood).

Donkeys do well on good grass hay and the same basic care you’d give any equine, including hoof trimming as well as regular vaccinations and deworming.

A donkey can deter predators because if it sees or hears one, it will bray. This loud response is often enough to make predators leave. Donkeys are very territorial and instinctively aggressive toward canines.

Donkeys can also be formidable—biting, striking, kicking and chasing intruders. Horses (being herd animals) tend to flee from danger before using their teeth and hooves to protect themselves. A donkey’s fight instinct is triggered more quickly because in the wild it generally lived alone.

If a donkey bonds to its flock and stays with it, flock members regard the donkey as a protector and gather near it if a predator approaches.

A jenny (female donkey) with a foal (offspring less than 1 year old) is the best guardian. She’s extremely wary of potential threats.

A foal raised with a flock usually becomes a good protector because it’s so bonded to and comfortable with its pasture companions. Not all donkeys make good livestock guardian animals. Some are overly aggressive with the sheep. Jacks (males) aren’t recommended.


Read more: Here’s what The Donkey Listener has to say about training donkeys.


Llamas

Some people use llamas because the animals can bond with and stay with the flock and tend to approach any canine that comes near. A predator approached by this large, tall animal generally leaves. Llamas can guard for 15 to 20 years and don’t require special feeding.

Dog-fearing livestock readily accept llamas. Another benefit is their calm, docile disposition.

Llamas can become livestock protectors because they are social animals that don’t want to live alone. If one is the only llama in a pasture, it tends to bond with the other animals and be aggressive toward canines.

When the llama sees a predator, it often responds with a high-pitched scream, followed by posturing, spitting and moving toward the predator. Llamas might charge, strike or stomp on small predators.

Some llamas place themselves between the threat and their flock or try to herd them away. Llamas generally scan the surrounding area for potential danger or patrol their area. For a small herd near your house, llamas might be able to dissuade many predators but can’t deter wolves or cougars.

A single llama will have difficulty deterring multiple dogs or a pack of coyotes.

Not all llamas are suitable livestock guardian animals. Some ignore dogs. Others run from dogs and are vulnerable to attack themselves.

Immature llamas don’t have the confidence to guard successfully. A guard llama must be on duty at all times, so it can’t be a pet or a pack animal.

Females work best. Male llamas—even if gelded—might be too aggressive or might try to mate with the sheep. 

This article originally appeared in the July/August 2020 issue of Hobby Farms magazine.

Categories
Animals Breeds Large Animals Urban Farming

Breed Profile: Get To Know St. Croix Hair Sheep

Hair sheep breeds in the Caribbean islands developed from stock that early European explorers left behind on their ventures to the New World in the 1500s. Small stock such as sheep, pigs and goats were left to naturalize and provide food for later explorers.

The livestock evolved to become landrace breeds well suited to their new environments. One sheep breed was called the Virgin Island White, even though not all of the sheep were white.

Move to St. Croix

In 1975, Warren Foote, a professor at Utah State University, imported 22 bred Virgin Island White ewes and three rams to study from the island of St. Croix. The professor selected the sheep on physical attributes he considered desirable:

  • above-average body size and conformation
  • lack of horns
  • a white hair coat to reflect the Middle Eastern sun

The United States wanted to give the sheep as a gift to the Shah of Iran and needed research proving the sheep would be suitable for that climate. The Shah was deposed before the sheep were sent, so their trip ended in the U.S.


Read more: Sheep are, quite possibly, the ultimate small-farm ruminant.


The New Breed

University personnel realized the Virgin Island sheep had useful characteristics:

  • seasonal breeding
  • multiple lambs
  • easy births
  • excellent mothering abilities
  • good flocking instincts
  • the strongest parasite-resistance of any sheep breed in the U.S. (the breed’s most notable trait)

Soon, experimental flocks popped up at several other colleges and field stations. Foote founded a breed registry in the early 1980s naming the breed the St. Croix Hair Sheep. After formation of the registry, managers and owners of private and public flocks started keeping detailed records of breeding and pedigrees for their St. Croix Hair Sheep.

Funding cutbacks, staff turnovers and changes in research focus saw many university St. Croix flocks dispersed from 1998 to 2006. Most of the St. Croix went to private flocks, and the owners continued the recordkeeping of the registry.


Read more: Learn more about how sheep experience the world.


Two Registries

In 2013, the St. Croix registry split into two.

One group wanted to register only pure-white St. Croix. The other group sought to register purebred St. Croix, even if they had color caused by the genetic characteristics that always existed in the sheep since before importation.

Both groups concur that no horned St. Croix is eligible for registration. Scur growths on the heads are also discouraged.

In 2019, St. Croix Hair Sheep moved from Threatened status to Watch status on The Livestock Conservancy’s Conservation Priority List. People looking for purebred and crossbred sheep are noticing the useful qualities of the St. Croix sheep.

Small farms continue to enjoy St. Croix for their ease of care.

Larger flocks focused on meat production have also begun to look at using St. Croix-influenced ewes and rams in their breeding flocks. When St. Croix are crossed with a heavier, faster growing breed of sheep, the offspring generally take on the market characteristics of the other breed but maintain the excellent maternal traits and a good degree of the parasite-resistance of the St. Croix.

For more information, contact St. Croix Hair Sheep Breeders Inc.

This article originally appeared in the March/April 2020 issue of Hobby Farms magazine.

Categories
Uncategorized

Use Digital Content To Connect With Farm Customers

Between weeding, watering, harvesting crops, caring for livestock, repairing equipment and performing sundry other tasks, maintaining a robust presence on Facebook, YouTube or Instagram isn’t exactly top-of-mind for most busy farmers. Even so, Jimmy Myers, owner and operator of Front 9 Farm in Lodi, Ohio, put in a remarkable effort last spring.

“It did take a fair amount of time,” he admits.

Looking to grow his CSA and increase general awareness, Myers worked with a few talented friends to create an original, three-minute music video, “So Farm Fresh and Clean—A Market Farmer CSA Rap.”

“I released it on YouTube last year a little bit into the season,” he says. (View the video below or on the the farm’s website.)

To date, he has been thrilled with the results. “Our customers at the farmers market think the video is great,” Myers says. “It has made us more well-known in the area, too.”

Fortunately, creating digital content for your farm need not be nearly as intensive. With a little planning and the right tools, you can improve your social media skills and enjoy real-world benefits as a result.

Pick a Platform

It’s simply not reasonable—or even necessary—to be on every imaginable social media platform. Instead, focus your efforts on one or two. Not sure which ones to consider? Clearly identifying your goals help simplify your choice.

For instance, maybe you want to attract more attendees to your farmers market booth or you need to advertise special events at your farm. With local event-posting options, Facebook might be your best option.

Looking to increase CSA subscriptions or just want to boost word of mouth? You might want to rely mostly on Instagram to tempt potential customers with artful images of your mouth-watering produce.

For his part, Myers really values Instagram as well as Facebook.

“People like personal messages, and we share a lot of our personal life on Instagram,” he says. “I feel like that helps connect people to their food, to their farm and to their farmer.”

If you aim to share in-depth digital content such as video farm tours, information on different kinds of produce, or even brief cooking demonstrations, starting your own YouTube channel might be best.

When possible, Myers repurposes content between different platforms. “I’m planning on putting [my YouTube video] up on Facebook again pretty soon,” he says.


Read more: Here are some tips for building your farm’s business through social media.


Provide Real Value

Ideally, your social media presence should help potential customers get to know you better. And, if you can offer digital content that your farm customers value personally, they’ll be even more likely to become regular customers. (What’s more, if they develop positive feelings about your farm, they’ll also be more likely to help spread the word for you.)

How can you provide personal value? First, rather than continually peppering your followers with posts solely about you, try to vary your subject matter. For example, “how-to” posts have been shown to be especially useful and shareable.

Have a bumper crop of tomatoes? Create a series of posts featuring some of your favorite pasta sauce and salsa recipes.

Posting on a relatively consistent schedule is another way to attract—and retain—potential customers. Still, on certain days you might feel a little uninspired. By creating an “editorial” calendar in advance—including several months of ideas at a time—growing your social media presence will be much easier.

You can start by filling in upcoming holidays, local special events and your farm’s anniversary milestones. And, including famous birthdays, historical events, weird holidays and other dates can pay off. For these, Chase’s Calendar of Events is a good (albeit expensive) secret weapon for more post ideas.

Among the entries you’ll find? October is “Vegetarian Awareness Month,” and May 23 is officially “National Eat More Fruits and Vegetables Day.”

Posts that Pop

Viewers are much more likely to engage with your content if it includes visual elements such as videos, photos or infographics. But that doesn’t mean you have to be a graphic designer to create posts that pop.

Want to design a special announcement or an enticing invitation? Canva is a free, Web-based design tool that includes predesigned social media templates for Facebook, YouTube and others, as well as assorted layouts, fonts and other goodies.

Or, say you have a good post idea but lack an accompanying image. In that case, you can turn to online resources such as Freepik, Pixabay, Morguefile or Wikimedia Commons for downloadable illustrations or photos. Each of these is searchable and includes a mix of graphics—many of which are free and available for commercial use with proper attribution.

Just be sure to read associated copyright notices carefully and follow the instructions for anything you use.


Read more: Your farm business can benefit from free earned media—if you know how.


Set It & Forget It?

If making time to post regularly is a hardship for you, social media post scheduling tools—such as  Hootsuite, Hopper HQ or Planoly, among others—can make life easier. Enabling users to create posts in advance and release them at specific times, many of these web-based programs have free, bare-bones versions and fancier, paid options, too.

(Facebook features its own advance-posting capabilities.)

Just don’t get carried away. Writer Kenzi Wood, who specializes in generating content for marketing agencies, recalls spending hours coaching a client on how to use Hootsuite.

“Something didn’t translate … and they ended up posting their entire collection of content at once,” she says. “Three months’ worth of content spewed onto their social accounts, and it was a nightmare.”

As a precaution, it’s a good idea to save all of your planned posts in a separate file. Sarah Scott, founder of the marketing intelligence firm Amboxie, warns that if your software goes down or has a glitch, there goes all of your content and none of your posts will be posted.

Finally, following a “set-it-and-forget-it” strategy doesn’t mean you can neglect your social media accounts. Actually, you should monitor—and respond to—social media engagement each day as needed.

After all, those online followers just might become your newest and most loyal customers.

This article originally appeared in the July/August 2019 issue of Hobby Farms magazine.

Categories
Crops & Gardening Uncategorized

Cut the Shiitake By Growing Your Own Mushrooms

The Japanese have cultivated shiitake mushrooms on logs for more than 1,000 years. In the beginning, a live Japanese chinquapin tree would be cut down and dragged alongside a standing tree full of wild shiitake mushrooms. “Shii” means oak and “take” means mushrooms in Japanese. Spores from the standing tree would disperse and inoculate the fallen tree.

Sometimes this was done when a male child was born so he would benefit from this growing treasure.

A horticulturist wrote the first book on shiitake growing in Japan in 1796. So in a global sense it’s not a “cutting edge” crop. But it has always been a highly desirable one. Stories are told in Japan of shiitake wars that started when people stole logs rather than starting their own.

But shiitake mushrooms have become cutting edge in Western countries in the past few decades. They now constitute about 25 percent of yearly mushroom production worldwide.

The shiitake (Lentinula edodes) is also a wild mushroom in Asia, but it’s not found in the wild here. So any shiitakes you see in the market or on a menu are cultivated, which hasn’t kept some chefs from describing a dish with shiitakes or cultivated oyster mushrooms as containing “wild” fungi. But I hope as mycophage diners get better educated, we’ll see less of that.

Meanwhile, North American growers are turning their woodlands into productive and profitable shiitake mushroom farms.


Read more: You can grow mushrooms on compost for a delicious fungal feast.


Basic Procedures

Agricultural extension agents and other experts no longer recommend dropping and dragging live trees as a growing technique, but they do suggest lots of cutting, drilling, packing, stacking and dunking of logs. One could set up an entire CrossFit regimen around growing shiitakes. (And if you could recruit workers by offering it as a CrossFit class—“Forget Forest-Bathing! Get a First-Class Workout with Shiitake CrossFit Training!”—you might add a second income stream. Maybe.)

Here are the basic steps involved:

  1. Choose a cold-weather or warm-weather strain of shiitake spawn based on your climate.
  2. Get or prepare the spawn in the form of wooden dowels or sawdust, depending on preference.
  3. Secure a load of logs of appropriate species and size.
  4. Drill holes along each log. Proper depth and diameter of holes depends on Step 2.
  5. Insert spawn into holes.
  6. Seal holes with melted wax to keep competing fungi out.
  7. Soak logs overnight (unless they are freshly cut and very heavy with moisture already).
  8. Stack in your preferred pattern under at least 80 percent shade from trees or shade cloth.
  9. Spray with water periodically to keep them from drying out.
  10. Learn patience.
  11. Once the cut ends are covered with mycelium (about 6 to 12 months for oak) dunk the logs for 12 to 24 hours and re-stack.
  12. Mist daily to keep moisture level up.
  13. After a few weeks, cut the fruiting mushrooms while the caps are still young and concave.
  14. Cook and serve or package and sell.

grow shiitake mushrooms

Which Logs When (and How Big)?

It’s best to cut your logs in winter, when they have more sugars and less moisture than during their growing season. Best sizes are 2 to 4 feet long by 6 to 10 inches wide, depending on how much weight you can handle.

After cutting, wait a week before inoculating them, so the trees’ antifungal defenses can whither away. Also, inoculate them no later than four weeks after cutting live wood so competing fungi won’t have time to invade.

Shiitakes prefer dense, deciduous hardwood trees such as oak. A 6-inch diameter log of white oak is dense enough that it might fruit for as long as six years if well tended, or very roughly one year of production for each inch of diameter.

Lighter (softer) hardwoods such as poplar, birch and alder fruit less than oak. Word of mouth indicates that sweet gums might be the wood that shiitake colonizes most quickly. But again, as a lighter wood, it doesn’t produce as much.

Perhaps sweet gum is a good species to start with for a quicker turnaround when you’re getting started (or if you have a lot of it you want to get rid of). Overall, white and red/black oaks provide the best return on your effort.

However you get your logs, make sure “they have their pants on,” as some growers say—meaning the bark should be intact and cover the entire length of the log. That helps keep moisture in and competing fungi out.


Read more: Get more stories like this in your inbox by subscribing to our newsletter!


Ways to Stack Logs

In your laying yard, stack the logs to get them off the ground and make easy access for mushroom picking. The two most common patterns are called “A-frame” and “crib” or “log cabin” style. 

For the A-frame, a horizontal pole or cable can be set about waist high and the logs lean on that like so many staggered roof rafters. In the crib or log cabin pattern, two logs are set parallel aiming north to south. Another two are placed on them aiming east to west. And so on.

On hillsides too steep for either pattern, there is a hybrid of the two called Japanese hillside stacking. It’s a trickier pattern best learned by doing. Check out a short video from Cornell University Extension that shows this technique.

grow shiitake mushrooms

Potential Pest Problems

Growing shiitake mushrooms is pest-free most of the time, but a few problems might show up. The most likely one comes from competing fungi: They might appear if the logs are resting on the ground.

Scare up some free pallets and spread them as a layer on the ground for your logs to rest on and to create a moat between your logs and fungus in the soil. This also deters termites. Laying your logs under a canopy of conifers also works: Pro-conifer fungi won’t attack deciduous wood.

Sometimes beetle larvae appear in the gills of your brand new mushrooms. You can prevent this by covering the logs with a fine mesh to preclude beetle egg-laying. Quick harvesting of mushrooms while the caps are still concave also prevents this.

When harvesting mushrooms with beetle larvae crawling around inside the gills, some folks have blown them out with a hair dryer.

If snails are a problem, you can trap them with decoys of lettuce or cabbage leaves on the ground. Kill slugs with salt or scoop them up for your chickens. Spreading wood ash can also deter them.

But How Much Money?

Wholesale prices on shiitake mushrooms run $5 to $9 a pound, and your retail price at the farmers market might be twice that. According to the North Carolina Ag Extension Service, a cord of about 125 logs could grow as much as 500 pounds of shiitake per year.

At the low end of the wholesale price you’d make about $2,500.

That cord might cost you about $125 and an equal amount for the spawn. Add another $1,000 give or take for labor and other expenses on that cord (unless helpers are paying you for their CrossFit training).

And then, depending on whether you let the logs fruit naturally or you force them by dunking, and whether you sell wholesale or retail, your annual net might be $500 to $3,700.

Data from the University of Vermont shows that a 500-log stand would net a farmer $6,000 to $11,000 a year, depending on whether the shiitakes were sold wholesale or retail.

Here’s one last bit of advice: Keep a written record of frequency of fruiting, time between dunking and fruiting, prices paid and so on to help you learn the best practices with your logs, market, site, climate and cultivar.

And maintain good quality control by sampling the merchandise on a regular basis.

Categories
Beginning Farmers Crops & Gardening

Scythes And Sword Beans Keep Smarter By Nature Sustainable

Angelique Taylor and Kip Ritchey founded Smarter By Nature when they realized their neighborhood in Tallahassee, Florida, is considered a food desert.

“There’s no available fresh food within a mile and a half of where we live,” recalls Ritchey. “We wanted to do something about that and grow food for our community. So we decided to turn our passion for growing food and plants into a business in our community.”

Since starting Smarter By Nature back in 2017, the sustainable venture has bloomed into a local hub that serves up a range of produce, as well as offering volunteer opportunities that help people from the nearby community learn how the food and growing process works.

We spoke to Ritchey about the importance of always keeping the community in mind and the benefits of growing marigolds on the farm. We also got into the meditative joys of using European scythes to tend to the land.

The Subtropical Learning Curve

https://www.instagram.com/p/CEtz-_vgrae/

Ritchey says that when he and Taylor began Smarter By Nature, they were faced with two early obstacles to overcome. First, there was the task of securing sufficient space to be able to grow.

“After we got access to space, we had to go through the learning curve of dealing with climate and weather,” says Ritchey. “We live in a subtropical climate, and there’s not a lot of available knowledge for subtropical growing. It’s mostly catered toward temperate climates in the United States, so we had to research a lot to get up to speed.”

Strengthening the Community

https://www.instagram.com/p/B-rutUqlA92/

Smarter By Nature offers local volunteers firsthand experience on the farm.

“For us, community is highly important because of the nature of our growing style,” explains Ritchey. “We lean less towards large machines and more towards hand tools—and with hand tools, having volunteers helps us out. We also look at it as a cyclical learning experience: People get to learn about the growing process and see the garden and the food process demystified.”


Read more: Community gardening grows healthy bonds as it creates access to produce.


Mastering the Scythe

https://www.instagram.com/p/B-7CgPzFKZF/

European scythes are one of the key hand tools that keep Smarter By Nature running sustainably.

“I love them!” says Ritchey of the giant tools. “Using a scythe is a meditation. It’s something where you build your skill as you become more experienced with it. It’s a lot to do with breathing—it’s a great meditation.”

Spotlighting Sword Beans

https://www.instagram.com/p/B_kd9KtFQcT/

Vivid pink sword beans made an appearance on Smarter By Nature’s land this year.

“They’re a perennial bean and they grow pretty large,” says Ritchey. “They’re edible when they’re young pods but when they’re older you can save them for seeds. We like them because they fix nitrogen and they’re an aggressive vine that would make a great trellis.”


Read more: Beans are good to grow, and they’re great for your health!


The Power of Marigolds

https://www.instagram.com/p/CCdzigUAT-5/

If you scroll through Smarter By Nature’s social media feeds, you’ll notice that marigolds make a recurring appearance on the farm. Ritchey says that planting marigolds brings numerous benefits to the land.

“Marigolds attract pollinators like butterflies and various types of bees,” he says. “But they also suppress nematodes in your space. Nematodes are responsible for often causing root rot, so being able to suppress them is good.

“Also, deer and rodents don’t really like marigolds. We went big and planted a lot of marigolds, and we noticed they helped suppress the weeds in our growing space, too.”

Follow Smarter By Nature at Instagram.

Categories
Crops & Gardening Equipment Homesteading Urban Farming

Take Care Of Your Garden Tools & They’ll Take Care Of You

Maybe it’s been a while since you took a hard look at your shovels, rakes, hoes, shears and other garden tools. Are they as neat as a pin? Or do you store them in a dirt-caked, rust-coated jumble?

Whether you’ve got a big garden and tons of home canning to do or you operate a commercial farm, sometimes keeping up with every last chore—like cleaning, sharpening and repairing your gardening equipment—simply isn’t practical.

Still, if you are able to take a long afternoon to give your garden tools some extra attention, the time you spend on their care can pay dividends next season.

Basic Supplies

Before tackling those tools, you’ll want to gather up a few items to make the job easier—and safer. I wear goggles to keep wood splinters and any stray metal fragments out of my baby browns, and I don a pair of lightweight, rubberized gloves when scrubbing with cleaning solutions or applying oils. To avoid inhaling any rust or sawdust, I also wear a protective mask.

Plan to work on rusty or dull implements? You’ll need:

  • White cleaning vinegar
  • Large, stiff-bristled brush
  • Smaller wire brushes
  • Steel wool
  • Lubricating oil of your choice
  • Clean rags
  • Coarse file and/or whetstone

And for refinishing wooden tool handles, gather:

  • Sandpaper
  • Boiled linseed oil (and turpentine for clean-up)
  • Wood glue (optional)

Rust-Busting

To remove light rust build-up, first dry-brush any soil that may be clinging to the tool you’re restoring. Next, gently scrub rusted areas with steel wool or a wire brush. Periodically wipe dislodged rust with a dry rag.

For heavier rust, soak tool heads in a one-to-one solution of white vinegar and water or apply the solution directly to the rusty spots with a rag.

Some people soak their rusty implements in that white vinegar solution overnight. However, I’ve had good luck simply applying the vinegar, letting it sit for five to 10 minutes, and then scrubbing over it with a wire brush or steel wool.

Afterward, I wipe away the rust residue with a vinegar-soaked rag, rinse the metal with water, and dry it well. To help guard against future rusting, apply a thin coat of the lubricant of your choice.

(Boiled linseed oil, vegetable oil, thinned-out motor oil, or even a spot of multi-purpose grease will do the trick.)

Handle Help

My favorite, go-to shovel—pictured above—needed a ton of TLC after this season. Because its wooden handle had begun to split and splinter, I took the time to sand it along its full length. (Usually, sanding out a rough spot here or there will suffice.)

Then I applied a few thin coats of boiled linseed oil, allowing time in between for the oil to penetrate the wood. I finished by wiping off the excess oil with a clean, dry rag.

The handle of my old pitchfork flew off earlier this year. Although I could’ve purchased a replacement, I wanted to try to reattach the original handle first. I removed debris from the inside of the top of the pitchfork—where the handle had been inserted—and lightly cleaned and sanded the section of the wooden handle to be reinserted.

Next, I painted a liberal amount of wood glue around the end of the handle, reinserted it into the top of the pitchfork, and lightly tapped the pitchfork’s head further down over the handle with a small mallet.

This method of care works well for most garden tools with loose heads. But there are times when you’re better off replacing old handles entirely.

Got a handle that has broken off? How the working end of your garden tool was originally fastened will dictate what kind of replacement handle you’ll need. For instance, many tool heads are attached to their handles with rivets or screws. Many others—like my pitchfork—have friction-fit ends which just fit snugly together.


Read more: Check out these 7 tips for repairing wooden-handled tools.


Look Sharp

My poor shovel also got pretty dinged up when I accidentally drove its point down onto some buried limestone. In fact, its entire digging edge was downright dull. So were my hoe, loppers, and scythe.

To restore the shovel and hoe, I held the coarse file at a 45-degree angle and filed with uni-directional, diagonal strokes along their cutting edges.

For the loppers and scythe, I moistened a small whetstone and, as with the coarse file, slid it across their cutting edges in just one direction and on a diagonal. To finish, I applied a thin coat of multi-purpose grease and, although my garden tools aren’t exactly as good as new, with some basic care they’re certainly much closer to it.