Our local poultry-owners association welcomes new members regardless of whether they live in our area or in another part of the state. With so many people turning to homegrown foods in order to avoid supermarkets, we’ve seen an recent increase in membership.
Understandably, those new to keeping chickens typically come with questions they hope experienced flock owners can answer for them. Common subjects include where to buy supplies and what feed we recommend. What predators are common in our neck of the woods gets asked a lot, too.
One enthusiastic young homesteader, however, eagerly shared photos of the baby chicks she’d just hatched. She bubbled about all the fresh eggs her chickens would produce come winter time.
Uh oh.
Fortunately, our group is very supportive, and not one person commented sarcastically or condescendingly. Not one person commented at all, actually.
As one of the moderators, I dutifully reached out to this newcomer to see if she understood how poultry egg production works. As it turned out, she didn’t.
She and her partner had researched every aspect of keeping milk goats—the primary focus of their homestead. But they had assumed chickens would be self sufficient, foraging and laying eggs all day long, all year long.
Our chat was quite an eye opener. Fresh eggs from your chickens can indeed be had all winter long. It just takes a bit of effort on your part (and on the hens’).
The following information may help you ensure your hens lay eggs during the off season.
Layers require 14 hours of light per day in order to produce eggs. This naturally occurs each spring, as the days begin to lengthen and a hen’s reproductive system responds to the increase in light.
As daylight wanes in early fall, egg production also diminishes, nature’s tidy way of preventing chicks from hatching—and perishing—during the harshest time of the year.
This off season also allows hens to recuperate from months of almost daily egg laying, which depletes the protein and calcium levels in their bodies. To alter a layer’s natural production cycle, artificial light must be introduced.
Timing Is Everything
The simplest way to extend a laying flock’s production season is by installing lights in the coop. While this seems straightforward, there are many factors to take into consideration. Foremost among these is that additional lighting needs to be timed in such a way as to not to disrupt your hens’ regular roosting.
Accomplish this by illuminating their coop in the early morning hours rather than at night. As daylight shortens, increase the length of time that your coop lights run so that, together, natural and artificial light total to 14 hours of exposure.
Adding artificial light at nighttime is detrimental. It prevents them from getting to sleep when their circadian cycle dictates. Also, the light increases the chances of them refusing to enter their coops at dusk, leaving them exposed to predation.
In addition to time of lighting, type of lighting is an important consideration if you want eggs from your chickens this winter.
There’s no need to illuminate your coop as if your birds were throwing a (hen)house party. Supplemental lighting should be soft, shedding only enough light to read. Because of this, fluorescent lights tend to be too intense for coop use.
The long fluorescent bulbs also attract the dust that is ever present inside a coop. This requires that both fixture and bulbs be cleaned with frequency. In addition, fluorescent lights function capriciously in cold weather, which effectively undermines their usefulness in an egg-production setting.
Incandescent bulbs are a more suitable choice, with their variety of wattages and warmth levels.
Make certain to select a warm, orange wavelength. This will help stimulate your hens’ reproductive cycle versus a cool, blue one. Incandescent lighting may not be as cost effective to use as fluorescent lighting. But its effect on your layers is the positive trade-off.
LED Lighting
Another option for coop lighting is the use of light-emitting diode (LED) bulbs. LED bulbs typically have a longer life span and are more energy efficient than both incandescent and fluorescent bulbs. They also emit far less heat than incandescent bulbs and are more reliable in cold weather than fluorescent bulbs, making them the safest choice for use inside a dusty coop.
However, LED fixtures and bulbs cost significantly more than both incandescent and fluorescent lighting, and warm-wavelength LED bulbs are in high demand and may be difficult to find.
Battery-powered LED light fixtures exist and may seem to be the solution for egg farmers whose coops are not equipped with electricity. Unfortunately, these type of fixtures are operated via touch, making them impractical as it would require flock keepers to go out to their coops at 3 AM or so to activate them.
And there’s no guarantee that a curious hen won’t peck the light to shut it off.
Installation
Whatever kind of lighting system you select, make certain that it is securely installed. A loose fixture creates a fire hazard, as it can fall onto the bedding below, igniting it through the heat of the bulb.
Install your lights overhead—on the ceiling if possible—at a height higher than your feeder and waterer. Make certain that there are no bare bulbs. Your light fixtures should have cages or panels covering the bulbs, preventing both the accumulation of dust as well as contact with litter should the fixture fall.
Make certain that there is no possibly way for a bird to roost on your fixture, the electrical cord or the timer. Finally, keep track of when you install the lights so that you are prepared to change the bulbs out before they burn out, literally leaving your layers in the dark.
The young homesteader was understandably disappointed. She and her partner had planned on as natural a chicken-rearing project as possible, with no electricity involved. For now, she is sticking to her original plan and simply shifting her eggspectations for eggs from their chickens to late spring instead of this winter.
Should the anticipation prove intolerable, she and her partner will have an illuminating conversation.
For those of us who grew up with grocery store eggs, we’re used to a highly curated and edited egg carton. Only the biggest and most perfect eggs ever made it from the farm to the supermarket (and still do).
But I say that nothing is perfect, and odd eggs are fun! Here are a few of the most common egg oddities.
Soft-Shell or No-Shell Eggs
You see treasure in the nest box, and you reach for it. And then—squish! The egg in your hand bursts open like a water balloon!
When hens are depleted of calcium, their shells will start to show it. Some of these odd eggs are laid without shells completely so that only the inner membrane is holding the egg’s liquids together. Other times, eggs have soft spots or weak points but an otherwise hard shell.
If you see any variation on these eggs, it’s a good reminder to refill the oyster shell container and keep it full and available at all times.
Kristina Mercedes Urquhart
Multiple Yolkers
As the name would suggest, a multiyolker egg may house two (or more!) yolks within the same shell, and you can imagine that these eggs have to be pretty large to hold so much volume! Double-yolked eggs are the most common and occur when ovulation moves faster than normal, sending two yolks out at the same time.
They become encased in the same shell before the hen can produce a new one.
Certain hens have proclivities to laying double-yolkers. You’ll soon learn that hens that lay multiyolked eggs will do so more frequently than other hens. This is normal, but it can be cause for concern. Watch these birds closely as they’re more likely to have future reproductive issues.
Tip: Skip the double-yolk eggs for any hatching goals, if you can (development won’t go well in the incubator), but do enjoy the extra omega-3s and vitamin D from the extra yolks!
Rough spots, bumps and blemishes are completely normal for chicken eggs. Not all eggs will be perfect.
Hens that lay these eggs may just need a little boost in calcium. Oyster shells offered free-choice every day, all day, will help remedy this ailment.
Kristina Mercedes Urquhart
Wind Eggs
This oddball also goes by the name “fairy egg,” “fart egg” or “rooster egg.” These unusual orbs are incredibly tiny and almost always yolkless. They’re laid by young pullets that are just getting their egg-laying machinery up and running.
There won’t be many more of these once your hens mature a bit, so enjoy while you can!
Kristina Mercedes Urquhart
Malformed Eggs
Occasionally, you’ll notice an egg that has a smooth, hard shell, no discoloration or blemishes, but it’s a really strange shape.
Maybe it’s very long and slender. Maybe it’s squat and round.
Don’t worry about these funny-looking eggs for eating, but do avoid hatching them. These eggs aren’t prime real estate for a developing chick embryo.
One joy to take from eating farm-fresh eggs from your own flock of hens is that nothing will go to waste—not even those funky, weird eggs!
This article originally appeared in the September/October 2020 issue of Chickens magazine.
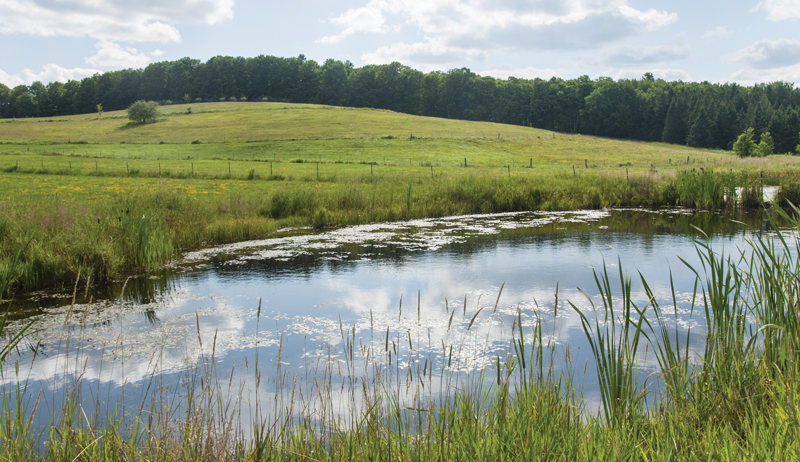
It’s a common occurrence when folks buy rural property. They discover acres and acres of older hayfields that have been let go for years. Now the fields are full of weeds and small trees with the rest of the forest encroaching on the edges.
Considering the effort that early homesteaders must have put into clearing the land and originally building up the soil quality and sod, it’s a shame to see all that work going to waste.
Whether the original crop was timothy, alfalfa, clover or some other type of hay, restoring these fields to productivity is certainly possible. But it requires some effort and a little bit of planning.
Let’s take a look at the process needed to restore a hayfield.
A Field Forgotten
There are many reasons why an older hayfield might have been abandoned. Perhaps a farm property was sold and used for a nonfarming purposes such as hunting. Or perhaps the original family was no longer able or willing to farm the land, and the fields were left dormant for a decade or more.
Whatever the reason, a period of five to 15 years is plenty of time for trees, weeds and rocks to take hold of the land. That makes it unsuitable for farming.
The severity of the unwanted growth depends on how long the field has been neglected and how aggressive the invading flora is. For this article, we’ll assume that the field is overgrown and unsuitable for hay equipment but still recognizable as a field—not a forest.
Here are some of the common obstacles you might find when you set out to restore an old hayfield.
Small Trees
Fast growing, “pioneering” trees such as quaking aspen, birch, green ash and many coniferous trees—pine and spruce, for example—are often among the first trees to encroach onto vacant hayfields.
Naturally, when the field is in use and cut each summer, it keeps these trees at bay. But if given a chance these species move in quickly. Aspens, in particular, can be aggressive because multiple trees are sometimes interconnected underground through their root system.
Fallen Trees
If there are any large trees surrounding the edges of your field, make a careful inspection for any old logs or large branches that might have fallen into the way and are buried under tall weeds.
Weeds & Brambles
Besides trees, smaller brushlike plants also begin to invade. Look for plants such as blackberries, raspberries and burdock, as well as troublesome weeds such as thistles, buttercup and milkweed.
Even nontoxic weeds such as dandelions and daisies can be a problem if they take up space that quality grass could use.
Frost action tends to continually raise small rocks to the surface. You’ll need to clear your hayfield of these troublesome objects.
Rocks can cause a great deal of damage to machinery. However, if the sod is thick and you don’t plan to till the field, small rocks might not get to the surface.
Also, be aware of boulders that were too heavy to move and intentionally left behind by the original landowners. After a few years, the tall brush and weeds might have hidden them. Carefully examine the field on foot and mark any boulders.
Also, watch out for rock piles, which, although usually concentrated on the edges of fields, could be somewhere in the middle.
Fencing
Barbed wire might have helped tame the West, but it won’t be kind to your equipment in the event of a direct hit.
Running over an old strand of it with your tractor—or worse, your brush hog—is bad news. Carefully scout suspected areas on foot before moving in with machines.
Ruts
If you have neighbor kids that have run their ATVs in the old field, watch for old ruts from these as well as trucks and machines.
Junk/Trash/Machinery
You never know what other people might have left behind in the hayfield, long buried by weeds and tall grass.
You might find old harrows, discs, trash piles or stove pipes. Take some helpers with you to scout the field before work begins.
Start With the Obstacles
Before you bring in farm machinery to rework the field, remove the large obstacles first. Get rid of downed logs, any tree with a diameter larger than what your brush hog can handle and large rocks. Such an initial evaluation is necessary to help determine what equipment you’ll need to summon.
For very small trees less than 3 inches in diameter, you’d be surprised how quickly an area can be cleared with nothing more than a few people, a chainsaw and a trailer to haul out the brush. Try to cut off the trees at or below ground level, if possible.
(The mowing process, later on, prevents them from growing back.)
But obviously, if your aim is to restore a large hayfield that’s filled with many small trees, larger machinery such as a bulldozer might be necessary to shorten the time required, although this can damage the sod.
For large rocks here and there, you might can handle the job with the front-end loader on your tractor. Or you might need a larger machine such as a bulldozer.
Another option, of course, is to do what the original farmers did. Leave the rock where it is, put up a flag to mark it and work around it.
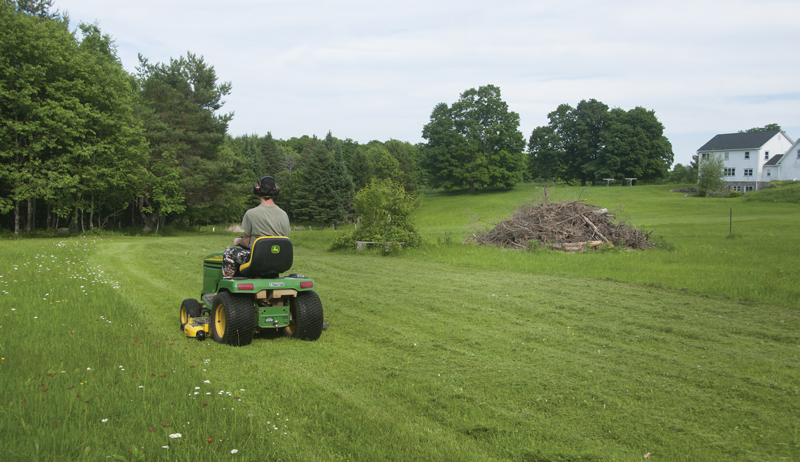
Then Mow, Mow, Mow …
Once you’ve dealt with the major obstacles, you can immediately begin improving the hayfield by mowing it repeatedly—possibly several times a year.
Presumably, your initial pass will be a rough cut, done with a brush hog to help take down the tall weeds and brambles. But after that, you can do a finer job, with the mower blades close to the ground.
The nice thing about this part of the renovation process? It’s a relatively easy task. Compared with moving rocks and hauling brush, riding on the tractor and mowing is pleasant indeed.
Repeated mowing does a few beneficial things. It stunts the growth process of larger woody weeds and unwanted wildflowers. But at the same time, it promotes the growth of the grass species that you do want.
If a weed is mowed down each time it tries to re-grow, the theory goes, it eventually runs out of energy in its root system and dies. This doesn’t happen with grass, of course. So mowing eliminates unwanted species while saving the good ones.
In fact, it’s quite possible to bring back a hayfield without tilling up the established sod base—especially if the field was used within the past few years.
Clearing the field of debris and mowing it are the first steps. While the field might look much better than it has in years, a few steps remain to fully restore the hayfield.
Lime Application
Odds are, the soil of your hayfield has become overly acidic. This encourages further weed growth, so a soil test is a smart idea at this stage.
If your field is too acidic—which it probably is—plan on applying lime to it.
Fertilizing
While it’s true that the decaying plant materials have been decomposing on your field for years, the field could still probably benefit from proper fertilization.
Reseeding
Once the soil pH and nutrient qualities are under control, you can reseed the field with a hay grass that you prefer. This further helps stem the growth of weeds.
Frost seeding can be done in the late winter or early spring, when natural processes help work the seeds into the ground, even without tilling. Choose a grass species that germinates in cool temperatures.
Starting From Scratch
If a field’s condition is poor and these steps aren’t enough to bring it back, you might need to consider tilling the entire field and reseeding from scratch.
This can get expensive quickly if the field is large, and you might need to use a rock rake for all of the small stones you uncover. But the results might be worth it if you can restore the hayfield to productivity.
While you might need to till—and even apply herbicides—to control very difficult weeds, you might want to leave the existing sod and control the weeds through mowing and frost seeding, if possible.
All in all, it’s a lot of work to bring an old hayfield back into production, but it’s a rewarding process. You can profit from the hay crop and increase the valuable working size of your property. And you’ll be satisfied knowing the old farm fields will remain productive for years to come.
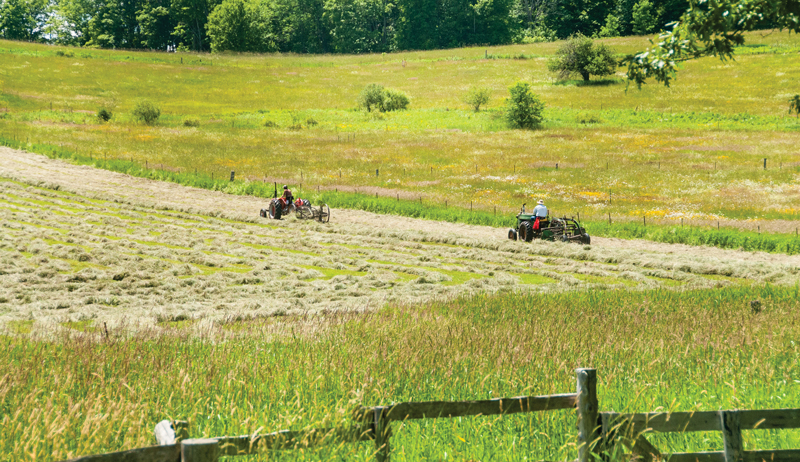
Sidebar: Neighborly Deals
If you want additional acres to hay but aren’t necessarily interested in purchasing more land, consider working out a deal with a neighboring farm. You might find someone nearby who doesn’t want their older fields abandoned but can no longer care for them.
In exchange for your work to restore the hayfield and the haymaking itself—cutting, raking, baling—you get the hay crop (or at least part of it).
In the right situation, this can benefit both sides. The landowner can keep the farmland more valuable and looking nice, while you get to farm additional acres.
Sidebar: Google Earth to the Rescue
Some versions of Google Earth allow users to view historical aerial imagery of a particular area, sometimes going back a few decades. If the historical images of your property are of high enough quality, this could help you learn where certain large obstacles might lurk.
Lost fence lines or junk piles might not be obvious now. But they might be clearly defined in photos from 20 years ago. The historical images can also help you identify the areas of the property that were in use most recently. This might help you decide which hayfield to restore first.
This article originally appeared in the July/August 2019 issue of Hobby Farms magazine.
It took the entire summer to figure out the logistics, but I’ve finally done it: I’ve successfully planted a group of flowering crabapple trees on artificially raised ground in my orchard, protecting their roots from the frequently waterlogged subsoil below.
Have you ever set your heart on planting trees in a specific location, only to realize the soil conditions aren’t ideal? That’s what happened to me. I’d latched onto the idea of planting crabapple trees in two parallel rows on a slope, with the notion of watching them form a beautiful walkway of pink blossoms every spring.
In June, I dug the holes in advance of ordering the trees. Everything was perfect … until the rains came.
I quickly discovered that my holes didn’t drain particularly well. Situated as they were on sloping ground, the bottom two holes in particular were problematic. Whenever an inch or so of rain fell, water would migrate down the sloping terrain, fill the holes, and sit there for days on end with minimal draining.
I tried a few experiments to improve the soil drainage, including digging deeper holes to try and break through the hardpan layer, but my efforts were unsuccessful.
Ultimately, I decided to employ a different approach. I would raise the ground level at the bottom of the slope and plant the two lowermost trees at an artificially elevated level.
Essentially, I would be planting the trees in a raised garden bed, except the bed would be much larger than usual.
Such a task is more challenging than it sounds. Trees need a lot of room to spread their roots. And the volume of soil required for raised plantings is substantial.
My flowering crabapples will eventually grow their crowns to a circumference of 20 feet, so each “raised bed” needs to be at least 20 feet by 20 feet to provide sufficient space for a mature tree.
Furthermore, I wanted the tops of my crabapple rootballs to sit about 8 inches above the surrounding ground, which created an imposing mathematical outcome. In order to raise a 20-by-20-foot area 8 inches high, I needed 264 cubic feet of quality topsoil—and that’s for a single tree.
To put this in perspective, filling a 4-foot-by-8-foot trailer with 12 inches of topsoil yields a load of 32 cubic feet. So I would need 8.25 loads to plant one tree.
The need for an abundance of topsoil isn’t the only challenge. Ironically, planting trees on raised ground means you’ll have to pay extra attention to keeping it watered. The soil underneath might contain plenty of water, but your raised bed will likely drain quickly, and you don’t want your tree to suffer from drought while it’s getting established.
Erosion is also a concern. How will you keep your raised ground in place and prevent rainfall from washing you’re carefully-placed topsoil away? Retaining walls built of rock, brick, wood, etc. may be necessary to keep the soil contained.
I was able to source a lot of topsoil from the edge of a wooded spot on my farm. But since my immediate goal was getting the trees in the ground before autumn, I didn’t build my raised plantings to their full extent. Instead, I made them 5 feet by 5 feet or so.
This provides just enough room for the trees to grow next spring while I continue bringing in topsoil throughout 2021.
To limit erosion and keep the soil in place, I got creative. Rather than build temporary retaining walls, I instead took a shovel and chopped up sections of sod around the planting areas. I flipped them outward and upside down (away from the holes) to form perimeters of well-rooted soil still partially attached to the ground by the roots of grasses and wildflowers.
With the sod chunks serving as surprisingly firm barriers, I was able to fill the interiors with a few small wagonloads of compost, packing it all down tightly to secure each tree in place.
Best of all, I won’t need to remove the chunks of sod when I expand the raised plantings next year. They’ll simply decompose and become an organic part of the soil.
Ultimately, I’m happy with the way my experimental planting project turned out. I’m confident my crabapple trees will appreciate sitting above the waterlogged ground, and I’m looking forward to adding more soil and building the true retaining walls in 2021.
I wish I could use pure compost for the project—I‘ve got plenty—but alas, I’m concerned it would be too rich for my trees. The last thing I want to do is burn their roots after going to such great lengths to avoid drowning them!
My love affair with goats began because of one simple thing: goat cheese. It was love at first bite when I first tried the creamy, tangy spread in college. For almost two decades, it was an infrequent treat because of the high price tag of a dollar an ounce. (That was back in the 1990s!)
When my family decided to move to the country to grow our own food organically in 2002, I knew I had to have a couple of goats so that goat cheese could become part of my regular diet.
Dairy
The cheese that most of us refer to as “goat cheese” is more correctly called chévre (pronounced like shev). And although you can use goat milk to make yogurt and a lot of cheeses traditionally made with cow milk, there is no other milk that makes cheese that tastes like chévre.
One of the reasons many people choose goats over cows as their personal family milkers is because of goats’ smaller size. This is especially attractive if they have no experience handling livestock.
The smallest cows weigh 700 pounds, which means they outweigh any human. This makes them challenging and sometimes dangerous for a novice to handle.
“My husband and I chose to have goats on our farm mainly for their milk and the products that are made from it: milk for drinking and cooking, cheese and soap,” says Kellie Pavlov of Eatonville, Washington.
“We just started our very first goat herd and farm a little over six months ago, after never having grown up on one and moving from the desert of Las Vegas [Nevada] to the forests of the Pacific Northwest.
“Other reasons why we chose goats (after much research) especially the Nigerian Dwarf and Kinder breeds, are their smaller size along with the high butterfat content of their milk. We didn’t want to deal with larger livestock animals like dairy cows.”
Dairy goats can range in size from a 60-pound Nigerian Dwarf doe (female goat) up to Saanens and Alpines, which weigh closer to 150 pounds. Due to its small size, the Nigerian Dwarf’s popularity has grown rapidly in recent years.
Cheese is one of the main reasons goats appeal to people who want cheese. The high butterfat of their milk means a much higher cheese yield than the larger breeds, which have half as much butterfat.
“I have always wanted to own a milking cow,” says Jenny Mansheim of Fort Madison, Iowa. “By the time I could afford a milking animal, I was a grandma with grandchildren. I knew cows could kick or injure them because of their size. So I researched, and the Nigerian Dwarf milking goat was a perfect fit.”
Allergen Alternative
Some people choose goats because they are allergic to cow milk. If you have a true lactose intolerance, you would have a reaction to any mammal’s milk because they all have lactose.
However, a milk allergy is a problem with the protein, and that varies from species to species. So, many people who are allergic to cow milk can drink goat milk without a problem.
Some people may prefer goat milk because the milk doesn’t separate like cow milk. Although some sources say that goat milk is naturally homogenized, it’s not really. It just takes many days to separate, whereas cow milk separates within a few hours.
On the down side, this means that it is more challenging to make butter from because you can’t skim as much cream off the top of the milk. But you can buy a cream separator if you want to make butter regularly.
It’s true that all goats produce milk. But if you want to make cheese and drink milk regularly, you should get one of the dairy goat breeds to avoid disappointment.
It’s also best to buy from a breeder who milks their goats. If someone is keeping goats for pets, they really have no idea what that goat’s milking potential is.
Meat
According to the latest census from the USDA, more than 80 percent of the 2.5 million goats raised in the U.S. are raised for meat.
For years, I said I could never eat a goat. They seemed too much like pet dogs to me.
But then we wound up with more wethers (castrated male goats) than we could sell as pets. Eventually, we came to the realization that we would need to eat some of them. That’s when I discovered that I love goat meat.
Today, we raise some goats for meat to stock our freezer every year.
The U.S. is probably the last country in the world to discover goat meat. It’s actually much more popular than beef in many parts of South America, Africa and Asia. It’s especially delicious in curry dishes.
And unlike so many other things that are delicious, goat meat is actually good for you, too. Goat meat has less fat, saturated fat, cholesterol and calories than beef, pork, lamb or even chicken.
When you say the phrase “meat goat,” most people immediately think of the biggest goats, such as Boers and Kikos. However, you can eat any goat. In fact, dairy goat breeders routinely butcher most of their males.
You only need one buck (intact male goat) for a dozen or more does, meaning that a lot of males don’t need to stay males.
Some people try to sell their whethers as brush eaters or pets. But if some are still on the farm in the fall, they usually wind up going to the locker for processing. It’s not worth it financially to feed them hay over the winter.
People who want fiber are quick to think of getting sheep, but goats produce fiber also. Angora goats produce mohair, and other goats produce a cashmere undercoat.
Although cashmere has to be separated from the guard hairs in a goat’s coat, mohair is sheared from angora goats two or three times a year. In fact, Mea Stone, president of the Colored Angora Goat Breeders of America, says that they are the most efficient fiber producers in the world for their size, with adults growing about an inch of fiber per month and producing 10 to 20 pounds per year, depending upon age.
Fiber is one of the main reasons Stone choose to keep goats.
“I was diagnosed with [multiple sclerosis] in 2006 and always wanted a farm with goats,” she says. “My husband said we had better do it now, and so we did. And my MS has not progressed, which is why I call my goats my herd of therapists.
“They keep me healthy by making me go outside every day and look after them.”
Stone was not a fiber artist when they bought the goats, but she has learned to spin, crochet, weave and needle felt. Although she has tried a variety of other fibers, mohair remains her favorite.
Angora goats are easy to handle due to their mellow nature and small size. Does average about 70 pounds, with bucks reaching about 120.
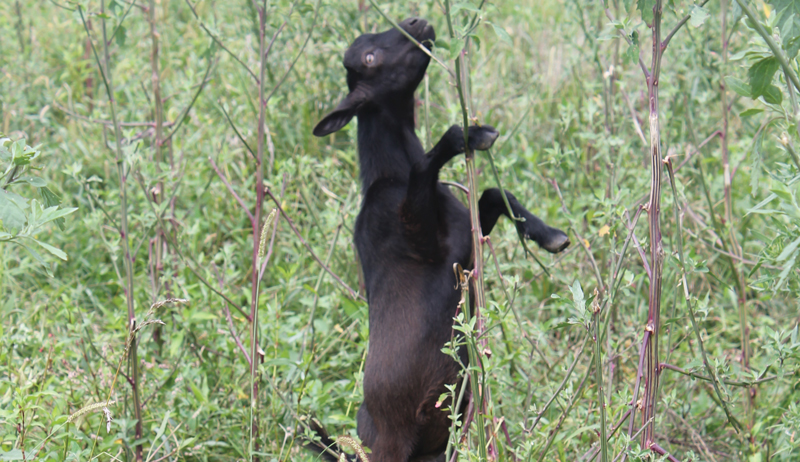
Brush Clearing
Although a lot of people think that a goat might make a good lawnmower, they actually prefer bushes and small trees. So they do a much better job of clearing brush. To people such as Pavlov, that’s one of the best reasons to have goats.
“It is great that our goats also clear brush and blackberry brambles and other undesirable things like that on our property while also fertilizing the pasture,” she says.
Goat landscaping companies have also sprung up across the country to clear areas that are inaccessible or too dangerous for humans and heavy equipment to clear. Google, Yahoo and Arlington National Cemetery, as well as airports in Chicago and Seattle, have hired goats to clear land.
In fact, goat landscaping has become so popular that there are now consultants who will help you start your own business. If you prefer a turnkey business, you can even buy a goat landscaping franchise.
Packing & Driving
Although we don’t need animals for packing and driving like we did a century ago, some goat owners still teach these skills to their goats for fun or profit. Some people just enjoy having their goats pull a cart in a parade or at a fair. Others have made a business out of taking pack goats and tourists along mountain trails and other natural areas.
Other than the cuteness factor, goats may be a good choice for these activities because they are smaller and safer than horses, mules and llamas. Goats cost less to buy, and the equipment used also costs less. Because goats eat less that those larger animals, they are also less expensive to raise.
The disadvantage of goats being smaller is that they can’t carry or pull as much weight as larger animals. Goats can pack about one-third of their body weight. Bucks can pull twice their body weight, while does can only pull their weight.
You also should not use pregnant does or does in milk for packing or pulling.
We can’t forget that goats are adorable animals that, more than the other reasons, many people just want to keep as pets.
Teresa Cole, of Tomball, Texas, started with three does five years ago. “I chose to raise Pygmy goats as pets,” she says. “I wanted ‘livestock’ that I could keep in a small pasture and take care of myself, and I wanted animals that would stay small and that I could interact with.
“Currently, I have six does and a buck. Raising goats has been more joyful than I ever imagined — especially bouncing baby goats!It’s amazing how each goat has their own unique personality. The most stressful time is kidding season, but having adorable baby goats climbing all over you is so rewarding!”
Pavlov concurs. “They are just too darn cute and entertaining to not have. We have fallen in love with their fun personalities and, by far, they are our favorite animal on our farm.”
All of the Above
Although I bought my first goats because of my desire for goat cheese, I’ve continued to raise goats for a multitude of reasons.
Like many owners, Victoria Rouch of Alton, Virginia, has thought about all of the possibilities and reasons why she keeps goats. “I have goats because I enjoy keeping an animal that is not only entertaining but diverse,” she says.
“When I first considered getting goats, I was struck by the possibilities afforded by ownership. Did I want an animal for milk? For meat? Companionship? Fiber? Did I want an animal I could train to use as a pack animal on hiking trips or even train to pull a cart? With goats, you can have more than one of these choices in the same herd or sometimes multiple choices in the same animal.
“They are a thinking animal, and while this can be a challenge, it’s a rewarding one. Part of keeping goats is staying one step ahead of their antics, which keeps the owner sharp. Even in a herd of goats, every animal is an individual with personalities that range from businesslike to aloof to goofy to affectionate.
“They are an all-around gratifying addition to any farmstead, and I can’t imagine life without them.”
This article appeared in Hobby Farm‘s Best of Goats 1012020 annual, a specialty publication produced by the editors and writers of Hobby Farms magazine. You can purchase this volume, Hobby Farms back issues as well as special editions such asBest of Hobby Farms and Living off the Grid by following this link.
A veterinarian is the first person you consult when an animal needs medical care, but if your vet is unavailable or can’t get to your farm in time, the care of the animal falls to you. As daunting as it might seem, it’s perfectly fine to administer animal medications yourself. Doing so can even save you money on vet visits.
We talked to a couple of experts to get some advice on:
It’s crucial to consult your veterinarian before administering medication. Townsend says it’s important to establish a veterinary-client-patient relationship because your vet knows you and your farm well enough to give simple advice over the phone. Some vets might charge a fee for this service.
“The importance of having a working relationship with a veterinarian is that it establishes a valid [veterinary-client-patient relationship] and allows for the purchase of prescription products and the use of drugs in a prescribed extra-label fashion,” he says.
While most medications are available only through a veterinarian, some are available over the counter, generally antibiotics. Livestock medication is sold at feed and farm-supply stores. You’ll find them kept in a small refrigerator or locked in a cabinet with syringes and needles.
It’s good to have some of these medications on hand in case of an emergency.
Don’t, however, grab a bottle and leave without reading the label. The medication might not treat the problem or be appropriate for your animal. For example, Shane advises to be careful with penicillin because there are long-acting and short-acting types.
“The dosages are calculated for cattle, and you can’t really dose a small amount of long lasting penicillin for a small animal like a lamb,” he says.
HQuality/Shutterstcok
Medications
Penicillin
Penicillin is widely found in stores. Common uses for this antibiotic include treating pneumonia and shipping fever in cattle and sheep; strangles in horses; and erysipelas in swine.
However, Townsend adds that penicillin is less effective now, and the recommendation for dosing is three to 10 times more than the dosage on the label. This larger dosage requires a longer withdrawal interval (see “Withdrawal Interval” at the end) and multiple shots at once. Penicillin is thick and not easy to administer.
“Here is where a vet’s advice would be important,” he says. “Another antibiotic might be a better choice.”
Oxytetracycline
The second most common antibiotic found over the counter is oxytetracycline, which is a longer-acting antibiotic labeled for beef cattle, dairy cattle, calves and swine. It’s commonly used to treat pink eye, hoof rot, scours, pneumonia, infections and wooden tongue.
That said, not all forms are long acting, Townsend says. Some are 100 mg/ml preparations with more frequent dosing—another example of the need to read the label closely.
Product names for antibiotics differ by manufacturer. They include Duramycin 72-200 for oxytetracycline and Pro-Pen-G for penicillin. Look for the chemical name underneath the brand name.
Most of these drugs are administered via injection. Some are administered through water, such as the anticoccidial drug amprolium, and you might be tempted to go with these, especially if you’re squeamish about giving a shot.
There are downsides. Townsend points out that it’s difficult to gauge the right medication dosage and to be sure that the animal has drunk enough (or any) of the medicated water.
Additionally, you might not find your animal’s species listed on the bottle at all. Can you still use it for your goats or sheep? Maybe.
Animals such as goats and sheep are considered minor livestock, and as a result, very little research as been done for them. So it’s important to consult your vet for advice on extra-label usage for an over-the-counter medication that does not include your animal.
Commonly used pain medications are phenylbutazone (also called bute) and flunixin (also called banamine). They are available only through a veterinarian. It’s good to have these in your first aid kit to treat pain, such as colic in horses.
Both are available in oral paste and tablets as well as injectable. Note: It can be illegal to use bute for some animals, such as for dairy cows older than 20 months of age.
How to Give a Shot
There are three ways to give your animal an injection of medication: subcutaneous, intramuscular and intravenous. The one you choose depends on the medication and, to some extent, your experience.
Townsend says the administration of medication depends on manufacturer recommendations and usage approval, such as absorption through specific routes. “For instance, some carriers are very irritating and some are tissue damaging, so those are going to direct how the medication is administered,” he says.
Subcutaneous Injection (SUBCU)
A subcutaneous injection is administered under the skin and used when medication can be released slowly or when an animal has little muscle, such as with a young lamb. Most medication can be given subcutaneously.
Method: Tent the skin and insert the needle at a 45-degree angle pointing downward. Be careful not to “buttonhole” your injection by poking the needle through the opposite side.
Intramuscular Injection (IM)
An intramuscular injection is administered into the muscle and can be tricky if you have little experience pushing a needle through hide. Medications given IM spreads through the fat layer.
Method: Insert the needle straight in at a 90-degree angle in one smooth dart-like motion.
Intravenous Injection (IV)
An intravenous injection is administered into the vein, which allows rapid transfer of the medication. This is not for the novice. Only a veterinarian or a highly knowledgeable person should give IV injections.
Needle Gauge and Length
Needles come in various diameters and lengths. Which one you choose depends upon the animal, what medication you inject and how you inject it.
“You want to make the smallest hole in the animal to make the right dose,” Shane says. “Some antibiotics are really thick and syrupy. So you’ll need to go with the bigger gauge.”
The general range of needles for livestock species is 14 to 20 gauge—the smaller the number, the bigger the diameter. The most common for young stock and small species are 18 to 20 gauge needles. 18 is the smallest you’d use for cattle or larger species.
Note: Be very careful with choosing the gauge for your animal. A too-thin needle can bend or break off inside the animal. Always restrain your animal when giving a shot.
The correct needle length depends on the animal’s size and how you use the needle. Shorter needles, such as a 1/2-inch, are best for subcutaneous shots to help with the 45-degree angle needed. They are also appropriate for IM shots for young animals.
If you vaccinate a steer IM, for example, choose a 1 1/2-inch needle. This length will get the medication through the hide and into the muscle.
DuxX/Shutterstock
Injection Sites
The triangular area on the neck is the most common place to give a shot. Animals have a triangular pattern on the side of the neck behind the shoulder and in front of the ear where there is a lot of dense tissue.
The skin is also loose there, especially when you turn the neck toward you, which makes it a good place for a subcu injection.
It’s also good for IM, but be careful to avoid the jugular vein and the ligaments along the crest of the neck. Young animals, such as goats and kids, don’t have enough muscle in the neck for an IM shot, so subcu is appropriate if the medication allows.
The second most common site is in the side, just behind the shoulder and right under the elbow. It has plenty of loose skin for a subcu injection. There’s also a large muscle appropriate for an IM injection.
The animal’s use also factors in on choosing a site. “Tissue damage on a valuable cut of meat [such as the loin, top, rump or leg] can be an expensive loss,” Townsend says. “So the neck is a good place for an injection for cattle as it’s a low-quality cut.”
Try to avoid giving shots in the rear flank because an animal won’t be able to walk if it’s sore. Equally, IM shots in a young animal’s neck might prevent it from nursing.
“Gravity also plays a part,” Shane says. “You want to choose a place where a [possible] abscess will be able to drain down [from the injection site].”
Fit your needle onto the syringe, remove the cap and draw the syringe back to bring in some air.
Step 2
Shake the vial then turn it upside down. Insert the needle. Press the air into the bottle to break the vacuum and slowly pull the syringe back until you reach the right dose. Make sure your needle is below the liquid.
Note: Cubic centimeter (cc) and milliliter (ml) is the same amount of volume.
Step 3
Gently tap the syringe to bring any air bubbles to the top. Push the bubbles back into the bottle, check the dosage once more, and remove the needle.
Note: Air bubbles won’t harm the animal but they take up space and can cause an incorrect medication dose.
Step 4
Don’t rely on eye-hand coordination when recapping the needle. Avoid finger sticks by laying the cap down a surface and sliding the needle inside.
Step 5
Clean the hide with alcohol, remove the needle cap and administer the shot. Pull the plunger back slightly to check for blood. If you see blood, you’ve hit a vein. Remove the needle and try again in a different spot. Recap as in Step 4.
Note: ask your veterinarian or pharmacist for assistance with discarding needles safely.
Tips: Never use a bent or damaged needle; throw it away and use another one. Damaged or weakened needles can break off inside an animal. If you need to inject multiple animals, don’t pull more medication into a single syringe and go from one animal to another.
“It’s very easy to push the plunger too far and overload the medication,” Shane says. “Instead use a dosing syringe made for this purpose.”
If you’re nervous about giving a shot, practice on an orange or banana. This mimics the feeling of injecting through skin.
Even armed with information, administering medication to an animal can be daunting, so ask your vet or a knowledgeable person for advice if you need it.
Administering medication is a crucial skill for every hobby farmer.
Sidebar:Educational Resources
The Food Animal Residue Avoidance Databank, commonly called FARAD, is a component of the Food Animal Residue Avoidance and Depletion program. It’s a university-based scientific program that lists recommendations for safe withdrawal intervals. The site also includes recommendations for extra-label withdrawal. If you have a more detailed question, you can contact FARAD for help.
Food Animal Residue Avoidance and Depletion Species Page is FARAD’s species-specific sister site with in-depth information about each species, including honeybees and wildlife. It also has information on treatment and withdrawal intervals for organic farms.
Youth Quality Care of Animals is a national multispecies educational and certification program for ages 8 to 21 that focuses on food safety, animal well-being and character awareness.
Sidebar: Organic Animals
Animal welfare is part of organic livestock farming, so you must must treat animals when they are ill or injured. The USDA has certain standards for treatment, but beyond that, your organic certifier might have additional requirements.
“For the most part, when you use medications not on the certified list, that animal is no longer organic, and that goes for a milk cow as well; its milk will never be able to be sold as organic again,” says Jonathan Townsend, D.V.M., Ph.D., the director of extension programs at Purdue University College of Veterinary Medicine.
“There is a requirement that an animal be treated humanely, and if it needs to go to non-organic therapy then it needs to be done. The animal comes first.”
Sidebar: Withdrawal Interval
It’s important to avoid eating food from treated animals before the withdrawal interval ends. Otherwise, there is a good chance you’ll consume the medication, which can be unhealthy and even dangerous.
As per a study published by the American Journal of Medicine in 2009, 10 percent of the human population is allergic to penicillin.
Consuming antibiotics you don’t need can lead to drug resistance. Some drugs might even be toxic. And if you sell meat, milk and eggs, you can be held liable if inspectors find drug residue in your products.
There is a broad spectrum of withdrawal intervals for medication in all livestock species. For instance, as per the Food Animal Residue Avoidance Databank, all FDA-approved, correctly administered medications for laying hens have a 0 day egg withdrawal. Penicillin has a 24-hour milk withdrawal after the final treatment, while oxytetracycline’s milk withdrawal is 96 hours after the final treatment.
(You have to discard milk for all medication during treatment.)
Extra-label withdrawal intervals can be difficult to ascertain, so visit the Food Animal Residue Avoidance Databank to find the withdrawal interval for information or ask your veterinarian for guidance.
This article originally appeared in the July/August 2019 issue of Hobby Farms magazine.
These heirloom pumpkins have exceptional storage and the best flavor and texture for pies. Originally from the French region of Bordeaux, this Galeux D’Eysines, translating as the “Embroidered Squash of Eysines” is a favourite on our farm. (Zach Loeks)
One of the best things we can do as gardeners, market gardeners and landscapers is grow some heirloom garden crops. This means varieties that have been around for at least 50 years and are open-pollinated.
These varieties can build food security and profit resilience.
Many varieties of vegetables grown in gardens and farms are filial 1 (F1) hybrids that have been created by breeding different varieties of the same crop together. This hybridization can lend many desirable traits to our crops, such as the increased sweetness of a turnip or less cracking in cherry tomatoes, as well as adding hybrid vigor.
But it also limits the resilience of our communities and businesses.
Hybrid Problems
Yes, hybridization can occur naturally in nature, and cross-pollination is also a big part of the breeding process of new varieties. But relying on only hybrid varieties also weakens farms by:
creating a dependency on imported seed
reducing the likelihood of adapting our varieties to climate change
denying farms and gardens additional income sources
For instance, if you buy in all your seed from seed producers and these varieties are all hybrids, what happens if there is a big run on seed and your typical order is short supplied? You may find you don’t have the seed you need to meet your garden yield or farm income goals.
With increasing changes in our climate system, the possibility of shortfalls in seed is increasingly possible. Moreover, the global and regional distribution of seed is less likely to supply varieties that will perform well across different regions.
The age-old selection of the best performing varieties for seed is one that allows for adaption to local and regional environmental pressures. But most seeds purchased for farm and garden use are adapted to different climates and various methods of production.
If organic arugula seed, for example, is grown on large acreage and has to be row covered to prevent flea beetle damage, it is less likely that the seed producer will develop a better variety. Rather, the producer is more likely to proliferate traits that require row cover protection.
Small growers are able to identify individual plants in their garden that show resistance to insect pressures or other new desirable traits. They can save seeds preferentially that have traits they specifically desire and that are locally relevant.
Additional Income
In addition, growing open-pollinated varieties provides another source of income for the farm.
Take squash for instance. You can grow and sell the squash. But you may also save the seed and dry them and pack them. This provides the farm with additional product in the late winter and early spring before new crops start to grow.
In this way, you can extend the season and reduce your seed costs. You can supply seed for next year’s crop from your own saved seed.
With hybrid varieties, you cannot save seed. Whatever grows from those seeds will have unknown characteristics from a broad spectrum of genetic variability. That sweet turnip may not be good at all, and those cherry tomatoes may crack.
Although heirloom crops have their own difficulties, they also have great benefits, and the reliability from one year’s seeds to the next is predictable.
If you like the variety, saved seeds should continue to perform much to your satisfaction from year to year. Saved seeds will also offer up some unique mutations for your selection, and you can even breed a whole new heirloom.
Furthermore, by growing from your own seed you can help create food security and community resilience. The essential ingredient of local food should, as much as possible, grow locally. And seed is an undeniably critical part of this equation of resilience.
With increasingly unpredictable climate trends, not to mention socio-economic uncertainties, seeds from good, locally adapted varieties in our communities is a building block of community.
So why not pick a few crops and grow some old school varieties? All your produce doesn’t need to be heirloom, but choosing to grow a few open-pollenated heirloom crops is a great start.
One note: When growing open-pollinated varieties, mind you don’t cross-pollinate with other varieties. In some cases, like beans, very little cross-pollination occurs within a small plot. But squash and corn have a much higher probability of cross-pollination.
Select a few varieties and research them well. You’ll have some great heirloom crops to enjoy while boosting your own profitability and resilience.
“I can’t wait to have a big plate of radicchio,” I have never said, ever. But that’s because I’ve never had homegrown radicchio—until now.
With vibrant fuchsia leaves, radicchio looks more like a relative of lettuce or cabbage than it does of its close cousin, chicory. Its hardy nature means it’ll stand up to some winter weather as well as to cooking in a variety of ways.
This is my first year growing radicchio, and I’m here for it.
How to Grow Radicchio
Like most bitter leafy vegetables, radicchio will take cold weather over hot. You can start seeds indoors, though it’ll likely be too warm for them there. Direct seed into the garden about 1 foot apart.
In my Central Kentucky garden, I planted radicchio in mid-September with the hope of overwintering for early spring harvest. Had we gotten around to planting a month earlier, it’s possible the plants would have done poorly because of the heat.
It’s also possible they would have done fine because the end of August wasn’t so bad this year, and in that case we would be eating radicchio before Halloween. Growing your own food is a gamble.
Mulch around the seedlings to keep the roots cool and to retain moisture here in the last vestiges of summer-like weather.
Keep radicchio watered, particularly leading up to your harvest, for the most crisp leaves. This can be challenging if you try to grow radicchio during freezing weather.
As we head into winter, radicchio will stand up to the cold and even become sweeter because of it. The head’s growth will likely slow as the weather drops to freezing. A low tunnel or row cover may keep slow growth coming.
Temperatures have to dip into the mid-20s to freeze-kill a radicchio plant.
Radicchio Growing 201 involves digging it up, relocating it indoors and forcing its growth. I have no plans for this at the moment but won’t rule it out as a winter experiment.
How to Harvest Radicchio
Radicchio will form tight, cabbage-like heads. Cut the head just above the soil surface with a sharp knife. You may find leaves resprouting from the core left in the garden bed a few weeks later.
Harvest a few loose leaves at a time if your plants aren’t shaping up or if you prefer a cut-and-come-again crop.
Keep radicchio in your fridge in the crisper drawer. It’ll keep for several weeks. After that, it’ll lose its crunch over time, as leafy veggies do.
How to Eat Radicchio
This vegetable is high in Vitamin C and potassium, according to Tufts University, making it a worthwhile addition to your cool-weather diet.
Radicchio is a famously bright-colored salad accent. As noted above, this is a bitter vegetable, so it pairs well with sweeter lettuces. It has a hardy leaf—think red cabbage—so also adds a nice crunch.
The leaves’ cup-like shape and firmness make them a great vehicle for egg salad, tuna salad and the like.
Cooked radicchio is sweeter than raw. Again, think cabbage: add it to soups, broil it with olive oil and herbs, or sauté it in a stir fry. Try substituting radicchio for endive, if you have a favorite endive recipe.
In planting this year’s radicchio, I have no idea how well it will grow or if anyone else in my house will want to eat it. Give me a plant that can add a pop of color to otherwise gray-brown fall surroundings, and I figure it can’t be so bad.
I’m looking forward to that first plate of radicchio, after all.
Last summer, we faced a situation on our farm that is never welcome news: no water. Turning on a faucet, spigot or hydrant anywhere on the property resulted only in dry silence.
We checked the obvious. Was the circuit breaker to the pump functioning? Yes, it was. Were the leads to the pump OK? Yes, they were. Then what was wrong? And, more importantly in the immediate sense: How would we water our livestock?
While we waited for our water to be restored, we had to implement our livestock water backup plan. This involved hauling many gallons of water twice a day from another property about half a mile away.
We were very happy when our water system was repaired, but we were also glad that we had a backup system in place ahead of time. It saved us a lot of uncertainty at the time of the problem.
Our situation brings up an interesting question for other small-scale farmers to consider: Do you have a water backup plan ready in case you experience a similar water problem? What if your well was to unexpectedly go dry or becomes otherwise unusable, such as from contamination?
A dairy cow might require as much as 20 gallons of water per day. A beef cow needs somewhat less, while a horse requires around 10 gallons daily. Smaller animals such as sheep and goats call for less than 5.
This is a lot of water to replace, especially if you have multiple animals. You hope, of course, that your well will deliver a high flow of sparkling water for years to come. But if you have a farm, it never hurts to have a basic backup plan for how you would water your livestock in the event of a water failure.
This differs somewhat from, say, a power outage. A power outage still affects your well in the sense that there’s no electricity to operate the pump. But in this case there’s nothing inherently wrong with your water system. A backup plan for this problem could be as simple as installing an appropriately sized gasoline generator for running the pump.
But in the case of a well or pump failure, a different solution is needed. You need a temporary way to continue to water your livestock while the longer-term problem of fixing the well is sorted out. This process could take days or weeks to complete.
Daniel Johnson
Here are a few options you can consider:
Shallow Backup Well
In some locations where the water table is high, it might be possible to drill a successful well workable by a hand pump. To be sure, using such a pump can be hard work and not something you would want to do every day for your livestock.
But in a serious pinch, such a backup system might save the day. Just take turns pumping.
House Well
Is there a home on your farm that is served by a different well than the barn or livestock area? While a very small-scale hobby farm might have only a single well to service the residence and the barn, a larger farm might have two (or more) wells to water the house and animals separately.
This is a great solution because it offers you an automatic backup.
Sure, it might not be as convenient to haul water from the house down to the barn. But you can certainly do it until your barn well is back up and running.
If the distance isn’t terribly far—and if it’s not winter—you might run enough hoses to transport the water down to the animals. Otherwise you can always move water in containers.
(If you have only a few animals, you might move enough water by simply purchasing some inexpensive 5- or 6-gallon camping containers.)
Daniel Johnson
Neighbor Wells
Rural neighbors have a long history of lending a helping hand during difficult times. A well failure could certainly qualify as this.
If you have good neighbors within a reasonable distance from your property, consider asking them if you can temporarily draw livestock water from their well and transport it back to your place.
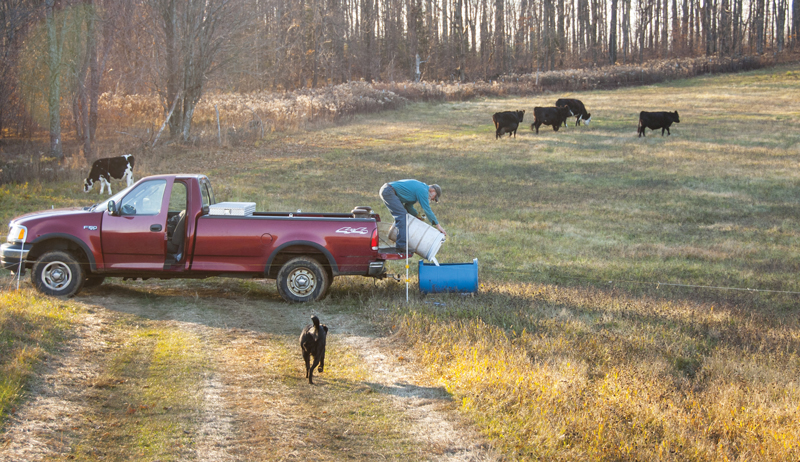
It’s certainly a big favor to ask, as you’ll probably need to haul many gallons. But some people are happy to help. If this scenario might work for you, then your water backup plan could be as simple as purchasing and keeping on hand a 100- or 250-gallon water tank.
The tank could be hauled in the back of a pickup or strapped to a small trailer and easily transported out to your animals or down to the barn.
One possible downside to using neighboring wells? The water supply might not exactly match what your animals are accustomed to drinking. Ideally, your livestock would be transferred over to the new water gradually. But this slow mixing might not be possible if your well has malfunctioned.
And if your neighbor is on a municipal water system, you might need to filter the water to remove chorine.
This one can be tricky. Ponds and other surface water sources can certainly make for potential livestock water sources and offer independence from a well. But there are some downsides.
Livestock with unrestricted access to surface water can easily contaminate it or destroy the banks. So fencing might be required to keep them away from the majority of the pond.
Another solution is to pipe water from a pond to a holding tank or trough, perhaps through the use of a solar- or wind-powered generator.
There is also the problem of maintaining the water quality of the pond. You need to prevent the buildup of algae and keep your livestock safe from the dangers of deep water. But if you can avoid these hazards, a quality pond can be another arrow in your backup quiver.
Daniel Johnson
Getting Back in Business
In the end, however, these plans are merely temporary. The main goal is to get your well up and running again, and that is a job for the experts.
Get an initial evaluation into the main problem, whether it’s a failed pump, a pressure switch problem, contamination or perhaps even a well that has run dry during a drought. Often, you see signs that a well is having trouble before it stops, such as decreased water pressure, air in the lines or dirty water.
Sometimes, a water system is repairable, and sometimes a new well is required. There are many variables, and each scenario is different.
Key Points
If you do end up needing a replacement well, keep in mind a few points about the process:
It can take some time. A lot has to happen: applying for a permit, determining a site, drilling or driving the well, testing it, connecting to buildings and hydrants, etc.
The well company will probably examine records of other wells in the area to estimate how deep you’ll need to go to reach a quality water source. The geology of the area plays into this quite a bit, as the various layers of sand, silt and gravel act as filters to the good water below. Obviously, the deeper the well, the more costly, but a well should last a long time, and the important thing is to reach reliable water.
You should tell your well company that you will use this well (at least in part) for livestock watering. It might influence how many gallons per minute are needed.
Well-drilling/driving can be a very noisy process, accompanied by a lot of vibrations—both of which can startle and stress your animals. Stay on hand during the drilling process to monitor your livestock, and consider putting them in the barn if they’re more comfortable inside and away from the noise.
And when you go down to the barn tonight to water your livestock, remember to be thankful when you turn the valve and have good, clear water.
This article originally appeared in the July/August 2019 issue of Hobby Farms magazine.
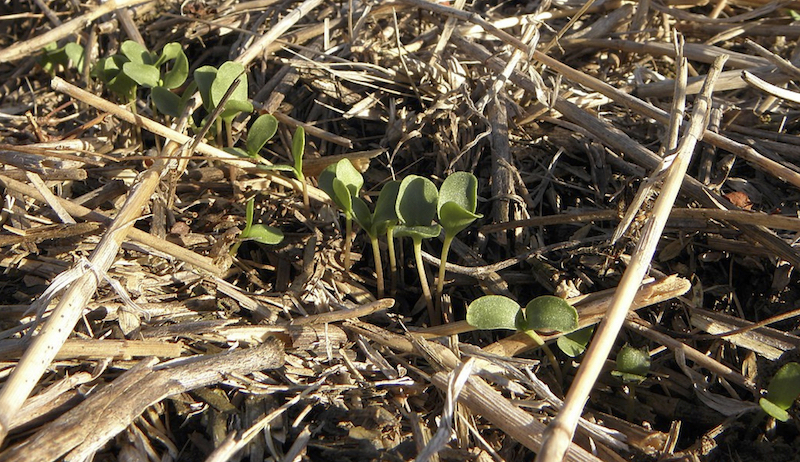
USDA NRCS South Dakota, Creative Commons BY-SA 2.0 (Wikimedia Commons)
After harvesting the last few beans, tomatoes and peppers, I usually just yank the plants, rake up the debris, and toss it all in my super-hot compost pile. As for my garden beds? They remain mostly bare until spring.
I’d always assumed cover crops were for large-scale farmers or people who grew heavy feeders like corn. But the increasing numbers of extreme weather events and the current climate crisis we’re all facing have changed my mind.
Cover crops afford all sorts of benefits—even for small-time growers like me. They prevent soil erosion and crowd out weeds. Cover crops also boost soil fertility, help to conserve moisture, and improve the soil’s overall structure.
So, even for my relatively small garden plots, I now see value in planting both green manures—crops like peas or buckwheat planted during the regular growing season—and more traditional cover crops like winter rye.
And especially important now? By covering the soil with certain types of plants—whether between successive plantings of crops or between entire growing seasons—we can trap carbon. Sequestering carbon in the soil can keep it from escaping into the atmosphere.
And keeping rogue carbon in check can help to mitigate the planet’s rising temperatures.
Room to Rotate?
Green manures and cover crops can also help growers with little-to-no ability to leave plots of land fallow.
“If you grow intensively in order to cram a lot of production into a small space year after year after year, your soil health and fertility are going to go down,” Certified Organic Inspector Gary Ogle explains. “So, if you have enough land that you can always practice good crop rotation—which not only increases soil health but also resists disease and pests—then you are off to a really good start.”
But if you don’t have acres and acres of land at your disposal?
“Taking the time to plant green manures—even though you might be using [part of] your land to grow something you’re not going to sell and you may just end up tilling under—you’ve got to remember that you’re growing that crop in order to build your soil tilth,” Ogle says.
“That’s going to give you a better crop the following year. It’s an investment. It can be a challenge for many people, but it’s definitely worthwhile.”
Ogle also works on seed variety selection and catalog production for Veseys in Canada’s Atlantic region.
“On our own trial farm, we’ll grow an early crop of buckwheat just to break up the soil and to control weeds,” he says. “Often we will follow that up in September with a crop of winter rye, so we have something green holding the soil in the winter.”
“In other areas, we’ll often put in our own custom mix,” Ogle continues. “We’ll put in beans and peas and other legumes, such as alfalfa and clover, and we’ll till that in.”
Depending on your soil’s specific needs, you can customize your own cover crop mix, too. Field peas, hairy vetch, and white clover expertly fix nitrogen in the soil. Crops like mustard and radishes will help break up heavily compacted areas.
Cornell University developed this online tool with New York-based growers in mind. Still, it could be useful if you live in a similar climate zone or you simply want to identify potential cover crops according to different soil management goals.
Don’t want to make your own mix? Some pre-mixed cover crops like “Protect & Fertilize Green Cover Crop Blend” are commercially available. Containing winter rye, hairy vetch, daikon radish, rapeseed, purple top turnip and Austrian winter peas, the Rene’s Garden mix covers 500 square feet.
Many cover crop-related resources mention the need for mowing and tilling—first to prepare the bed for planting and, later, for working the cover crop vegetation back into the soil. Rather than break out my carbon-emitting, gas-powered gadgets to prepare the areas to be planted, I’ve instead covered the spaces with cardboard.
In a week or two, the cardboard will smother any vegetation below. Then I can rake the soil and direct-sow my cover crops. I’ll keep the seeded beds moist until the new crops are established.
Then, in early spring, I’ll cut it down either with my reel mower or scythe. Finally, I can let the spent vegetation serve as mulch above ground or hand-dig it back into the soil a month or so before planting my early spring garden.