Categories
Homesteading Recipes

Let Your Garden Grow The Perfect (Home) Spa Day

On a visit to a family-friendly resort, my preschool daughter became giddy over the prospect of some pampering time in the “Kid Spa,” a posh area outfitted with fluffy pink robes and sweet-smelling beauty treatments.

Unfortunately, when we saw the spa’s price list ($50 to paint her nails!), we had to temporarily shelve our visions of a mother/daughter spa day.

But my little girl’s crestfallen face forced me to think creatively. I realized that we had many of the ingredients for resort-quality spa treatments in our own garden. Once home, we invited over some friends and mixed, muddled and chopped garden offerings into a memorable (and affordable) spa day.

The next time you’re discouraged by expensive spa prices, take a stroll through your garden and use your backyard bounty to create the freshest spa treatments you’ve ever experienced.

The garden-fresh ingredients and lack of preservatives means these beauty treatments don’t have a long shelf life. Most should be refrigerated and used within one week.


Lavender-Rose Foot Soak

garden spa homemade
Irina Burakova/Shutterstock

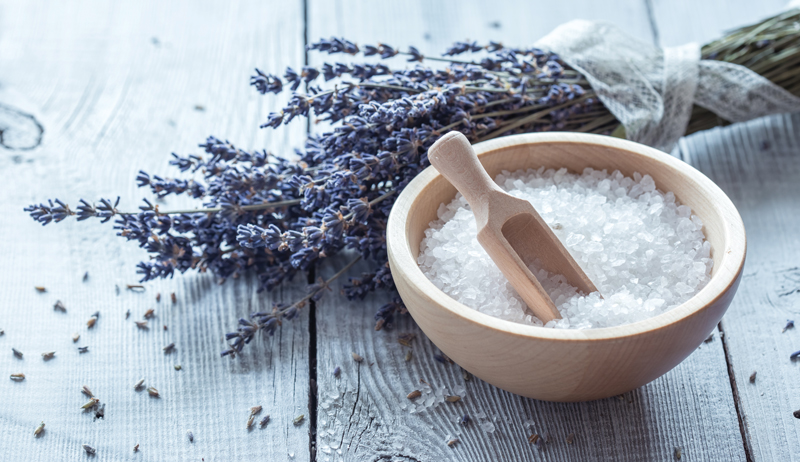
An age-old remedy for anxiety, lavender calms more than just your tired tootsies. The herb is antifungal and antiseptic, aids in healing wounds, and repels insects, as well.

Rose petals transform the soak into a thing of visual beauty. The flower also serves as a tonic and astringent, while its unmistakable scent acts as a mild sedative and antidepressant.

Yield: 1 1/2 cups, enough for two foot soaks

Ingredients

  • 1/2 cup sea salt
  • 1/2 cup Epsom salt
  • 5 drops lavender essential oil
  • 1/2 cup rose petals, or 1 T. rose water, if fresh petals are unavailable

Preparation

In medium-sized bowl, mix salts. Add essential oil, and stir to combine.

Fill gallon-sized wide-mouth bowl or basin with warm water. Stir in half salt mixture.

Sprinkle water with rose petals. Soak feet and breathe deeply until thoroughly relaxed.

Mix It Up

Try sweet orange or eucalyptus essential oil with dried lavender buds or basil leaves sprinkled in the water. Sweet orange provides a refreshing, uplifting aroma, while eucalyptus possesses decongestant, antiviral and antifungal properties. Basil contains antioxidants that help protect against cell damage.


Learn more about the joys of growing lavender!


Cucumber-Mint Clay Mask

The cooling properties of your garden cucumber and mint, combined with yogurt, calm inflamed skin, while cucumber’s natural stores of silica tighten connective tissues for spa results. Kaolin clay gently pulls impurities from the skin while increasing blood circulation to the face.

Yield: 1 cup, enough for at least four masks

Ingredients

  • 1 cucumber, halved
  • 2 T. fresh mint
  • 1/2  cup kaolin clay
  • 1/2 cup yogurt

Preparation

Chop one cucumber in half coarsely, combine with mint and yogurt in food processor, and blend until smooth. (Some small lumps are OK.)

Pour mixture into glass bowl and stir in clay until slightly thickened. Slice remaining cucumber half to use on eyes.

Recline in a comfortable chair and slather clay mixture on your face (or take turns “masking” each other’s faces). Place one slice of cucumber over each eye. Rest while mask firms up, approximately 10 minutes.

Wash off mask with warm water and pat dry.

Mix It Up

Swap avocado or banana for the cucumber. Avocado is a remarkable skin moisturizer, while the potassium in bananas helps soothe blemishes and other skin irritations. If you can’t find kaolin clay, substitute one egg white instead.


When’s the right time to plant garden cucumbers?
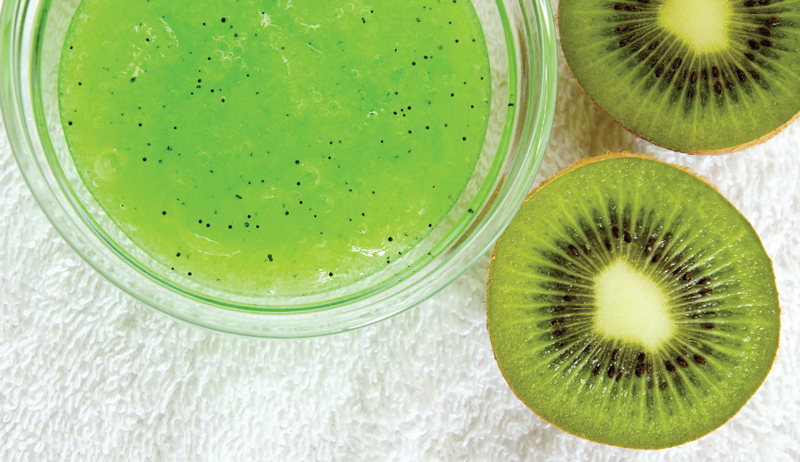

Kiwi Facial Peel

Kiwi contains substantial amounts of vitamin C, useful for the production of collagen. Its heavy-hitting antioxidants help fight the free-radical damage that ages skin. Gelatin pulls out dirt and oil that clog pores.

Yield: 1/2 cup, enough for at least four face masks

Ingredients

  • 1 kiwi
  • 1/4 cup pineapple or coconut juice
  • 1 T. unflavored gelatin

Preparation

Peel kiwi and coarsely chop, discarding hard inner core. Purée in blender.

In small saucepan, stir together puréed kiwi, juice and gelatin. Whisk over low heat until gelatin is dissolved. Pour mixture in small bowl and refrigerate, stirring every 5 minutes to prevent clumping, until sticky but not solid, approximately 25 minutes.

Apply thin layer of gel to face, avoiding eyes, eyebrows and mouth. Let set until dry and firm, approximately 20 minutes. Peel mask off in sections. Remove stubborn portions with warm, soapy washcloth.

This mixture cannot be stored for later use, as refrigeration causes it to harden.

Mix It Up

Swap kiwi with 1/4 cup puréed strawberries, which contain salicylic acid to help tone and refresh the skin. Try apple juice instead of pineapple or coconut. If you forget to retrieve your gel from the refrigerator in time, it will solidify, but all is not lost. Sit back and eat your tasty gelatin dessert!

garden spa homemade
joanna wnuk/Shutterstock

Rosemary-Pecan Sugar Scrub

Rosemary, a plant revered by the ancient Romans and Egyptians, flourishes as the most prolific herb in many gardens. Its antiseptic and anti-inflammatory properties leave skin clean and refreshed, while its earthy aroma sharpens mental focus. Pecans boast more than 19 vitamins and minerals, including Vitamins A, B and E, and their nutty aroma makes this scrub irresistible.

Yield: 1 cup, enough for at least four hand-and-foot scrubbings

Ingredients

  • 1/4 cup turbinado sugar
  • 1/4 cup pecans
  • 1/4 cup sea salt
  • 6 T. coconut oil
  • 2 T. fresh rosemary

Preparation

In a food processor, combine all ingredients. Pulse until blended. Pour into clean glass container.

Gently rub spoonful of scrub onto hands and feet, focusing your massage on rough areas. Rinse with warm water, and pat dry.

Store unused scrub at room temperature. Coconut oil may solidify, but rubbing mixture onto your skin will make it melt instantly. Use within one week.

Mix It Up

Substitute almonds or hazelnuts for pecans. Swap fennel seed, known for its powerful antioxidants, for the rosemary. Add 1 teaspoon cocoa powder for a scrub that smells delicious enough to eat.


Get as much rosemary as you can to use in fall and winter.


Spa-Worthy Snack: Watermelon-basil Fizz

Sip this refreshing homemade beverage while you relax.

Yield: six 8-ounce servings

Ingredients

  • 4 cups chopped watermelon
  • 2 cups ice
  • 2 T. chopped fresh basil
  • juice of 1 lime
  • 24 ounces club soda

Preparation

Combine watermelon, ice, basil and lime juice in blender. Fill glasses half-full with mixture, and top with club soda.


Pumpkin Body Butter

garden spa homemade
kazmulka/Shutterstock

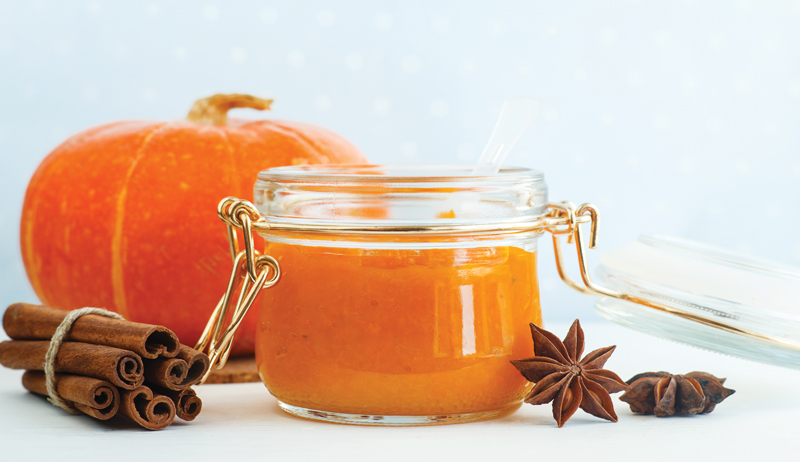
Joining the classic skin-care combo of milk and honey, pumpkin contributes its rich stores of vitamins A and C to soften skin and help heal sun damage. Milk helps unclog pores while moisturizing, and honey’s antibacterial properties clean and heal skin.

Yield: 3/4 cup, enough for several hand/foot coatings

Ingredients

  • 1/4 cup cooked and puréed pumpkin
  • 1/4 cup milk
  • 1/4 cup honey
  • 1/4 tsp. cinnamon
  • 3 tsp. cornstarch
  • 1 tsp. vanilla

Preparation

Combine pumpkin, milk, honey and cinnamon. In small saucepan over medium heat, gently warm, stirring constantly. Whisk in cornstarch.

Bring to gentle boil, and reduce heat to low. Continue whisking until thickened. Remove from heat and allow to cool until comfortable to touch.

Slather on hands and feet. Leave on for at least 10 minutes. (Cover feet with socks if you need to walk.) Rinse with warm water, and pat dry.

Mix It Up

Substitute acorn or butternut squash or sweet potato for the pumpkin. If you have any body butter left over, it makes an amazing ice cream topping!

So go ahead and pamper yourself. And your garden is the perfect start to a home-crafted spa day!

Categories
Recipes

Maximize Your Garden Produce With Vegetable Broth

Have you ever poured a carton of store-bought broth and wondered, “Why can’t I make this myself?” Well, you can, and your garden holds the key to making flavorful broth all year long.

Vegetable broth is a clear liquid made by extracting the flavor of vegetables and herbs into water and then straining out the solids. While it’s sometimes served on its own, broth often serves as the base for soup, which usually contains pieces of food.

Clive Wanstall, chef and instructor of culinary arts at Lane Community College in Eugene, Oregon, explains it simply: “A soup is generally the finished product that turns up in a bowl.” Stock, a term often used interchangeably with broth, is made in a similar manner to vegetable broth but extracts its flavor from the bones of livestock, fish or fowl.

Hit or Remiss

Almost any combination of vegetables will make a good broth, and your selections might change with the seasons. While you’ll want to use the vegetables at hand, there are some you should almost always strive to incorporate into the mix.

“Mirepoix is the term that we use for a standard ratio of vegetables that are used in a foundation stock, which is 50 percent onion, 25 percent carrot [and] 25 percent celery,” Wanstall explains. These three vegetables are the flavor base of your broth.

The total weight of other vegetables added should not exceed that of the mirepoix.

Brassicas are tricky. “Some of the vegetables, like cauliflower, Brussels sprouts, broccoli—they’re going to be delicate to use and tend to not work well,” Wanstall says. “Cabbage can work well if done carefully. The problem is that these vegetables are very volatile [i.e., their flavor is released quickly]. You can only cook them for a short period of time.”

Vegetables in the brassica family can impart a musty flavor to the broth if cooked too long.


Check out these 11 plants to start in your fall garden.


The best bet is to find a mixture that you enjoy and that maximizes your seasonal harvest. Whatever you decide to use, vegetables may be used in their raw state. But cooking them in some vegetable oil first will extract more flavor.

Both Wanstall and Jason Robinson, sous chef at Heidi Tunnell Catering Company in Creswell, Oregon, recommend browning the vegetables in the oven or on the stovetop. You can also brown a portion of the vegetables, depending on the flavor you want to achieve.

Keep a few ingredients, such as soy sauce, dried mushrooms and tomato paste, in your pantry and refrigerator to add nuance to each batch. Wait to add salt until you actually use the broth in a recipe. That way, you can adjust the seasoning as needed for the dish in which it’s used.

vegetable broth
Virginia Pinkston

Balancing Act

A good ratio of water to vegetables is 2 to4 cups water for every pound vegetables. Use cold water for the clearest vegetable broth. Impurities from water heaters can cloud the liquid or give it an off-flavor.

For the best results, Robinson suggests dicing or chopping the vegetables. “When you’re making a vegetable stock, cut things small, like 1/2- to 1-inch square … to increase the surface area,” he explains.

“You get better flavor extraction, and you’re not cooking it too long.” Use a food processor for this task if you don’t relish the chore of chopping.


Learn how to grow ramps, a true culinary delicacy.


Eyes on the Prize

Transfer your browned vegetables to a stockpot and add water. A true stockpot, which has a heavier bottom and is usually taller than it is wide, is best for controlling evaporation, Wanstall says.

“The narrower the pot is, the less evaporation takes place,” he explains. “[Food] can often stick to the bottom of the pot, so a thick bottom is important as well as the right size.”

Don’t cover the pot. According to Wanstall, “Covering [it] up does two things: It keeps some of the volatile components in the pot that may lead to discoloration, and … if it’s covered up [you] don’t watch it.”

Bring the water to a simmer for 30 to 45 minutes, tasting as you go.

“The overruling guide here is when it tastes good, go with it,” Robinson says. Delicate herbs, such as thyme or savory, and strongly flavored vegetables, particularly brassicas, might need to be added toward the end of the cooking time to avoid overpowering the broth.

When the broth is done to your liking, remove it from the heat and strain it immediately. Vegetables left in hot water will continue to cook, changing the flavor. For clarity and taste, don’t press the vegetables when straining.

If the broth will not be used immediately, cool it down quickly by immersing the container of strained broth in a sink filled with cold water. Stir often until the pot is cool enough handle. If immersion is not practical, you can also use ice.

“We actually make the soup concentrated with less liquid than it needs, and then use the ice to be part of the cooling process,” Wanstall says. Another option is to simply transfer the hot soup into shallow containers to put directly in the refrigerator.

vegetable broth recipes recipe
Virginia Pinkston

Value in Versatility

You don’t have to follow a recipe when making your broth. Use what you have in the garden and what you like.

“Don’t be afraid to experiment,” Robinson says. If your first effort doesn’t turn out, you can often rescue it by using about a quarter of it in the base liquid for your next batch.

Using parts of vegetables you would otherwise compost is a good way to get the most out of your garden. However, you shouldn’t throw anything and everything into the pot. Use only what is wholesome and clean.

Save the tougher portions of leeks, pea pods, seeds and pulp from winter squash—anything that has good flavor but isn’t something you’d want to eat as-is. Keep scraps in resealable plastic bags in the freezer or refrigerator until you have enough for a full pot.

The next time you need liquid for a recipe, consider using your homemade broth. Use it to make white sauce or gravy or as the liquid in stew or other braised dishes. Vegetable broth can also perk up grains when used in place of water as the cooking liquid, and broth is always recommended for making risotto.

Wanstall offers still more possibilities.

“Mashed potatoes cooked in vegetable stock—oh my gosh, delicious! Add to roasted vegetables to control the cooking. It will keep them from getting dry if they are browning too quickly. Any type of puréed vegetable dish, instead of using milk or cream or butter to augment it, a little broth will smooth out the vegetables, as well.”

For a quick meal, use the broth as a base for soup and add leftover pasta or rice along with vegetables and maybe some cooked shredded chicken or beans. Simmer the soup until heated through, and you’re ready to eat.

Keeping the Magic

If you’re preparing broth in quantity, you’ll need a way to preserve it. Freezing or processing in a pressure canner is your best option.

Freeze

Transfer cooled broth (40 degrees F or lower) to appropriate containers. Use heavy-duty plastic freezer bags, rigid-sided plastic containers or freezer-safe jars, leaving at least 1 inch headspace between the soup and the top of the container.

In order to keep bags flat for stacking, place them on trays until frozen. The trays will also guard against leaky bags. Another option is freezing in ice cube trays and transferring to bags so you can more easily control the amount you need in a recipe.

For the best quality, use frozen broth within one year.


Here are some basic pointers for preserving with a pressure canner.


Pressure Can

Always use a pressure canner to can vegetables and vegetable broth. Low-acid foods cannot be safely canned in a water-bath canner.

If you’re using a dial-gauge pressure canner, be sure to have the gauge tested every year. (Contact your local cooperative extension office for testing locations and dates, or inquire wherever you buy your canning equipment.) Gauges that are 2 or more pounds off should be replaced.

Step 1: Sterilize

Wash jars, lids and rings in hot, soapy water. Drain. Place rack in canner and cover with 2 to 3 inches water. Heat water to 180 degrees F.

Step 2: Fill

If broth has been cooled, skim any fat and reheat it to boil. Fill jars, leaving 1 inch headspace. Wipe jar rim, place lid and screw on ring until finger tight. Place jars in canner, being careful not to tip them.

Step 3: Process

Lock lid in place and turn burner to high. When steam is exiting the open vent or petcock, set timer for 10 minutes. At the end of that time, put the weight on the vent or close the petcock.

(Use the 10-pound weight if you are at or below 1,000 feet of elevation, 15 pounds if you are above that.)

When the dial reads 11 pounds of pressure (at zero to 2,000 feet of elevation), or the weighted gauge begins to rock, set your timer: 30 minutes for pints or 35 minutes for quarts. If you live in an elevation above 2,000 feet, increase the pressure by 1 pound for every 2,000 feet. Maintain this pressure (or slightly above). If the pressure falls below the mark at any time, restart the timer once it returns to the correct reading.

At the end of the processing time, turn off heat and allow pressure to fall to zero naturally. Do not attempt to cool the canner or remove the weight. Once the gauge has returned to zero (or the vent lock has returned to its normal position in canners without gauges), carefully remove the weight or open the petcock.

You can unlock the lid, but do not open the canner. Wait an additional 10 minutes before removing the lid to decrease the risk of getting burned by released steam.

Step 4: Cool

Remove the jars from the canner using a jar lifter. Take care not to tilt the jars or they might not seal properly. Place jars on a folded towel or cooling rack, leaving space between jars. Make sure they are clear of any drafts; do not tighten or remove rings, and leave the jars undisturbed until completely cool.

Step 5: Store

After 12 to 24 hours, check seals. Immediately reprocess, refrigerate or  freeze any jars that have not sealed. Remove rings from sealed jars. Wipe jars clean, label and store in a cool, dark place for up to one year.

Once you get in the habit of making vegetable broth, you’ll find your compost buckets don’t fill up as quickly, with more of the vegetable trimmings going into the stockpot. Make homemade broth a permanent and indispensable staple in your kitchen, and you’ll always have the means to enhance your meals.


vegetable broth recipe recipes
Virginia Pinkston

Sidebar: In Season

Jason Robinson, sous chef at Heidi Tunnell Catering Company in Creswell, Oregon, whose motto is “Let’s try it,” recommends experimenting when it comes to what vegetables to use for broth. Here are some seasonal suggestions:

Spring

  • leeks (white and green parts)
  • peas (including pods)
  • carrots
  • green garlic
  • spring onions
  • leafy greens (small quantities, shorten cooking time)

Summer

  • tomatoes
  • baby carrots
  • green beans
  • fresh shell beans
  • summer squash
  • fennel (use sparingly)
  • corn cobs (try roasting first)
  • roasted eggplant

Fall

  • parsnips
  • beets (use sparingly)
  • winter squash (especially seeds and pulp)
  • leeks
  • cooking water from dried beans as liquid

Winter

  • potato skins (add toward end of cooking)
  • winter squash (especially seeds and pulp)
  • root vegetables (red beets will turn broth red; turnips can be too strong)
  • mushrooms
  • lentils (will thicken and cloud broth)

Recipe: Spring Vegetable Broth

This is a delicately flavored broth, so use strong herbs, such as rosemary and sage, sparingly, if at all. These measurements are approximate. It’s OK if you use a little more or less of a certain ingredient.

Yield: about 7 cups

Ingredients

  • 2 T. vegetable oil
  • 1 cup finely chopped leeks (white and green parts)
  • 1 cup finely chopped yellow onion
  • 3 cups chopped bok choy or Chinese cabbage
  • 4 cups chopped mild greens (e.g. spinach, romaine lettuce)
  • 1/2 cup chopped pea pods or snap peas
  • 7 cups cold water
  • 1/2 cup chopped, mixed fresh herbs (mostly thyme and parsley)
  • pepper to taste

Preparation

In large sauté pan over medium heat, heat oil until shimmering. Add leeks and onions, and sauté until leeks are wilted, about 4 to 5 minutes.

When onions are soft, add bok choy, greens and pea pods, stir, and cook 3 to 4 more minutes or until greens are wilted. Transfer to 6-quart stockpot and add water.

Over medium-high heat, bring water just to simmer. Reduce to low to maintain gentle simmer for 40 minutes. Add herbs and simmer 10 more minutes. Strain broth, taste and adjust seasoning as needed.

Refrigerate for up to three days, freeze or can.


Recipe: Winter Vegetable Broth

Mushrooms add a wonderful earthiness and make this a good alternative to meat stock or addition to meat dishes. I prefer to use golden beets in this soup both for their color and flavor, but you can substitute red beets.

Yield: about 8 cups

Ingredients

  • 1⁄4 cup vegetable oil
  • 2 cups chopped golden beets
  • 2 cups chopped carrots
  • 3 cups chopped yellow onions, divided
  • 2 cups chopped rutabaga
  • 2 cups chopped mushrooms
  • 8 cups cold water
  • 2 T. dried thyme
  • 1 T. peppercorns
  • 2 tsp. dried rosemary
  • 2 T. soy sauce (optional)

Preparation

In large sauté pan over medium heat, heat oil until shimmering. Add beets, carrots, rutabaga, mushrooms and 11⁄2 cup onions and sauté 10 to 15 minutes until onions are soft.

Transfer vegetables to 6-quart stockpot, along with reserved onions. Add water and peppercorns.

Bring to simmer and hold there for 40 to 45 minutes. Add dried herbs and cook an additional 10 to 15 minutes. Strain broth, discarding solids. Add soy sauce if desired.

Refrigerate for up to three days, freeze or can.

This article appeared in Hobby Farm‘s Best of Hobby Farms Home 2019, a specialty publication produced by the editors and writers of Hobby Farms magazine. You can purchase this volume, Hobby Farms back issues as well as special editions such asBest of Hobby Farms and Living off the Grid by following this link.

Categories
Animals Poultry

Raising Meat Chickens Off-Grid Is Just A Matter Of Timing

What do you know about protein? Or, more to the point, what do you need to know about protein beyond that it’s a really important component of every cell in your body and you need a fair amount of it to do things like generate muscle, make enzymes and walk across a room?

For those living off-the-grid lifestyles, the need for protein rivals that of our hunter and gatherer forbearers. Doing things the hard way on purpose calls for a nutrient-dense diet.

Garden-raised beans, legumes and nuts are great, but, for omnivore diets, meat is really a prime protein source. Sure, hunting can fill freezers and bellies throughout the seasons. But if you’re seeking a little more control over your menu than the forest provides, homegrown livestock represents protein-dense meals for months to come.

Pastured chicken is an excellent protein source. These chickens are healthier than red meat, versatile and delicious. There are some upfront considerations you’ll need to make, but once your yard birds settle in, you’ll wonder how you ever lived without the delectable protein of homegrown grilled chicken or backyard coq au vin.

Breed Matters

Generally speaking, there are two paths forward when raising chickens for meat, determined by a loose breed association.

Birds bred to grow fast and large, or broilers, are commonly recognized as “meat birds.” Most often these are Cornish cross or Cornish Rock chickens. (Red Rangers are considered a heritage broiler.)

They eat a huge amount daily, producing copious meat in the breast, thighs and legs. They reach slaughter weight around 7 weeks. Combine this with their limited mobility, and you get the tender white meat many associate with chickens.


Here’s what you need to know about raising broiler chickens for meat.


Small-Farm Favorites

While broilers are the backbone of the commercial poultry industry, they’re also popular with small farmers for their economical feed conversion rate—they make a lot of muscle from limited
feed—and the quality of their meat.

When raised outside, most often in movable pens, broilers enjoy a high-quality life. They fertilize pastures and produce meat enhanced by flavors of grass and foraged bugs.

You can raise broilers off the grid—after going outside, they require only shelter, feed and water—but meat storage can be a challenge. Most on-grid farmers raise a flock to slaughter weight, then store carcasses in a freezer.

Pressure canning your chickens is an option for off-grid meat storage. But careful scheduling can ensure you have fresh birds for roasting, grilling or frying all summer long.

Seek out a hatchery that has low minimum orders. Stagger small orders a few weeks apart to ensure birds come of age at different times throughout the season.

For example, if you order six Cornish cross chickens—often the minimum for free shipping—you can begin harvesting them one at a time beginning at the age of 4 weeks, when they are considered Cornish game hens.

Just choose the largest from the flock each time you go out to collect dinner. Males grow faster than females, so you’ll probably take them first and harvest the females last.

When your final two chickens are 8 weeks old, take both. Solitary conditions ail a chicken left alone in a pen.

Order more chicks to be delivered when your first flock leaves the brooder. This is usually around 4 four weeks, when they’ve feathered out enough to withstand temperature changes.

For your season’s final flock, order as many chickens as your pen can hold, then slaughter, process and can them all for meat through the winter.         

chickens chicken meat off-grid
Rodney Wilson

Dual-Purpose

The second way of raising birds is simpler and involves dual-purpose breeds, traditionally raised to provide eggs as well as meat. Popular dual-purpose chickens include:

  • Jersey Giant (also called “poor man’s turkey”)
  • Black Australorp
  • Dorking
  • Speckled Sussex
  • Wyandotte
  • Orpington

The immediate benefit is the addition of eggs to the menu, but it’s also handy that these birds can be processed on demand.

Usually this happens once egg production slows down after the chicken’s first year. No schedules, special housing or long-term storage is required. Just catch, kill and process a bird for dinner.

There are some cons, though, with time and texture being among the most notable. Dual-purpose chickens take longer to reach maturity—as long as 8 to 9 months—during which time they move around a lot, hardening muscle fibers.

For people accustomed to commercially available chickens, the tougher meat could be off-putting, especially when fried. Younger dual-purpose birds are, however, great for roasting, while older hens are good in a stew pot.

Getting Started

Regardless of which breed you raise, a chicken journey starts with chicks. Order these for delivery from a hatchery with National Poultry Improvement Plan certification. Most hatcheries have mail-order catalogs, and you can place an order online or by phone.

You’ll order your chicks according to hatch date. Mark this date on the calendar and start getting things ready for the day you’ll pick them up at the post office. Then start addressing climate controls, as chicks need very specific temperatures in their first weeks: 90 to 95 degrees the first week, reduced 5 degrees weekly until week five.

A lidded, ventilated box next to a wood-burning stove or other constant heat source can bring temperatures to exact points in tandem with a succession of hot water bottles placed within the box and replaced every 4 to 6 hours.

If you have a robust solar system, you might choose to use a heat lamp, gradually moved higher to reduce temperatures.

Feed chicks starter crumbles in chick feeders—pay attention to the ingredients, too, as some are medicated and others not—and make sure there’s always fresh, clean water available.


Raise meat birds for healthy, homegrown protein.


Living Conditions

You’ll also need to provide and maintain bedding material such as pine shavings or straw. Avoid potentially slippery surfaces, such as newspaper, which can lead to “spraddle leg,” and clean out the brooder at least once a week, adding fresh bedding daily between cleanings.

And keep an eye on chick’s hind ends. A condition known as “pasty butt,” treatable with a wet washcloth, can be fatal.   

Your chicks can go outside once they feather out around 4 to 5 weeks (different breeds develop at different rates). Switch broilers to a grower feed at 5 weeks, and dual-purpose chickens to layer feed at 18 weeks.

If you’re raising dual-purpose birds, they need a coop or tractor with nesting boxes and roost bars.

Broiler chickens don’t need either of these. A mobile pen and the means to move it once or twice a day will keep them on fresh grass.

chicken chickens off-grid meat
Rodney Wilson

Processing Day

As mentioned earlier, you can start taking broilers for processing as early as 4 weeks. Dual-purpose chickens can be processed starting at 4 to 5 months old.

Processing is the same regardless of breed. You just need a metal cone affixed to a tree, a sharp knife, clean water and a sanitized surface. (A propane grill and large pot are optional but helpful.)   

First, select the chicken(s) you’d like to process—the largest male or one with a problematic personality. Separate this bird or birds from the rest so that it can withdraw from feed for 8 to 12 hours, clearing the digestive tract.

Ideally, you withdraw the chicken from feed overnight for an early-morning slaughter. Collecting a sleepy bird is less stressful than catching an alert one.

Once you have your bird, clasp it by both feet, then invert it so that the head points to the ground. Hold the chicken’s head in position for a few seconds, then let the bird go limp—not asleep, exactly, but unresponsive.

Insert the chicken headfirst into the metal cone so the head emerges from the bottom (sometimes you have to reach with two fingers to pull it all the way down). Take the sharp knife in one hand and the head in the other, and, drawing the knife toward you against the neck, sever the arteries on each side. Cutting the arteries in this way allows the heart to pump all the blood out for a quick, efficient death.

(Note: As the nervous system shuts down, the carcass is likely to thrash. It’s a neurological response, and the bird is already dead, but secure either the head or feet to ensure it doesn’t flop out.)


Keep these five things in mind when processing chickens.


Carcass Prep

Once the carcass has bled out, de-feather it. You can heat a pot of clean water on a grill to 140 degrees and dunk the bird to loosen the feathers, or you can hang the bird by its feet from a tree branch and hand-pluck.

As a rule, white feathers are easier to remove than darker ones.

Once the carcass is free of feathers, place it on a sanitized surface and, with a sanitized knife, chop off the head and cut around the chicken’s vent—the multipurpose cavity in the rear—being careful not to slice through the intestine where it attaches. (Putting a finger into the vent can help prevent this.)

Then, turn the chicken upright and eviscerate. The organs should all come out together with a tug. Put a hand into the empty carcass and scrape your fingers against the rib cage to pull free the lungs and any clingy bits.

Finally, cut the feet free from the body at the joints.

Rinse the carcass, and, voila—your chicken is processed. If you’re batch processing, put the chicken into a cooler full of ice water to chill and go fetch your next bird.

Pasture-raising chickens for meat is not effortless, but it’s a straightforward way to provide clean, healthy protein for the off-grid dinner table. And a hearty chicken dinner can be just the thing to fuel up before heading out for a long day of hunting wild game or working in the vegetable garden.   


Categories
Animals Large Animals

Angelia Silvera (The Donkey Listener) On Training Donkeys

“Donkeys changed my life for the better,” says Angelia Silvera, who’s become known as the Donkey Listener in equine training circles.

Based in Tennessee, Silvera’s initial interest in donkeys came about when she learned that they were effective guardians for at-risk livestock.

“I had tried livestock guardian dogs, and they just did not work out for multiple reasons,” she recalls. “I decided to get a donkey and, after reading about donkeys, learned I would need two. Not all donkeys are cut out for guarding, so you have to choose the donkey carefully.”

Silvera’s guardian donkeys worked out. And after becoming smitten by their “personable and affectionate” nature, she eventually graduated to becoming a respected donkey trainer.

We spoke to Silvera about some vital dos and don’ts for early-stage donkey training. She also dispelled some of the misconceptions people have about the animals.


Which are better for your farm—donkeys or horses?


Don’t Treat Donkeys Like Horses

https://www.instagram.com/p/CBNpVIGg6KG/

“I learned very early that donkeys cannot be trained like a horse,” says Silvera when asked about the earliest lesson she learned when coming to grips with her new equine friends.

“Training a donkey like a horse often leads to a sour donkey,” she explains. “Donkeys also need you to earn their trust before they willingly do as you ask. You’ve got to ask the right way.

“Setting up communication makes life much easier for the donkey and the caregiver.”

Building Trust With Your Donkey

https://www.instagram.com/p/CAk0HFUAqwi/

Going deeper into building trust with your donkey, Silvera says that as long as the donkey in question “has had good experiences with humans and had some kind of early training,” then it shouldn’t be too difficult to forge a bond.

But if a donkey has been through negative experiences with humans, including being mistreated, it’s imperative you don’t rush what might be a fearful donkey.

“Taking into consideration the donkey’s background and past experiences is important—having empathy and trying to see the world through its eyes and accepting it takes the time it takes.”


Here are some important donkey health pointers new keepers should know.


Early Donkey Training Dos & Don’ts

https://www.instagram.com/p/B-sJ7GWA4YT/

If you’re new to donkey training, Silvera says patience is key.

“No time spent earning your donkey’s trust is a waste,” she explains. “If you spend time earning that trust, then setting up solid communication with your donkey, they will be more likely to do as you ask no matter what the direction you take in more advanced training.”

Never rush a donkey, especially during the first stages of training, as it could set you back.

“Get in the mindset that you are investing in a partnership with a companion,” Silvera says. “Good relationships take time to build.”

Dispelling Common Donkey Misconceptions

https://www.instagram.com/p/CAnMc58ASuX/

Asked about the biggest misconceptions people have about donkeys, Silvera says, “It’s that they aren’t as smart as horses. In reality, they may be smarter. They are cautious and self-preserving and they prefer to think about things before they do them, especially if they aren’t sure about the person who is asking them to do something.”

Silvera adds that correctly trained donkeys are “a surefooted riding mount.” They also make for “amazing hiking companions,” not least because you’re able to pack a lunch on the donkey’s back.

Getting the Right Donkey for Your Land

https://www.instagram.com/p/CAsYTWTAvVx/

If you’ve been considering adding a donkey to your homestead, Silvera encourages people to “think about what their goals will be for the donkey.” Also spend time reading up and watching videos about the animals.

“After you decide what you want the donkey for, then seek out the donkey that can best fit your needs,” she explains. “For example, if you want a donkey to guard your goats and provide enjoyable rides around the farm, make sure to choose a donkey with the right temperament for guarding and that’s big enough to carry your weight. Choosing the right donkey for your goals will help ensure that you and the donkey will be successful.”

Finally, Silvera adds that donkeys are herd animals. “Be prepared to have at least two. Donkeys need other equine.”

Follow Angelia Silvera at Instagram.

Categories
Poultry

4 Steps to Properly Burying A Deceased Chicken

There comes a sad time in all our lives when a favorite hen or rooster passes on, arriving at the fabled rainbow bridge to await the day we can cross together into sunnier pastures.

While their avian spirits might now soar free, their earthly remains require prompt attention. Giving your beloved bird a proper burial goes without saying but, before you grab your shovel, read through our guidelines to ensure your send-off is stress free.

Check Your Local Ordinances

Most cities and towns have very specific regulations regarding the disposal of animal remains. Some municipalities have separate ordinances for pets and for livestock. Others have one regulation that covers all carcasses.

Before burying a chicken, review your local laws to ensure your burial plans fall in line with what your town allows. Ordinances might regulate:

  • At what distance from existing structures and property lines you can bury an animal
  • How close you can get to wells or bodies of water
  • Whether animal burial is even permitted in your area

If the home burial is not allowed, you may wish to contact a local veterinarian to learn about such options as cremation or pet-specific cemeteries.


Read this author’s account of the recent loss of a beloved rooster.


Contact Your Utilities

I cannot emphasize how important it is to reach out to your local utilities office prior to digging.

These days, everything runs underground: natural gas, water lines, fiberoptic cables, electricity, you name it. Your neighbors will be less than happy with you if you interrupt everyone’s Internet connectivity because you accidentally snapped a line burying Hennifer.

811 is the national number to call before you dig. You can also locate your state’s service online by searching for your state’s name plus 811.

Dig Deep

Once you’ve checked both your ordinances and utilities and have selected your burial site, the next crucial step is to dig deep when burying your chicken.

I would need more fingers and toes to count the number of times I’ve heard from heartbroken poultry (and pet!) owners who went to pay their respects the day following the funeral, only to find a dug-up hole and gnawed over remains … or no remains at all.

Predators have a sense of smell that far surpasses that of humans. If you bury your bird only 1 to 2 feet down, you can bet you’re providing dinner for the local wildlife.

Dig your burial pit to a minimum depth of at least 3 feet. If you stand in the hole and ground level is at your hip level, then you’ve reached that minimum. Don’t neglect to dig widely as well to avoid laying your rooster to rest standing up.


Dealing with the winter loss of a chicken presents certain, climate-specific challenges.


Final Preparations

Before the actual burial, remove any non-biodegrable items such as saddles, tags and leg rings from your bird.

Pour approximately one cup of lime (available at farm supply and hardware stores) into the burial pit to cover the bottom. Lay your bird to rest on top of the lime, then cover your bird with one more cup of lime. The lime will aid in decomposition and will also mask any smells that might attract carrion eaters.

Fill the hole completely in with soil and tamp it down firmly. You may want to stake a tarp on top of the hole or otherwise cover it up to minimize access for a few days—long enough for the soil to settle but short enough so that grass beneath does not bleach out from lack of sun. You may also wish to place a grave marker at the site, as it will blend back in with its surroundings after a few weeks.

Saying goodbye to a beloved animal is never easy. My hope is that these guidelines make burying your chicken easier and parting at least a somewhat sweeter sorrow.

Categories
Animals Farm Management Poultry

Keep Your Chickens (And You) Free Of Salmonella

Bacteria causing food-borne illnesses have plagued humankind for centuries. They have been the driving force behind many of the regulations that are in place when it comes to the handling, preparation and selling of food.

Salmonella is just one of the bacterial organisms that has been responsible for human illness from foods we ingest.

In the United States, the Center for Disease Control and Prevention has reports indicating increases in the popularity of backyard poultry flocks has been associated with increases in live-poultry associated salmonella outbreaks.

Looking at data from the years 2000 to 2018, there were 76 outbreaks of salmonella linked to backyard chickens. Within these, there were a total of 5,128 illnesses, 950 hospitalization and 7 deaths from salmonella.

In particular, the highest numbers of outbreaks were in 2016 and 2017.

The Where

So where does salmonella come from with chickens? It can live within the birds’ gastrointestinal system and harbor there for years. Salmonella then passes out from the bird in its feces and can spread to other locations.

The bacteria can get on their feet and feathers and in their mouths. It can also be present on or in their eggs.

Feces of an infected bird can easily soil objects that the bird has been around, such as bedding, perches and nest boxes. A person can also act to spread the disease by getting the bacterium on their hands, shoes, clothing or farming equipment.

If this person is moving from one flock to another, they can spread the disease through these contaminated objects.

A bird will contract it from another individual through one of two routes: either horizontal or vertical transmission.

chicken chickens salmonella backyard flock
TaraPatta/Shutterstock

Horizontal Transmission

This means that the organism transmits from one bird to another bird through oral ingestion of products from the infected or by inhalation by the uninfected bird. Dust particles from tainted feces or feathers are the source for inhalation of the organism.

Vertical Transmission

This is the other route through which a bird can become infected with salmonella. It occurs when the bird contracts it from its parent. If the parent bird has it in their reproductive system, it can transmit to the young bird through the ovum or sperm.


What’s the risk of contracting salmonella from a backyard chicken flock?


How Humans Get It

Humans contract the organism by oral ingestion of contaminated products. Yes, this means that if you get bird poop in your mouth, you could contract the disease.

Most people aren’t outside purposefully ingesting chicken feces. However, it could happen with young kids who don’t know any better and will put inappropriate objects in their mouth.

But human infection more commonly occurs through contacting items that got contaminated.

One well-known route is through simply forgetting to wash one’s hands. For example, if a bird has salmonella and a backyard farmer goes to clean the coup or perches and fails to wash their hands before ingesting a bite of food, they may inadvertently have some bacteria on their hands.

This could then transfer to the food item they next place in their hands. Then when they go to take a bite of that food item, they could get it into their mouth.

An interesting fact is that just because a chicken has salmonella doesn’t mean that it will always be sickened by it themselves. Sometimes it is simply a carrier of the organism.

Have you ever heard of Typhoid Mary? She was a cook back in the 1800s who was a healthy carrier of the bacterium Salmonella typhi. She inadvertently spread the organism, causing illness and even death in some people. However, she herself was not ill by this organism.

This same situation can happen in chickens.

chickens chicken salmonella backyard flock flocks
r.classen/Shutterstock

The Why

Illness from salmonella in chickens depends upon numerous factors, including:

  • The particular species of salmonella contracted
  • The birds’ own immune system health
  • Their environment.

If salmonella sickens a chicken, it may show nonspecific signs such as lethargy, weakness, anorexia, weight loss and reduced egg production.

It might also have loose, yellow-colored droppings, and its combs and wattles may turn a purple color. These signs can be nonspecific, however. Therefore, testing a bird for salmonella is necessary to obtain a diagnosis.

Contact a veterinarian achieve a diagnosis in a bird. Testing may involve performing cultures or blood tests.

When people become infected with this bacterium, they may experience fever, chills, diarrhea, cramping and nausea. Sometimes signs like this are self-limiting and will resolve as an individual’s immune system kicks in.

Other times, they won’t resolve and can lead to serious and life-threatening illness in humans. The individuals who are most at risk for having severe problems from the bacteria include children younger than 5, adults older than 65 and immunocompromised people.

The CDC recommends that a physician check out anyone suspicious of having contracted the disease. Guidelines state that for children, if there has been diarrhea for greater than 24 hours, vomiting for more than 12 to 24 hours, a fever more than 102 degrees Fahrenheit, dehydration or bloody stools that individual should be checked out by a doctor.

For the average healthy adult, signs such as diarrhea or vomiting for more than 48 hours, a fever greater than 102 degrees or dehydration could necessitate a visit to a doctor.


Here are 10 tips for deep-cleaning your chicken coop.


The Treatment

Treatment of salmonella in chickens is somewhat of a controversial topic. Although antibiotics are considered the standard route to resolve bacterial infections, they may not always be the best thing for treatment.

Because chickens can be carriers of the bacteria, they may not be able to clear the organism 100 percent with antibiotics. This could then lead to the development of bacterial resistance.

This means the focus is more on supportive care measures for birds ill from salmonella. Treatments can include fluid support, nutritional support, probiotics and gastrointestinal support.

Antibiotics may be necessary at times. But it’s important to allow a veterinarian to make this call so that other issues do not arise.

People who have contracted salmonella will also likely require supportive care in the same way chickens receive it when they are ill from the bacterium.

Antibiotics may or may not be necessary for humans with salmonella infections. However, just as mentioned with the chickens, it’s up to a doctor to determine who is in need of antibiotics and who is not.

The Solutions

Although all of this may sound alarming, it’s not meant to scare people away from chicken keeping. Rather, having knowledge of what can go wrong empowers a backyard farmer to avoid problems and enjoy a more fulfilling experience with their chickens.

First and foremost, in order for the chicken farmer to keep themselves and their families safe, it is important that good hygiene be followed. After handling your chickens or any of their items, make sure to wash your hands thoroughly. Use soap and water, lathering the soap up well.

Rub it between the fingers, along the palms and backs of the hands, up the wrists and to about mid-way on the forearm. Rinse the soap well, and dry your hands thoroughly before touching food items.

If soap is not available, use hand sanitizer in a similar fashion after rinsing any particulate matter off of hands with water. Instruct children how to wash their hands and monitor them to make sure they are doing it correctly.

Second, appropriately cook all chicken products, meat and eggs. Don’t consume food items with raw eggs such as dough. Avoid consuming undercooked meats. Cook chicken meat to an internal temperature of 165 degrees Fahrenheit.

salmonella chickens chicken backyard flock
irem01/Shutterstock

Some Others

Other practices to help reduce the chances of salmonella contraction include wearing boots or clothing specific for use only when working with your birds and not taking these items indoors.

Try to avoid allowing backyard chickens in the house. They could track unwanted bacteria indoors or poop on something inside, leaving behind a possibly contaminated item.

Although it may be difficult to resist, avoid kissing your pet birds or having them near your face. Yes, they are cute, but contracting salmonella is not!

You can also take measures to reduce contamination of eggs with salmonella.

First, try to pick up and remove eggs quickly from the coop. The longer an egg sits in the coop, the greater the chance it has to become contaminated with feces or other items that are harboring salmonella.

Once you collect all the eggs, remove any debris from their surface with a fine sandpaper sheet or cloth. You can clean the eggs with hot water but not cold water. Cold water could draw any bacteria that are on the egg’s surface inside.

Next, refrigerate the eggs. Discard any cracked eggs, and avoid feeding eggshells back to birds, as these could have salmonella on their surface. Also, do your best to regularly clean the chicken coop and environment to keep bacteria numbers low.

Salmonella can be a frustrating organism to deal with in backyard poultry, but one should not feel powerless or overwhelmed. Knowing how to avoid and manage it within a flock can allow the urban farmer to take control and live a healthy life with their chickens.


Sidebar: USDA-NPIP

One other way to try and reduce salmonella in your flock is to purchase birds that have been certified by the U.S. Department of Agriculture National Poultry Improvement Plan to be free of certain forms of salmonella.

This is a voluntary program where farmers can have their birds tested for certain types of salmonella to see if they are carriers. If they find positive cases, the farmer can then choose to not sell these birds and segregate them from their flock of disease-free birds.

If you purchase a bird from this route, you can feel more comfort you are unlikely to be bringing in a pathogenic form of salmonella to your flock. Find out more at www.poultryimprovement.org.


Sidebar: Sage Advice

Now, although chickens are known to carry this organism, there may be something that can be done for those individuals that do harbor it. Sage, the herb known as Salvia officinalis, also used for culinary purposes, has been shown to have some effects at combating salmonella.

The addition of sage extract to the diet has been shown to reduce counts of salmonella in the liver, spleen and cecum of birds. This suggests that this could be effective in protecting salmonella-infected chickens.

The essential oils of this plant, known as alpha-thujone, camphor, 1,8-cineole and alpha-pinene, have also been shown to be effective against other human bacterial pathogens such as Staphyloccocus aureus, E. coli and Listeria monocytogenes.

Adding sage to the diet of chickens, whether chopped, dried or in the form of the essential oil added to the water, may be a good preventative measure to help protect them and us from this damaging salmonella bacterium.

This article originally appeared in the May/June 2020 issue of Chickens magazine.

Categories
Farm Management

A Farm Plan Is Important, Especially For Small Farms

Time and space are two elements that are critical in any farming enterprise, and the smaller the enterprise, the more critical they become. Within small urban agricultural enterprises, the careful timing of all of our actions allows for maximum production, greater efficiency, higher quality and more success in the marketplace.

Time in the small farm enterprise must be balanced with space. They are interconnected. The successful urban farmer will develop an overall plan that plots out the stages of a crop’s development from seed to sale, including planting information, harvest details and sales/marketing projections.

The plan determines, for example, how many carrots will be planted, in which block and during what time period, and when and in what amount repeat plantings will happen. And while instinct, experience and intuition are critical to farming, it’s helpful to have a good written plan to guide you, especially if you are just getting started.


Check out the Combstead Urban Farm, where chickens rule the roost.


Who Are You?

Farmers typically fall into one of two distinct personality types: those who rely more on intuition, experience and memory and those who rely more on planning. Find a way to develop and incorporate both aspects. Making a good farm plan each year is about building the foundation.

Intuition and experience will allow you to respond to the inevitable changes of a biological system that is constantly shifting. The plan is the guide, and crop production and diversity at our largest farm changes as the season progresses. A good farmer knows how to move within that plan and when to deviate from it.

small urban farm plan
USDA/Flicker

Set Goals

Before making your plan, revisit your mission and goals: Whom are you serving, and what is the purpose and vision of your farm? Let these goals guide you as you develop the plan, and again as you implement it. If you are growing for a membership program like a CSA, a good plan is very helpful in order to ensure a consistent supply of a variety of foods to that membership. This also holds true if your crop system is very diversified: a large number of different crops, plantings and harvests over the course of a season are more easily managed with a strong plan.

The planning process also serves to even out the workload over the course of the season. Some people may have a goal of working in very distinct chunks: For example, just hiring in a crew for a few weeks and having the farm be quiet for the rest of the year. Others may want to keep the work evenly spread out over the course of the season.

If you are working by yourself, spreading out the workload helps prevent burnout, and if you work with a crew, providing them with consistent predictable work throughout the full season helps retain people so that you don’t have to retrain folks every year.


You should plan ahead if you want to sell at the farmers market.


Plan on Planning

Good planning helps you use time efficiently during the season and anticipate needs well in advance in order to prepare for them; good planning prioritizes proactive management over reactive management.

For example, reactive management could be planting a crop and realizing too late that it needs to be trellised but you don’t have the stakes or the string, and that your time is already committed to some other crop.

With proactive management, you have thought through all of the needs and cycles of each crop and have recognized how those needs combine with all the other crops. While there will always be a certain amount of stress associated with commercial farming, good planning can reduce that stress to a manageable level. Your farm plan will likely end up being a series of sub-plans: documents and spreadsheets that, used in tandem, help you track your crops from seed to sale.

The overarching plan should include at least the following elements:

  • What you are going to plant
  • How much of it to plant
  • Where you will plant it
  • How you will plant it
  • When and how you will harvest it
  • How much it’s going to cost to grow it
  • How much the crop is going to yield
  • To whom and how you will sell it
  • How much it’s going to gross financially
small urban farm plan
HorticultureGroup/Flickr

Get Started

To get started creating the plan, you’ll need to have some data on hand, such as field notes, yield data from previous years, the dimensions of your planting blocks or fields, and how many boxes or beds can fit into a block or a field. You need to know how much space you have to work with, and any characteristics of those spaces that make them more or less suitable for different crops or for planting at certain times of the year.

Other helpful resources are seed catalogs, any notes from past markets or marketing, and any field diaries from prior years. Seed catalogs are an excellent free source of information if you are just starting out and don’t have any field diaries or prior notes to fall back on (and if you have been farming for a while, they are a great addition to your own notes).

Some seed catalogs have great cultural information sections that include yield data, growing requirements and field spacing for a multitude of crops.

Sales Plan

You can create your plan on paper, but a computer has many benefits. Spreadsheet programs allow you to insert formulas, cross-reference and calculate costs and projections, and visualize time and space.

At Sole Food, we typically work backward, creating a sales plan and a harvest plan, and then a planting plan. To create your sales plan (what you will sell, and to whom) and harvest plan (when you will be harvesting each crop for your customers), you’ll need to determine what your six to 10 anchor or signature products will be, what outlet(s) these products are best suited for (restaurants, farmers’ markets, retail, etc.), and when you can have those products available.

Start the sales plan with some simple research (visiting markets, talking to other growers, etc.) to come up with a list of products and a price range for each product (keeping in mind that prices will differ depending on your sales outlets).

Essentially, you’re planting the entire farm on paper; consider it a dry run for the real thing. It also ensures that you allow enough space to grow the crops in the volumes you need. It’s easier to go back and reconfigure a plan on paper than to do it in the field!

This farm plan article has been excerpted with permission from Farm the City by Michael Ableman, published by New Society Publishers in April 2020. It appeared in in Hobby Farm‘s Urban Farm 2020 annual, a specialty publication produced by the editors and writers of Hobby Farms magazine. You can purchase this volume, Hobby Farms back issues as well as special editions such asBest of Hobby Farms and Living off the Grid by following this link.


Categories
Equipment

Tractor Won’t Start? It Might Be Your Battery Terminals

During the spring, while working on annual machinery maintenance, I was surprised to discover that trusty old “Little Mo”—my John Deere Model 40—wasn’t in the mood to start when asked.

This was noteworthy because Little Mo, despite her age, has never had any meaningful issues with starting. She’ll fire up in the dead of winter if necessary, as my brother humorously discovered on one particularly cold afternoon.

Yet here I was, hoping to move a hay rake, and Little Mo was stubbornly refusing to show signs of life.

It wasn’t as though the starter was spinning and the engine was refusing to catch. Turning the ignition produced no response whatsoever.


Keeping an old tractor going is just a case of maintenance (and appreciation).


An Electrical Issue

This was encouraging in one respect. Presumably, there wasn’t anything wrong with the engine (always a relief), and the issue lay instead with the electrical system. Which, in Little Mo’s case, involves the starter and little more, since the headlights haven’t worked in decades.

My first thought was that the battery must have failed. This seemed odd, though, since Little Mo had been working fine a few days before.

But then an alternative answer popped into mind. Perhaps the problem wasn’t with the battery, but the battery terminals and/or cables instead.

Arguably nothing can shut down a tractor as quickly as an issue with the battery terminals. If the battery is unable to pass an electrical current through the cables to power the tractor, you’re not going anywhere, even if all other parts are in perfect working order.

Starting a tractor starts with the starter, after all!

About Batteries

A tractor battery has two terminals—positive and negative, also referred to as battery posts. Upon these, a pair of color-coded metal cables clamp to carry the current to the electrical system.

There’s plenty that can go wrong at the point where the clamps make contact with the battery terminals. The terminals and/or clamps can corrode over time, weakening (or halting entirely) the flow of electricity. Less messy, but still problematic, are loose clamps that fail to securely grip the terminals.

In Little Mo’s case, loose clamps turned out to be the culprit. They’re a little worn out and probably due to be replaced. After tightening the bolts, though, Little Mo has been running happily without any further issues. This proves once again that old tractors really are the best.


The latest may not be the greatest, but it’s not hard to make a case for old tractors !


However…

If corroded terminals and/or clamps had been the issue, though, the solution would have been a bit more complicated.

Many do-it-yourself folks are game to clean corroded components themselves. By mixing a tablespoon of baking soda with approximately 1 1/2 cups of water, these amateur mechanics can use a toothbrush to delicately scrub the resulting solution across corroded terminals and clamps. This cleans the corrosion and restores parts to working order.

But working with and around tractor batteries can be a safety hazard. Water is a good conductor of electricity, so there’s a risk of electric shock if you’re not careful, or if you connect/disconnect the battery cables in the incorrect order (review your tractor’s manual and read battery labels for safety advice).

Also, keep in mind the corrosion you’re dealing with is sulfuric acid, which can be a dangerous irritant to your skin, eyes and lungs. The goal is to neutralize the acid with the baking soda, but there’s still a risk involved.

All battery maintenance—even something as simple as changing or charging the battery—should be undertaken with gloves and safety goggles. And if corroded components are preventing your tractor from starting, consider having a professional mechanic perform the cleaning.

If the damage is too extensive, replacing the battery and/or clamps is a final option that can restore your tractor to perfect working order.

Categories
Animals Poultry

4 Egg Experiments (Or Egg-Speriments) To Try At Home

Egg experiments provide an egg-cellent opportunity to spark curiosity about the natural world in your children (and curious grownups) while also explaining some of the principles of physics and chemistry.

There are many different STEM (Science, Technology, Engineering and Math) projects that can be done using eggs. Here we present four of our favorites that use materials you likely already have around the house. So grab an egg carton or two, and let’s see if these science experiments are all they’re cracked up to be!

Warning: While there are no specific diseases associated with heavy exposure to puns, this article on experiments contains high levels of egg and chicken puns. If you don’t like puns (especially egg puns), this article may stress your hen-durance and make you a little cuckoo.

Note: Aside from a few household items, these egg experiments are easy, fun and safe. While there are no egg-splosions in the following egg-speriments, it’s always better to have an adult do them with little ones.

The Floating Egg

This experiment provides a demonstration of density and its impact on buoyancy. Following the steps here, you’ll find that adding salt increases the density of the water in the glass, until its density exceeds that of the egg, at which point the egg will begin to float.

Materials

  • 2 raw eggs
  • 2 glasses of warm water
  • salt

Method

Add 6 to 10 tablespoons of salt to one of the glasses of warm water, and stir until mixed thoroughly. Place an egg into each glass of water. If the egg in the saltwater sinks, remove it for a moment, and add more salt, stir, then try again!

Wash your hands and cups after handling raw eggs.

egg experiments egg-spiriments science STEM
Nicole Sipe

Buoyancy is a force acting upward that is responsible for keeping the egg, as well as boats, afloat. According to Archimedes’ principle, the strength of the buoyancy is equal to the weight of the displaced fluid.

In this experiment, the salt-water is denser than pure water, which means the weight of the salt water that is displaced is greater than pure water, and its buoyant force is stronger. Because the salt water is denser than an egg, its buoyancy is actually strong enough to keep the egg floating, while the less-dense, salt-free water doesn’t generate a buoyant force stronger than gravity on the egg, so it sinks.

If you want to do an more egg-sotic version of this experiment, go to the Dead Sea, a salt lake bordering Jordan to the east and Israel to the west. The human body can float in its salty water.

Spinning Eggs

Next, try the Spinning Eggs experiment to learn about the physics of rotational motion. Through this experiment, you can demonstrate how an egg’s center of gravity affects rotation, and a bit about Newton’s First Law of Motion.

Materials

  • 1 hard-boiled egg
  • 1 raw egg

Method

Place the eggs on the table and spin them, observe the differences in speed.

Try stopping the eggs by gently placing one finger on the spinning eggs for a moment.

Wash your hands and surface after handling raw eggs.

The raw egg rotates slowly because its interior is a liquid, which moves inside the shell as the egg rotates, causing the center of gravity of the egg to shift, creating a wobble that slows down its spinning.

Conversely, the hard-boiled egg spins faster and more smoothly because the entire egg is solid. Its center of gravity is fixed, and the egg can rotate efficiently around that without a wobble.

Stopping the eggs is an opportunity to introduce Newton’s First Law of Motion, which states that an object in motion stays in motion until acted upon by an outside force. Though friction between the shell and table slows down the raw egg eventually, the momentum of the swirling interior of the egg tends to keep the egg in motion longer.

The reason is that the outside force (friction) acting on the eggshell is weaker on the liquid egg contents (because they can move within the shell) than on hard-boiled eggs where the entire egg is subjected to the force of friction.


Check out these 7 science facts about the egg-ceptional egg.


Bouncy Eggs

Finally, it’s time to make some Bouncy Eggs! One of the most popular experiments with eggs takes only a little vinegar and a lot of patience to demonstrate a remarkable chemical reaction.

Materials

  • 2 raw eggs
  • vinegar
  • 2 large jars or lidded containers

Method

Place raw eggs into two jars. Cover completely with vinegar.

Wait two to three days, or until the entire shell has disappeared from each egg, then drain off the vinegar.

The eggshell should be gone; try lifting the egg up a few centimeters and letting it bounce.

Be aware: The egg is still raw so if it drops from too high, the membrane will break and spill the egg’s contents

Wash hands, jar and surface after handling raw eggs.

egg eggs experiment experiments egg-spiriment
Nicole Sipe

What you’ll observe over the course of a few days is a reaction between acetic acid in the vinegar and calcium carbonate in the eggshell to produce calcium acetate (which dissolves away from the egg into the liquid), carbon dioxide (bubbles) and water.

After this chemical reaction is finished, the eggshell is dissolved, leaving a protein-based membrane behind, allowing the egg to bounce.

Osmosis Eggs

As an extension to the bouncy eggs experiment, you can also take your shell-less eggs and try this fun demonstration of osmosis.

Materials

  • 2 bouncy eggs
  • 2 large jars or lidded containers
  • water
  • corn syrup
  • food coloring (optional)

Method

Place bouncy eggs into two jars. Cover one completely with water and the other with corn syrup. Try adding a few drops of food coloring to each jar.

Wait one to two days, and then examine the eggs again. The egg in water should have grown substantially while the egg in corn syrup will shrivel up.

Wash hands, jar and surface after handling raw eggs.

eggs egg experiment experiments egg-spiriments
Nicole Sipe

Through the process of osmosis, water is able to move across the semipermeable membrane surrounding the egg now that the shell has been removed. This membrane allows small particles like water to cross the barrier in either direction but won’t let larger molecules, such as the proteins in the egg or the sugars in corn syrup, to move through it.

Osmosis moves water from an area of higher concentration to an area of lower concentration, and eggs are about 90 percent water while corn syrup is about 25 percent water. As a result, water molecules move from the jar full of water into the egg in one jar, making the egg grow larger, while water moves out of the egg to the corn syrup in the other jar, causing the egg to shrink.

However, in both cases, individual water molecules move in both directions across the membrane, just more frequently from high water concentration to lower water concentration. This is why, if you used food coloring, the shriveled egg will also have changed colors, because water is moving freely across the egg’s membrane, and overall more water leaves the egg than enters.

We hope the egg experiments were all they were cracked up to be. Please don’t call fowl on any of our puns.

This article originally appeared in the May/June issue of Chickens magazine.

Categories
Animals Farm Management Large Animals

Sheep Can Help You Control Weeds On The Farm

I was chatting with a nearby farmer recently and he told me how much he admired our sheep in their new pasture, which is visible from the road.

“Do they just eat the grass?” he asked “And how much do they eat? “

“They eat a lot,” I replied with a laugh. “And they eat a lot more than grass! We’ve carved out a pasture out of our woods with those sheep.”

Acreage Aches

We live on 20 acres of nearly all woods in southern Indiana. It’s lovely, rolling land that I enjoy tremendously. But it has always been a sore point for me that only about one of those acres is devoted to pasture.

So, when we decided to get sheep a while back, we knew we were going to have to do a lot of work to get it ready. Our one-acre pasture with grass was far from the house. We decided to create a smaller pasture near the house so we could keep an eye on the sheep at first.

Eventually, we planned to fence off the larger grassy pasture as a way of rotating grazing.

Our first venture into using the sheep as weed eaters came when we fenced off that smaller pasture. It was about a half an acre of trees, brush and weeds that had been left dormant for many years.

The proposed pasture adjoined an outbuilding that serves as my husband’s ceramics studio. So we figured we could keep an eye on the sheep. But as we looked at the area, we decided we could have a useful silvopasture as well.

We could have a pasture that includes grass, trees and livestock.


Ever wonder how sheep experience the world around them?


Forbs

A friend and sheep mentor told me to let the sheep clean out the dense brush that included poison ivy, rosa multiflora and tons of tiny tree shoots. I was skeptical, looking at that mess of plants.

But once we finished the fence and introduced five sheep to the property, I amazed over how quickly the weeds disappeared! In two weeks, the property was bare.

Sheep are particularly fond of forbs, which are leafy greens other than grass. In watching my own sheep, I routinely see them choose a tender young bush or tree to attack before they will go after the grass.

Forbs can be flowering plants and are very nutritious.

Many forbs are invasive species, so if you have a patch of kudzu for example, the sheep will eat that happily. Sheep also eat poison ivy and autumn olive, both of which we have in abundance on our land.

sheep weeds weed silvopasture woods plants
Jana Wilson

Know Your Weeds

You do need to be careful that there are no plants that are toxic to sheep. I’ve seen hemlock, for example, on my friend’s sheep farm. She was careful to make sure her electric netting fence kept the sheep away from that. Sheep can die if they eat enough of it.

You also don’t want to let your sheep have access to common garden plants, such as chrysanthemums, buttercups, azaleas, daffodils or elderberry. Those are toxic to sheep as well.

Compared to cattle and horses, sheep eat a wider variety of plants. This is why they are so good at clearing the undergrowth in the woods.

I know some people prefer goats for brush clearing. But honestly I have found sheep to be excellent at controlling weeds in our overgrown Midwestern woods.


Sheep are, quite possibly, the ultimate small-farm ruminant.


We have started using our own electric netting fence to move our sheep around in large areas that we want to get cleaned out. We now have them working on a small area of woods just off of our large field.

When they aren’t working on that, I bring them into the formerly bare pasture that is now planted in pasture grass and clover. I don’t leave them on the new grass long, but just enough for them to strip down the small bushes that want to grow back up and choke out the grass.

I notice when the sheep go in my new silvopasture, they head for the leaves on the small bushes and the weeds before they start nibbling at the tender young grass. After a couple of hours, I have my border collie, Dash, herd the sheep out of the new pasture to give the grass time to grow back—hopefully stronger and thicker than it was before.

And better yet, without weeds.