Categories
Crops & Gardening

9 Tips For Success When Harvesting Raspberries

Raspberries are nutrient-packed berries that come in many colors. You can find raspberries in yellow, red, purple, black and more.

Their canes can be upright or trailing. They ripen around mid-summer in Ontario, and some varieties can yield again in the fall.

Picking raspberries is a subtle art. The following tips are helpful to make sure your harvests are bountiful and enjoyable. Proper picking can ensure you maximize your raspberry patch for quantity, quality and efficiency.

Tip #1: Start to Harvest When the Very First Berries Begin to Ripen

Harvesting early allows you to gain familiarity with this season’s productivity. You are forecasting the yield and helping to plan how much time and supplies are needed to harvest your patch.

Also, by beginning the harvest as soon as the first berries ripen, you ensure no berries will overripen and spoil.


Cherry picking is fun, delicious and builds better communities.


Tip #2: Pick Your Patch Thoroughly

Harvest raspberries by making complete sweeps through the patch.

Being organized about harvesting the entire patch means harvesting the upper, lower and middle canes, and moving systematically from one side to the other on both the left- and right-hand sides.

Harvesting with a friend or colleague is a great way to manage both sides.

harvesting raspberries harvest raspberry
Zach Loeks

Tip #3: Look Under the Leaves

Many fruits hide underneath the foliage, and raspberries are certainly guilty of tucking many of the biggest clusters below the leaves.

Lift canes with your left hand to reveal and reach those clusters beneath. Kneel and gets a kid’s eye view of the raspberry patch to harvest many hidden gems.

Tip #4: Leave No Raspberry Behind

The quality of your patch and future harvests depends on properly harvesting all ripe raspberries. If you leave raspberries on the canes unharvested, they will:

  • become over mature
  • soften
  • rot
  • house beetles, worms and other bugs

This decay and pestilence will spread to good berries in the same cluster. Raspberries ripen in clusters in succession, so you want to keep your clusters clean.


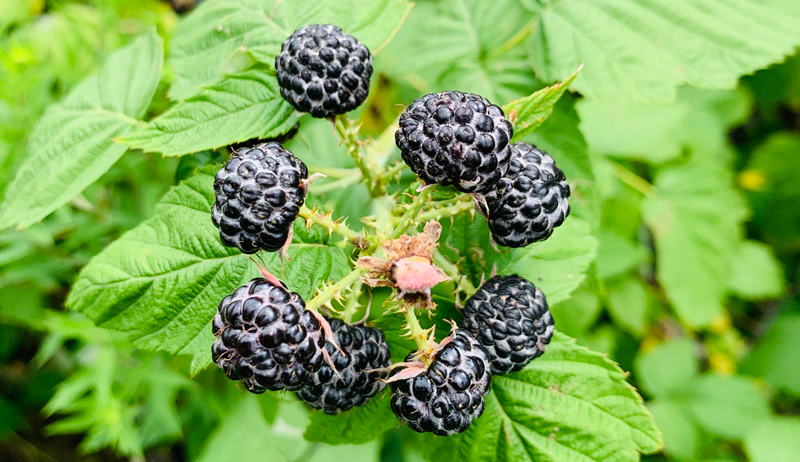
Blackberries and raspberries are popular, and they’re easy to grow at home!


Tip #5: Leave the Patch Better Than You Found It

While harvesting, there will be times when you need to move canes aside to get at the center of the patch, or you may need to lift a cane to harvest underneath.

You can improve the harvestability of your raspberry patch for future harvest days by arranging the canes to improve similar harvest patterns.

Tuck one cane over an adjacent cane to let light in and reveal those unripe berries on the clusters beneath. You can also improve the path each time for harvest flow by pressing down weeds, adding some chip mulch where needed, and generally opening things up.

harvesting raspberries harvest raspberry
Zach Loeks

Tip #6: Harvest Berries Into Boxes, in Boxes, in Boxes

Berries get crushed by their own weight. The best way to harvest berries on most scales is by looping the handle of a 3-litre harvest basket (what peaches are sold in) into the loop of your belt.

Into this basket place two small cardboard or plastic pint boxes (what raspberries are sold in at farmers markets). This leaves your hands free to pick and ensures your berries are safe in the pint boxes.

When you fill the boxes, place them into a large cardboard box, Rubbermaid tote or harvest crate. You can even use commercial bagel trays.

Tip #7: Keep Those Berries in the Shade

When you are harvesting, there may be sun in your eyes, on your back and on the berries.

But once you fill your pints and move them to the larger harvest crate, that crate better be in the shade! You may even want to put a Rubbermaid lid over it to further protect it from sun.


Check out this recipe for a raspberry mojito cheesecake!


Tip #8: Have a Plan for Your Harvest

It is best to know what you are doing with your harvest before you bring it in.

Are you eating raspberries fresh after washing in a bowl and straining the water and debris out? Do you want to can them, freeze them or make pie?

If you have a decent-sized berry patch (25-50 feet), you can gain a sizable yield (especially if you follow these tips), and you will need fridge space to keep them fresh or a plan to preserve them as soon as possible.

This is because raspberries are actually a cluster of many small berries all together. There is a lot of surface area that is vulnerable to rot.

Tip #9: Store Them Right

Raspberries can be stored in an open pint box in a dehumidified fridge for a few days. If you want to store them longer, you’ll need to bring the temperature down, if possible.

Otherwise, freeze them in freezer-grade Ziploc bags or Tupperware. If the berries are hot from the field, make sure to hydro cool them by immersing them in cold water for five minutes. For the best freezing results, place the berries on a cookie tray in a freezer for an hour, then funnel them into your freezer bags.

Or make jelly, pie or some other delicious food!

I hope you enjoy your summer harvests,

Zach

Categories
Crops & Gardening Urban Farming

Grow Basil For Its Ease & Its Sensory Delights

The world is darn hard enough. Can’t we just grow things that are easy?

Basil is in this category—for me, at least.

I find basils of all kinds germinate easily, produce prolifically for months and even pop up as volunteers where I least expect it. That last one might not be a positive attribute for some gardeners, but I find it charming.

Varieties of Basil

Basil, related to mint, comes in many flavors and cultivars. A few that I love are:

  • Mrs. Burns Lemon Basil, which produces smaller, stouter leaves than sweet basil, doesn’t seem to be bothered by pests and imparts a lemony-basil flavor to dishes.
  • Genovese Basil is the typical, broad-leaved, Italian basil you probably think of first. This year, I’m trying the hybrid Elida, which was developed to be somewhat resistant to fusarium wilt. Grown side by side in my garden, I see the impact of insects chowing on my standard Genovese leaves more so than the Elida. I hope to not have to find out which is more fusarium-resistant.
  • Thai Basil, which I probably shouldn’t claim to love so much as appreciate. Thai basil has a mildly anise basil flavor, and I’m not the biggest anise fan. This is an important herb for several recipes that I enjoy, so I always have a few of these plants around.

Other types I’ve tried include cinnamon basil and purple basil. Neither of those make my favorites list, though they offer nice diversity in the garden, and pollinators enjoy them.

One missing here, holy basil, or tulsi, is in my top-five list of all plants to have in the garden. While it is a basil, it’s a different species (Ocimum sanctum) than culinary basil (Ocimum basilicum), so I’m not covering tulsi here.


Check out these 10 types of basil that you can grow and use at home.


How to Grow Basil

Basil is equally as happy getting started in the greenhouse four-ish weeks before last frost as it is being direct-seeded into the garden after the chance of frost has passed and the soil has warmed.

I seed basil once or twice throughout the summer, though you can more rigorously succession plant.

Plant basil 12 to 18 inches apart in full sun. I leave a little more space between varieties in the row, as the plants will grow into one another, and I want to give each a chance to thrive.

Basil also does well in pots. Some varieties are specifically for container gardens.

Basil is a nice companion plant to grow. The plant’s aroma deters some insect pests, and when left to flower, beneficial insects flock to these herbs. Consider whether you’d like to grow all of your basils together or to intersperse them throughout the garden, particularly among your nightshades and asparagus.

I keep reading about basil needing lots of water to thrive, though this year’s hot, dry, breezy weather is kicking our butt, and the basil is like, “What drought?”

Straw mulch helps. So have the means to water your basil throughout the season, but listen to your plants.

How to Harvest Basil

Basil is susceptible to cold weather. Its growth will slow significantly when nights dip into the low 50s. The plants will die, turn black and leave your garden looking like an apocalypse film on first approach to the mid-30s.

Row cover is little help. Plan your harvest accordingly.

Basil likes to be harvested often. I think basil just likes attention in general. Harvest at leaf intersections to encourage growth from other branches.

Because of its aversion to cold, basil is tricky to keep after harvest. If harvesting long stems, cut the stems and keep them in a jar of water, like a flower bouquet.

If, like me, you’re harvesting mostly short-stemmed leaf clusters, keep them in a bag with air in it (like a balloon) in the fridge. The air in the bag will insulate against the harsh refrigerator air.

Don’t wash basil until you’re ready to use it.


Here are 8 ways to preserve the basil you grow for use in the kitchen.


How to Use Basil

Cook with basil as much as possible while you have it fresh, as there’s no substitute for summertime basil.

Use your Thai basil in a curry and as a topping for pho. Use any of the basils in Italian sauces, soups—added at the end—cocktails, fresh salads and this aioli. (I tried this aioli years ago, when the recipe was tested for Hobby Farms, and I highly recommend it.)

Basil tossed with fresh peaches or melons is a singular treat.

When you’ve eaten your fill, pesto is the obvious way to preserve basil’s deliciousness. Maybe you’ll spend two hours every summer weekend making and freezing pesto. (Or maybe you know better than to put 24 basil plants in your garden.) Mix it up by making a pistou—pretty much pesto without nuts—adding other herbs or cooking greens to the blend, and using various nuts and seeds.

Basil also keeps dried or frozen.

You can grow two plants or 24 plants in your garden. Basil’s easy-going growing habits and versatile uses in the kitchen make it a favorite in mine.

Categories
Animals Poultry Waterfowl

4 Types Of Poultry The Beginning Farmer Should Consider

For the beginning farmer, poultry are often a ‘gateway’ animal.  They are the start of many small farms, but do not require the infrastructure or time commitment of larger livestock. This makes them perfect for people dipping their toes into self sufficiency. 

If you are thinking about adding birds but don’t know where to start, or you’ve only considered chickens, here are some helpful tips about what birds might work best for you.

Chickens

Chickens are a wonderful place for a backyard farmer to start. Within the world of chickens there are many different breeds, and this variety means that your flock can be spectacular looking or very cold hardy. You can go for many different colored eggs or raise your birds for meat. 

The varieties are also very fun if you’re raising chickens with young children. Many farm kids have their first entrepreneurial experience by starting a fresh eggs farm stand.

Chickens require a coop that keeps them safe from the outside elements and offers them roosts to sleep on and nesting boxes to lay their eggs in.  Depending on your property, you probably should also offer a fenced outdoor run for your hens. 

Chickens are good foragers but still need feed provided, as well as grit in their diet to help them digest what they eat.  Hens tend to be friendly, or possibly shy, while roosters can become aggressive as they grow up.


Considering chickens? Check out these chicken-keeping tips first.


Ducks

Ducks are sometimes overlooked but make excellent additions to a small farm.  They are still excellent egg layers, and duck eggs often fetch a premium. 

Like chickens, there are several varieties of ducks, and you can get breeds that are primarily for egg laying or meat. You can also try some of the more showy birds like Call Ducks, Runner Ducks or Crested Ducks.

Ducks can imprint and therefore make excellent pets, and they are usually very friendly with people.  However ducks are aggressive with each other during mating season, so it is important to ensure that you don’t have too many male ducks. 

Ducks do not need any bells and whistles in their coop—just a place safe from the elements and predators. They will need plenty of water, and while they do not need a pond, they should be offered a pool or trough large enough for them to bathe in.

beginning farmer farmers poultry
Kirsten Lie-Nielsen

Guinea Fowl

Guineas are a unique bird, and for the right farm they are perfect.Small, active foragers, guinea fowl wander far and are very loud—not ideal if you have close neighbors.

However, if this is not a concern, they make excellent farm ‘employees,’ constantly eating ticks and other bad bugs.  They are highly entertaining and their eggs are delicious—although they often hide them in some secret nest.

Guinea fowl aren’t friendly—in fact, they’re usually pretty impossible to catch. They should have a safe coop to roost in at night, and are often kept with chickens. 

It can be hard to encourage them to return to the coop at night, but raising them from keets in that space often helps.


If you’re adding ducks and/or geese, you need to consider their housing needs.


Geese

Like guineas, geese are perfect for the right farm but don’t fit in everywhere. They’re much larger birds and require a bit more space. 

Contrary to popular belief, geese can be friendly and even imprint and bond with the people who raise them. They also lay delicious seasonal eggs.

Geese can be loud. And even if they’re imprinted, they can sometimes be aggressive with strangers or with smaller birds.

Like ducks, they don’t require a pond but do need space to wash off. Geese are very hardy but still need a coop and can wander far if they aren’t enclosed in a run.

There are plenty more wonderful poultry options out there!  Consider turkeys, peafowl or gamebirds.  With a little bit of research into what poultry works best, the beginning farmer can have a fun menagerie of entertaining, unique and useful birds.

Categories
Crops & Gardening Farm Management News

What’s The Deal With Those Unsolicited Seed Packages?

Good things don’t always come in small packages—especially when those packages come to your home unsolicited. Marked as containing specific jewelry items, small toys or even earbuds, hundreds of seed packages are hitting doorsteps across the U.S.

Precisely what they contain and why they’ve been sent is still a puzzle.

“We don’t know exactly what is going on, but people are reporting that they’re getting packages containing seeds that they did not order,” explains Dr. Kevin Ong, a plant pathologist with Texas A&M AgriLife Extension Service. Ong also directs the Texas Plant Disease Diagnostic Laboratory in College Station, Texas.

Ong initially saw news reports the seed packages arriving in Washington state and Virginia late last week. “My understanding is that folks in Utah have had reports of this from the past two weeks or so,” he adds.

More recently, Texans began getting the tiny parcels, too. In fact, as of this week, at least 27 states have alerted residents to be on the lookout for the unsolicited seed packages. Now, people in Arizona, California, Illinois, Indiana, Louisiana, Kansas, Kentucky, South Carolina and Tennessee, among others, claim to have received the mysterious mailers.

Unsolicited seeds have also been sent to Canada, Australia and the EU.

China’s Role?

The international mailers often feature Chinese characters, and, although most of the packages seem to come from China, some other countries of origin have included Serbia, Kyrgyzstan, Uzbekistan and Malaysia.

During a July 28 press conference, Reuters questioned China’s Foreign Ministry Spokesperson Wang Wenbin about the unsolicited mailings.

“USPS recently found some packages of seeds with address labels suggesting they were sent from China,” Wenbin commented. “After verification with China Post, those address labels turned out to be fake ones with erroneous layouts and entries. China Post has contacted USPS, asking it to send those fake packages to China for investigation.”

Seed IDs

Besides establishing just who is sending the seed packages, state and federal officials will also need to determine what kinds of seeds have been sent.

“I’ve seen pictures that say [they are] spinach seeds,” Ong says. “I have seen pictures that look like citrus seeds. I think I saw one picture that looked like a lentil seed.”

Many of the seeds appear to be those of vegetables or herbs. To date, the Plant Protection program of USDA’s Animal and Plant Health Inspection Service (APHIS) has identified 14 seed species. They include mustard, cabbage, morning glory, mint, sage, rosemary, lavender, hibiscus and roses.

“This is just a subset of the samples we’ve collected so far,” says Deputy Administrator for Plant Protection Osama El-Lissy.

“The state Department of Agriculture and USDA are doing their due diligence to check it out and take some precautions,” Ong says. “On the biology side, if the seeds are, let’s say, weed seeds or, worst case, noxious weed seeds that may or may not exist in the U.S., they can cause detrimental effects to our ecosystem.”

If there are some problem plants in the mix, they could wreak havoc on our farms and food supply.

“We’ve got some great examples from history,” Ong says. “Think about the 1920s and 1930s and the story of kudzu in the South. It was brought in to help prevent erosion and guess what happened? It took over and basically did a lot of economic damage.”

That’s also true for the tropical soda apple in Florida.

“That accidentally showed up in Florida I think in the ’90s,” he says. “It’s a shrubby, thorny bush that’s hard to get rid of with herbicides. So, for a farmer, that’s problematic.”


The coronavirus pandemic has led to an unprecedented demand for seeds.


Possible Scam

USDA-APHIS is investigating the mailings, noting, “At this time, we don’t have any evidence indicating this is something other than a ‘brushing scam’ where people receive unsolicited items from a seller who then posts false customer reviews to boost sales.”

Because seeds are small and lightweight, they are relatively inexpensive to ship. And demand for seeds has increased markedly in response to COVID-19. Whether the packages are part of a massive scam or something more nefarious remains to be seen.

In the meantime, the USDA is working to collect and test the mystery seeds.

You’ve Got Mail

So, what if you receive unsolicited seeds? Don’t plant them. Don’t toss them. And don’t attempt to destroy them.

Instead, put them back in their packaging, place the whole thing in a resealable baggie, and wash your hands. Then, call USDA’s Smuggling Interdiction and Trade Compliance Program at 1-800-877-3835 or email SITC.Mail@aphis.usda.gov. You should also contact your state regulatory official or plant health director.

Categories
Animals Beginning Farmers Farm Management Large Animals

At Mazzeltov Farms, Nigerian Dwarf Goats Bond With Chickens

When Bethany Riner was 21-years-old, she moved in with her brother and became interested in learning how to live a self-sustainable lifestyle. She secured three Buff Orpington hens from a local feed store, started a vegetable garden and picked up some goats.

In 2016, she founded Mazzeltov Farms in Modesto, California, which she runs alongside her husband, Ryan Riner.

These days, Nigerian Dwarf goats have become the focus of the farm and the star of Riner’s Instagram account, which documents the daily goings on at Mazzeltov Farms.

We spoke to Riner about the appeal of Nigerian Dwarf goats and how they interact with the farm’s resident chickens. We also found out how goats are excellent escape artists.

Introducing Nigerian Dwarf Goats

https://www.instagram.com/p/CC4-Ov6gko8/

Riner says that her interest in Nigerian Dwarf goats came about through a family friend named Bettyann Spenker who owns a winery and goat dairy in Lodi, California.

“I got my first goats from her in 2015,” recalls Riner. “I still have one of the first goats I got from her, Nova.”


Here are 10 questions to ask yourself before getting goats of your own.


Living With Goats

https://www.instagram.com/p/CAdaryunhPd/

On a day-to-day basis, Riner says that living around Nigerian Dwarf goats is “so much fun.” She adds that there’s nothing like enjoying a relaxing moment sitting out in the pen and watching the goats play and interact with each other.

“They are just like dogs—they loved to be loved!” Riner says. “They definitely each have their own personalities and things they like and dislike. It is really cool watching them all interact with each other.”

The Remarkable Escaping Goats

https://www.instagram.com/p/BvmF9YTFFcC/

When asked about the most surprising thing she’s discovered about Nigerian Dwarf goats, Riner says, “I wish I would have known that they are escape artists! You have to have solid locks on every single gate, because if not, they’ll find a way out!”

When Goats Meet Chickens

https://www.instagram.com/p/BwFIdUNlz03/

On Mazzeltov Farms, the Nigerian Dwarf goats and the chickens have forged a strong bond. Riner says they both get along with each other well, with the chickens “loving to peck at the goats’ fur, jump on them and even steal their grain!”


At the Combstead Urban Farm, it’s all about living alongside chickens.


Great Goat Misconceptions

https://www.instagram.com/p/B_zwQ0NA4YG/

“The biggest misconception about goats is probably that they are too much work,” reveals Riner.

“To me, they aren’t any more work than other more common pets. They eat all of the scraps left over from the kitchen, all the weeds from the yard, and they are loving and can make great companions. They can even be trained to walk on leashes and are really good with kids.”

The Rewards Of Farm Life

https://www.instagram.com/p/CAGBnEogbql/

When it comes to the joys of living a farming life, Riner says that the most rewarding part of the lifestyle is “getting to spoil every single animal that lives at Mazzeltov Farms.” In return, she adds, “They give me healthy food for my family.”

Follow Mazzeltov Farms at Instagram.

Categories
Animals Poultry

Cool Things Down In The Coop With These Chicken Treats

When the summer heat gets you down, you can enjoy a cool drink, sit in front of an air conditioner or perhaps take a swim in your pond. But when your chickens get hot, they don’t have all of those easy options.

That’s why chicken owners need to be aware of how uncomfortable their birds feel when temperatures begin to soar.

While they probably don’t want—and might not appreciate—a leisurely swim in your farm’s swimming hole, they would love to nibble on an icy watermelon, sit quietly in the shade or enjoy some frozen chicken treats to cool off.

Making cold treats for your chickens on a hot summer day is one of the easiest ways to help your hens through a heat wave. Just head into your kitchen and grab a few ingredients. Make some room in the freezer, then create cool and delicious chicken treats for your birds.


It’s hot! Here are some tips for keeping chickens cool in the summer.


Know the Signs of a Hot Chicken

Have you ever watched chickens walk around when it’s really hot outside? They may hold their wings away from their bodies to allow the breeze to blow through. And their mouths may be wide open.

While they’re walking around in a bit of a lethargic daze, you might even see them panting or gasping a bit.

Because chickens don’t sweat the way people do, they have to rely on shade and water to keep their internal temperature from soaring. If they don’t, chickens are suspect to heatstroke on hot days. Without a way to cool off, it’s all too easy for them to die.

While treats should only be given in moderation and are a temporary way to chill your birds, they can be part of an overall plan to help your flock make it through steamy summer days.

summer hot cool cold chicken treats
Shelly Wutke

Getting Ready

To get ready to make summer treats for chickens, you first need to gather your supplies. But even before that, you need to know what your chickens should and shouldn’t eat, and stock your supply lists accordingly.

It’s also a good idea to keep in mind that these cool chicken treats should only be used as supplemental food. Your chickens will still need the regular pellet or crumble you supply on a daily basis.

Bad Foods

Don’t feed your chickens:

  • citrus fruit
  • rhubarb
  • uncooked beans
  • moldy or spoiled fruits and vegetables
  • onions
  • green potato skins
  • avocado
  • chocolate

Good Foods 

These foods, however, make great chicken treats:

  • leafy greens of all kinds
  • grain cereals
  • berries of all types
  • apples
  • peas
  • tiny bits of carrots
  • oatmeal

Before making treats, look at your kitchen scraps and see what you’re about to toss in the compost. Chickens love the tops of strawberries, small amounts of yogurt and cottage cheese, raisins, sunflower seeds, and, if you have a surplus, leftover eggs.

If you want to bake them a treat before you freeze it, you’ll also want to make sure you have whole-wheat flour, cornmeal and honey.

Once you have your supplies, you’re ready to cool your birds with unique chicken treats you can make in minutes. Here are a few ideas to get you started.


City chickens bring some cluck to urban backyards.


Flash Freeze Fruit

Chickens love watermelon, but on a day when the sun is beating down, they’ll love that watermelon even more when it’s frozen. Soak it in a sink full of water for 10 minutes, and place it in the freezer for a few hours.

Once it’s icy cold, give it to your chickens and watch them devour it.

You can freeze all types of fruit including strawberries, blueberries, blackberries or peaches. Soak them in the sink before freezing, freeze them for several hours on a cookie sheet, and they’ll develop a nice, icy crust your chickens will love on a hot day.

Soak or Steam Veggies

Vegetables are another yummy treat in the summer heat. Because chickens like something they can sink their beak into, steam the vegetables before you freeze them.

Steaming adds enough water that you may not need to soak them before you freeze. Just like fruit, you’ll want to freeze the vegetables on a cookie sheet to avoid clumping.

summer hot cool cold chicken treats
Shelly Wutke

Freeze Some Scratch

While it might be tempting to throw a few handfuls of scratch for your chickens to eat when they look bored and listless in the sun, hen scratch with corn can actually raise their temperatures because the grain and corn take longer to digest.

This is great in the wintertime but not so great in the summer heat.

If you want to use chicken scratch for summer snacking, choose one with peas instead of corn. To help your chickens cool off while eating it, freeze your scratch after soaking it in water for a few days.

Add your scratch to a large pail, and add enough water to cover it. You may want to add a shot of apple cider vinegar or electrolytes if you’re trying to keep your chickens hydrated during a hot spell.

Let it sit and ferment for a day or two, constantly topping up the water so the grain is covered.

Once you’ve let it sit for a few days, pour off the excess water and scoop the scratch out into muffin tins. Put the tins in the freezer for a few hours until they are almost solid or solid, depending on your preference.

You can give them to your chickens as an ice block that will melt quickly in the sun. Your chickens will love the ice-cold treat.

Make a Yogurt Pop

Chickens can have small amounts of dairy, and a frozen yogurt pop is a great way to let them have a cold treat. Place a chopstick or skewer in a small container of yogurt, and put it in the freezer.

Once frozen solid, run it under hot water in the sink until the yogurt pops out. It’s that simple. Add different types of fruit to the skewer including apples, strawberries and grapes.

Hang the skewer in the coop if your chickens are bored and need something to peck at. Or you can just drop it in the middle of a group of lethargic hens and watch them enjoy the berries and ice-cold yogurt.


Check out these tips for keeping cooped chickens entertained (and out of trouble).


Freezer Baking

Rather than give your chickens a block of ice, freeze up treats inside the block and let them peck at it until they’ve broken through. You can freeze fruit, vegetables, grain or, for a bit of protein, smashed-up hard-boiled eggs.

Use your imagination to come up with unique combinations of fruit, grain and vegetables and layer it in a Bundt pan. Pour water over it until everything is covered. Freeze overnight.

A bit of hot water is all it takes for your ice block to pop out, and it’s a great treat to hang in the coop or place in a food tray.

summer hot cool cold chicken treats
Shelly Wutke

Subzero Mealworms

Chickens love a nice pile of mealworms, and if you want to make your usual treat of mealworms even better, just pop them in the freezer. You can soak them for 30 minutes in water and place them on a cookie sheet so they freeze individually. Then add them to feed or scatter them on the ground.

If you want a colder treat, freeze mealworms in their container by adding water, turning it into a mealworm Popsicle. Place your block of ice in a shallow bowl of water, and watch your chickens bob for mealworms.

You can also put the ice block in a feed dish and let your chickens enjoy their treat as it melts.

Keep an eye on your chickens when you know the temperatures are going to soar. And always provide fresh, cool water and shade, and use a few of the ideas in this article for cool summer chicken treats.

While they won’t drop the temperatures to bearable levels, you’ll definitely help your birds feel more comfortable!


Recipe: Oatmeal Treat Balls

Not every treat for your chickens has to be frozen. If you’d like to bake something nutritious and delicious to keep their energy up and give them something fun to peck at, try this Oatmeal Treat Ball recipe.

If you want to, you can toss them in the freezer and your chickens will enjoy a cool treat. Reprinted with permission from FreshEggsDaily.com.

Ingredients

  • 1/2 cup coconut oil
  • 1/4 cup honey
  • 2 eggs
  • 1/2 cup whole-wheat flour
  • 1/2 cup wheat germ
  • 1/2 cup cornmeal
  • 1 teaspoon baking soda
  • 1 teaspoon ground cinnamon
  • 3 cups old-fashioned oats
  • 1 cup raisins
  • 1/2  cup chopped walnuts

Preparation

Heat oven to 350 degrees Fahrenheit. In the bowl of a stand mixer, beat oil and honey until creamy. Add eggs, one at a time.

Combine flour, wheat germ, cornmeal, baking soda and cinnamon, and add slowly at low speed until incorporated. Add oats, raisins and walnuts, mix until blended.

Drop dough onto an ungreased cookie sheet using an ice cream scoop. Bake for 10 minutes or until light golden brown.

Cool on cookie sheet for a minute or two and then remove to wire rack to cool completely. Serve immediately as an occasional treat.

This article originally appeared in the May/June issue of Chickens magazine.

Categories
Poultry

6 Ways You Can Help The Aging Chickens In Your Flock

All poultry farmers experience this at least once in their chicken-keeping career: one, a couple or an entire flock of birds reaches an advanced age.

Some flock owners sell off or cull their older birds. But many—especially those who follow conservation practices—allow aging chickens in their flock to live out their lives in the comfort of the coop they know.

But comfort is relative. And a geriatric bird has different needs than it did when it was a spring chicken.

If a member of your flock is getting long in the tooth, take these six steps so they can live their lives out in ease.

Switch the Feed

As we age, our digestion begins to get sluggish and pickier about the food we eat. The same holds true for your old biddies, who may find pellets harder to handle with geriatric beaks.

The smaller crumbles can be easily scooped up by birds having coordination issues. Crumbles are also less taxing on an aging digestive tract, as they are tiny in size and easier to process.

Consider switching to grower crumbles, which contain a healthy combination of proteins, carbohydrates, natural fats and vitamins for older chickens … minus the high calcium levels required by layer hens.


Read about one chicken-keepers’ difficult farewell to an elderly rooster in her flock.


Switch the Feeder

I had wondered why our seven-year-old Buff Orpington, Flapjack, was looking thinner than her younger flockmates. I chalked it up to age until one afternoon, when I brought a crockful of kitchen scraps to her run.

As Thomas Orpington called his hens to the tasty morsels, Flapjack carefully stood back, away from the gorging girls. She finally advanced and aimed for a hunk of stale bread. But the poor girl tottered each time she leaned down to peck at her treat.

Age had made her balance precarious.

I realized then that Flapjack must be having difficulty eating from her coop’s feeder, which hung at just about leg level. Bending down to eat was undoubtedly throwing her balance off. She struggled to grab more than a couple of beakfuls.

While raising the feeder helped her stay stabilized, the narrow saucer proved too much of a challenge for her decreasing coordination. My solution? A heavy-duty rubber bowl of crumbles, elevated six or so inches off the ground.

Flapjack could feed without falling over and without any obstacles blocking her access to her food.

Lower the Roost

Coordination is not the only aspect affected by age. A chicken’s ability to jump up—and down—from their perch becomes increasingly difficult for aging chickens, especially for larger birds in the flock such as Cochins, Australorps and Orpingtons.

To prevent elderly birds from injuring their legs hopping down from their perch, lower the perches in your coop to a height of 12 to 18 inches above the coop floor. This will allow your aging chickens to still be able to roost with younger birds in the flock and maintain their daily routine.

Pad the Floor

Some older chickens eventually decide that they are done with jumping up and down from their perches and choose to settle down for the night on the coop floor. To keep these henhouse elders comfy and cozy, increase the amount of bedding on the floor to a thickness of two inches minimum.

Remember to remove soiled litter frequently so that your older birds don’t bunk down on droppings.

Be observant. Some hens might prefer to bunk down in the nestbox, which will need to be cleaned out daily so that any eggs laid there during the day remain clean.


Here are some important steps for safeguarding the chicken coop against stormy weather.


Ramp It Up

If your coop entrance is accessed by an entry ramp, gauge if the slope is too steep for the elder members of your flock. Slow, deliberate steps at lock-up serve as an indicator that the incline might be too acute for tired, older birds.

Consider extending the ramp further into the run. It may seem to cut into the flock’s free space, but the gentle ascent will be kinder to senior birds. And everyone will enjoy the additional shady spots beneath the extension.

Even Out the Run

Decreased balance and coordination, combined with increased fragility, mean that a chicken run might morph into a minefield for your aging birds. Any dips in the ground—indentations left by dustbathing hens, chipmunk burrows, natural divots—can potentially trip an unsteady, older chicken, as can such obstacles as rocks, sticks, and thick weed growth.

Take a rake—and if necessary, a power trimmer—to your flock’s run regularly to smooth out the walking surface and provide a safe space for your elder birds to spend their days.

Dolly and Alex are the grande dames of our flocks, at almost 8 years of age. Both are still going strong, with Dolly still laying an egg or two per week.

Thanks to the adaptations we have made to their coops, runs and feeders, these girls—and the ones just a year or two behind—can continue living comfortable, fulfilling lives on our farm.

Categories
Equipment

A Lawn Aerator Can Help You Keep A Healthy Yard

You take pride in your lawn and want to keep it as healthy and vibrant as possible. So you might want to expand your list of lawn care tools to include a lawn aerator.

A lawn aerator is pretty much what its name suggests. It’s a tool designed to aerate the soil in your yard, allowing oxygen and nutrients to enter the soil while also improving drainage.

This can be necessary if the soil in your lawn has too much thatch (dried plant remains). Likewise if it is heavily compacted by frequent activity.

A typical aerator is a rolling device with a row of specially designed spikes that rotate and penetrate the soil as the machine travels across your yard. Although they are simple in essence, they’re also a little more complicated than they appear at first glance.

Here are a few things to keep in mind when shopping for a lawn aerator.


Like growing grass? You can start a turf farm on your acreage.


1. Spike or Plug?

Here’s your main consideration. There are two types of aerators—spike aerators and plug aerators—and they are suitable for different types of lawns.

  • A spike aerator is designed to simply punch holes in the soil to improve aeration.
  • A plug aerator actually removes some soil (“plugs”) from the ground.

Generally speaking, people prefer plug aerators to spike aerators, though it depends to some extent on the lawn soil type.

Clay soils can become compacted in other ways by the use of spike aerators, so a plug aerator is the better option. But for lighter soils, a spike aerator can be a viable option.

2. How Wide Is the Aerator?

Obviously, the width will determine how much soil you can aerate on a single pass.

A unit that is 4 feet wide will aerate 33 percent more soil on each pass than a unit measuring 3 feet wide, which can add up to significant time savings for large lawns.

Aerating an area 12 feet wide would require just three passes with a 4-foot aerator as opposed to four passes with a three-foot aerator.


Check out these 4 unusual tractor attachments!


3. Hand Pushed or Tractor Powered?

Some small aerators are designed to be pushed by hand. Others are designed to be towed behind a lawn tractor.

Hand-pushed aerators offer the advantage of simplicity (all they need is muscle power to operate) and are less expensive as well. But they’re more tiring to use and naturally aren’t as wide as aerators pulled behind a lawn tractor.

For small lawns, a hand-pushed aerator could be a good choice. But for large yards, a larger unit for a lawn tractor is probably the way to go.

This article originally appeared in the May/June issue of Hobby Farms magazine.

Categories
Equipment Farm Management

How To Mark Hay Bales From Different Fields & Cuttings

You might assume storing small square hay bales is a fairly simple process. Don’t you just stack them any which way in a sheltered building and feed them one by one until the annual crop has been consumed?

Yes and no. It sounds logical in theory, and with a bit of planning it can be a simplistic approach to strive for. But the truth is, not all hay is the same.

Different fields might yield different types of hay—alfalfa, for example, or clover. Some bales might be from the first cutting of a field and others from a second cutting. The difference can be significant, with bales from second cuttings generally being denser and more nutritious.

Even a small-scale farm can produce a wide variety of hay over the course of a season. And stacking it all together in one building can make it difficult to remember which bales are which as you feed them—or sell them—over the course of a year.

Farmers experienced in dealing with hay can determine a lot just by the physical appearance of each bale. But a more foolproof approach is to keep accurate records and mark hay bales in some manner.

That way you can easily identify later on which are which.


What you need to know to grow and produce hay for your farm’s needs.


Stack It

If you have an abundance of storage space, the simplest solution is to create one stack for each field and/or cutting and mark each stack accordingly.

But sheltered storage spaces are usually at a premium on farms. So if space constraints require you to stack all your hay together, an alternative is to divide the master stack into sections. One corner can be reserved for Field A, another corner for Field B, etc.

Is there a noticeable difference in the appearance of adjacent bales? Then it will be easy to distinguish in the future where one section of the stack transitions to the next. If the bales are similar in appearance, consider placing markers within the stack to delineate the boundary. You can use pieces of cardboard a or a long strand of baling twine.


Here’s how to calculate baling twine needs for hay season.


Color Coding

Speaking of baling twine, if you really want to get fancy, color-coded baling twine can be a terrific way to mark hay bales from different fields and cuttings.

Polypropylene baling twine comes in many different colors. By switching the color in your baler each time you switch fields, every bale you produce will be marked unmistakably in a manner that can be gauged at a glance.

Whether you adopt one of these approaches or develop a different technique that suits your specific situation, the key is to be diligent in your recordkeeping.

Color-coded twines and separate stacks for different fields are helpful only if you write down the secrets of your careful organization. Eight months after baling your hay, you don’t want to be scratching your head trying to remember if the green twine marks the first cutting of Field E or the second cutting of Field B. Or if the stack on the western end of the barn is the third cutting of Field A, or the first cutting of Field B.

In short, a little organization can go a long way. Good luck during hay season!

Categories
Animals Farm Management Large Animals Uncategorized

Is The Pork Butcher Stealing Your Meat? (Probably Not)

As COVID-inspired orders roll in and fill meat processing appointment books all over the country, why not take the extended wait times to do a little soul searching, examining a most-uttered question at the processor’s door.

Is the butcher stealing my meat?

Spoiler alert: Probably not. Look, I get it. If Jesus Christ himself was my butcher, and I took in a 300-pound hog and got 400 pounds of meat back? I’d still be suspicious.

It’s human nature after lovingly rearing a rare and precious beast for eight to 10 months (maybe longer if you’ve got Kunes), to surrender all control to whatever happens behind closed doors. And if you’ve heard a story about a butcher from a farmer, it probably wasn’t good.

But the more we familiarize ourselves with our animals and the bigger picture of small-meat processing, the more we have discovered our fears to be in vain.


Here are some tips for choosing the right pigs for your farm.


Is That Even My Hog?

Unless you are getting your hog back in less than a week, chances are, yes, that’s your pig. At least most of it.

The key to sleuthing the truth, meat detectives, is simply asking the right questions.

Are you getting your meat back in rapid pace, especially cured hams and bellies? Well, you may be frequenting what is referred to in the industry as a “sub” facility.

That is, they take the pounds of meat your animals provide and swap them for the same number of prefabricated pounds in the freezer. This is rare, and obviously a nightmare to those raising heritage breeds. So it’s important to ask ahead of booking.

For our purposes, the vast majority of small state and federal inspected processors practice as “pool” facilities.

That means whole muscle cuts (pork chops, roasts, bacon) from your individual animal come back to you. But ground meats, bones and fats (for rendering) are often pooled with others cut the same day, then ground and divided and packaged proportionally.

Before you’re bummed out, realize it is space- and labor-prohibitive for most facilities to trace ground fat and lean 100 percent from individual animals through the entire process. If you can find a facility that does this, expect to pay for that service. A lot. 

pork butcher stealing steal meat processor
Know how much fat covering is typical for your breed and method of management so you don’t get caught off guard by low yields. (Lyndsey Teter)

Know Your Animal

We love our full-bodied pigs and believe they make a no-brainer superior product to conventional pork. But we also realize that the same thing that makes them delicious will also murder the “typical” yield percentage.

That’s right: Fat. Delicious, flavorful, moisturizing, healthy fat.

Take-home packaged yields are hurt worse if you fail to communicate to a butcher that your freezer is a safe space for fatty cuts. Over the years, the majority of customers at small processing plants want the fat trimmed off, (horror!) and butchers want happy customers.

Have the conversation beforehand if you’d like them to lighten up their trimming hand. Communication is key. What we’re doing isn’t “normal.” Not yet, anyway.


Can you read a butcher’s cut card? Here’s a quick primer.


Bacon Bits

The item counted with the most side-eye from the farmer (for good reason) is bacon. Made from the hog’s sides, bacon bellies can be trimmed to fit specific equipment. Thus, a larger hog will experience some loss.

They also may trim several pounds of belly fat from on an overly fat pig. Again, just ask them about their process.

There are thousands of hog yield estimates out there, but they will only evoke suspicion. Available information is weighted for a leaner, more conventional carcass. Expectations for newbies coming in hot with these estimates are high. Lower them.  

Breed, line and condition all play a role in the amount of bacon that makes it home. 

Percentages depend on whether the processor removes the skin or scalds the hog on the kill floor, and what they include in the hanging or “dressed” weight.  Some facilities may leave the hog’s head, organs, trotters and your carefully curated 3 inches of back fat on the kill room floor.

It’s your job to find out what body parts are included in each step of the process when determining yield as a percentage of live weight and hanging weight. It’s a lot of navigating. And a lot of math.

Be patient and consistent. You load hogs on a trailer—you can do anything.

Good resources for heritage breed-specific carcasses exist out there. But nothing on this Earth will guide you on the path of righteous accusation better than specific numbers from your own animals.

Keep records from every cross of creature you send in. If you can, break down a carcass or two at home. I promise that when you’re elbow-deep in a few hundred pounds of pork carcass, local processing services will seem extremely underpriced. 

When mistakes are made and weights seem low, ask if a forgotten box is hiding in the back of the freezer. That’s the culprit way more often than a butcher stealing customers’ meat.

pork meat butcher stealing meat steal processor
If you want something done right and also very unprofessionally, do it yourself. The home butchering experience is guaranteed to be enlightening. (Lyndsey Teter)

Partners in Struggle

The relationship between butchers and those who raise hogs, though integral, is often hostile and full of mistrust right out of the gate. It’s very common for a butcher to be accused of stealing meat.

But butchers face a lot of the same hurdles that farmers and homesteaders do:

  • Lack of reliable skilled labor
  • Handling hard physical work in rough elements
  • Trying to make a living as a craftsman in a world where efficiency and automation are king

Processors carry the additional burden of heavy regulatory pressure. They sometimes deal with traumatic stress or mental health disorders from the taxing job, too.

Nowadays, with the global pandemic in full swing, butchers are adding shifts and kill dates, working at 100 percent capacity or above, and trying to keep employees safe during a global pandemic. It’s even more than usual to juggle, so it can’t hurt to check in and see how you can make their job easier.

We’re on the same team.

Are there bad eggs? Absolutely. Are there thieves out there? Of course. But we need the good ones around, or we’re on our own. Don’t add to their trouble by wrongly accusing the butcher of stealing your meat.