Categories
Animals Poultry

These Nutrients Are Essential For A Healthy Flock

Everyone who keeps chickens should have a simple knowledge of nutrition and how what we put into our hens or meat birds impacts their health, longevity and levels of production. It should be noted that volumes have been written about nutrients, animal rations and general feeding practices. Here, we’re going to stick with the basics.

For this overview, we’ll glimpse all six classes of nutrients. Each grouping is related, and they interact metabolically to help maintain the health of chickens.

Each category also has members within the class that are essential nutrients.

Essential nutrients are specific molecules within a morsel of food that absolutely must be ingested by the animal. For a hen, it’s some kind of molecule that she can’t produce on her own. She must eat it.

A perfect example is water. A chicken can’t produce water and yet a chicken—or any other animal—must drink water! Therefore, like other nutrients, is essential. It’s one of the reasons scientists look for water in outer space: If there is no water, there is no life as we know it.


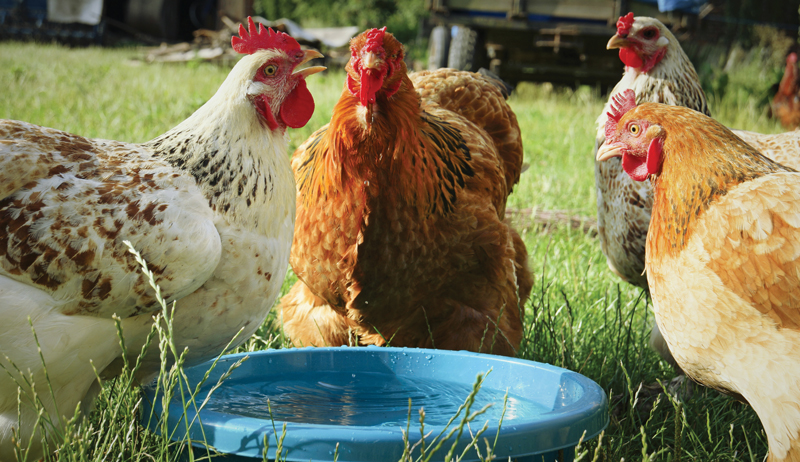
Check out this no-mess chicken watering and feeding system!


Water

So, water is our first example of the essential nutrients. It is also a stand-alone nutrient. Water must be given to all animals free-choice. In other words, clean water must be available at all times. When chickens and other animals wake in the morning, they’ll need water fairly soon.

The amount of water they consume will also affect the amount of food they eat and even their mood and stress level.

Even though chickens don’t have sweat glands, they do lose water in other ways. Most moisture or water loss occurs when they defecate. Even more is lost just because of breathing.

Obviously, death could occur quickly if the coop runs out of water! Never deprive your hens by filling a bowl at your convenience.

Use automatic waterers or nozzles to provide a constant source of water, if possible. And make sure it doesn’t clog or freeze.

In addition to helping the flock maintain body temperature, water is related to every metabolic activity in a bird’s body. Because there is water within the cells, blood and bones, chickens must maintain between 65 to 70 percent water by weight.

essential nutrients chicken feed
Matt Zulawski/Shutterstock

Carbs

The second group of nutrients adds just one more element to the water molecule. Water is made up of oxygen and hydrogen. Adding carbon makes the appropriately named nutrient: carbohydrates.

One of the simplest of carbs is the sugar molecule known as glucose. Basically, plants can use carbon dioxide from the air, moisture from the soil and energy from the sun to create glucose. We know this as photosynthesis.

Plants take it a step further to create different forms of sugar, starches, hemicellulose and cellulose.

As carbs become more complex during plant development, they become more difficult to digest. Once plants go to seed, most carbs are stored in the seed to provide a food source for the new plant.

So it’s pretty obvious that grains provide an excellent source of carbohydrates. Seeds most common in scratch are corn, milo (sorghum), wheat and barley.

Other sources might include oats, sunflower seed and others. Grains basically come from grasslike plants and not broadleaf plants such as beans.

Chickens reverse the process of stored energy that came from the sun. That means: As the chicken eats grain, it burns carbon, generating heat energy.

The hen exhales carbon dioxide the plant originally stored, and energy released provides body temperature and energy for mobility.

For chickens, grain is a snacklike treat. They will eat too much. The problem here is that scratch generates energy but lacks sufficient protein for growth or egg production.

I like to throw grains directly on the ground and let the chickens “scratch” for it. If there’s any left in 15 minutes, you’re feeding too much.

Never feed scratch free-choice. To do so gives hens too much starch and not enough of the other nutrients, especially protein.


Here are 5 sources of alternative protein for chicken flocks.


Protein

Protein is yet another nutrient that has carbon, hydrogen and oxygen. The big difference is protein also contains nitrogen.

For most animals, including your chickens, there are 10 essential proteins, nutrients known as amino acids. They are the building blocks for muscle and organ tissue. There are more than 10, but only 10 that the chicken can’t make all by itself by breaking down and combining other amino acids.

Those 10 nutrients are therefore essential for the chicken to eat.

Here’s a little anecdotal information to help understand amino acids. As a chick grows, it creates its own muscle tissue.

Now try to look at the muscle tissue as if you were building a brick wall with different colored bricks. It’s weird, right? Remember, they’re called building blocks.

essential nutrients chicken feed
ice_blue/Shutterstock

Building a Chicken

A chicken’s drumstick is made up of a very specific group of amino acids. Think of amino acids as bricks.

If you had to build a wall and every tenth brick had to be a yellow brick, the size of your wall would be limited by the number of yellow bricks you have. In this situation, once you run out of yellow bricks, you have to stop building your wall.

It’s the same with amino acids. If one of the 10 amino acids is too low, it will slow down or limit the growth of the chick’s tissue.

Usually the two amino acids that are low in chicken feed are lysine and methionine. Read the label on many feedbags, and those two amino acids should be listed.

For instance, the bag analysis may say “minimum lysine … 0.75%” or “minimum methionine … 0.35%.” Trusted feed companies not only know which amino acids are needed for a complete diet, they also know the quantity of specific amino acids needed to constitute a balanced diet.

Laying hens should receive at least 16 percent protein. Growing chicks and meat birds should have a diet with 20 percent crude protein.

Read labels and buy from trusted sources.


Black fly larva: A self-harvesting chicken feed.


Meal Worms

If you want to add protein to a chicken’s diet, think about an animal protein like mealworms. Dried mealworms are usually more than 50 percent protein. It’s a reliable protein supplement, and chickens love them.

No need to overdo it. Remember, worms are also a treat and would be costly if you were to feed them as a major part of the ration.

I raise my own mealworms and feed live ones to my hens. Because live worms aren’t dried, they contain moisture and are lower in protein by weight.

Live worms are a natural feed for chickens since they are omnivores. I often get a kick out of the wording on supermarket eggs. Some labels say, “From chickens fed a vegetarian diet.” Chickens are not herbivores!

Your flock loves to eat bugs and worms. That’s a food source loaded with protein. Free-range wins again!

Fat

You might not consider fat as an essential part of a chicken’s ration. Nevertheless, the truth is that fats and oils are present in most plants.

Flax seed oil, sunflower oil, corn oil: all terms that prove plants contain fats and oils.

Two main fats are, indeed, essential nutrients—specifically, omega-3s and omega-6s.

Fats are solid at room temperature like a cube of butter, and oils are liquid at those temperatures. Both essential fats can be used by the body as energy sources, and both nutrients are used by the chicken to transport fat-soluble vitamins.

Fats and oils affect the palatability or taste of the chicken’s ration.

One word of caution: Fats stored at room temperatures eventually turn rancid. It’s one reason you should not store feed for extended periods.

Only buy enough feed to last a few months at most. Even though fat levels may be low, certain feeds can turn rancid.

Fats are often associated with cholesterol. Omega-3s and omega-6s are the so-called good fats, and eggs moderately infused with these fats are a healthy product for human consumption.

The fats that can cause trouble are trans fats and saturated fats.

Fats provide more than twice the energy of carbohydrates and are often referred to as brain food, because the chicken’s brain (and our own) is largely composed of cholesterol-filled cells.

essential nutrients chicken feed
TOM…foto/Shutterstock

Vitamins

There are two classes of vitamins, although more than 10 of these nutrients are essential. The two main groupings are water soluble and fat soluble.

Water soluble vitamins are B complex vitamins and vitamin C. Poultry, unlike humans, can make or synthesize their own vitamin C. Additionally, most of the B vitamins are readily available from plant sources.

The one exception is vitamin B-12 which, chickens can source from the microbes that live in their gut or from the worms and bugs they consume. Chick starter feed often has a vitamin boost because chicks really don’t have microbes in their system for the first few days.

They also struggle briefly producing enough vitamin C.

Fat-soluble vitamins are vitamins A, D, E and vitamin K. Vitamin D can be produced by poultry through a specialized process in the skin if the chicken has exposure to sunlight. Vitamins A and E can be found in plants and are therefore ingested by chickens daily.

Some plants are high in carotene (vitamin A), and these plants will often promote richly colored deep yellow-orange egg yolks.

Chickens and other species produce vitamin K to help coagulate blood in case of an injury. Many poisons for rodents use a vitamin K inhibitor, causing internal bleeding in the rodent.

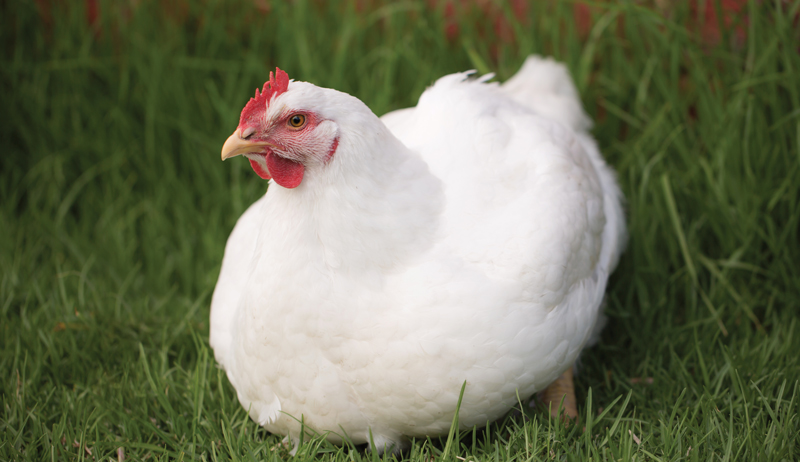
You may notice that free-range chickens produce dark, rich yolks. Given the opportunity, hens will eat grains, grasses and bugs that fill their needs.

Eggs from free-range hens are loaded with good fats and with heavy doses of plant-sourced vitamins.


Is free-ranging better for chickens?


Minerals

The minerals a chicken needs to survive are all essential nutrients. Your hens can’t produce carbon, phosphorus, potassium or any other mineral.

Gold is a mineral, and let’s face it: There is no goose that can lay a golden egg! Simply put, minerals must be consumed.

Bone and shells are composed mostly of calcium and phosphorus, so your flock needs those two in fairly high levels. Fortunately, grasses and other plants have enough to supply their needs. Nevertheless, most producers provide oyster shells and grit supplements to ensure adequate calcium.

The minerals needed by your flock in moderately high doses are known as macro-minerals. If just trace amounts are needed, they are called micro-minerals. Iodine, iron, boron and selenium are examples of micro-minerals.

Usually when a mineral is missing or insufficient in the ration, the chicken will at first display some kind of subclinical symptom. Sub-clinical means your flock is deficient, but the nutrient is not completely lacking.

However, if the deficiency continues or increases over time, the symptoms will worsen, and death will ultimately occur.

For example, if your flock is moderately low in the macro-mineral calcium, the first sign may be thin, weak eggshells. If the situation continues, production will suffer, bones may be noticeably deformed from chicken rickets and eventually death will occur.

If you have several hens all showing some kind of symptom, at least consider something might be lacking in their diet and consequently affecting them all.

Best Management

Keep this in mind with a flock of any size—best management practices always include buying feed from trusted sources. Also, make sure you allow some access to pasture, fresh air and the sun.

Never feed spoiled moldy rations. And provide ample clean, fresh water.

Your flock will reward you with nutritious eggs and meat for years to come!

This article originally appeared in the May/June issue of Chickens magazine.

Categories
Recipes

Artisan Homemade Soda Is A Refreshing Summer Treat

Thirsty for something different and craving refreshment that will quench your thirst while tickling your taste buds? Then look to your garden for homemade soda inspiration.

Syrups crafted from your fruit and herb bounty and combined with an in-home carbonator will quickly elevate you to artisan homemade soda maker.

The concept of flavored water with bubbles is nothing new. In the late 1800s, the invention of a means to manufacture carbon dioxide in a tank that then could be injected into water to add carbonation resulted in soda fountains popping up across the country.

Common in drugstores, young men working as “soda jerks” would “jerk” the fountain handle back and forth to serve up a tall, cold glass of bubbly water flavored with syrup.

Through the 1940s, these soda fountains quickly grew into more than just a beverage stop. They provided a community gathering place where folks could linger and talk over a refreshing drink.

As fast-food joints and mass-produced commercial sodas gained popularity in the 1950s and 1960s, interest in soda fountains dried up. Today, there are just a handful of them left across the country.

But thanks to new, convenient and easy-to-use home carbonators, such as Sodastream, you can rekindle the Americana spirit through connection and conversation over a bubbly homemade soda.

You can make both your own soda water (aka seltzer or sparkling water) and syrups in-house using your garden produce as not only inspiration but as infusions.


Treat yourself to some delectable homemade doughnuts!


Loaded Bubbles

One reason behind the current classic-soda-making revival is our increasing consciousness about what we put into our bodies. And we’ve realized how unhealthy mainstream, mass-produced soda is.

“The high-fructose corn syrup found in most commercial soda is sourced from highly processed GMO, or genetically engineered, corn. That’s not good for our environment or us,” explains Melinda Hemmelgarn, a registered dietitian and host of Food Sleuth Radio.

“When we think about food, we need to take a perspective beyond just ourselves and think about how our food choices affect the global food system and our environment. GMO corn uses fossil-fuel-based fertilizers, pesticides and a lot of energy to process into high-fructose corn syrup. We all pay the environmental costs.”

“Sweeteners of all kinds also add extra calories to our diet without nutritional merit, so using as little as possible is best,” Hemmelgarn says. “Most commercial sodas contain more added sugar than recommended by our national dietary guidelines. To find out how many teaspoons of sugar are in your soda, read the label. Divide grams of carbohydrate by four to get teaspoons of sugar.

“You’ll be sugar-shocked!”

homemade artisan soda
Rachael Dupree

Make Your Own Homemade Soda

Making your own homemade soda enables you to control all the inputs, adjusting sweetener levels and avoiding artificial colors and preservatives found in most commercial sodas.

When you use sugar, you can choose higher-quality ingredients, such as organic, Fair Trade-certified sugar.

Trying to cut back calories? Simply use less sweetener than the chemically derived, low-calorie versions.

“By using fresh, in-season fruits for your syrups, the flavors simply pop more and taste way better,” says Andrea Lynn, author of The Artisan Soda Workshop and soda-making expert. She grew up on a blueberry farm in Alabama, where she first realized the importance of seasonal eating.

“You can also customize everything about the soda based on what you like, from the sweetness factor to the level of fizz.”


Want something special? Grow some pawpaws, a tasty fruit with a history.


Bubble Up

Home carbonators are both economical and environmentally sound in the long run. The units use a carbon-dioxide carbonator unit that injects CO2 into water to create fizzy bubbles.

The unit requires an upfront investment, but the more you use it, the lower the cost of your beverages, averaging about 25 cents per liter of seltzer.

Sodastreams run between $80 and $200, and the carbonator refills cost around $30. Sodastream carbonators vary in size, from 60 to 130 liters. According to Sodastream, a 130-liter carbonator might last between three and four months depending on use.

Cuisinart and other manufacturers are also getting into the sparkling-beverage-maker market, coming out with their own units.

Traditional soda-making depends on yeast to ferment sugar into alcohol and generate carbonation, amounting to more of a science experiment than a cooking project. There are many variables to control, and a miscalculation could lead to disaster in the form of a botched batch or exploding bottles.

“Forced carbonation is much easier and safer than the old-fashioned way of fermenting soda and carbonating directly in the bottle,” says Austin Ashley of Viroqua, Wisconsin.

His passion for making homemade soda led him and his wife, Hallie, to launch Wisco Pop!, a Wisconsin-based soda company that uses local ingredients and natural sweeteners.

Ashley also recommends looking into do-it-yourself soda-carbonating kits that use a large carbon-dioxide tank what a bar or restaurant would use). You can better control carbonation and avoid being locked into buying a specific manufacturer’s carbonator unit.

homemade soda artisan
Wisco Pop!

4 Steps to Bubbly Bliss

Follow these simple instructions to craft artisanal homemade soda that quenches your thirst for farm freshness.

Step 1: Make Syrup

Soda syrup can contain any combination of flavor and sweeteners. While the recipes below provide starter ideas, feel free to experiment with combinations.

Ideally, the key is to use fruit in peak season. Flavors will pop from natural sweetness, so you’ll need to add less sugar or other sweetener.

Frozen fruit also works well for making syrup. It’s generally more watery, so after defrosting, cut back the water used in the recipe by half. (You can add more water to achieve the desired flavor.)

Chop fruit into small pieces or slice thinly to expose more of the fruit surface for extracting flavor. In recipes like the Strawberry Soda Syrup, where you strain fruit pieces out of the final syrup, save this sweet pulp and serve it in yogurt or over pound cake.

“The sky is the limit as far as what you can put in a syrup,” Lynn says. However, she recommends avoiding watery produce varieties, such as melons, as their flavor is limited.

She adds that sometimes you don’t need to cook a syrup. Simply add your fruit, herbs or other flavoring directly to natural liquid sweeteners.

“I always have a simple citrus syrup on hand at home for my soda flavoring,” she says. “I’ll use a microplane grater to finely grate orange or other citrus zest directly into agave nectar, honey or maple syrup and let it sit overnight in the refrigerator.

“You can strain out the rind pieces, but frankly, I just leave them in for extra flavor.”

Typically, syrups can be stored in sealed containers in the refrigerator for up to one week. Discard if the mixture appears cloudy.

A funnel is helpful for pouring syrup into your storage container. Lynn recommends freezing syrup in ice-cube trays for convenient single-serving portions all year long.

Step 2: Add Bubbles

“Always used chilled, cold water for carbonating,” Ashley advises. “Carbon dioxide is already very cold and will be more soluble if blended with another cold liquid.”

Follow your home carbonator instructions for adding fizz, but never carbonate anything other than water. (It will clog the internal mechanisms.)

Carbonation machines have a gauge indicating different levels of fizz. Stop the machine when you reach your preferred level.


Check out these 7 perennial herbs you can grow in the garden.


Step 3: Combine Flavor & Fizz

Combine soda water and syrup in your serving glass. A general rule of thumb is to use 1⁄4 cup syrup (2 ounces) for every 1 cup soda. But this can be readily customized based on your tastes.

Keep tasting and mixing until you reach your perfect combination of flavor and fizz.

Don’t mix up more than you immediately need because you start losing carbonation once you pour. It’s best to mix individual servings as needed to get the highest fizz factor.

If you have soda water left over, tightly seal the bottle cap and store it in the refrigerator.

Step 4: Play Mad Scientist

“Let your taste buds guide you in trying new flavors, and be open to trying something new,” Lynn says. “For example, adding an herb to your fruit syrup is the perfect gateway to experimenting with more savory flavored sodas.”

She recommends trying rosemary with strawberry, oregano with lemon, or lavender with berries. When making the simple-syrup recipe below, add a few sprigs of the fresh herb along with the fruit and let the flavors infuse as the syrup cools. Then, remove herbs before serving.

Think seasonally in your flavor experiments, savoring garden flavors during the growing season and enjoying citrus syrups in the winter months.

Above all, remember to rekindle that community connection found at soda fountains in decades past. Pour two glasses of homemade soda and invite someone to share in the fizzy drinks and lively conversation!

homemade artisan soda syrup
Rachael Dupree

Sidebar: Simple Syrup

A staple soda-making ingredient, simple syrup is something you can keep in your refrigerator for drink sweetening throughout the summer.

As a liquid, simple syrup will dissolve much more readily into cold liquid than other sweeteners—no sugar crystals clumping together at the bottom of your glass. You can find simple syrup on grocery-store shelves, but it’s more economical to make this homespun version.

This syrup tastes best fresh and lasts about one week, so it’s a good idea to make small batches suited to the amount you’ll need for a couple days’ worth of homemade soda.

The proportions below make a medium-weight syrup, perfect for sweetening drinks. Use 3 cups water for an even lighter syrup or reduce to 1 cup water for thicker syrup suitable for sweetening cocktails.

You can easily double or triple this recipe to serve a crowd.

Traditionally, simple syrup is made with granulated white sugar. You can experiment with brown or other sugars, such as turbinado, which is less processed. While the flavor with these alternative sugars will be very rich and distinct, the darker color will alter the appearance of your drink.

You can keep your simple syrup as a basic sweetener or add other flavorings as it cools, such as vanilla extract for a vanilla syrup (great in iced coffee), grated ginger, or any fruit or herb combo.

Make the syrup the night before you make homemade soda for enhanced flavors.

Yield: approximately 2 cups

Ingredients

  • 2 cups water
  • 1 cup sugar
  • flavorings, such as fruit, herbs or extracts (optional)

Preparation

  1. In a medium saucepan, stir together water and sugar. Bring to boil over high heat.
  2. Reduce to low heat. The syrup will turn clear as it boils.
  3. Stir until all sugar granules are dissolved, approximately 3 minutes. Do not continue to cook syrup after sugar dissolves or syrup will be too thick. Syrup will naturally thicken as it cools.
  4. Add desired flavorings.
  5. Remove from heat and cool completely. Remove any flavoring solids, such as fruit or herbs, by either straining syrup or removing with slotted spoon.
  6. Store syrup in sealed, airtight container in refrigerator for up to 1 week.

Make simple syrup last longer by freezing it in single-serving cubes.


Recipe: Rosemary Honey Soda Syrup

Blend savory and sweet with this herbal syrup. Feel free to experiment with other favorite garden herbs, such as basil or lemon verbena.

Yield: approximately 2 cups

Ingredients

  • 1 1/2 cups water
  • 1/2 cup honey
  • Three 3-inch-long sprigs rosemary

Preparation

  1. In medium saucepan over low heat, stir together water and honey and cook until all honey is dissolved, approximately 10 minutes.
  2. Remove from heat and stir in rosemary.
  3. Cool completely.
  4. Remove herbs and store syrup in sealed, airtight container in refrigerator for up to one week.

Rosemary is refreshing, even in the cooler months.


Recipe: Strawberry Soda Syrup

Yield: approximately 1 1/2 cups

Ingredients

  • 1 cup water
  • 1 cup sugar
  • 2 cups fresh or frozen stemmed and quartered strawberries

Preparation

  1. If using frozen strawberries, defrost first. Pour strawberry liquid into a measuring cup and add water to equal 1 cup liquid.
  2. In medium saucepan over high heat, stir together water (or water-juice mixture) and sugar, and bring to boil.
  3. Reduce heat to low and stir until sugar is dissolved.
  4. Add strawberries, then simmer about 10 minutes until strawberries are soft and sauce starts to thicken.
  5. Remove from heat and let cool.
  6. Strain liquid and save fruit for another use. Store syrup in sealed, airtight container in refrigerator for up to 1 week.

Recipe: Strawberry Summer Fizz Cocktail

Yield: 1 serving

Ingredients

  • 1/3 cup Strawberry Soda Syrup
  • 1/8 cup white rum
  • 1/8 cup triple sec or other orange-flavored liqueur
  • 1 tsp. lime juice
  • 1 cup seltzer
  • mint or lime, for garnish

Preparation

  1. Mix strawberry syrup, rum, triple sec and lime juice in serving glass.
  2. Add seltzer and mix.
  3. Add ice and garnish.

Recipe: Tart-Cherry Cinnamon Soda Syrup

Yield: ~2 cups

Ingredients

  • 1 cup sugar
  • 1/2 cup water
  • 1 cup fresh or frozen tart cherries, pitted
  • 1 cinnamon stick

Preparation

  1. If using frozen cherries, defrost first. Pour cherry liquid into a measuring cup and add water to equal 1/2 cup liquid.
  2. In medium saucepan, stir together sugar and water and bring to a boil.
  3. Reduce heat and stir until sugar is dissolved.
  4. Reduce heat to low, and add cherries and cinnamon. Simmer about 10 minutes until syrup is thick.
  5. Remove from heat and cool completely.
  6. Strain liquid, and save fruit for another use. Store syrup in sealed, airtight container in refrigerator for up to 1 week.

Recipe: Blackberry Lavender Syrup

From The Artisan Soda Workshop by Andrea Lynn

Yield: approximately 1 cup

Ingredients

  • 2 cups blackberries
  • 3/4 cup water
  • 1/4 cup raw cane sugar
  • 1 tsp. dried lavender flowers

Preparation

  1. In medium pot over high heat, combine blackberries, water, sugar and lavender. Bring to boil and stir to dissolve sugar.
  2. Reduce heat to medium or medium-low.
  3. After about 5 minutes, smash blackberries with masher. Continue to simmer until berries are completely softened, about 5  more minutes.
  4. When finished cooking, remove from heat and let cool.
  5. Use fine-mesh sieve to strain berries and lavender from syrup, pressing berries against strainer to extract as much liquid as possible. Discard berries and lavender. Refrigerate in covered container for up to 5 days.

Recipe: Pear Ginger Soda Syrup

The maple syrup-infused pear pieces strained from the syrup are perfect for serving on vanilla ice cream.

Yield: ~2 cups

Ingredients

  • 2 large pears, thinly sliced (Anjou pears work well.)
  • 1/2 cup water
  • 1 cup maple syrup
  • 1/2 tsp. ginger powder or 1/2 T. fresh grated ginger

Preparation

  1. In medium saucepan over low heat, stir together pears, water, maple syrup and ginger. Cook until pears soften, about 30 minutes.
  2. Remove from heat, and cool to room temperature.
  3. Strain liquid and save fruit for another use. Refrigerate in sealed, airtight container for up to 1 week.

This article appeared in Hobby Farm‘s Best of Hobby Farms Home 2019, a specialty publication produced by the editors and writers of Hobby Farms magazine. You can purchase this volume, Hobby Farms back issues as well as special editions such asBest of Hobby Farms and Living off the Grid by following this link.

Categories
Crops & Gardening Video

Video: How To Collect A Sample For A Soil Test

All soil isn’t the same, and it’s important to understand your soil’s composition before planting an area. That way you can amend for nutrient deficiencies or move along to a better plot.

But how can you know what’s down in the dirt? The answer—get a soil test. A test is inexpensive and available through extension services and other agencies.

It is important, however, to collect a soil sample that provides a good idea of what’s going on underground. So in this video, we walk you through the steps to gathering a test sample that will give a good snapshot of your plot’s soil health.

Read more about healthy soil—what it is and how to build it—by clicking here!

Categories
Animals Poultry Urban Farm

The Combstead Urban Farm Embraces Life With Chickens

Mel Combs’s urban hobby farm was founded when she and her husband felt “a desire to just have space.”

Named The Combstead, the Caldwell, Idaho-based venture took off when she brought in some goats to keep the grass in the pasture low. Then she added chickens and a garden.

“It seemed like the lifestyle chose us, but we definitely didn’t argue,” reflects Combs. She shares her farming experiences with the world via her popular Instagram account.

Taking time out from tending to the chicks, we spoke to Combs about the challenges to overcome when taking up urban farming. We also discussed the rewarding nature of running a family farm. Finally, we touched on the therapeutic benefits of living with chickens.

The Urban Farming Workload

https://www.instagram.com/p/CBZJkqHA-7K/

Combs says that workload is the greatest challenge when tackling urban farming.

“We moved from an acre to five, and although our property is not that big in the grand scheme of a homestead or urban farm, the workload truly did multiply itself by five,” she explains.

“Sounds like common sense, but I don’t know if we were actually ready for that. The idea that there are no off days came quick. Because if you tell yourself you’ll do it tomorrow then when tomorrow comes, you will be even more behind than just the one day.”

As a solution, Combs says she and her family started to spend an extra 30 minutes a day working beyond their usual chores.

“There is always something that needs to be built, weeded, cleared, harvested, mowed, cleaned or planted,” she says. “Those 30 minutes a day really help us stay on top of things and also not get burned out—which in turn has helped us stay motivated.”


You can have goats in many urban areas, but ask yourself these questions first.


Treating the Chickens

https://www.instagram.com/p/CBbn2jzAetP/

Chickens form a key part of The Combstead. “They are perhaps the most demanding animals we have,” reveals Combs.

“Not in a high maintenance way, but in a how dare you come out here to do chores and not bring us a treat buffet? When the chickens see us coming, they all run for the gate to greet us. When we are treat-less, you can almost feel the birds roll their eyes and walk away in disappointment!”

Combs adds that the chickens on The Combstead are “a great source of therapy.” She characterizes them as “calm and curious” and says she’ll often spend her post-chores time “sitting on the ground or an overturned bucket just watching them peck or dust bathe or just be.

“It’s very relaxing and makes any day better.”

Watching the Chickens

https://www.instagram.com/p/CCq4iODAubz/

When it comes to raising chickens, Combs maintains that the biggest lesson she’s learned on The Combstead is to simply watch the chicks.

“You’d be amazed how many issues can be stopped early or prevented altogether if you just take a couple minutes each day to really watch each chick,” she says.

“How are they walking? How are their eyes, beak and vent? Are they eating and drinking fine? How is their energy level? By paying attention and knowing the signs, you will have a much happier and healthier batch of chicks.”


With urban chickens, you can bring some cluck to the city.


Claiming the Chicken Tree

https://www.instagram.com/p/CCjRZkZga9_/

If you follow The Combstead’s social media accounts, you’ll have noticed that the farm’s chickens have reclaimed a tree on the property as a hang out spot—which has now been named the Chicken Tree.

“Before we even decided on a chicken coop design, we had to figure out where we would put it,” says Combs, explaining how the Chicken Tree came to be.

“We knew our birds would be 100 percent free range, but we also wanted their coop close and easily accessible by us; we wanted lots of shade for the birds and some sort of protection.

“The Chicken Tree is an old Russian Olive that was all alone along the fence that divides our side paddock from the main pasture. It was also right by the irrigation pipes that feed our pasture, so we knew that equaled one other thing that chickens love—bugs!”

After situating the chicken coop there, Combs was pleasantly surprised to find the chicks adopting the tree.

“All the birds use it as a perch. It offers valuable shade in the hot summer days, filters and lessens snow fall in the winter, the trunk that lies along the ground is a fantastic wind block and we’ve even seen it used as an escape from hawks and eagles that have tried to get a free meal,” she says.

“To see them using their natural perching instincts is the greatest reward of all.”

Embracing Family Farming

https://www.instagram.com/p/CAf3JS5AV5d/

“It may be cliché, but I truly think the most rewarding thing about running a family farm is the sense of pride in a simple meal,” says Combs when asked to sum up the joys of family farming.

“Seeing all of your hard work come across the dinner table is remarkable. There are several months of the year when everything on our plates was raised or grown by us. We also spend a great deal of time canning, freezing, dehydrating and preserving our bounty.

“That means the feeling of accomplishment can continue throughout the cold, bare winters. It leaves you with an undeniable sense of excitement and curiosity for what is next.”

Follow The Combstead at Instagram.

Categories
Crops & Gardening Urban Farming

Bring The Heat With Ghost Peppers, Carolina Reapers

Clocking in at 600,000 Scoville heat units, the ghost pepper used to be the world’s hottest pepper. Until Ed Currie crossed a ghost pepper with a habanero, that is.

The result? A blistered-looking—and blisteringly hot—hot pepper. The Carolina Reaper measures 1.569 million Scoville heat units. Eating a Carolina Reaper raw has been compared to “eating molten lava” or “licking the sun.”

Currie is the self-described “owner, president, mad scientist and chef” at the PuckerButt Pepper Company. Thanks to his Carolina Reaper, the Guinness Book of World Records designated him the record holder for the world’s hottest pepper.

Now, besides operating the largest certified organic pepper farm in the U.S. and continually experimenting with even hotter cultivars, Currie frequently offers would-be pepper growers solid advice.

Carolina Reaper ghost pepper peppers
Carolina Reaper (U.S. Department of Agriculture, Lance Cheung)

New to Peppers?

Currie recommends hot pepper growers wear disposable gloves when planting their seeds. (Both seeds and fruits of ghost peppers and similar plants contain capsaicin, which can irritate eyes, skin and mucous membranes.)

Still, he notes, “There’s nothing dangerous that can happen to you from a pepper. It’s all a chemical reaction that our brain perceives as heat. There’s no actual heat going on.”

So, when people suggest they’ve been burned by a pepper?

“When they say a hole gets put in their throat or their stomach, that’s impossible,” he continues. “There’s no heat involved. That’s all internet fodder.”


Check out this recipe for jam made from aji charapita peppers and peaches!


Common Mistakes

Currie has pepper-growing dialed in. He grows thousands of extra-hot peppers each year.

Currie also willingly guides gardeners like me who are new to these particular crops. (For my part, I’ve grown aji charapitas, but never anything hotter until now.)

The most common mistake we make? Planting hot pepper seeds too deeply and failing to allow enough time for germination. “Pepper seeds in the super-hot category can take up to six weeks to germinate,” he says.

And it can take 120 to 150 days from seed-starting until your first hot-and-spicy harvest. That may work for gardeners living in warm climates, but those of us in colder areas may want to start pepper seeds indoors as early as late December or early January.

“If you start seeds in April like you might with most vegetables, you’re probably going to get a frost before you get a harvest,” Currie explains.

Good Stock

Of course, before you go to all of that trouble, you’d better be certain your seed stock is legit. Case in point, it wasn’t until after I’d nurtured seeds for an “heirloom purple ghost pepper” that I noticed the online seller’s mediocre product reviews.

According to Currie, my seeds could be the real deal, but the odds aren’t great.

“The designation for an heirloom is 25 years after stability,” he explains. “And ghost peppers have only been in the United States since the mid to late 1980s. So, officially, if someone’s got [an heirloom] purple ghost pepper, mathematically it’s possible—but it’s probably just someone saying it’s a purple ghost pepper.”

For comparison, consider Currie’s Carolina Reaper. A botantist and geneticist declared the variety “stable” when the plant was in its tenth generation.

“And it doesn’t even become a cultivar until 15 generations after that,” Currie says. “Then I believe it’s 25 generations after that to become an heirloom.”


What are heirloom vegetables, and should you grow them?


A Better Start

To give his seeds a head start, Currie soaks them for a few hours in either a hydrogen peroxide solution or black tea.

“The hydrogen peroxide actually takes all of the hot stuff off [of the seed],” he says. “And the tannic acid [in the tea] kind of mimics the stomach of a bird and softens the seed casing, so that makes it easier to germinate.”

Currie recommends planting pepper seeds at about an eighth of an inch deep in moist—not waterlogged—soil. “If the seeds get too much water, they’ll get a fungus or mold before they can germinate,” he adds.

And once seeds do germinate? Currie waits until seedlings are six inches tall and then transplants them into larger cells.

“Then we wait until they’re a foot tall or more to transplant them into the ground,” he says. “That seems to work best.”

Respect the Reaper

Whatever your extra-hot pepper may be, you should wear protective gloves for their harvest and handling. And if you plan to dehydrate or cook with ghost peppers, Carolina Reapers or similarly spicy numbers, take them outside.

“I don’t recommend anybody do it inside their house!” Currie laughs.

He slices Carolina Reapers on a specially designated cutting board. And, to avoid overpowering capsaicin fumes, he operates his food dehydrator outdoors or in the garage.

Categories
Poultry

Basic Steps To Selling Chickens Online

Perhaps it’s because your darling little Dora distinctly made it known she was actually a Darius. Perhaps chicken math finally caught up with you and it’s time to do some subtraction.

Or perhaps your homegrown poultry business is to grow them and sell them from home.

For whatever reason, you have a chicken to sell and you’ve heard Internet classifieds are the way to go. While posting an ad online just takes moments and is often free, creating an ad that draws attention requires some thought when selling chickens.

Follow these eight guidelines for drafting a successful poultry sales post.

Snag Them With Your Subject

Most online classifieds sites, such as craigslist, present shoppers with a list of ad titles that best match their search parameters. Your chicken is going to be presented by a one-line subject, so the words you choose better make that bird stand out.

Keep it simple but make it snazzy. “Chicken for sale. $10 OBO” is as exciting as doing dishes. “Best Hen in the World Needs Loving New Forever Home,” on the other hand, conveys nothing but your emotions.

When selling chickens online, select words that describe, not bore or gush. “Adult Cochin Hen, Frequent Layer/Good Mother, Available Now!” generates interest in a handful of words.

Remember, your ad’s title is your one and only chance to convince a peruser to click your link in order to contact you for more details. Make it powerful.


Here are 6 things you can do when you learn your hen is actually a rooster.


A Picture Is Worth 1000 Words

Now that you’ve caught someone’s attention with your title, capture their interest with a color photograph.

A captivating photo entices potential buyers far better than a jumble of words. Choose a photo—or several photographs—that best show off your bird.

Use a full-body shot if you can only use one picture. If you can post more, include a close-up of your chicken’s face and a profile shot.

A photograph that conveys your bird’s size—standing next to a shrub or feeder for an adult; positioned near a baseball or tennis ball for a chick—will let interested buyers know how big or small your chicken is. Make sure that the photos you choose depict no clutter or household mess, as this tends to turn buyers off.

Also ensure that only the bird up for sale is in your photograph(s). Showing other chickens creates confusion regarding which bird you’re actually selling. 

Just the Facts

Someone looking to buy a chicken most likely will not care about why you named your hen Daisy, that your chicks are the cutest little fluffs ever or that your rooster is great at locating bugs.

Facts about your bird far outweigh your personal opinions and sentiment, so stick to the facts.

The more details you provide, the better prepared your potential buyer is when they reach out to you. Providing enough details also ensures you don’t end up answering the same questions over and over again.

Include such information as:

  • Sex of the bird
  • Age of the bird
  • Breed of the bird, if known 
  • Variety/color of the bird
  • Whether you hatched the bird or bought it
  • If you bought the bird, where from?
  • Whether the bird is vaccinated and for which diseases
  • If a hen/pullet, frequency of lay and color of eggs
  • Temperament towards humans
  • Lineage, if you raise exhibition birds

Also include your city/town of residence. This way, someone reading your ad doesn’t end up having to travel four hours to pick up your rooster. 

The Price is Right

Clearly state how much you are asking for your chicken.

Many online classified sites require a set price, with the option of adding OBO (or best offer) if you so desire. Never list ambiguous information like “price to be determined,” “make us an offer” or no price at all.

Buyers want to know right off the bat what they may be paying to determine if your bird is worth the investment to them. 


You can sell plant starts online, too. Learn how to get started.


Money Matters

A piece of advice I learned long ago: do not accept checks. You have no way to determine whether there is money in the bank to back up a check, so make it abundantly clear that checks are not an accepted method of payment.

This leaves cash, which is fine. But in this digital age (and in this pandemic), not everyone keeps cash on hand.

Plastic is where it’s at. There are numerous digital-payment sites that allow you to sign up, securely connect to your bank account, and start accepting payments.

While we use both PayPal and Square, we currently only accept PayPal since there is no signature or swiping—in other words, no close contact—required. Be aware that most online payment sites charge a minimal fee for their services.

On PayPal, buyers can opt to pay you via “Goods and Services” or  the fee-free “Friends and Family.”

State Your Return Policy

This is absolutely crucial when selling chickens online. It is always possible that your buyer is unaware of their local poultry ordinances and cannot keep their newly bought pullet.

Or they might have bought your bird without checking with their significant other first. There are myriad reasons why someone might want to return a chicken that they purchased from you.

If you are open to returns, be sure you state your policy clearly. Perhaps you only accept returns within 48 hours of purchase. Perhaps you accept returns for a week after purchase.

If you do not accept returns—and if you practice biosecurity, this means you—state clearly that all sales are final with no exceptions. Once a bird leaves your farm, you do not know what it has been exposed to, and you do not need that unknown factor brought back into your flock.


Need to give up your chickens? These 7 tips will help.


Purchase Pick-Up

Make sure you specify that pick-up is by appointment only. You don’t need a stranger showing up on your doorstep looking for their chicken, especially during these pandemic days.

This is a detail that can be determined once a purchase has been agreed to between you and your buyer. There is no need to state anything but that an appointment must be made—unless you have limited availability.

If you work on the weekends and are only available to your buyers on Tuesdays, make that perfectly clear in your post so as to avoid riled emotions later. 

Odds and Ends

Add a few courteous touches to your online ad when selling chickens.

Not only will your buyer appreciate this knowledge going into the transaction, but things will flow far more smoothly. Present such facts as:

  • They must supply their own box or carrier
  • Whether you have dogs/cats in your household whose dander might cling to your clothing
  • The type of feed your chicken is used to eating

You undoubtedly will still get questions about your bird but, by providing this essential information, you have helped potential buyers determine whether to contact you to set up the sale. And you have also presented yourself as a professional source for future poultry purchases.

Categories
Farm Management

PR Is Important, Even For Hobby Farm Owners

Just as bad things happen to good people, bad things (and bad PR) can happen to perfectly good farm businesses, too. Imagine an E. coli outbreak, a disgruntled employee’s online smear campaign or worse.

Cory Cart, chief client officer at Bandwagon in New Orleans, Louisiana, has worked on agri-tourism PR campaigns and recounted one particularly harrowing story of a family farm. An accident during a fall hayride resulted in a toddler’s death.

“This happened towards the end of one week, and they waited until the following week to make a statement,” Cart says. “Because they waited too long to respond, a lot of different headlines and stories spawned from it—none of which were accurate.”


Check out these 7 food trends to consider adding to your farm business.


More to Lose

You may have elaborate plans for this year’s growing season or the next big holiday market. But do you have a crisis management plan in place? You should—now more than ever.

“There are all kinds of crazy things that can crop up,” says Baron Christopher Hanson, lead consultant and owner of RedBaronUSA, a PR firm operating out of Charleston, South Carolina, and Washington, D.C. “Someone has an iPhone somewhere, takes a video, and the next thing you know, it’s on the evening news.’”

These days, social media, the 24-hour news cycle and wall-to-wall litigation have changed the game. Cart’s great grandfather was a beekeeper. “Back in the ’80s when he was still selling honey, if someone were to become sick because of that, they probably just would’ve said something to him.”

And now? “If you’re not insured properly or your hobby farm is not a separate LLC or corporation and that honey makes someone sick, it’s not just a loss of profit from your side business,” he says.

“It becomes your home, your land and every asset that you own personally. Those become exposed to litigation if you don’t properly plan.”

Where to Start

Fortunately, you can prepare for many potential farm PR crises ahead of time.

“One of the things I always encourage people to do is to think through worst-case scenarios,” Cart says. “The goal is to reduce problems, anticipate threats and prevent a crisis from happening, if possible.”

“What could become a highly visible incident or topic that could impact my business?” Cart asks.

Worst-case PR scenarios could be specific to your farm or to your whole industry. For industry-wide problems, try contacting relevant advocacy organizations, trade groups or even your county extension office for help.

Having trouble considering the worst?

“Think about what your pressure points are in your business,” Knight says. “Take some of the pinpoint questions that have happened over the last few years, and come up with great holding statements that can be used across the board to address issues like that which you can just send out within a second.”

“Whatever your worst-case scenario is for your hobby farm, practice that,” Cart says.

“Who is going to be in charge of contacting authorities? Who is the first person that you’re going to call?”

hobby farm PR communications business
MinDof/Shutterstock

The Golden Hour

You should also plan to act swiftly. “With crises, you’ve got the ‘golden hour,’” says Deja Knight, founder of Pearl Public Relations in Charleston, South Carolina. “You have 60 minutes to get it together and respond to a crisis, so you have to really be prepared.”

Ideally, that means having your messaging well in hand before you need it.

“You’re going to be measured by what you say,” Hanson says, “that first statement out of your mouth when the cameras are on you or something goes viral. You really have to have a statement together, a strategy and a polished response.”

You also need to be one of the first to respond.

“Because what you say sets the tone for the conversation moving forward,” Cart says. “You don’t ever want to let the news media or social media take that narrative away from you.”

Still, that doesn’t mean rushing things, if you aren’t ready to make a full statement immediately.

“Your first comment could be something as simple as: ‘We are investigating this. We have nothing to report at this time. We will be back in three hours to give you an update.’” Cart says. “And then show up in three hours!”


Here are some tips for using social media to build your farm’s reputation.


Positive PR

“Part of PR isn’t just crisis management. It’s positive content management,” Hanson says. “You can defend against negative publicity or attacks by proactively going out and doing something.”

In other words: Build your brand over time and establish positive relationships with your customers and community to help to insulate you against crises when they do happen.

“If people already know your story, they’re more likely to have your back or at least understand your point of view, because they already know you and your business,” Knight says.

“By using free tools—like social media, newsletters—and even if you have to pay a little bit for your website, that kind of stuff is so important.”

Knight’s firm has launched a series of free, interactive webinars to help business owners navigate social media, crisis management and more.

“A lot of PR doesn’t necessarily take a firm,” Hanson adds. “Sometimes, you can just have a PR coach come in and talk to you and teach you how to set up some of those things.”

That could include setting up social media monitoring tools and specific Google alerts to keep tabs on potential problems before they become full-blown crises.

“They can be their own little PR sleuths and do some of this side work,” Hanson says.

And if big trouble does come calling?

“[Professional PR services] can be like an attorney or an accountant that you see seasonally when there’s an issue,” Hanson says.

“But the core solution is that they’re going to have to be a lot more proactive, so if something does happen, they’ve got a strategy to say, ‘We’re sorry this happened, but here’s what we’re really trying to do on the farm.’ Then they can start to redirect and improve on the story.”

This article originally appeared in the May/June issue of Hobby Farms magazine.

Categories
Crops & Gardening Equipment

Discovered Daylilies Are A Reminder Of Farming Joys

On a recent summer afternoon on my northern Wisconsin farm, I was busy raking up grass clippings created from mowing around a handful of apple trees.

Normally I’m able to mow this mini-orchard regularly so that raking isn’t needed. But on this particular occasion, a combination of ultra-hot weather and a busy schedule forced me to neglect the mowing a bit longer than I’d intended.

No matter though—grass clippings are good for many things, including mulch and fertilizer. Once I raked the clippings into piles, I set aside some for future use. Then I loaded the rest into my trusty red wagon to haul away and spread in the woods.

I knew just the place—a secluded spot not far from the old pond, where young pine, ash, and chokecherry trees grow on sloping and uneven ground. I figured I would spread the grass clipping through the low spots. This is part of a long-term effort to smooth out the tricky terrain.


A wagon is an essential piece of farm equipment.


A Welcome Surprise

It was while I was shoveling the grass clippings out of the wagon that I noticed the daylily. Tucked in among the trees, shining in a small patch of sunlight, was a single bloom reaching toward the sky.

Impressed by this completely unexpected sight, I crashed my way through tall grass and cherry branches to take a closer look. To my surprise, I discovered much more than a single daylily plant.

There was only one flower in bloom. But a substantial area of ground—a roughly circular spot six feet across—was covered in daylilies. The majority were nothing more than spindly leaves crying out for sunlight in the deep shade of the forest.

I have no idea how these daylilies got started growing in the woods. Perhaps they were transported their accidentally. There are many daylilies across the farm, so anything’s possible.

Or perhaps a former owner of the farm planted them long ago, as part of a landscaping effort around the pond. Maybe they simply got crowded out by encroaching trees to the point where I had never noticed them.


Can you have fruit and nut orchards in cold regions? Click to learn more.


Transplanting Plants

In any case, I was impressed by the resilience of these woodland daylilies. The one that endeavored to put out a flower under challenging circumstances particularly intrigued me.

I knew the daylilies would never thrive in the ever-deepening shade of the rapidly-growing trees. So I decided then and there to give them a boost by transplanting them to a sunnier location.

Later that afternoon, I returned to my newly-discovered flowerbed with a shovel and some cardboard boxes. Battling my way past hungry mosquitos, I plunged into the shade and quickly dug up the two largest daylilies. I brought a substantial amount of soil with each one in an effort to preserve their roots as well as possible.

I loaded the daylilies into my wagon and set off toward my orchard. The lone flower bobbed along behind me.

Before long I’d successfully planted the two daylilies in a sunny spot along a fenceline, not far from a row of apple trees. With frequent watering to ease the shock of transplanting, I’m happy to report they’re doing well.

Additional flowers have bloomed. I intend to transplant the remainder of the daylilies in the near future—as soon as the mosquitos ease off a little.

I continue to be amazed at the surprises a farm can offer up. Just when you think you’ve learned every acre by heart, you can casually head out to spread some glass clippings and discover a patch of previously unknown daylilies.

If you ask me, that’s pretty special!

Categories
Animals Farm Management Large Animals News

Hidden Pastures Goat Dairy’s Goat’s Milk Gelato Is A Winning Idea

Andrew and Blake Place took their chances on an awards program, and the payoff allowed them to bring their goat’s milk gelato production online.

Getting into the commercial dairy goat business is risky right now, according to Blake Place. She and husband Andrew operate Hidden Pastures Goat Dairy in Glenfield, New York.

The couple launched their commercial goat dairy business in 2017 after first owning two pets. Their initial milking herd was 20, and at their peak they milked 160 goats for fluid milk, gelato and cheese on a 100 acre-farm just two hours from the Canadian border.

“We have significantly buckled down to weather COVID-19 and the lack of markets for fluid goat milk,” she says. “We have been focusing on more value-added products, and we’ve been able to do that because of the Farm Bureau award we won.”

In 2018, Hidden Pastures Goat Dairy won the American Farm Bureau Ag Innovation Challenge. Nearly 500 farms entered the contest and winners were chosen across 10 categories.

Hidden Pastures won the Best Local Farm Product Start Up Category. The honor included a $10,000 check, which Place used to launch the farm’s commercial gelato products.

“I’m always dabbling in the hobby end of things, and we decided to make it a business,” she says. “That helped us launch so I could leave my job and work on the farm.”


Learn more about how to choose the right breed of dairy goat for your farm.


Making It A Priority

The odds of winning a nationwide contest can feel like a longshot. There’s also a never ending to-do list that makes it appear there’s no time to complete an application.

Even Place’s husband didn’t think it was worth the time to apply for the Farm Bureau Ag Innovation Challenge.

“It was the last thing I should have been doing,” she says. “We were going 110 miles per hour, but I just sat down and did it.”

Aside from making the time, Place believes that her transparency in the application and their unique idea for a gelato made from goat’s milk sealed the deal. Looking for a way to differentiate a farm business from others providing similar products is key to standing out in an application and for creating a successful business model, according to Place.

“You can’t go forward without trying something,” she says. “At least trying gets you going in the right direction.”

goat's milk gelato Hidden Pastures Goat Dairy
Hidden Pastures Goat Dairy

Start Up Funds

With the cash award, Place purchased milking equipment, developed a goat’s milk gelato product, put it through testing and created the packaging and marketing.

In addition to the funds, Place also received an all-expenses-paid trip to Nashville to attend the American Farm Bureau Convention. There she met other farm entrepreneurs, which she says was invaluable in building her business.

“People don’t realize how much goes into creating a new product,” she says. “It’s a lot more than just turning the milk into gelato.”

There’s Still Time to Apply

It isn’t too late to apply to the seventh annual Ag Innovation Challenge. Applications are accepted through July 31, 2020. Ten startups will be selected to compete at the AFBF Annual Convention in January 20201 as Semi-Finalists.

Each will receive $7,500.

Four finalist teams will advance and be given three minutes to pitch their business to a panel of judges. Presentations will be livestreamed, and viewers will vote for the People’s Choice Award winner for a total of $20,000.

Additionally, a 2021 Farm Bureau Entrepreneur of the Year will be selected and will receive $50,000.


Check out these 5 ways to maximize your dairy goat’s lactation cycle.


Thinking Outside the Box

There are no goat milk cooperatives in New York state, so Place has had to get creative. Prior to the coronavirus pandemic, she shipped milk to a creamery more than three hours away. Currently, the creamery isn’t accepting goat milk, so Place has had to adjust.

“We are doing more value-added things on the farm as we figure out how to adapt,” she says.

In addition to selling gelato and soap on-farm, they have added goat yoga, farm yoga and other activities to make up for the fact that they are currently unable to bottle milk.

Place also launched a Goats In Pink Collar campaign, #goatsinpinkcollars, with 100 percent of the donations going to the local hospital. She also worked with volunteers to start @lewiscountyfarm to donate farm products from the area to community members in need.

Categories
Animals Poultry

RHDV2, Or Rabbit Ebola, Is Devastating Rabbit Populations

As if rabbits don’t have enough to burden them, what with being at the bottom of the food chain and living as companions, livestock and wild animals. But now a deadly virus has been killing them worldwide at a rapid clip—Rabbit Hemorrhagic Disease Virus 2 or RHDV2.

It’s also been given the moniker rabbit Ebola.

Unlike other rabbit hemorrhagic diseases, RHDV2 affects both domestic and wild rabbits. The disease threatens to wipe out endangered rabbit species such as California’s riparian bush rabbit.

Thankfully, RHDV2, which is caused by a calcivirus (caliciviridae naturally infect vertebrates), holds no danger for humans or other domestic animals. But for rabbit owners, the disease can be devastating, as the virus is extremely contagious and the mortality rate is very high (5-70 percent).

Because of this, rabbits and hares from states with outbreaks are banned from entering some states. This includes rabbit products (meat, pelts, fiber) and even used processing equipment.

The American Rabbit Association (ARBA) is asking people from affected states to voluntarily quarantine their animals to protect other rabbits. So far the virus has been found in New York, New Mexico, Arizona, Texas, Colorado, Nevada, California and Washington.


Check out these 5 tips for feeding rabbits right.


ABout RHDV2

Rabbits are prey animals, and as such they’ve evolved to hide illnesses until it’s almost too late for intervention. So it can be difficult to know which rabbit might be infected.

Rabbits catch RHDV2 by inhaling and consuming contaminated air and food, or having contact with sick rabbits or anything an infected rabbit has touched. Either animals and insects can be mechanical vectors, which means they can carry the disease in many ways.

For example, scavengers can pass the disease in their feces.

The virus can remain on dry cloth for 105 days at a normal room temperature and one hour at 122 degrees. On other surfaces at a normal room temperature, it remains for 22-35 days. It survives freezing and thawing (for example meat and fur) and lasts for 90 days in decaying tissue or carcass outdoors.

Rabbits with RHDV2 can die suddenly, but others may show symptoms of distress, such as:

  • fever
  • breathing troubles
  • lack of appetite
  • lethargy
  • blue lips
  • bleeding from the nose and mouth

Symptoms start one to five days after exposure, and animals two weeks and older can be affected. Asymptomatic or recovering animals can shed the virus for two to possibly four months. There is no known treatment or cure, only symptomatic supportive care.

The only test for RHDV2 is post mortem.

Vaccinations in the U.S. are not currently available, though production is underway. Two are made in Europe—Filavac, and Eravac. The European manufacturers can’t produce enough vaccines and can only provide some for emergencies and control.

Vaccines may be available widely as soon as fall of 2020. Keep in communication with your veterinarian and ask them to contact you as soon as the vaccine is available.

Biosecurity

Biosecurity is hugely important for preventing RHDV2.

Try to avoid coming into contact with other domestic rabbits. When visiting other rabbitries, change your clothing before entering your own. Keep other rabbit owners out or provide shoe covers and gloves. If you keep your pet rabbits in your home, don’t wear your outdoor shoes indoors.

Quarantine new rabbits or those coming back from shows for at least 30 days.

In your rabbitry, scrub cages and equipment (a solution of 10 percent bleach or sodium hydroxide mixed with water). Leave the disinfectant on for 10 minutes before rinsing it off. Do the same with equipment coming back from competition.

Wood is a porous material, and the virus can only be eradicated by burning. So consider using washable materials in your rabbitry.

Wash and disinfect clothing and shoes after walking in areas known for wild rabbits. Rabbits that play, feed or live outdoors are at a higher risk because wild rabbits can infect the ground.

Keep your bunnies indoor if possible. If they are outdoors, have a strong fence to keep wild animals out.

Keep hutches off the ground. Don’t feed wild plants to domestic rabbits, and if you live in an endemic area avoid feeding vegetables you’ve grown. (It is okay to use rabbit manure on your garden, but definitely don’t feed any produce to your rabbits.)

Try to source hay from unaffected states.

If your rabbitry is positive for RHDV2, you have two choices:

  1. Euthanize your herd, sanitize your rabbitry and keep new animals out for three months.
  2. Quarantine your remaining animals for six months and sanitize your rabbitry.

Attending Shows Safely

You can go to shows, but ask questions and have your own bio-security plans.

Ask the organizers about the other competitors—especially where they come from. Also ask about the show’s own bio-security plan.

Bring a carpet square to place on a shared surface before you put your animal down. Have everything you need, and don’t share anything. Consider bringing your own water, because even a shared hose can spread the virus.

Put up a barrier between your bunnies’ neighbors—cardboard or Plexiglas is a good choice. Make sure the clothes you’re wearing are clean and recently washed before you enter the facility.

Sanitize footwear before and after you leave the building and get into your vehicle. Always, when in doubt, sanitize.


Rabbits can pull their weight on the farm in a few different ways.


Do Your Bit

If you see any dead wild rabbits (including jackrabbits, hares or pikas)—especially those with blood on the anus, nose and mouth—contact your state wildlife official at www.fws.org.

To report death of a domestic rabbit, contact your state veterinarian at www.usaha.org. Vets must contact the USDA APHIS Area Veterinarian in charge of your state and/or the state veterinarian.

If a domestic rabbit has died, preserve the carcass for the state veterinarian by double bagging it in plastic and disinfecting the outside of the bag. Put the carcass in a cooler with ice or in a fridge. Make sure to disinfect your own clothing and shoes after.

Do not touch dead wild rabbits.

RHDV2 must be taken very seriously, and we hobby farmers and rabbit enthusiasts can do our parts by reporting cases, practicing strict bio-security, and above all, being vigilant.