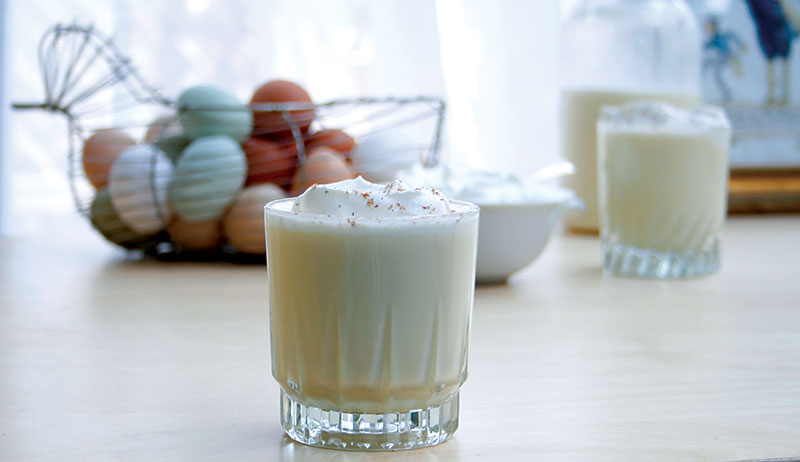
Categories
Recipes

Turkey Recipes: 3 Classic Favorites Anytime

Turkey recipes are a beloved staple at Thanksgiving and Christmas, but they’re delicious any time of year. Many of my traditional turkey recipes date back to my great-grandmother’s kitchen in Scotland, and while I’ve updated them for modern cooking, they retain all the rich, classic flavors of the originals. These three classic turkey recipes are perfect for family dinners or holiday feasts, offering timeless taste and simple steps to create memorable meals.

1. Bubbledy Jock: Traditional Scottish Turkey Recipe

Bubbledy Jock Ingredients

  • 1 12- to 14-pound turkey, fresh (or thawed) and cleaned out
  • 1 cup of plain breadcrumbs
  • 1/2 cup milk
  • 1 tablespoon dried parsley
  • 1/2 teaspoon dried thyme
  • 2 stalks of celery, finely chopped
  • 1 dozen roasted chestnuts, shelled and coarsely chopped
  • 1 turkey liver, sautéed and finely minced
  • 1 pound pork or turkey sausage, casing removed
  • 4 tablespoons salted butter, melted
  • 3 cups chicken (or turkey) stock
  • 1 tablespoon red raspberry jelly
  • salt
  • pepper

Bubbledy Jock Directions

Preheat the oven to 325°F and lower the rack. In a small bowl, combine the breadcrumbs with the milk until just moistened. Add the parsley and thyme, blending well. Add the celery, chestnuts and liver, stirring until well mixed. Stuff the body cavity of the turkey with this breadcrumb mixture, taking care not to densely pack the stuffing. Stuff the neck cavity of the turkey with the loose sausage meat, folding the neck skin shut over the top. Place the turkey in a roasting pan and brush with the melted butter. Pour a half cup of the stock into the pan around the turkey. Cover the bird with an aluminum foil tent and roast in the oven for 20 minutes per pound, basting with the butter frequently throughout the cooking time.

Once the turkey is fully roasted, remove it from the roasting pan and place it on a warmed serving platter. Skim the fat from the roasting pan, then add the remaining stock, the jelly, and salt and pepper to taste. Blend well. Pour this mixture into a saucepan, then bring to a boil. Let boil for two minutes, then reduce the heat to medium, stirring constantly, until the sauce is reduced to your preferred consistency. Serve with the turkey.

2. Turkey Puff Pie Recipe with Port Wine and Sausage

Turkey Puff Pie Ingredients

  • 1 pound turkey meat, chopped roughly into inch-wide pieces
  • 1/2 cup flour
  • 1/2 teaspoon cinnamon
  • 1/4 teaspoon nutmeg
  • 1/2 teaspoon salt
  • 1/4 teaspoon pepper
  • 2/3 cup port wine
  • 1 pound turkey or pork sausage, casing removed
  • 1 8-ounce package puff pastry
  • 1 large egg, beaten
  • 1/2 cup chicken (or turkey) stock, warmed

Turkey Puff Pie Directions

Preheat the oven to 350°F. In a medium bowl, combine the flour, cinnamon, nutmeg, salt and pepper. Dredge the turkey pieces in the flour mixture, then place in a 2-quart casserole. Pour the port wine over the top of the turkey pieces, then cover and bake for 1 1/2 hours or until the turkey is cooked through. Increase the oven temperature to 400°F. Cover the turkey with an even layer of sausage. Cover the meat with a layer of puff pastry. Cut a dime-sized hole in the center of the pastry to allow the contents to vent. Brush the pastry evenly with the beaten egg, then bake for 30 minutes or until the pastry is golden brown. If the pastry begins to brown too quickly, cover with aluminum foil. Once the pie is done, remove it from the oven and slowly pour the stock through the vent hole into the pie. Do not overfill; you might not need all of the stock. Gently shake the pie pan to allow the stock to settle into the sausage and turkey. Let it set for 15 minutes, then serve.

3. Stovetop Turkey Recipe with Potatoes and Onions

Stovetop Turkey Ingredients

  • 4 pounds of turkey meat, white and dark
  • 1 stick salted butter
  • 1 large Vidalia or sweet onion, thinly sliced
  • 3 pounds of Yukon gold potatoes, cut into 1/4-inch-thick slices
  • 3 cups chicken or turkey stock
  • 1/4 cup fresh parsley, chopped
  • salt
  • pepper

Stovetop Turkey Directions

Melt half the stick of butter in a large saucepan over medium-high heat. Brown the turkey pieces a few at a time, ensuring that they are all golden brown on all sides. Place the browned turkey on a platter; keep warm. In a large stockpot or Dutch oven, melt one tablespoon of butter over medium heat. Carefully place one layer of onions, then cover with a layer of potato slices. Cover the potatoes with a layer of turkey meat. Chop the remaining butter into small pieces. Dot the turkey meat with bits of chopped butter. Repeat the layers of onions, potatoes and turkey. Top the turkey with more bits of butter, then top with a final layer of potatoes. Carefully pour the stock over the top of the layers. Place the lid on the pot, then simmer for 2 to 2 1/2 hours or until the turkey is tender and the potatoes are cooked through. Check from time to time to see whether more stock is needed and (if so) add it. Sprinkle with parsley before serving; season with salt and pepper to taste.

Whether you’re celebrating a holiday or enjoying a simple family dinner, these classic turkey recipes bring rich flavor and tradition to the table. Try one—or all three—and savor the taste of homemade turkey at its best.

This article about turkey recipes was written for Hobby Farms and Chickens magazines. Click here to subscribe.

Categories
Farm & Garden

Hedge Apples: The Curious Osage Orange Fruit

Hedge apples (Maclura pomifera), also known as osage orange or horse apple, are distinctive green fruits often used as natural fall décor. Their textured surface and vivid color make them eye-catching additions to autumn displays, and they are commonly found along roadsides and fence lines throughout much of North America during the season.

The Ancient Story of Hedge Apples

Part of the fascination with hedge apples lies in their remarkable history of survival. Like other large, fleshy fruits native to North America, they once depended on an animal partner for seed dispersal. Scientists believe that this partner was a now-extinct species of giant ground sloth that fed on the fruit and spread its seeds across what is known as the Red River drainage of Texas, Oklahoma, and Arkansas.

When those prehistoric mammals disappeared, the osage orange tree seemingly lost its natural means of reproduction. Yet the species endured and spread far beyond its original range. Today, hedge apples grow across nearly every state and even into parts of Canada—a testament to the plant’s adaptability and human influence.

Hedge apple fruits are edible, though the flavor isn't exactly worth it to most cooks.F.D. Richards/Flickr

Folklore and Function

Over the centuries, hedge apples have inspired a wealth of folklore. One enduring belief is that placing the fruit in basements or corners of homes will repel spiders and crickets. While scientific studies have found no evidence that hedge apples deter most pests, their sticky sap may have some repellent effect on cockroaches. The fruit’s unusual texture and color have also made it a traditional fixture in seasonal decorations and displays.

Though osage oranges are technically edible, they are not commonly consumed. You won’t see them mentioned often in foraging cookbooks. The seeds are difficult to extract from the dense, fibrous fruit. They are trapped inside the hard outer coating, embedded in woody flesh and encapsulated in a slimy pocket. Most reports suggest the flavor is far from appealing. Wildlife such as squirrels and horses may eat the fruit, but even they contribute little to seed dispersal.

The reason why the tree has been spread all across North America is less about the fruit and more about the wood.

The Wood That Built Fences

The wood of the osage orange tree was used by settlers to make fencing because it is strong.
Miche`le/Flickr

The wide distribution of the hedge apple tree owes more to its strong, flexible wood than to its fruit. Native American tribes valued the bendable limbs for making bows, and early settlers soon recognized its durability for building fences. Before the invention of barbed wire in the late 19th century, rows of closely planted osage orange trees—kept trimmed and woven together—created living fences described as “horse high, bull strong, and hog tight.”

This practical use ensured that hedge apples were planted widely across the country, turning a once-regional species into a fixture of the rural landscape.

Hedge Apples Today: A Living Legacy

When the giant sloths and mammoths disappeared, the hedge apple tree might have vanished as well. Instead, human interest in its fruit and its remarkably strong wood ensured its survival and widespread planting. The unusual green fruit, while not ideal for consumption, attracted attention, and the tree’s wood proved invaluable for fences and bows, making it a practical resource for early settlers and Native Americans alike.

Today, hedge apples remain a popular feature in seasonal décor, appreciated for their distinctive appearance and historic significance. The fruit continues to inspire curiosity and folklore, while the tree itself stands as a reminder of the ways humans and plants have shaped each other’s histories. From rustic living fences to autumn table displays, the osage orange tree maintains its place in both the landscape and American culture.

This article about hedge apples was written for Hobby Farms magazine. Click here to subscribe.

Categories
Farm & Garden

Rodent Control: Preparing Your Farm for Winter

Rodent control becomes an important topic as winter approaches. Late fall is the time of year when mice, squirrels, voles, rats and chipmunks are trying to find a warm place for winter, and your farm buildings make an attractive target.

It’s easy to see why. Barns, sheds, stables, and pole buildings are generally not as well sealed off for rodent prevention—at least, not typically to the extent of a home. So there are more potential cracks, crevices, vents, and open barn door seals for rodents to access. Barns are also full of things that rodents seek out—feed, corn, oats as a food source (either spilled or contained), as well as bedding possibilities like hay, straw, and wood shavings. Finally, the warmth and dryness of these buildings is a big draw.

All of this can actually help you prepare and guard your buildings to help keep rodents outside as much as possible. By anticipating rodent habits, you can make it more difficult for them to move in and cause winter damage. Here are four ways to increase your rodent control on the farm.

1. Trap Mice and Rats Before They Settle In

This isn’t everybody’s favorite job, but setting basic mouse or rat traps in your farm buildings—and checking and resetting them regularly—can actually play a big role in controlling rodents. It doesn’t have to be elaborate. Simply a spoonful of peanut butter on a spring trap placed by a doorway makes a surprisingly effective and low-cost option. Make sure the traps are inaccessible to pets like dogs or cats, and ideally keep them out of the range of non-target animals like birds. If you’re consistent and maintain the traps for several weeks during the fall, you should be able to reduce pest numbers.

2. Rodent Control to Keep Feed Safe from Intruders

There are two elements at play here—protecting your animal feed so that it can’t be contaminated by rodents, and by doing so, you eliminate the attractant for better rodent control. Consider storing feed in airtight containers like galvanized trash cans or food-grade plastic/rubber containers. If these containers can also be in a rodent-proof shed or tack room, even better. Farms with higher feed needs may construct larger, custom, self-contained feeding systems that are efficient and rodent-proof. After this, general tidiness can go a long way towards keeping rodents away. Sweep up spilled feed right away.

3. Winter-Proof Your Barn and Outbuildings

This isn’t always possible—think of something like a three-sided animal shelter or hay storage—but some buildings can definitely benefit from additional winter sealing. This could range from tiny improvements—even worn weather sealing around doors and windows can be an open invitation to critters—to addressing larger issues like literal holes around wall joints, soffit, and siding. An arsenal of caulk, trim, screen, hardware cloth, and similar tools can be used to prevent access through a variety of small spaces.

4. Clear Hiding Spots to Discourage Rodents

Rodents are cautious and reluctant to ever dash across large regions of open space. They want to stealthily creep from one hiding location to another as they seek food and shelter. Rodent control means making your farmyard and your buildings much less attractive to rodents by keeping things clean. Avoid leaving that pile of pallets outside long-term. Try to clean up loose piles of hay, straw, leaves, and similar debris before it creates trouble. Keep the interior walls of your barn clear, so rodents can’t use the edges of the room to creep about.

Rodent Control: Final Thoughts

By taking these steps now—setting traps, protecting feed, securing buildings, and removing rodent hideouts—you can make your farm much less inviting to winter pests. A little preparation in the fall goes a long way toward preventing damage, protecting your feed, and keeping your barns and outbuildings safe all season long. Staying consistent and proactive is the key to keeping rodents outside where they belong.

This article about rodent control in the fall was written for Hobby Farms magazine. Click here to subscribe.

Categories
Poultry

Raising Turkeys with Chickens: A Beginner’s Guide

Raising turkeys with chickens is something that many poultry keepers consider. Turkeys have many of the same basic needs that chickens do, which makes adding a small flock of these all-American birds a thriftier choice than adding waterfowl or a herd of mammals.

Before you bring home a bunch of peeping poults, consider these six factors to determine whether turkeys are right for you.

Turkey Varieties for  Raising Them with Chickens

While there are dozens of breeds of domestic chicken, there is basically one breed of domestic turkey, Meleagris gallopavo, a direct descendant of the North American wild turkey. Several commercial and heritage varieties of domestic turkey exist, however. Small-scale farms have had success with such commercial varieties as the Broad-Breasted Bronze and the Broad-Breasted Large White (shown above), both of which grow quickly and have a high breast-meat yield.

The Large White is much more popular than the Bronze because of the Bronze’s dark-colored pin feathers, which sometimes remain on the bird after processing and detract from its appearance.

The American Poultry Association recognizes eight varieties of heritage turkeys, including the White Holland, Bourbon Red (shown below), Narragansett, Black, Slate, Standard Bronze, Beltsville Small White and Royal Palm. These varieties do not have the same feed conversion, growth or body size as the commercial varieties, but they are all stunning in appearance and are ideal for the hobby farmer as they tend to be more ornamental but can also serve dually as a meat bird.

I personally love the gray-blue plumage of the Slate and the contrast of the black bands of feathers against the white found on the Royal Palm.

bourbon red turkeys on a farm raising turkeys with chickens
Mtshad/Wikimedia Commons

Housing Tips When Raising Turkeys with Chickens

When raising turkeys with chickens, remember that even small turkey varieties are larger than the largest standard-fowl chicken breeds. Be prepared to provide your turkey flock with roomier housing than what your roosters and hens have.

Each turkey requires approximately six square feet of space from age 2 months to adult. For a flock of six turkeys, a 40-square-foot coop would more than suffice. Because of their larger body mass, turkeys require more ventilation than chickens, especially during the hot summer months. Their greater size and weight also necessitate a sturdier perch than that used by chickens. We use a 2-by-4 with its edges sanded down, and installed 2 to 3 feet off the ground.

Similarly, turkey nest boxes must be large enough to provide turkey hens with the space they need to lay and brood eggs. Our turkey nest box (one per four turkey hens) measures 24 inches high by 18 inches wide by 24 inches deep.

Ranging and Fencing for Flocks Raising Turkeys with Chickens

Turkeys are excellent foragers and happily range freely … and widely. Naturally inquisitive, turkeys tend to wander pretty far, which occasionally leads to lost birds.

If you plan on raising turkeys with chickens free-range, consider either permanent or portable fencing (or both) for your flock. Permanent fencing provides them with a wider range and protection from local predators, while portable fencing allows you to change their paddock on a weekly or biweekly basis, allowing for pasture recovery.

When raising turkeys with chickens, bear in mind that, unlike chickens, turkeys love perching up high—very high. If you have stands of trees within your ranging area, you’ll probably find your flock high up in the branches.

On a similar note, you need fencing that is at least six feet tall. Turkeys that perch high also fly high. I’ve lost count of the number of times we had to search for Henrietta and her daughters, Alexandra and Catherine, in the state forests surrounding our farm. We always found them 10 to 12 feet up a tree we could not climb.

Common Illnesses to Watch for When Raising Turkeys with Chickens

Turkeys are susceptible to many of the same illnesses that can infect chickens, including avian influenza, pullorum, fowl pox and Newcastle. There is one condition, however, that poultry keepers raising chickens with turkeys need to know affects turkeys to a much greater degree: blackhead (Histomoniasis).

This illness affects turkeys of all ages and has an 80 percent to 100 percent mortality rate. Chickens can indeed develop blackhead, but this is rare; the bigger concern is that they serve as hosts for the blackhead parasite.

Because of this, it is strongly recommended that turkeys not be housed in the same coop as chickens or use the same run or paddock.

Laying and Breeding Turkeys

Turkey hens on the whole produce between 70 to 100 eggs in a laying season, which lasts about five to six months annually. Just as with chickens, certain varieties of turkey—the Royal Palm and Narragansett—go broody easily and make great mothers, while others—the Broad-Breasted Bronze and the Broad-Breasted Large White—rarely even mate, much less produce a fertile egg without artificial insemination.

Whether it is gestated by a mother hen or incubated artificially, a turkey egg takes 28 days to hatch. The resulting infant, a poult, resembles a leaner, slightly taller chick, with a blip of flesh (its snood) at the base of its beak.

turkey poult isolated on white background
Shutterstock

Raising Poults Alongside Chickens

If you plan on raising turkeys with chickens from the time they hatch,  be aware that poults have a reputation for not being the brightest baby birds around. They eat sawdust and fine shavings, so avoid using these for bedding in your brooder.

Poults need to be placed on their food so that they know where to find it. They need to be shown where their waterer is—and have their beaks dipped into the water so that they know there is actually water. Keep the water level in the saucer should shallow by adding pebbles or marbles, because poults will accidentally drown themselves with a regular water level.

Like baby chicks, they need a nutrient-rich starter, a heated brooder and fine grit to help them get through the first few weeks of life.

This article about raising turkeys with chickens was written for Chickens magazine. Click here to subscribe.

Categories
Poultry

Flock of Chickens: Benefits of a Closed Backyard Flock

Keeping a closed flock of chickens comes with pros and cons, but for many chicken keepers, it is the best way to prevent disease from entering the coop.

Understanding What is a Closed Flock of Chickens

A closed flock means no adult or adolescent flock members are allowed to enter the coop or property.

While this may sound rather bleak to the backyard chicken enthusiast, many flock owners simply put a ban on adding adult chickens to their already existing flock.

Chicks are the perfect way to expand your closed flock of chickens without needing to worry about the spread of disease. However, care should be taken to avoid introducing vaccinated chicks to an unvaccinated flock and unvaccinated chicks to a vaccinated flock to avoid certain diseases from being spread.

Note: Chicks should be introduced to the flock by hatching your own eggs or by purchasing hatching eggs or baby chicks through a hatchery that supports the National Poultry Improvement Plan (NPIP).

Why Maintain a Closed Flock of Chickens?

A closed flock of chickens helps to reduce the chances of your flock contracting diseases and harmful bacteria from other poultry entering the flock or property.

Tips for Maintaining a Healthy Flock

Keeping a closed flock should involve more than refusing to add adult chickens to your flock. It should also include practicing a few biosecurity tips to keep your flock healthy and free of contagious diseases and pathogens.

As mentioned above, in a closed flock of chickens, no adult or young poultry (with the exception of chicks) should enter the flock or property. In addition, chickens entering the show ring should not be allowed to re-enter the property after visiting a show.

If possible, never visit other poultry flocks, as coming into contact with chickens and other poultry can make your own birds sick. Disease is often spread from flock to flock through a human carrier, so staying clear of other people’s poultry is wise when maintaining a closed flock.

Do’s and Don’ts for Your Flock

Keeping a closed flock of chickens is a practical disease-prevention tip for most backyard flocks. However, there are several things you should or should not do to help make this technique work.

Do’s

  1. When expanding your flock, be sure to acquire chicks or hatching eggs from hatcheries that support the NPIP, as these hatcheries routinely check adult poultry for certain diseases and pathogens to ensure the guaranteed health of the chicks.
  2. Continue to practice good biosecurity tips to keep your flock healthy.
  3. When purchasing chicks, stay clear of birds that appear sick or injured.

Don’ts

  1. Don’t allow your flock to die out. Chickens are flock creatures and need the companionship of another chicken to keep them happy.
  2. Never allow visitors to enter your flock’s enclosure to prevent diseases from being spread via footwear from one flock to another.
  3. Don’t bring home adult chickens. If adult chickens do enter the property, be sure to quarantine them for thirty days before introducing them to the rest of your flock.

Advantages of a Closed Flock of Chickens

There are many benefits to keeping a closed flock. Highly contagious poultry diseases such as avian influenza, Marek’s disease, and coccidiosis are just a few chicken diseases that can be spread by adding adult chickens to your flock.

In a flock of chickens, it’s the smaller, “less harmful” pathogens, such as bacteria, yeast, and parasites, that cause many flock members’ demise after being introduced to a newly acquired adult chicken.

Another consideration is the health of the new chickens in the coop. All chickens, including your own flock, carry a certain amount of bacteria and coccidia in their droppings. These pathogens are not bad in small doses, as your flock has built up an immunity to them. However, a newly acquired adult hen or rooster has not had the ability to build up an immunity to these pathogens, and can become sick or die.

Challenges of Keeping a Closed Flock

Tending to a closed flock is not for everyone, as this practice can have some disadvantages.

For chicken enthusiasts looking to purchase a rare breed or color, acquiring adult stock may be the best way to attain these chickens.

Staying clear of poultry shows and swap meets, and refusing to bring home new stock, may not be something some flock owners want to put into practice.

Another downside to keeping a closed flock of chickens is the inability to rehome chickens in need. For many chicken keepers, being able to adopt a hen or rooster in need is very rewarding.

Keeping a Flock of Chickens Healthy Without Closure

It is possible to keep your flock healthy by practicing good biosecurity if keeping a closed flock is not for you. Examining chickens and other poultry before the time of purchase is necessary to prevent bringing home diseases to your existing flock is a good place to start to keep your flock free of diseases.

Quarantining newly acquired adult and young chickens (excluding chicks) for a minimum of thirty days can go a long way to helping your flock stay healthy.

Final Tips for a Safe and Healthy Flock

Keeping a closed flock is a practical and inexpensive way to maintain the spread of disease in backyard flocks. Whether you raise your chickens for pleasure or purpose, this practice will help to ensure your flock stays happy and healthy.

This article was written for Hobby Farms and Chickens magazines. Click here to subscribe.

Categories
Poultry

How Long Do Chickens Lay Eggs?

How long do chickens lay eggs? The answer to this common question varies based on the health of the hen, genetics, breed, and even stress levels in the coop. Knowing what breeds to choose, managing stress and boosting egg production through nutrition can help hens produce more eggs for a longer period of time.

Annual Egg Production: How Long Do Chickens Lay Eggs

Novice chicken owners may be surprised to learn that chickens do not lay year-round. When a pullet reaches maturity and produces her first egg, she will lay throughout the entire year until the start of the autumn molt. (about the age of eighteen months).

After molting, hens spend the winter months recovering from the wear and tear of the previous egg-laying season. In all but the most northern regions, laying hens resume egg production in late winter or early spring.

When averaging how long do chickens lay eggs annually, a reasonable expectation is about seven to eight months per calendar year.

Dual-Purpose Hens and Extended Egg Laying

How long do chickens lay eggs can vary since not all breeds are created equal. If looking for a chicken to lay an abundance of eggs for several years, choosing a laying breed is essential. Egg-laying breeds fall into two categories: high production layers and dual-purpose chickens.

High production breeds, such as sex links (Golden Comets) and Leghorns, lay an outstanding number of eggs for two years before production drastically declines. Though rare, some sex link hens have been reported to consistently lay eggs until the age of five, and some can lay for even longer.

During the peak of their production, these hens can put out three hundred eggs annually, and will easily outlay all your other chickens. However, their short laying seasons can be a disadvantage to flock owners looking for longer production.

Dual-purpose breeds consistently produce fewer eggs than high-production hens (about two hundred to two hundred and fifty eggs annually per hen). While these hens lay fewer eggs, they tend to lay for more years, creating a more even flow of eggs for a longer period of time.

Top Dual-Purpose Breeds for Long-Term Egg Laying

Australorp
Dorking
Orpington
Plymouth Rock
Rhode Island Red
Sussex

While all these breeds are excellent layers, Sussex and Plymouth Rocks are especially known for their longevity in egg production. Exceptional egg layers, these two heritage breeds consistently produce medium-sized brown eggs for the first four years of their lives, before egg production begins to drop off.

Keep in mind, chickens are individuals, so some hens may outlay expected numbers while others can produce significantly less than average production.

Mixing high-production breeds with dual-purpose chickens is a good way to help balance out a good flow of eggs consistently for several years without needing to add more hens to the coop each spring.

Egg Count Over a Hen’s Lifetime

The number of eggs a hen lays throughout the course of her life can vary, but a typical backyard hen should produce an average of six hundred to one thousand eggs over the course of her life.

Stress and Its Impact on How Long Chickens Lay Eggs

How long do chickens lay eggs will also depend on their environment. Is your henhouse a place of bliss? Or are chickens squabbling over the right to use the nesting boxes? Do predators frequently prey on your flock, whether in the coop or free-ranging in the backyard?

These questions may not seem like they would contribute to a chicken’s production, but high stress levels can cause egg laying to slow down or even cease.

Keep your flock happy and laying by providing plenty of nesting boxes and space in the coop and run for chickens to move about. Avoid housing aggressive breeds/chickens with easily bullied hens to help lower stress levels.

Last but not least, house chickens in a completely predator-proofed coop and run to prevent predator attacks from occurring in your backyard flock.

Chickens can become stressed for many reasons. Spending some time observing your flock will help you notice problems that arise and allow you to resolve stress factors more quickly.

Nutrition Tips for Hens to Maximize Egg Laying

Chickens are what they eat, so it’s little wonder that a chicken eating a healthy diet is more likely to outproduce a chicken eating foods with little nutrition. How long do chickens lay eggs is greatly affected by diet, so here are a few helpful hints to feed your flock for healthier, more abundant eggs.

Feeding for Longevity: How Long Do Chickens Lay Eggs

Probiotics work to keep your chicken’s gut and immune system healthy. Without poultry-specific probiotics, bad organisms can enter a chicken’s body, causing sickness and a decrease in egg production.

Prebiotics work to feed the probiotics and are a necessary part of a chicken’s diet. These two supplements work together to keep a chicken’s body healthy and in prime condition for egg laying.

Herbs That Support Long-Term Egg Laying

Many culinary herbs are chicken-safe and help reduce inflammation throughout the body, including the reproductive tract.

When left untreated, this inflammation can cause reproductive tumors and cancer. These medical conditions not only affect how long do chickens lay eggs, but they will also shorten a hen’s life.

Treats and Their Effect on How Long Hens Lay Eggs

The perfect treat during the winter months, scratch can cause as much harm as it can good. High in fats, calories, and carbohydrates, scratch can cause fat buildup around a laying hen’s organs.

As more fat accumulates, the hen’s body begins to weaken, and egg production ceases. Unlike humans, a chicken’s body can not lose the excess weight around their organs, so the best treatment for this diagnosis is prevention.

Did You Know? If a chicken’s body does not receive enough nutrition, she will withhold certain nutrients from her eggs. While this is vital for the hen’s existence, it’s bad news for the consumer eating eggs with less nutritional value.

Final Thoughts on How Long Chickens Lay Eggs

How long do chickens lay eggs varies for each hen, but with proper nutrition, reduced stress levels, and selecting long-laying breeds, filling your egg basket for several years without needing to replace your layers is possible.

This article about how long do chickens lay eggs was written for Hobby Farms and Chickens magazines. Click here to subscribe.

Categories
Crops & Gardening Sponsored

Winter Sowing Garden Guide

The cold has arrived. As gardeners, we find ourselves longing for spring, when our gardens come back to life and we can spend time outside. It’s tempting to believe we can’t plant anything now, but there is a way to plant seeds for next spring. Winter sowing is a type of planting that involves planting seeds outdoors in winter. It sounds too easy, but it works! Many hardy annuals and perennials can be sown in winter to give plants a head start in spring.

What is Winter Sowing?

To answer this question, we’ll look at the basics of seed physiology. Many seeds require a period of cold and moist conditions to grow. The plants we observe in nature often have this requirement. This process is known as stratification. Plants typically form their seeds during late summer. These seeds fall to the ground and wait to grow. If those seeds germinate in the fall, they would be too weak to survive the winter cold. Stratification protects the seed, allowing it to germinate in spring when conditions are suitable for growth. Winter sowing involves planting seeds outdoors in a container during winter. This process allows the seeds to experience cold weather and germinate in spring.

Benefits of Winter Sowing

This planting method protects your seeds from animals and harsh weather conditions. You can scatter seeds in your garden during winter, but they will be at risk for several problems. Animals can eat them, rain can wash the seeds away, or winter winds may dry them out. Containers protect the seeds while giving them the proper cold treatment. Planting the seeds in containers allows the plants to harden off and stay compact naturally. Gardeners typically use milk jugs for winter sowing.

What Can I Winter Sow?

You can sow a variety of annuals and perennials using this method. Seed packets can provide information on germination requirements. For annuals, you’ll want to plant hardy species that tolerate frost. A few examples are sweet alyssum, pansies, and petunias. As you read the seed packets, you may see terms like reseeds or self-sows. Some annuals, like sweet alyssum, regularly self-seed in the garden, a sign they can be winter sown. Annuals prone to frost damage can be winter sown but should be planted later than hardier annuals. Many tropical annuals require warm soil and weather to germinate, making it better to start them in a home or greenhouse. A few examples are annual geraniums, impatiens, and coleus. Hardy perennials often have a cold requirement, making them an excellent choice for winter sowing. The seed packet will give you insight into their germination requirements.

When Should I Winter Sow?

As the name suggests, winter is ideal, but the exact timing will vary for different plants. Perennials and hardy annuals can be winter sown from December to March. Tender plants, like veggies and some annuals, should be sown in March or April after the threat of extreme cold has passed. Tender plants don’t require a cold treatment for germination.

Sowing The Seed

Winter sowing is a simple process and only requires a few materials. Here are the steps to successfully plant your seeds.

Step By Step Instructions For Sowing Seeds

  1. Find a clean container- A milk jug is ideal, but you can use other containers too.
  2. Cut the container- If using a milk jug, insert a serrated knife about 1.5 inches under the handle and work around the container, but don’t cut the hinge point under the handle. This cutting method allows you to open and close the container while keeping it in one piece. Marking the cut line is recommended before you start cutting.
  3. Create drainage holes- Poke several holes in the bottom of the container to allow water and airflow. A milk jug will require a few holes toward the top for airflow and to avoid overheating on warmer days.
  4. Add soil- Put a 2-4″ layer of seed starting potting mix in the container. Soil from the garden is unsuitable as it creates drainage issues and may contain weed seeds.
  5. Moisten Soil- Add water to the mix to lightly moisten the soil and allow excess water to drain. Remember, you want the soil to be moist, not wet and soggy.
  6. Sow the seeds-  Sprinkle them on the soil and cover them with a thin new layer of soil. Read the seed packet to determine the proper planting depth for different seeds. Gently press the soil down to ensure the seed has firm contact with the soil.
  7. Seal the Container- Use tape to seal the cut edges of the container. The container top should be left open to allow airflow and moisture for the seeds.
  8. Label the Container- Use a plant label to record the type of seed and planting date. Tags will help you keep track of each plant and let you evaluate the results to prepare for next year.
  9. Place the Containers outside- Find a sunny spot for your containers and leave them alone until spring. Make sure they’re in a location that receives rain and snow. If you live somewhere windy, consider using a milk crate to hold the containers in place. Return in spring to see the results!
  10. Observe Seedling growth- Keep an eye on the emerging seedlings to ensure they have enough moisture and ventilation. You may need to open the container on warm days to avoid overheating the seedlings. Just make sure to close the container at night. Eventually, the seedlings can be separated and planted in the garden.

Plants To Consider

Here are some common plants to consider for winter sowing.

Note: This list is only a few plants suitable for winter sowing.

Perennials –SalviaShastadaisyRudbeckiaPenstemonMilkweedLiatrisBaptisiaColumbineFoxgloveLupineHollyhock

Cool Season Annuals – SnapdragonViolaPansySweet Alyssum

Cool Season Vegetables  CauliflowerLettuceBroccoliSpinachKaleKohlrabi

Winter sowing teaches us about seed germination while having fun in the process. You can use this activity to introduce kids to gardening too! As you plan for next year, consider sowing your seeds in winter to get a running start in spring.

Other Recommended Reading


At Jung Seed Co, we strive to be your go-to guide for all your gardening needs. Our YouTube channel, The Garden Doctor by Dick Zondag, is where he provides gardening tips for all levels of gardeners. When you need reliable gardening advice, turn to the trusted experts at Jung.

View our new catalog online or browse our website for your gardening favorites. Sign up for our weekly email to receive info on new products, exclusive deals, and specials. Join our Facebook page to discuss all things gardening!

About the Author:  Matthew Olson is a professional horticulturist and garden writer.   He has a bachelor’s degree in horticulture from UW-River Falls and is a certified professional with the Minnesota Nursery and Landscape Association.  His enthusiasm for plants and the outdoors brought him to the green industry.  He regularly writes articles about gardening for both gardeners and industry professionals.  He can be reached at matt@mattolsonhorticulture.com.

Categories
Crops & Gardening

Aronia Berry: A Native Superfood for Thanksgiving

Aronia berry is a little-known native fruit that deserves a spot on your Thanksgiving table. Often called black chokeberry, this humble shrub produces glossy black fruits packed with antioxidants, vitamins, and flavor. While it may grow unnoticed along hedgerows in the Midwest, its health benefits and culinary versatility make it a perfect addition to your holiday dishes, from sauces to baked goods.

What Is the Aronia Berry?

The aronia berry is a “trash tree” in the Midwest. It grows in hedgerows and goes virtually unnoticed. It’s often called black chokeberry. They’re often used by landscapers as ornamentals. In the spring, you’ll see them decorated with beautiful white flowers, which are then followed by dark, black berries. Finally, the shrub puts on a fall display of deep rust-colored leaves that is not to be missed.

Health Benefits

Aronia berry has three to four times the antioxidant content of blueberry, goji or pomegranate. It’s currently being studied for its beneficial effect on the cardiovascular system (blood pressure, cholesterol levels, heart attack prevention and recovery), the digestive system, the urinary tract (even better for UTIs than cranberry) and even cancer. Specifically, it is being tested against breast and colon cancer. In laboratory environments, it’s been shown to kill colon cancer cells with no damage to surrounding tissue. Very exciting stuff!

Aronia berry, aka chokeberry, is high in pectin. The first settlers added it to other fruits for a natural set for jams and jellies. It’s not likely that the chokeberry was at the first Thanksgiving, but that shouldn’t stop you from using it if it’s native to your area.

Growing and Harvesting Aronia Berry

Aronia grows very well in Midwestern soils. It’s a medium-sized shrub that tends to spread in clusters. The fruit is ready to pick in the fall, and it’s a real battle to get it before the birds do, so you might consider covering it with netting. It likes full sun and will perform very well year after year with very little input from you, the grower.

Using Aronia Berry in Thanksgiving Recipes

Aronia berries are versatile and can add a unique, tangy flavor to your Thanksgiving table. Here are some ideas to inspire your holiday menu:

  • Aronia Cranberry Sauce: Combine aronia berries with traditional cranberries for a naturally sweet and tart sauce. Add a touch of orange zest or cinnamon for extra warmth.

  • Holiday Baked Goods: Use aronia berries in pies, tarts, muffins, or quick breads. Their high pectin content helps jams and preserves set naturally.

  • Stuffing or Grain Salads: Toss dried aronia berries into cornbread stuffing, wild rice, or quinoa salads for color, texture, and a subtle tartness.

  • Festive Drinks: Make a warm aronia punch, add aronia juice to sparkling water, or create a spiced cocktail for a seasonal beverage.

  • Garnishes: Fresh or dried aronia berries can decorate desserts, cheese boards, or roasted vegetables, adding both color and a nutrient boost.

Aronia berries are at their peak in the fall, perfectly timed for Thanksgiving preparations. If fresh berries aren’t available, frozen aronia or aronia juice works beautifully in most recipes, making it easy to include this native superfood on your holiday table.

Including aronia berries on your Thanksgiving table is a simple way to celebrate a native, nutrient-packed fruit. Whether you use them fresh, frozen, or as juice, their unique flavor enhances sauces, baked goods, and drinks alike. Next year, consider planting your own aronia berry shrub and enjoy the satisfaction of serving a local superfood that’s good for both your family and the environment.

This article about the aronia berry was written for Hobby Farms magazine. Click here to subscribe.

Categories
Homesteading

Farmers’ Market Items: 5 Thanksgiving Favorites to Sell

Farmers’ market items can be a big hit during the Thanksgiving season. Whether your customers are shopping for gifts, preparing a holiday meal, or looking for unique seasonal treats, the right products can make their lives easier — and boost your farm business at the same time. From creative condiments and holiday spice mixes to meal kits, gift baskets, and seasonal décor, there are plenty of ways to offer shoppers convenient, thoughtful, and locally made options for the holidays.

1. Creative Condiments are Perfect Farmers’ Market Items

Every part of the holiday meal has room for the kinds of condiments you produce and sell at the market. Pepper jelly can be served with fresh goat cheese for a winning appetizer, and it makes a flavorful spread for a leftover turkey sandwich. Pickled vegetables can be added to an appetizer platter or complement a cheese tray. Canned cranberry sauces, ketchup and barbecue sauce can be served alongside the turkey.

Market these farmers’ market items in a way that highlights their value to a traditional Thanksgiving meal, and the leftovers that everyone looks forward to. Add a gift tag or provide a postcard with suggested uses. Just remember that when preparing value-added foods to sell, you will need to consult with your state’s commercial kitchen and prepared food laws to ensure you work within appropriate guidelines.

2. Holiday Spice Mixes for Thanksgiving

Everyone has that jar of poultry seasoning or pumpkin pie spice in the pantry that is used only during the holidays, and each passing year it loses more of its flavor. Packaging single servings of these classic spice mixes are appealing to shoppers who do most of their cooking during the holiday season.

Consider putting together a multi-pack of a seasoning to be combined with sour cream for an appetizer dip, poultry seasoning for dinner, pumpkin pie spice for desserts, and a mix of curry and other spices to stir into turkey salad for leftovers. Package a combination of herbs and spices, like chili powder, coriander and cayenne, to make roasted nuts, a seasoning mix for stuffing, and dried herbs to stir into roasted root vegetables. These are the types of products that are both helpful in the kitchen and can be given as a gift.

Chili Seasoning Mix Recipe

  • 1/4 cup chili powder
  • 1 T. seasoning salt
  • 1 T. ground cumin
  • 1 T. dried oregano
  • 1 T. dried minced onion
  • 2 T. sugar
  • 1 T. dried parsley

Preparation: Mix all ingredients together. Store mix in an airtight glass jar in a dark place at room temperature. Use within six months for the best flavor. Shake well before using. (Yields approximately 3/4 cup.)

3. Easy Meal Kits and Mixes for Holiday Shoppers

Mixes and kits for side dishes and desserts are simple farmers’ market items that make it simple for your customers to put together a fresh, locally sourced meal. Do you sell freshly baked bread? Dry bread cubes and combine them with herbs and seasonings to package as a complete stuffing mix. Put together a pie or cobbler kit that includes a small pie pumpkin or canned fruit filling with all of the dry ingredients needed for a crust. A jar of dry ingredients for biscuits paired with sliced country ham and farm-fresh cheese makes an easy breakfast for a holiday morning.

If you still have fresh vegetables available, combine baskets of root vegetables like turnips, parsnips and carrots that roast well together and include a seasoning mix. Make a salad kit with fresh kale, dried fruits, nuts and seasonings to make a dressing. You can even package products like honey, nuts, cinnamon and homemade marshmallows and sell them with fresh sweet potatoes for a casserole.

Just remember that your customers will need guidance with these types of farmers’ market items. Prepare a recipe card that includes the additional ingredients necessary to complete the dish, as well as instructions on how to prepare it. Butter, milk and eggs are just a few of the additional ingredients they will need to have on hand. If you sell these items, add them to the kit. If not, consider working with another vendor to provide additional resources and increase sales for both of you.

4. Thanksgiving Gift Baskets Are Farmers’ Market Items That Sell

Selling gifts allows you to pull together multiple items that you have for sale and dress them up in bags or baskets so that they are ready to give as soon as the customer leaves the market. These items are perfect as hostess gifts or just to say “I’m thankful for you.”

Give the gifts a theme. For example, a pie basket for the baker may have winter squash, sweet potatoes, persimmons, citrus, canned pie fillings, crust mix, and fresh eggs and butter. A juice lover’s basket might include greens that can be juiced, such as kale, as well as carrots and apples. Consider adding glassware with your company logo for drinking the juice. Don’t limit your basket to food. A relaxing retreat basket might include alpaca yarn, knitting tools, a pattern, a mint herb mix for tea and a tea mug with your logo.

5. Seasonal Décor and Centerpieces for Farmers’ Market Items

Take advantage of selling your products for more than preparing the Thanksgiving meal. Consider offering holiday décor. Sets that include haystacks, winter squash, mums and flint corn can make you a one-stop shop for your customers’ decorating needs. Make wreaths with fresh herbs to hang on the door as a welcome to dinner guests or a vase of herbs for a centerpiece. Baskets in a variety of sizes with small squash and pinecones also make a great gift or centerpiece.

This article about farmers’ market items to sell at Thanksgiving was written for Hobby Farms magazine. Click here to subscribe.

Categories
Farm & Garden

When Should You Stop Mowing Your Lawn Before Winter?

When should you stop mowing your lawn before winter? It’s a good question. In the spring and summer, it can sometimes feel like you must get the lawnmower out every other day. And when you own farm property with large open grass spaces around the farm buildings, this may really be the case. Even late into the fall, cooling temperatures can actually have a rejuvenating effect on cool-season grass species—meaning that you might have a lush, tall, green lawn right up until the snow flies. But this brings up a question: Should you cut your lawn right up until the last moment before winter? Or is it better to leave a few inches of growth intact in the fall? What’s better for the lawn’s overall health?

When Should You Stop Mowing Your Lawn Before Winter? Keep It Up!

It’s best not to leave your lawn height too long over the winter. Continue your regular mowing schedule—never removing more than about 1/3 of the total length, and maintaining a height of around 2.5 to 3 inches. Keep this up until either the snow falls or there have been a few solid frosts that send the grass dormant. In very warm climates, there may not be a frost at all, and you may be mowing the lawn into December before it goes dormant. But in all cases, try to keep mowing as long as the grass is growing.

Why Mowing Before Winter Keeps Your Lawn Healthy

It might seem like leaving the grass long might help it stay resilient against winter weather. But long grass will end up lying down or being crushed down by the weight of snow, where it becomes a potential breeding ground for mildew and other lawn diseases. Tall, dead lawn grass is also a prime habitat for destructive voles, who will happily use the tall grass to form an elaborate series of tunnels and nesting areas.

How To Store Your Mower For Winter

Eventually, snow will cover the grass or it will simply go completely dormant. But before you park your lawn mower for the next few months, it can be beneficial to do a little maintenance to make sure that it starts up strong next spring. Consider pulling the battery and storing it ideally in a safe location where it won’t freeze. Adding some fuel stabilizer to the gas tank can help keep the fuel from going stale or gumming up the lines as it sits unused. And if you really want to get ahead on next spring, go ahead and change your mower’s oil and filter now. You’ll thank yourself later.

This article about when should you stop mowing your lawn before winter was written for Hobby Farms magazine. Click here to subscribe.